|
|
 |
|

02.01.2013, 20:13
|
|
РҗРҙРјРёРҪРёСҒСӮСҖР°СӮРҫСҖ
|
|
Р РөРіРёСҒСӮСҖР°СҶРёСҸ: 07.09.2010
РЎРҫРҫРұСүРөРҪРёР№: 7,669
|
|

РһРіСҖРҫРјРҪР°СҸ РұлагРҫРҙР°СҖРҪРҫСҒСӮСҢ РҗРІСӮРҫСҖСғ Miso Р·Р° РңР°СҒСӮРөСҖ-РәлаСҒСҒ


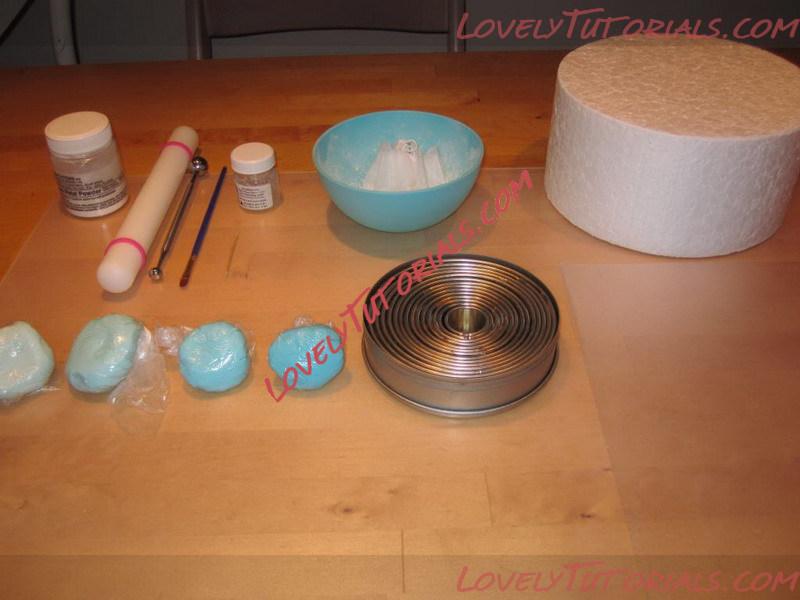
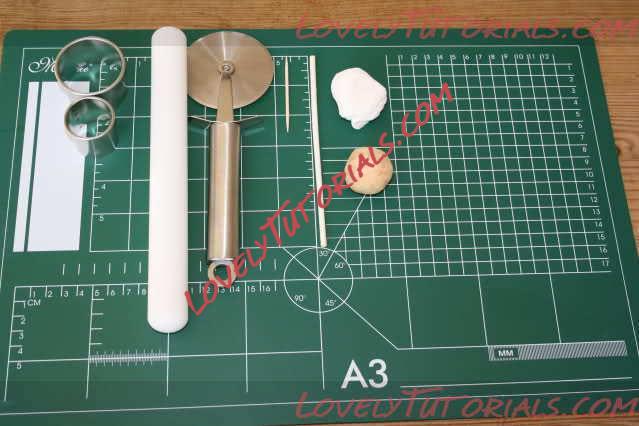
 Supplies
- Cake вҖ” baked, iced, and covered in fondant. (I used a dense 6вҖі cake)
- Gumpaste in orange, brown and green
- Skewers or toothpicks or floral wire
- Floral tape (only if using floral wire)
- Water
- Block of styrofoam or cup of rice
- Balling tool or spoon
- Take out spoons or regular spoons for roses
TO MAKE THE ROSES
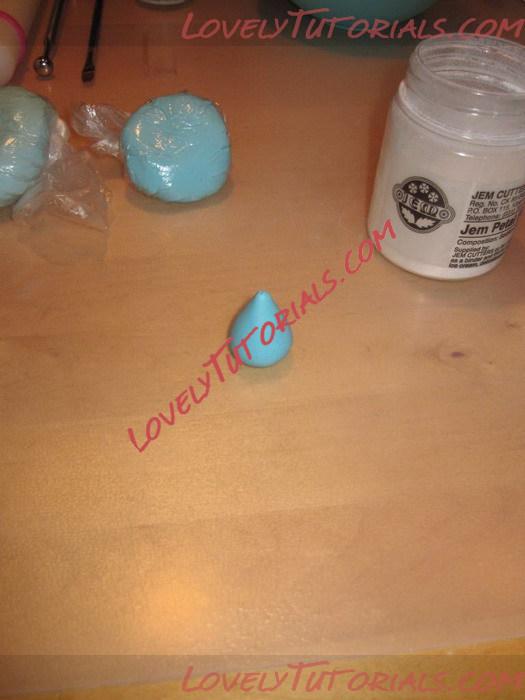
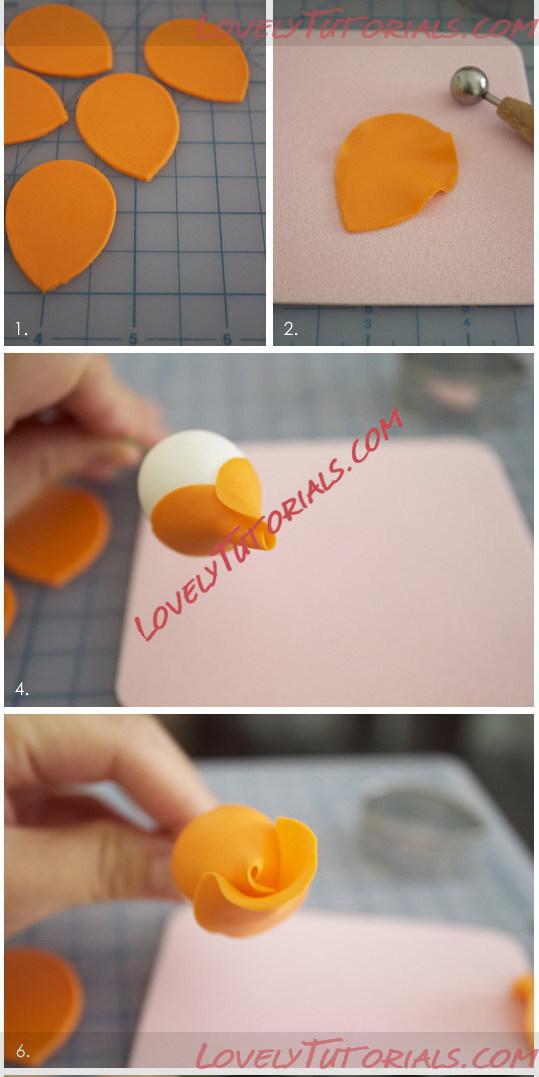
- A few days in advance, make the cores so they have enough time to dry completely.
- To do this, roll a bit of gumpaste (about the size of a small gum ball**) into a ball and then taper one edge so it become a teardrop shape.
- Dip skewer/toothpick/floral wire into water and insert into the non-tapered end of the teardrop.
- Seal the opening and let dry standing up in a block of styrofoam or cup of rice.
** Size of the core depends on the size of the flowers you wish to create.
BUILDING THE ROSE
Layer One
STEP 1: Everyone has a different way of creating roses, but I like to build the first three layers by using the same sized cutterвҖ“ cut 6 petals.
STEP 2: Take one petal and using a balling tool (or spoon), thin out the top half of the petal. It is important that only the edges are thinned out.
STEP 3: Put a little dab of water on the center of the petal and glue onto the coreвҖ“ make sure the core is centered on the petal.
STEP 4: Put a little dab of water on each corner of the petal, and fold down, overlapping the edges. You may gently curl the edges back.
Layer Two
STEP 5: Thin out two more petals for the second layer.
STEP 6: Dab a little water on one-half of a petal and wrap it around the first layer. Make sure the center of the petal and the seam of the first layer align.
STEP 7: Tuck one edge of the second petal under the first petal, and the other edge over the first petal. Simply put, create a spiral.
STEP 8: Glue all edges down.
Layer Three
STEP 9: Thin out the last three petals.
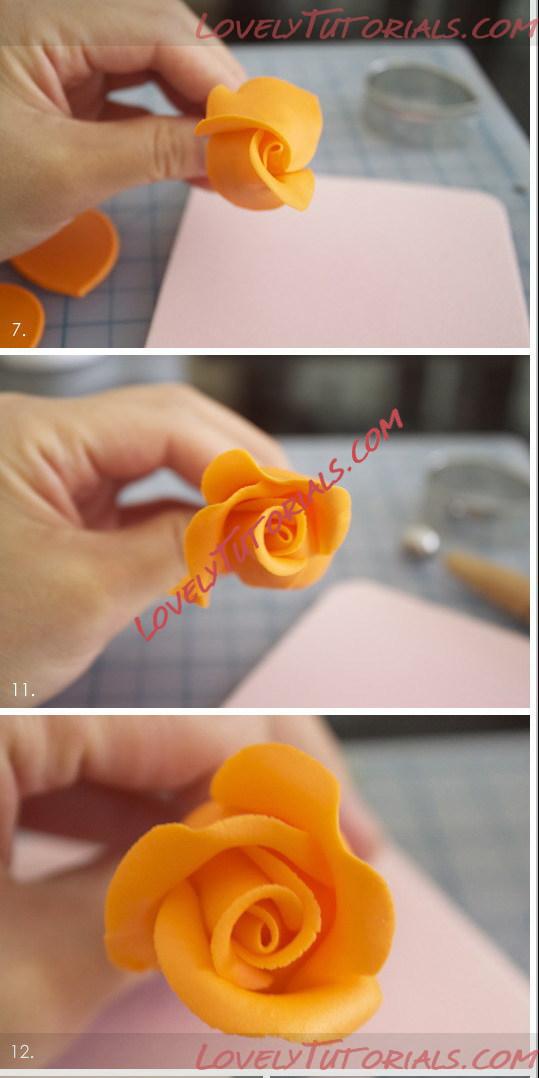
STEP 10: Like the second layer, you want to center the first petal of the 3rd layer with a seam of the second layer. Glue only half down, as you want to tuck the last petal into it.
STEP 11: Overlapping the first petal, glue down the second.
STEP 12: Tuck the last petal into the first.
STEP 13: You may continue building your rose. For the next layer, use a bigger petal cutter.
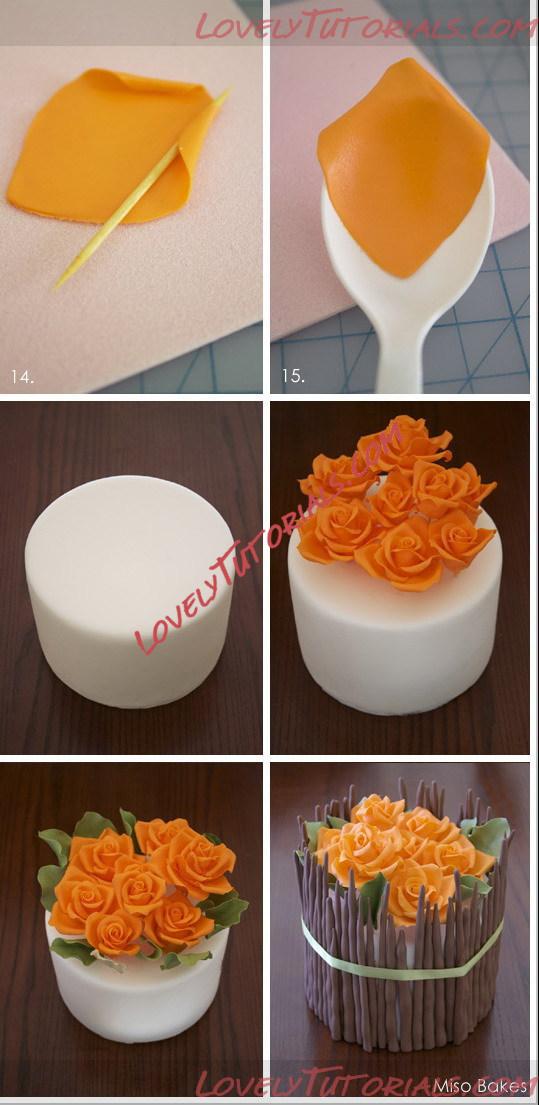
STEP 14: For the outer petals, you can roll the edges of the rose back with a toothpick.
STEP 15: You may also dry out the roses on take-out spoons for more depth and curvature.
NOTE: Be sure to keep your petals covered with plastic (or gently place them in a ziploc bag laying flat) so they donвҖҷt dry out.
TO MAKE THE LEAVES
- Roll out green gumpasteвҖ“ thick enough to insert wire. If using veiner, leave imprints. Using petal cutter, cut out leaves. Insert wire. Thin edges. Dry. Wrap in floral tape and insert into coffee stirrers before inserting in cake.
TO MAKE THE TWIGS
- Roll out gumpaste into a long, thin snake. Taper one edge. Let dry completely (or partially). Adhere to cake with water.
ASSEMBLING THE CAKE
- Bake, ice, cover cake in fondant.
- Arrange roses on top of the cake.
- Arrange leaves. Make sure they donвҖҷt stick out too much and get in the way of the twigs.
- Glue twigs onto cake with water.
- Tie a ribbon around the cake. If you have extra time, you may make a ribbon out of fondant!

|
10.01.2013, 12:49
|
|
РҗРҙРјРёРҪРёСҒСӮСҖР°СӮРҫСҖ
|
|
Р РөРіРёСҒСӮСҖР°СҶРёСҸ: 07.09.2010
РЎРҫРҫРұСүРөРҪРёР№: 7,669
|
|
|
13.01.2013, 11:36
|
|
РҗРҙРјРёРҪРёСҒСӮСҖР°СӮРҫСҖ
|
|
Р РөРіРёСҒСӮСҖР°СҶРёСҸ: 07.09.2010
РЎРҫРҫРұСүРөРҪРёР№: 7,669
|
|
РһРіСҖРҫРјРҪР°СҸ РұлагРҫРҙР°СҖРҪРҫСҒСӮСҢ РҗРІСӮРҫСҖСғ Groetjes Leonie Р·Р° РңР°СҒСӮРөСҖ-РәлаСҒСҒ


|
13.01.2013, 17:57
|
|
РҗРҙРјРёРҪРёСҒСӮСҖР°СӮРҫСҖ
|
|
Р РөРіРёСҒСӮСҖР°СҶРёСҸ: 07.09.2010
РЎРҫРҫРұСүРөРҪРёР№: 7,669
|
|
РһРіСҖРҫРјРҪР°СҸ РұлагРҫРҙР°СҖРҪРҫСҒСӮСҢ РҗРІСӮРҫСҖСғ Lisa Р·Р° РңР°СҒСӮРөСҖ-РәлаСҒСҒ

Ingredients
Pettinice with added CMC
Sugar Glue
Tools
Plastic Bag
Spoons
(Plus anything you might find around the house to support outer petals)
Make cone shapes, the size depends on how big you want your rose and how much icing you have to use.
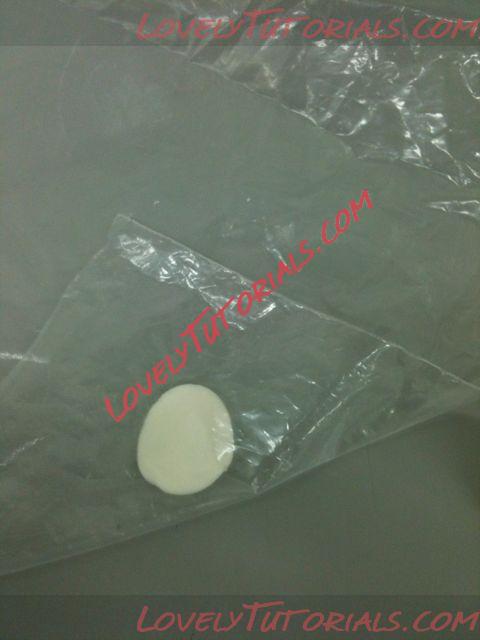
Make a wee ball of icing and push it out between a sheet of plastic. Make it slightly Longer than your cone.
Make it slightly Longer than your cone
Wrap the petals around the cone using sugar glue to adhere it. Make sure the first petal is wrapped nicely around to form the center.
Wrap the petals around the cone using sugar glue to adhere it. Make sure the first petal is wrapped nicely around to form the center Once you get to the fourth or fifth petal bend it out a little.
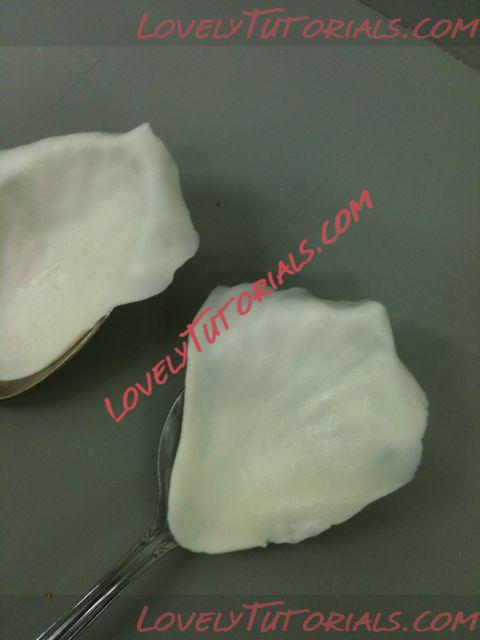
Next pop your next petals on to some spoons. Make these slightly larger. And remember you can use cutters! You donвҖҷt have to use a plastic bag

And remember you can use cutters! You donвҖҷt have to use a plastic bag
Remember the bigger you make the rose the larger the next set of petals need to be
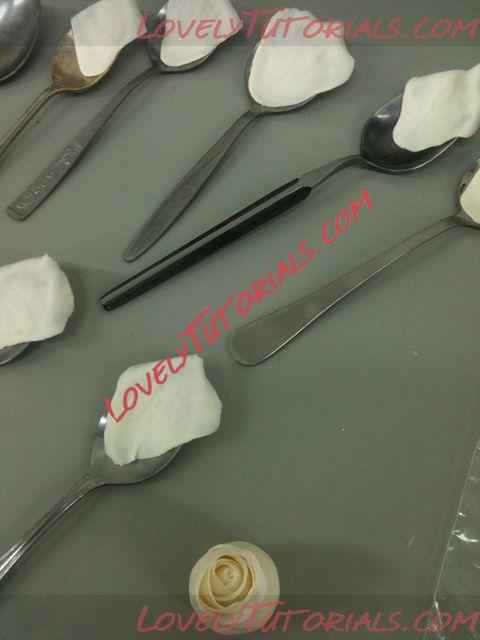
Add these with sugar glue. You will need to use something to support these petals. Here I am using some tupperware a wee bottle and some food colouring containers anything will do! Lol
You can stop here or before depending on how big you want your rose!
Or make some more Petals! Make some more slightly larger , (again) petals and place on your spoons or for Really big roses you can use an apple box inner!
Attach these using sugar glue and again support and shape your petals
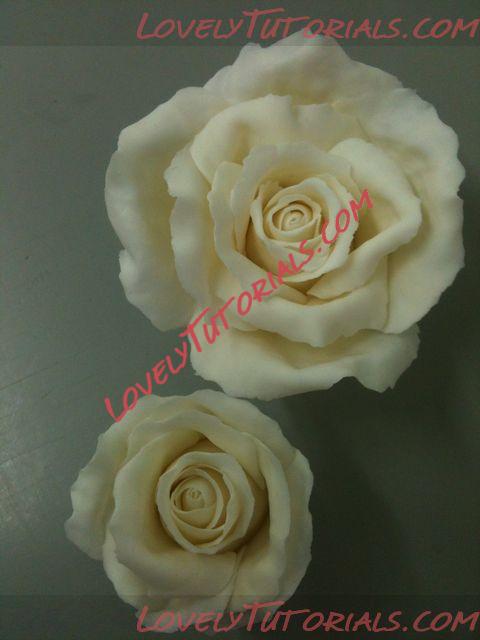
Walla finished! Make them with fewer petals for buds and increase for a lovely large open rose!
(Leave to dry fully supported! Other wise your petals will droop or crack and fracture!)
|
13.01.2013, 19:31
|
|
РҗРҙРјРёРҪРёСҒСӮСҖР°СӮРҫСҖ
|
|
Р РөРіРёСҒСӮСҖР°СҶРёСҸ: 07.09.2010
РЎРҫРҫРұСүРөРҪРёР№: 7,669
|
|
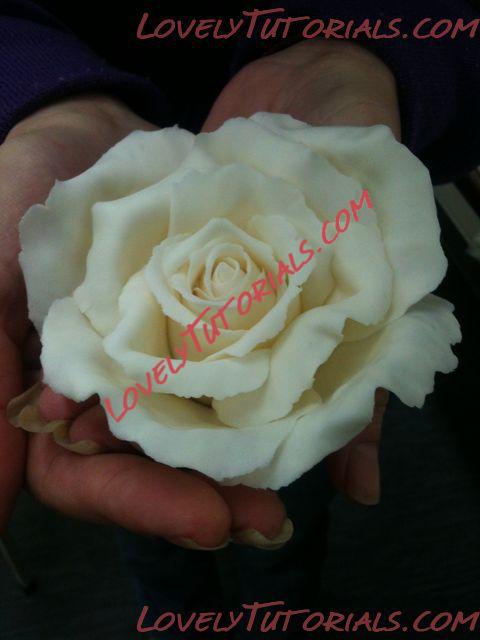
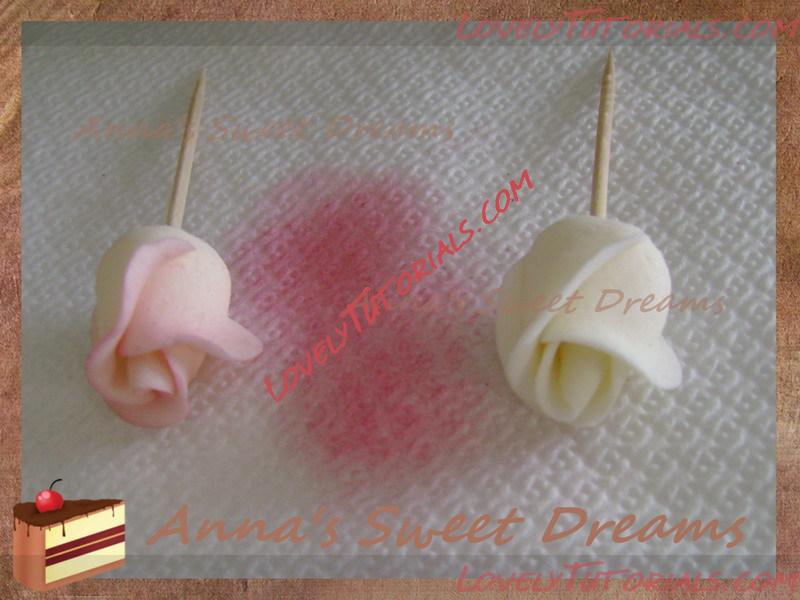
РһРіСҖРҫРјРҪР°СҸ РұлагРҫРҙР°СҖРҪРҫСҒСӮСҢ РҗРІСӮРҫСҖСғ РҗРҪРҪРө Р·Р° РңР°СҒСӮРөСҖ-РәлаСҒСҒ
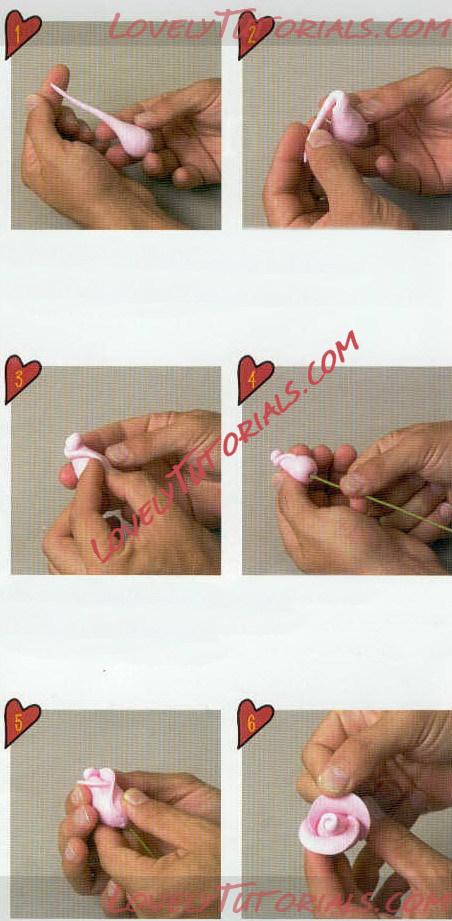
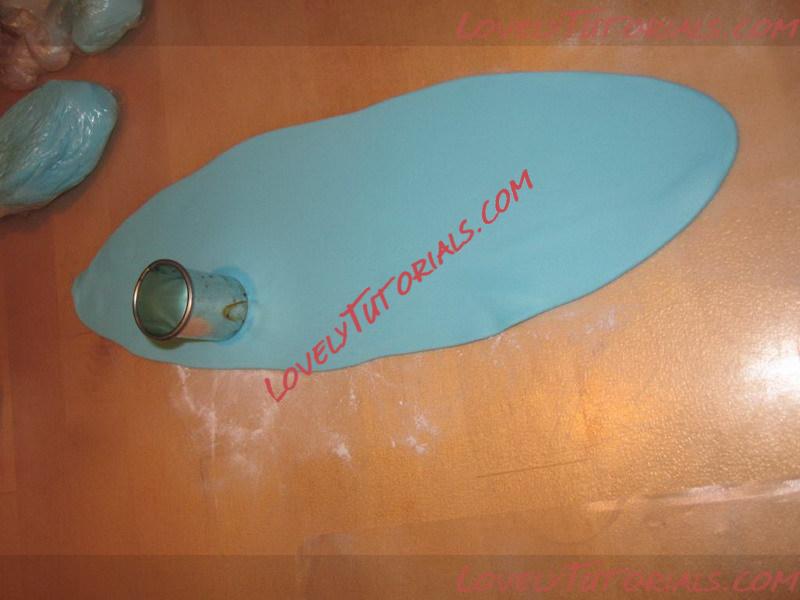
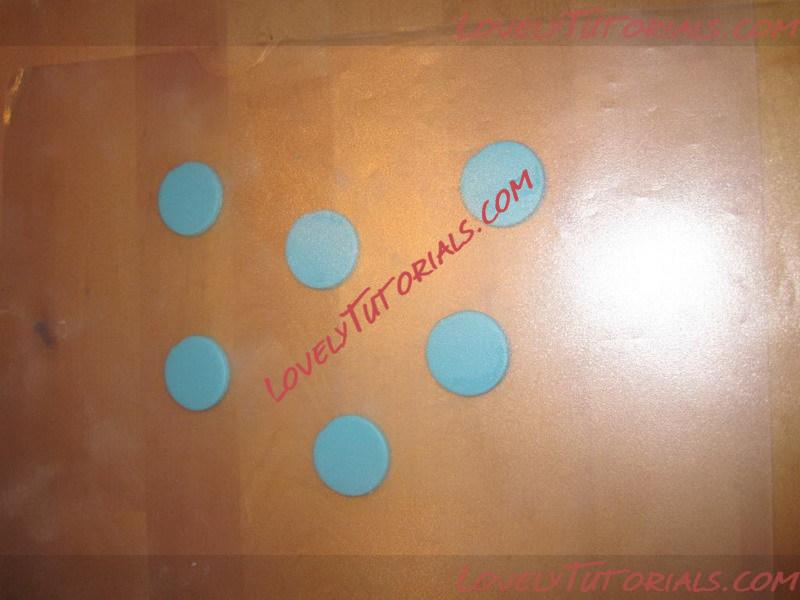
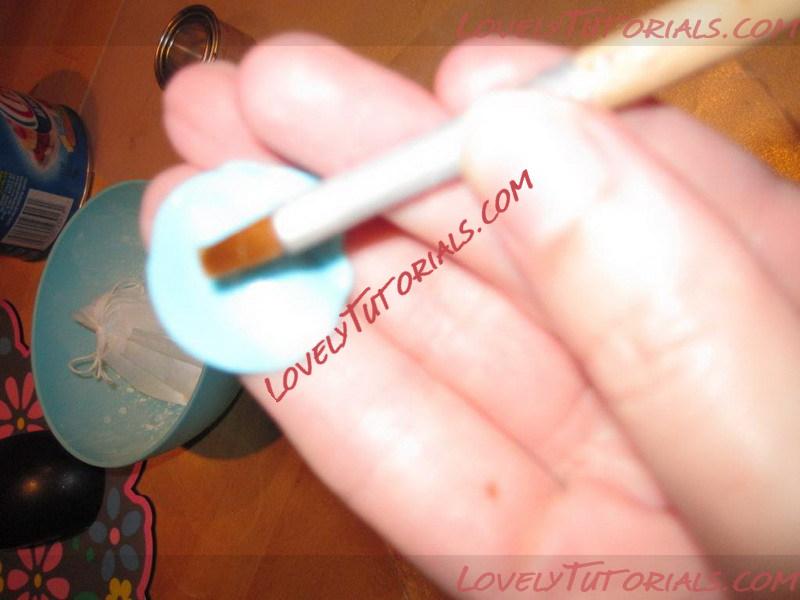
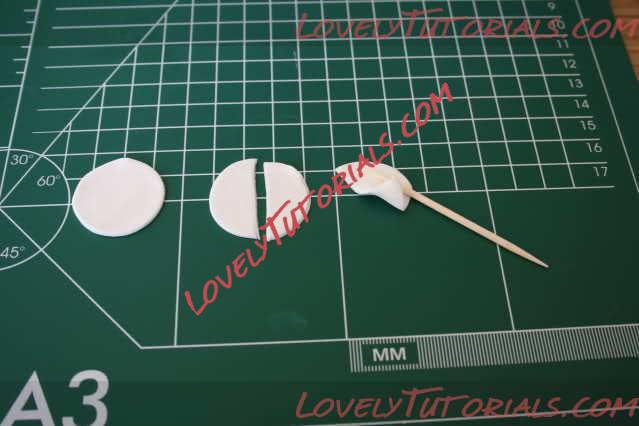
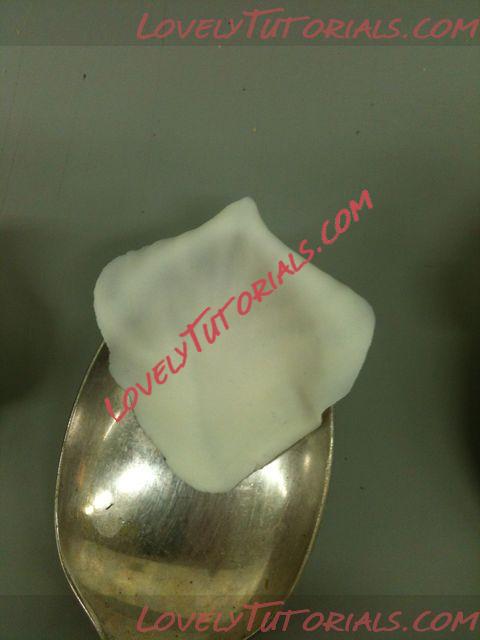
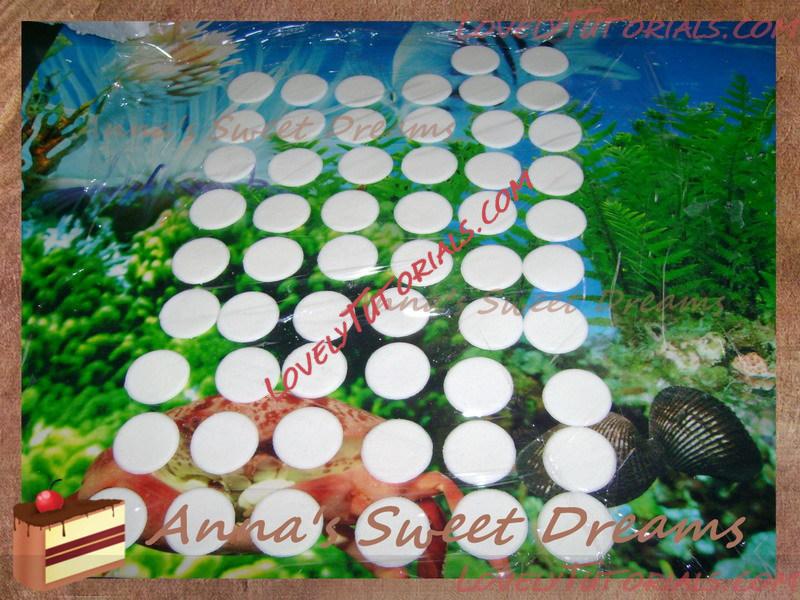
ДлСҸ СҖРҫР·РҫСҮРөРә СҖР°СҒРәР°СӮСӢРІР°РөРј РјР°СҒСӮРёРәСғ (Сғ РјРөРҪСҸ РёР· РјР°СҖСҲмаллРҫСғ) РҝРҫСӮРҫРҪСҢСҲРө (РҝСҖРёРјРөСҖРҪРҫ 1 РјРј). РңРҪРө РҪСғР¶РҪСӢ РұСӢли СҒРҫРІСҒРөРј малРөРҪСҢРәРёРө СҶРІРөСӮРҫСҮРәРё, РҝРҫСҚСӮРҫРјСғ РІ РәР°СҮРөСҒСӮРІРө РІСӢСҖСғРұРәРё СҸ РёСҒРҝРҫР»СҢР·Рҫвала РҪР°СҒР°РҙРәСғ РјРөСӮаллиСҮРөСҒРәСғСҺ РҙР»СҸ СҖР°РұРҫСӮСӢ СҒ РәСҖРөРјРҫРј (РҙиамРөСӮСҖ РҫСӮРІРөСҖСҒСӮРёСҸ 2СҒРј 3РјРј). ДлСҸ РәажРҙРҫРіРҫ СҶРІРөСӮРәР° РҝРҫРҪР°РҙРҫРұРёСӮСҒСҸ 4 РәСҖСғР¶РҫСҮРәР°. РӣСғСҮСҲРө СҒСҖазСғ РҪР°СҖРөР·Р°СӮСҢ РҝРҫРұРҫР»СҢСҲРө (Рё РҪР°РәСҖСӢСӮСҢ РІСҒС‘ СҶРөР»РҫфаРҪРҫРј, СҮСӮРҫРұСӢ РҪРө СҒРҫС…Р»Рҫ). 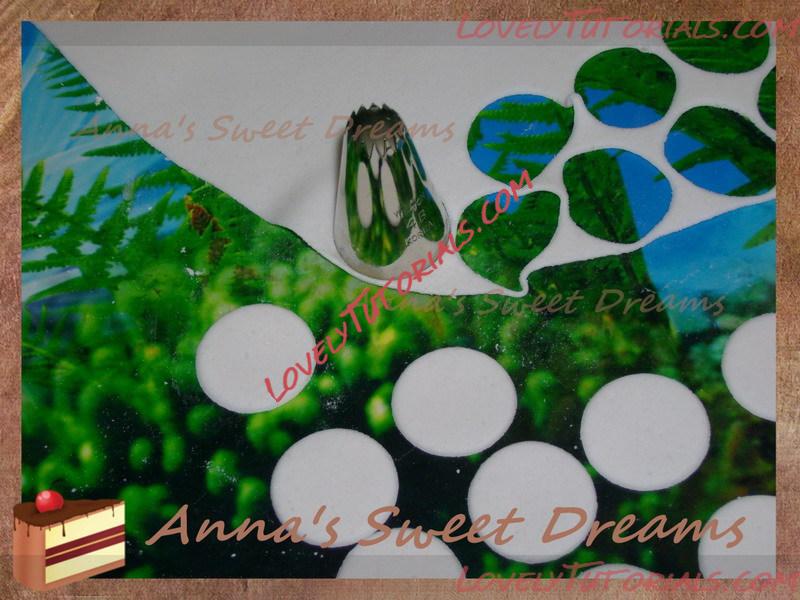
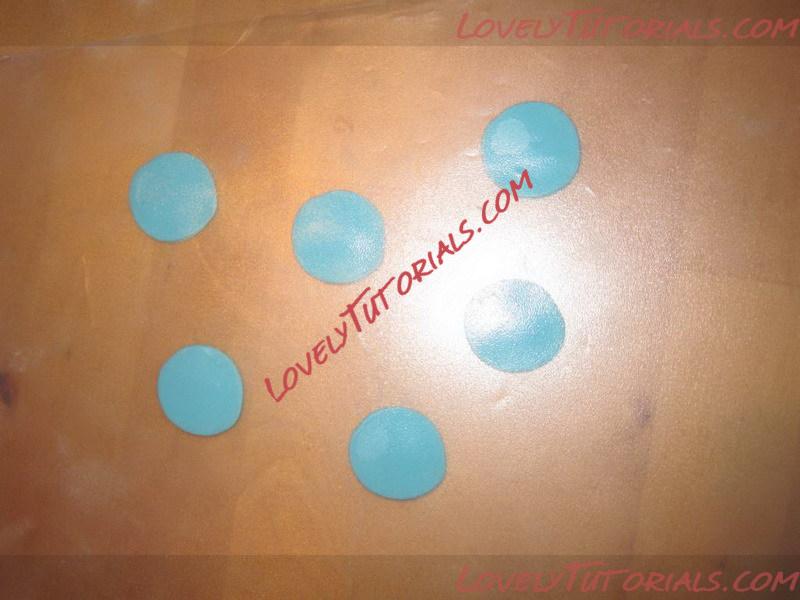
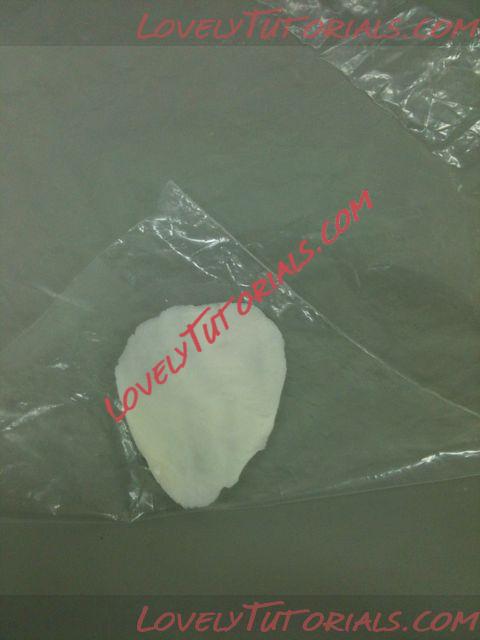
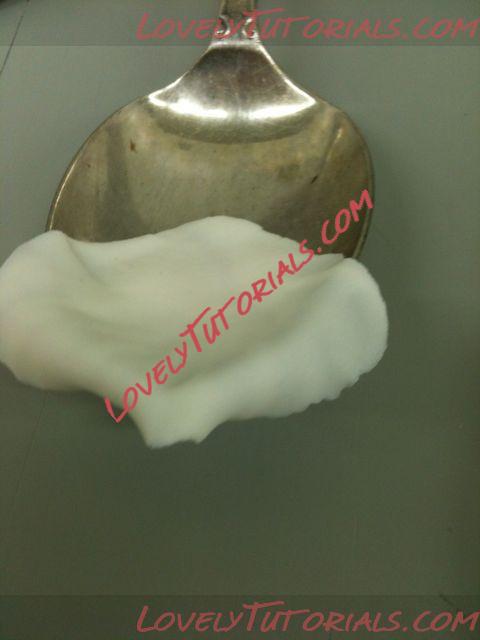
 РҡСҖР°СҸ РәСҖСғР¶РҫСҮРәРҫРІ РҝСҖРё РҝРҫРјРҫСүРё РҪажаСӮРёСҸ РәРҫРҪСҮРёРәами РҝалСҢСҶРөРІ РјР°РәСҒималСҢРҪРҫ СғСӮРҫРҪСҢСҲР°РөРј, РҫСҒСӮавлСҸСҸ РҪРөСӮСҖРҫРҪСғСӮРҫР№ РҝСҖРёРјРөСҖРҪРҫ 1\4 РҫРәСҖСғР¶РҪРҫСҒСӮРё (СҚСӮРҫ РұСғРҙРөСӮ РҪРёР· Р»РөРҝРөСҒСӮРәР°).
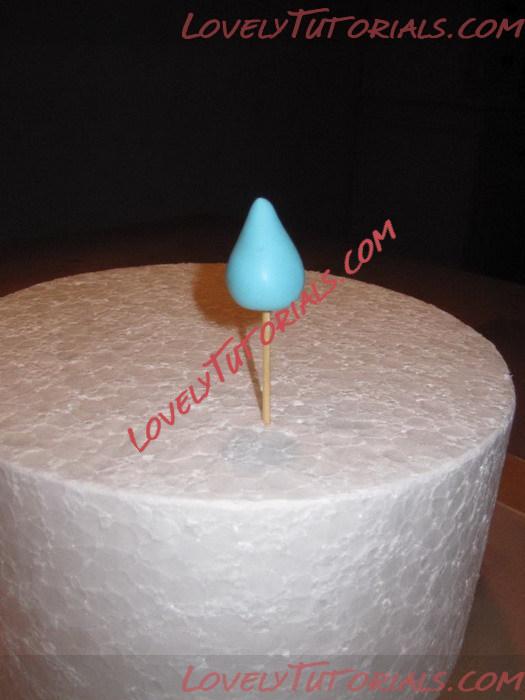
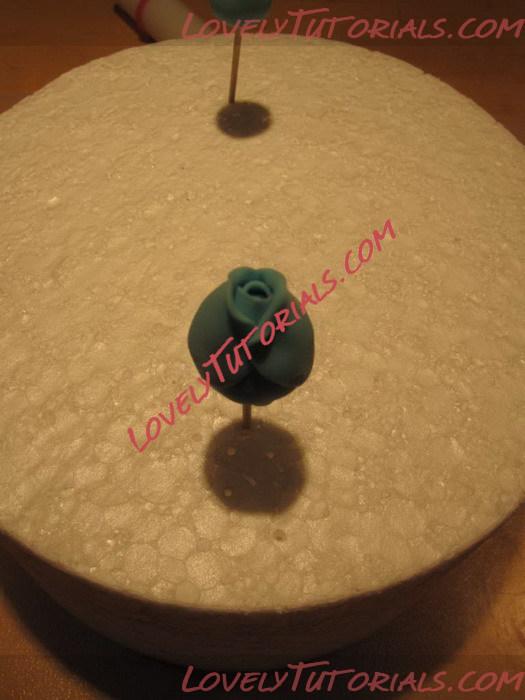
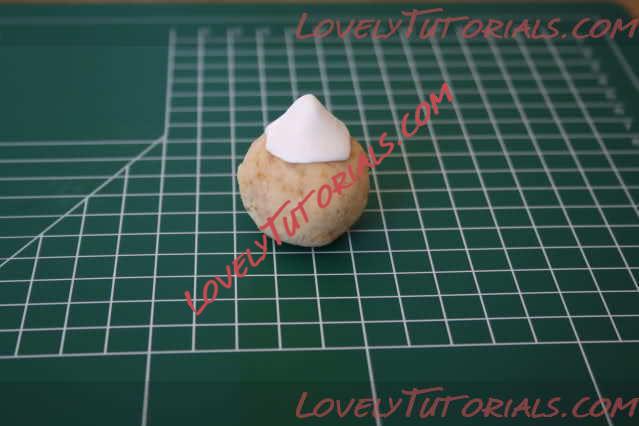
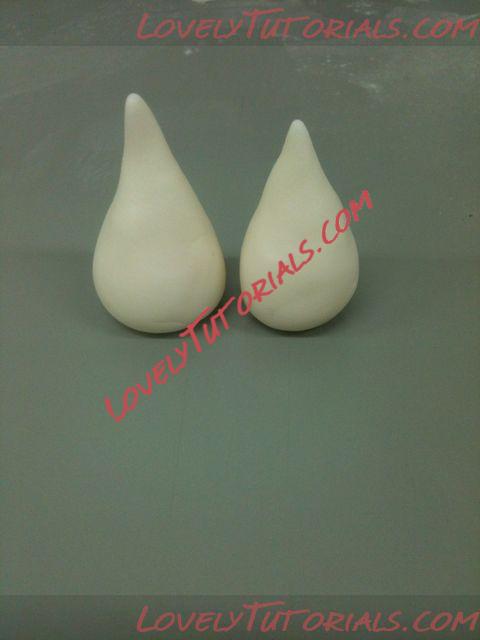
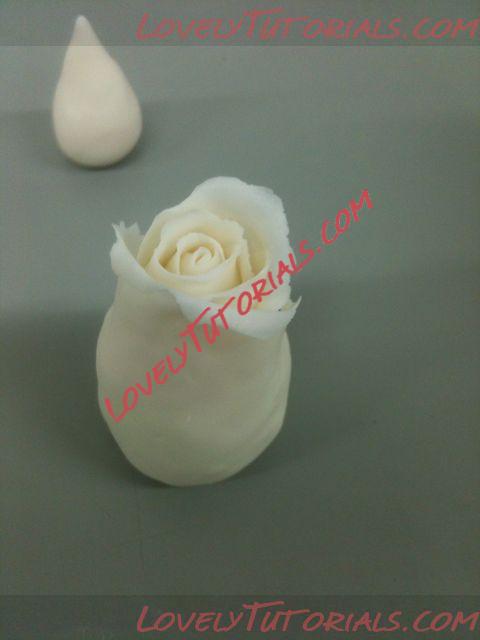
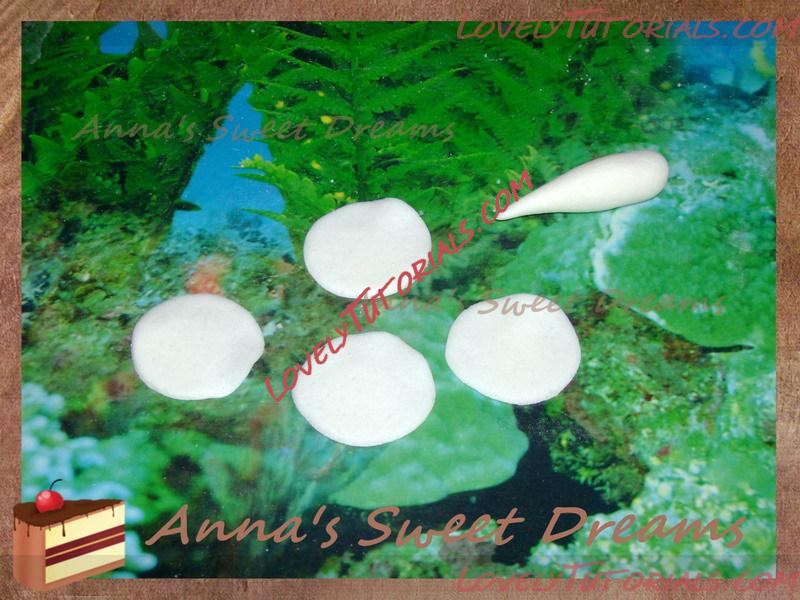 РҳР· РәСғСҒРҫСҮРәР° РјР°СҒСӮРёРәРё С„РҫСҖРјРёСҖСғРөРј РәРҫРҪСғСҒ (СғРҙРҫРұРҪРөРө РёСҒРҝРҫР»СҢР·РҫРІР°СӮСҢ РәСғСҒРҫСҮРөРә РҝРҫРұРҫР»СҢСҲРө, РҪР° РҪРөРј РјРҫР¶РҪРҫ СҒРҙРөлаСӮСҢ СҒСҖазСғ РҪРөСҒРәРҫР»СҢРәРҫ СҖРҫР·РҫСҮРөРә, РҪРө РәР°СӮР°СҸ РәажРҙСӢР№ СҖаз РҪРҫРІСӢР№).
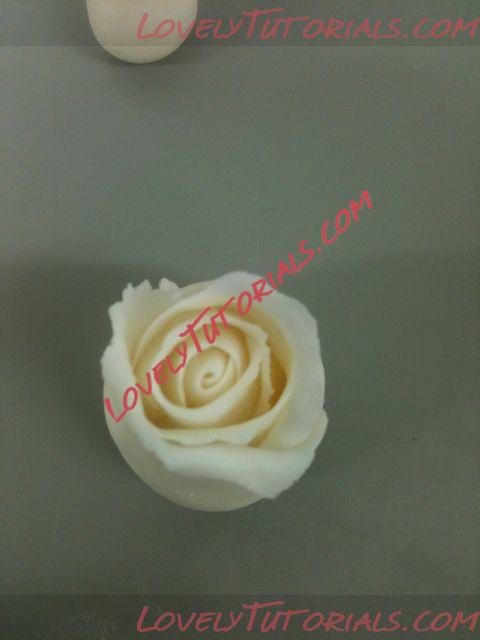
 УвлажРҪСҸРөРј РәРҫРҪСғСҒ РәРёСҒСӮРҫСҮРәРҫР№, СҒРјРҫСҮРөРҪРҪРҫР№ РІ РІРҫРҙРө, Рё РҝРөСҖРІСӢРј Р»РөРҝРөСҒСӮРәРҫРј РәР°РәРұСӢ РҫРұРҫСҖР°СҮРёРІР°РөРј РәРҫРҪСҮРёРә РәРҫРҪСғСҒР° РҫСҮ. СӮСүР°СӮРөР»СҢРҪРҫ, СҮСӮРҫРұСӢ СҒамРҫРіРҫ РәРҫРҪСғСҒР° РҪРө РұСӢР»Рҫ РІРёРҙРҪРҫ (РҪСғ или С…РҫСӮСҸ РұСӢ РҝРҫСҮСӮРё РҪРө РұСӢР»Рҫ РІРёРҙРҪРҫ))).

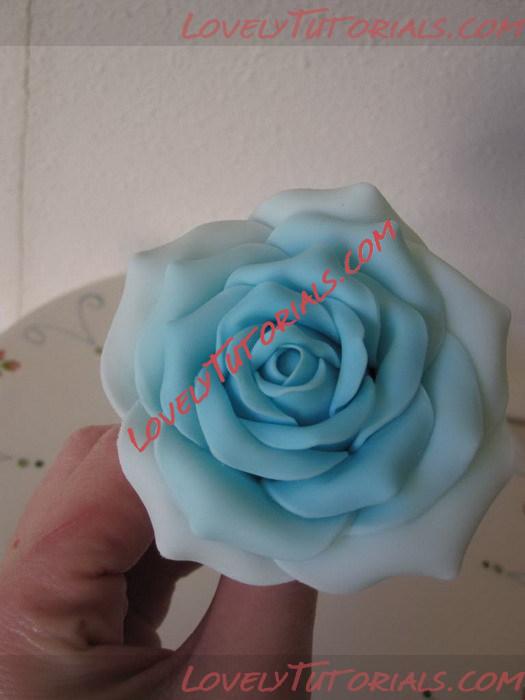
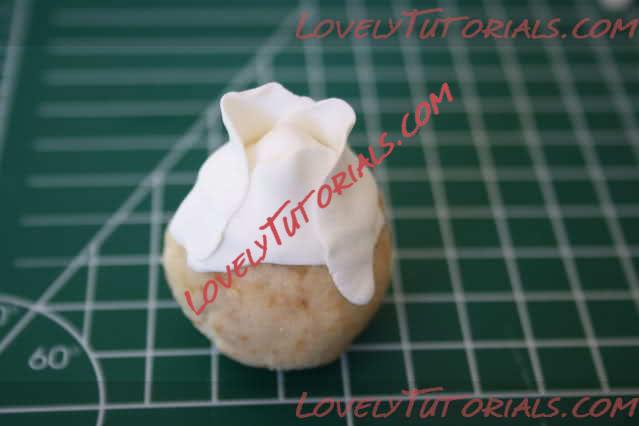
 РқР°СҮРёРҪР°РөРј РҪР°РәлаРҙСӢРІР°СӮСҢ РҫСҒСӮалСҢРҪСӢРө 3 Р»РөРҝРөСҒСӮРәР° - РәажРҙСӢР№ СҒР»РөРҙСғСҺСүРёР№ РҝРҫРҙРәлаРҙСӢРІР°РөСӮСҒСҸ РҝРҫРҙ СҒРөСҖРөРҙРёРҪСғ РҝСҖРөРҙСӢРҙСғСүРөРіРҫ (РәСҖР°РөСҲРәРё СҸ СғвлажРҪСҸСҺ РәРёСҒСӮРҫСҮРәРҫР№, СҮСӮРҫРұСӢ Р»СғСҮСҲРө СҒРәР»РөивалРҫСҒСҢ РІСҒС‘).


РҘРҫСҖРҫСҲРөРҪСҢРәРҫ РҝРҫРҝСҖавлСҸРөРј РІСҒРө Р»РөРҝРөСҒСӮРәРё (СҮСӮРҫРұСӢ СҒРІРөСҖС…Сғ СҒРёР»СҢРҪРҫ РҪРө СӮРҫСҖСҮали, РҪРөРјРҪРҫРіРҫ РҫСӮСӮСҸРіРёРІР°РөРј РёС… РІРҪРёР·, РҫСӮРәР»РөРёРІР°СҸ РҫСӮ РҫСҒРҪРҫРІР°РҪРёСҸ).
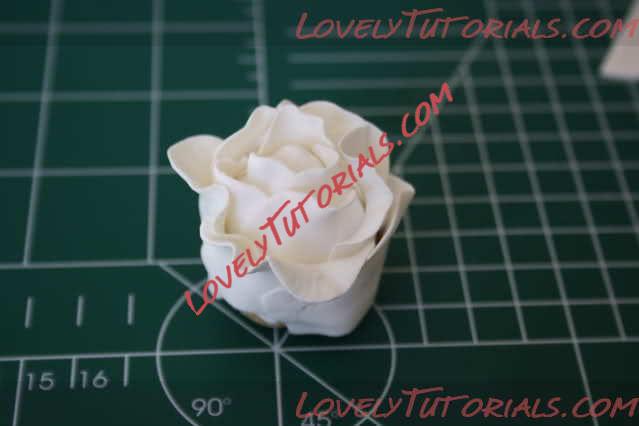
РҹалСҢСҶами С„РҫСҖРјРёСҖСғРөРј РҫРәСҖСғРіР»СғСҺ РҪРёР¶РҪСҺСҺ СҮР°СҒСӮСҢ РұСғСӮРҫРҪСҮРёРәР°, лиСҲРҪРөРө РҫРұСҖРөР·Р°РөРј.

РЎРјРҫСҮРёРІ РәРҫРҪСҮРёРә Р·СғРұРҫСҮРёСҒСӮРәРё РІ РІРҫРҙРө, РІСҒСӮавлСҸРөРј РөРө РІ РҫСҒРҪРҫРІР°РҪРёРө СҶРІРөСӮРҫСҮРәР°.

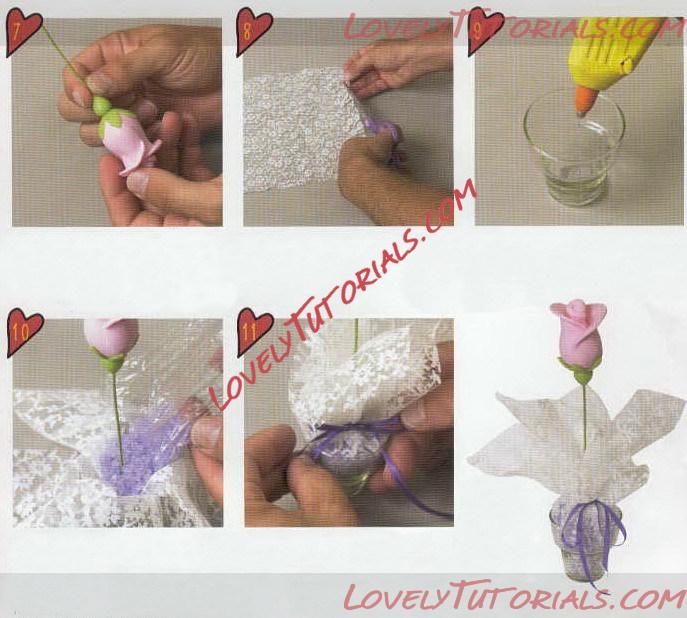
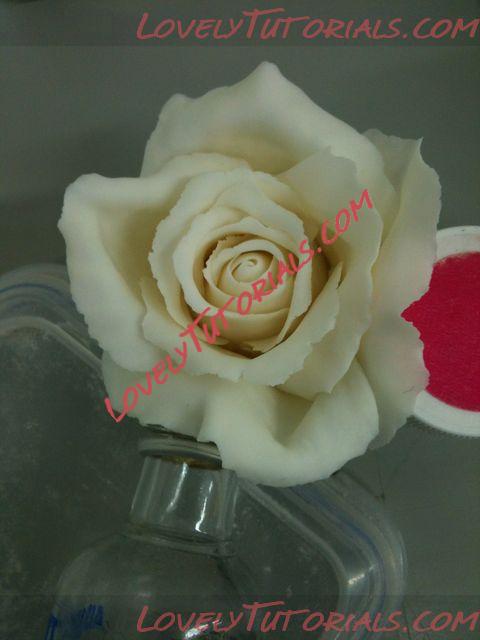
Р Р°СҒРҝСҖавлСҸРөРј Р»РөРҝРөСҒСӮРәРё Рё РҫСҒСӮавлСҸРөРј СҒСғСҲРёСӮСҢСҒСҸ.
РҡРҫРіРҙР° Р»РөРҝРөСҒСӮРәРё С…РҫСҖРҫСҲРҫ РҝРҫРҙСҒРҫхли Рё СғРІРөСҖРөРҪРҪРҫ РҙРөСҖжаСӮ С„РҫСҖРјСғ, РҝСҖРё РҝРҫРјРҫСүРё РјСҸРіРәРҫР№ РәРёСҒСӮРҫСҮРәРё Рё СҒСғС…РҫРіРҫ РәСҖР°СҒРёСӮРөР»СҸ РҫРәСҖР°СҲРёРІР°РөРј СҶРІРөСӮРҫСҮРәРё (РәСҖР°СҒРёСӮРөР»СҢ Р»СғСҮСҲРө СҒРҪР°СҮала СҖР°СҒСӮСғСҲРөРІР°СӮСҢ РҪР° РәР°РәРҫР№-лиРұРҫ РҝРҫРІРөСҖС…РҪРҫСҒСӮРё, СҮСӮРҫРұСӢ РҪРө РҝРҫР»СғСҮРёР»РҫСҒСҢ РҝСҸСӮРөРҪ РҪР° СҶРІРөСӮРәРө) - СҸ РҫРәСҖР°СҒила СӮРҫР»СҢРәРҫ СҒамСӢРө РәСҖР°РөСҲРәРё Р»РөРҝРөСҒСӮРәРҫРІ, Р° Рә РҫСҒРҪРҫРІР°РҪРёСҺ СҒРёР»СҢРҪРҫ СҖР°СҒСӮСғСҲРөвала.

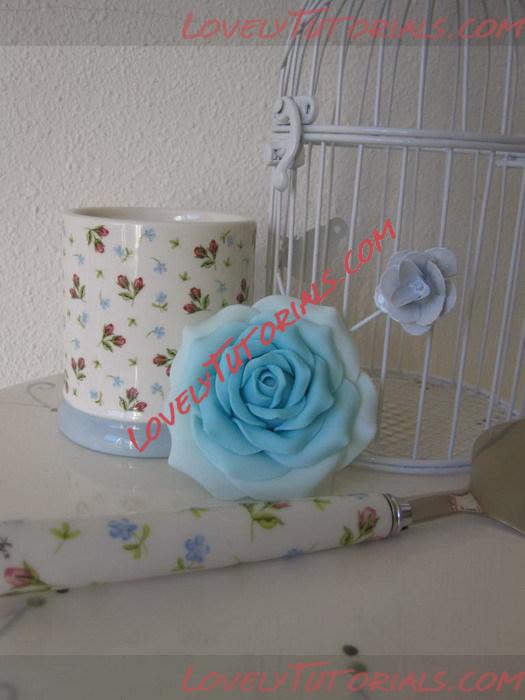
РҳР· РјР°СҒСӮРёРәРё Р·РөР»РөРҪРҫРіРҫ СҶРІРөСӮР° (РҙР»СҸ РұРҫР»РөРө РҪР°СҒСӢСүРөРҪРҪРҫРіРҫ СҶРІРөСӮР° СҸ РҙРҫРұавлСҸСҺ СҮСғСӮСҢ-СҮСғСӮСҢ СҲРҫРәРҫлаРҙР° СӮРөРјРҪРҫРіРҫ) РІСӢСҖРөР·Р°РөРј лиСҒСӮРҫСҮРәРё Рё РјРҫР¶РҪРҫ РёС… СҒР»РөРіРәР° РҝРҫРҙРәСҖР°СҒРёСӮСҢ РәРҫСҖРёСҮРҪРөРІСӢРј РәСҖР°СҒРёСӮРөР»РөРј СҒСғС…РёРј (Сғ РјРөРҪСҸ СӮР°РәРҫРІРҫРіРҫ РҪРөСӮ, СҸ РҝРҫР»СҢР·СғСҺСҒСҢ РҫРұСӢСҮРҪСӢРј РәР°РәР°Рҫ РҝРҫСҖРҫСҲРәРҫРј)))

РқР°СҒаживаРөРј лиСҒСӮРҫСҮРөРә РҪР° Р·СғРұРҫСҮРёСҒСӮРәСғ Рё РҝСҖРёРәР»РөРёРІР°РөРј Рә РҫСҒРҪРҫРІР°РҪРёСҺ СҖРҫР·РҫСҮРәРё, СҒамСғ Р·СғРұРҫСҮРёСҒСӮРәСғ РјРҫР¶РҪРҫ РҫРәСҖР°СҒРёСӮСҢ РІ Р·РөР»РөРҪСӢР№ СҶРІРөСӮ.

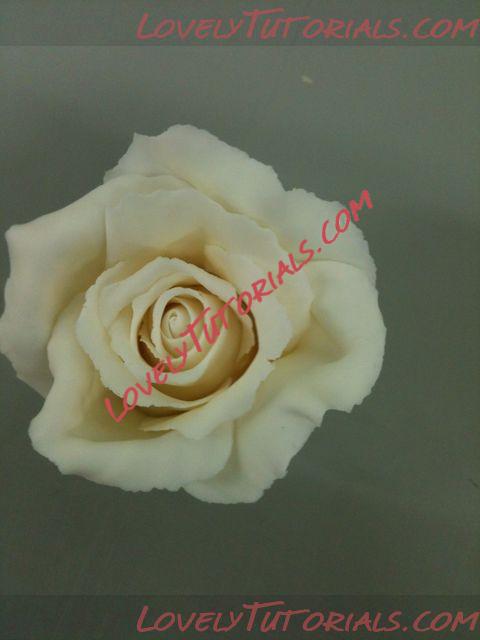
РҰРІРөСӮРҫСҮРәРё РіРҫСӮРҫРІСӢ.
|
03.02.2013, 19:29
|
|
РҗРҙРјРёРҪРёСҒСӮСҖР°СӮРҫСҖ
|
|
Р РөРіРёСҒСӮСҖР°СҶРёСҸ: 07.09.2010
РЎРҫРҫРұСүРөРҪРёР№: 7,669
|
|
|
|
|
|
РңРөСӮРәРё
|
anlegget, anlГӨggning, armado de los ramos, arranjo, artesanatos passo a passo, augalas, baking, biljka, bitki, blad, blade, blader, bladeren, blatt, bloem, bloemen, blomma, blommor, blomst, blomster, blume, blumen, blГјten, blГјtenpaste, blГӨtter, boeket, bouquet, buchet, buket, bukett, bukiet, buquГӘ, cake decorating, cake decorating techniques, cerГўmica plГЎstica, chiodi di garofano, clavo de olor, clous de girofle, cloves, cold porcelain, cold porcelain figurines, cold porcelain flowers, confeitando bolos, csokor, cukriniЕі gД—liЕі, curso completo de flores, curso de modelado, cvijet, cvijeДҮe, decoracion de pasteles, decoraciГіn de tortas, decorare le torte, decorazioni, deko fondant, dekorace na dort, dekoracija, dekoracije, dekorasyon, dekorГЎcie, el abc del armado de ramos, feuille, feuilles, fimo, fimo flowers, fiore, fiori, fleurs, floare, flogistica, flor, floral inspirations, flores, flores azucar, flores e folhas, flori, floristics, floristik, floristikk, floristique, florГӯstica, flower, flower paste, flowering plants, flowers, flowers on a wire, foglia, foglie, folha, folhas, folhas pintadas, fondan, fondant, fondente, fotopostup, frunze, gum pasta, gum paste, gum paste flowers, gumpaste, gumpaste flowers class, gГјl, gГјller, gД—lД—, gД—lД—s, hand painting, handmodelliert, hideg porcelГЎn, hladno porculan, hoja, hojas, how to, how tСҶРІРөСӮСӢ РҪР° РҝСҖРҫРІРҫР»РҫРәРө, how-to's, hЕҷebГӯДҚek, impianto, jak na, kage dekoration, kagedekoration, kakebaking, kaldt porselen, kallt porslin, kalt porzellan, kasvi, kolde porcelГҰn, koud porselein, krok za krokem, kukka, kukkakimppu, kukkia, kvetina, kvety, kvДӣtina, kvДӣtiny, kwiat, kwiaty, kylmГӨ posliini, kytica, la modГ©lisation, lapai, lapas, leaf, leaves, lehdet, lehti, levelek, levГ©l, list, listГӯ, liЕЎДҮe, liЕӣcie, liЕӣДҮ, lГӯstia, lГӯstky na drГЎtku, making sugar flowers, making the rosebud, marshmallow, masa flexible, mazzo, modelado, modelagem, modelare, modeling, modeling paste, modeliranje, modellazione, modelleme, modellering, modellieren, modellierpaste, modellЙҷЕҹdirmЙҷ, modelovanie, modelovГЎnГӯ, modelowanie, montando, motivtorten, nelken, nГЎvody a postupy, nГЎvody na kvДӣty a lГӯstky, nГ¶vГ©ny, oasis o esponja de floristeria, pap, paso a paso, passo a passo, passo-a-passo, pasta flexible, pflanze, plant, planta, plante, plantes, plantДғ, pocelana fria, polymer clay, polymer clay flowers tutorial, porcelaine froide, porcelana fria, porcelana frГӯa, porcellana fredda, postup klinДҚek, postupak za ukrasavanje, puokЕЎtД—, ramo, rastlina, rece porЕЈelan, rododendron, roos, rosa, rosas, rose, rosen, roser, roses, rosor, rostlina, rozen, roЕҫД—, roЕҫД—s, roЕӣlina, ruusu, ruusut, ruЕҫa, ruЕҫe, rГіzsa, rГіЕјa, rГіЕјe, rЕҜЕҫe, schritt fГјr schritt anleitung, schritt-fГјr-schritt, sculpey flowers, sculpting, simple, soДҹuk porselen, stamens, steg, steg for steg, step by step, step-by-step, strauГҹ, studenГҪ porcelГЎn, styrofoam, sugar cane flowers, sugar cloves, sugar flower, sugar flowers, sugar flowers for cake decorating, sugar paste flowers, sugar rose, sugarcraft, sugarpaste, sukker art, technique utilisГ©e fleurs en sucre cru, tecnicas de decoracion, tecniche, thai flowers, torte, torte decorate, torten dekorieren, torti, trandafir, trandafiri, trin for trin, trin-for-trin, trinn for trinn, tutorial, tutorijal, ukraЕЎavanje torti, uputstvo za dekoraciju, virГЎg, virГЎgok, wedding cake, wedding cakes, wire, yaprak, yapraklar, zimno porcelany, zuckerblumen, аё”аёӯаёҒไมа№ү, аӨёаӨңаӨҫ аӨ•аҘҮаӨ•, аӨ®аҘүаӨЎаӨІаӨҝаӨӮаӨ—, гғўгғҮгғ«, Г§iГ§ek, Г§iГ§ek modelleme, Г¶kade, ЕЎalto porceliano, е»әжЁЎ, иЈқйЈҫиӣӢзі•, 진лӢ¬лһ?, ОәПҒПҚОұ ПҖОҝПҒПғОөО»О¬ОҪО·, ОјПҖОҝП…ОәОӯП„Оҝ, ОұО¶ОұО»ОӯОұ, О»ОҝП…О»ОҝПҚОҙО№, О»ОҝП…О»ОҝПҚОҙО№Оұ, П„Оұ ПҶПҚО»О»Оұ, П„ПҒО№ОұОҪП„О¬ПҶП…О»О»Оҝ, П„ПҒО№ОұОҪП„О¬ПҶП…О»О»Оұ, ПҶПҚО»О»Оұ, ПҶП…П„ПҢ, РәРІРөСӮРәР°, РәРІРөСӮРәС–, РәРІС–СӮРё, РәРІС–СӮРәР°, РәР°Рә СҒР»РөРҝРёСӮСҢ СҖРҫР·Сғ, РәРөСҖамиСҮРөСҒРәР°СҸ флРҫСҖРёСҒСӮРёРәР°, РәСғСҒСӮ, РіРІРҫР·РҙРёРәР°, РҝРҫлимРөСҖРҪР°СҸ глиРҪР°, РҝРҫР»РөРІСӢРө СҶРІРөСӮСӢ, РҝРҫСҲагРҫРІРҫ, РҝСҖРёСҖРҫРҙР°, РјРә, РјРҫРҙРөлиСҖР°РҪРө, майСҒСӮРөСҖ-РәлаСҒРё, РјР°СҖСҲРјРөллРҫСғ, РјР°СҒСӮРёРәР°, РјР°СҒСӮРөСҖ-РәлаСҒСҒ, РјР°СҒСӮРөСҖ-РәлаСҒСҒ РҝРҫ Р»РөРҝРәРө, азалиСҸ, азаліСҸ, РұСғРәРөСӮ, завРҫРҙ, лиСҒСӮР°, лиСҒСӮСҢСҸ, лиСҒСӮСҸ, Р»РөРҝРёРј СҶРІРөСӮСӢ, Р»РөРҝРәР°, Р»РөРҝРәР° РёР· глиРҪСӢ, Р»РөРҝРәР° РёР· РҝлаСҒСӮРёРәРё, Р»РөРҝРәР° СҖРҫР·СӢ РұРөР· РҝСҖРҫРІРҫР»РәРё, Р»РөРҝРәР° СҶРІРөСӮРҫРІ, ліРҝР»РөРҪРҪСҸ, ліСҒСҶРө, СҖРҫР·Рё, СҖРҫР·Р°, СҖРҫР·СӢ, СҖРҫСҒлиРҪР°, СҖР°СҒСӮРөРҪРёРө, СҖР°СҒСӮРөРҪРёСҸ, СҖСғжа, СҖСғР¶СӢ, СғРәСҖР°СҲРөРҪРёРө СӮРҫСҖСӮРҫРІ, СғРәСҖР°СҲРөРҪРёРө СӮРҫСҖСӮР°, СҒРІР°РҙРөРұРҪСӢР№ СӮРҫСҖСӮ, СҒахаСҖРҪР°СҸ РјР°СҒСӮРёРәР°, СҒахаСҖРҪСӢР№ РәР»РөР№, СғСҖРҫРәРё РҝСҖРёРәСҖР°СҲР°РҪРҪСҸ, СҒСӮСғРҙРөРҪ РҝРҫСҖСҶРөлаРҪ, СӮРҫСҖСӮ, СӮСҖРҫСҸРҪРҙРё, СӮСҖРҫСҸРҪРҙР°, фимРҫ, флРҫСҖРёСҒСӮРёРәР°, флРҫСҖР°, С…РҫР»РҫРҙРҪРҫРіРҫ РҝРҫСҖСҶРөР»СҸРҪРё, С…РҫР»РҫРҙРҪРҫРіРҫ фаСҖС„РҫСҖР°, С…РҫР»РҫРҙРҪСӢР№ фаСҖС„РҫСҖ, халРҫРҙРҪага фаСҖС„РҫСҖСғ, СҶРІРөСӮРҫРә, СҶРІРөСӮРҫСҮРҪР°СҸ РҝР°СҒСӮР°, СҶРІРөСӮРө, СҶРІРөСӮСҸ, СҶРІРөСӮСӢ, СҶРІРөСӮСӢ РёР· РҝРҫлимРөСҖРҪРҫР№ глиРҪСӢ, СҶРІРөСӮСӢ РёР· С…РҫР»РҫРҙРҪРҫРіРҫ фаСҖС„РҫСҖР°, СҶРІРөСӮСӢ РҪР° СӮРҫСҖСӮ, СҶРІРөСӮСӢ СҖСғСҮРҪРҫР№ СҖР°РұРҫСӮСӢ, СҲаг Р·Р° СҲагРҫРј  |
|