|
|
 |
|

14.03.2013, 10:43
|
|
–Р–і–Љ–Є–љ–Є—Б—В—А–∞—В–Њ—А
|
|
–†–µ–≥–Є—Б—В—А–∞—Ж–Є—П: 05.03.2013
–°–Њ–Њ–±—Й–µ–љ–Є–є: 665
|
|
|
21.03.2013, 13:14
|
|
–Р–і–Љ–Є–љ–Є—Б—В—А–∞—В–Њ—А
|
|
–†–µ–≥–Є—Б—В—А–∞—Ж–Є—П: 05.03.2013
–°–Њ–Њ–±—Й–µ–љ–Є–є: 665
|
|
|
05.04.2013, 15:13
|
|
–Р–і–Љ–Є–љ–Є—Б—В—А–∞—В–Њ—А
|
|
–†–µ–≥–Є—Б—В—А–∞—Ж–Є—П: 05.03.2013
–°–Њ–Њ–±—Й–µ–љ–Є–є: 665
|
|
|
06.04.2013, 14:01
|
|
–Р–і–Љ–Є–љ–Є—Б—В—А–∞—В–Њ—А
|
|
–†–µ–≥–Є—Б—В—А–∞—Ж–Є—П: 05.03.2013
–°–Њ–Њ–±—Й–µ–љ–Є–є: 665
|
|
|
20.04.2013, 22:33
|
|
–Р–і–Љ–Є–љ–Є—Б—В—А–∞—В–Њ—А
|
|
–†–µ–≥–Є—Б—В—А–∞—Ж–Є—П: 05.03.2013
–°–Њ–Њ–±—Й–µ–љ–Є–є: 665
|
|
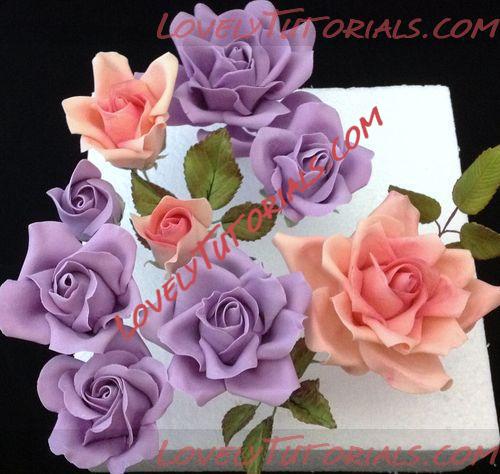
–Ю–≥—А–Њ–Љ–љ–∞—П –±–ї–∞–≥–Њ–і–∞—А–љ–Њ—Б—В—М –Р–≤—В–Њ—А—Г Eleanor –Ј–∞ –Ь–∞—Б—В–µ—А-–Ї–ї–∞—Б—Б
This tutoriial is based in part on FranвАЩs Rose tutorial : http://www.youtube.com/watch?v=UYkPhb-_gDg
but includes wired petals.
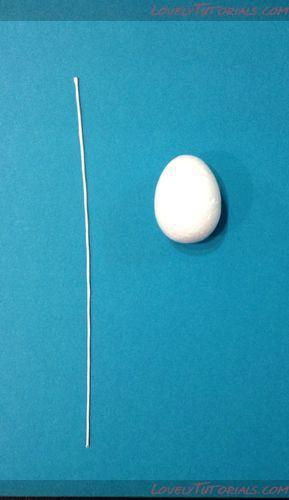
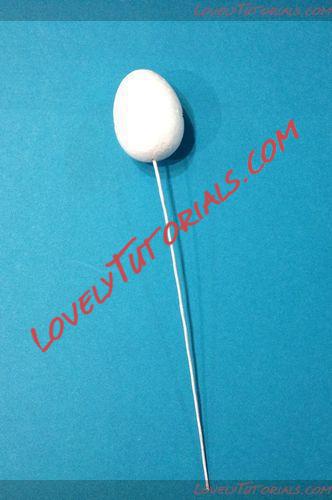
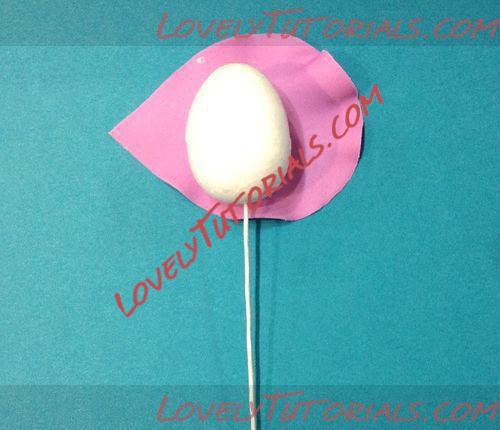
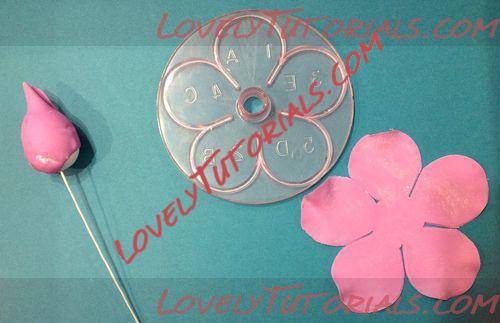
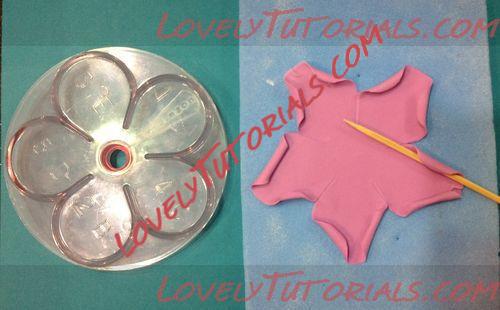
Take a 20 gauge wire and a small styrofoam egg. The egg should be no bigger than the petal size of a 100mm Jem вАЬEasy RoseвАЭ cutter. Use a hot glue gun to attach some glue to the wire and then push the wire up into the base of the egg.
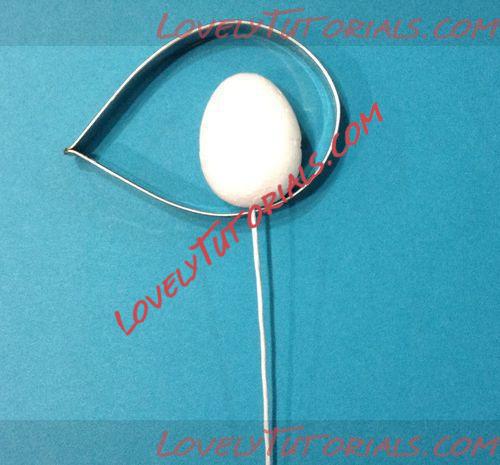
Then choose a large petal shaped cutter- cutter is big enough if the egg fits within it when the cutter is turned sideways.
|
22.04.2013, 07:30
|
|
–Р–і–Љ–Є–љ–Є—Б—В—А–∞—В–Њ—А
|
|
–†–µ–≥–Є—Б—В—А–∞—Ж–Є—П: 05.03.2013
–°–Њ–Њ–±—Й–µ–љ–Є–є: 665
|
|

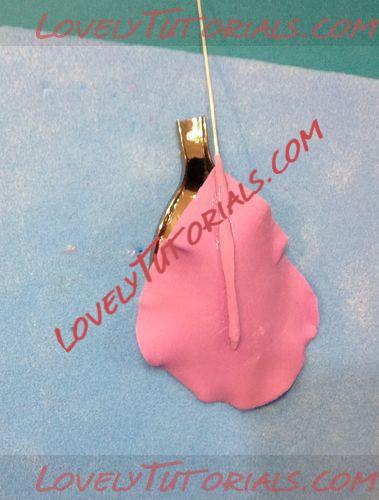
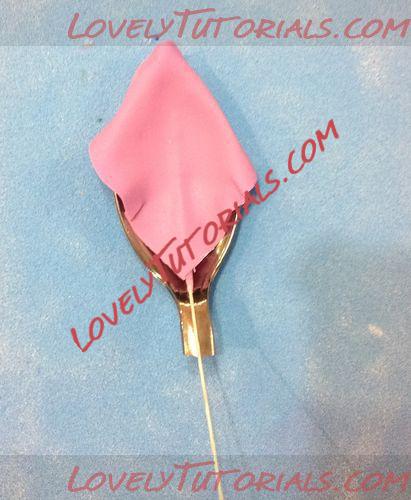
Roll paste thinly and cut out a single petal with the cutter. Put petal on a petal pad and use a ball tool to thin the edges of the petal. Brush tylose glue all over egg and lay it down on the petal.
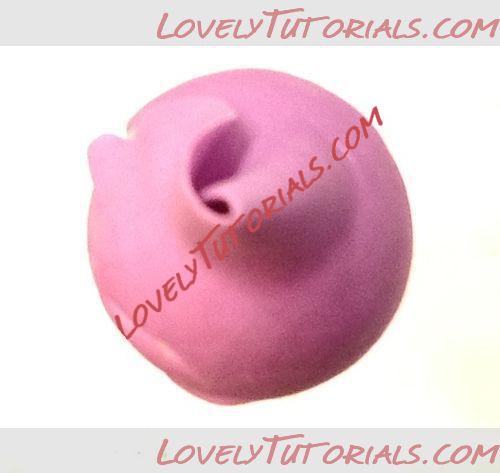
Wrap the petal tightly around the top of the egg (cone), tucking the sharp end of the petal in first, then pulling the wide end around so that there is a tiny hole at the top. The styrofoam must not be visible through this hole.
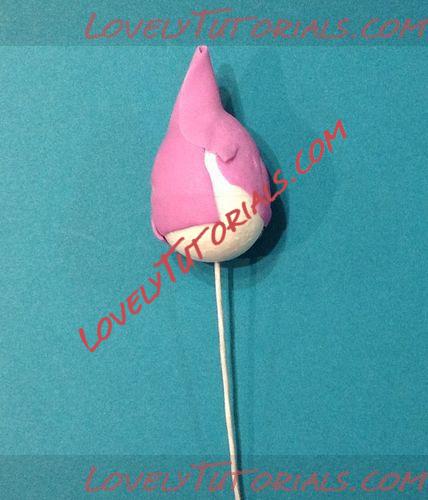 
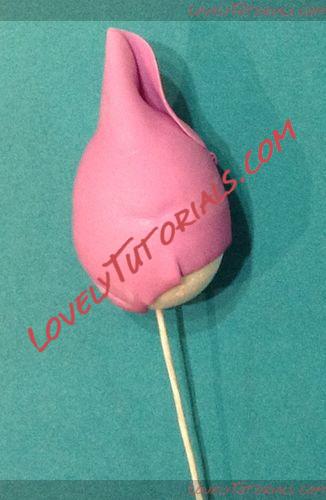
This is the FIRST ROW of petals.
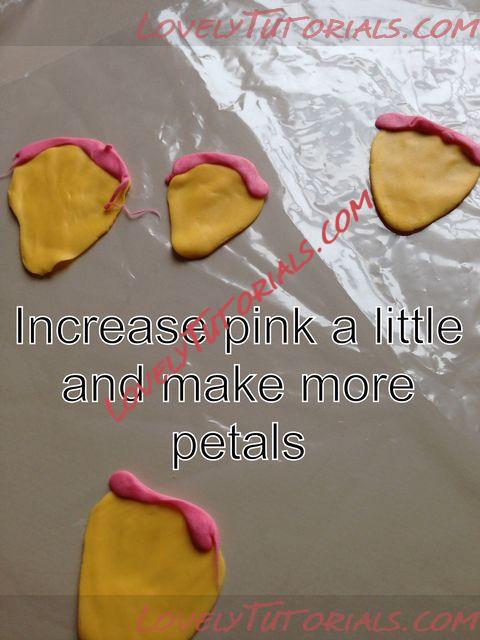
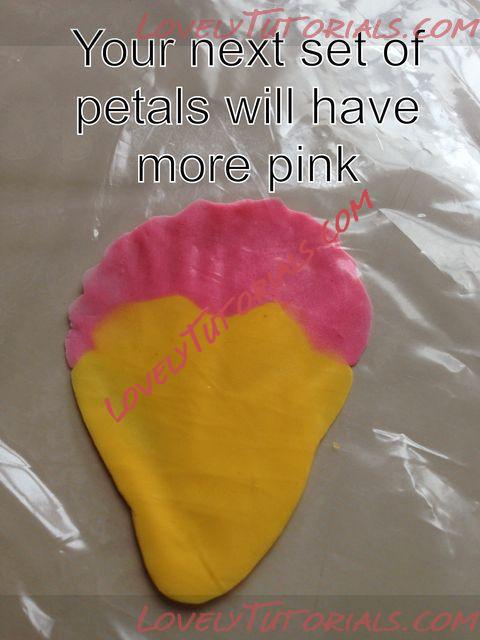
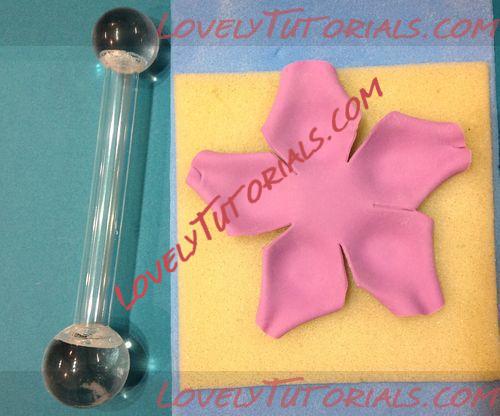
Next, roll paste and using the Jem вАЬEasy RoseвАЭ 100mm cutter cut one set of petals and ball the edges to thin.
Transfer petal to a thin foam pad. Apply glue to the left hand edge of each petal, from top to bottom. Add a little glue to the centre also.
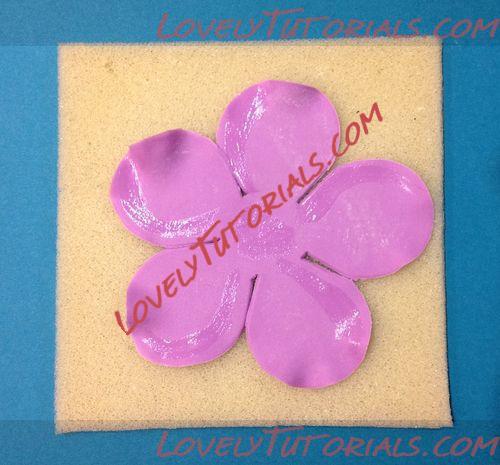
Feed wire down through centre of the petals and foam.
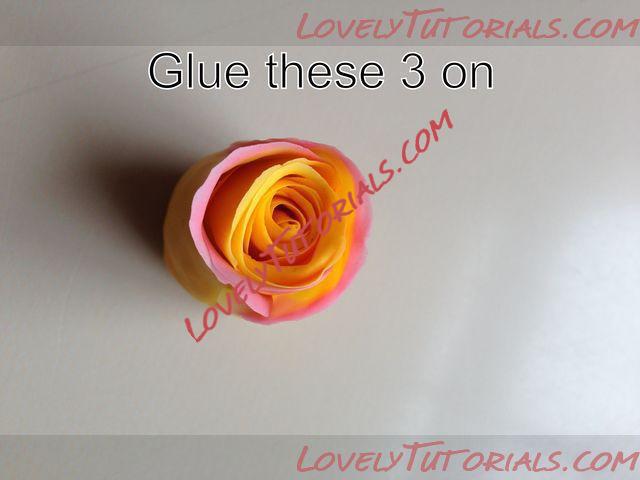
Take the petal furthest away from you and attach it to the cone along its glued sideвА¶ 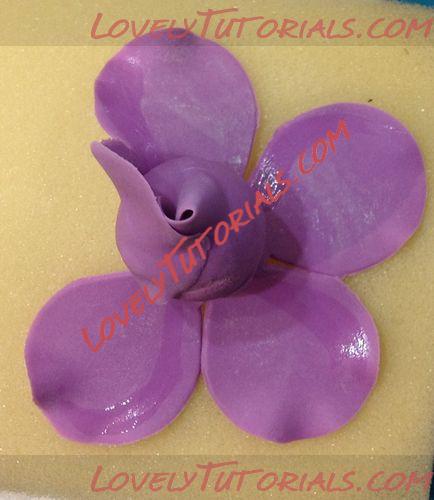
then skip the next petal (working clockwise), and attach the third petal in the same way- you should have something that looks like this:
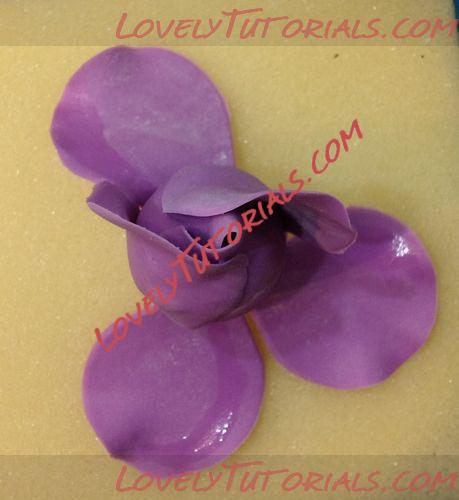
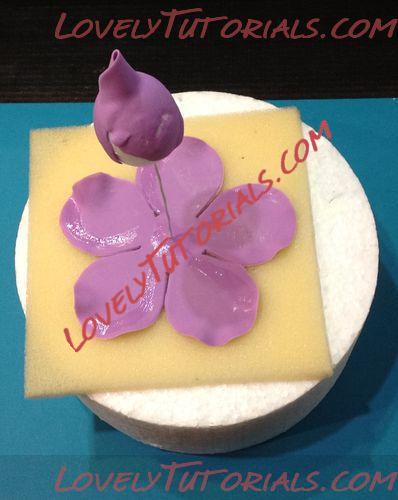
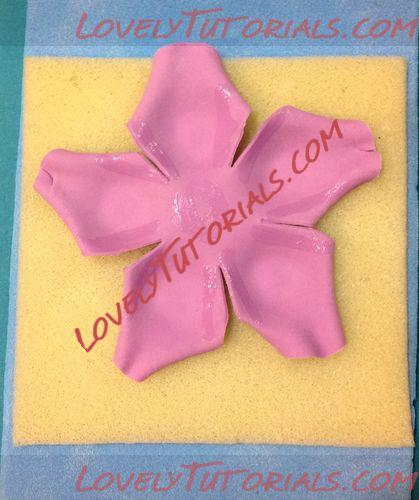
Tuck the ends of the petals around one another to form an вАЬSвАЭ shaped spiral.
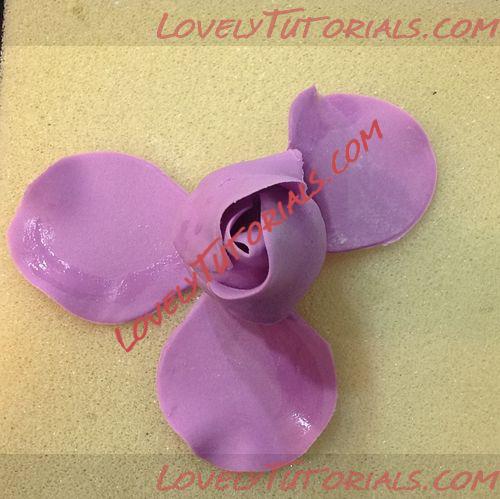
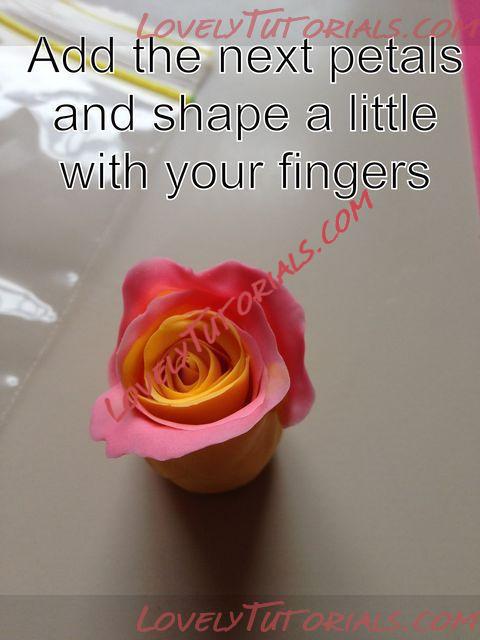
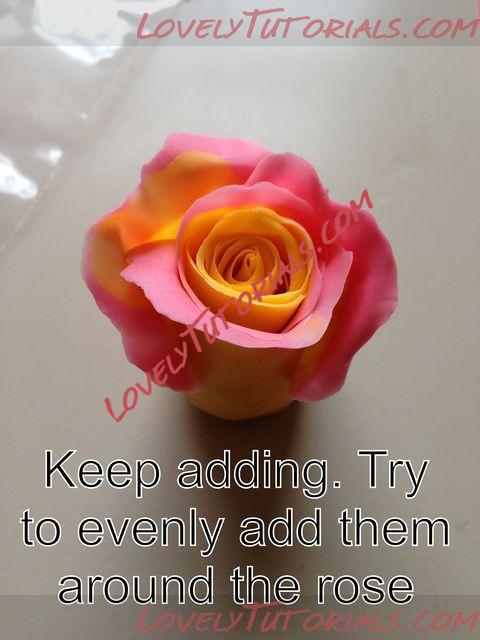
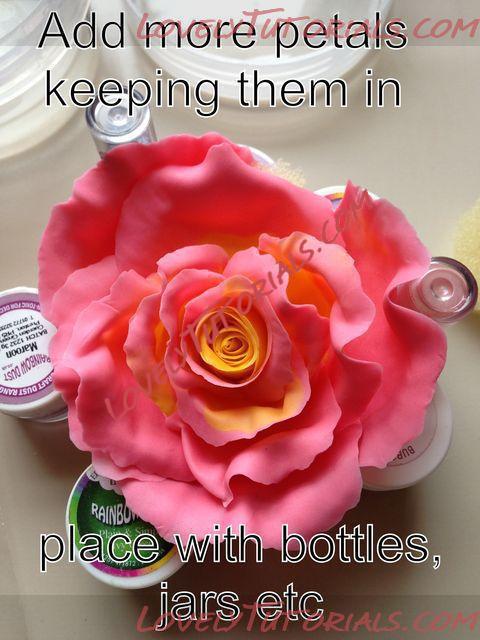
Then take the remaining petals and attach them (evenly spaced) in turn around the cone- when finished, the petals should look a bit like the blades of a ceiling fan.
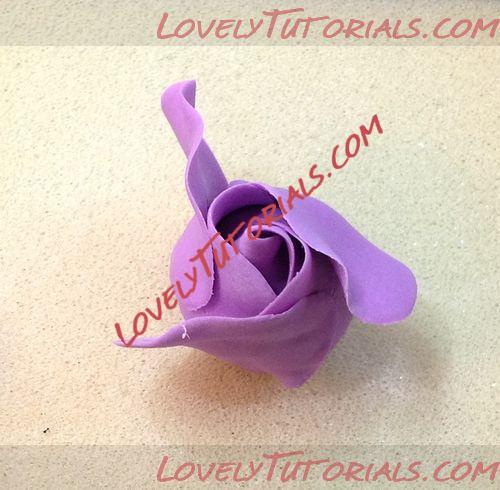
Spiral the petals around the cone, at this stage you can turn the unglued edge back behind itself slightly if desired.
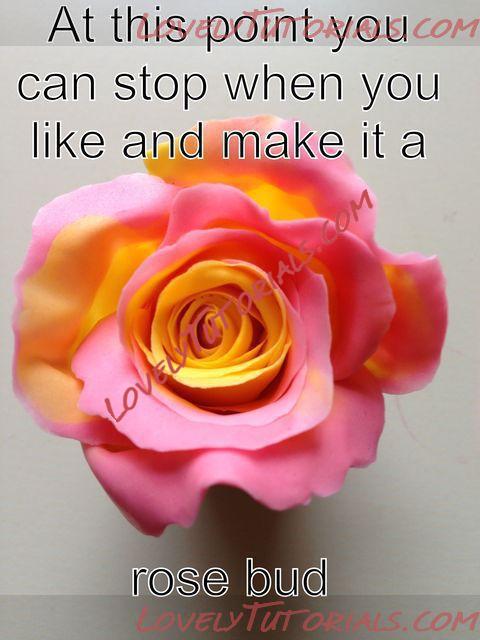
This makes up the SECOND and THIRD row of petals and is at this point a BUD rose.
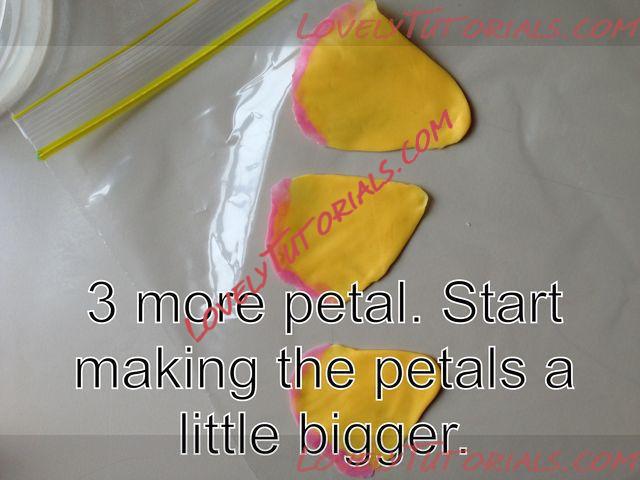
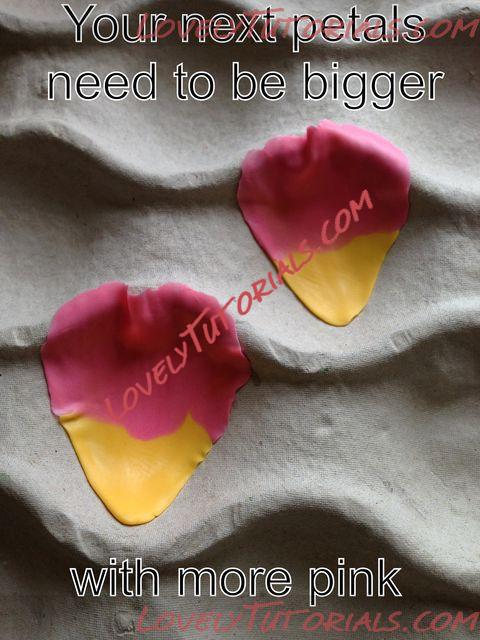
For the FOURTH row of petals, use the 110mm cutter to cut out petals, ball to thin the edge, then flip over and use a cocktail stick to roll the edges of the petal back slightly towards the middle of the edge of the petal.
Then, flip back onto the foam square, and place on top of petal pad. Use ball tool to make aвАЭbowlвАЭ at the base of each petalвА¶
|
22.04.2013, 07:31
|
|
–Р–і–Љ–Є–љ–Є—Б—В—А–∞—В–Њ—А
|
|
–†–µ–≥–Є—Б—В—А–∞—Ж–Є—П: 05.03.2013
–°–Њ–Њ–±—Й–µ–љ–Є–є: 665
|
|
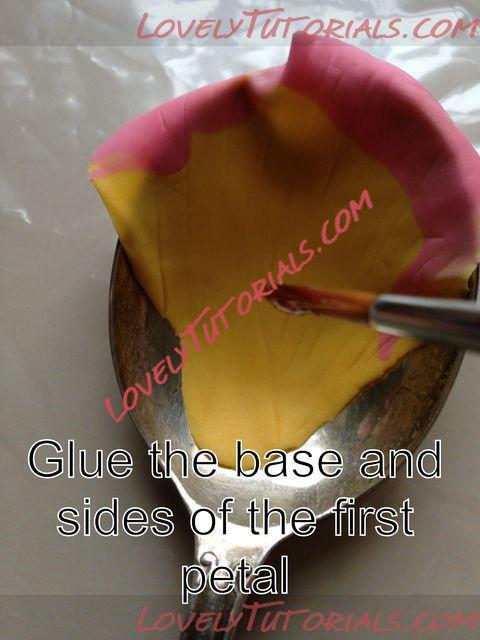
Apply glue to both sides of each petal, from the base, to half way up the side.
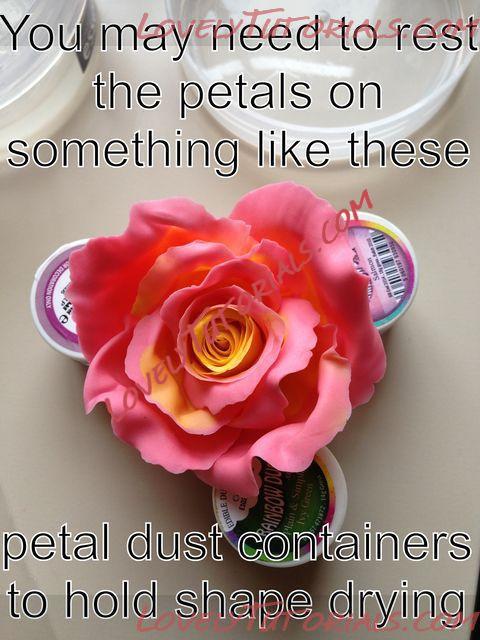
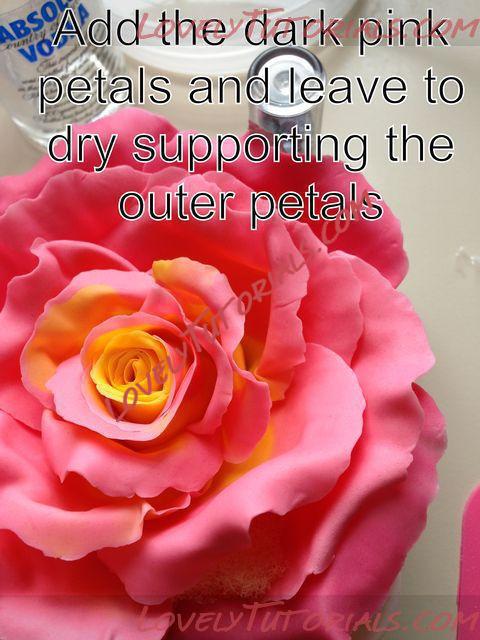
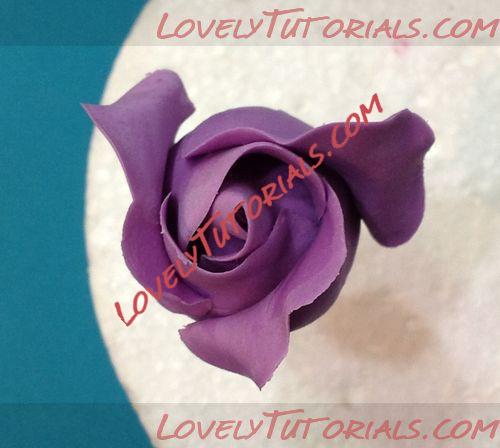
Thread the wire down through the centre of the petals, the attach each petal to the rose along the glued edges, trying not to squish the bowl shape, you should be able to see down into the base of each petal. Overlap each petal slightly if necessary.
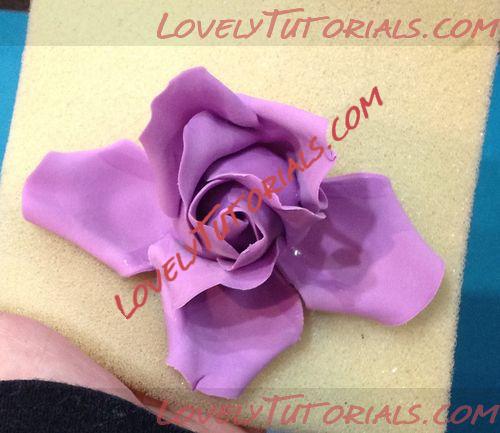
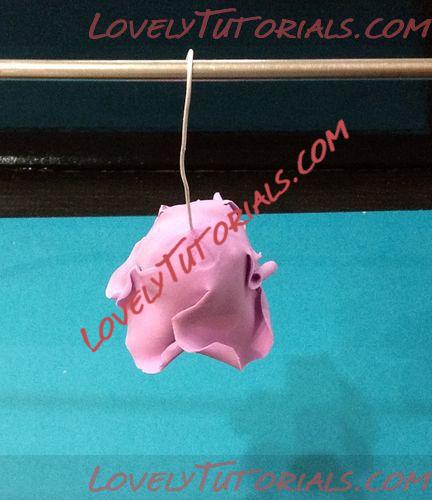
This completes the FOURTH row of petals and makes a HALF OPEN rose. Hang the rose upside down at this stage to firm up.
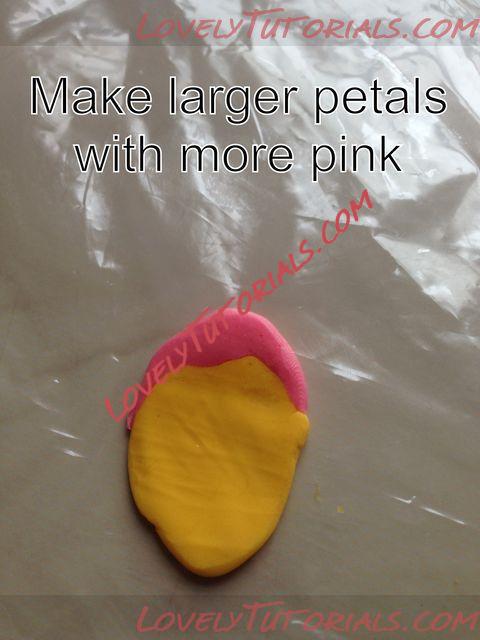
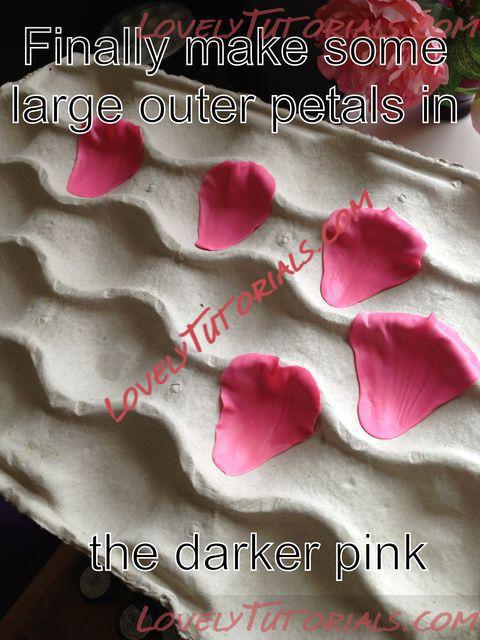
Cut out another set of petals with the larger cutter, this time balling the whole petal to increase its size slightly. Curl back petals as before and attach in the same way, taking care to place the petals over the joins in the previous row. This completes the FIFTH row of petals.

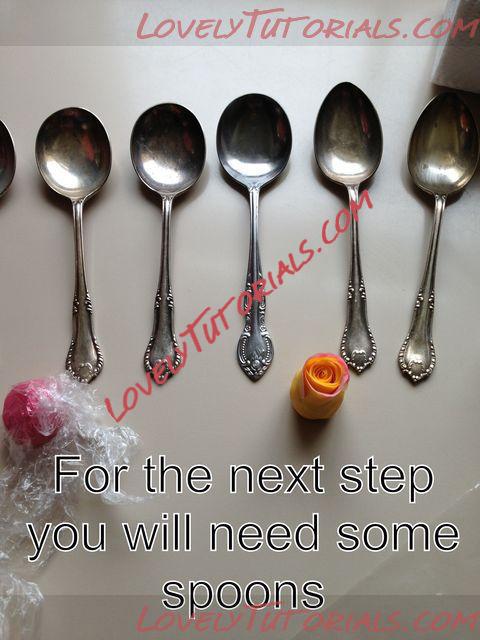
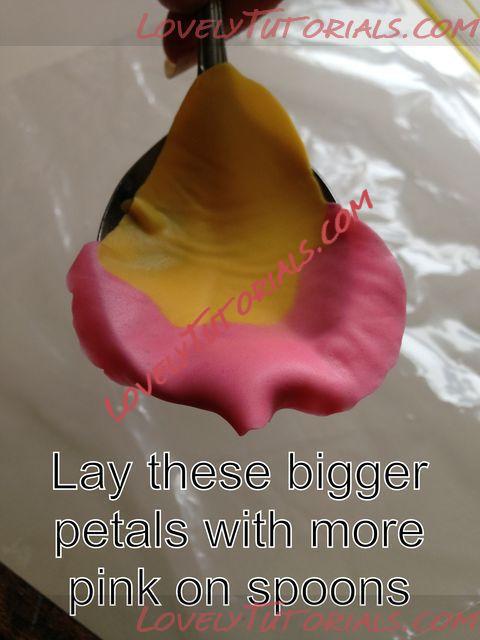
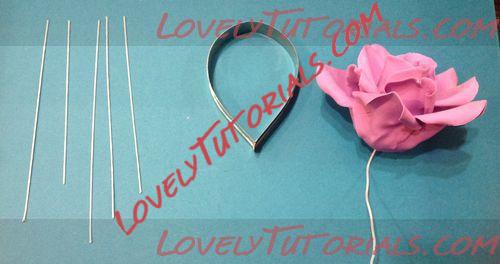
For the SIXTH row- cut 5 lengths of 24 gauge wire. Select a single petal shaped cutter which can span the rose from base to tip.
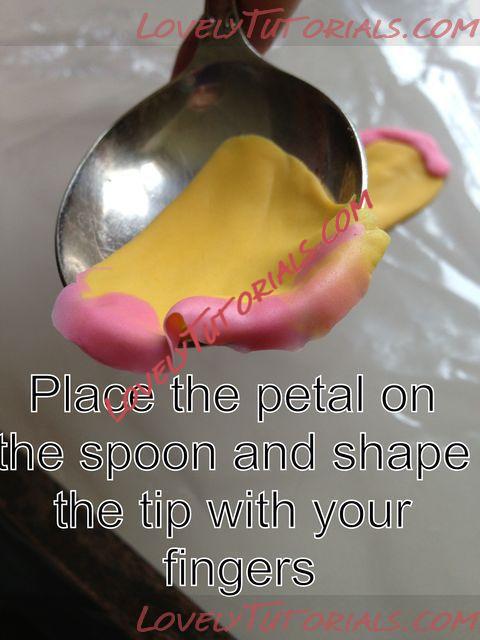
Moisten the tip of the wire with a little glue. Take a small sausage of paste and roll it onto the wire.
 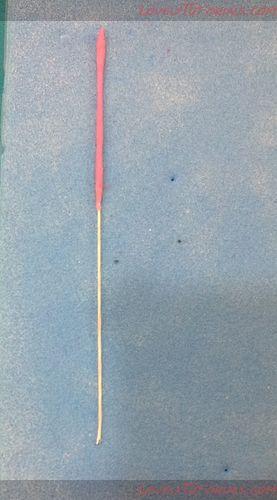
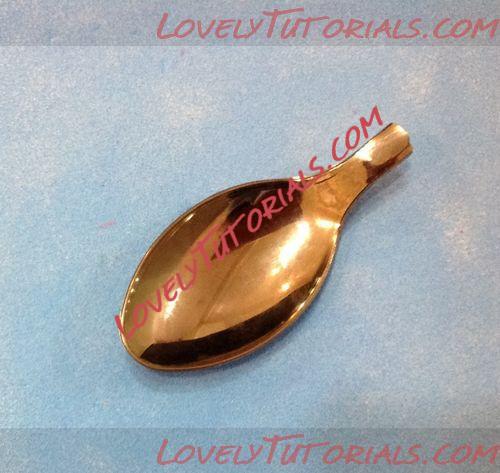
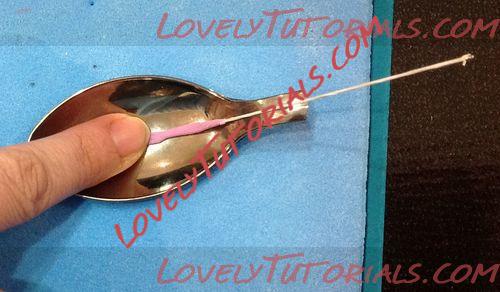
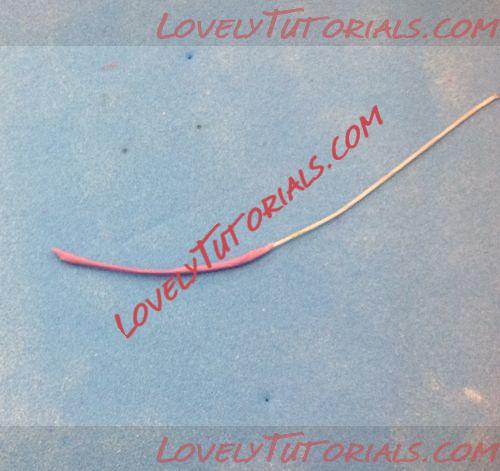
Then bend the paste covered end inside the bowl of a plastic spoon, creating a curve in the wire.
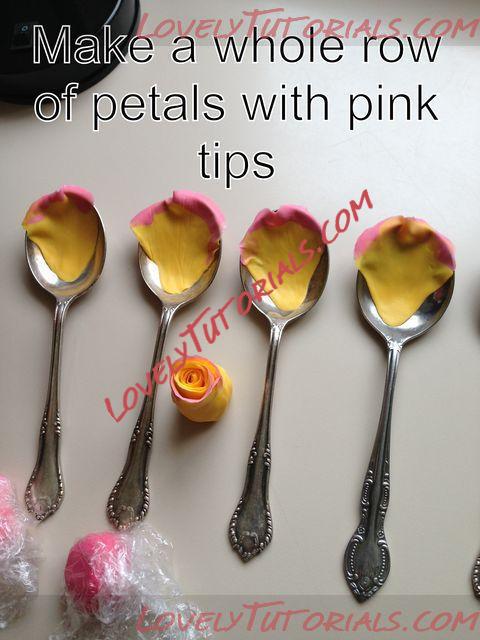
Cut 5 petals with the single petal cutter. Ball the edges and bowl out the bases of the petals slightly. Brush the side curve of the paste covered wire with glue and attach the petal on top- matching curve to curveвА¶ (this is the back view- )
(Front view)
Curl top edges of petals around and behind the spoons. Leave to dry.
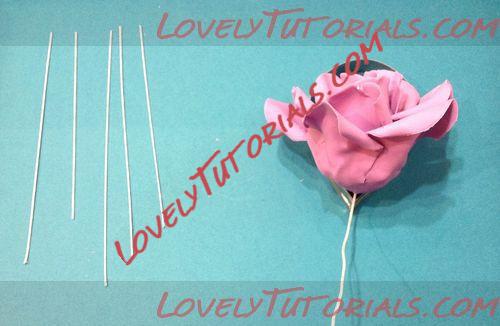
Tape petals tightly behind the last row, again, covering the joins between petals in the previous row.
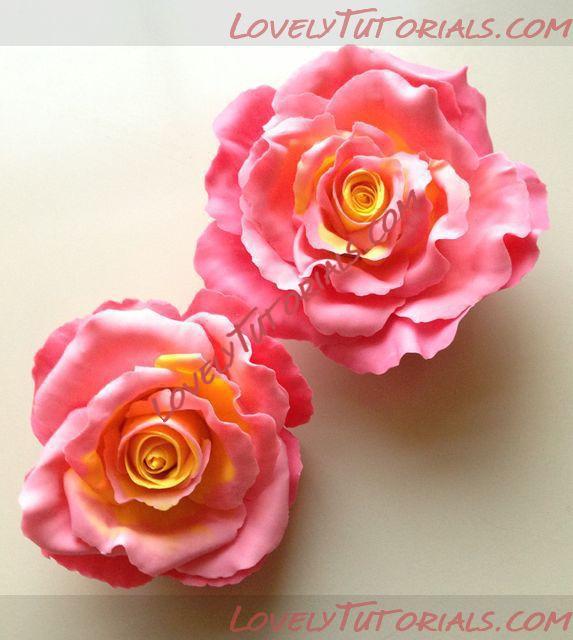
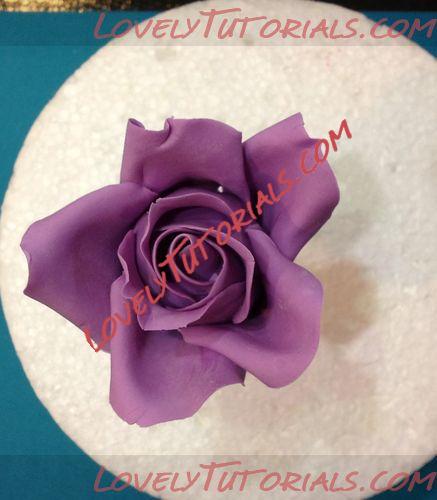
When assembled your rose should look like this-
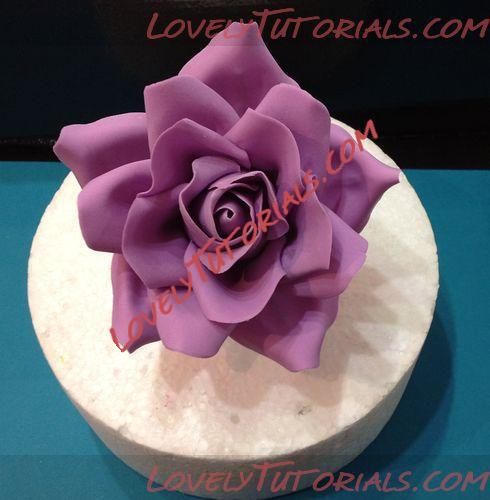
To finish off the bud rose and the half open rose, cut two calyxes out of green coloured paste. Ball to thin and elongate slightly, then attach to the base of the rose, covering any imperfections.
|
|
|
|
–Ь–µ—В–Ї–Є
|
anlegget, anl√§ggning, armado de los ramos, arranjo, artesanatos passo a passo, augalas, baking, biljka, bitki, blad, blade, blader, bladeren, blatt, bloem, bloemen, blomma, blommor, blomst, blomster, blume, blumen, bl√Љten, bl√Љtenpaste, bl√§tter, boeket, bouquet, buchet, buket, bukett, bukiet, buqu√™, cake decorating, cake decorating techniques, cer√Ґmica pl√°stica, chiodi di garofano, clavo de olor, clous de girofle, cloves, cold porcelain, cold porcelain figurines, cold porcelain flowers, confeitando bolos, csokor, cukrini≈≥ gƒЧli≈≥, curso completo de flores, curso de modelado, cvijet, cvijeƒЗe, decoracion de pasteles, decoraci√≥n de tortas, decorare le torte, decorazioni, deko fondant, dekorace na dort, dekoracija, dekoracije, dekorasyon, dekor√°cie, el abc del armado de ramos, feuille, feuilles, fimo, fimo flowers, fiore, fiori, fleurs, floare, flogistica, flor, floral inspirations, flores, flores azucar, flores e folhas, flori, floristics, floristik, floristikk, floristique, flor√≠stica, flower, flower paste, flowering plants, flowers, flowers on a wire, foglia, foglie, folha, folhas, folhas pintadas, fondan, fondant, fondente, fotopostup, frunze, gum pasta, gum paste, gum paste flowers, gumpaste, gumpaste flowers class, g√Љl, g√Љller, gƒЧlƒЧ, gƒЧlƒЧs, hand painting, handmodelliert, hideg porcel√°n, hladno porculan, hoja, hojas, how to, how t—Ж–≤–µ—В—Л –љ–∞ –њ—А–Њ–≤–Њ–ї–Њ–Ї–µ, how-to's, h≈Щeb√≠ƒНek, impianto, jak na, kage dekoration, kagedekoration, kakebaking, kaldt porselen, kallt porslin, kalt porzellan, kasvi, kolde porcel√¶n, koud porselein, krok za krokem, kukka, kukkakimppu, kukkia, kvetina, kvety, kvƒЫtina, kvƒЫtiny, kwiat, kwiaty, kylm√§ posliini, kytica, la mod√©lisation, lapai, lapas, leaf, leaves, lehdet, lehti, levelek, lev√©l, list, list√≠, li≈°ƒЗe, li≈Ыcie, li≈ЫƒЗ, l√≠stia, l√≠stky na dr√°tku, making sugar flowers, making the rosebud, marshmallow, masa flexible, mazzo, modelado, modelagem, modelare, modeling, modeling paste, modeliranje, modellazione, modelleme, modellering, modellieren, modellierpaste, modell…Щ≈Яdirm…Щ, modelovanie, modelov√°n√≠, modelowanie, montando, motivtorten, nelken, n√°vody a postupy, n√°vody na kvƒЫty a l√≠stky, n√ґv√©ny, oasis o esponja de floristeria, pap, paso a paso, passo a passo, passo-a-passo, pasta flexible, pflanze, plant, planta, plante, plantes, plantƒГ, pocelana fria, polymer clay, polymer clay flowers tutorial, porcelaine froide, porcelana fria, porcelana fr√≠a, porcellana fredda, postup klinƒНek, postupak za ukrasavanje, puok≈°tƒЧ, ramo, rastlina, rece por≈£elan, rododendron, roos, rosa, rosas, rose, rosen, roser, roses, rosor, rostlina, rozen, ro≈ЊƒЧ, ro≈ЊƒЧs, ro≈Ыlina, ruusu, ruusut, ru≈Њa, ru≈Њe, r√≥zsa, r√≥≈Љa, r√≥≈Љe, r≈ѓ≈Њe, schritt f√Љr schritt anleitung, schritt-f√Љr-schritt, sculpey flowers, sculpting, simple, soƒЯuk porselen, stamens, steg, steg for steg, step by step, step-by-step, strau√Я, studen√љ porcel√°n, styrofoam, sugar cane flowers, sugar cloves, sugar flower, sugar flowers, sugar flowers for cake decorating, sugar paste flowers, sugar rose, sugarcraft, sugarpaste, sukker art, technique utilis√©e fleurs en sucre cru, tecnicas de decoracion, tecniche, thai flowers, torte, torte decorate, torten dekorieren, torti, trandafir, trandafiri, trin for trin, trin-for-trin, trinn for trinn, tutorial, tutorijal, ukra≈°avanje torti, uputstvo za dekoraciju, vir√°g, vir√°gok, wedding cake, wedding cakes, wire, yaprak, yapraklar, zimno porcelany, zuckerblumen, аЄФаЄ≠аЄБаєДаЄ°аєЙ, а§Єа§Ьа§Њ а§Ха•За§Х, а§Ѓа•Йа§°а§≤а§ња§Ва§Ч, гГҐгГЗгГЂ, √Іi√Іek, √Іi√Іek modelleme, √ґkade, ≈°alto porceliano, еїЇж®°, и£Эй£ЊиЫЛз≥Х, мІДлЛђлЮ?, ќЇѕБѕНќ± ѕАќњѕБѕГќµќїќђќљќЈ, ќЉѕАќњѕЕќЇќ≠ѕДќњ, ќ±ќґќ±ќїќ≠ќ±, ќїќњѕЕќїќњѕНќіќє, ќїќњѕЕќїќњѕНќіќєќ±, ѕДќ± ѕЖѕНќїќїќ±, ѕДѕБќєќ±ќљѕДќђѕЖѕЕќїќїќњ, ѕДѕБќєќ±ќљѕДќђѕЖѕЕќїќїќ±, ѕЖѕНќїќїќ±, ѕЖѕЕѕДѕМ, –Ї–≤–µ—В–Ї–∞, –Ї–≤–µ—В–Ї—Ц, –Ї–≤—Ц—В–Є, –Ї–≤—Ц—В–Ї–∞, –Ї–∞–Ї —Б–ї–µ–њ–Є—В—М —А–Њ–Ј—Г, –Ї–µ—А–∞–Љ–Є—З–µ—Б–Ї–∞—П —Д–ї–Њ—А–Є—Б—В–Є–Ї–∞, –Ї—Г—Б—В, –≥–≤–Њ–Ј–і–Є–Ї–∞, –њ–Њ–ї–Є–Љ–µ—А–љ–∞—П –≥–ї–Є–љ–∞, –њ–Њ–ї–µ–≤—Л–µ —Ж–≤–µ—В—Л, –њ–Њ—И–∞–≥–Њ–≤–Њ, –њ—А–Є—А–Њ–і–∞, –Љ–Ї, –Љ–Њ–і–µ–ї–Є—А–∞–љ–µ, –Љ–∞–є—Б—В–µ—А-–Ї–ї–∞—Б–Є, –Љ–∞—А—И–Љ–µ–ї–ї–Њ—Г, –Љ–∞—Б—В–Є–Ї–∞, –Љ–∞—Б—В–µ—А-–Ї–ї–∞—Б—Б, –Љ–∞—Б—В–µ—А-–Ї–ї–∞—Б—Б –њ–Њ –ї–µ–њ–Ї–µ, –∞–Ј–∞–ї–Є—П, –∞–Ј–∞–ї—Ц—П, –±—Г–Ї–µ—В, –Ј–∞–≤–Њ–і, –ї–Є—Б—В–∞, –ї–Є—Б—В—М—П, –ї–Є—Б—В—П, –ї–µ–њ–Є–Љ —Ж–≤–µ—В—Л, –ї–µ–њ–Ї–∞, –ї–µ–њ–Ї–∞ –Є–Ј –≥–ї–Є–љ—Л, –ї–µ–њ–Ї–∞ –Є–Ј –њ–ї–∞—Б—В–Є–Ї–Є, –ї–µ–њ–Ї–∞ —А–Њ–Ј—Л –±–µ–Ј –њ—А–Њ–≤–Њ–ї–Ї–Є, –ї–µ–њ–Ї–∞ —Ж–≤–µ—В–Њ–≤, –ї—Ц–њ–ї–µ–љ–љ—П, –ї—Ц—Б—Ж–µ, —А–Њ–Ј–Є, —А–Њ–Ј–∞, —А–Њ–Ј—Л, —А–Њ—Б–ї–Є–љ–∞, —А–∞—Б—В–µ–љ–Є–µ, —А–∞—Б—В–µ–љ–Є—П, —А—Г–ґ–∞, —А—Г–ґ—Л, —Г–Ї—А–∞—И–µ–љ–Є–µ —В–Њ—А—В–Њ–≤, —Г–Ї—А–∞—И–µ–љ–Є–µ —В–Њ—А—В–∞, —Б–≤–∞–і–µ–±–љ—Л–є —В–Њ—А—В, —Б–∞—Е–∞—А–љ–∞—П –Љ–∞—Б—В–Є–Ї–∞, —Б–∞—Е–∞—А–љ—Л–є –Ї–ї–µ–є, —Г—А–Њ–Ї–Є –њ—А–Є–Ї—А–∞—И–∞–љ–љ—П, —Б—В—Г–і–µ–љ –њ–Њ—А—Ж–µ–ї–∞–љ, —В–Њ—А—В, —В—А–Њ—П–љ–і–Є, —В—А–Њ—П–љ–і–∞, —Д–Є–Љ–Њ, —Д–ї–Њ—А–Є—Б—В–Є–Ї–∞, —Д–ї–Њ—А–∞, —Е–Њ–ї–Њ–і–љ–Њ–≥–Њ –њ–Њ—А—Ж–µ–ї—П–љ–Є, —Е–Њ–ї–Њ–і–љ–Њ–≥–Њ —Д–∞—А—Д–Њ—А–∞, —Е–Њ–ї–Њ–і–љ—Л–є —Д–∞—А—Д–Њ—А, —Е–∞–ї–Њ–і–љ–∞–≥–∞ —Д–∞—А—Д–Њ—А—Г, —Ж–≤–µ—В–Њ–Ї, —Ж–≤–µ—В–Њ—З–љ–∞—П –њ–∞—Б—В–∞, —Ж–≤–µ—В–µ, —Ж–≤–µ—В—П, —Ж–≤–µ—В—Л, —Ж–≤–µ—В—Л –Є–Ј –њ–Њ–ї–Є–Љ–µ—А–љ–Њ–є –≥–ї–Є–љ—Л, —Ж–≤–µ—В—Л –Є–Ј —Е–Њ–ї–Њ–і–љ–Њ–≥–Њ —Д–∞—А—Д–Њ—А–∞, —Ж–≤–µ—В—Л –љ–∞ —В–Њ—А—В, —Ж–≤–µ—В—Л —А—Г—З–љ–Њ–є —А–∞–±–Њ—В—Л, —И–∞–≥ –Ј–∞ —И–∞–≥–Њ–Љ  |
|