Огромная благодарность Автору Miso за Мастер-класс

 Supplies
- Cake — baked, iced, and covered in fondant. (I used a dense 6″ cake)
- Gumpaste in orange, brown and green
- Skewers or toothpicks or floral wire
- Floral tape (only if using floral wire)
- Water
- Block of styrofoam or cup of rice
- Balling tool or spoon
- Take out spoons or regular spoons for roses
TO MAKE THE ROSES
- A few days in advance, make the cores so they have enough time to dry completely.
- To do this, roll a bit of gumpaste (about the size of a small gum ball**) into a ball and then taper one edge so it become a teardrop shape.
- Dip skewer/toothpick/floral wire into water and insert into the non-tapered end of the teardrop.
- Seal the opening and let dry standing up in a block of styrofoam or cup of rice.
** Size of the core depends on the size of the flowers you wish to create.
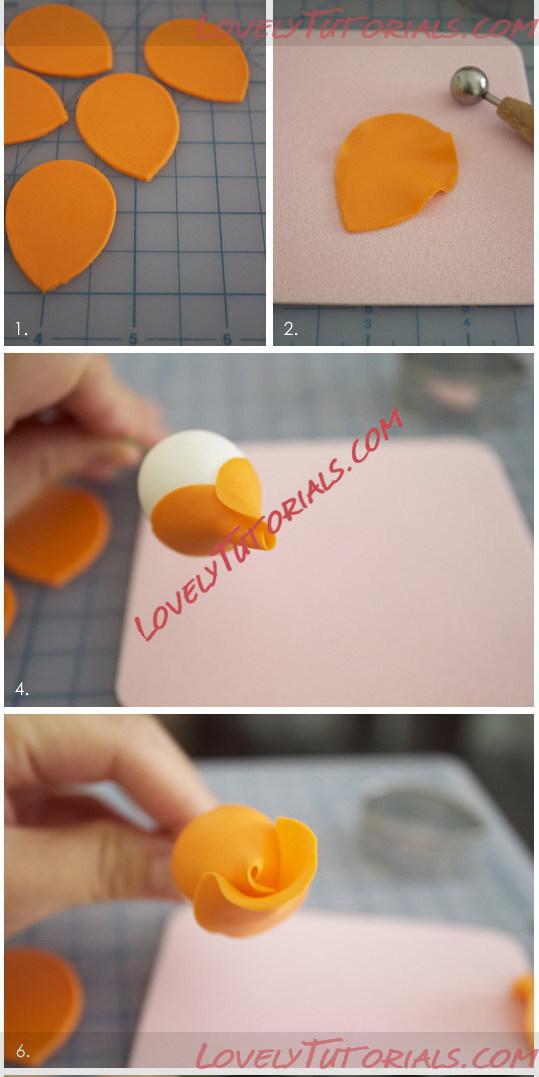
BUILDING THE ROSE
Layer One
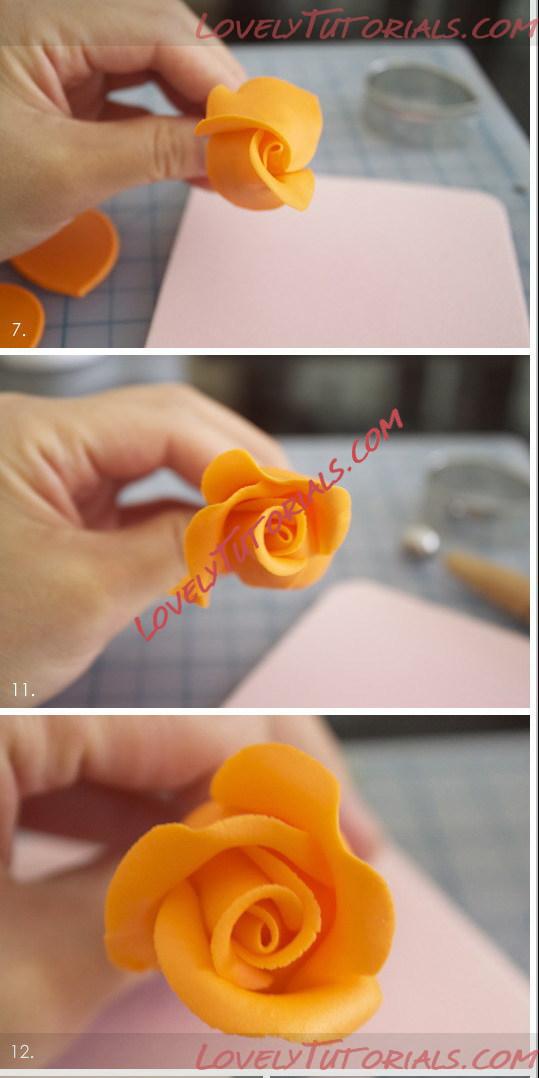
STEP 1: Everyone has a different way of creating roses, but I like to build the first three layers by using the same sized cutter– cut 6 petals.
STEP 2: Take one petal and using a balling tool (or spoon), thin out the top half of the petal. It is important that only the edges are thinned out.
STEP 3: Put a little dab of water on the center of the petal and glue onto the core– make sure the core is centered on the petal.
STEP 4: Put a little dab of water on each corner of the petal, and fold down, overlapping the edges. You may gently curl the edges back.
Layer Two
STEP 5: Thin out two more petals for the second layer.
STEP 6: Dab a little water on one-half of a petal and wrap it around the first layer. Make sure the center of the petal and the seam of the first layer align.
STEP 7: Tuck one edge of the second petal under the first petal, and the other edge over the first petal. Simply put, create a spiral.
STEP 8: Glue all edges down.
Layer Three
STEP 9: Thin out the last three petals.
STEP 10: Like the second layer, you want to center the first petal of the 3rd layer with a seam of the second layer. Glue only half down, as you want to tuck the last petal into it.
STEP 11: Overlapping the first petal, glue down the second.
STEP 12: Tuck the last petal into the first.
STEP 13: You may continue building your rose. For the next layer, use a bigger petal cutter.
STEP 14: For the outer petals, you can roll the edges of the rose back with a toothpick.
STEP 15: You may also dry out the roses on take-out spoons for more depth and curvature.
NOTE: Be sure to keep your petals covered with plastic (or gently place them in a ziploc bag laying flat) so they don’t dry out.
TO MAKE THE LEAVES
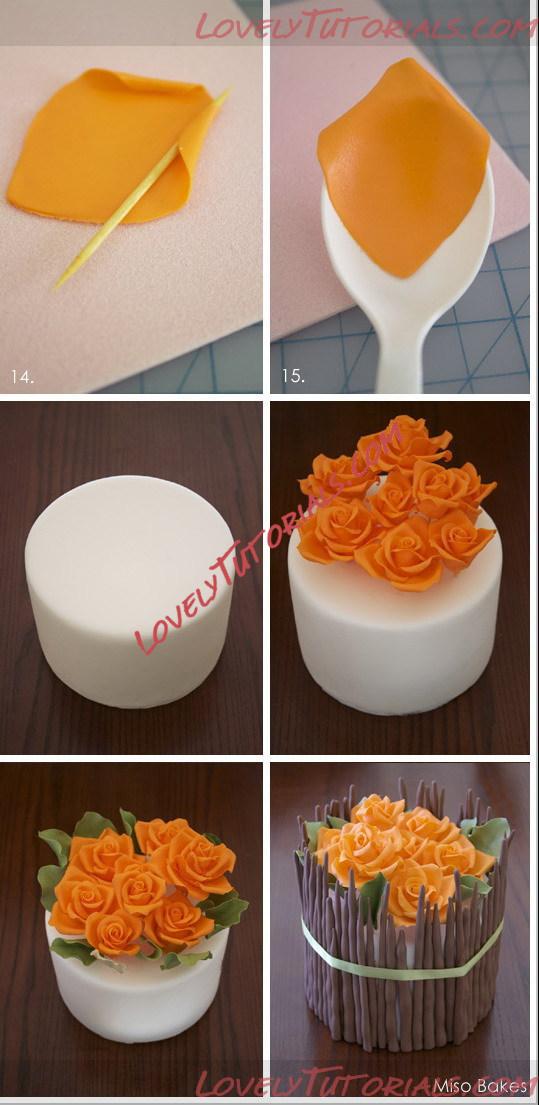
- Roll out green gumpaste– thick enough to insert wire. If using veiner, leave imprints. Using petal cutter, cut out leaves. Insert wire. Thin edges. Dry. Wrap in floral tape and insert into coffee stirrers before inserting in cake.
TO MAKE THE TWIGS
- Roll out gumpaste into a long, thin snake. Taper one edge. Let dry completely (or partially). Adhere to cake with water.
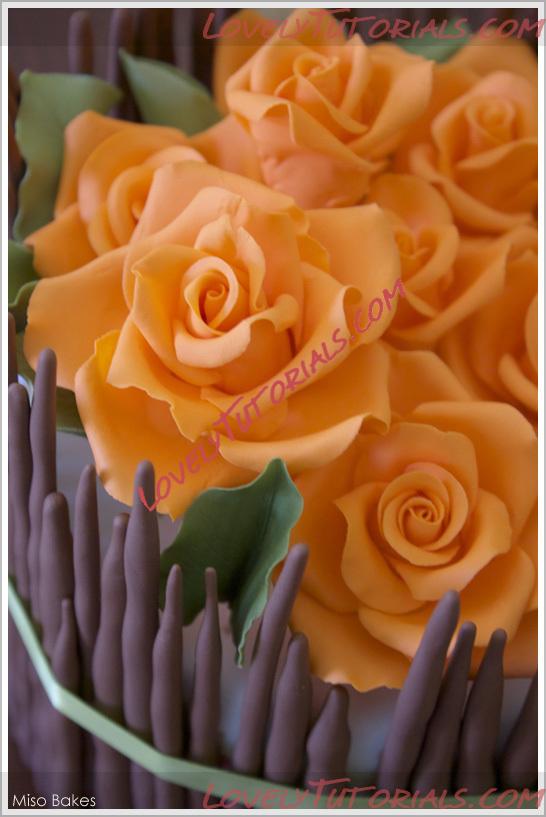
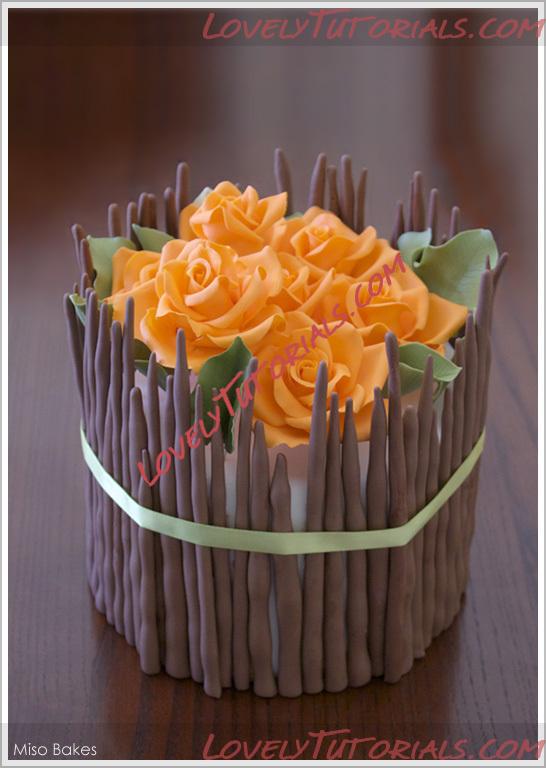
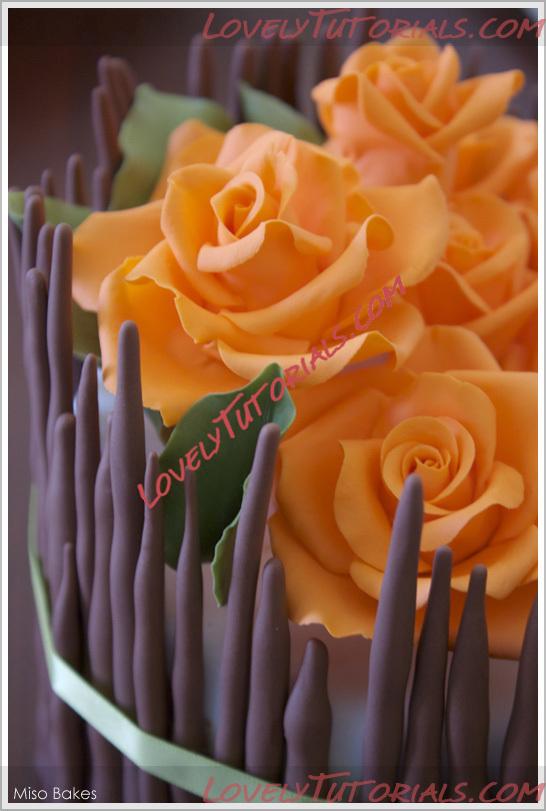
ASSEMBLING THE CAKE
- Bake, ice, cover cake in fondant.
- Arrange roses on top of the cake.
- Arrange leaves. Make sure they don’t stick out too much and get in the way of the twigs.
- Glue twigs onto cake with water.
- Tie a ribbon around the cake. If you have extra time, you may make a ribbon out of fondant!