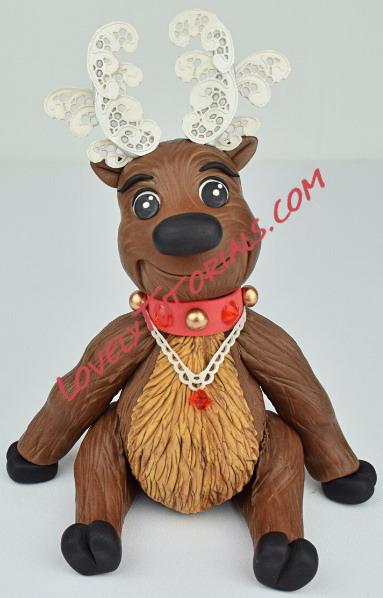
Огромная благодарность Автору Lynsey Wilton-Eddleston за Мастер-класс
 You will need:
- Balling Tool
- Dresden Tool
- Small Rolling pin
- Sharp Knife
- Small Sharp scissors
- Paintbrushes
- Cool boiled water / edible glue
- Food safe skewers
- Small circle cutter
- 2 x RKT bars
- Saracino Sweet lace pearl ready to use
- Saracino edible soft jelly diamonds
- Saracino Liquid Shiny
- 392g Brown modelling paste
- 30g White modelling paste
- 27g Black modelling paste
- 5g Red modelling paste
- 5g Grey modelling paste
- Saracino Gel colour – Flesh, black, brown, yellow
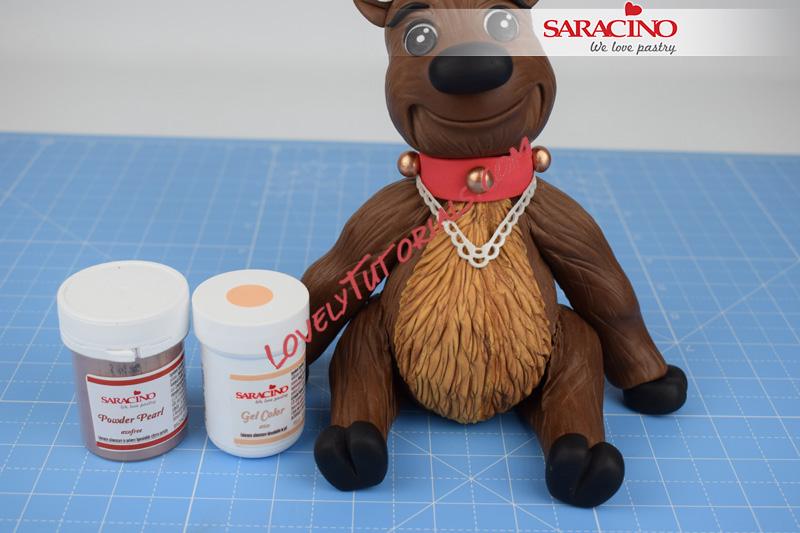
- Saracino powder colour – Brown
- Saracino lustre – Silver and bronze
 Step 1
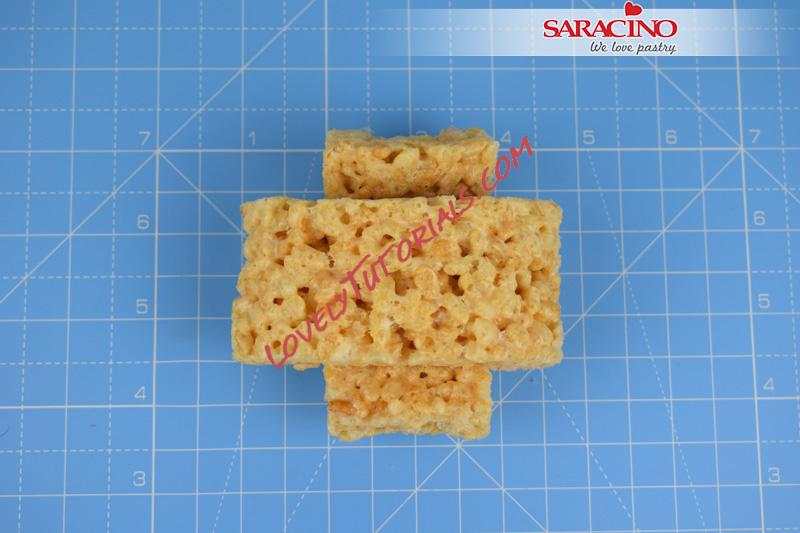
Take two RKT bars and lay them on top of each other in a cross.
 Step 2
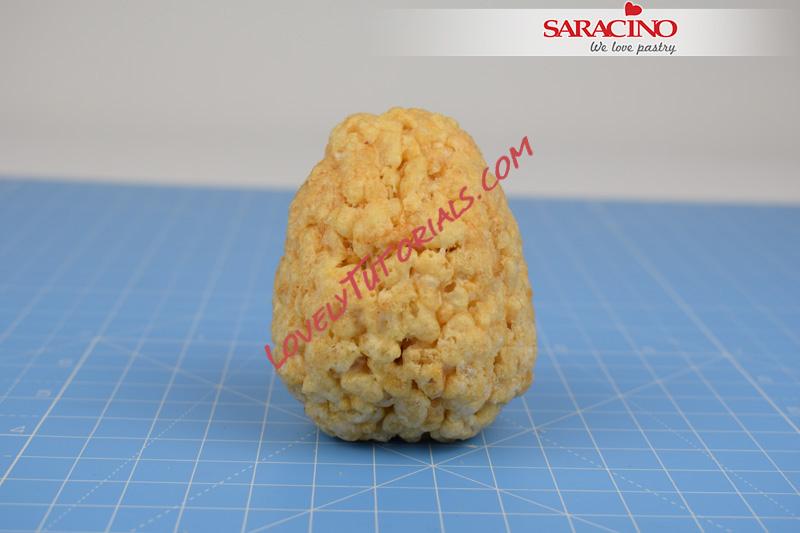
Fold them around each other and shape into a tear drop shape, gently squeezing the bars together to create a firm body.
 Step 3
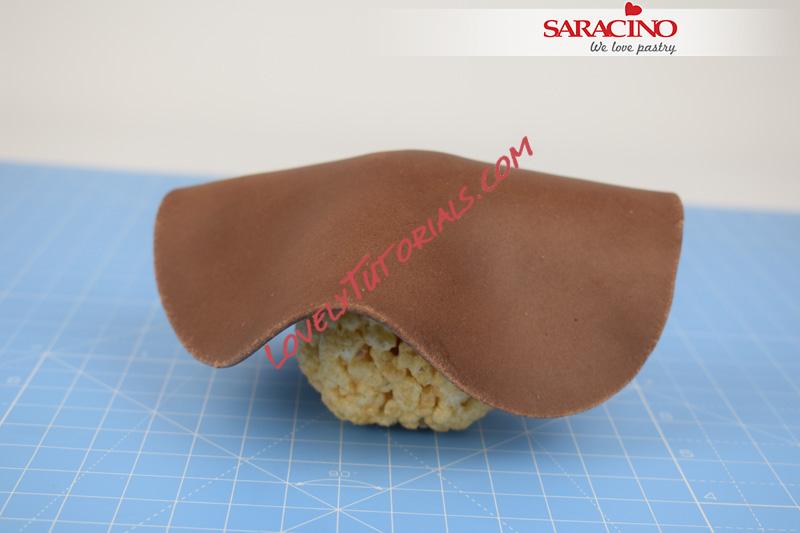
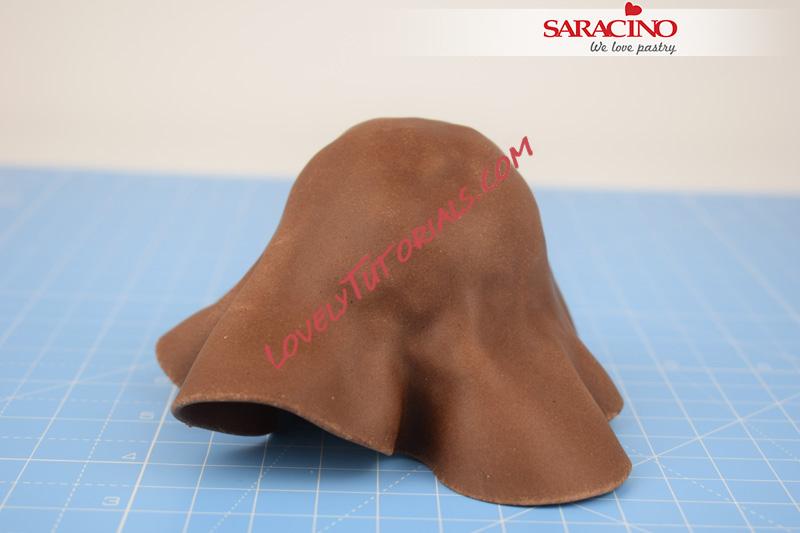
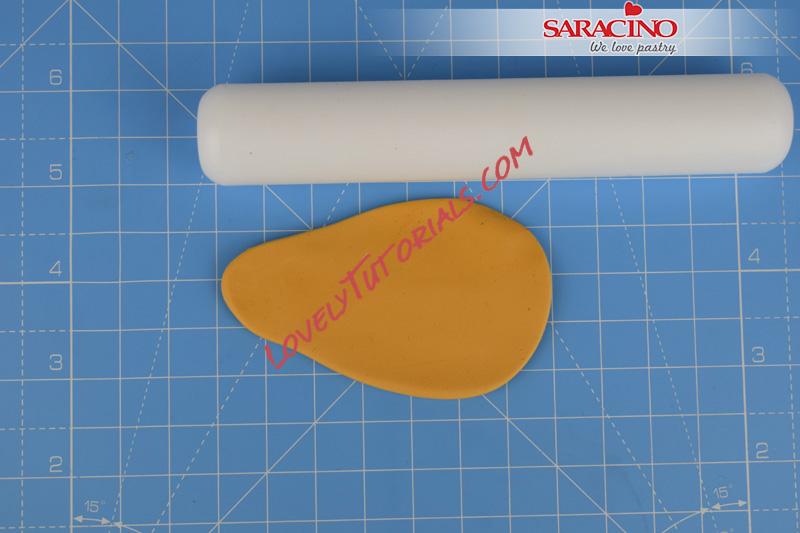
Roll out 100g of brown modelling paste to around 3 mm in thickness, gently lift the paste and drape across the top of the body.
 Step 4
Smooth the paste down the body pressing gently but firmly as you go.
 Step 5
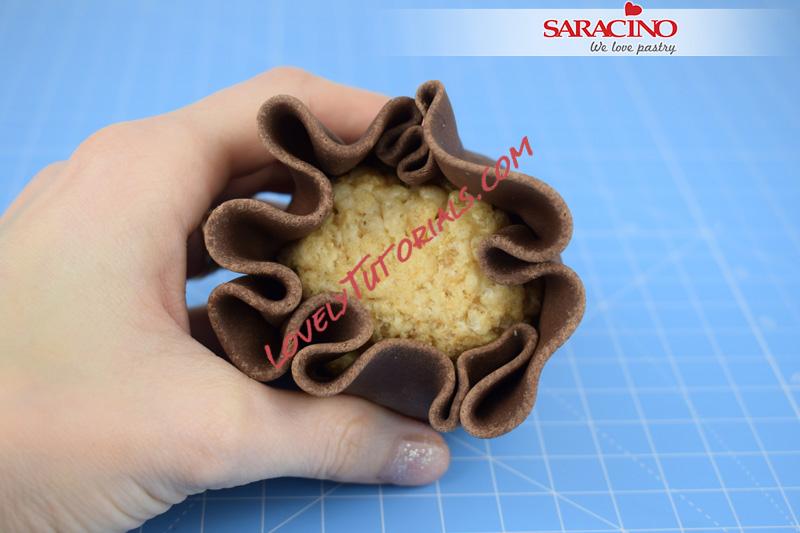
Gather the excess paste at the bottom of the body.
 Step 6
Fold the paste over to completely cover the bottom. Smooth the paste with your fingertips to blend the joins.
 Step 7
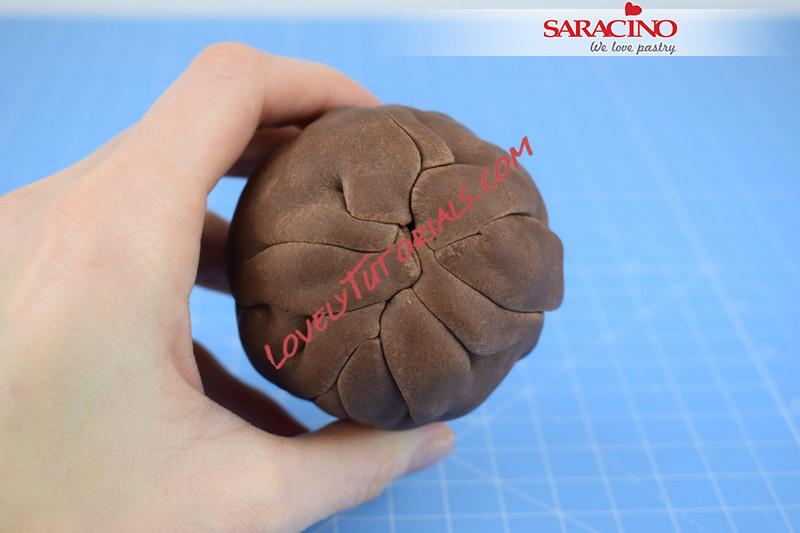
Re shape the body if needed.
 Step 8
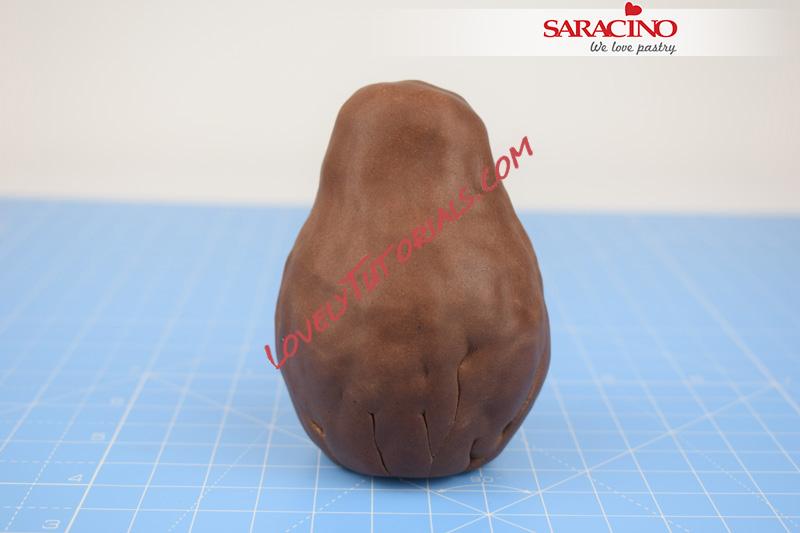
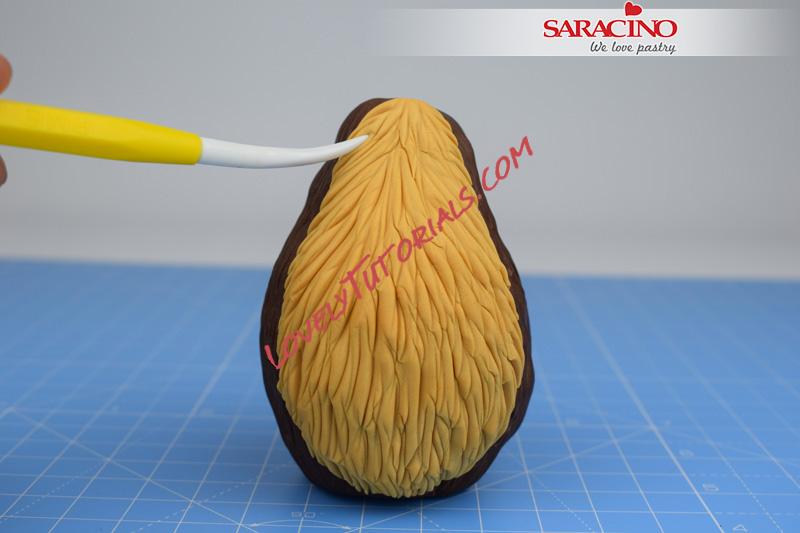
Take 25g of white modelling paste and colour to a golden brown using some Saracino yellow gel colour and a small amount of Saracino brown gel colour. Shape the paste into a tear drop and roll out thinly with a small rolling pin.
 Step 9
Apply a small amount of water to the back of the paste and stick into place on the front of the body.
 Step 10
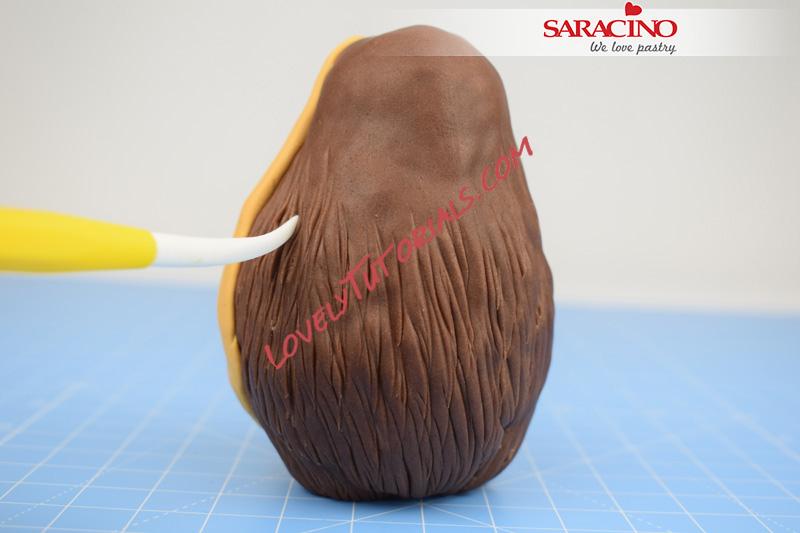
Using the veining end of the Dresden tool begin to texture the fur, start at the bottom and work your way up the body in rings.
 Step 11
Keep going overlapping each layer until you get to the top of the body.
 Step 12
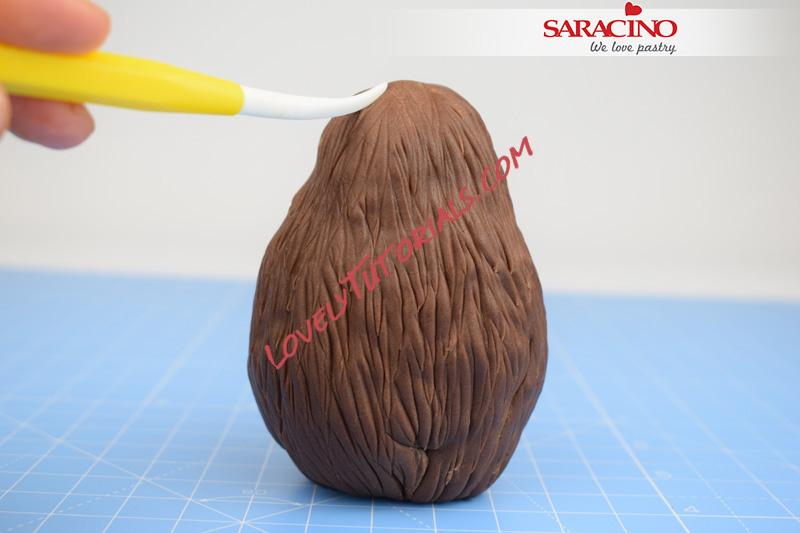
Texture the front fur in the same way.
 Step 13
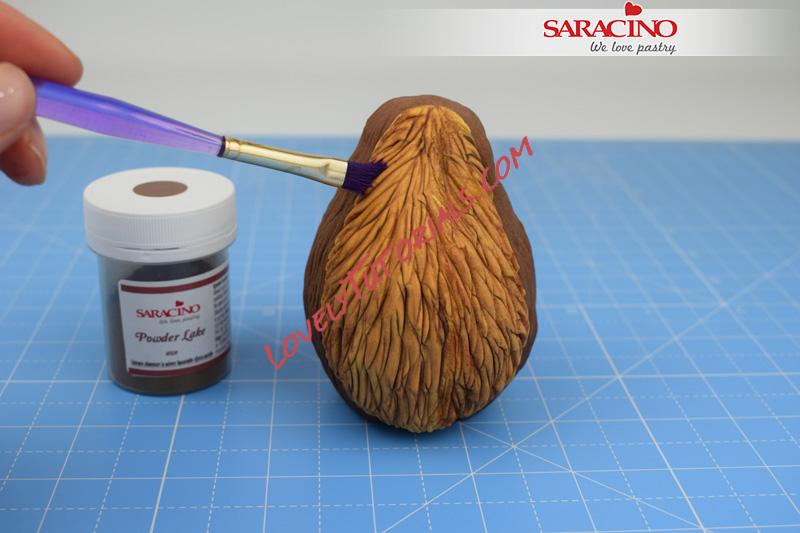
Use a small soft brush to shade the front of the fur with some brown dust.
 Step 14
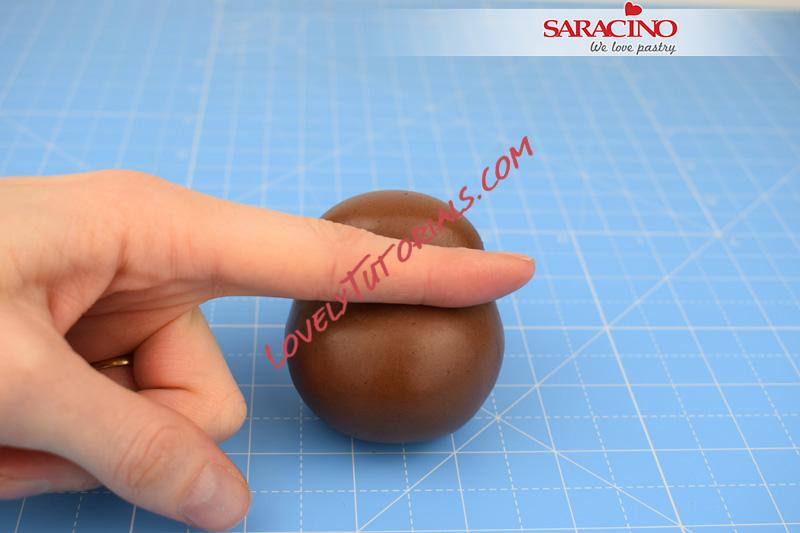
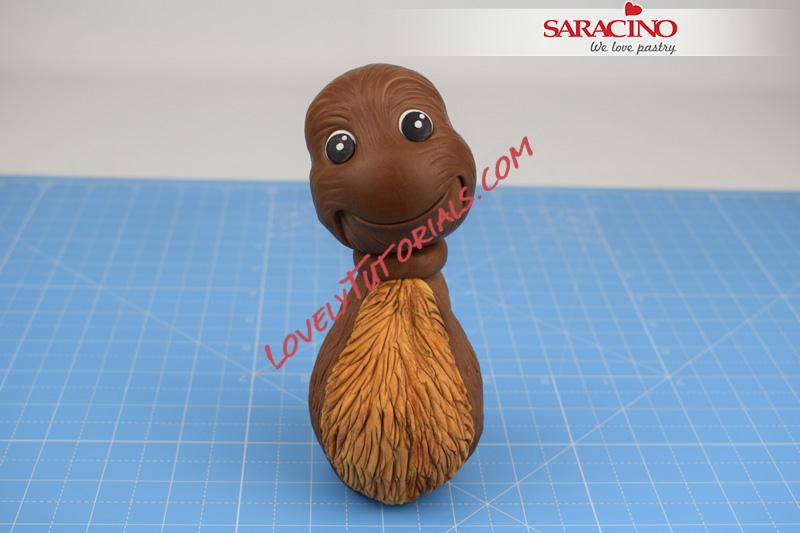
Roll 120g of brown modeling paste into a ball, narrow the top of the head slightly and use your finger to create a small ridge across the front of the face.
 Step 15
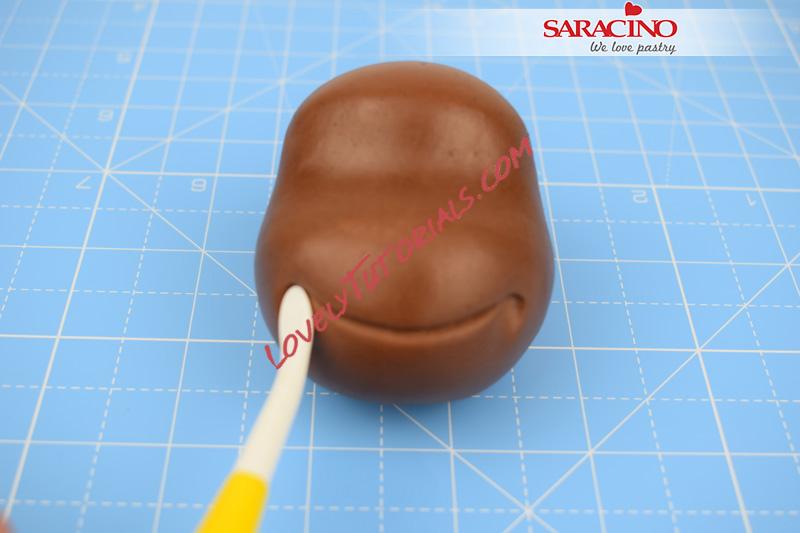
Use the veining end of the Dresden tool to mark a smile across the face. Use the smoothing end of the Dresden tool to gently indent the corners of the mouth.
 Step 16
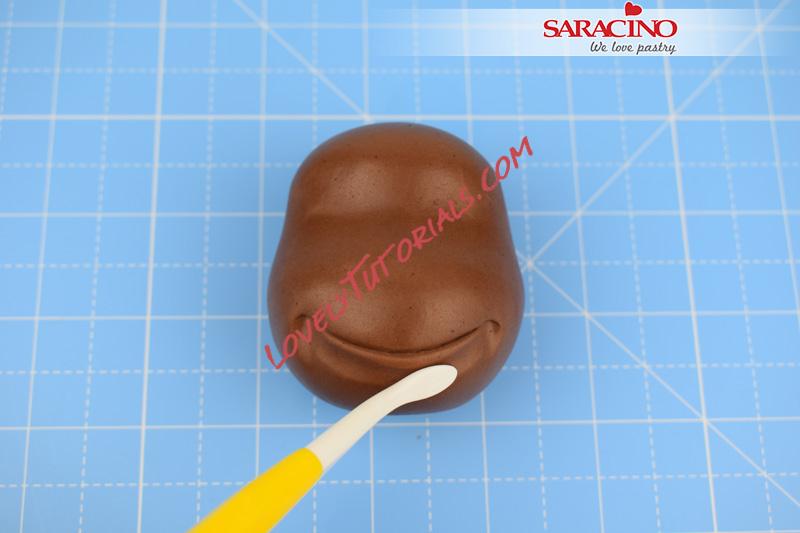
Using the smoothing end of the Dresden tool, gently smooth across the bottom of the mouth to create a lip.
 Step 17
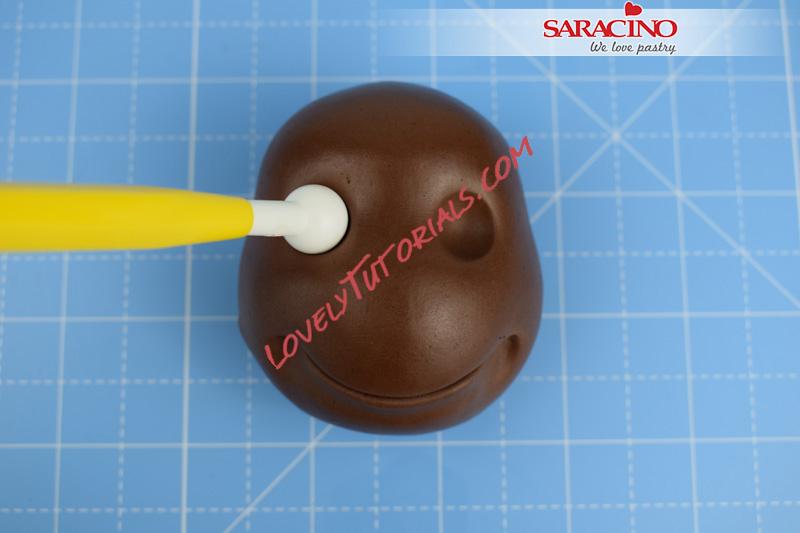
Indent two eye sockets with the large end of the balling tool.
 Step 18
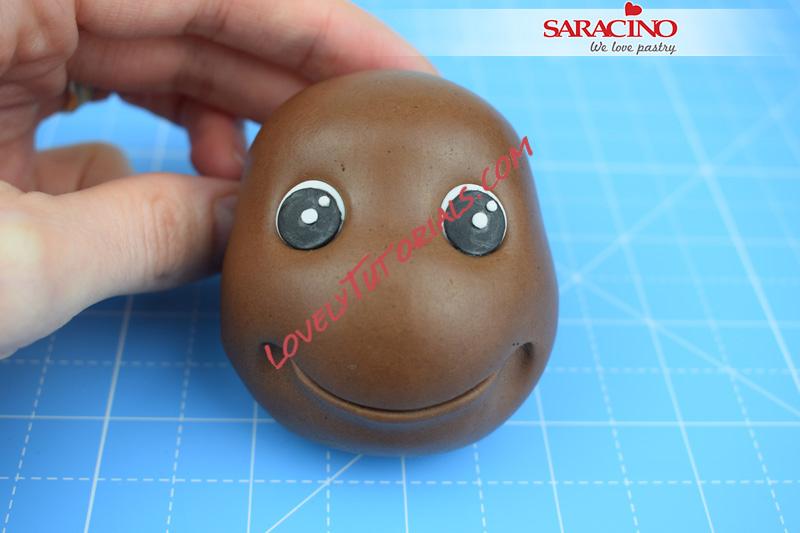
Take 2g of white modelling paste, divide into two and roll into balls. Stick the balls into the eye sockets and flatten. Take 2g of black modelling paste roll out thinly and cut out two circles using a small circle cutter, stick the pupils into place on the eyes. Finish the eyes by sticking two small balls of white paste onto each pupil as shown.
 Step 19
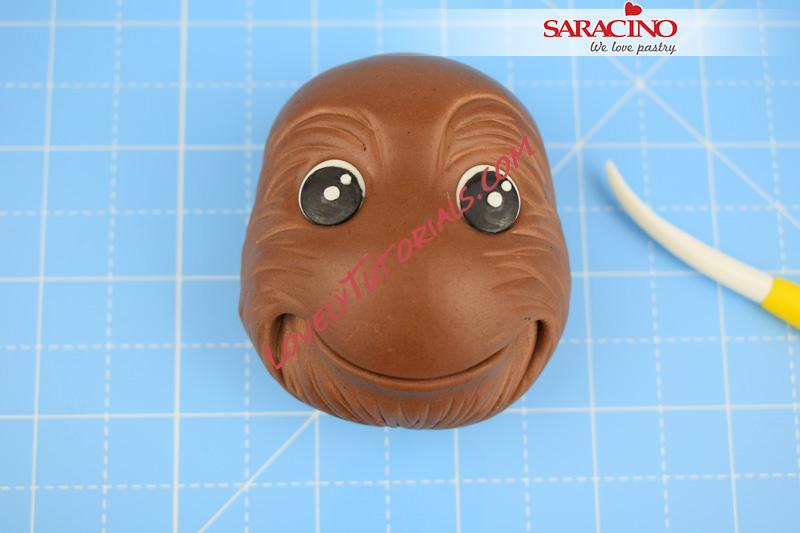
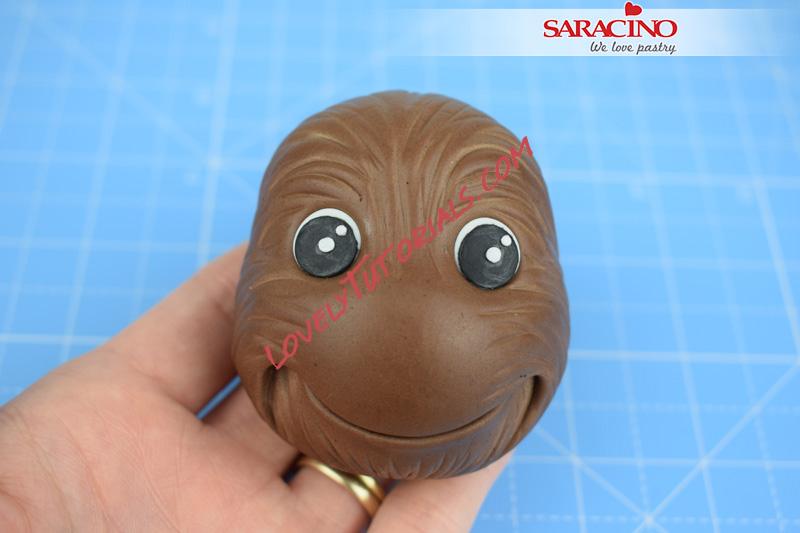
Use the veining end of the Dresden tool and begin to texture the fur on the front of the face as shown.
 Step 20
Texture the fur on the top and back of the head.
 Step 21
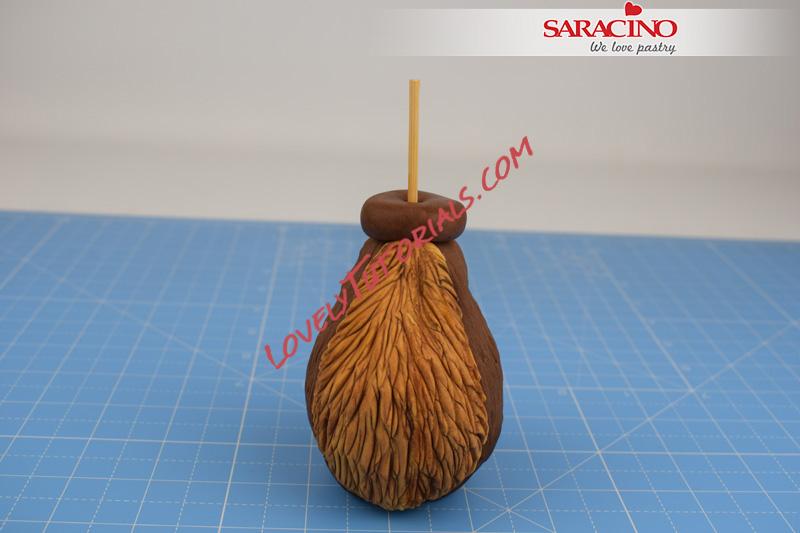
Take 10g of brown modelling paste, roll into a ball and flatten slightly. Apply a small amount of water to the top of the neck and stick the paste into place. Insert a food safe skewer down through the center of the neck and into the body.
 Step 22
Apply a small amount of water to the top of the neck. Gently slide the head down the skewer until it comes to rest on the neck.
 Step 23
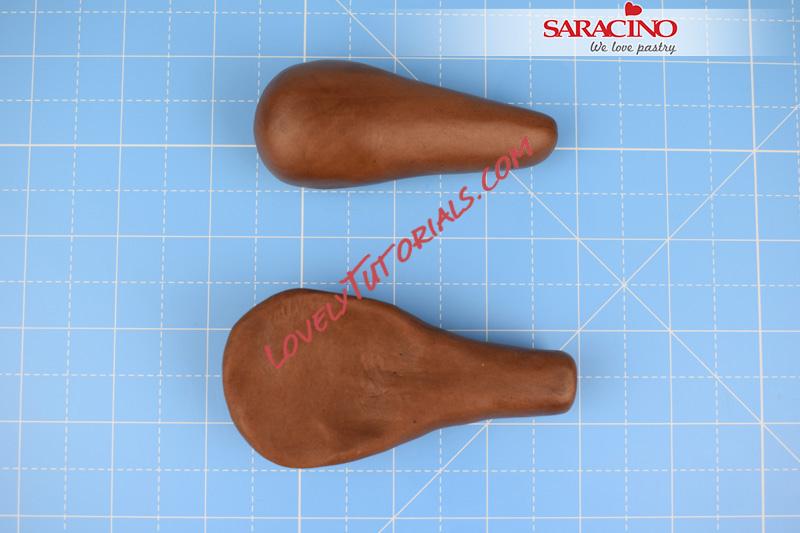
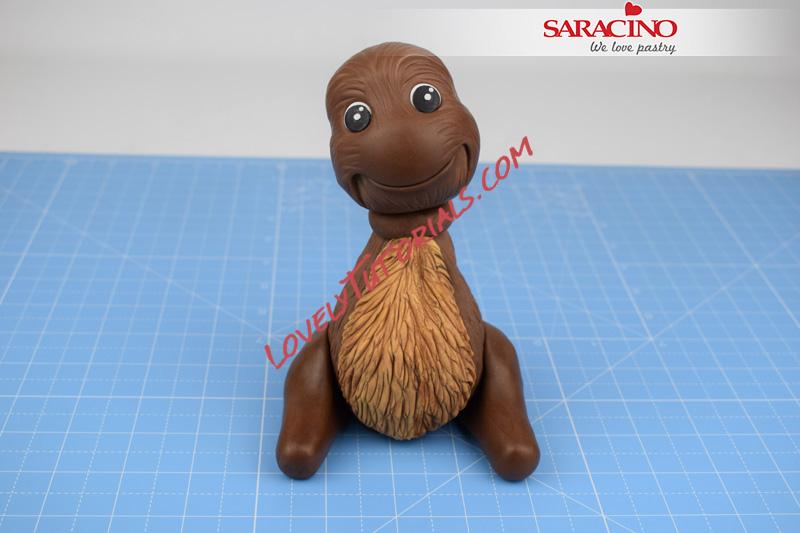
Take 80g of brown modelling paste, divide equally in two. Roll each piece into an elongated tear drop. Pinch out the edge around the fat end of the teardrop to shape the leg.
 Step 24
Stick the legs into place on each side of the body.
 Step 25
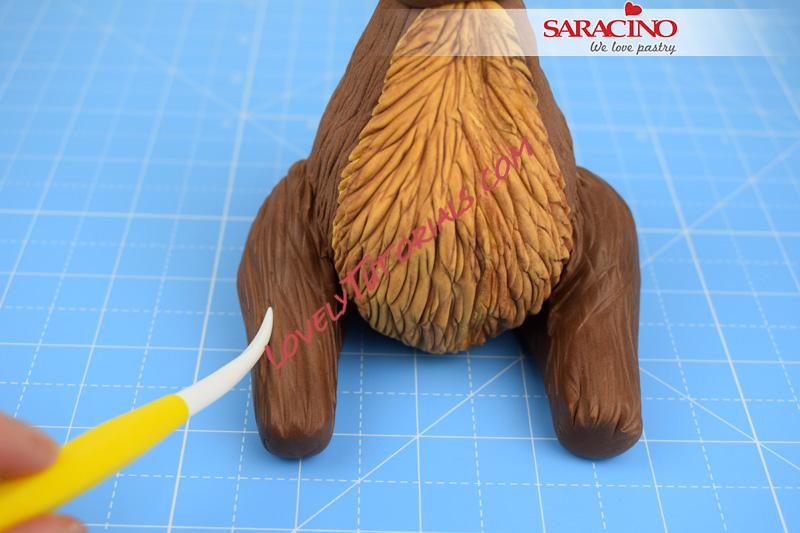
Use the veining end of the Dresden tool to texture the fur on each leg.
 Step 26
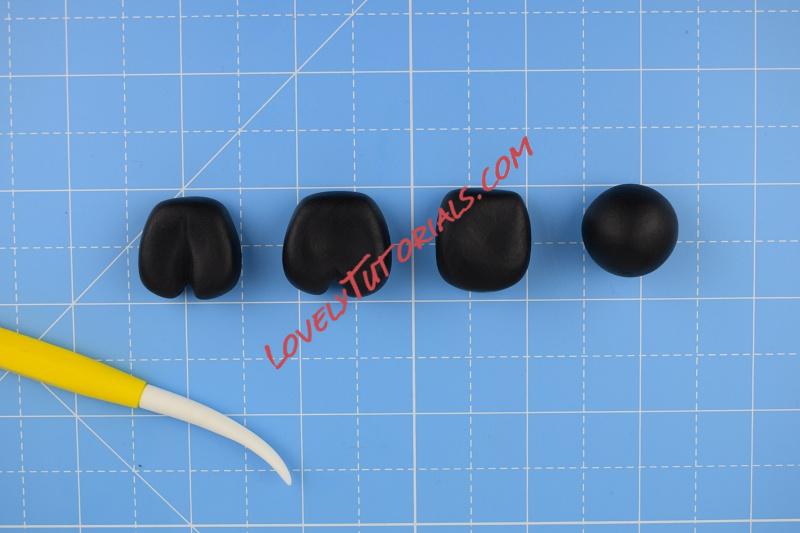
Take 20g of black modelling paste, divide into 4. Roll each piece into a ball, flatten the ball and shape as shown. Use the veining end of the Dresden tool, mark a groove across the top and down on to the front of the hooves.
 Step 27
Use the large end of the balling tool to widen the end of each leg. Apply a small amount of water to the end of the legs and stick the hooves into place.
 Step 28
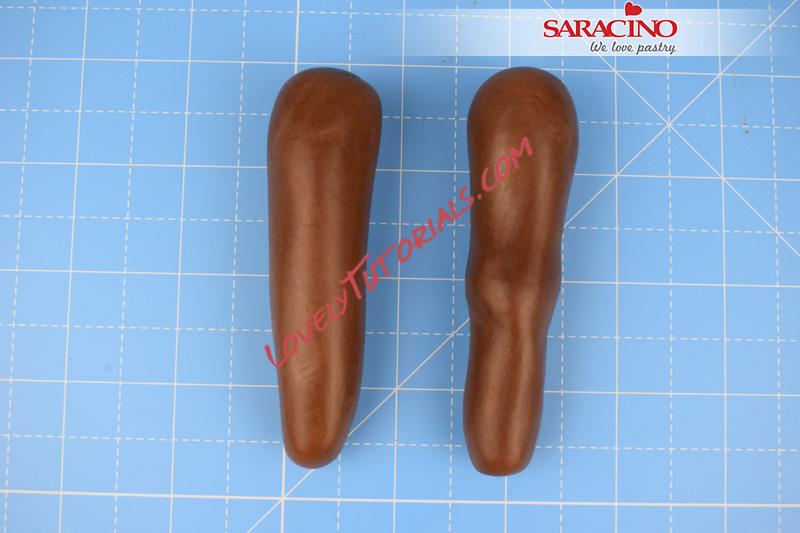
Take 80g of brown modelling paste, divide equally into two and roll each into a sausage shape. Pinch in and narrow the paste to shape the knees as shown.
 Step 29
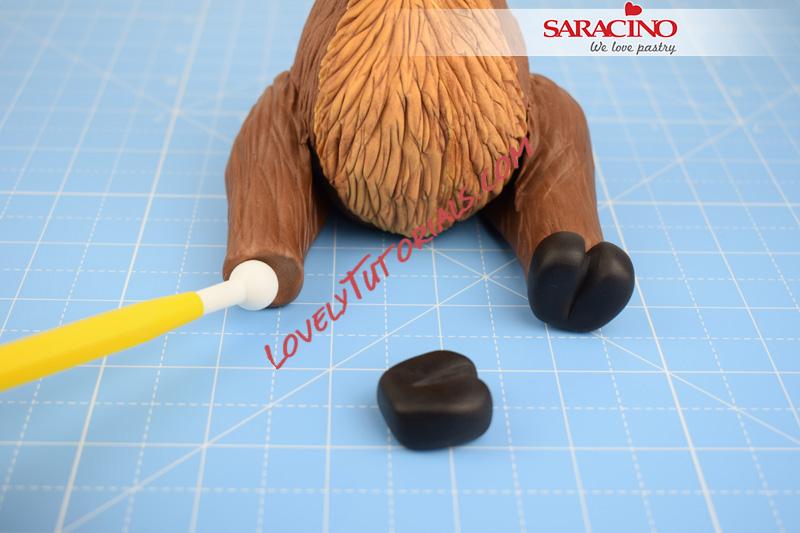
Stick the hooves to the bottom of each leg, stick the legs into place and texture the fur using the Dresden tool as before.
 Step 30
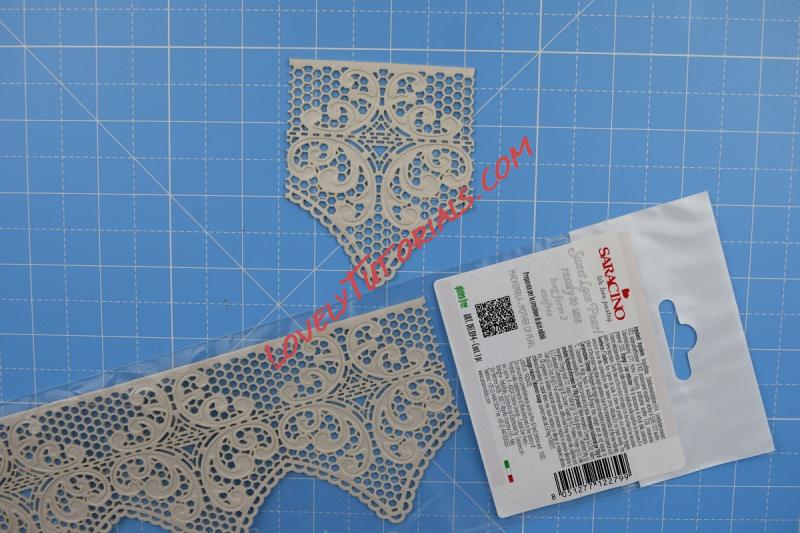
Take a packet of Saracino sweet lace pearl, using a pair of small sharp scissors, cut out the section shown. Carefully cut out each of the swirls.
 Step 31
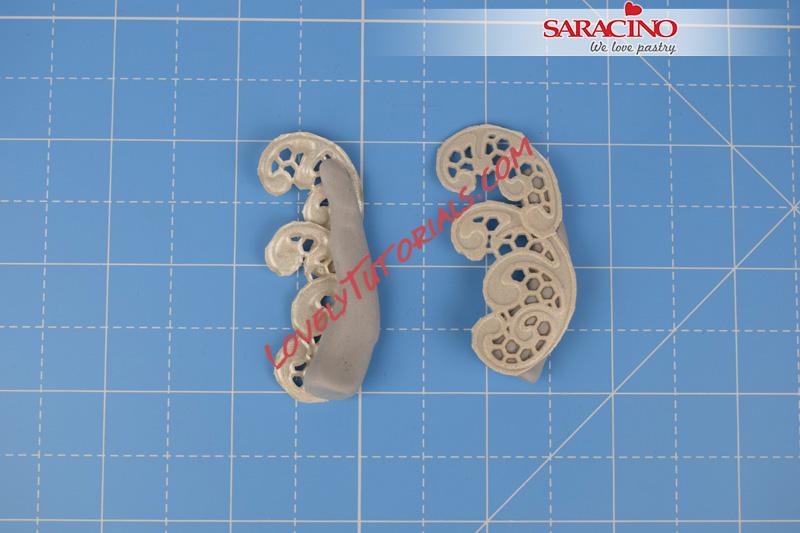
Take 5g of grey modelling paste, divide into two and roll each piece into a sausage tapered to a point. Stick the largest swirl to the bottom of the sausage and then stick the small swirl to the top of the sausage as shown (left is the back view; right is the front view) repeat for both antlers.
 Step 32
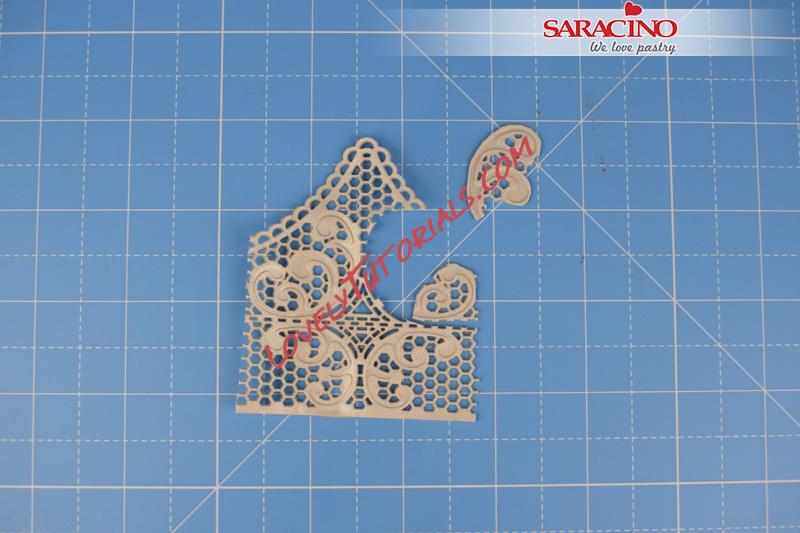
Cut another section of lace and remove the right swirl and then remove the same left swirl.
 Step 33
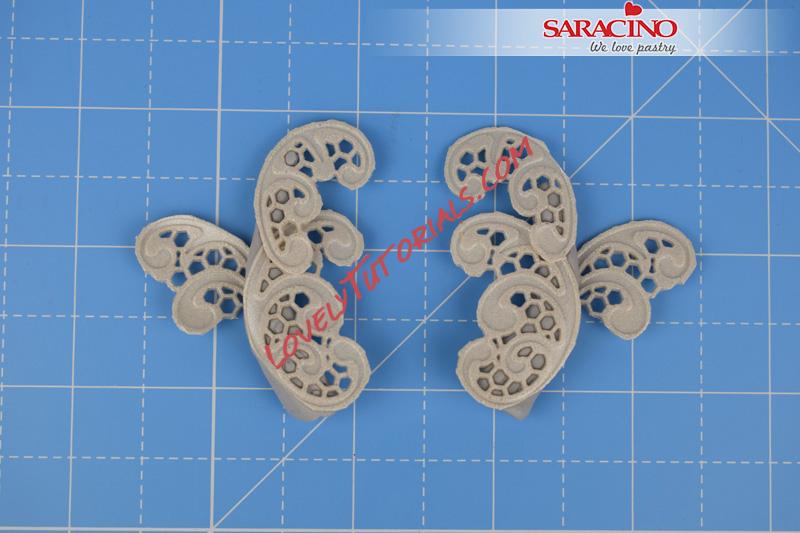
Stick the swirls into place on the back of the antlers as shown. The paste should be sticky enough for the lace to stick to straight away, if not use a small amount of water
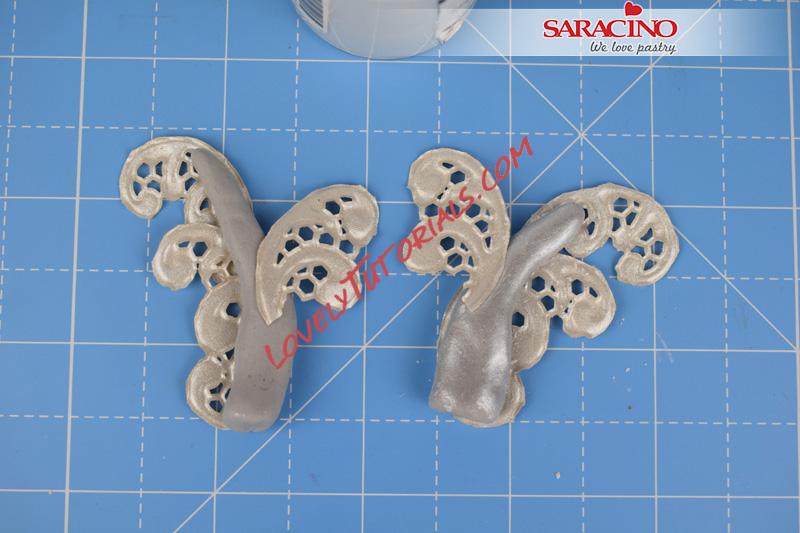 Step 34
Dust the grey paste with silver lustre dust to match the antlers.
 Step 35
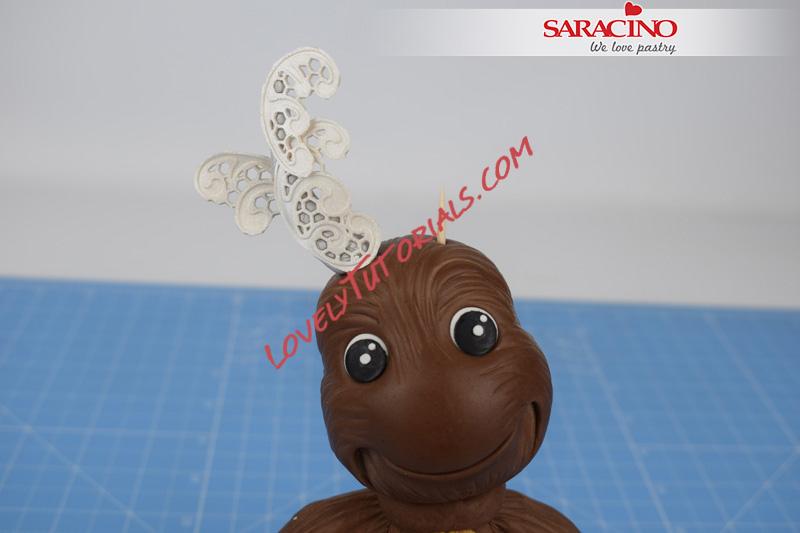
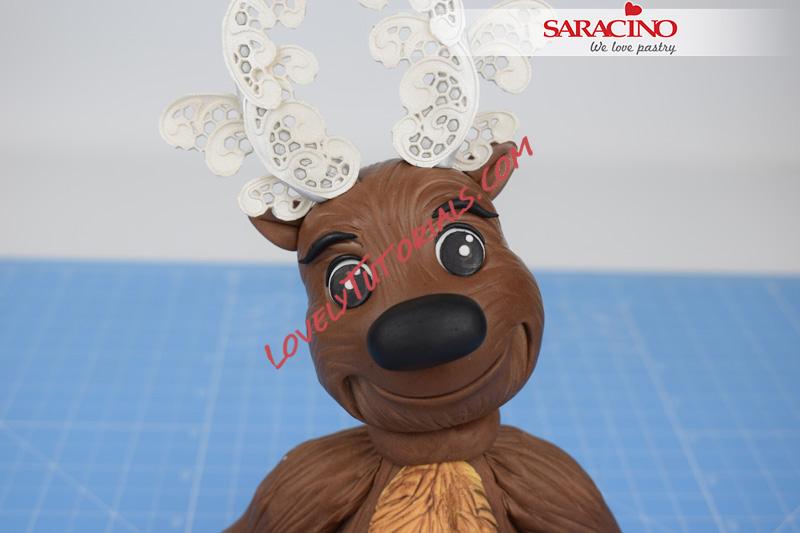
Stick two small cocktail sticks into the top of the head, gently slide the left antler down into place.
 Step 36
Stick the other antler into place and gently bend the tops of the antlers over to shape.
 Step 37
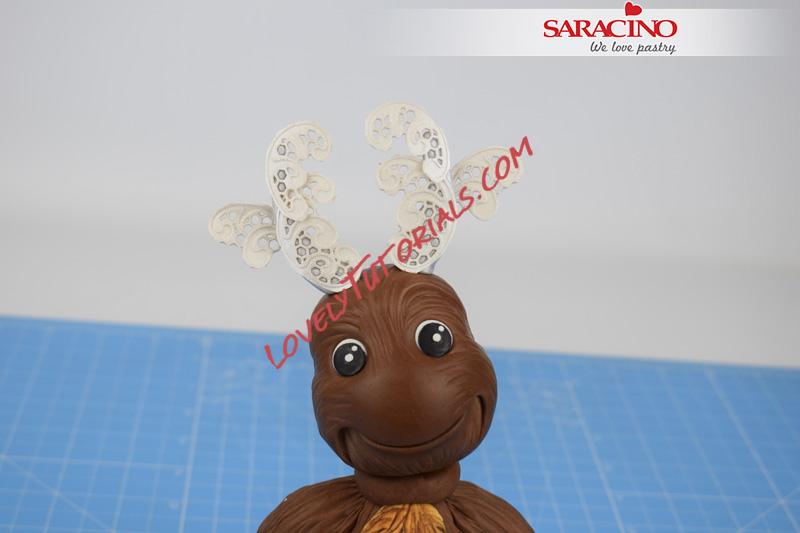
Again, using scissors cut out the small right-hand swirls shown and the matching left-hand swirls from the lace.
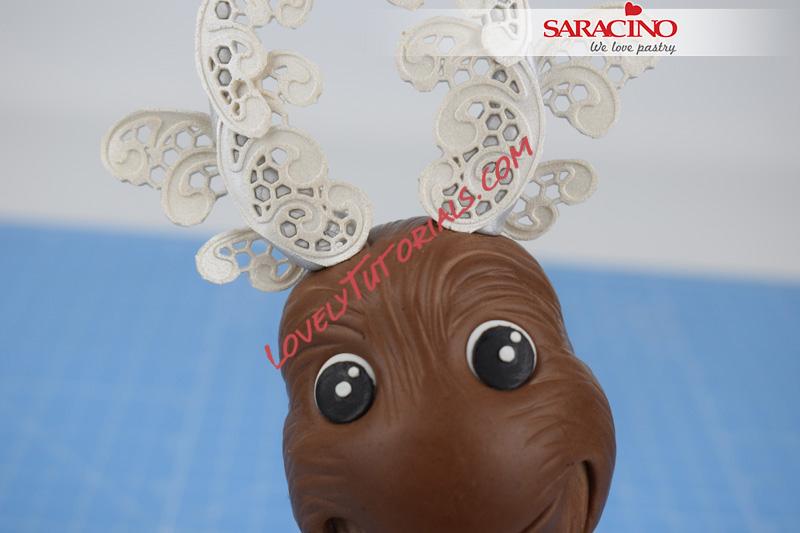 Step 38
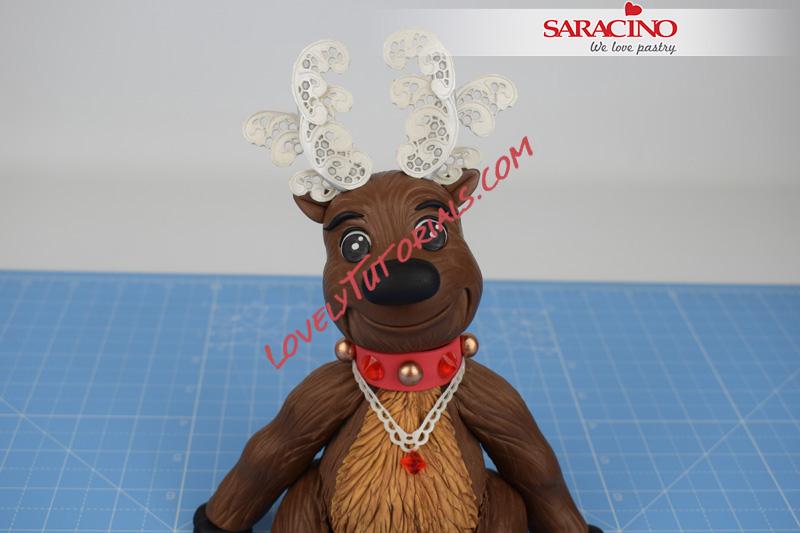
Stick the small swirls to the back of the antlers as shown.
 Step 39
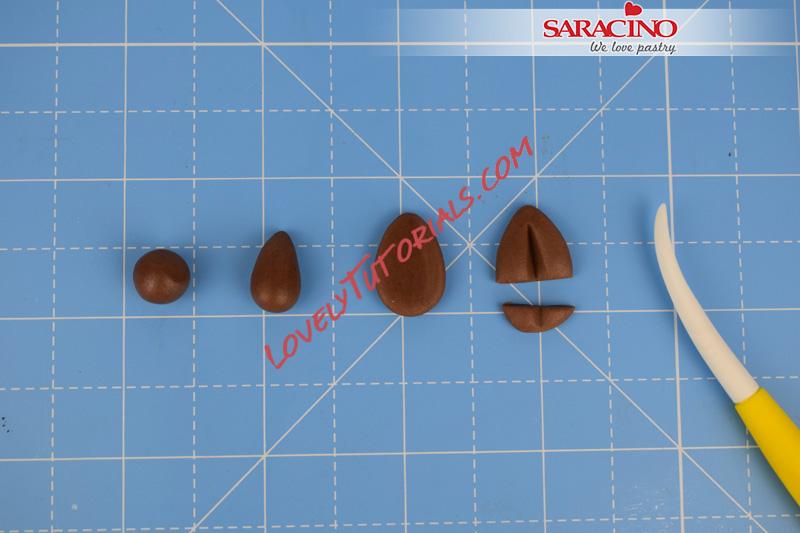
Take 2g of brown modelling paste, divide into two. Roll each piece into a teardrop shape. Flatten slightly. Use the veining end of the Dresden tool to mark a groove in the centre of each ear. Cut off the bottom of each ear with a sharp knife as shown.
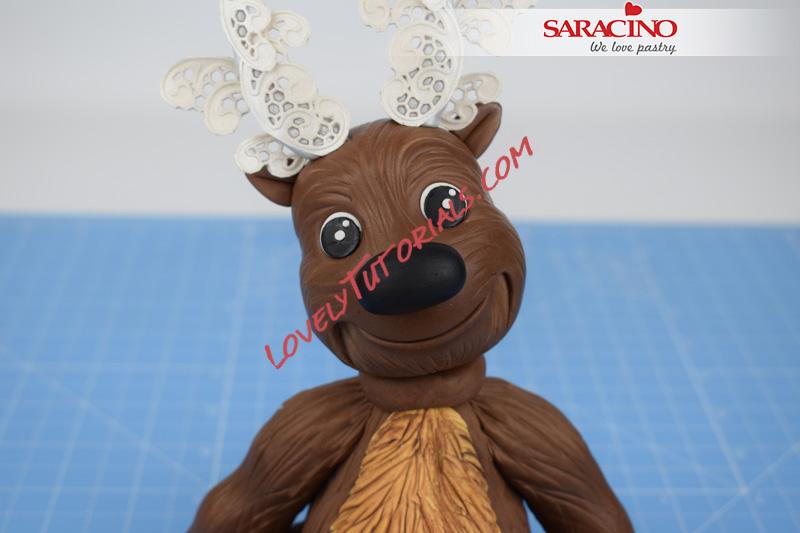 Step 40
Stick the ears into place. Roll 3g of black modelling paste into the shape of a nose and stick into place.
 Step 41
Roll two small sausages of black paste tapered at both ends and stick into place across the top of each eye. Roll two more slightly bigger sausages of black paste, tapered at both ends and stick into place for the eyebrows.
 Step 42
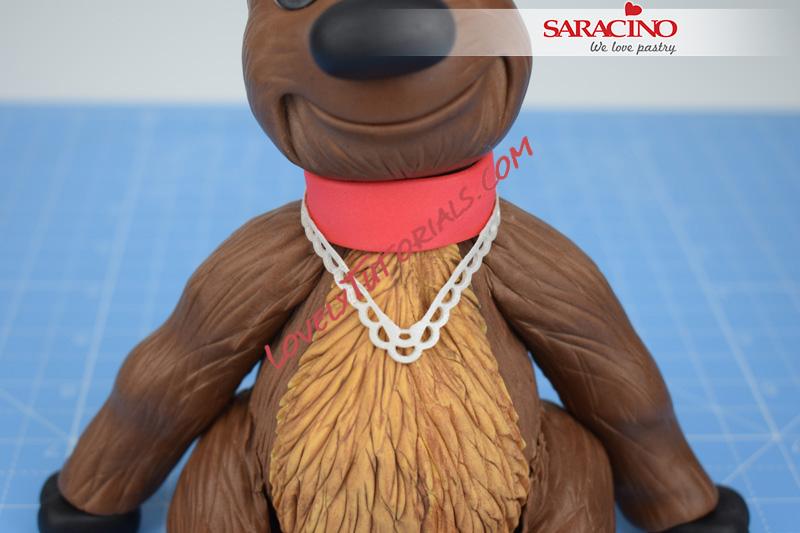
Roll 5g of red modelling paste into a strip and stick into place for the collar as shown. Trim the piece shown from the sweet lace pearl and stick into place as shown.
 Step 43
Take 3g of white modelling paste, colour with Saracino flesh gel colour and divide into three pieces. Roll each piece into a ball and dust with Saracino bronze dust. Stick the balls into place on the collar as shown.
 Step 44
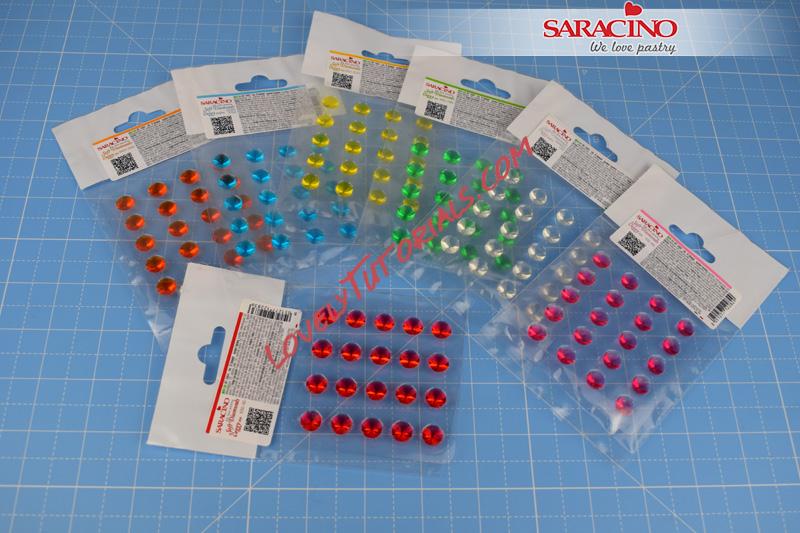
Choose your favourite colour from Saracino Soft diamonds range. They are vegetarian jelly diamonds.
 Step 45
Stick two onto the collar as shown. Stick two together to create a diamond shape and stick into place as shown. The paste should still be tacky enough that the diamonds will stick without the need for glue. If not use a small amount of glue to stick them into place.
 Step 46
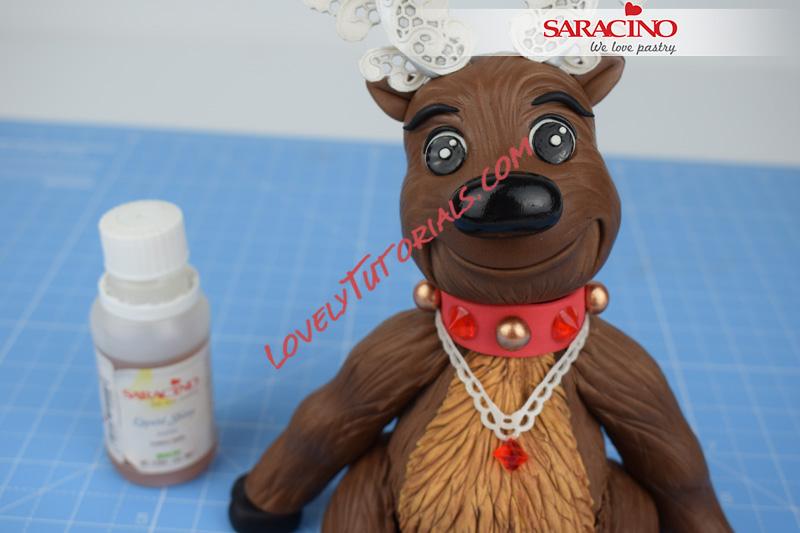
Finally paint Saracino liquid shiny onto to the nose and eyes to varnish.


