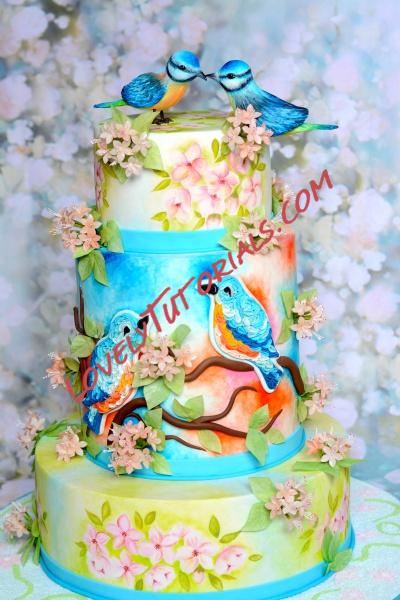
Огромная благодарность Автору ANJALI TAMBDE за Мастер-класс
 You will need:
- White Saracino modelling paste
- Dark Blue Saracino modelling paste
- Yellow Saracino modelling paste
- Black Saracino modelling paste
- Saracino wafer paper 0.27
- Micro stamens
- 24 gauge wire
- Green tape
- 10”, 8” and 6” round cake dummy with 4” height
- Saracino cake covering/white
- Cake drum/board 12” round and some covering
- Edible paint- hot pink, white, green,red,blue and yellow
- Round brushes various sizes from thin to thick, say number 0,2,4 and 8 or any equivalent (roughly 4 brushes)
- Colour palette
- Vodka (just a table spoon each) or any evaporator
- Wipes
- Rolling pin
- Cake smoother
- Contrast ribbon to cover the cake and drum and some glue or double sided tape
- Knife, scissors
- Some cornstarch required while rolling the cake covering
- Any small bowl for washing brushes
- Dresden tool
- Ball tool
- Shell tool
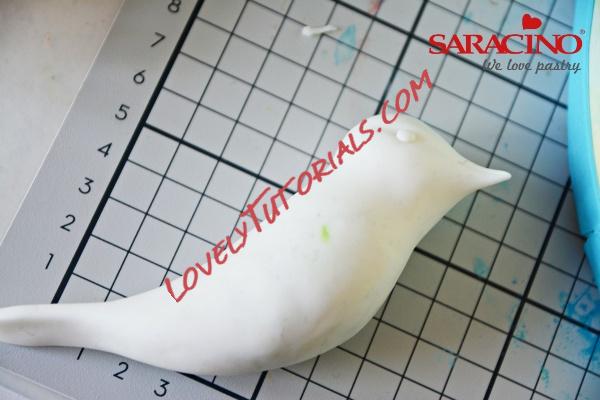
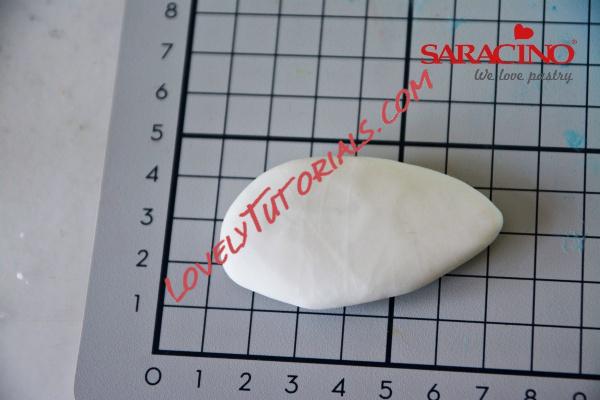
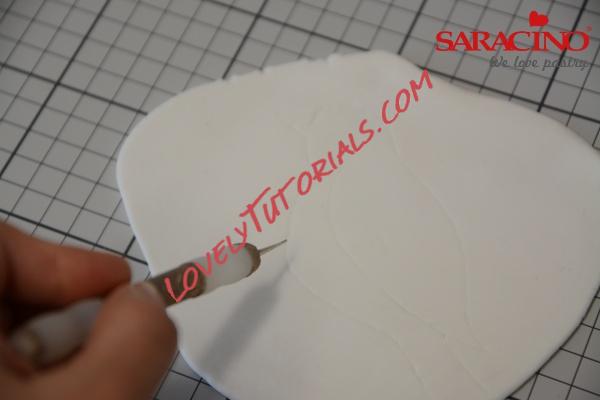 Step 1
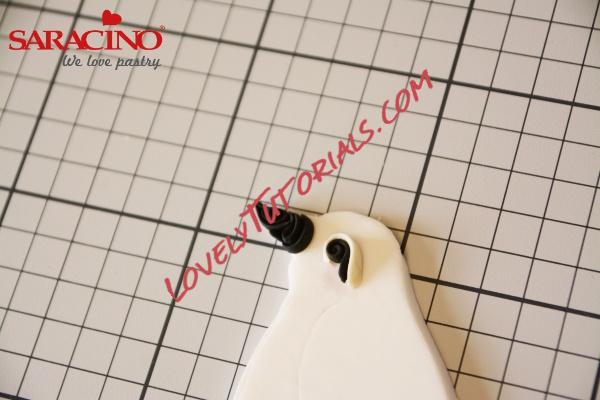
Draw a bird shape using a ball tool on a flat rolled sheet of Saracino sugar paste.
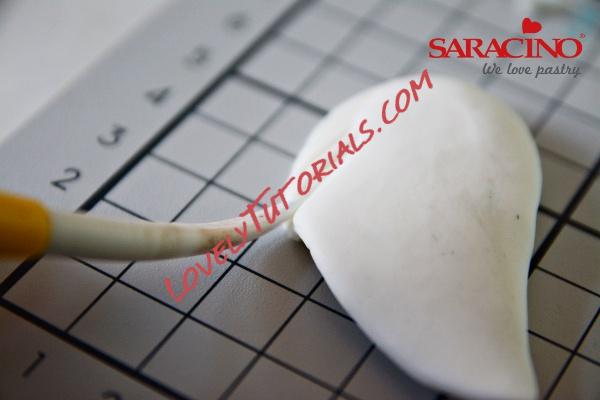
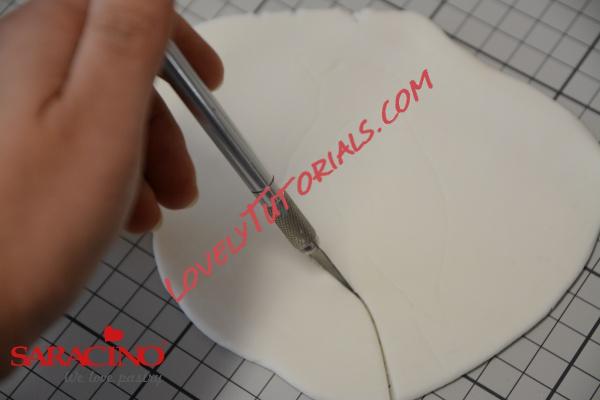 Step 2
Cut the drawn outline with a knife tool.
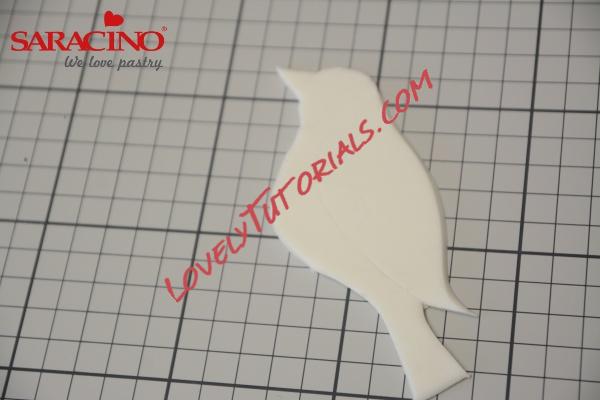 Step 3
Cut all the edges well and smoothen if any rough or raw edges left.
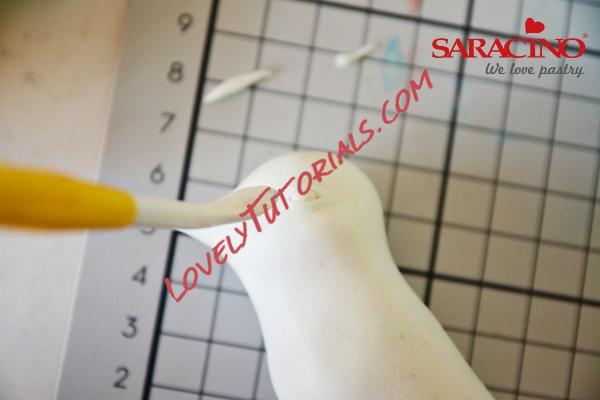
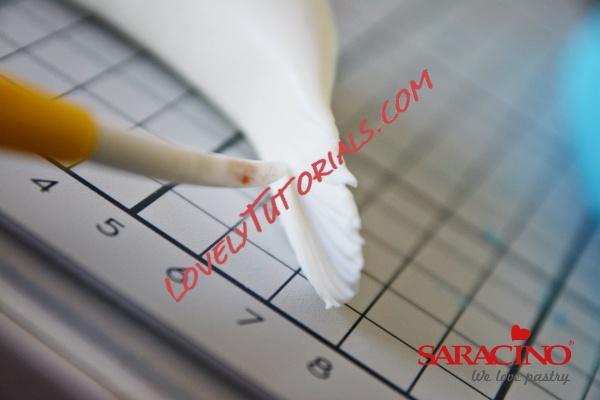
 Step 4
Roll thin strips in black and curl them to form the beak shape and eyes.
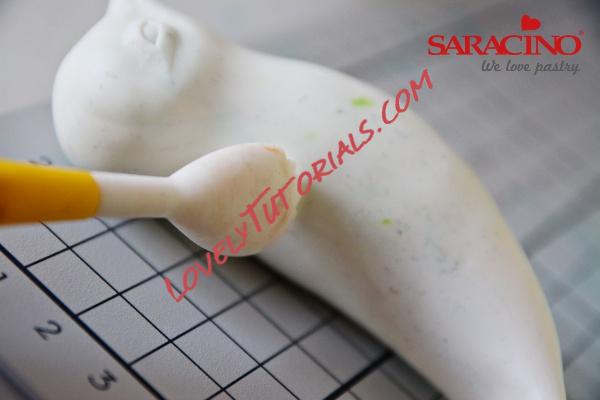
 Step 5
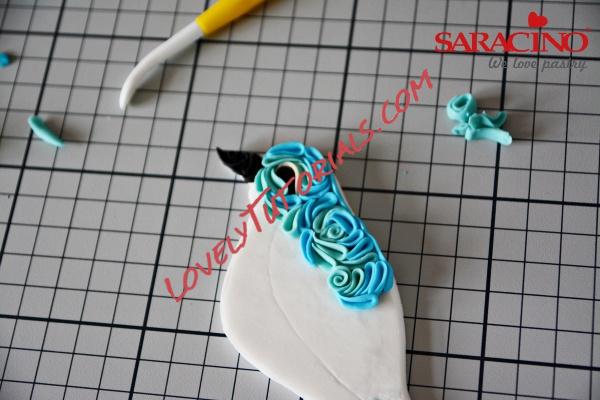
Using the blue and light blue Saracino sugar paste form small droplets and start gluing on the bird base following a pattern and continue using some yellow, white and orange droplets.
 Step 6
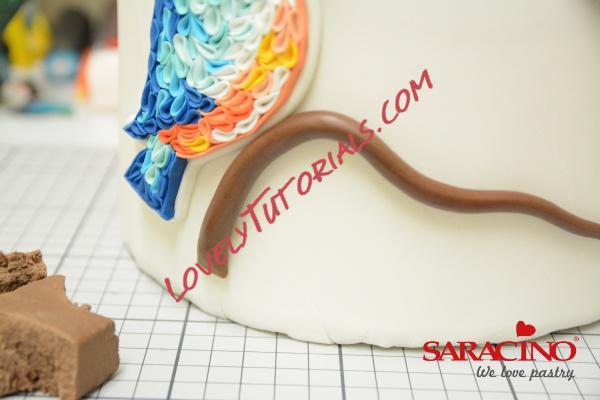
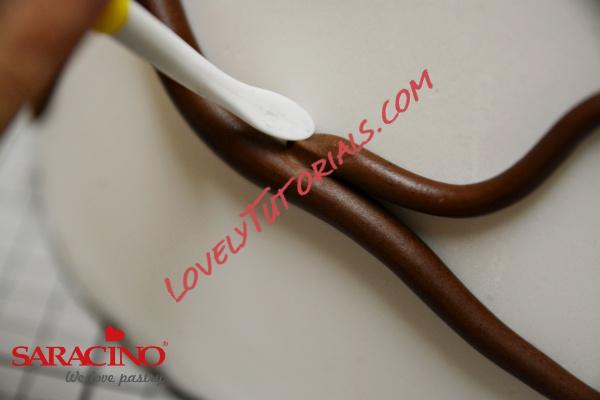
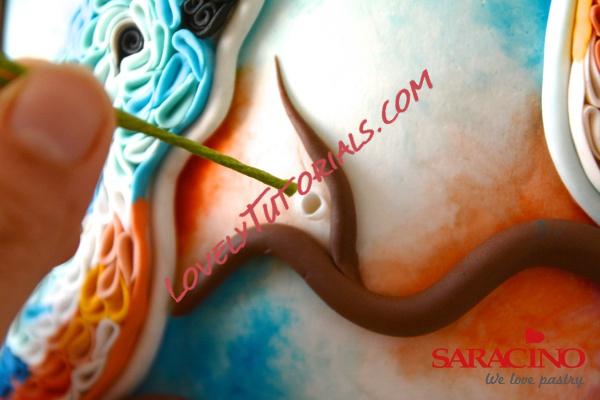
Make the branches with brown paste that is tapered from one end,Glue on the bird over the branches.
 Step 7
Make one more bird facing the 1st bird in the same way.
 Step 8
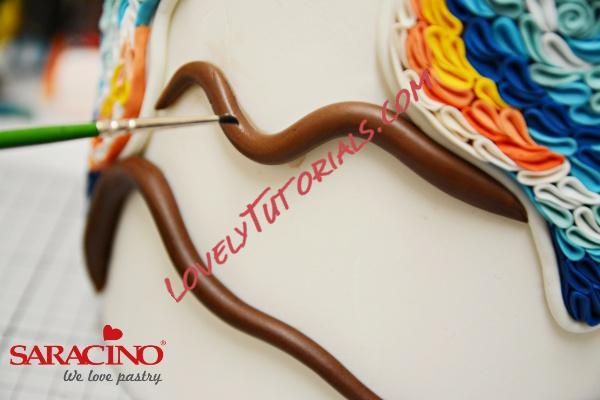
Again make some more branches in brown.
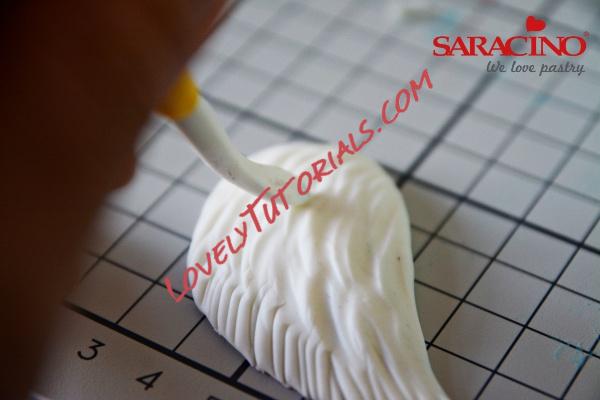
 Step 9
Using a leaf tool blend them well.
 Step 10
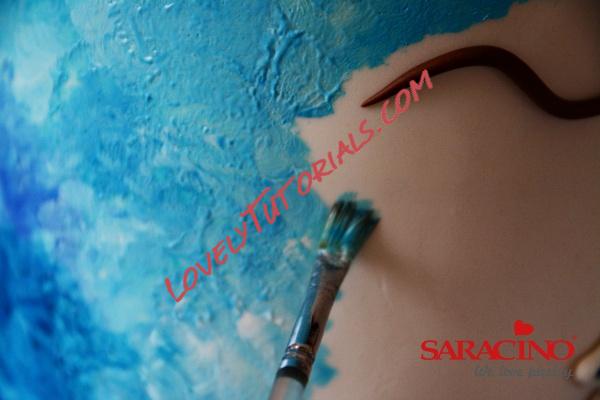
Mix some edible gel colours (blue and dark blue) with evaporators/vodka and start painting on the cake, using a flat brush dab and blend the two shades well, then add a bit of pink, red and orange and blend all the colours well.
 Step 11
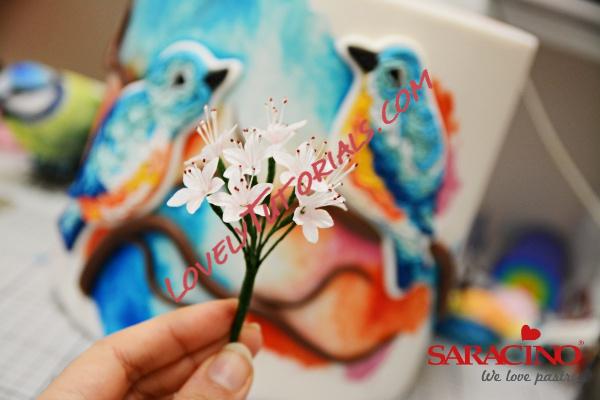
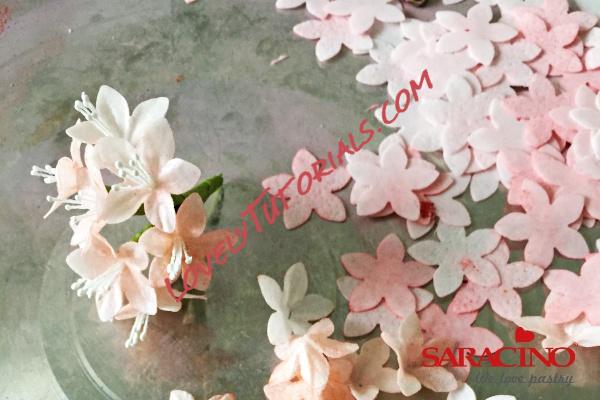
Make tiny wafer paper flowers
 Step 12
Add few more highlights in dark blue.
 Step 13
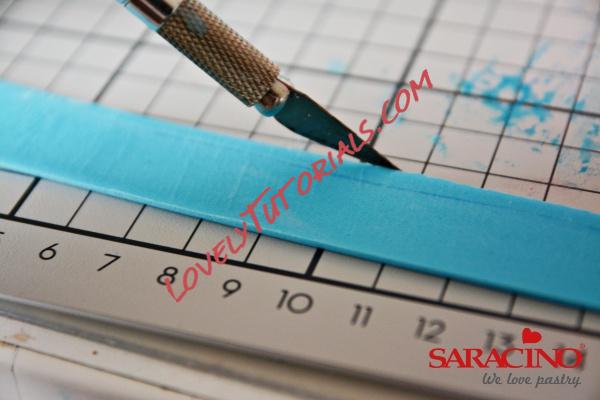
Cut a thin ribbon like strip in light blue sugar paste, approximately 2cm wide
 Step 14
Brush with Saracino glue on one side.
 Step 15
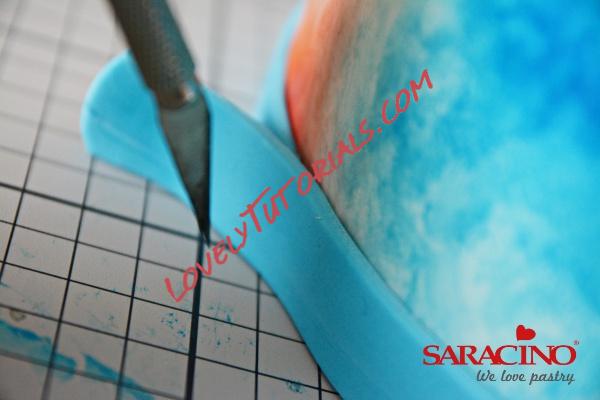
Glue it around the bottom of the cake.
 Step 16
Trim the rest and blend the joints well.
 Step 17
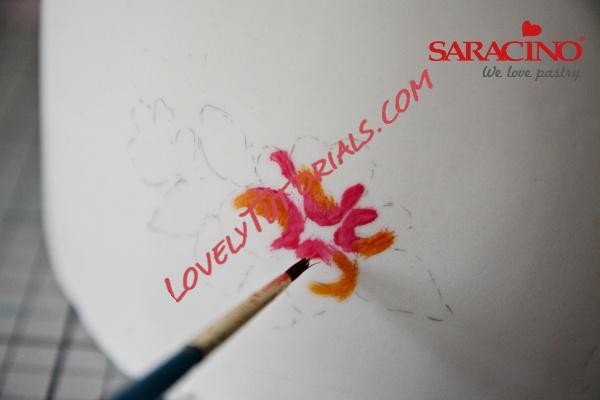
Using the edible marker draw some flowers and leaves on the second tier of the cake, mix some pink and orange edible paint and highlight the edges of the flowers.
 Step 18
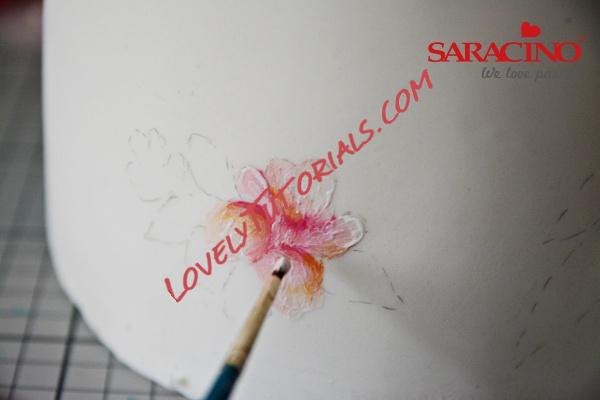
Blend the colours using white edible paint.
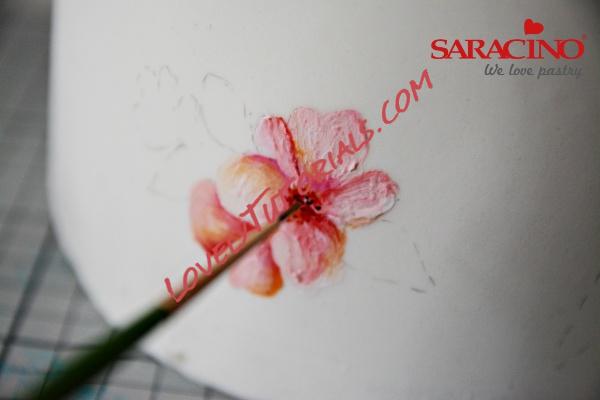 Step 19
Paint tiny dots in red and black in the center of the flower and blend some green around the flowers.
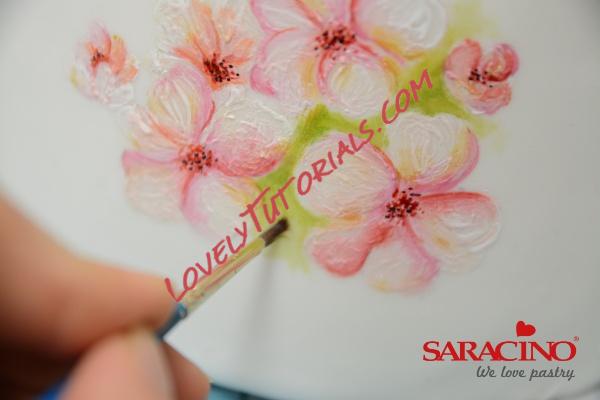 Step 20
Now with a pointy round brush draw the leaves in green.
 Step 21
Blend using some light green and yellow/this can be achieved by mixing white or yellow in dark green.
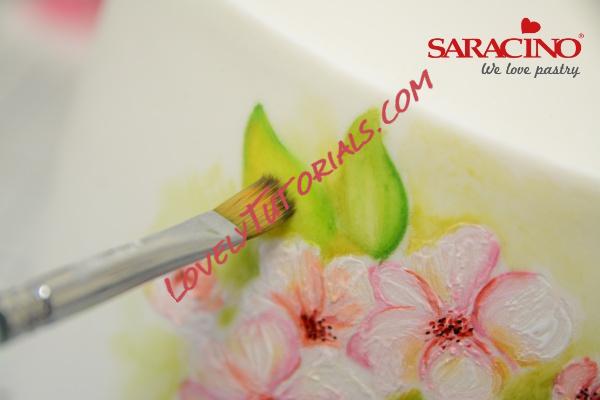
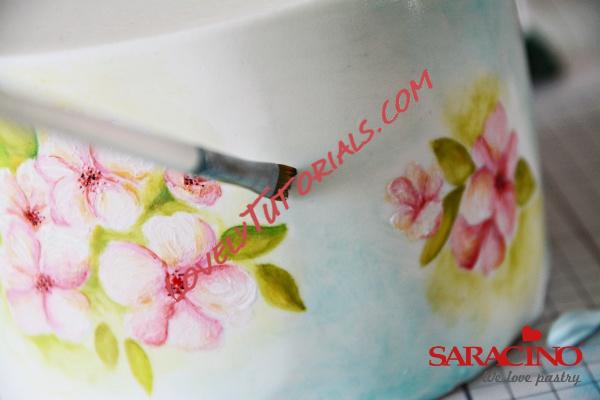 Step 22
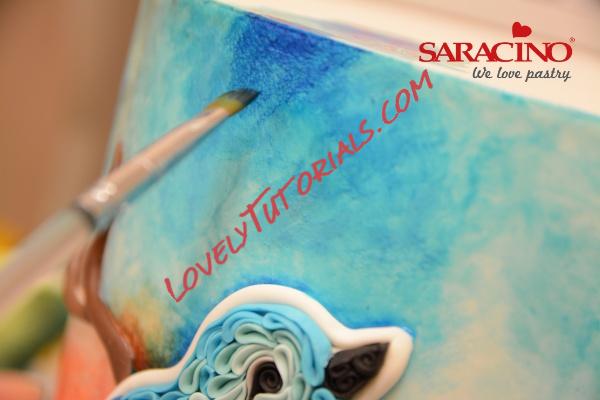
Brush some light blue in the empty spaces left between the flowers and leaves.
 Step 23
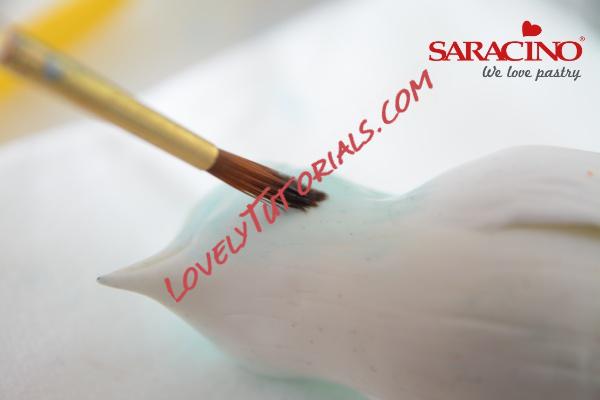
Making the small birds is easy, start with an elongated ball of white modelling paste and taper from one end for the tail white a rounded end on other side for the head, make the eyes with a ball tool and add tiny eye balls.
 Step 24
Add two tiny eyelids around the eyes.
 Step 25
Blend the eyelids well.
 Step 26
Make some feather texture on the tail with the knife tool or any pointy tool.
 Step 27
With the shell tool texture the body.
 Step 28
Roll a ball and shape it into a drop shape and flatten it to make the wings.
 Step 29
Texture the edges of the wings with the knife tool.
 Step 30
Texture the rest using the leaf tool.
 Step 31
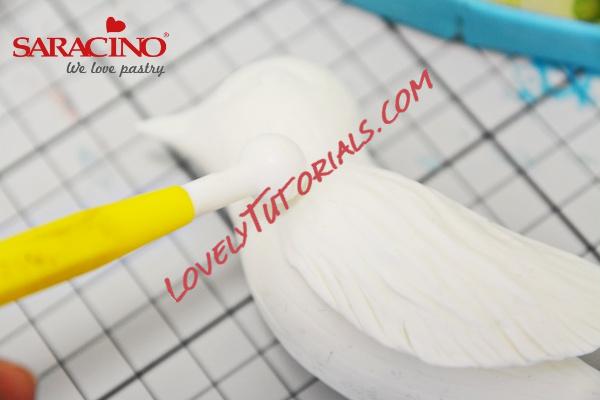
Join it to the body and blend with the ball tool
 Step 32
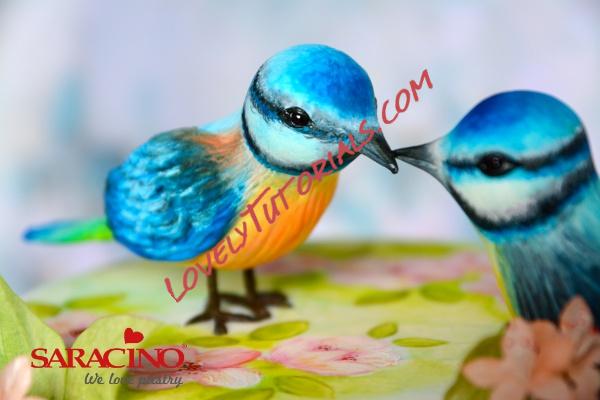
Start painting the body starting with the lightest shade of blue
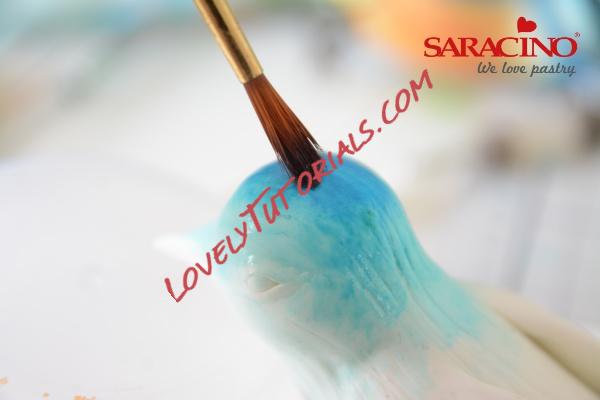 Step 33
Add a darker shade of blue on the top
 Step 34
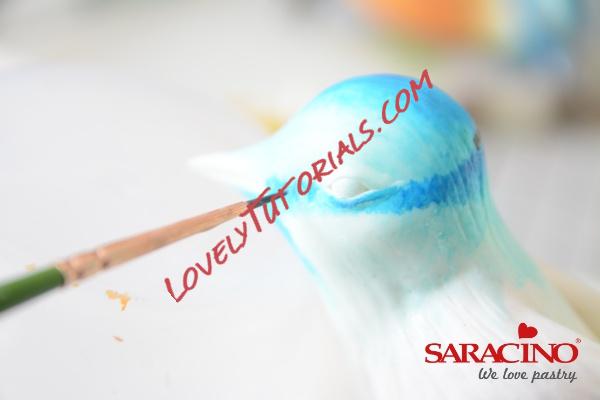
Using a thin brush paint standing strokes around the eyes forming a ring
 Step 35
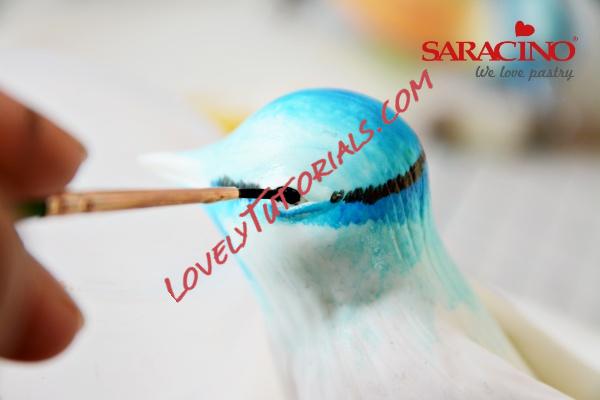
Paint a black ring just below the blue one
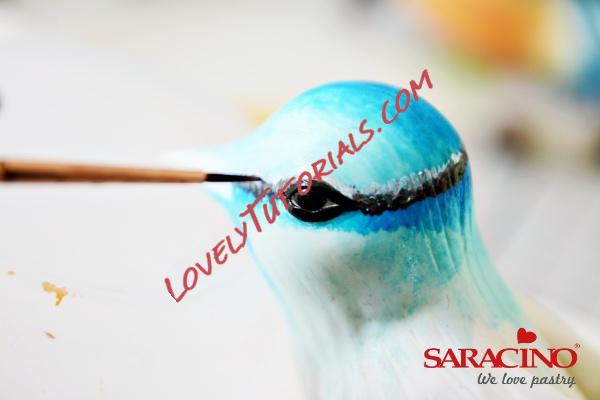 Step 36
Now paint the the eyes
 Step 37
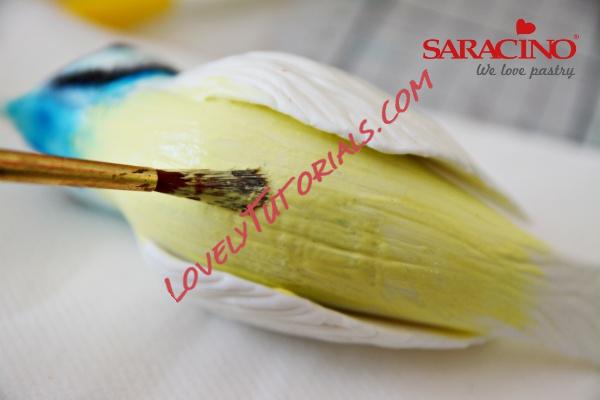
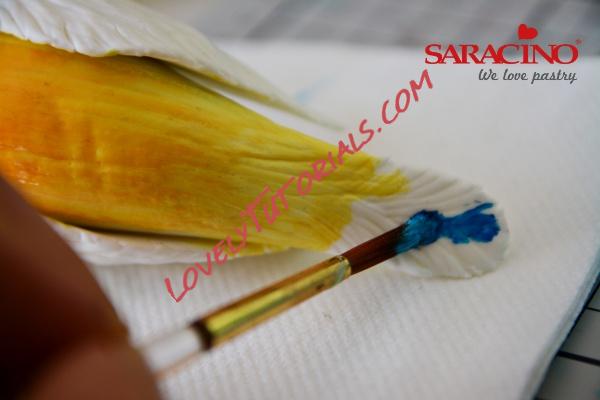
Paint the lower body with a light yellow edible paint
 Step 38
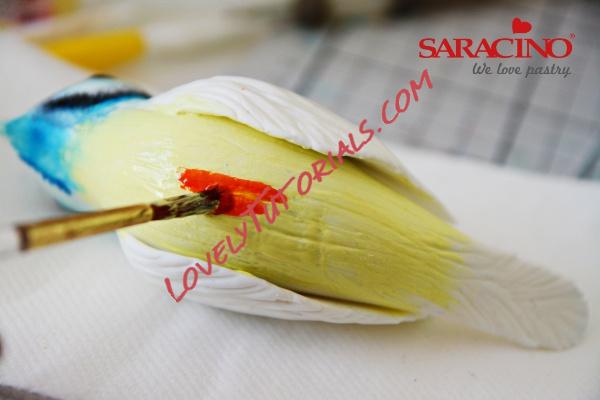
Add some dark yellow and orange edible paint in the center of the lower body and blend well
 Step 39
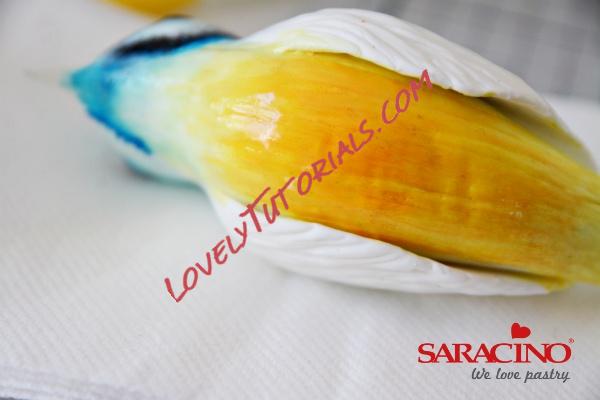
This is how it will look, make sure you keep the light yellow on both ends of the lower body
 Step 40
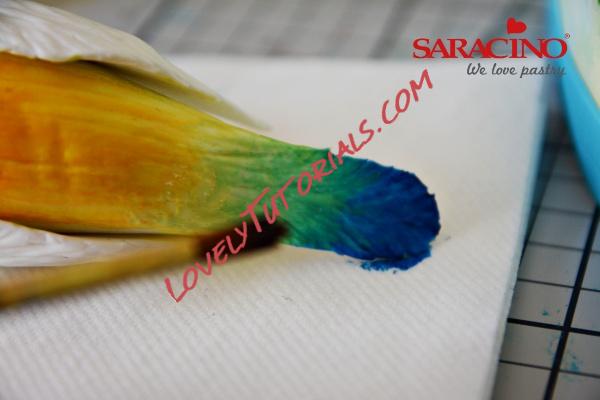
Paint the tail in blue.
 Step 41
Blend with the yellow and the blending will show some green on the tail too, make sure you have a bit of blue on the end of the tail and don’t carry the shading right till the end as it will result in a green tail
 Step 42
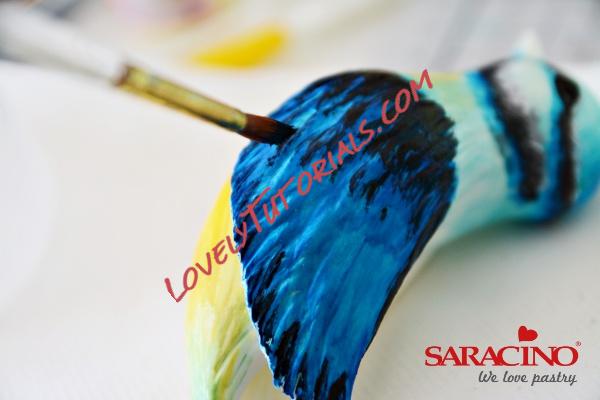
Start painting the wings in shades of blue and then some black strokes
 Step 43
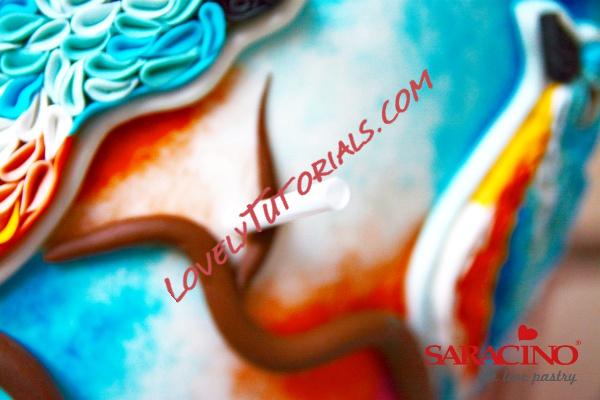
Push a posy pick or a straw in places where you want the flowers
 Step 44
Immerse the flower bunch into the straw/posy pick
 Step 45
Create more wafer paper leaves around the branches and the flowers. Vein them, dust with green dust and use some Saracino wafer paper glue to glue them on.
 Step 46
Make the birds legs with a wire and then tape it with brown tape, immerse it when the bird is completely dry. Place both the birds on top of the top tier of the cake
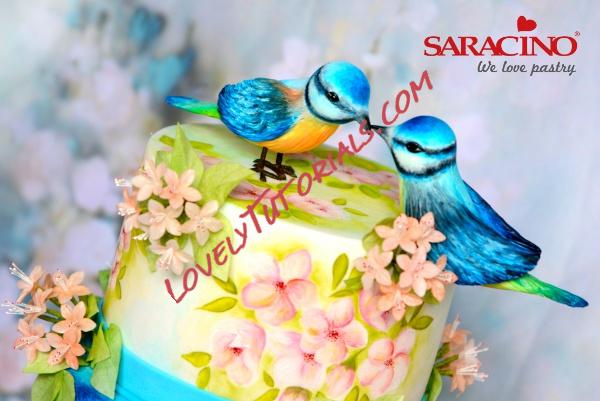 Step 47
Your bird theme cake is now ready


