|
|
МК кружева из мастики, фонданта -Fondant Lace Tutorials V1
|

26.07.2011, 17:07
|
|
Администратор
|
|
Регистрация: 07.09.2010
Сообщений: 7,669
|
|
 МК кружева из мастики, фонданта -Fondant Lace Tutorials V1
|
23.04.2012, 18:04
|
|
Администратор
|
|
Регистрация: 07.09.2010
Сообщений: 7,669
|
|
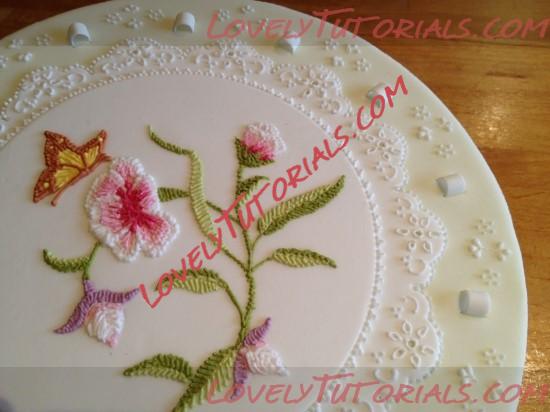
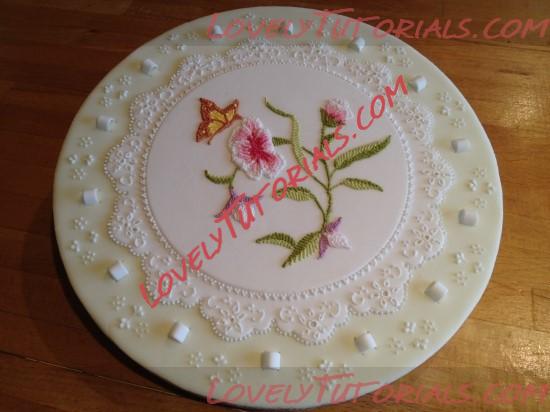
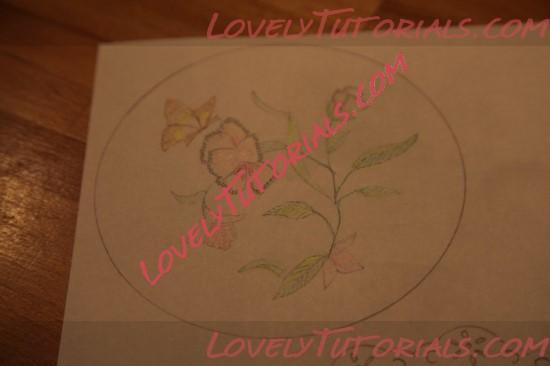
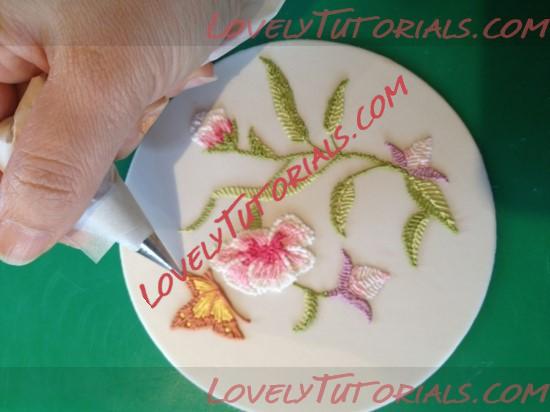
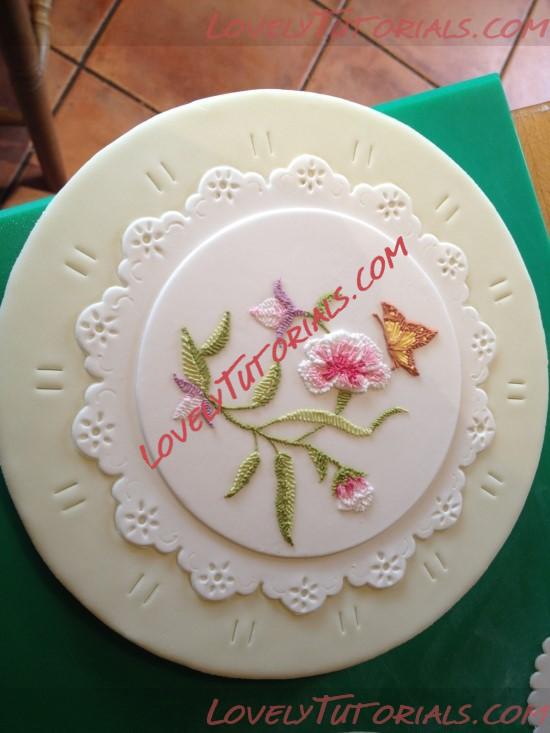
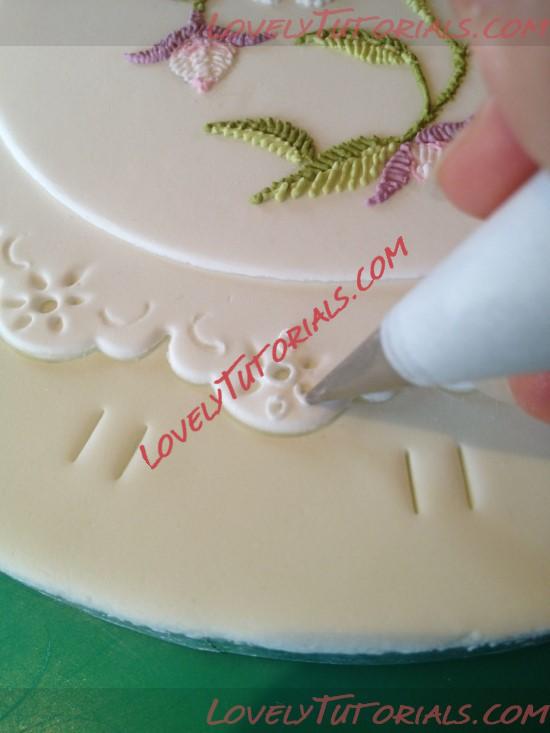
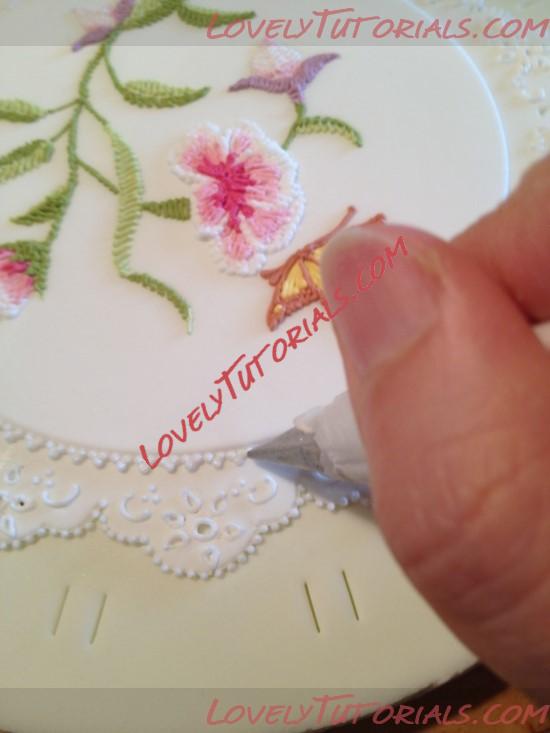
МК вышивка из крема
|
21.09.2012, 12:14
|
|
Администратор
|
|
Регистрация: 07.09.2010
Сообщений: 7,669
|
|
МК кружева из мастики, фонданта -Fondant Lace Tutorials V2
Огромная благодарность Автору Melanie за Мастер-класс
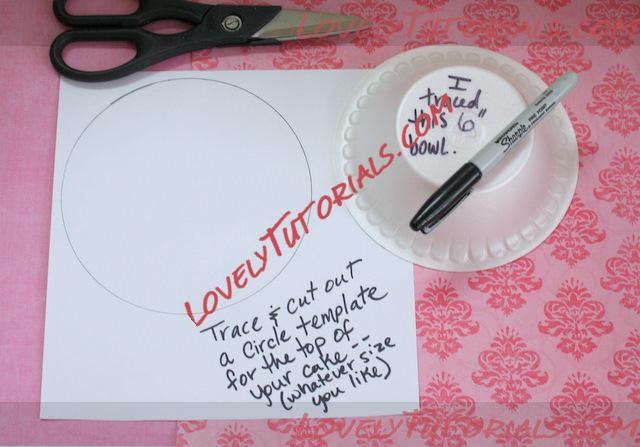
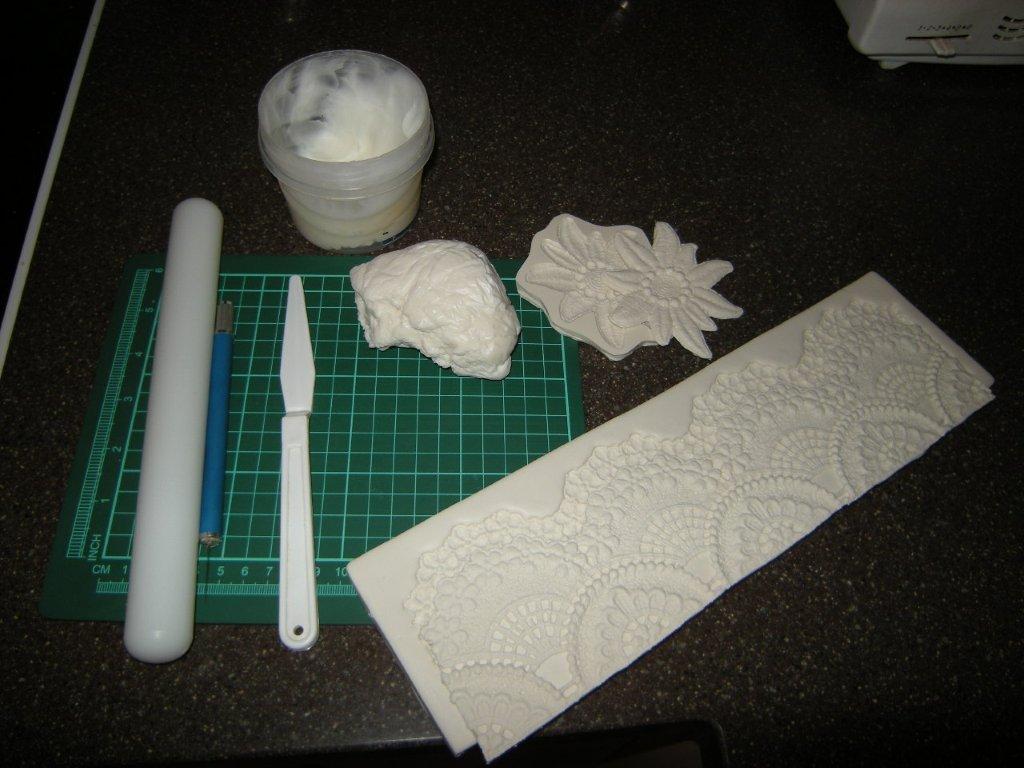
Materials You'll Need:
- fondant, kneaded until soft
- rolling pin
- sharp knife
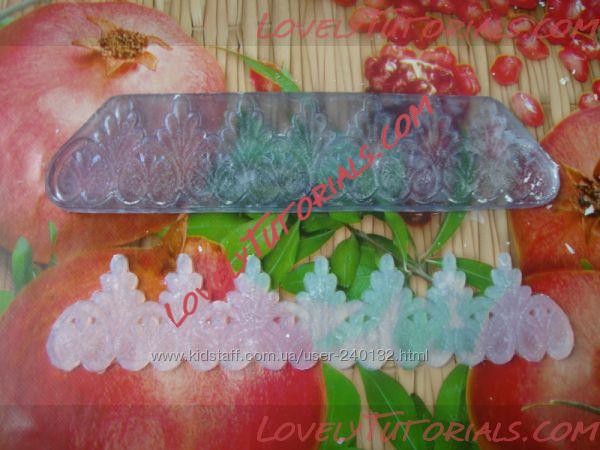
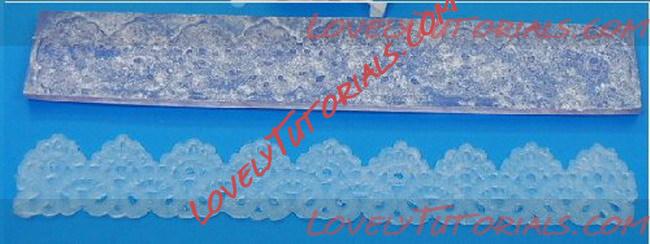
- lace mold (my molds are from Caljava)
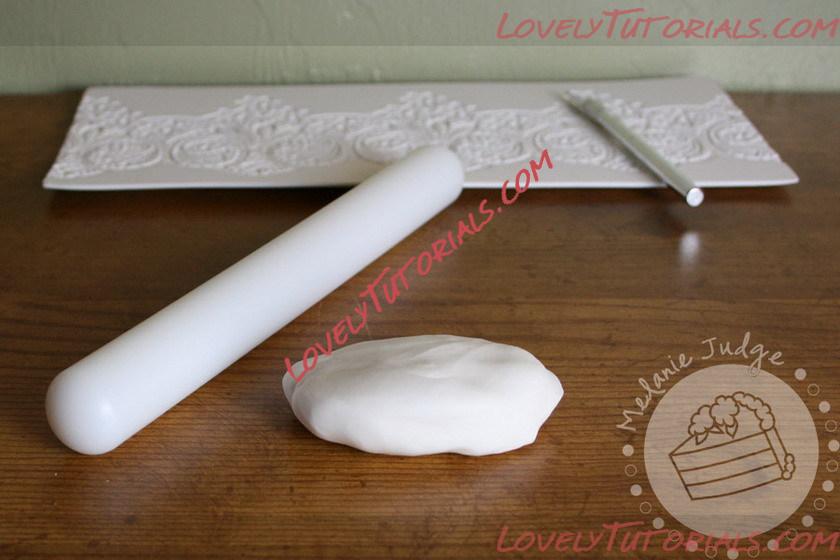
 Step 1:
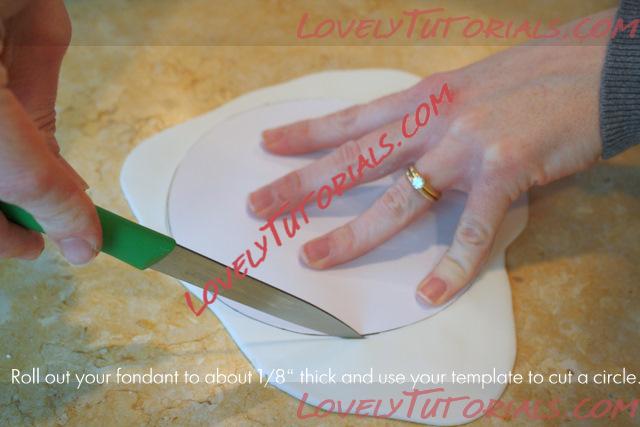
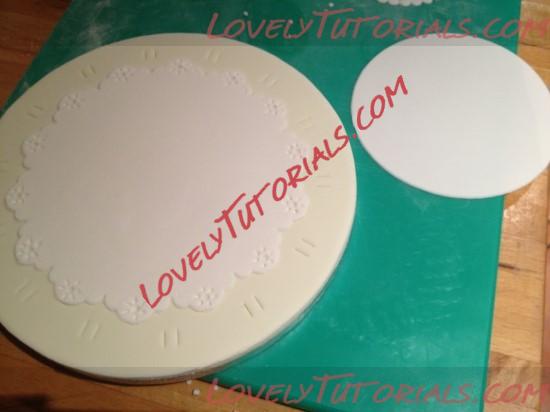
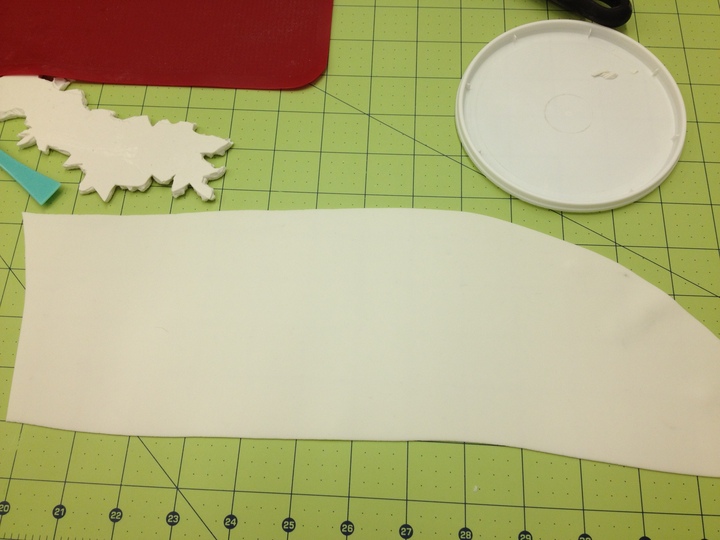
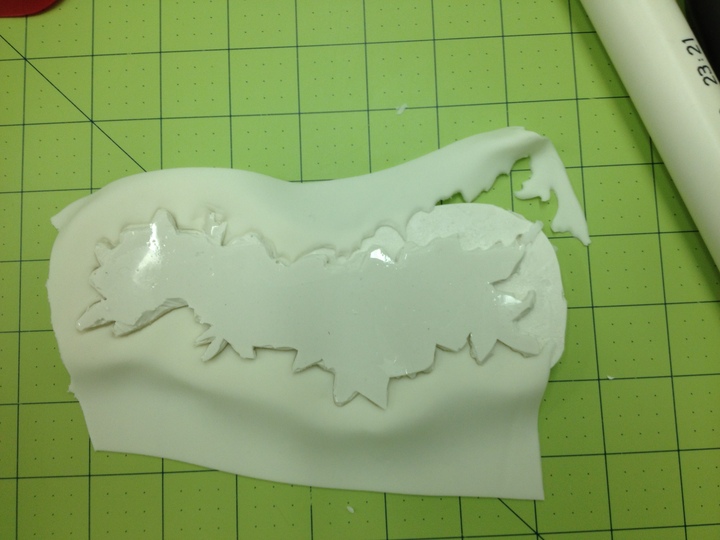
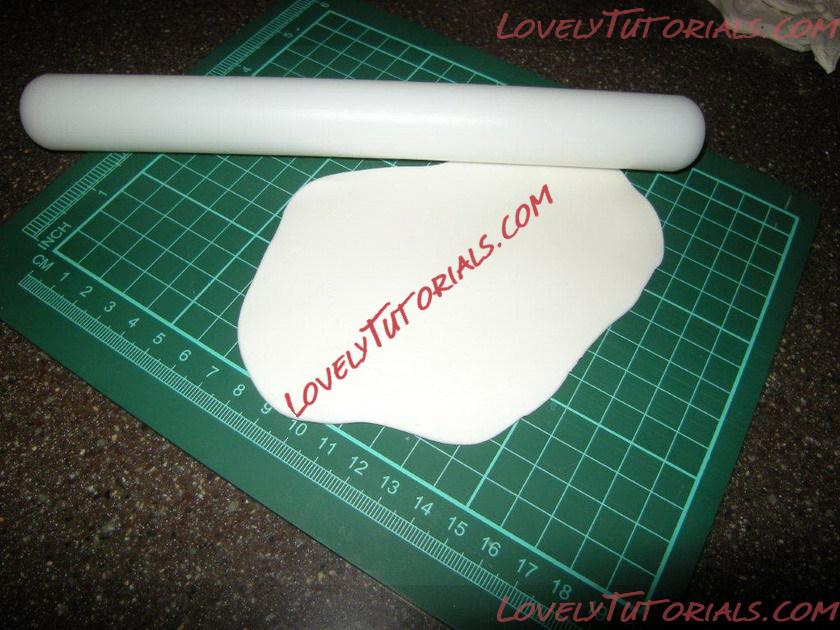
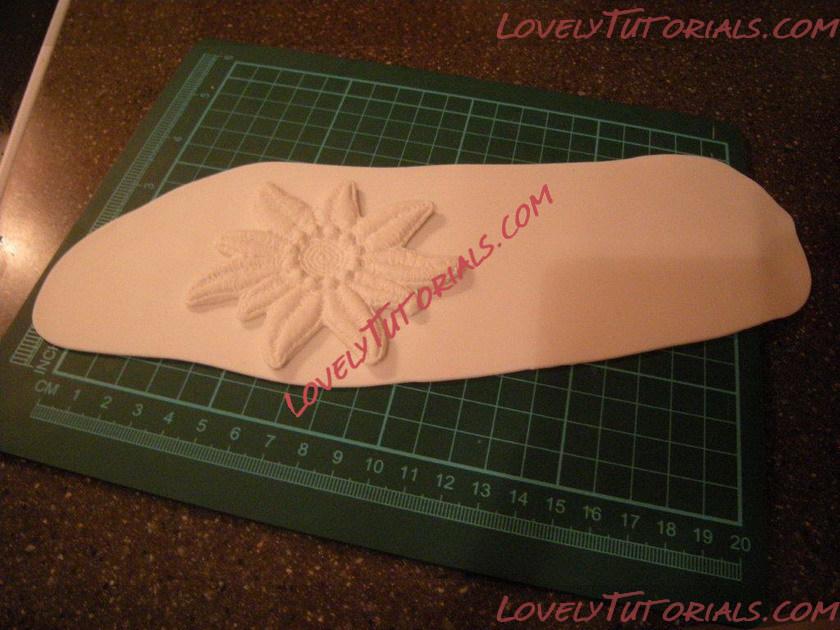
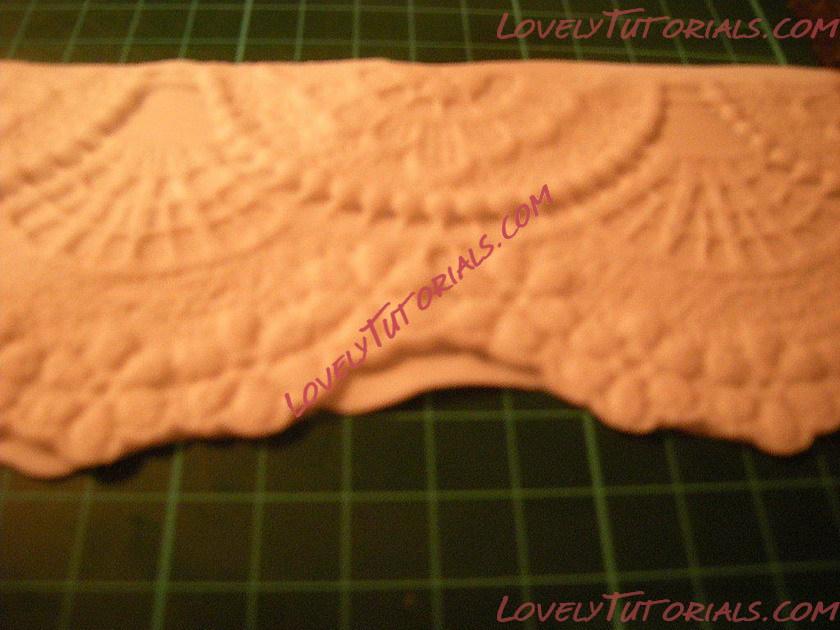
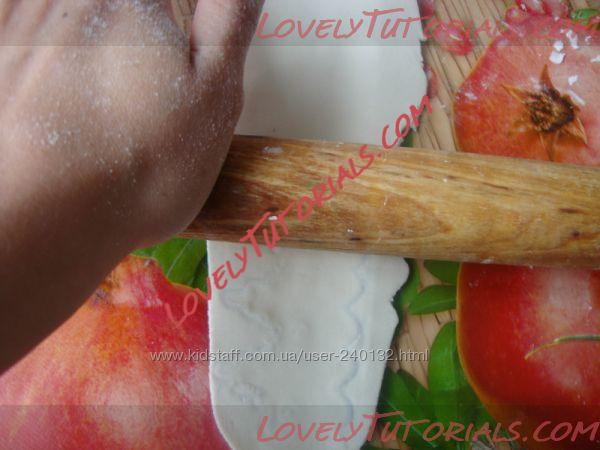
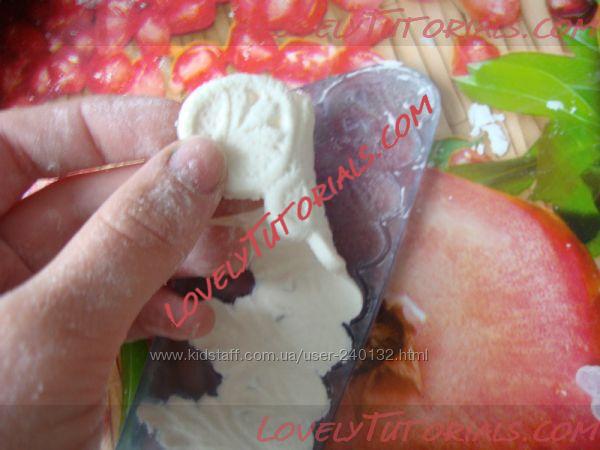
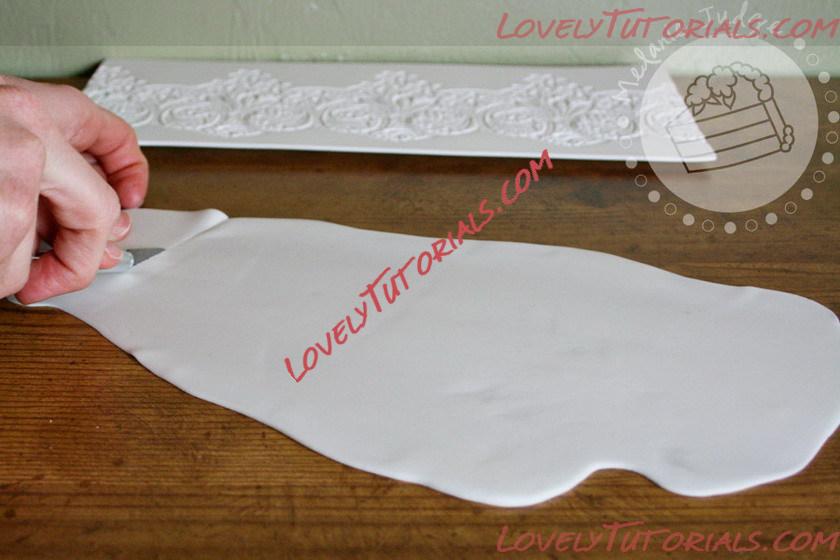
 Roll the fondant into a thin sheet, between 1/8 and 1/16 of an inch thick. You may need to lightly dust your work surface with powdered sugar to keep the fondant from sticking.
 Step 2:
 Trim edges of fondant sheet so it's easier to work with.
  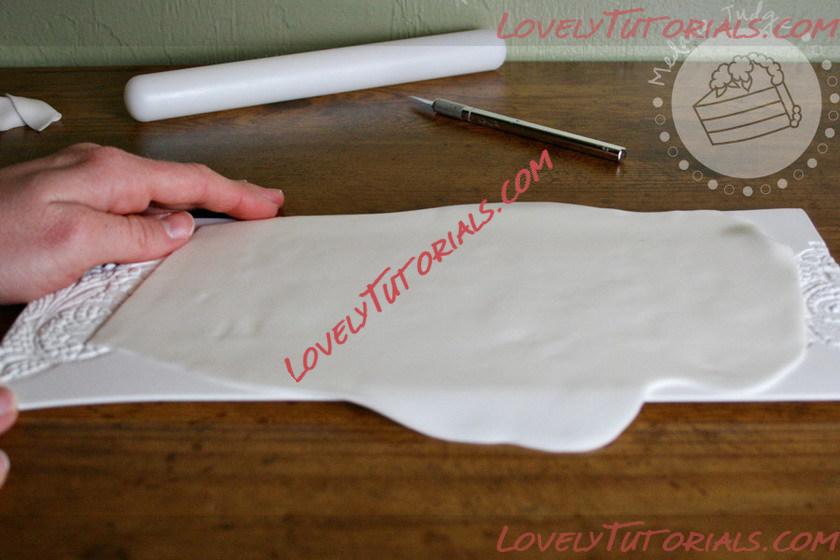 Step 3:
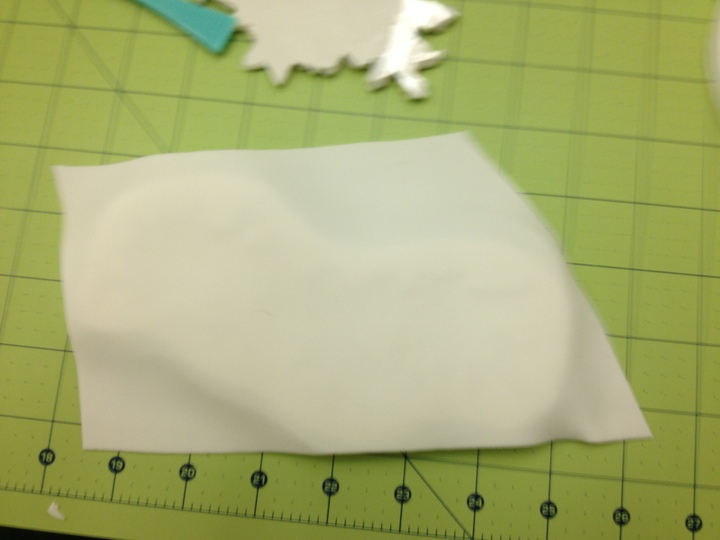
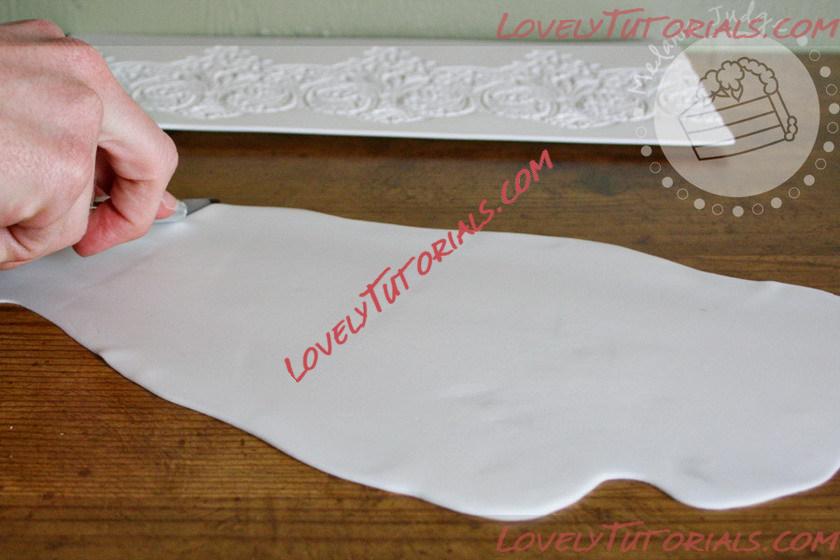
 Carefully lift the fondant sheet and place it on the lace mold.
 Step 4:
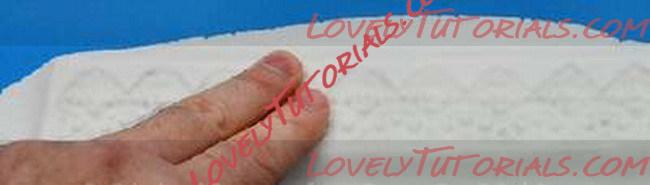
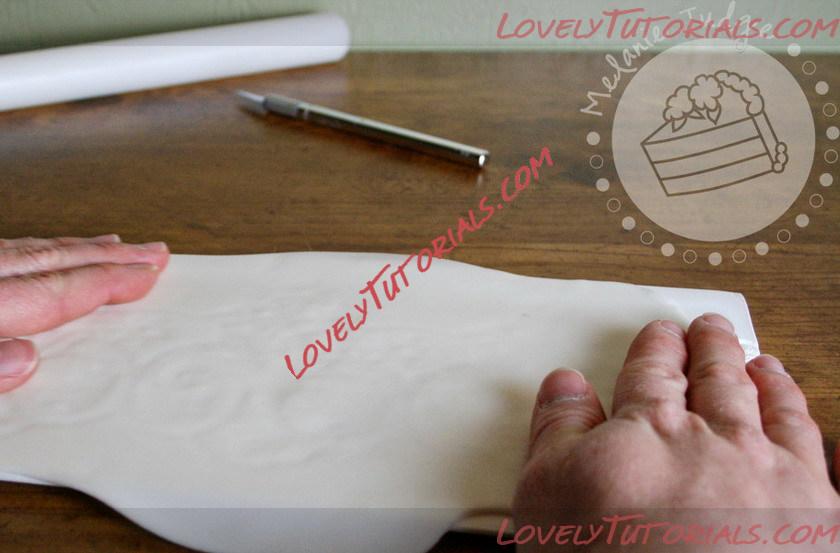
 Firmly press the fondant into the lace mold, being careful not to stretch it.
 Step 5:
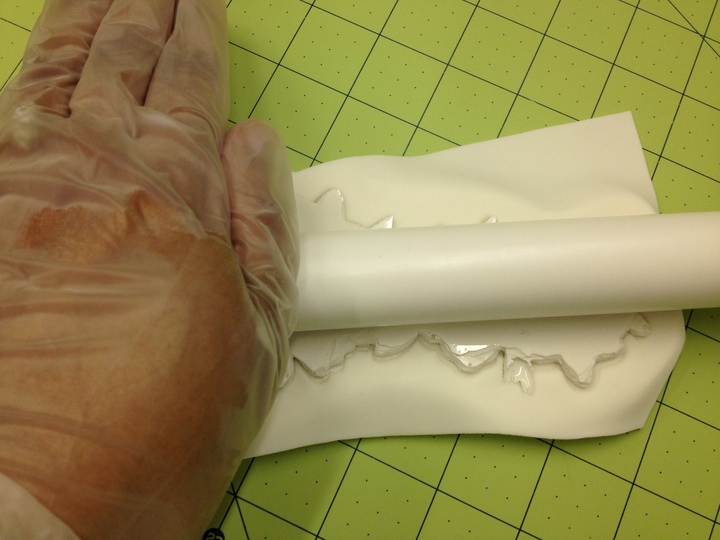
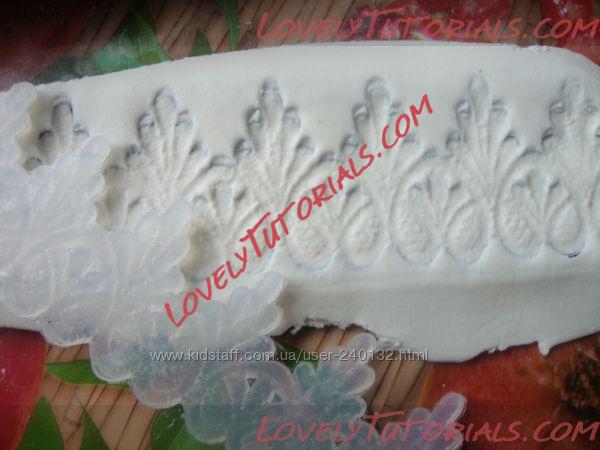
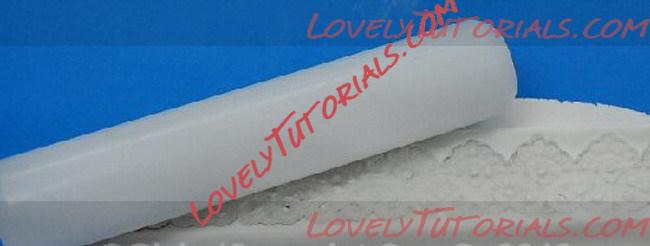
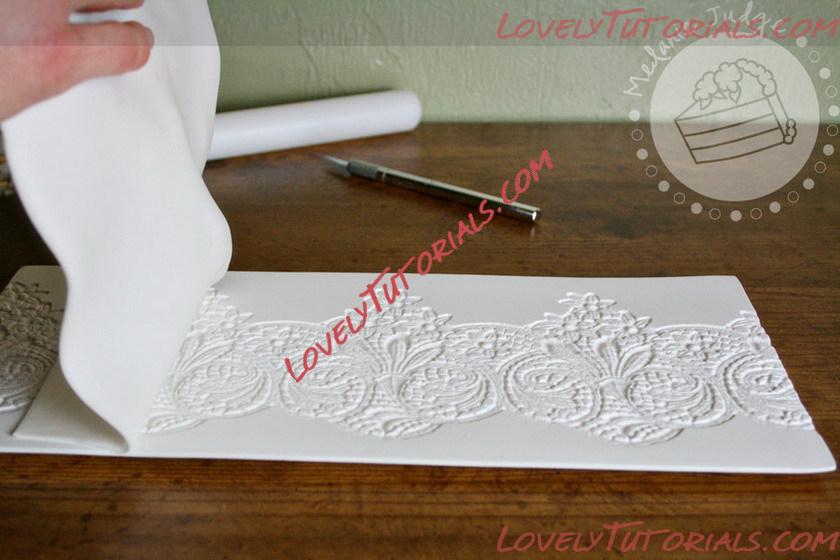
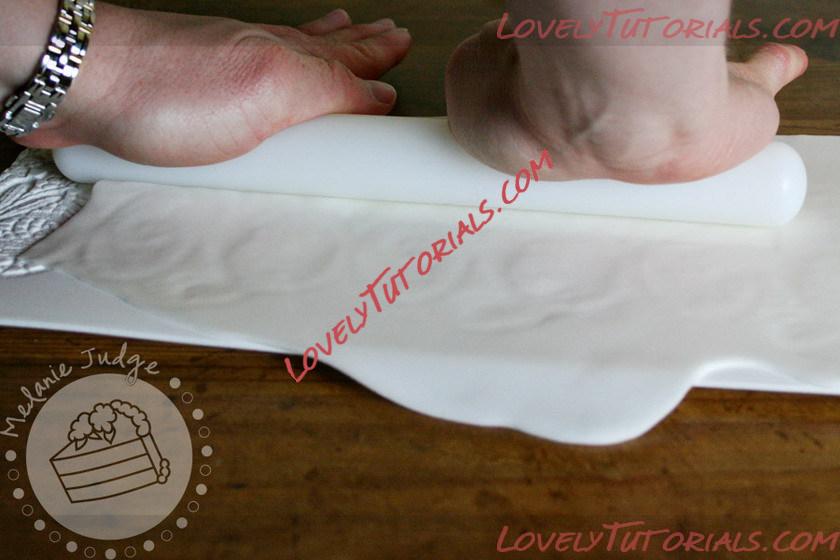
 Firmly roll over the fondant to press it further into the lace mold. I like to roll from the center upwards and then from the center downwards. Its important not to stretch the fondant or move it on the lace mold in this step. If the fondant shifts, you will get a second lace mold impression.
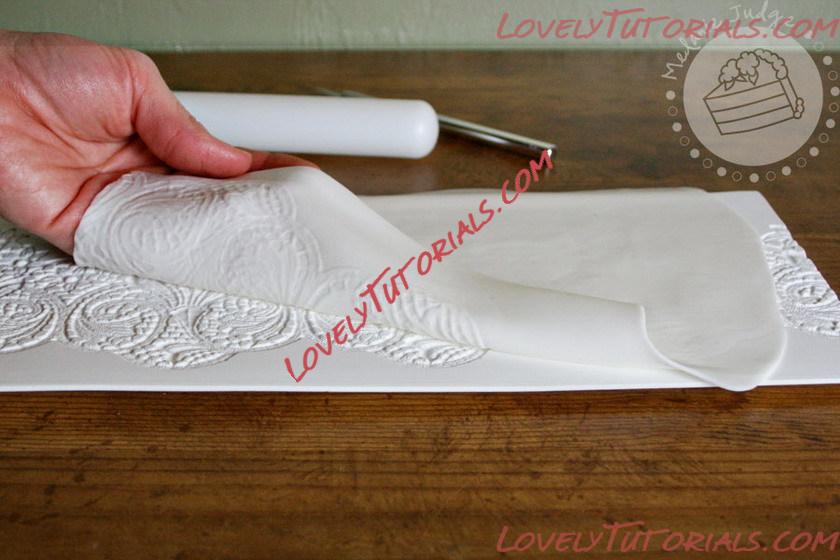  Step 6:
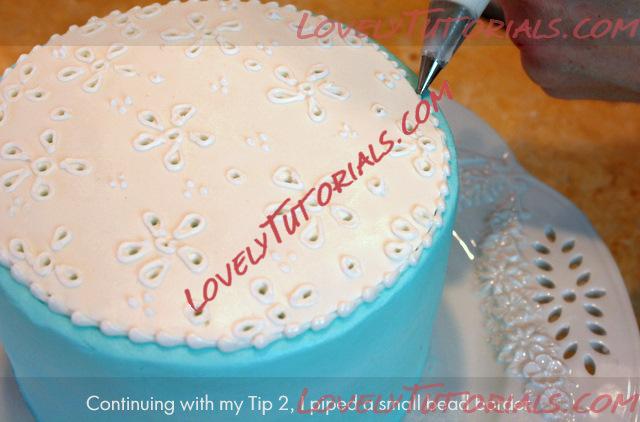
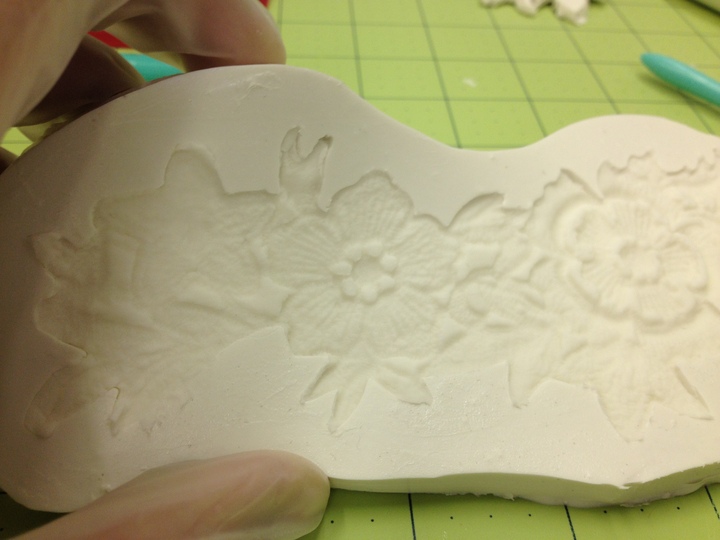
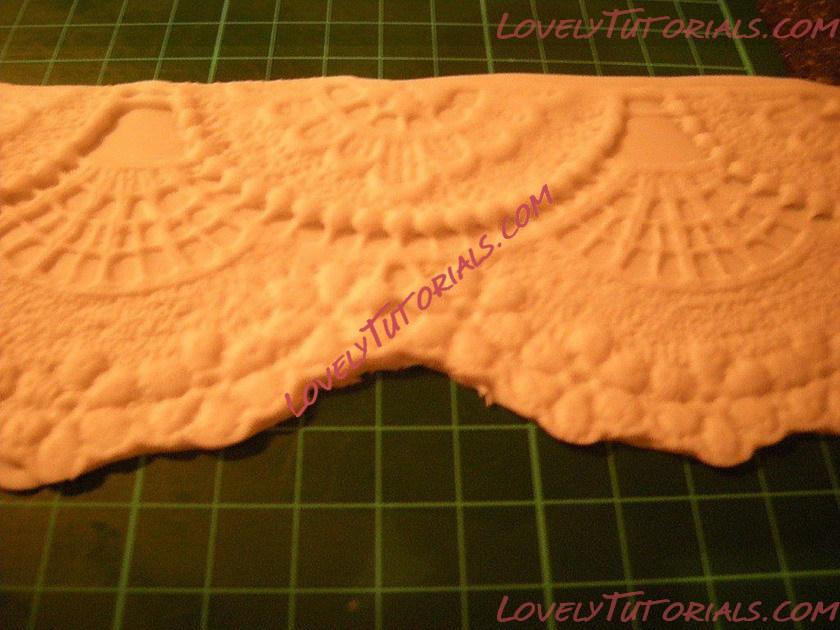
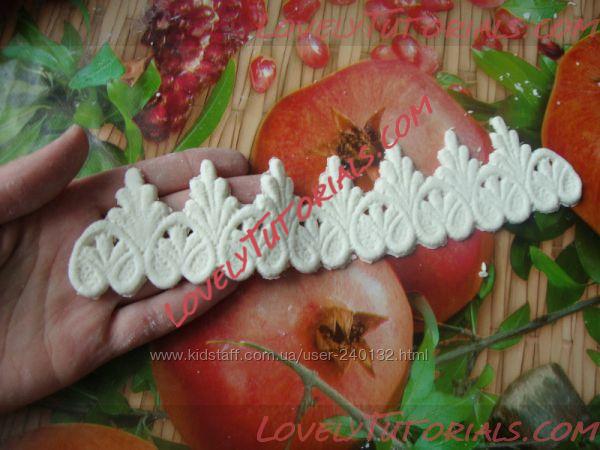
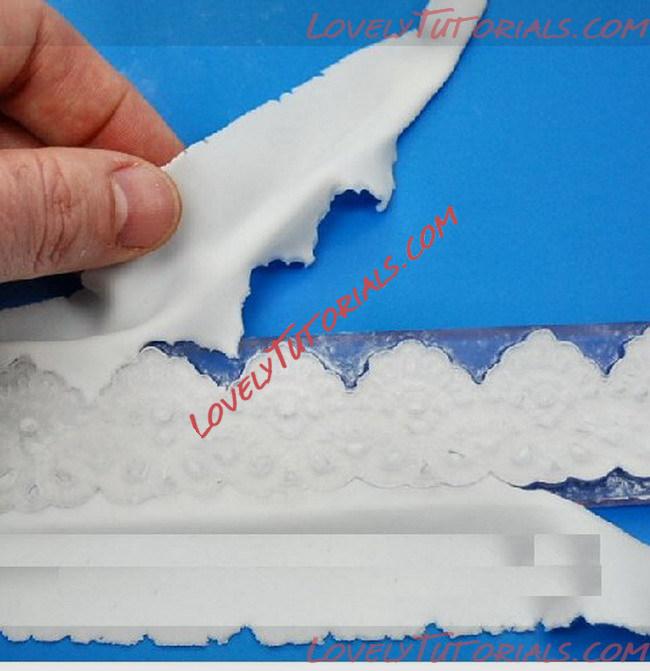
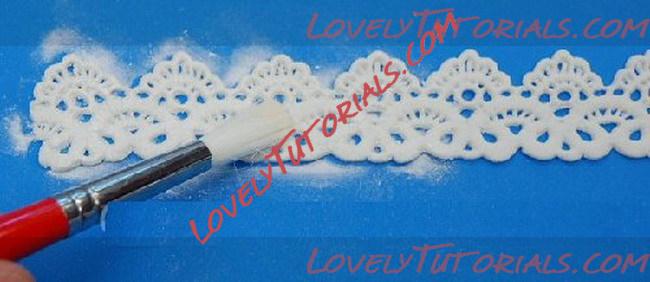
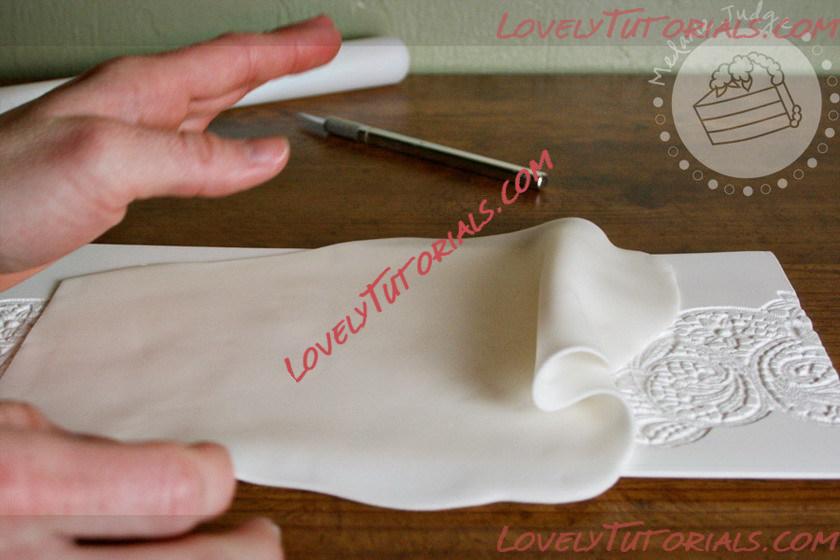
 Carefully lift the fondant off of the lace mold and place it on your work surface. If you do not see a clean, crisp lace impression in the fondant at this time, re-knead the fondant and start again.
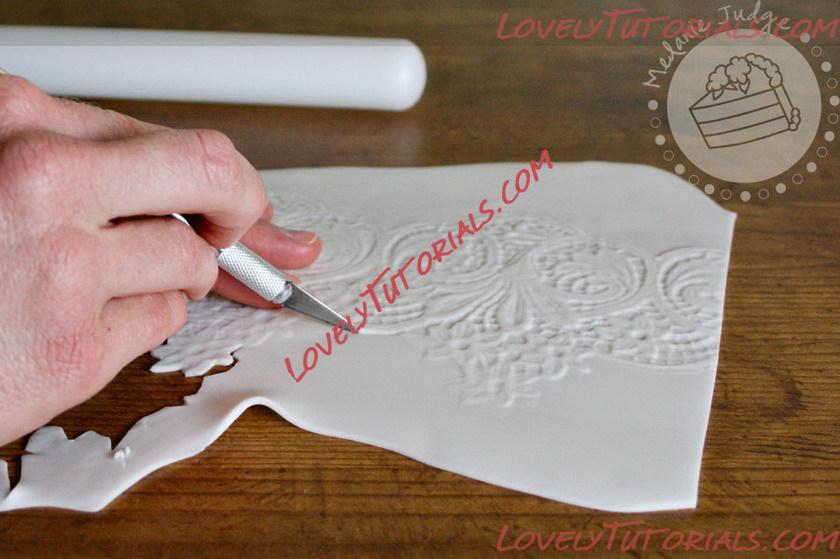   Step 7:
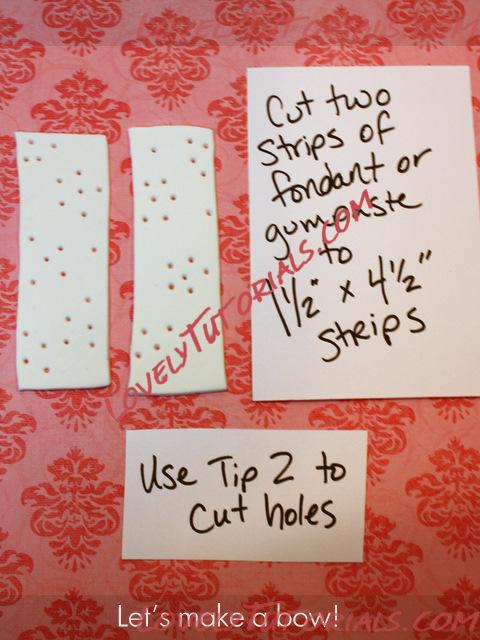
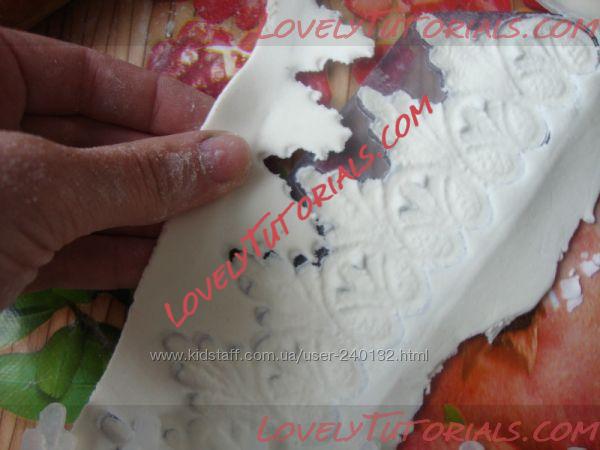
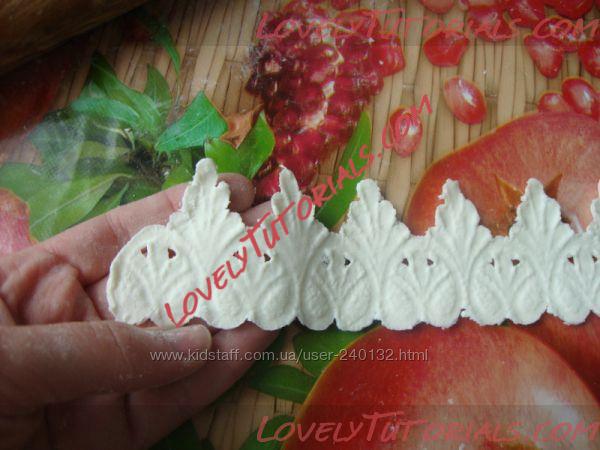
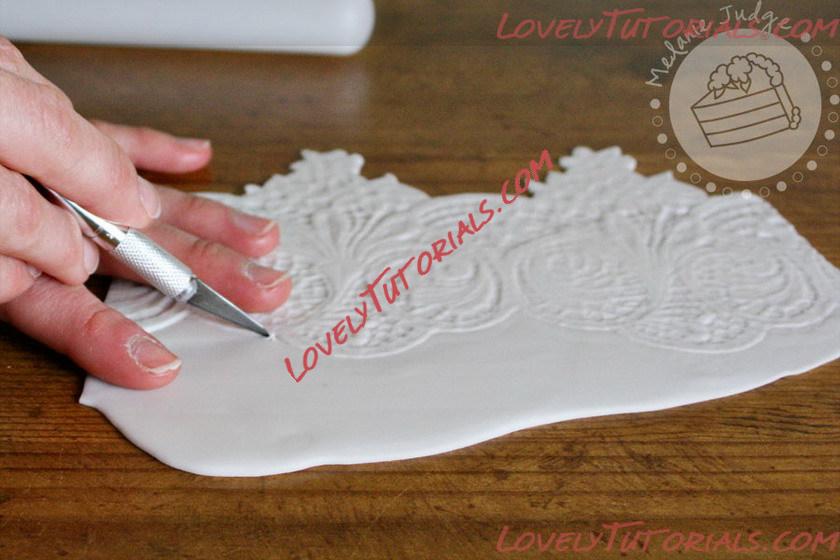
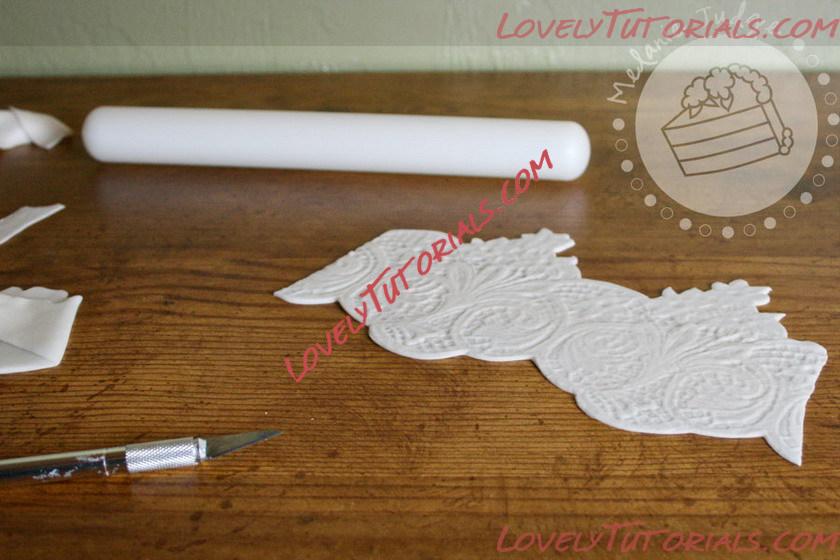
 Using a sharp knife, trim around the edges of your fondant impression. Use your imagination here! You do not have to abide by the lines of the lace mold. You can use just tiny pieces from the impression, cut more holes out of it, etc.
I find it easiest to trim the piece if I put a finger on each side of the knife. That keeps the fondant from sliding or bunching while the knife cuts through.
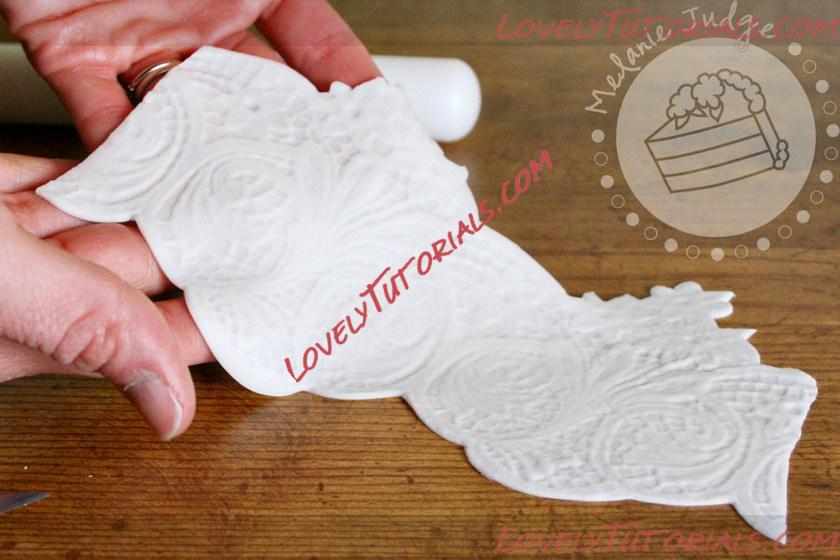 
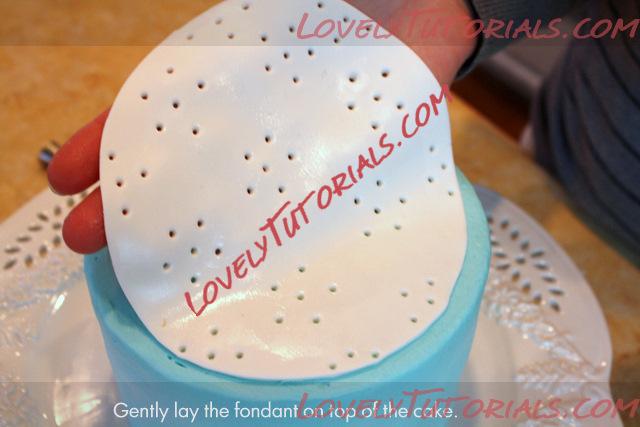
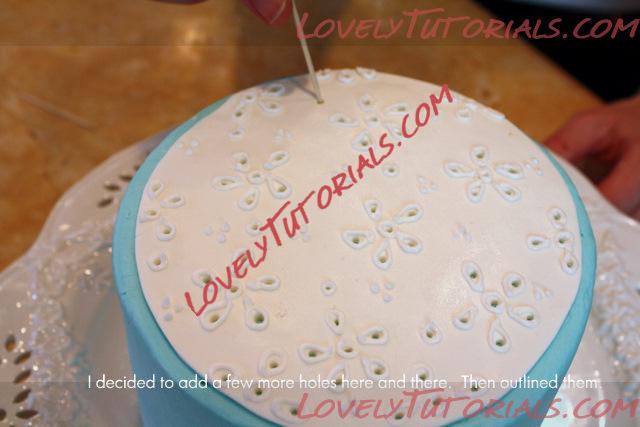
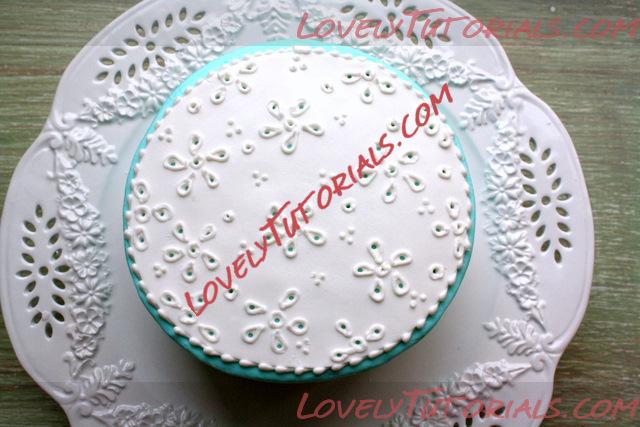
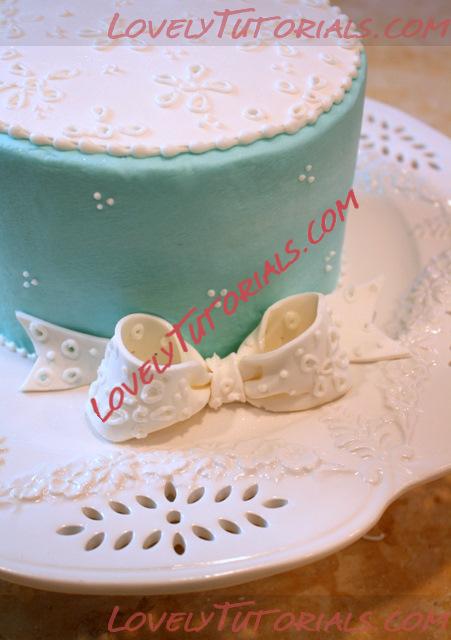
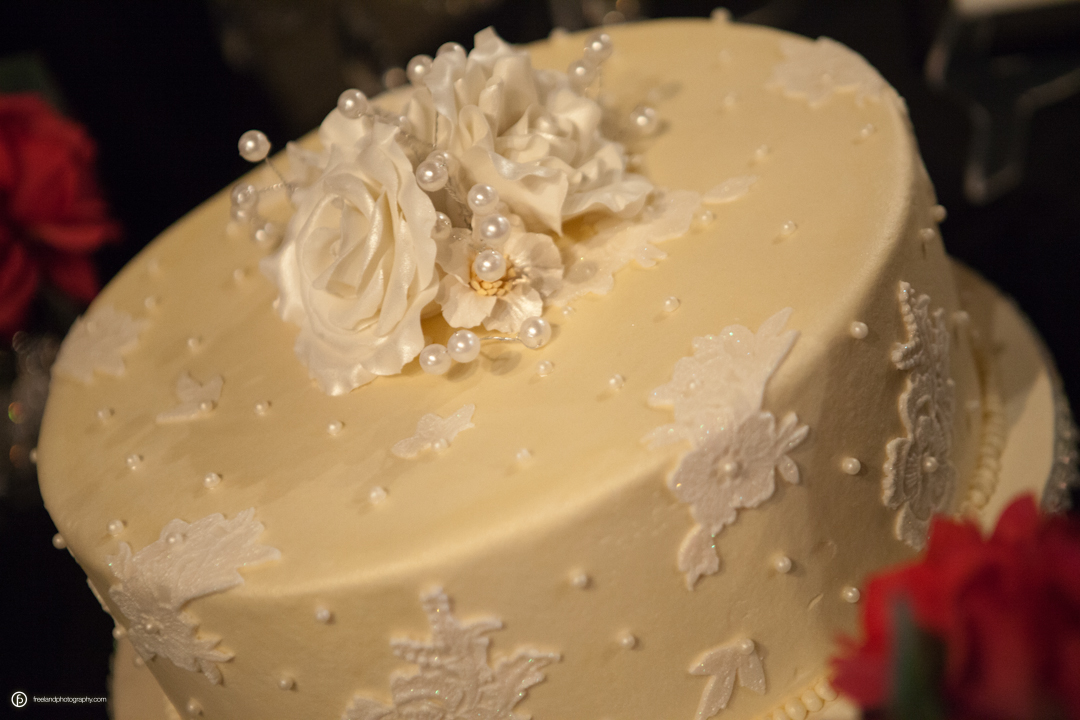
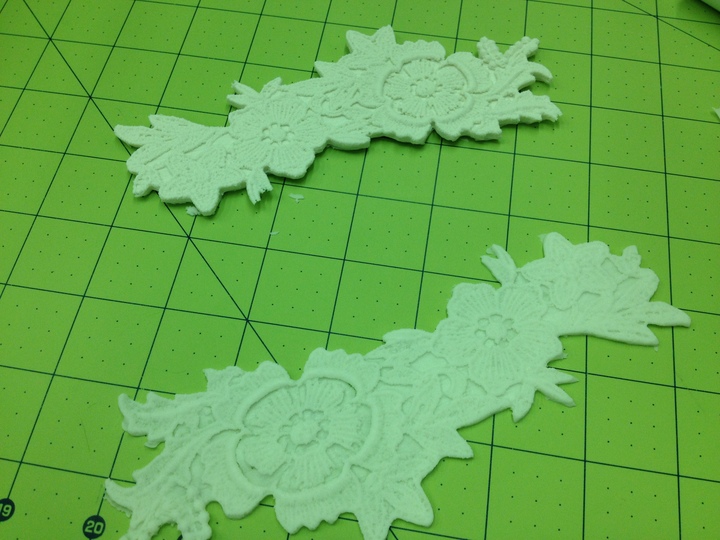
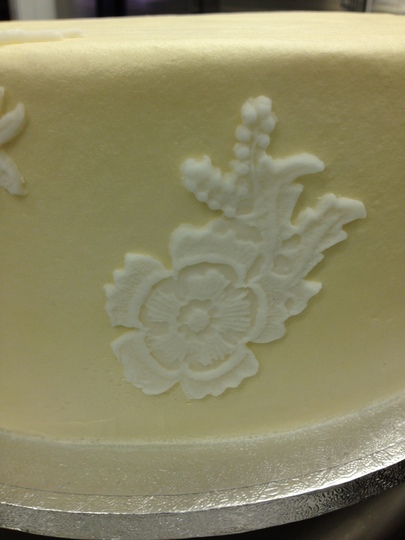
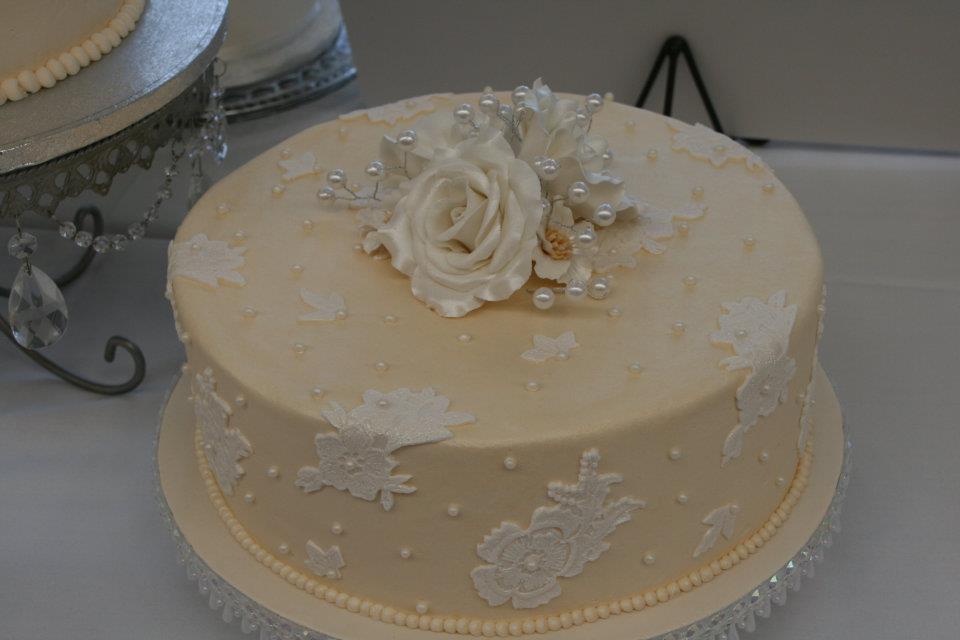
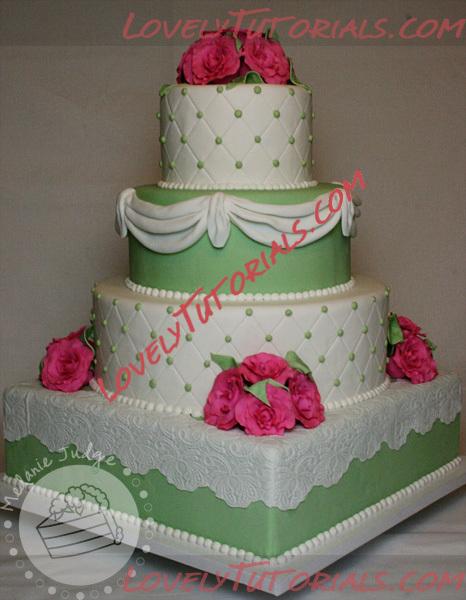
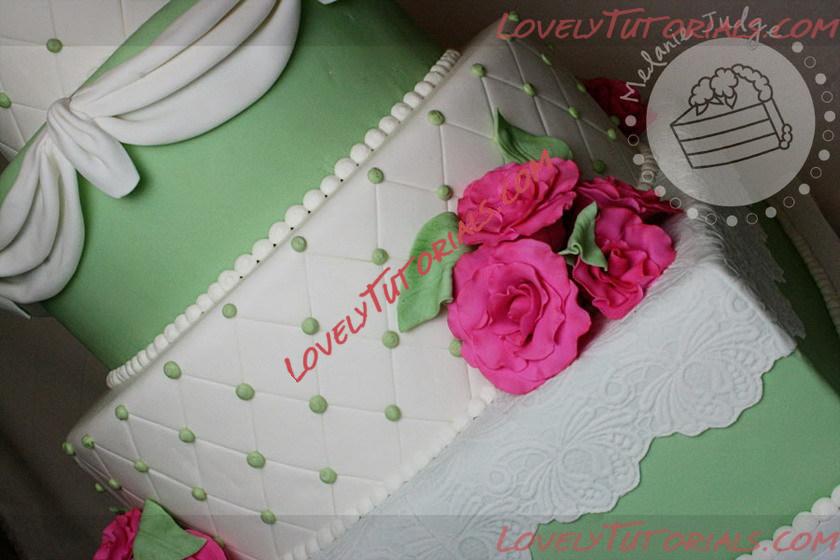
Now your fondant lace piece is ready to be applied to your cake! If you're applying it like I did on the cake above, paint a little bit of water on the cake and then carefully lay the fondant lace piece on it.
Here are a couple of other examples for how to use your lace pieces:
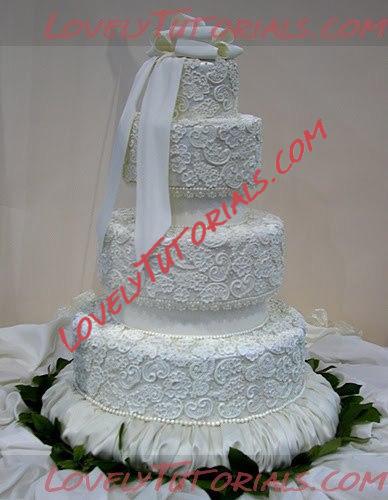 A lace patchwork cake from Earlene Moore.
|
21.09.2012, 12:40
|
|
Администратор
|
|
Регистрация: 07.09.2010
Сообщений: 7,669
|
|
Bridal Motif Lace
By Renea Feagin, Baked Expressions
Tools needed: fondant/gumpaste mix, DTC Lace Press mold, fondant roller
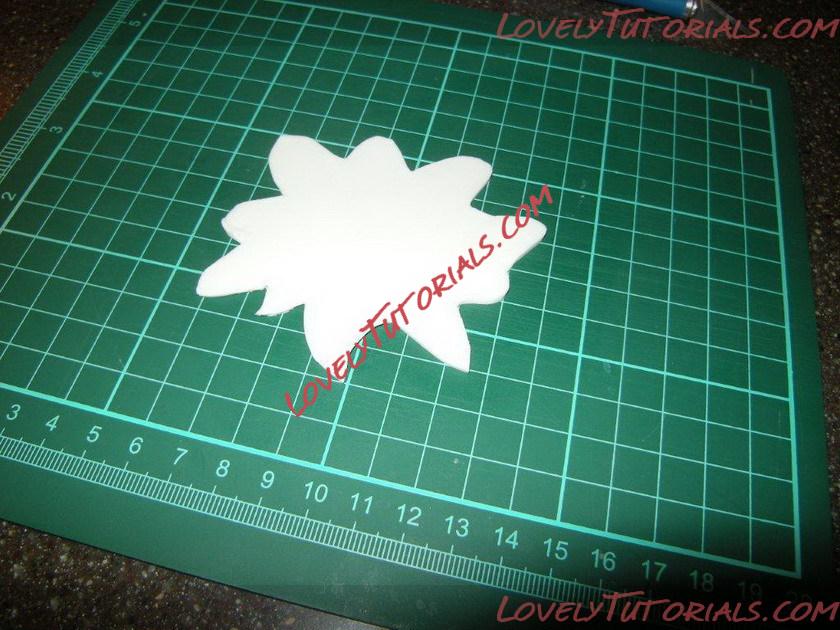
1. Roll out fondant/gumpaste to about 1/8” thick or down to a 2 or 3, using a pasta machine.
2. Lay the fondant/gumpaste over the mold.
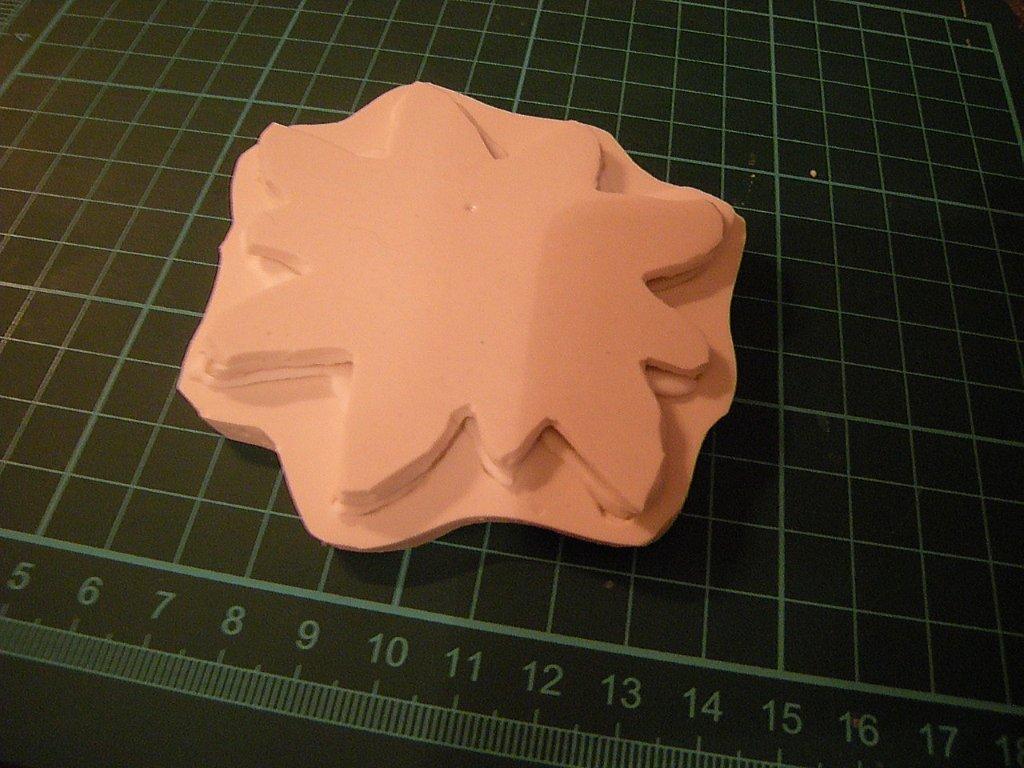
3. Position the silicone lace over the mold, matching up the pattern. Press into place.
4. Continue pressing the silicone lace into the mold, using a small fondant roller.
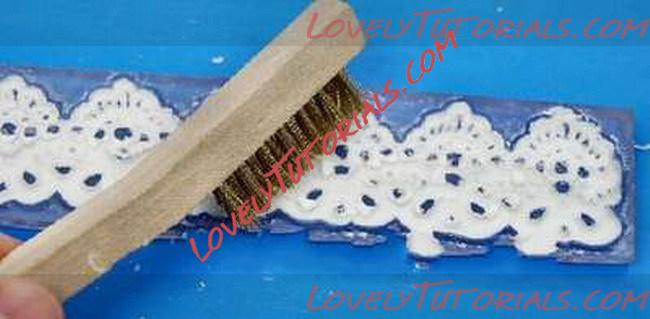
5. Gently, start peeling away or removing the excess fondant/gumpaste from the mold.
6. Once excess removed, it should look like this.
7. If there is a little fondant/gumpaste sticking over the outline of the mold, just push it back in the mold so that there is no fondant/gumpaste over the outline. This will prevent you from having to trim the finished lace.
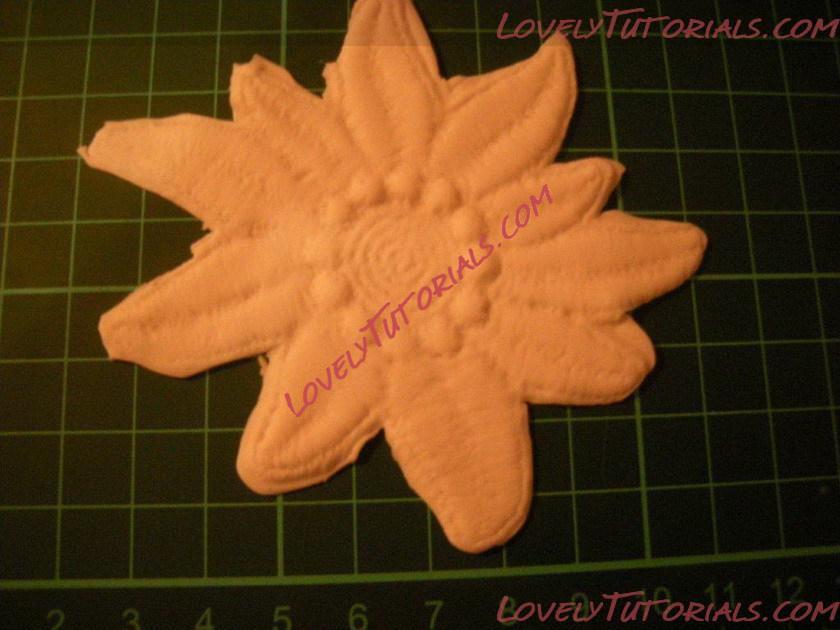
8. Flip the mold over and bend it at the end or corner and allow the lace appliqué to fall out and release from the mold.
a. At this point, you can use the mold as one piece or cut out desired portions of the lace appliqué
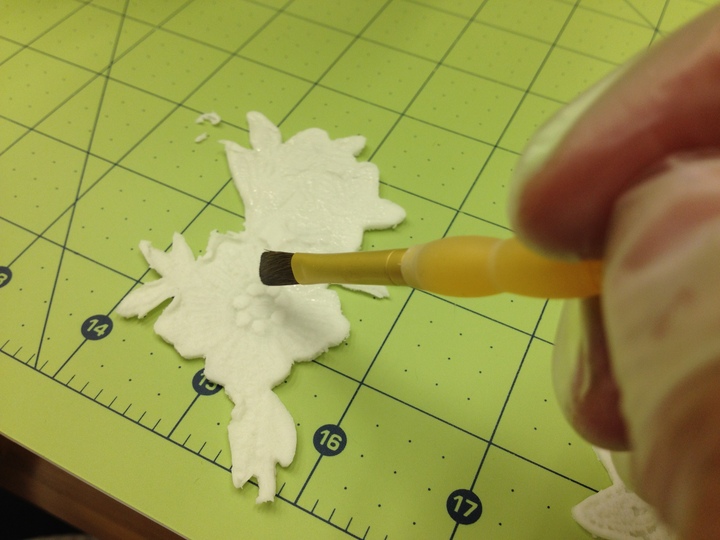
9. Brush the back of the mold with water. Do not over apply the water. The appliqué should be “tacky” to the touch but not too wet.
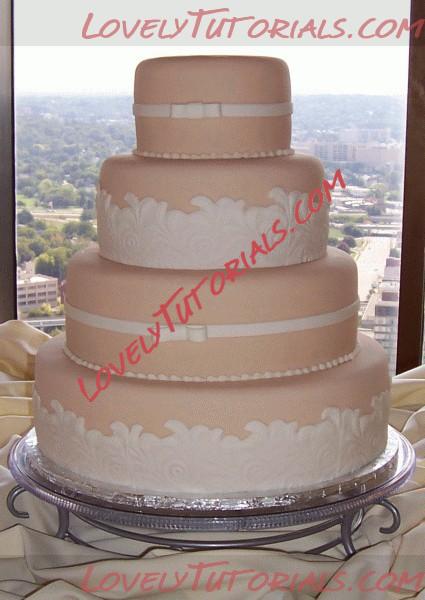
10. Place the lace piece on an iced cake and decorate as desired.
Finished Product!
Visit Renea's Facebook Page to check out more of her wonderful designs. Baked Expressions
|
21.09.2012, 12:44
|
|
Администратор
|
|
Регистрация: 07.09.2010
Сообщений: 7,669
|
|
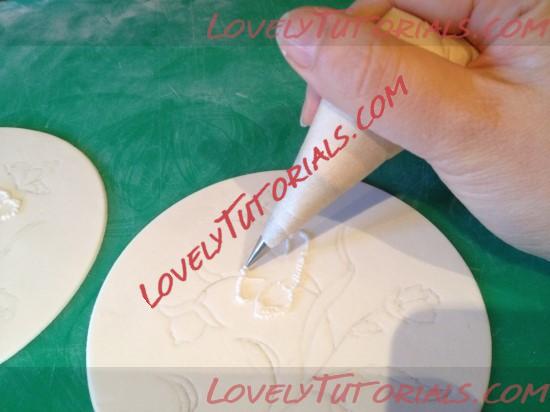
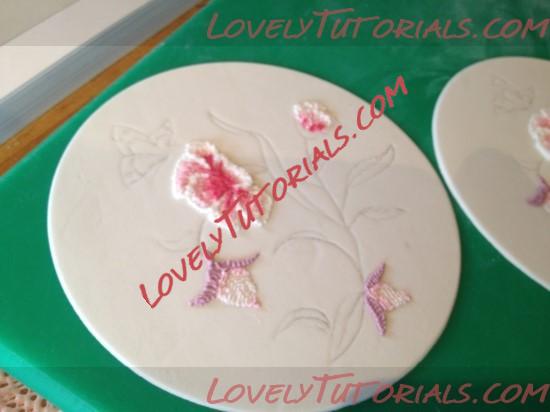
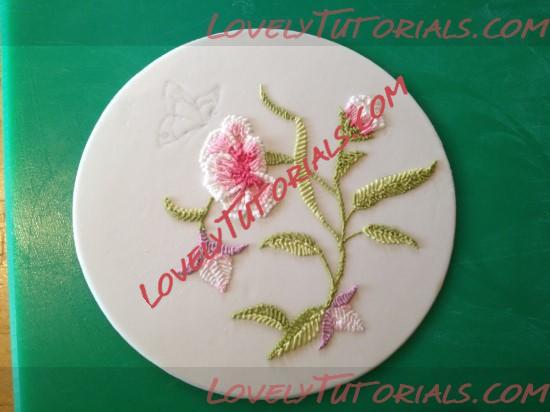
Tutorial - DTC's Lace Press Molds
Огромная благодарность Автору morselsbymark за Мастер-класс
Tutorial - DTC's Lace Press Molds
Hi Everyone! I am so honored to be part of Decorate the Cake's product test group! My name is Mark, and I own Morsels By Mark in Montreal, Canada. This is my first time guest-blogging, but I do have my own sugar related blog where I talk sugar and even interview some pretty famous people in the industry!
I love the line of lace molds available at DTC and they are by far the best quality I have found out there! On top of great quality, the entire line of products are reasonably priced, shipped in a reasonable amount of time considering they are all made to order, the selection is incredible, and I have never had such incredible customer service! So, without any further adieu, here is a little tutorial I came up with on how to use DTC's lace press molds:
Materials:
Lace Press Mold
Rolling Pin
Embellishment of your choice (pearl dust, luster dust, highlighter dust) if desired Molding medium of your choice (I used gumpaste, but fondant or modelling chocolate work also)
Step One
Soften gumpaste by kneading it with a little bit of shortening until it is smooth and pliable
Step Two
Roll the gumpaste out to a little over the same size as your mold. You want to get it to about the same thickness as the depth of the mold. I use my Kitchen-Aid pasta roller attachment on
number 1 or 2. Use a small pallet knife to trim it to size.
Step Three
Place the gumpaste in the cavity of the mold. Press the excess into the cavity and smooth. Use
the press back to apply pressure and emboss your lace.
Step Four
Turn your molded piece out onto your work surface, trim excess paste from edges using an
exacto knife.
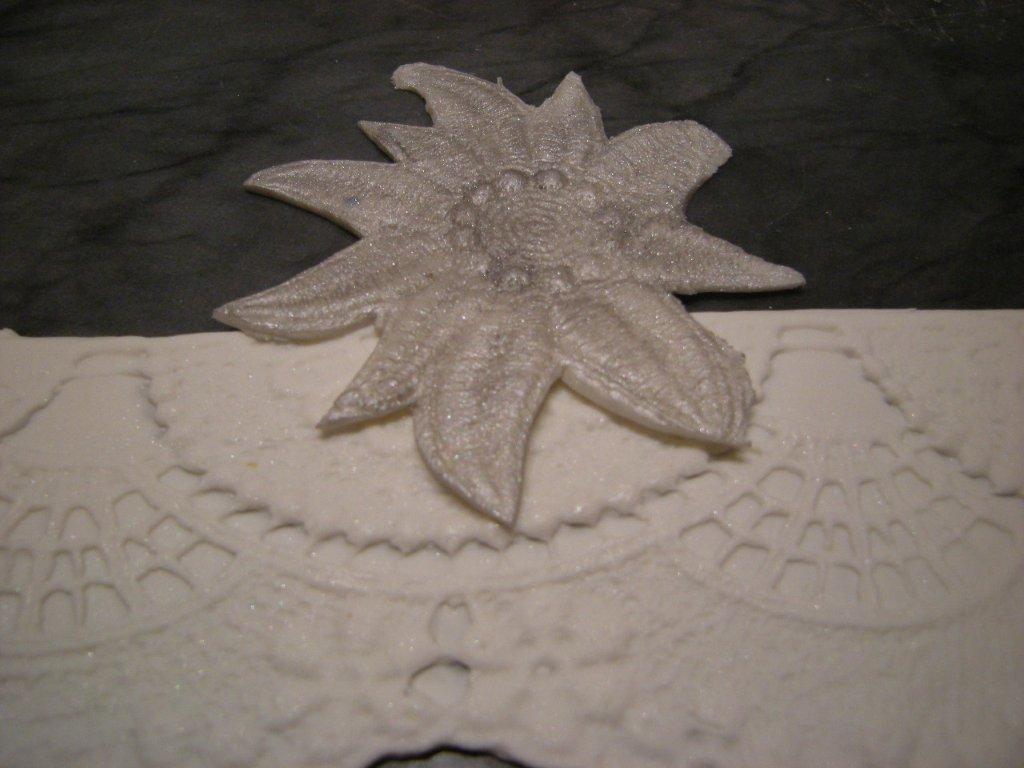
Step Five
Finish using whatever method you choose. Here I used pewter shimmer dust on the small flower applique, and pearl dust on the large lace border. For a metallic look (think of those embossed ceiling panels), you can mix some metallic highlighter with some clear alcohol or extract and paint it on.
Tips and tricks:
- To really make the lace pop, I highly recommend using luster or pearl dust to help bring out the pattern of the piece. I also love the way black lace pops off of a red or white fondant background!
- Smaller shaped two-piece molds can be tough to piece together once medium is in base of mold. Before using, use a Sharpie marker to mark registration lines on the mold for easy match-up.
- If using fondant, mix with a bit of tylose to give it some added strength
- If you need to make a lot of smaller applique pieces, I recommend making a template to cut your rough pieces out before molding to speed the process up a bit
- When trimming paste, always make sure your blade is clean and still sharp to ensure a perfect cut
|
21.09.2012, 12:48
|
|
Администратор
|
|
Регистрация: 07.09.2010
Сообщений: 7,669
|
|
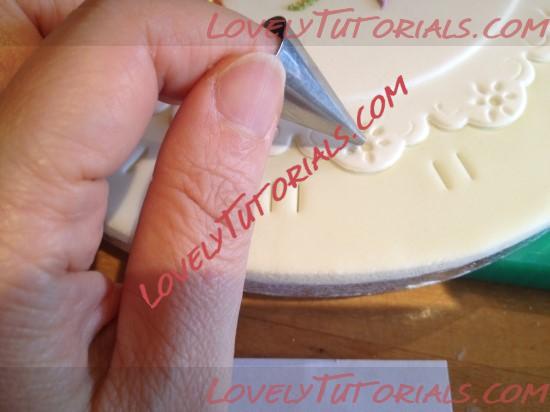
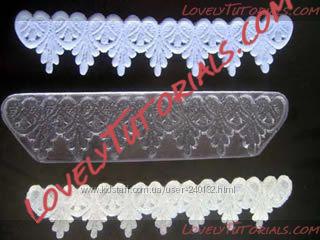
молд для кружевных украшений для мастики кружево ПАРИЖ
|
21.09.2012, 12:52
|
|
Администратор
|
|
Регистрация: 07.09.2010
Сообщений: 7,669
|
|
|
 |
|
|
Метки
|
3d figures, addım-addım təlimat, adım, adım adım yönergeler, artesanatos passo a passo, bemutató, birthday cake, biscuit, bolando bolos, bolos decorados, cake decorating, cake decorating techniques, cake topper, cake toppers, cake tops, cerâmica plástica, character figures, characters, children's cake, cold porcelain, confeitando bolos, csipke, curso de modelado, dantel, dantelă, decoracion de pasteles, decoración de tortas, decorada en fondant, decorare le torte, decorazioni, deko fondant, dekorace na dort, dekoracija, dekoracije, dekorasyon, dekorácie, dentelle, encaje, especializada em modelagem de biscuit, fender, figur kager, figuras, figure making tutorials, figuren, figures, figurice, figurice od fondana, figurine on the cake, figurines, figurinhas, figurky, figúrky, figür modelleme, fimo, fixando a cabencinha, flower paste, fondan, fondant, fondant lace tutorials, fondente, fondente di zucchero, fotopostup, foundant, gebak, glazuur, gum pasta, gum paste, gumpaste, hand-made, handmade, how to, how-to's, instrucţiuni, instrukcijas, instrukcje, jak na, kage dekoration, kagedekoration, kakebaking, kant, korak, korak za korakom navodila, korak-po-korak upute, koristeet ja koristelu, krajka, krok, krok po kroku, krok za krokem, krok-za-krokem, la modélisation, lace, las instrucciones, las técnicas, le tecniche, les techniques, lukie, marcipanové figurky, marshmallow, marsipanfigurer, masa flexible, master-class, master-klasse, master-klasy, meistras klasės, metodikas, mistr třídy, modelado, modelagem, modelando a barriga, modelando a cabencinha, modelando a perninha, modelando as maozinhas, modelando o cabelinho, modelando o corpinho, modelando os bracinhos, modelando os pezinhos, modelare, modelerte figurer, modeling, modeling paste, modeliranje, modellazione, modelleme, modellering, modellieren, modellierpaste, modelling, modelling past, modelləşdirmə, modelovanie, modelování, modelování krok za krokem, modelowanie, motivtorten, návod, návody a postupy, návody na květy a lístky, nėriniai, opplæringen, orelhas, ozdoby, pamoka, pap, pas, pas-cu-pas, pas-à-pas et modèles, paso, paso a paso, passo, passo a passo, passo-a-passo, passo-passo le istruzioni, pasta de goma, pasta de miel, pasta flexible, pasta laminada, pintura dos olhos, pitsi, pizzo, pocelana fria, polymer clay, postupak za ukrasavanje, pravljenje figurica za torte, pâtisserie, předměty z marcipánu, renda, schmelzend, schnüren, schritt für schritt anleitung, schritt-für-schritt, schritt-für-schritt-anleitungen, sculpting, snøre, soggetti, souvenirs, spetsar, stap, stap-voor-stap, stap-voor-stap instructies, steg for steg, steg-för-steg-instruktion, step, step by step, step-by-lépésre, step-by-step, step-by-step instructions, styrofoam, sugarcraft, sugarpaste, suikerglazuur, technieken, techniken, techniki, techniky, technikák, techniques, tecnicas de decoracion, tecniche, tehnici, tehnike, teknikker, teknikler, telgopor, topo de bolo, topo do bolo, topos de bolo, torte, torte decorate, torten dekorieren, torti, trin, trin for trin, trin-for-trin, trin-for-trin instruktioner, trinn, trinn for trinn, trinn-for-trinn-instruksjoner, trucs et questions sur la décoration de gateaux, tutorial, tutoriale, tutorias, tutorias/ideas para decorar los bizcochos, tutoriel, tutoriels, tutorijal, técnicas, udžbenik, ukrašavanje torti, uputstvo za dekoraciju, zasznurować, zuckerfigürchen, zuckermasse, सजा केक, ट्यूटोरियल मास्टर वर्ग, कदम, कदम दर कदम निर्देश, तकनीक, मॉडलिंग, モデル, étape, étape par étape les instructions, öğretici, 一步, 一步一步的指示術, čipka, žingsnis, žingsnis po žingsnio, šnurovať, 宗師級教程, 建模, 裝飾蛋糕, 黏土教程, δαντέλα, βήμα, βήμα προς βήμα οδηγίες, οδηγίες βήμα βήμα, παντεσπάνι art, τεχνικές, φροντιστήριο, дантела, декорация на торти стъпка по стъпка, инструкция, как сделать, карункі, крок за кроком, крок за крокам, кружево, оздоблювати мереживом, покроково, полимерная глина, пошагово, пошаговые фотки, пакрокава, персонажи, миниатюра, мк, мк кружева из мастики, моделиране, майстор-класа урок, майстар-клас, майстер-клас, майстер-класи, маршмеллоу, мастика, мастер-класс, лепка, ліплення, ручной работы, ручная работа, украшение тортов, сахарная мастика, уроки прикрашання, стъпка, стъпка по стъпка инструкции, торта стъпка по стъпка, техники, техника, техніка, туториал, туторіал, тэхніка, фигурки, фигурка на торт, фимо, фонданта, фігурки, фігуркі, холодный фарфор, шаг за шагом, інструкцыя, інструкція  |
|