|
|
Как сделать красивый бантик-How to make a beautiful bow V3
|

20.01.2013, 19:03
|
|
Администратор
|
|
Регистрация: 07.09.2010
Сообщений: 7,669
|
|
|
03.02.2013, 18:05
|
|
Администратор
|
|
Регистрация: 07.09.2010
Сообщений: 7,669
|
|
Огромная благодарность Автору за Мастер-класс
|
06.04.2013, 21:29
|
|
Администратор
|
|
Регистрация: 05.03.2013
Сообщений: 665
|
|
|
08.04.2013, 08:53
|
|
Администратор
|
|
Регистрация: 05.03.2013
Сообщений: 665
|
|
|
12.05.2013, 20:08
|
|
Администратор
|
|
Регистрация: 05.03.2013
Сообщений: 665
|
|
Огромная благодарность Автору за Мастер-класс
|
25.05.2013, 21:59
|
|
Администратор
|
|
Регистрация: 05.03.2013
Сообщений: 665
|
|

Огромная благодарность Автору Tatiana за Мастер-класс

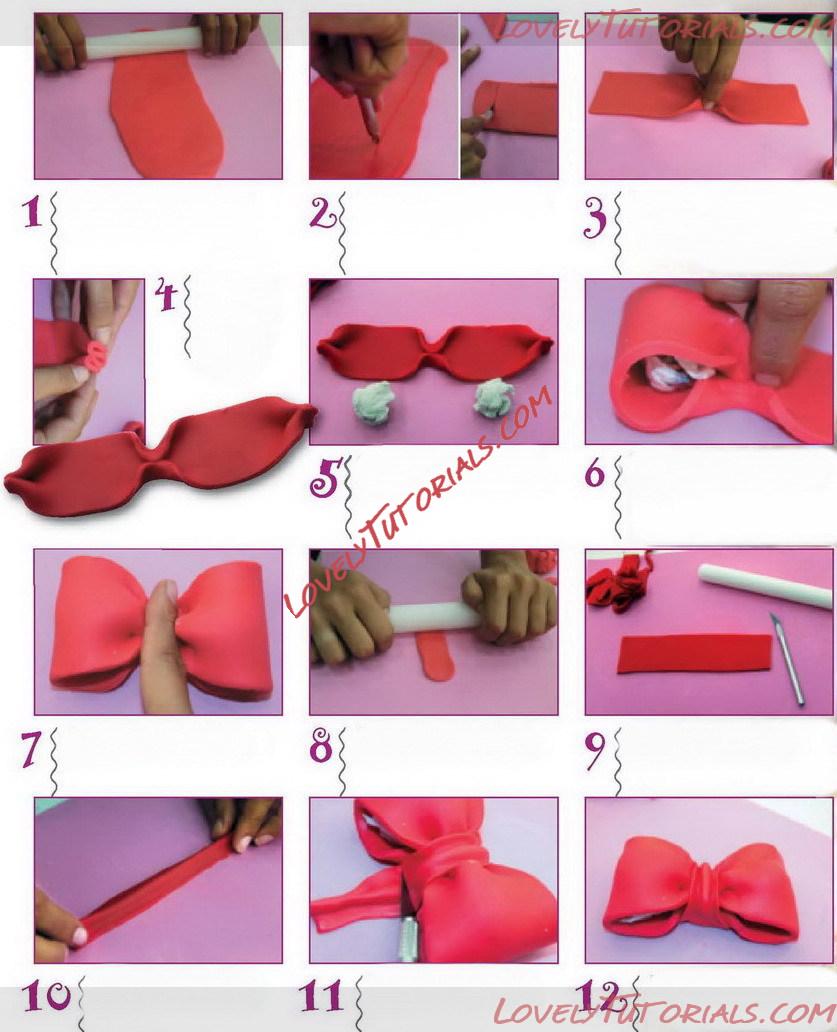
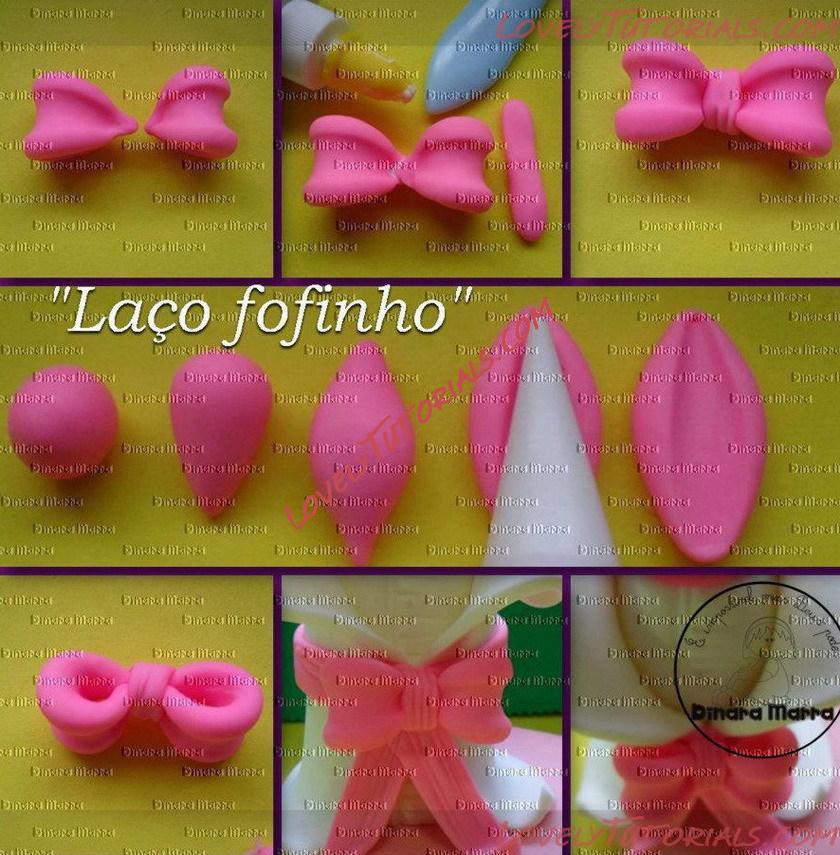
I absolutely love girly bows. Ever since my daughter had long enough hair to be put back, I felt the need to have a matching bow or hair accessory for each outfit she’d wear. Gymboree bows were definitely a staple  I really wanted to make a bow out of fondant that looked just like one of those fun adorable bows. Here is a tutorial on how to make a double bow. You can add more layers of loops and ribbon or even cute decorative accents.

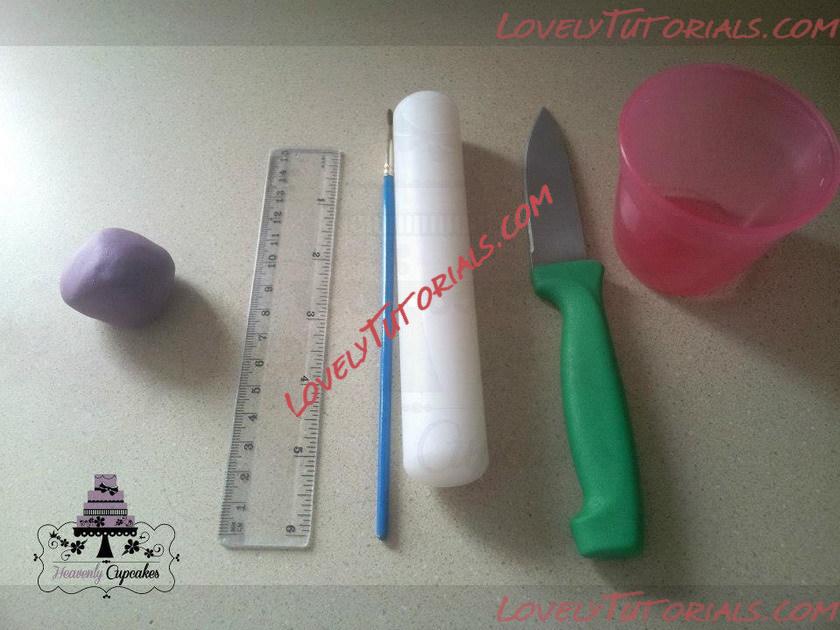
To start, I use rolled up wax paper cut into different lengths as inserts for my bow loops to dry. I find that this method helps me to customize the size of the loop and adapt accordingly while in the midst of working.


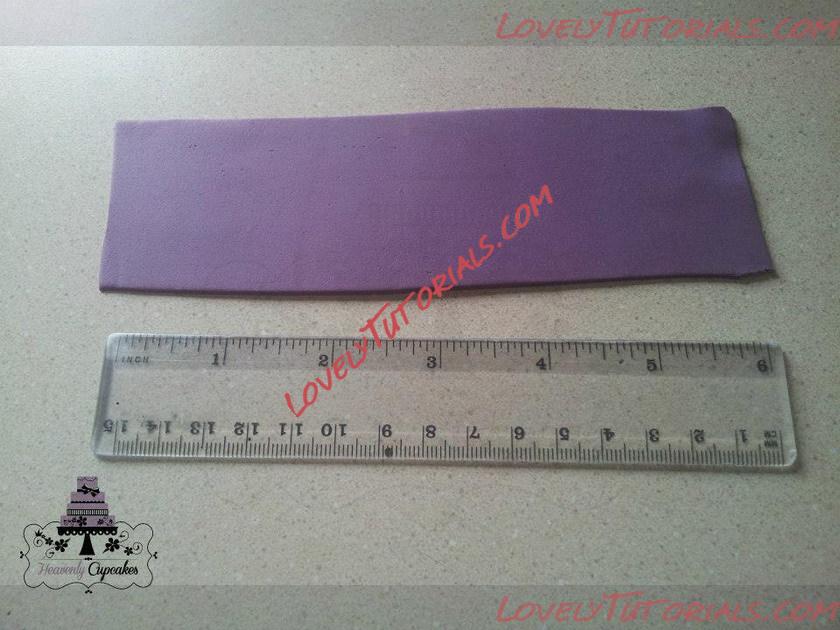
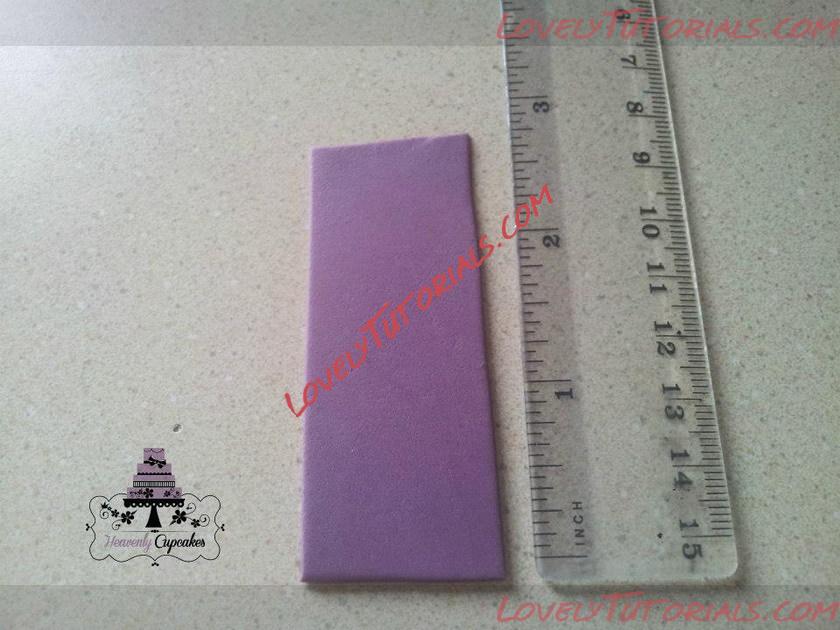
Roll out fondant and cut into desired size strip.

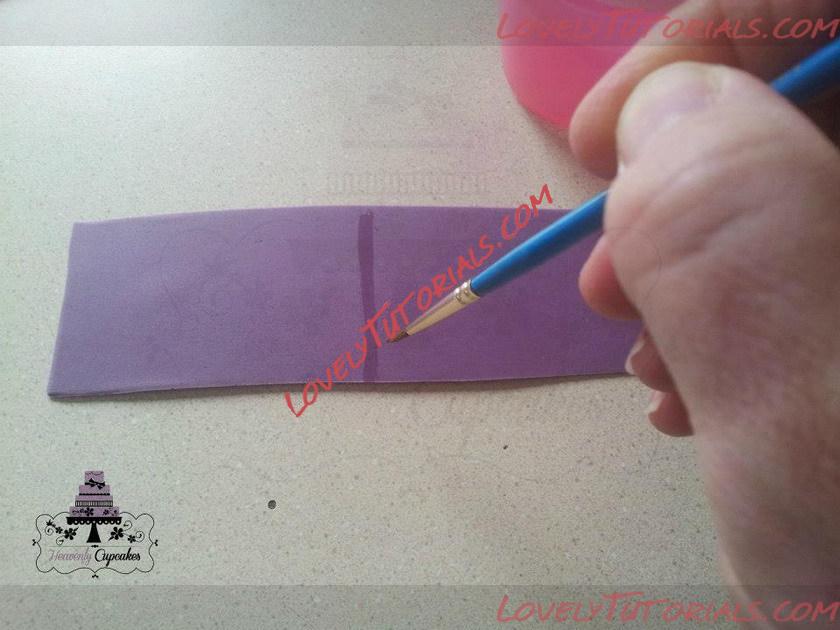
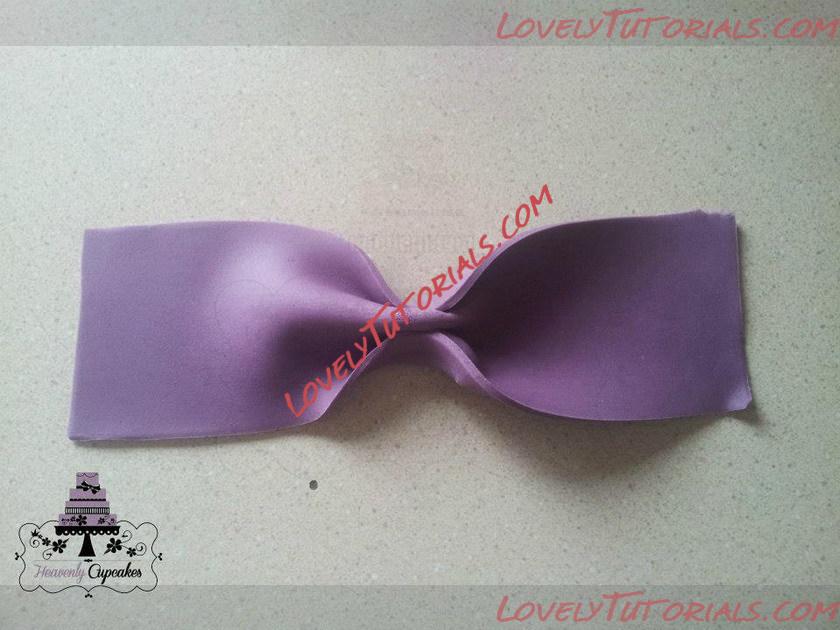
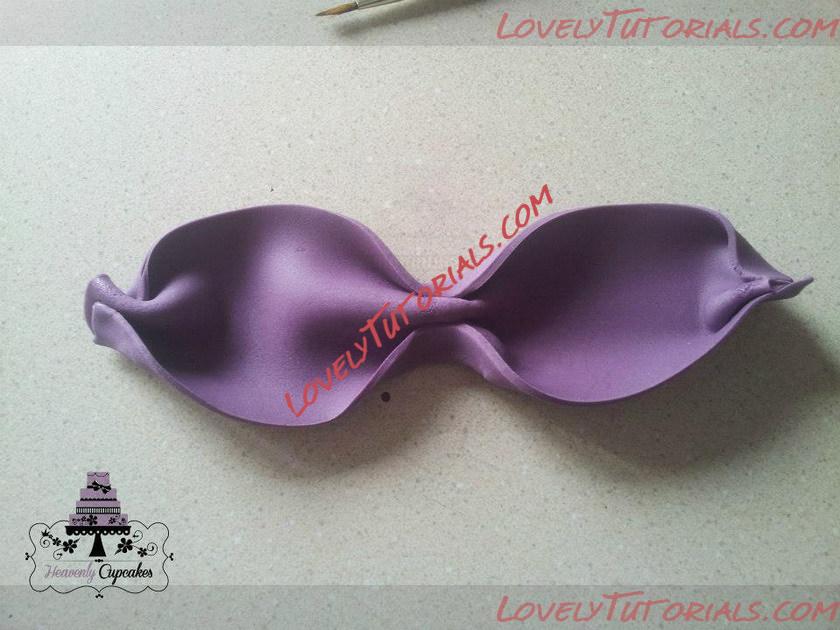
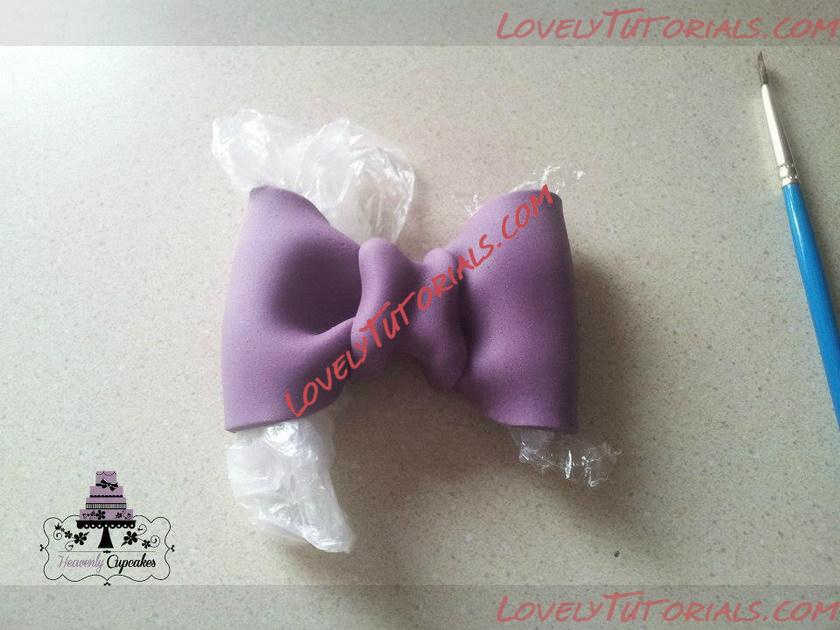
Next take each end and gently twist the loop facing up and attach each end to the top of the center.

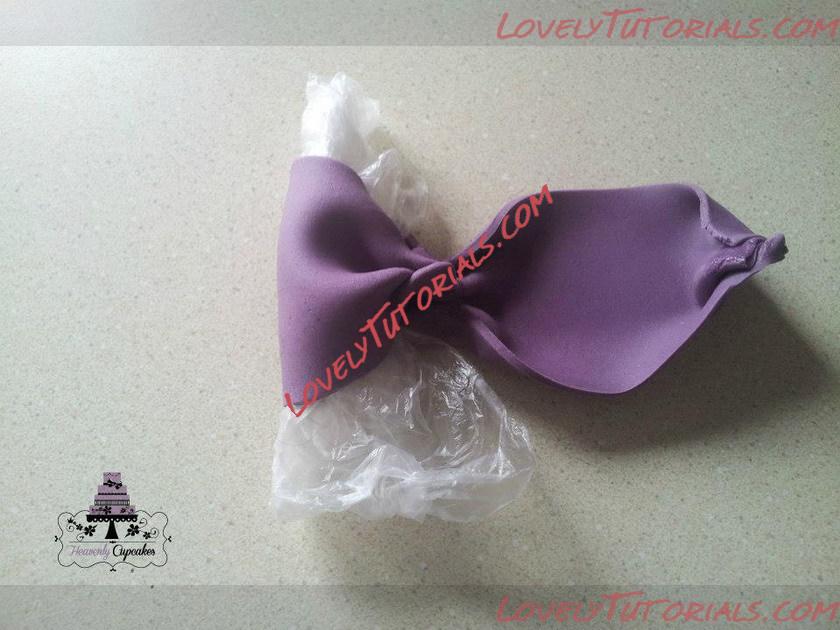
Insert a cut up piece of rolled wax paper to insure that the bow dries opened.

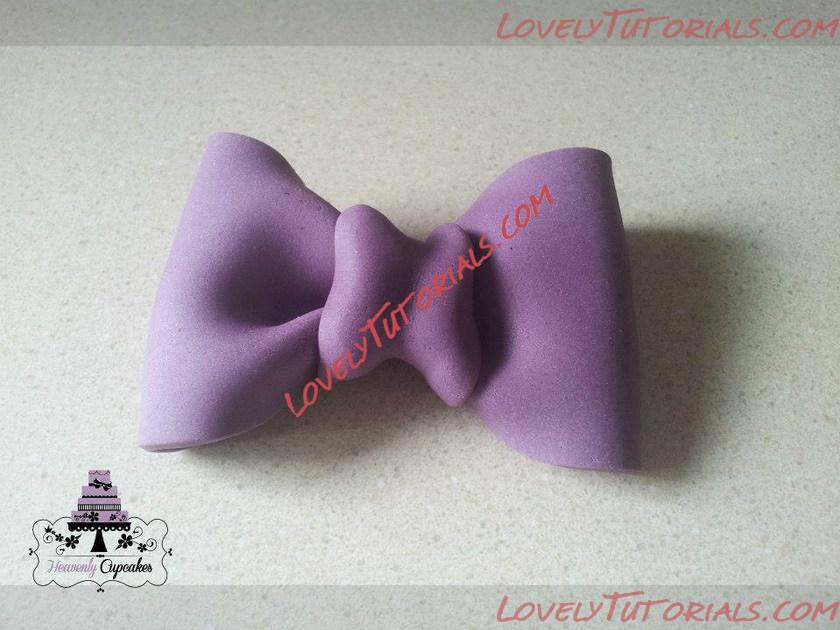
Repeat the process and attach one on top of the other to achieve that double bow effect.
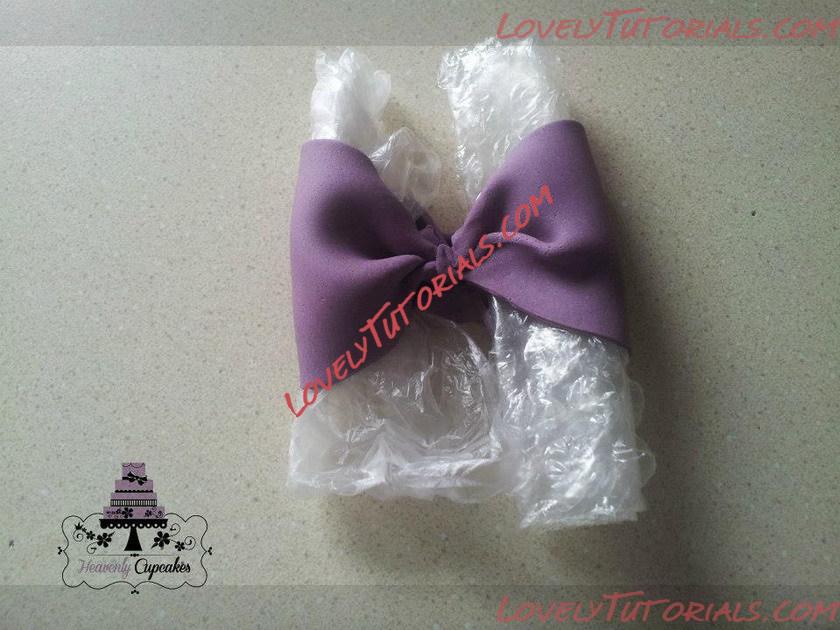
Take a small strip of rolled fondant and carefully wrap it around the center of the bow, making sure that it is secured in the back.


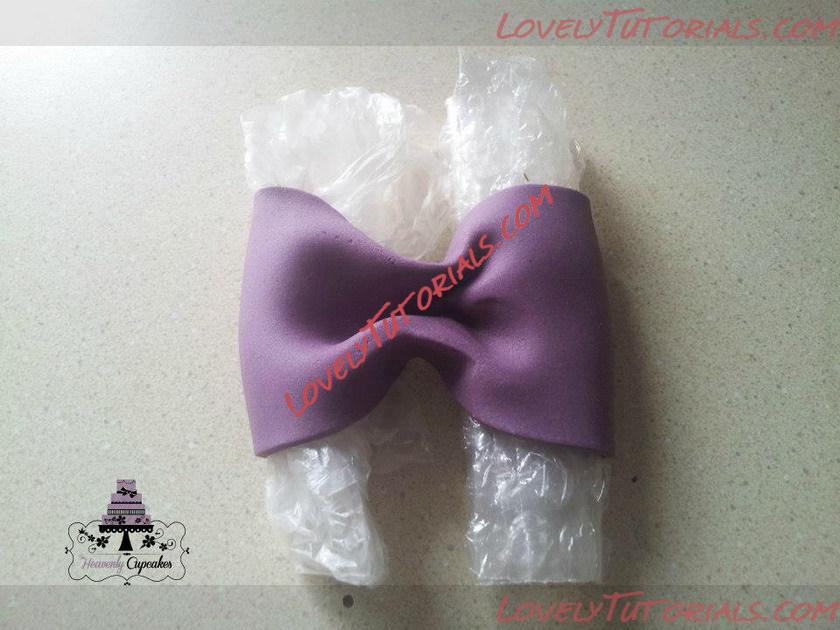
Roll out two more strips of fondant and attach to the back of your bow.


For a really full bow with multiple layers of color, repeat this process with either a larger or smaller set of a double bow. Single strands of colored fondant ribbon can also be attached from the back of the bow to give more dimension.


Finally you can either leave your bow as is or adorn the center with a decorative accent of your choice.

|
 |
|
|
Метки
|
3d figures, addım-addım təlimat, adım, adım adım yönergeler, arc-noeud, arco-nó, artesanatos passo a passo, bemutató, birthday cake, biscuit, bogenknoten, bolando bolos, bolos decorados, boog-knoop, bow, bow-düğüm, bow-knot, bow-knut, bow-knute, cake decorating, cake decorating techniques, cake topper, cake toppers, cake tops, cerâmica plástica, character figures, characters, children's cake, cold porcelain, confeitando bolos, csomó, curso de modelado, decoracion de pasteles, decoración de tortas, decorada en fondant, decorare le torte, decorazioni, deko fondant, dekorace na dort, dekoracija, dekoracije, dekorasyon, dekorácie, especializada em modelagem de biscuit, fender, figur kager, figuras, figure making tutorials, figuren, figures, figurice, figurice od fondana, figurine on the cake, figurines, figurinhas, figurky, figúrky, figür modelleme, fimo, fiocco passo-passo, fixando a cabencinha, flower paste, fondan, fondant, fondente, fondente di zucchero, fotopostup, foundant, fundă, gebak, glazuur, gum pasta, gum paste, gumpaste, hand-made, handmade, how to, how to make a beautiful bow, how-to's, instrucţiuni, instrukcijas, instrukcje, jak na, kage dekoration, kagedekoration, kakebaking, keula-solmu, korak, korak za korakom navodila, korak-po-korak upute, koristeet ja koristelu, krok, krok po kroku, krok za krokem, krok-za-krokem, la modélisation, laivapriekio mazgas, las instrucciones, las técnicas, le tecniche, leptir-čvor, les techniques, luk-uzel, luk-uzol, lukie, marcipanové figurky, marshmallow, marsipanfigurer, masa flexible, master-class, master-klasse, master-klasy, meistras klasės, metodikas, mistr třídy, modelado, modelagem, modelando a barriga, modelando a cabencinha, modelando a perninha, modelando as maozinhas, modelando o cabelinho, modelando o corpinho, modelando os bracinhos, modelando os pezinhos, modelare, modelerte figurer, modeling, modeling paste, modeliranje, modellazione, modelleme, modellering, modellieren, modellierpaste, modelling, modelling past, modelləşdirmə, modelovanie, modelování, modelowanie, motivtorten, návod, opplæringen, orelhas, ozdoby, pamoka, pap, pas, pas-cu-pas, paso, paso a paso, passo, passo a passo, passo-a-passo, passo-passo le istruzioni, pasta de goma, pasta de miel, pasta flexible, pasta laminada, pintura dos olhos, pocelana fria, polymer clay, postupak za ukrasavanje, pravljenje figurica za torte, pâtisserie, předměty z marcipánu, schmelzend, schritt für schritt anleitung, schritt-für-schritt, schritt-für-schritt-anleitungen, sculpting, soggetti, souvenirs, stap, stap-voor-stap, stap-voor-stap instructies, steg for steg, steg-för-steg-instruktion, step, step by step, step-by-lépésre, step-by-step, step-by-step instructions, styrofoam, sugarcraft, sugarpaste, suikerglazuur, technieken, techniken, techniki, techniky, technikák, techniques, tecnicas de decoracion, tecniche, tehnici, tehnike, teknikker, teknikler, telgopor, topo de bolo, topo do bolo, topos de bolo, torte, torte decorate, torten dekorieren, torti, trin, trin for trin, trin-for-trin, trin-for-trin instruktioner, trinn, trinn for trinn, trinn-for-trinn-instruksjoner, tutorial, tutoriale, tutorias, tutorias/ideas para decorar los bizcochos, tutoriel, tutorijal, técnicas, udžbenik, ukrašavanje torti, uputstvo za dekoraciju, zuckerfigürchen, zuckermasse, सजा केक, ट्यूटोरियल मास्टर वर्ग, कदम, कदम दर कदम निर्देश, तकनीक, मॉडलिंग, モデル, étape, étape par étape les instructions, íj, öğretici, 一步, 一步一步的指示術, žingsnis, žingsnis po žingsnio, 宗師級教程, 建模, 裝飾蛋糕, βήμα, βήμα προς βήμα οδηγίες, οδηγίες βήμα βήμα, παντεσπάνι art, τεχνικές, τόξο-κόμβων, φροντιστήριο, инструкция, как сделать, как сделать красивый бантик, крок за кроком, крок за крокам, покроково, полимерная глина, пошагово, пошаговые фотки, пакрокава, персонажи, миниатюра, мк, моделиране, майстор-класа урок, майстар-клас, майстер-клас, майстер-класи, маршмеллоу, мастика, мастер-класс, бант, лепка, лък възел, ліплення, ручной работы, ручная работа, украшение тортов, сахарная мастика, уроки прикрашання, стъпка, стъпка по стъпка инструкции, техники, техника, техніка, туториал, туторіал, тэхніка, фигурки, фигурка на торт, фимо, фігурки, фігуркі, холодный фарфор, шаг за шагом, інструкцыя, інструкція  |
|