Огромная благодарность Автору Lauren за Мастер-класс
Slanted Stripe Cake Tutorial
First things first, we gotta start with the recipe. When I made the construction cake, I had 4 layers total (2 chocolate, 2 vanilla), enough to make 2 double layer cakes. I cut slanted layers in them all, and picked which ones I thought would look best. If you don’t want 2 full cakes, either cut both recipes in half, or just make this white cake recipe, and dye it 2 different colors.
White Cake (makes 2 8” layers)
Adapted from Cook’s Illustrated recipe I found at Crumbly Cookies
1 C milk, room temperature
3/4 C eggs whites (about 4), room temperature
1 1/2 tsp almond extract
1 1/2 tsp vanilla
1 3/4 C cake flour
1/2 C all purpose flour
1 3/4 C sugar
4 tsp baking powder
1 tsp salt
12 T (1 1/2 cubes butter), softened
- Preheat oven to 350 degrees F, and prepare 2 8” pans with spray and wax paper.
- In a bowl, combine milk, egg whites and extracts and whisk together with a fork. Set aside.
- Sift both flours together, and add sugar, baking powder and salt. Mix together on low speed with a standing or hand mixer.
- Add the butter a little bit at a time, and mix together until it’s all moist crumbs*
- Reserve 1/2 C of the egg/milk mixture, and add the rest to the dry ingredients.
- Mix on medium speed with a standing mixer, using a paddle (or high speed with a hand mixer) for 1 1/2 minutes.
- Scrape sides of bowl, then add the rest of the milk mixture, and mix to combine, for at least 30 seconds.
**if you are adding color, be sure to add it before you start baking. I use gel colorings
- Divide evenly into 2 prepared pans, and cook for 22-25 minutes until a toothpick in the middle comes out clean.
- Let cakes sit in pans for about 3 minutes, then invert onto wire racks, remove wax paper, then invert again to let cool completely.
*I don’t really understand what ‘moist crumbs’ are, but this is what mine looked like:

Now that your layers are cooled all the way, they need to get frozen.
Loosely wrap each layer individually with plastic wrap, then place in the freezer for at least a couple of hours. I think mine were in the freezer for 4-5 hours before I took them out.
*I made this tutorial at night, so I apologize for all the harsh flash lighting*
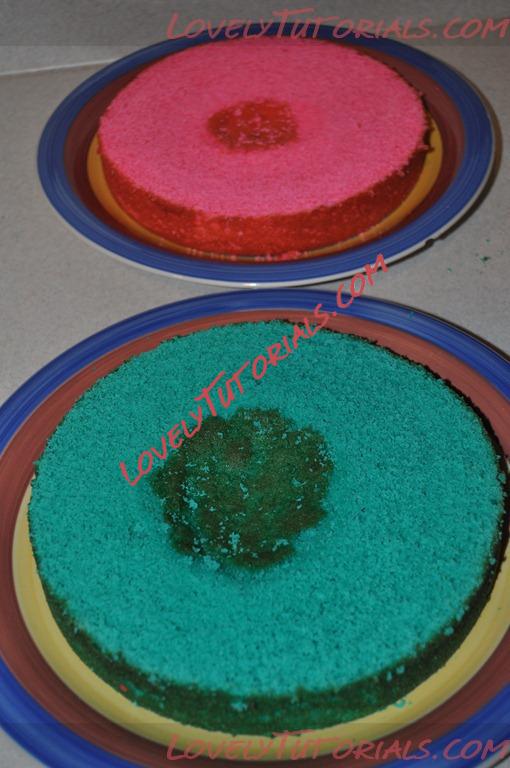
The first step is to level the cakes, for 2 reasons: 1. so the cake is flat* across the top 2. so both layers are equal in height.
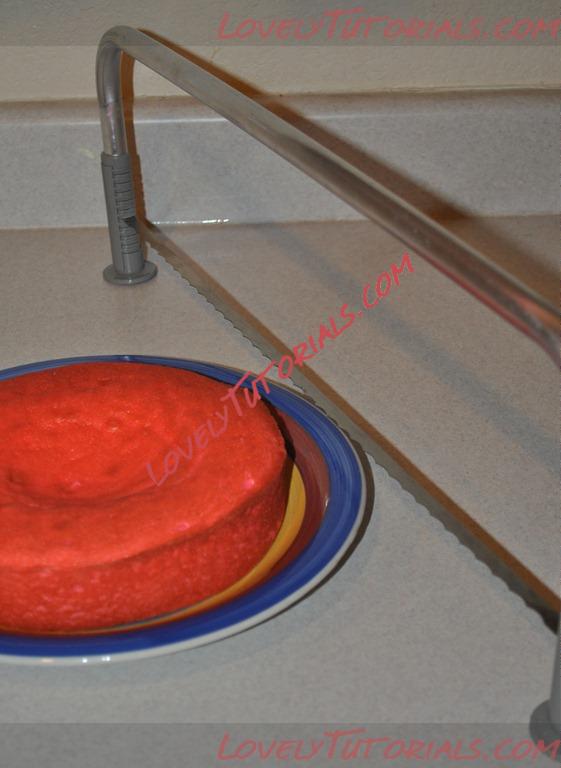
I have a cake leveler, but if you don’t, you can definitely use a serrated knife. Just be careful to hold the knife level.
*I didn’t make my cake exactly flat across the top. Because they sunk a bit in the middle, I decided I would rather have a small dip in the middle than taking more cake off:
Now we can start making those slanted cuts!
I used our bread knife, because it is serrated, and I seem to have better luck cutting cakes with a bread knife.
I put my cakes on plates, because the plate turns easily on my counter.
Place the tip of your knife about this far away from the edge of your cake: (don’t start cutting yet, just get the distance)
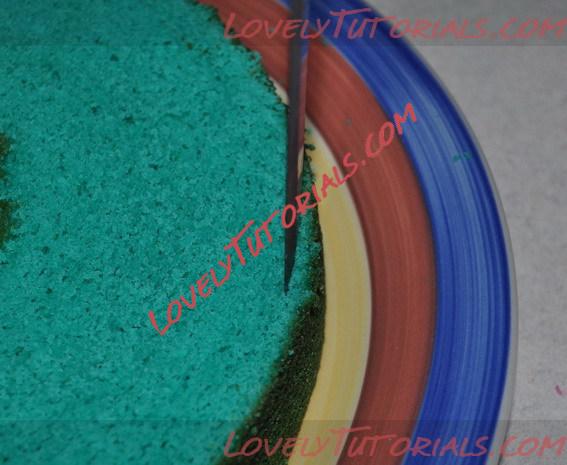
now, tilt your knife to your desired angle, I believe mine was about 45 degrees, and then stick the knife into the cake at your angle, getting all the way through the cake
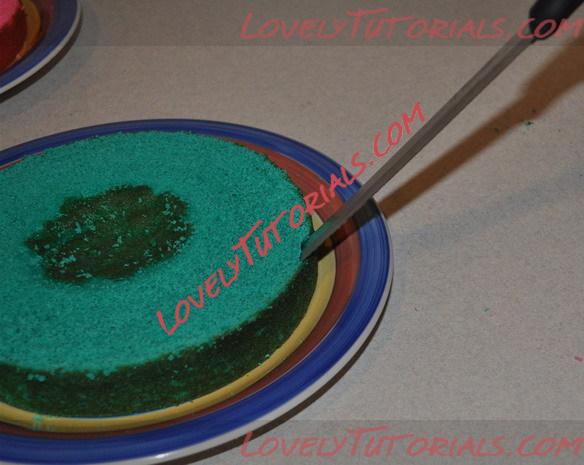
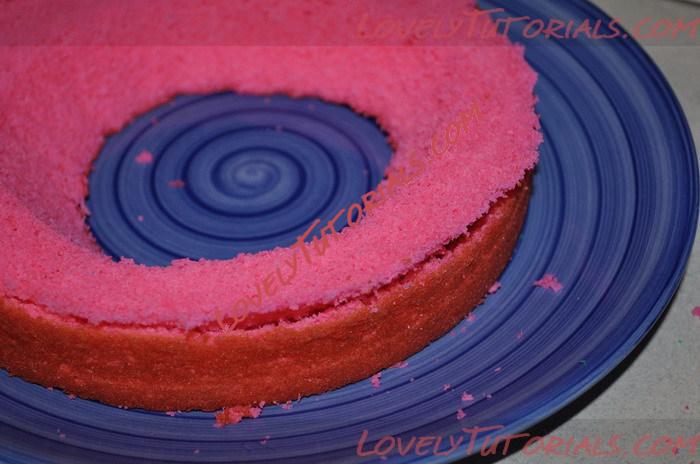
Cut the cake in a circle: staying as equal distance to the edge of the cake, and keeping the angle the same as best as you can around the whole cake. I do a couple of saw motions, then rotate the plate, saw, rotate etc. until you’ve gone all the way around.
Once you make it all the way around the cake, lift up and edge of the cake from the plate:
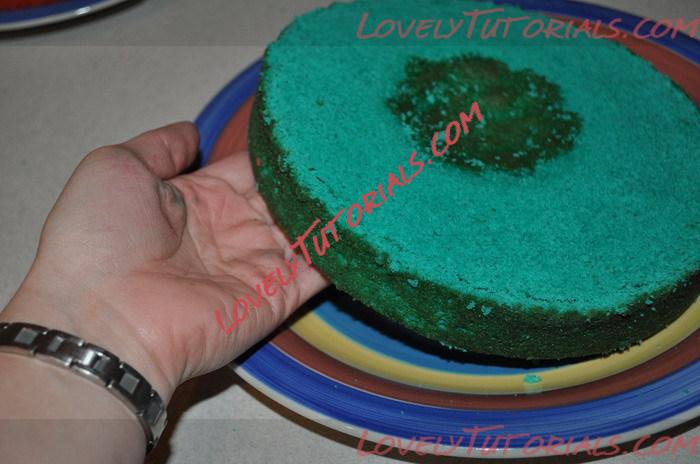
Then slip the inside circle out:
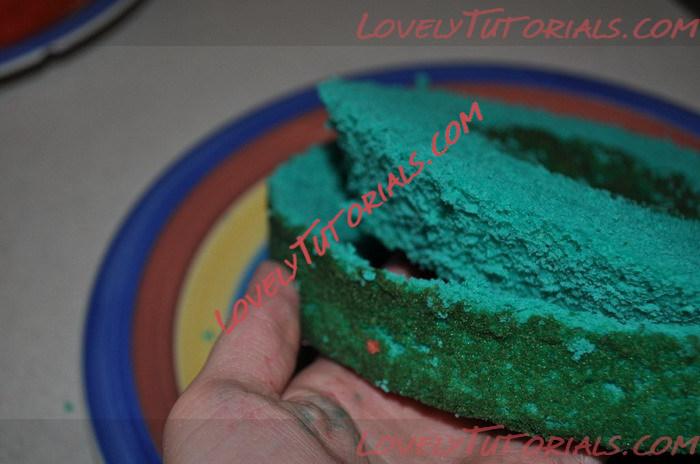
It should come easily since the cakes are frozen, and they should be sturdy enough to not break. But be careful anyway.
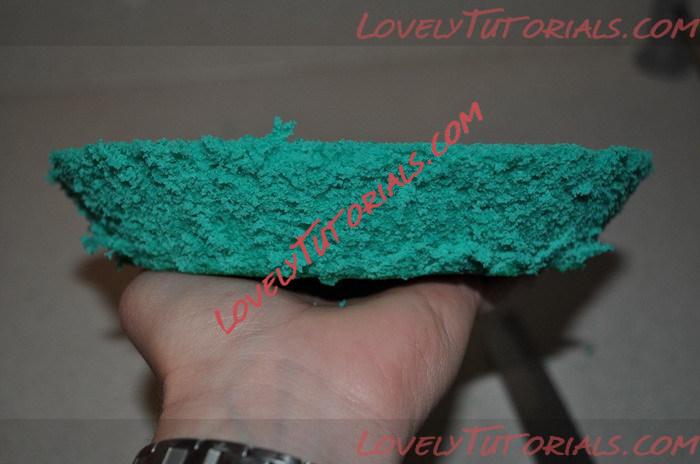
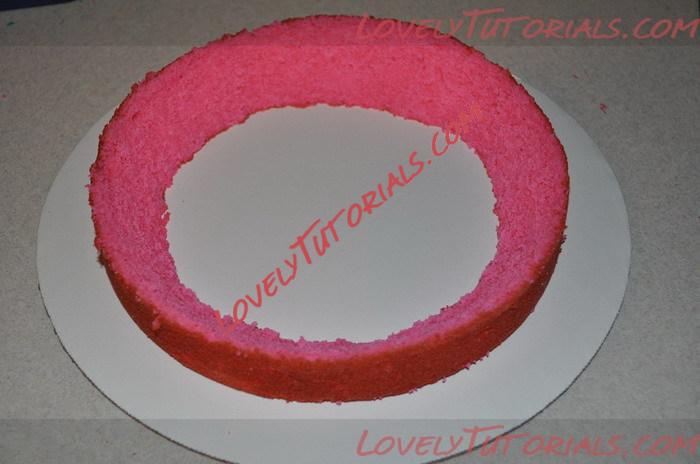
the inside ring should look like this:
and the outside ring should look like this:
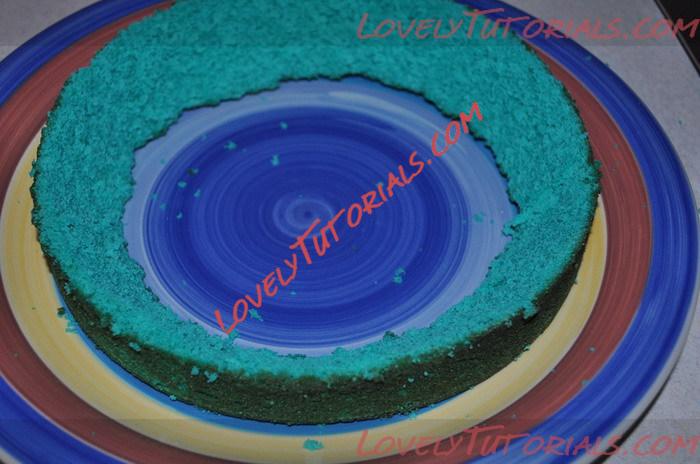
**wow, I REALLY need to get some white plates…. I hope you can see it ok**
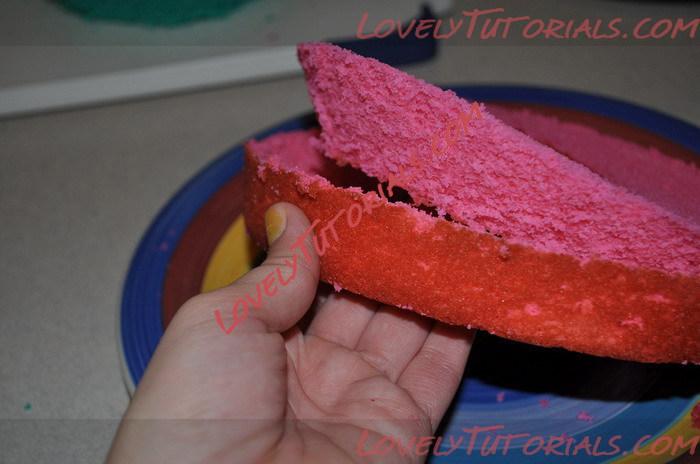
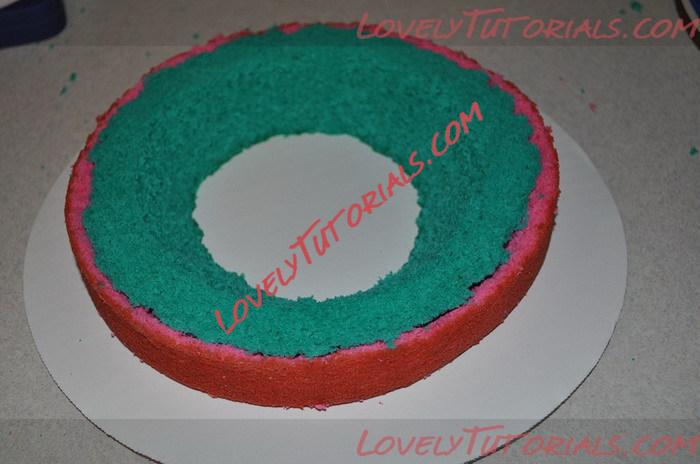
After I cut them, I move the outside ring to another plate off to the side.
Repeat the outer cut with the other color layer
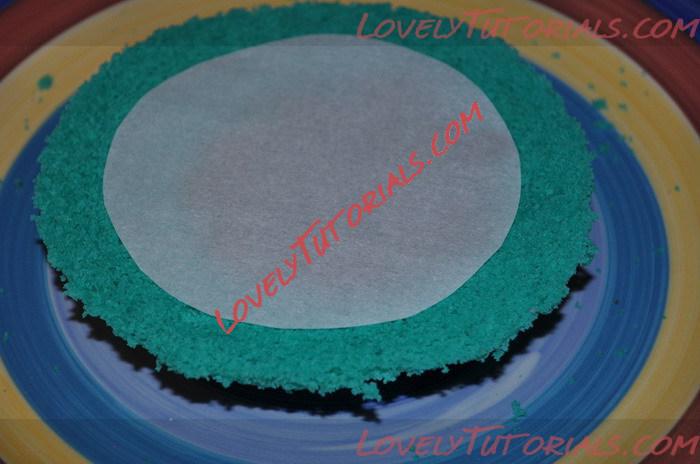
Now onto the smaller circles. For measuring, the first time around I used cardboard, but I don’t think that’s necessary. This time I just used parchment paper. I used my 6” pan to trace a circle on the parchment paper, cut it out just inside the line (so it was a little smaller than 6”), then placed it on top of the cake:
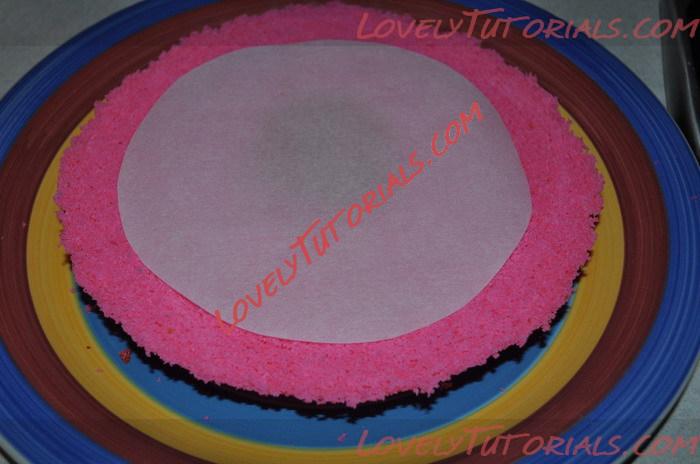
then I took a small knife, traced around the parchment paper making a shallow line, so that I knew where I should be cutting:
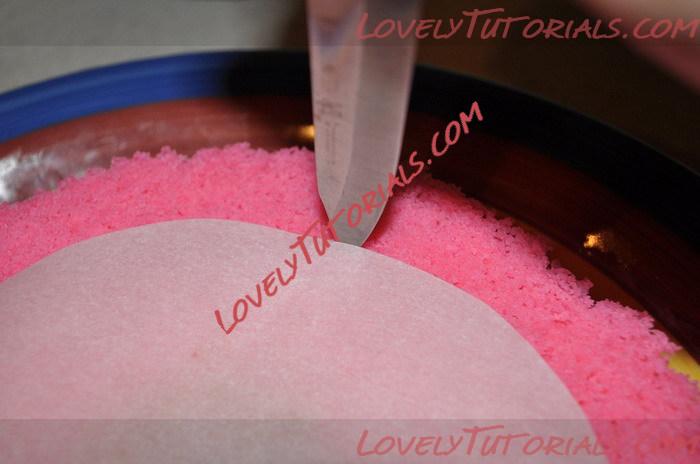
I tried to take a picture to show you the traced line, but it wasn’t showing up in the pictures. as long as you can see it, and know where you should cut, then you’re good to go.
and then you cut again, this time following the line you just traced, holding the knife at an angle just like last time:
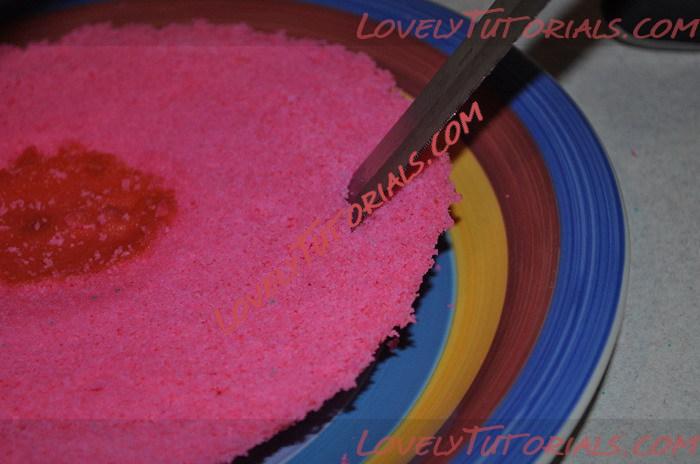
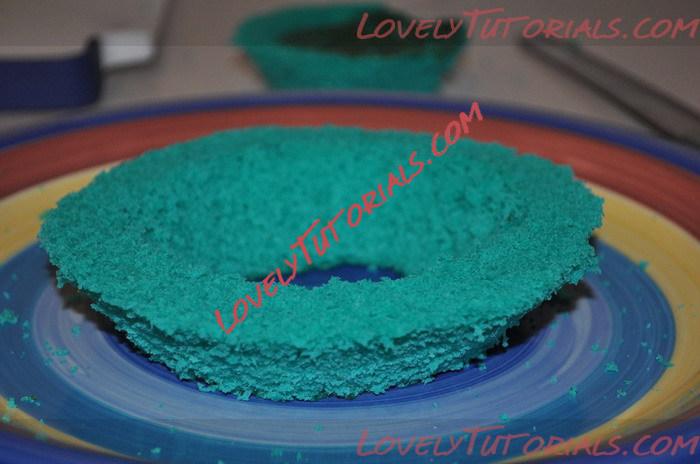
When you make the full circle, it should come out easily:
move the outside circle to another plate:
then cut the other colored layer the same way, with the same 6” parchment paper circle, and move the outside ring to another plate.
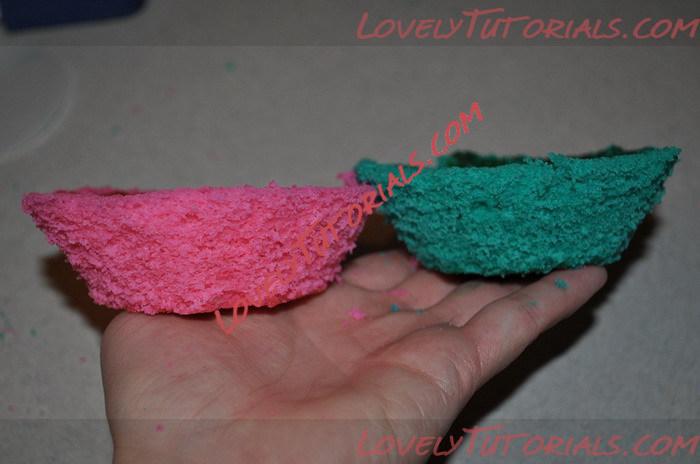
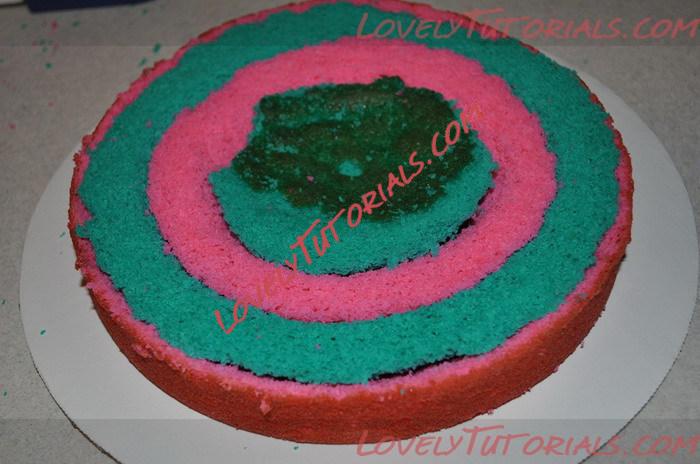
After that, we need 1 smaller circle. I decided to eye ball cutting the circle to be about 4”, and placed it on top of the cake:
trace around it with a knife, to make a shallow line to follow, and then cut with the bread knife just as on the others
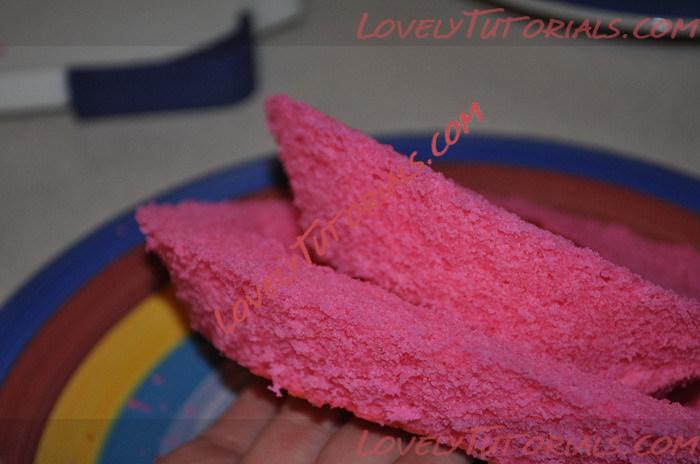
so after this cut, the outside circle should look like this:
and the very inside should look like this:

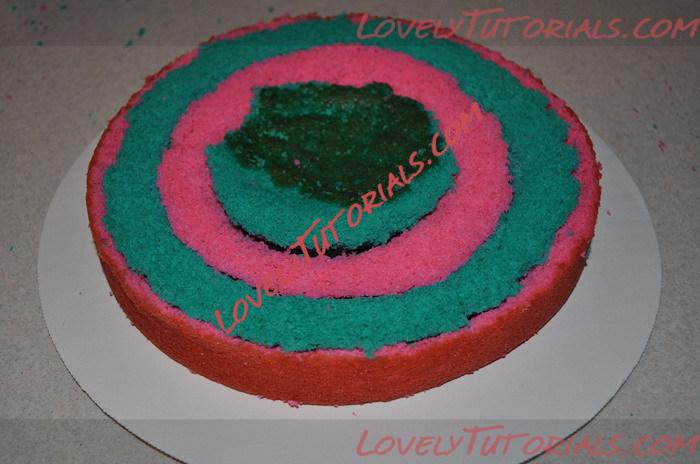
Now cut the other color layer the same way! then you will have 2 insides:
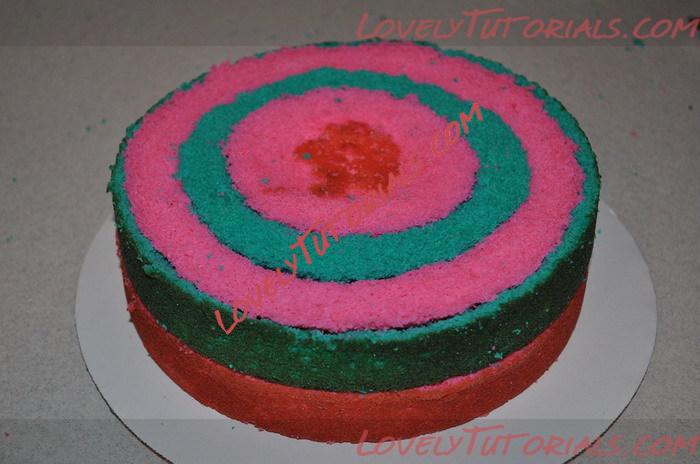
Now we’re going to put it all together!!
See the little gaps? It will be ok. Since we’re just judging the angles, I think that it would seriously be impossible to make this cake perfect. So, we’ll just run with imperfect!
At this
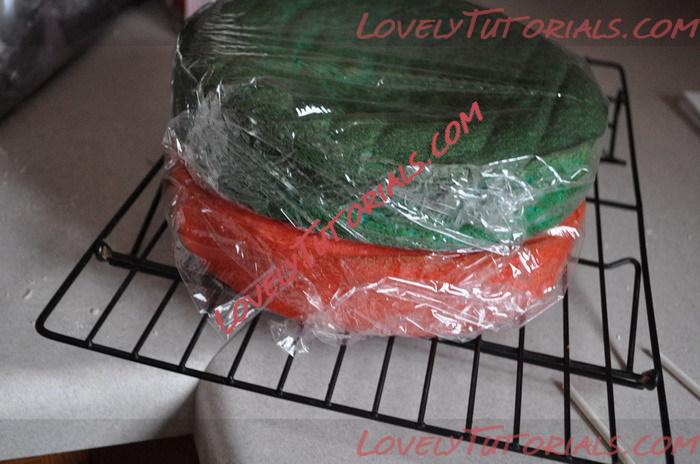
tutorial where I got my idea from, she pours a simple syrup on top of the cake, wraps wax paper around it to get it to stick, and puts it back into the freezer. I don’t think this is a bad idea, but I didn’t do it. I just wrapped mine fairly tightly (not enough to distort the cake shape) in plastic wrap and threw it back into the freezer. This way the layers start to freeze together.
Once they’re frozen again (a couple hours) you can start to decorate!
(for this tutorial, I decided not to frost it, sorry! But you’ll get the idea how awesome it would look frosted, right??)
Place the bottom layer on your serving platter and cover with frosting
Place the next layer on top:
frost entire cake how desired!!
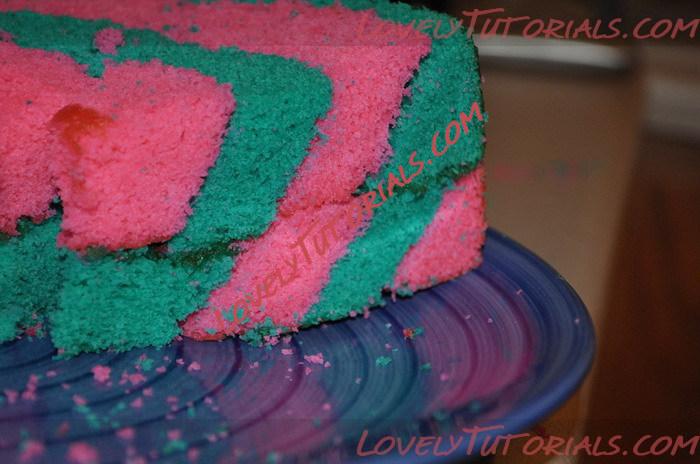
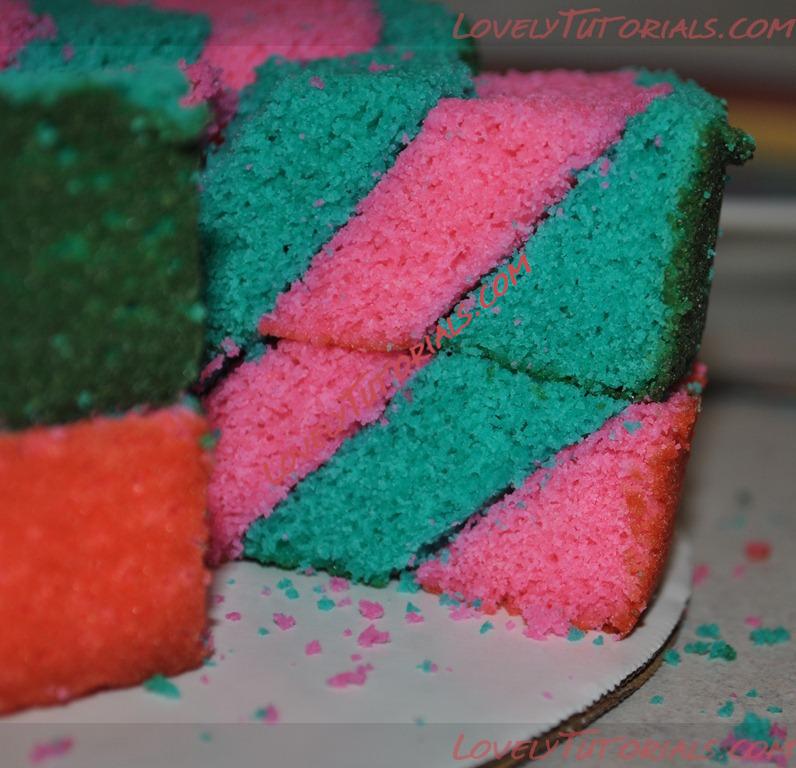
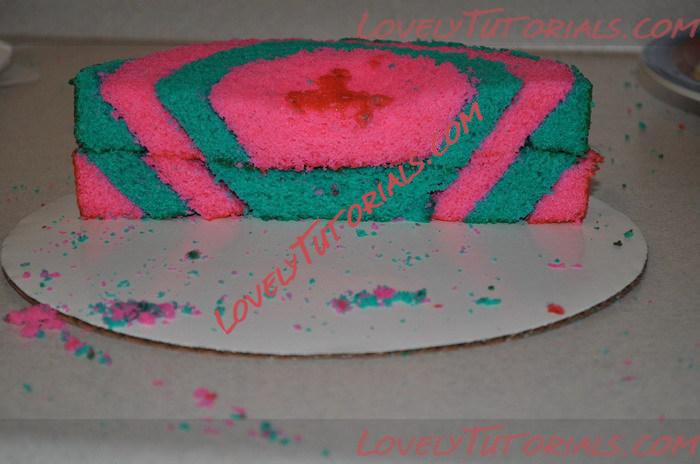
Then…. when you cut into it, it will look like this:
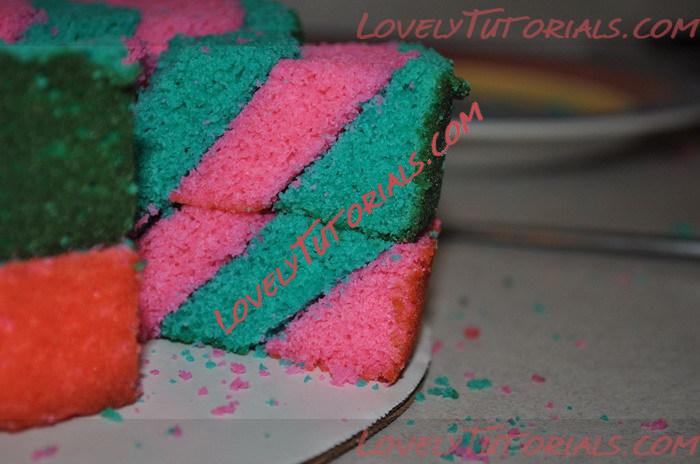
(with frosting, it will look even better! and stay together better too)
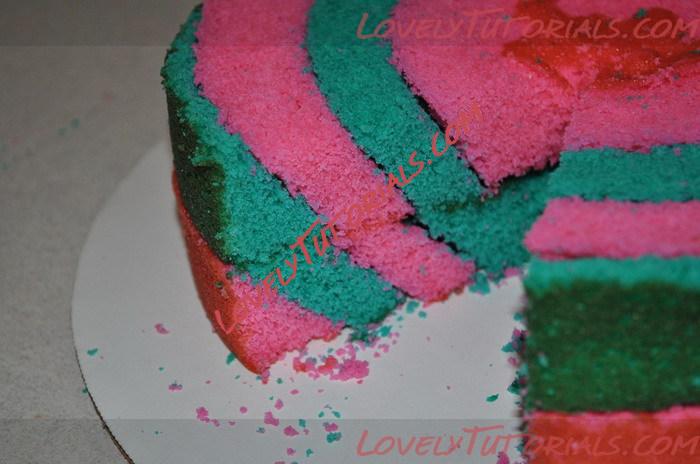
cut in half:
and believe me when I say that no one is going to notice gaps, or that the lines aren’t perfectly matched, or any imperfection when they see a piece of cake that looks like this sitting on their plate!!