|
|
Розовый цветок из пластики в технике "колбаса" -Pink flower cane tutorial
|

01.08.2012, 21:47
|
|
Администратор
|
|
Регистрация: 07.09.2010
Сообщений: 7,669
|
|
 Розовый цветок из пластики в технике "колбаса" -Pink flower cane tutorial
Огромная благодарность Автору Naama Zamir за Мастер-класс
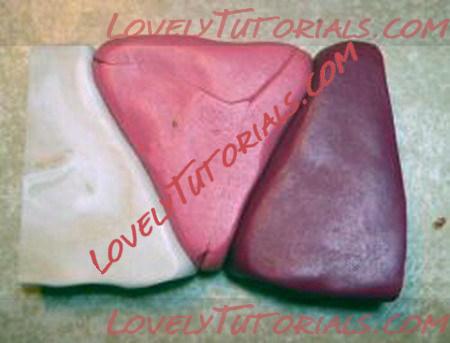
Step 1: Choose 3 complimentary colors in equal amounts. Arrange as shown to do a Skinner blend, with the lightest color at the left and darkest at the right. Create the blend.
(See Skinner blend instructions here)
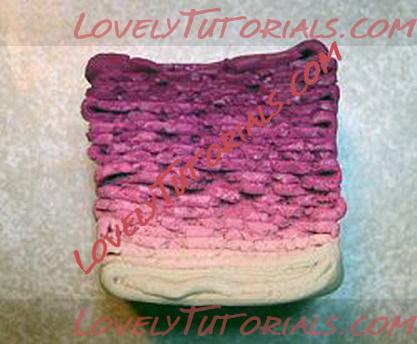
Step 2: Once the blend is finished, do an accordian fold as show. The result will be lightest color at the bottom of the stack, large blended section, and then darkest at the top.
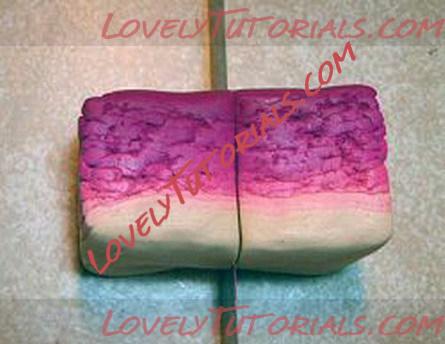
Step 3: Compress the block and flatten it out a little, then using your cutting blade, slice the block in half.
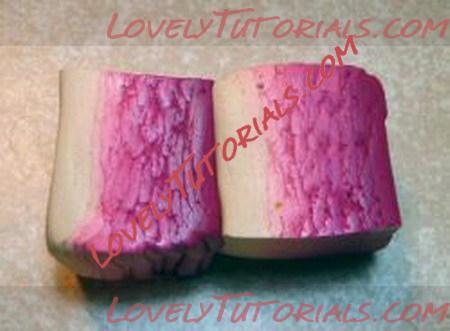
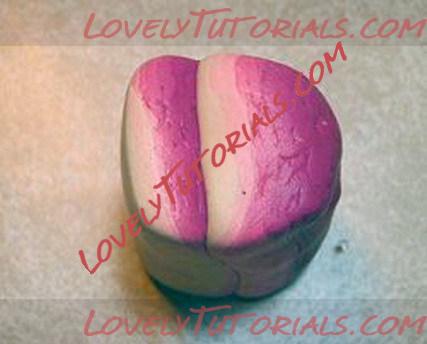
Step 4: Stack the two halves as shown, light side of one half to the dark side of the other half.
Step 5: Squeeze in the corners to form the block into a round log.
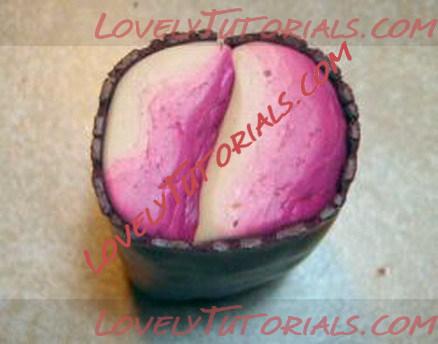
Step 6: Using a dark contrasting color, roll out a sheet on number 7 on the pasta machine and wrap the log in this sheet. Begin to reduce the log.
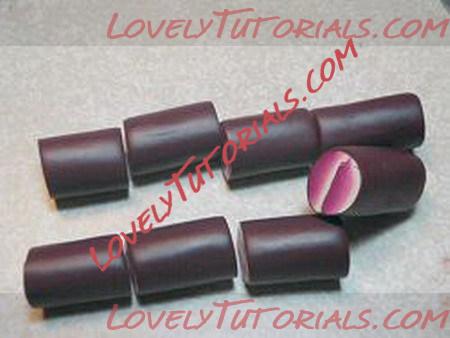
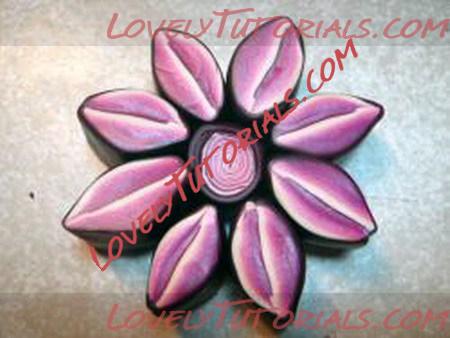
Step 7: Once you have reduced the log, cut it into 8 equal pieces as shown.
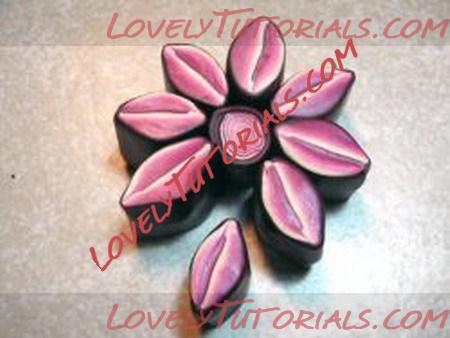
Step 8: Pinch the 8 pieces to form petal shapes as show. Make a center for the flower by sandwiching sheets of light and dark colors, roll them up, cut to the same height as the petals, and then wrap it in the same color as the petals. Arrange the petals around the center.
Step 9: This how your cane will look before adding the background.
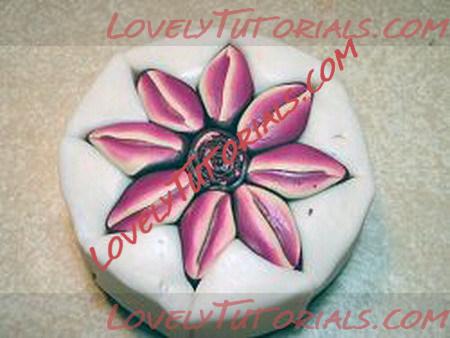
Step 10: Add triangles of translucent clay between the petals.
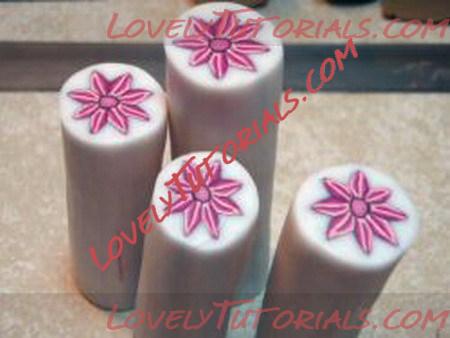
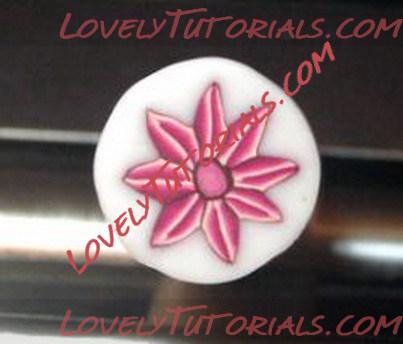
Step 11: Now reduce your cane and cut.
|
 |
|
Метки
|
addım-addım təlimat, adım, adım adım yönergeler, artesanatos passo a passo, bemutató, cane, curso de modelado, especializada em modelagem de biscuit, fender, fimo, fixando a cabencinha, fotopostup, hand-made, handmade, how to, how-to's, instrucţiuni, instrukcijas, instrukcje, jak na, korak, korak za korakom navodila, korak-po-korak upute, krok, krok po kroku, krok za krokem, krok-za-krokem, la modélisation, las instrucciones, las técnicas, le tecniche, les techniques, master-class, master-klasse, master-klasy, masy termoutwardzalnej, meistras klasės, metodikas, millefiori, mistr třídy, modelado, modelagem, modelando a barriga, modelando a cabencinha, modelando a perninha, modelando as maozinhas, modelando o cabelinho, modelando o corpinho, modelando os bracinhos, modelando os pezinhos, modelare, modeling, modeliranje, modellazione, modelleme, modellering, modellieren, modelləşdirmə, modelovanie, modelování, modelowanie, návod, opplæringen, orelhas, pamoka, pap, pas, pas-cu-pas, paso, paso a paso, passo, passo a passo, passo-a-passo, passo-passo le istruzioni, pink flower cane tutorial, pintura dos olhos, polimer kil, polimeras molis, polymer argila, polymer clay, polymer clay cane tutorials, polymer glina, polymeren clay, postupak za ukrasavanje, premo, schritt für schritt anleitung, schritt-für-schritt, schritt-für-schritt-anleitungen, sculpting, stap, stap-voor-stap, stap-voor-stap instructies, steg for steg, steg-för-steg-instruktion, step, step by step, step-by-lépésre, step-by-step, step-by-step instructions, technieken, techniken, techniki, techniky, technikák, techniques, tehnici, tehnike, teknikker, teknikler, torte, trin, trin for trin, trin-for-trin, trin-for-trin instruktioner, trinn, trinn for trinn, trinn-for-trinn-instruksjoner, tuto et bijoux en polymère, tutorial, tutoriale, tutorias, tutoriel, tutorijal, técnicas, ट्यूटोरियल मास्टर वर्ग, कदम, कदम दर कदम निर्देश, तकनीक, मॉडलिंग, モデル, étape, étape par étape les instructions, öğretici, žingsnis, žingsnis po žingsnio, 宗師級教程,一步,一步一步的指示� �術,udžbenik, 建模, βήμα, βήμα προς βήμα οδηγίες, οδηγίες βήμα βήμα, πολυμερικού πηλού, παντεσπάνι art, τεχνικές, φροντιστήριο, инструкция, изделия из пластики, колбаски из полимерной глины, колбаска из полимерной глины, как сделать, как слепить, как слепить колбаску из полимерной глины, кане, крок за кроком, крок за крокам, покроково, полимерна глина, полимерная глина, полімерна глина, пошагово, пошаговые фотки, пакрокава, палімерная гліна, пластик, пластика, миниатюра, мк, мк-ы "колбаски из полимерной глины", моделиране, майстор-класа урок, майстар-клас, майстер-клас, майстер-класи, мастер-класс, лепим из пластики, лепка, ліплення, розовый цветок из пластики в технике "колбаса", ручной работы, ручная работа, создание бижутерии из полимерной глины, своими руками, стъпка, стъпка по стъпка инструкции, техники, техника, техника "колбаса", техніка, туториал, туторіал, тэхніка, фимо, фотоурок, цветок, цветы, цветы из пластики, шаг за шагом, інструкцыя, інструкція  |
|