Materials Needed:
(These will be listed with the Colors that I'm using. You can change your rose color to whatever appeals to you)
- Fimo Soft #26 Cherry Red and Premo Pearl for Skinner Blend for Rose
- Premo Alizarian Crimson mixed with Black for Rose outline
- Fimo Turquoise and White for Skinner Blend for leaves
- Fimo Turquoise mixed with Black for leaf outline
- Black Clay for background of Finished Cane
- Tissue Blade
- Clay Gun with Triangle tip
- Condition your clay.

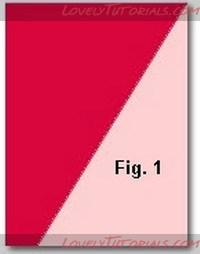
- Prepare for a Skinner Blend using the Rose colors. Since I want the rose to be predominantly red, I use a slight variation when I prepare the initial triangles for the Skinner Blend. Notice in the picture (Fig. 1, right) that the bottom color intersection is not at the corner - I've moved the dark color about 3/4" over into the light color. This will give you more dark color in the finished blend.
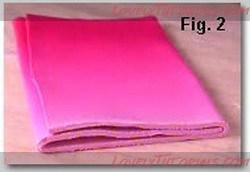
Continue with normal procedure for the
Skinner Blend, putting the clay through your pasta machine about
20-25 times. Before the last pass through, trim the ends,
fold the sheet in thirds (Fig. 2, left) and send it through the pasta machine, starting with the light end, on
setting #1. Then send it through again on
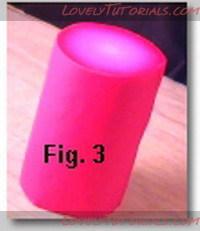
setting #4. Now take the sheet and roll up the clay into a log,
beginning with the light end, and then trim the ends. You should end up with a log that resembles
Fig. 3.
Skinner Blend HintsHint - Mix a pinch of the Red color in the Pearl to tint the white to a light pink
Hint - If your dark color (Red in this case) is saturated, mix it with translucent in a 2 parts color to part translucent to lighten saturation.
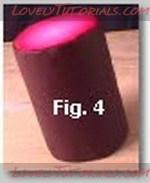
Run a sheet of the
Rose outline mixture through the pasta machine at
setting #3 and then wrap it around the log (Fig. 4, right).
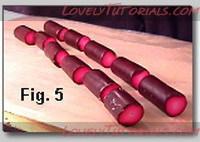
Reduce the log to about
5 times it's original length. Cut the log into
two equal pieces. Cut one half-log into
5 equal pieces and the other half-log into
6 equal pieces. See
Fig. 5 for a view of the finished reducing and cutting.
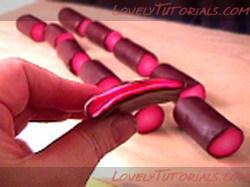
Take
one piece of the
six piece half log, flatten it and roll it into a
jelly-roll [Directly stolen from a
Marie Segal video] (below).

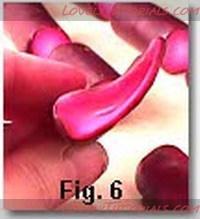
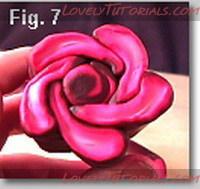
Take the remaining five pieces of that half log and shape them into an
elongated teardrop shape (Fig. 6). Start fitting these pieces onto the jelly-roll in a
pinwheel fashion, so that that when finished it will look like
Fig. 7.

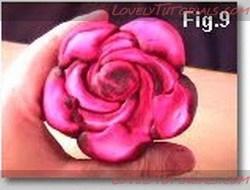
Take the remaining five pieces and slightly flatten them into an
oval shape, and then
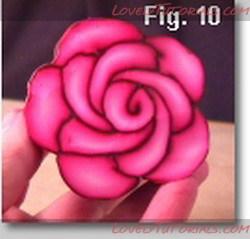
pinch up a small triangle in the center (Fig. 8). Keep in mind that this triangle will fit into the space between the petals (Fig. 9), so shape accordingly. After the remaining pieces are attached,
pack the cane together to make sure that all pieces are fitted tightly together, and then trim off the end pieces to see the cane. It should look like
Fig. 10.
 N
Now it's time for the Leaf Cane... Prepare the
Skinner Blend for the
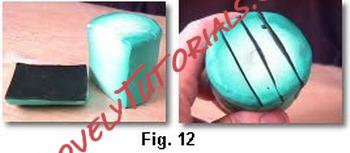
Leaf Cane using the same technique as described for the rose, but the offset corner in the initial triangles is not necessary. Once the clay is rolled into the log, stand it on end, and use your
tissue blade to make
3 parallel cuts from top to bottom, one in the middle and one on either side of that cut (Fig. 11).
We're now going to sandwich a slice of the
mixed leaf outline clay, at thickness setting #4 or #5, into each cut and then reassemble the log in it's original shape. When finished, it will look like Fig. 12.

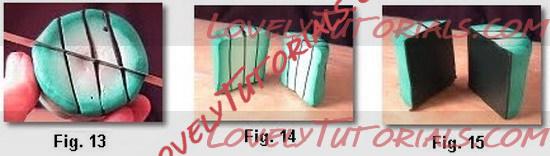
The next sequence of steps is best decribed with this group of photos. First, make a
diagonal slice across the log, tilted as shown in
Fig. 13, from top to bottom. Separate the pieces as shown in
Fig 14. Now line the inside of each half with the
mixed leaf background clay as shown in
Fig. 15.
Now take two slices of
green clay and cover the inside of each half as shown in
Fig. 16. The left half is covered about
halfway with the green, and the right half is covered about
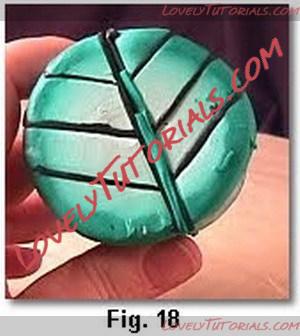
3/4. These pieces of green will form the stem of the leaf when everything is assembled. Turn one of the halves so that the green edges butt together as in
Fig. 17, and squeeze the halves together and compress. When finished your leaf will look like
Fig. 18.

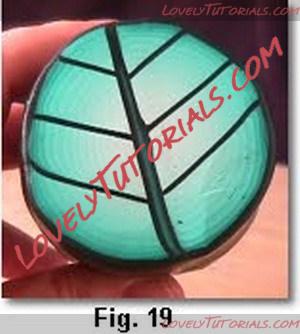
Now cover the outside of the log with the
mixed leaf background color, and compress to remove all the air bubbles. If you were to slice the end off now it would look as
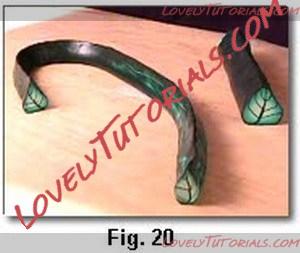
Fig. 19. To reduce the cane, first pinch the top up to form a leaf shape to the whole cane, and then reduce. Reduce to a size that looks proportional to your rose. When finished, your cane will look like
Fig. 20.
Hint - The bigger you make your leaf, the more background clay you'll need on the finished cane - so plan accordingly! Smaller leaves will make your rose appear bigger.
 L
Let's put everything together...
Once your
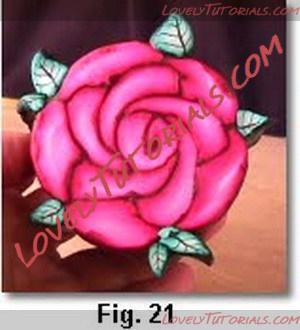
Leaf Cane has been reduced, plan where you will put leaves on the
Rose Cane. I usually put them in the intersection of the second petal set, as shown in
Fig. 21. Cut your leaf cane pieces and attach them to the rose, being careful to get out any air bubbles.
15. Now we're going to
outline the Rose and leaves with a thin sheet of
Black clay, usually at
setting #6 or #7. Make sure to press the clay into all indentations and creases. Once the Rose is initially covered, I use a technique with the
clay gun that helps to
strengthen the shape of the rose and also helps to
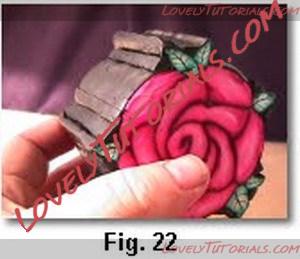
prevent distortion as the background color is added around the Rose. Squeeze out a long triangle of
Black clay from the
gun, and then cut off pieces that you will wedge into the indentations and creases around the leaves, and at the petal intersections.
Fig. 22 shows how these wedges are placed, and you can see how the delicate leaves are fortified.
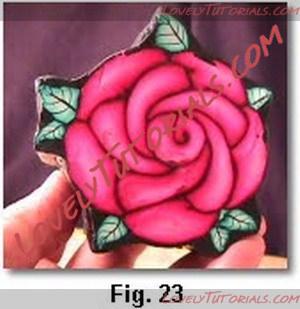
After the clay gun wedges are placed, your cane will look as
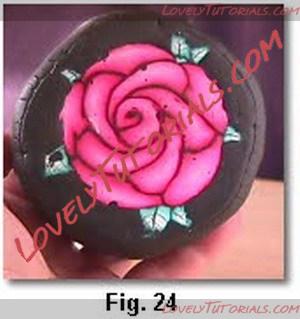
Fig.23. Now start adding black background clay around the Rose, until a nice round background is created, like
Fig. 24.
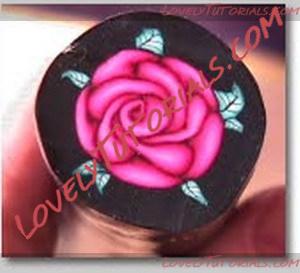
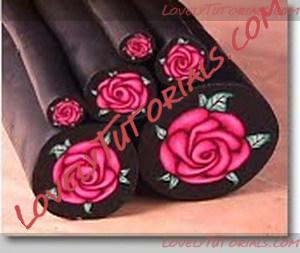
At this point, you can now reduce your
Rose Cane to various sizes as needed. Here are some of the sizes I use, and also a fresh cut
end piece that shows how well the leaves reduce after using the
clay gun technique.