Огромная благодарность Автору Megan за Мастер-класс

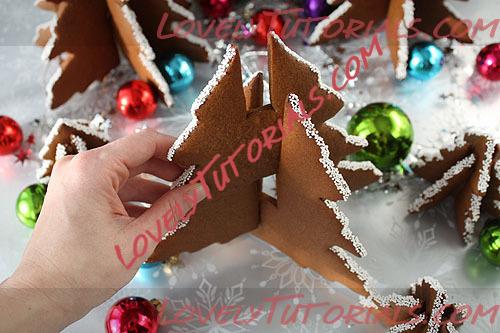
I made 3D Christmas Tree Gingerbread Cookies for Christmas. They slot together and don’t require icing to hold them up. Below I explain how to 3Dize your own cookie cutters and I also provide printable templates in case you don’t have a tree cookie cutter you like.


Click through for a how-to.
Things you can do up to a whole day before, aka the stuff you might consider doing ahead of time if you are hoping the cookie making will be a fun group project:
Make a batch or two of Simply Recipes Gingerbread House gingerbread. I divide it into thirds (since you’ll want at least three cookie pieces). Fair warning: one batch of that recipe will nearly overfill a 4.5 quart Kitchenaid mixer. But in that good, yay we’re baking sort of way.
Make a simple syrup glue – two parts sugar to one part water. Combine these in a small saucepan and heat until the sugar is dissolved. Let this cool and pour into an airtight container, store at room temperature. Or, you can use this right from the saucepan once it’s cooled enough to not be dangerous.
Prepare your cookie templates. If you have an awesome tree cookie cutter you’d like to use see my instructions below. If you don’t you can print out and use the templates I’ve provided at the end of this post. My favorite tree cutter is the one shown here and it comes in
8 inch,
5 inch and
3.5 inch heights. I use the 8 inch and 3.5 inch ones here.
To 3D-ize your cookie cutter follow these directions:

All right! What we are doing now is creating three slots for your cookie cutter so that three flat cookies can fit together.
Gather your cookie cutter, a pencil, ruler, and stiff paper that is easy to cut out, I used cardstock. You’ll also need a rolling cutter like a pizza wheel or a
pattern tracing wheel from your sewing supplies. Also something narrow and flat to cut detail, I’ve used an
itty bitty metal ruler here but a flat head screwdriver would work as well. If you have nothing else a knife will do just fine. A small inexpensive craft paintbrush and plenty of parchment paper will also be needed.
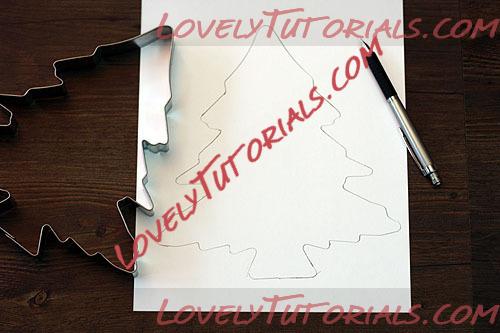
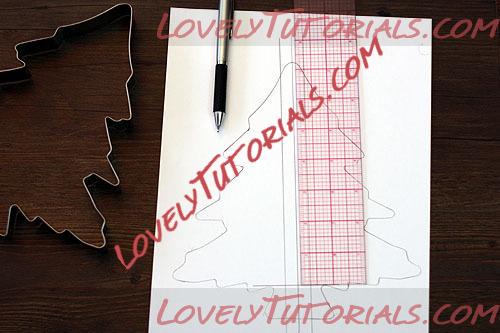
Trace your cookie cutter onto your cardstock.
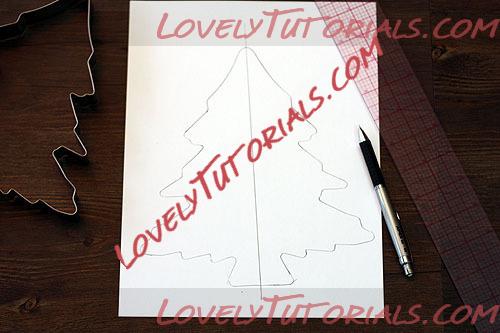
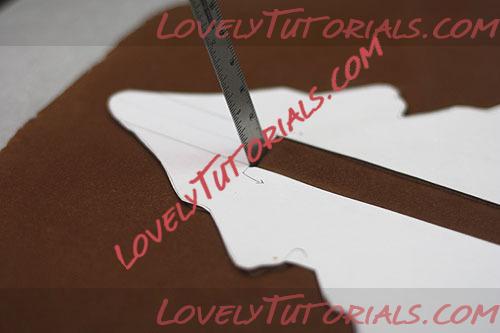
Draw a center line through your cookie cutter shape.
Now, measure two lines 3/8ths of a inch on either side of your center line (for a total width of 3/4ths of an inch).
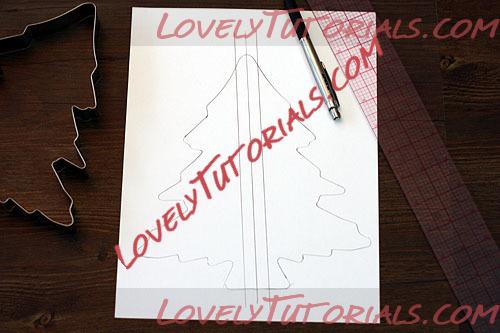
And here is the kicker –
do this again twice for a total of three cookie cutter outlines.
Measure the height of your cookie cutter to get X and
forget about the trunk if there is one. Your final tree will have a much better chance of not falling over if you eliminate it.
Take X and divide it by 3, then multiply that by 2. Now add 1/4th of an inch to get Y. Divide Y in half to get Z. Write down Y and Z before you forget what they are. What we are doing here is getting thirds of the total height plus just a little bit so that when we slot the cookies together one of them won’t be hanging up higher than the others. In this way all three will be resting on the surface (plate or decorative paper or otherwise) and will be more stable.
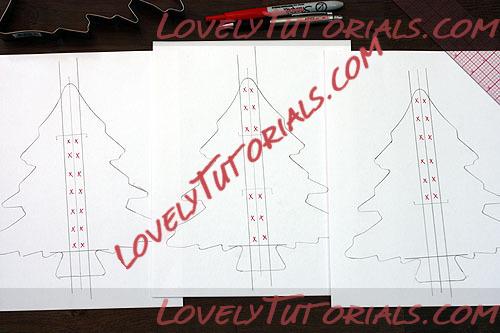
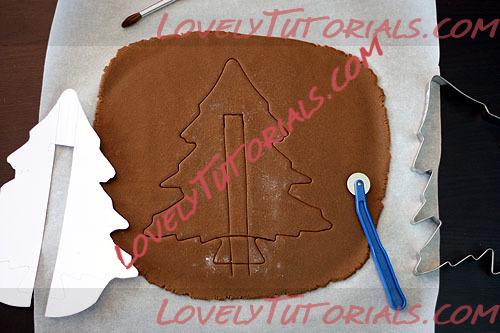
Now mark your first cookie outline with Y from the top down, your second cookie outline with Z from the top down and the bottom up, and your third cookie outline with Y from the bottom up.
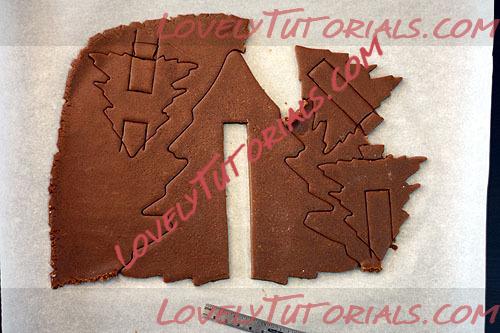
Trim your cookie outlines leaving enough detail so that you can line them up with a cut out cookie, in my case I made sure the bottom branches were cut out.

Roll out your dough to 1/4 inch thick. No thicker and no thinner. Thinner and the cookies will sort of lean instead of stand, thicker and they won’t fit together at all. Roll the dough out between two layers of parchment paper and, leaving the top parchment on, slide this onto a cutting board or cookie sheet and chill this in the freezer for about 10 minutes. Chilling the dough will help the top parchment come off cleanly and will help keep the cardstock templates from sticking.
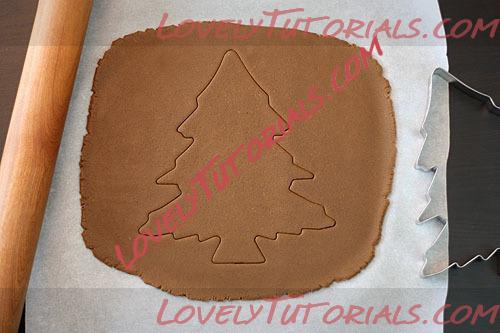
Take off the top layer of parchment and use your cookie cutter.
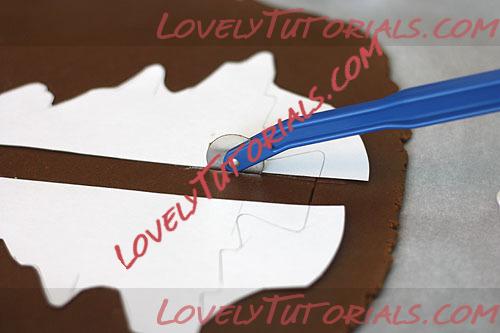
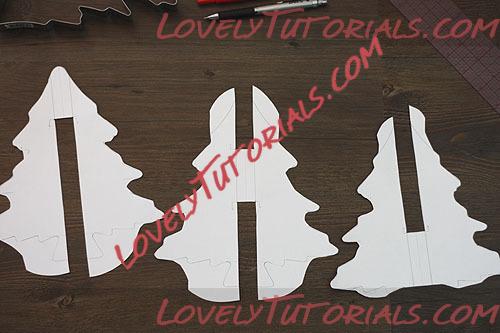
Then dust a wee amount of flour on the surface of your dough and on the back of your cardstock template and line up the template with your cookie outline. Using whatever tool you can cut out the slot. If you’re feeling particularly meticulous you can use a clean paintbrush to brush away excess flour once you’re done with the paper templates.
Use your tiny ruler, flathead screwdriver or knife to cut the corners of the slot.
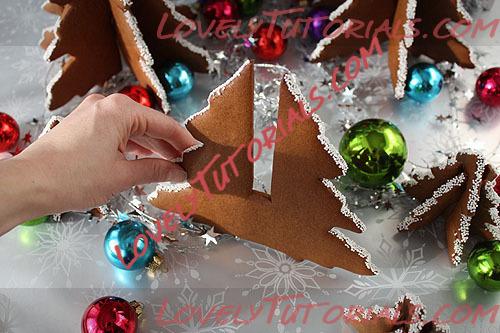
Ta da! You’ve created a 3D cookie.
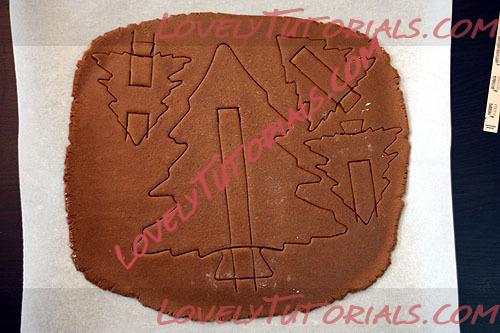
Don’t forget to cut away the trunk of your tree if you have one. Here I’ve added three of my smaller sized tree.
Don’t move the dough from the parchment, instead pull away the dough from around your cut out shapes.
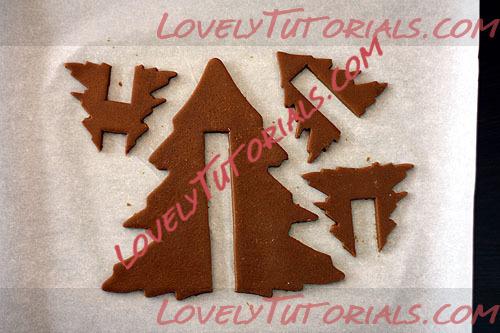
Use your small ruler or screwdriver as a spatula to pry up dough without disturbing your cookies.
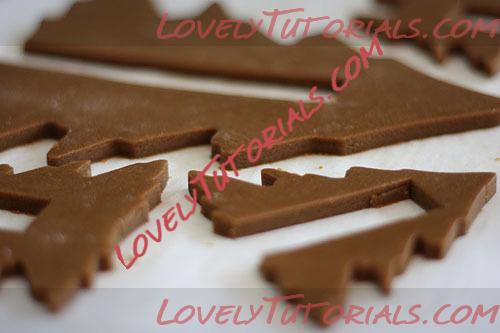
Slide your cookies back onto the cutting board and chill in the freezer for another 10 minutes.
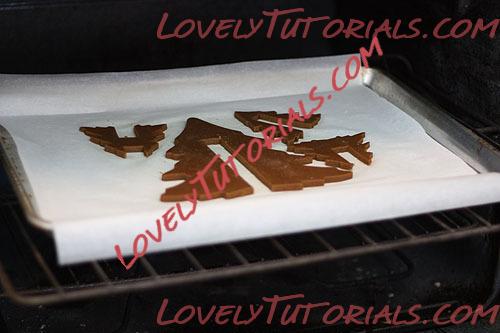
Then slide the parchment onto a cookie sheet and bake at 350 degrees for 20 to 25 minutes depending on the size of your cookie. You want the dough to be darker and almost overdone so that it has a lot of strength. When you bring them out of the oven don’t remove them from the cookie sheet, let them all cool together. This will keep your cookies as flat as possible and will help the slots from becoming distorted. If you discover the cookie is a little flexible after it’s cooled you can stick it back in a 350 degree oven for a few minutes, I did this with success on one of the trees in the photos above.

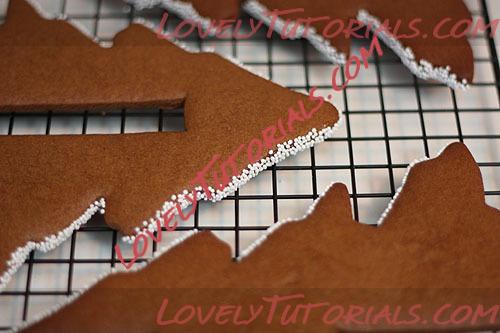
I decorated the branches of my cookies with nonpareils, which roll and bounce everywhere. To combat this I lined a 8X12 baking pan with paper towels to catch my sprinkled nonpareils. I shook the nonpareils from a small condiment cup, which was faster than using my fingers.
Use your small paintbrush to brush simple syrup along the top edges of the branches, then sprinkle your decorations over the glue.
Let your decorated cookies dry for about a half an hour before setting them up. And we’re done!

A few notes:
– I chose a pattern tracing wheel over a similar fondant cutter because the pattern tracing wheel is larger and will clear the 1/4 height of the dough here. Also, the fondant cutter is wider and v-shaped whereas the pattern tracing wheel acts more like a pizza wheel.
– If you make the dough thinner you should make the slots narrower, otherwise your trees will lean a bit. Likewise if you want a thicker dough your slots will need to be wider. I’m afraid I don’t have helpful tables on what is what yet, so it’ll be up to your own trial and error.
– Can you make trees with four, five or six cookies? Yes! You just have to adjust the slots to fit all together and use a fairly thin dough. I’ll show some of my early creations tomorrow. I like the plumper cookies I’ve used here and I’ll show you why.
– Before I used a sugar syrup to adhere the nonpariels I tried using clear piping gel. The gel worked ok and dries to a gummy consistency but it required being smoothed down by a finger. In the end brushing on the sugar syrup was faster and tidier. Of course, if you are using something that doesn’t need the glue to be clear some royal icing will work just great. White icing and glittery sanding sugar would look great.
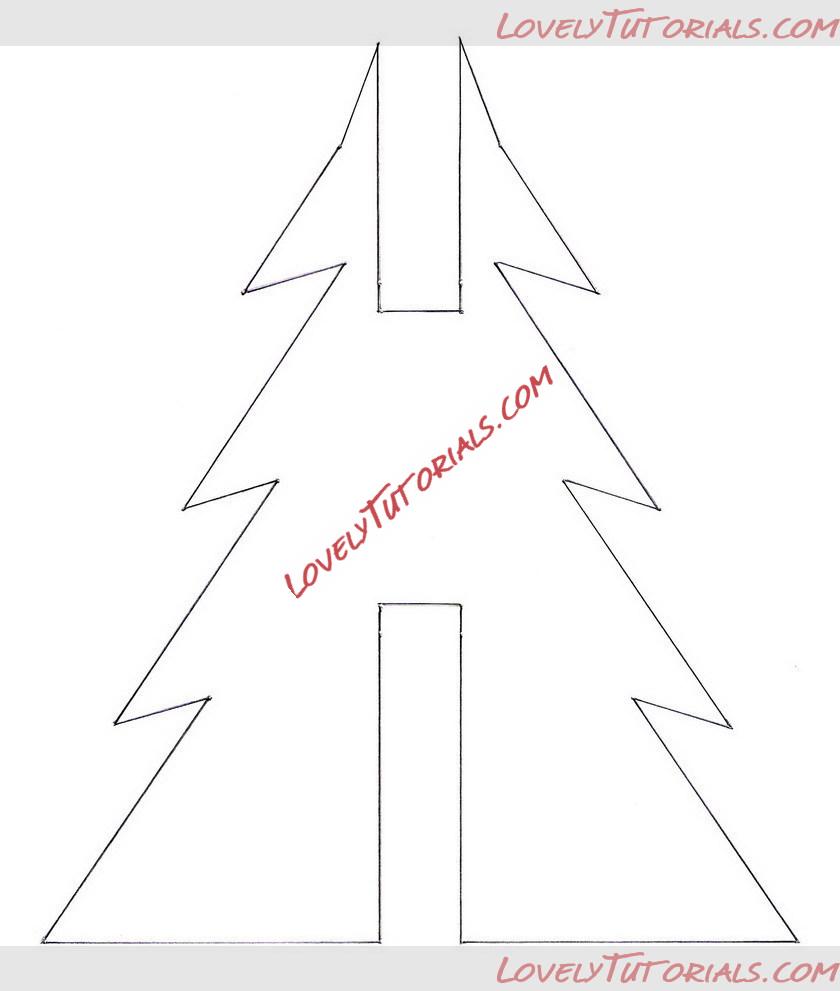
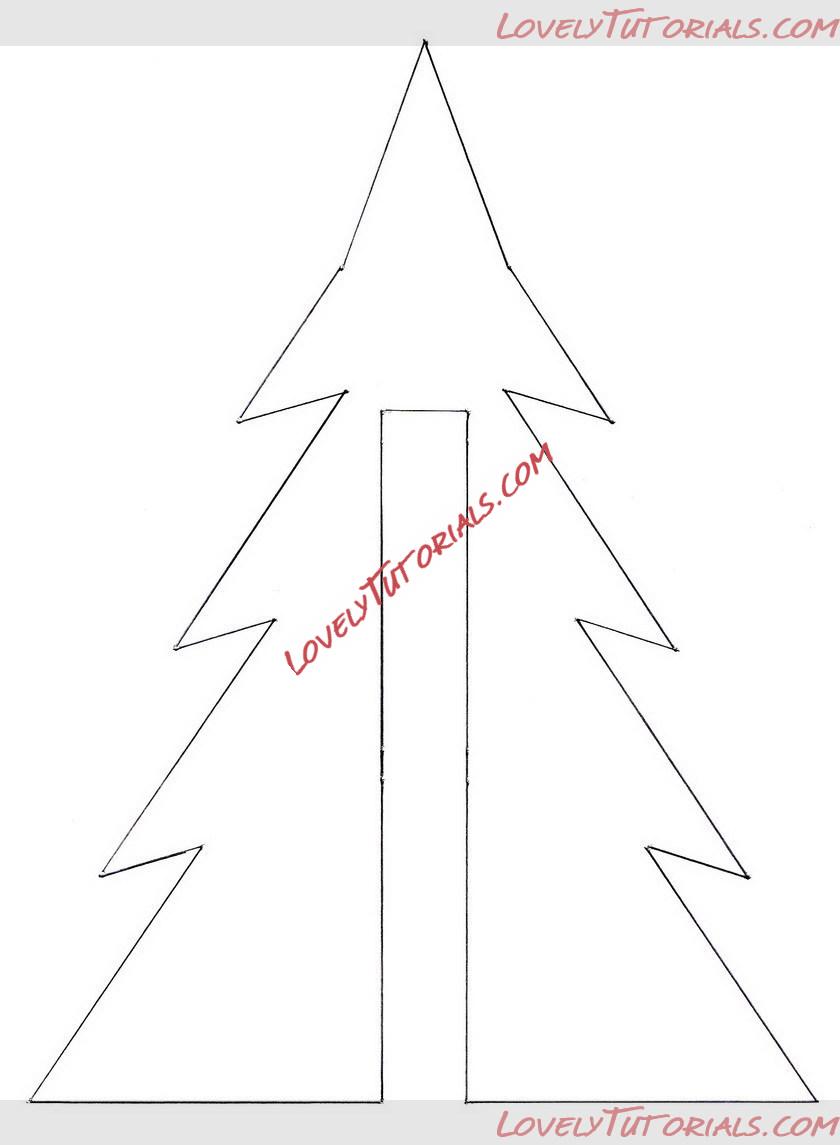
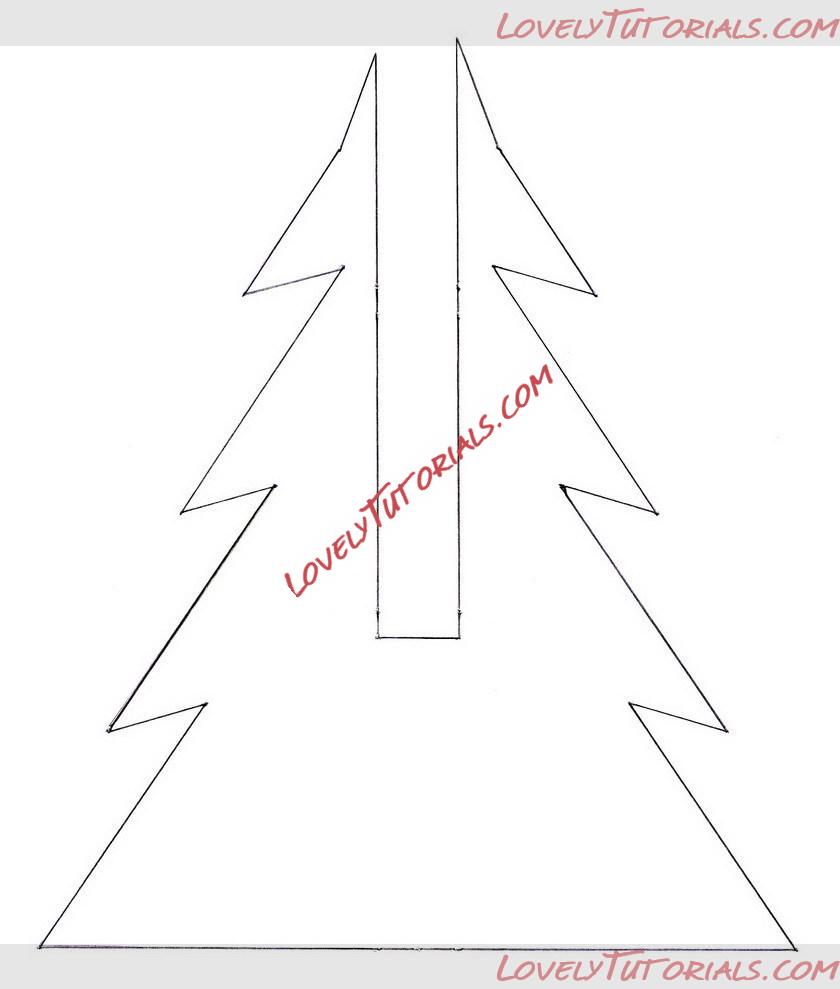
If you don’t have a tree cookie cutter handy you can use the templates I’ve created below to make the tree shown above. It’s not fancy but I kept all the lines straight in the hopes that it would be easy to cut out. To use the templates click on each thumbnail to view a larger picture and print that out, each is about 8 inches tall. You can print the trees smaller to make smaller cookies, but if you do make sure to widen the slots to 3/4ths of an inch.