|
|
МК торт "3Д змея"-Carved 3D python cake tutorial
|

10.11.2012, 19:31
|
|
Администратор
|
|
Регистрация: 07.09.2010
Сообщений: 7,940
|
|
 МК торт "3Д змея"-Carved 3D python cake tutorial
Огромная благодарность Автору thesnakecake за Мастер-класс
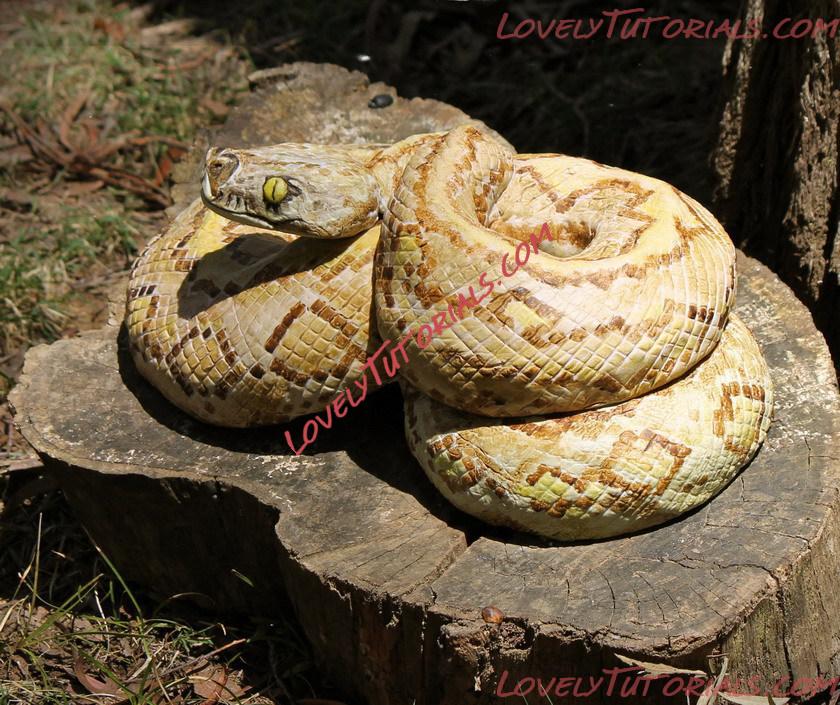
Hi all, after lots of questions and disbelief, here are some pics of how to make a snake cake…
It took a while, but turned out better than i hoped and was a huge hit with the kids – so, well worth the effort. Unfortunately i didnt take as many pics as i should have during the creation, but you will get the idea.
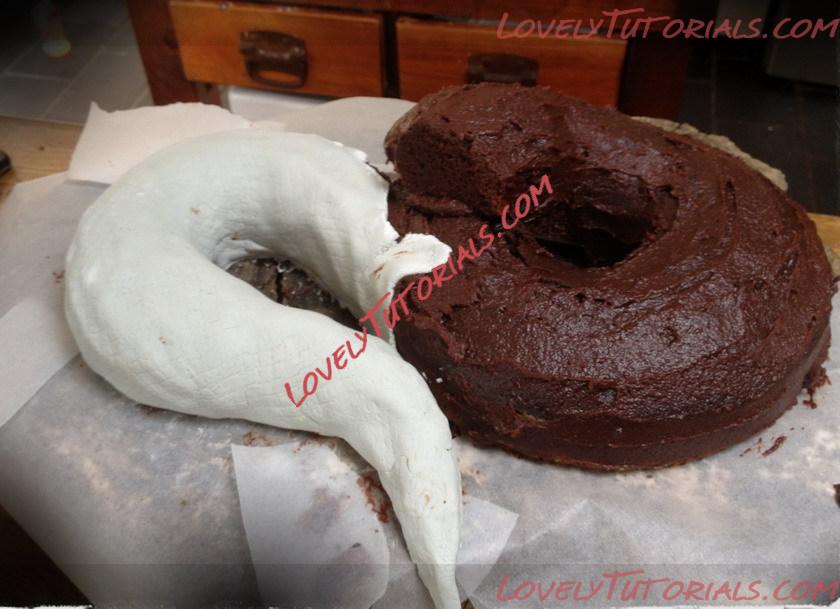
I started with 2 ring tins and a heavy basic chocolate mud cake. I made a double mixture for the big ring tin and 2 single ones for the smaller ring tin.
In looking for a ‘plate’ big enough to accommodate the size of a large 8 (Rex was turning 8) I came across the log slice which gave the whole thing some authenticity. I hosed it off with the high pressure hose and waited for it to dry before starting to build the snake.
With some careful trimming i created the ‘base’ layer of the snake with a large and a small ring, starting from the tail and sticking the offcuts back on with chocolate frosting before applying a thin layer of fondant icing. (I tried to colour it browny grey, but it wasnt really working, so decided to leave it and paint later).
The fondant also allowed me to drape the tail off the edge of the log to look more realistic.
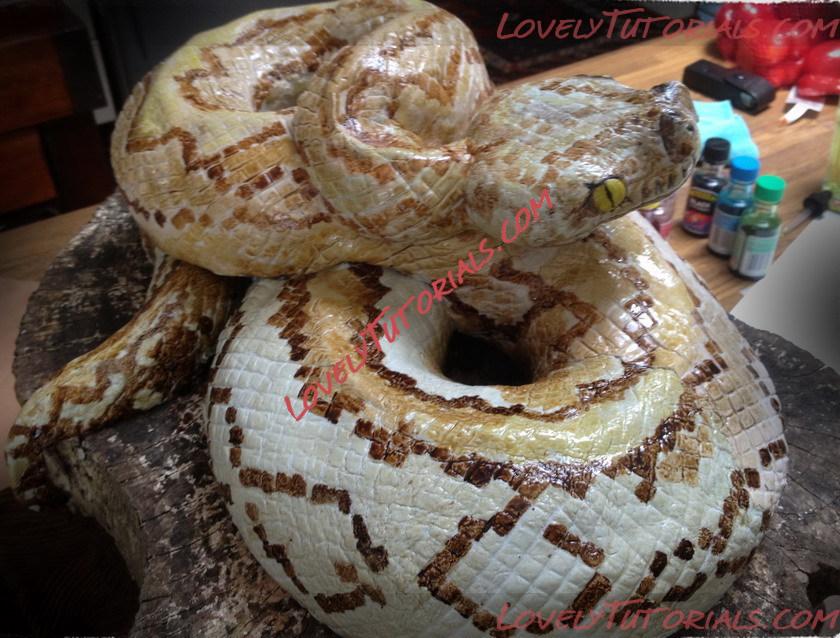
A small angle of corrugated cardboard was used to elevate the end of the large ring to step it up to the next ‘loop’, another small ring cake. Trimmed pieces of this top cake were stuck on top with more chocolate goo to make the neck piece, although the angle wasnt quite right, so i needed to fudge a slight extension with a lump of icing to help secure the neck. Fondant icing was then continued up over the top layer of the cake and i used an onion bag to create the scale patterns. The scales were not really working as i had hoped though, and so i raided the shed and found a square of gutter guard – plastic cross hatched stuff, and washed it off and used that to press into the half dry fondant. Some parts worked better than others!
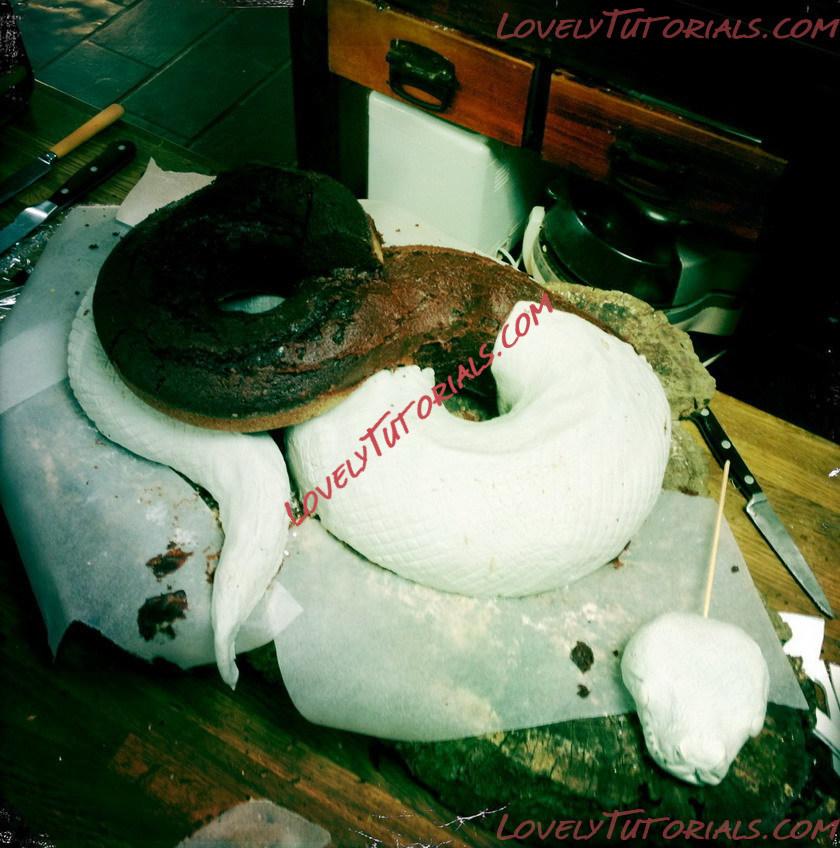 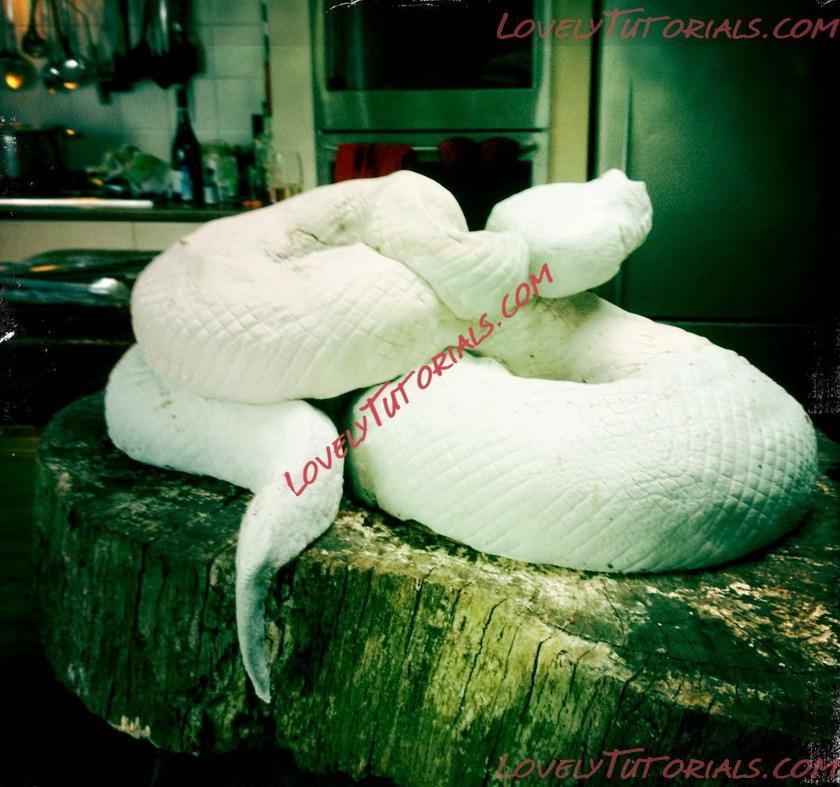
For the head I used chocolate wafer biscuits, ‘glued’ together with Nutella until i had a ‘brick’ of them, which i then shaved to shape with a sharp knife and covered with fondant icing. Pinching and poking with a skewer helped form the right shape for nostrils etc and small balls of icing squashed on for eyes. I then inserted a skewer to help secure the head into the cake at the right angle, continued the icing to meet it and left the whole thing to dry overnight under an overturned washing basket and sheet.
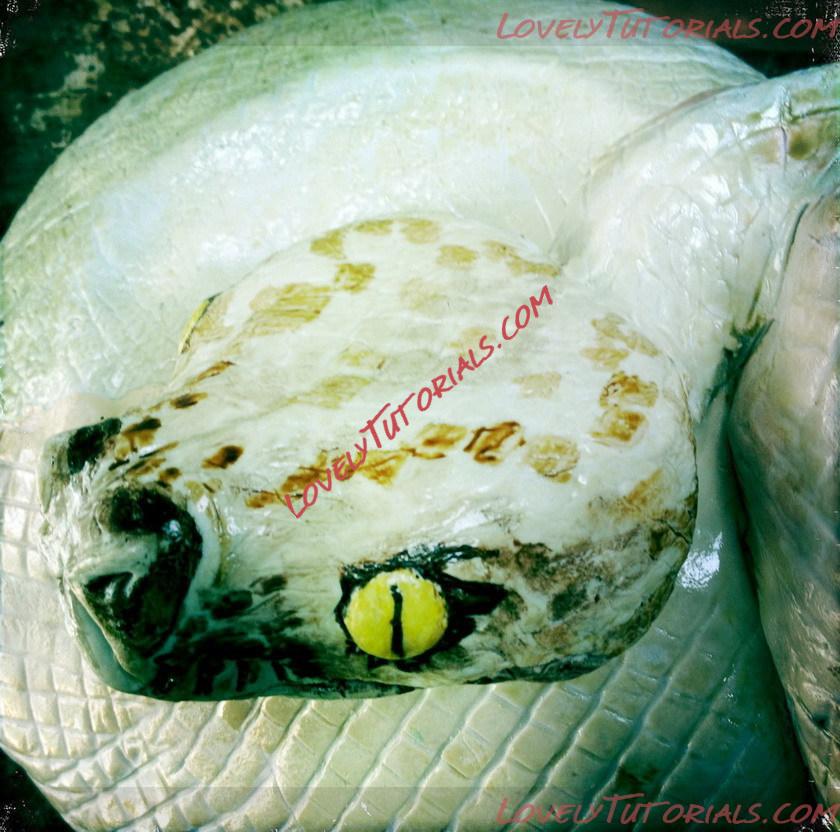
The next morning I set about painting it – rather nervously! I used basic food colouring from the supermarket and mixed them in an ice cube tray with a dash of vodka – apparently it dries quicker and helps prevent the icing going too soggy. It seemed to work, i used a paler wash of colour and then a drier smaller brush to paint darker detail. It was easier to create a realistic looking python pattern where the scales were more obvious, and i sort of got into the swing of it. It did take several hours to paint, but since it was all experimental I was in no rush, and it was great fun! I realised about half way through that it was actually going to look fairly realistic – i couldn’t wait to show Rex when he got home from school – he was so thrilled with it!
|
 |
|
Метки
|
3d bizcocho, 3d bolo, 3d cake, 3d dort, 3d kage, 3d kager, 3d kake, 3d kek, 3d pastel, 3d python cake, 3d tarta, 3d torta, 3d torte, 3d torti, 3d torty, 3d κέικ, addım-addım təlimat, adım, adım adım yönergeler, artesanatos passo a passo, bemutató, bolando bolos, cake decorating, cake decorating techniques, carved 3d snake cake how to, cobra bolo, confeitando bolos, creazione e decorazione torte, decoracion de pasteles, decoración de tortas, decorada en fondant, decorare le torte, decorazioni, deko fondant, dekorace na dort, dekoracija, dekoracije, dekorasyon, dekorácie, dort had, fender, fimo, flower paste, fondan, fondant, fondente, fondente di zucchero, fotopostup, foundant, gebak, glazuur, gum pasta, gum paste, gumpaste, had s postupem, hand-made, handmade, how to, how-to's, instrucţiuni, instrukcijas, instrukcje, jak na, kage dekoration, kage slange, kagedekoration, kake slange, kakebaking, kakku käärme, kek yılan, korak, korak za korakom navodila, korak-po-korak upute, koristeet ja koristelu, krok, krok po kroku, krok za krokem, krok-za-krokem, kuchen schlange, las instrucciones, las técnicas, le tecniche, les techniques, lukie, marshmallow, masa flexible, master-class, master-klasse, master-klasy, meistras klasės, metodikas, mistr třídy, modeling paste, modelling past, motivtorten, návod, opplæringen, pamoka, pap, pas, pas-cu-pas, pas-à-pas et modèles, paso, paso a paso, passo, passo a passo, passo-a-passo, passo-passo le istruzioni, pasta de miel, pastel de serpiente, postup na 3d torty, postupak za ukrasavanje, pâtisserie, schlange, schmelzend, schritt für schritt anleitung, schritt-für-schritt, schritt-für-schritt-anleitungen, serpent, serpent gâteau, snake, snake cake, snake cake tutorial, stap, stap-voor-stap, stap-voor-stap instructies, steg for steg, steg för steg, steg-för-steg, steg-för-steg-instruktion, step, step by step, step-by-lépésre, step-by-step, step-by-step instructions, sugarcraft, sugarpaste, suikerglazuur, taart slang, technieken, techniken, techniki, techniky, technikák, techniques, tecnicas de decoracion, tecniche, tehnici, tehnike, teknikker, teknikler, tips och trix, tort șarpe, torta di serpente, torta kígyó, torta zmija, tortas gyvatė, torte, torte decorate, torten dekorieren, torti, tortu had, trin, trin for trin, trin-for-trin, trin-for-trin instruktioner, trinn, trinn for trinn, trinn-for-trinn-instruksjoner, trucs et questions sur la décoration de gateaux, tutorial, tutoriale, tutorias, tutorias/ideas para decorar los bizcochos, tutoriel, tutorijal, tårta orm, tårtbottnen, tårtor, técnicas, ukrašavanje torti, uputstvo za dekoraciju, zuckermasse, सजा केक, ट्यूटोरियल मास्टर वर्ग, कदम, कदम दर कदम निर्देश, तकनीक, étape, étape par étape les instructions, öğretici, žingsnis, žingsnis po žingsnio, 宗師級教程,一步,一步一步的指示� � � � �技術,udžbenik, 宗師級教程,一步,一步一步的指示� � � �技術,udžbenik, 裝飾蛋糕, 만들기 제작 과정, βήμα, βήμα προς βήμα οδηγίες, οδηγίες βήμα βήμα, παντεσπάνι art, τεχνικές, φίδι κέικ, φροντιστήριο, декорация на торти стъпка по стъпка, инструкция, как сделать, крок за кроком, крок за крокам, год змеи, покроково, пошагово, пошаговые фотки, пакрокава, миниатюра, мк, мк 3д торт змея, майстор-класа урок, майстар-клас, майстер-клас, майстер-класи, маршмеллоу, мастика, мастер-класс, зд торт, зд торта, змей, ручной работы, ручная работа, символ 2013, украшение тортов, сахарная мастика, уроки прикрашання, стъпка, стъпка по стъпка инструкции, торт змея, торт змяя, торт змія, торта змия, торта стъпка по стъпка, техники, техника, техніка, туториал, туторіал, тэхніка, шаг за шагом, інструкцыя, інструкція  |
|

