|
|
–ú–ö —ā–ĺ—Ä—ā –ú–į—Ź–ļ -Light House Cake tutorial
|

25.02.2013, 12:06
|
|
–ź–ī–ľ–ł–Ĺ–ł—Ā—ā—Ä–į—ā–ĺ—Ä
|
|
–†–Ķ–≥–ł—Ā—ā—Ä–į—Ü–ł—Ź: 07.09.2010
–°–ĺ–ĺ–Ī—Č–Ķ–Ĺ–ł–Ļ: 7,669
|
|
 –ú–ö —ā–ĺ—Ä—ā –ú–į—Ź–ļ -Light House Cake tutorial
–ě–≥—Ä–ĺ–ľ–Ĺ–į—Ź –Ī–Ľ–į–≥–ĺ–ī–į—Ä–Ĺ–ĺ—Ā—ā—Ć –ź–≤—ā–ĺ—Ä—É Veena –∑–į –ú–į—Ā—ā–Ķ—Ä-–ļ–Ľ–į—Ā—Ā
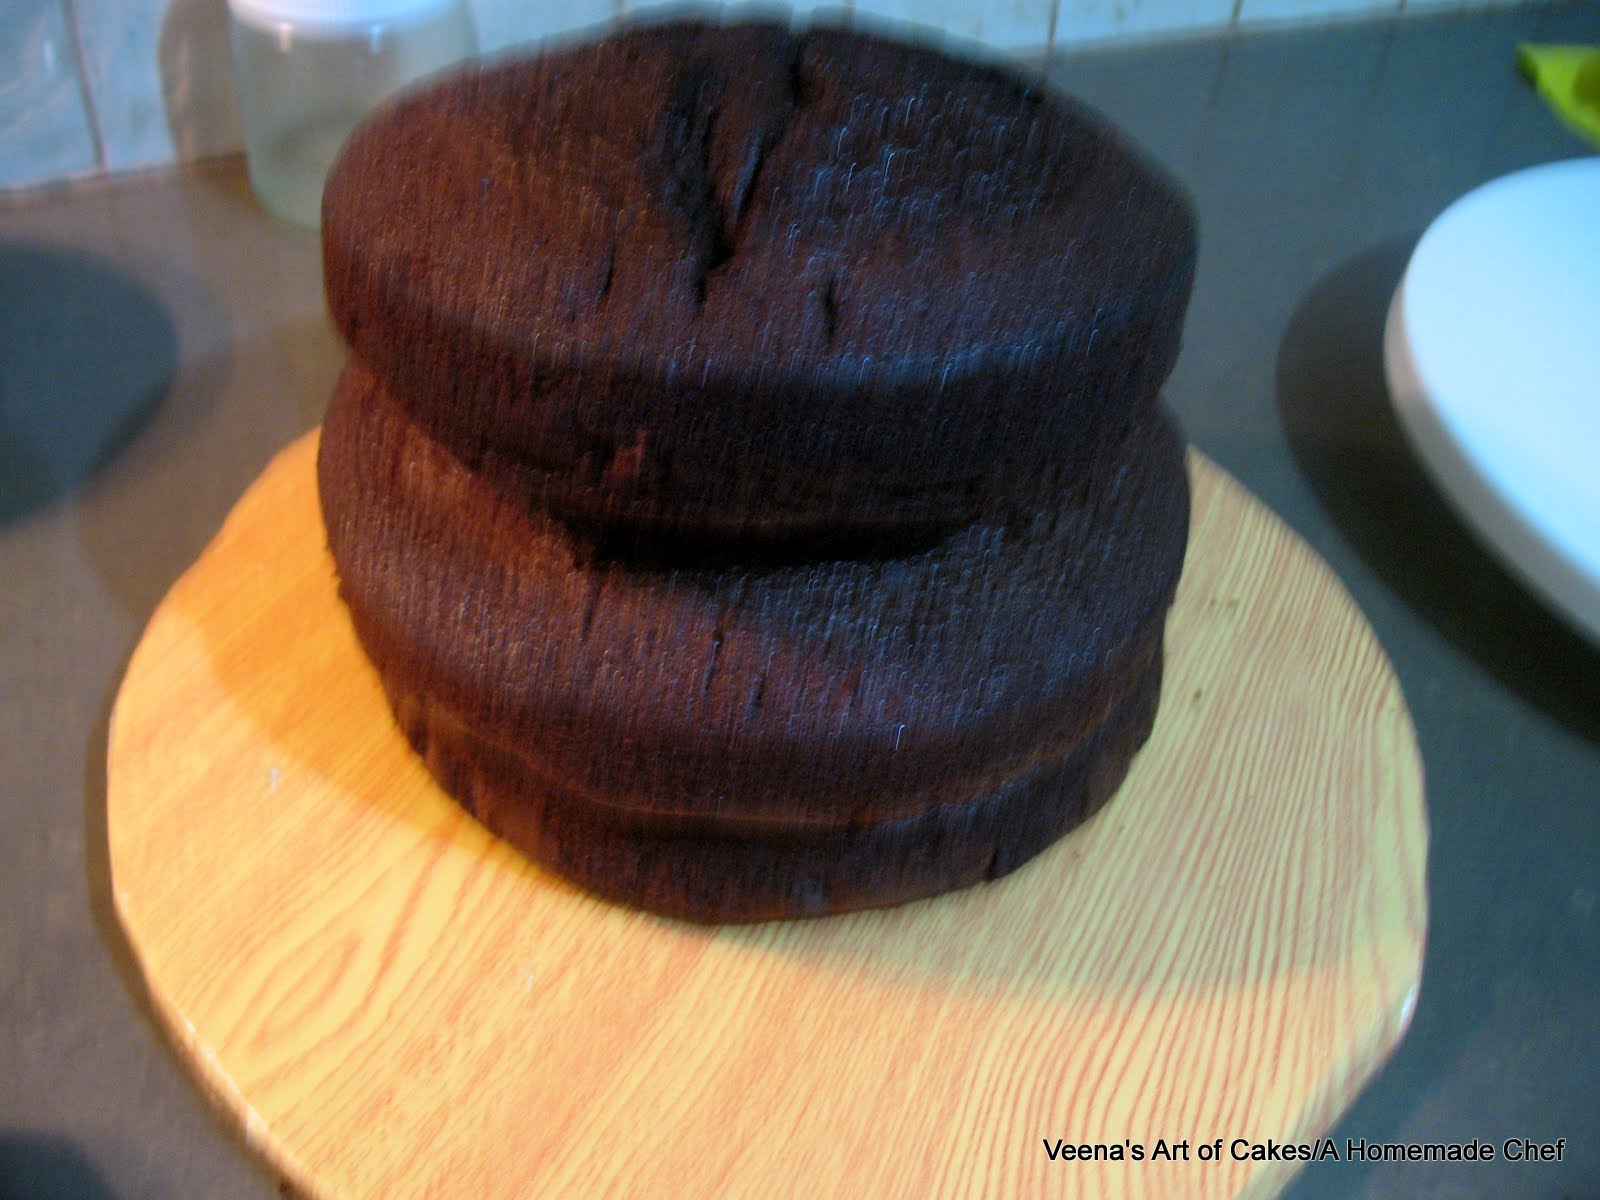
I started with two seven inch round cakes.
There's the first seven inch round. See the cut?
I removed the cut and placed it down.
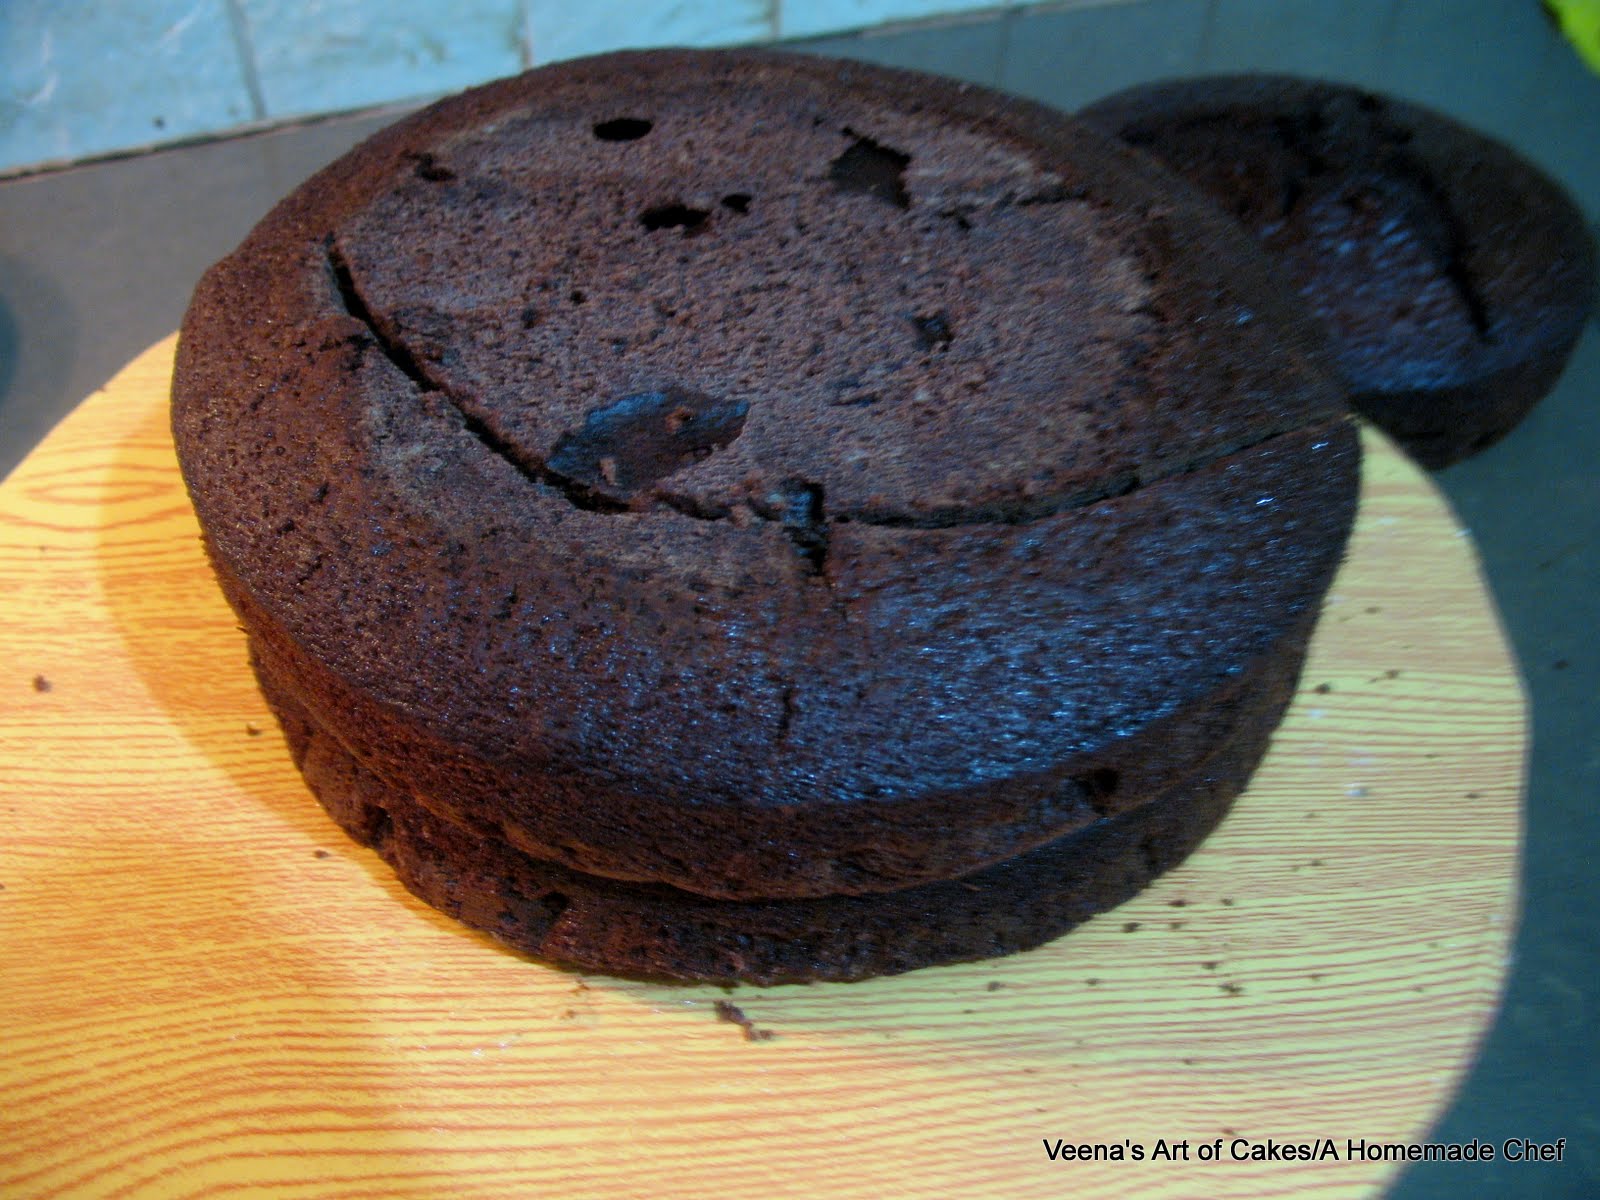
Now; I was planning to keep it like so because I wanted the cake to be tall.
So I layered the tiers with buttercream as well as put dowels between the two cakes.
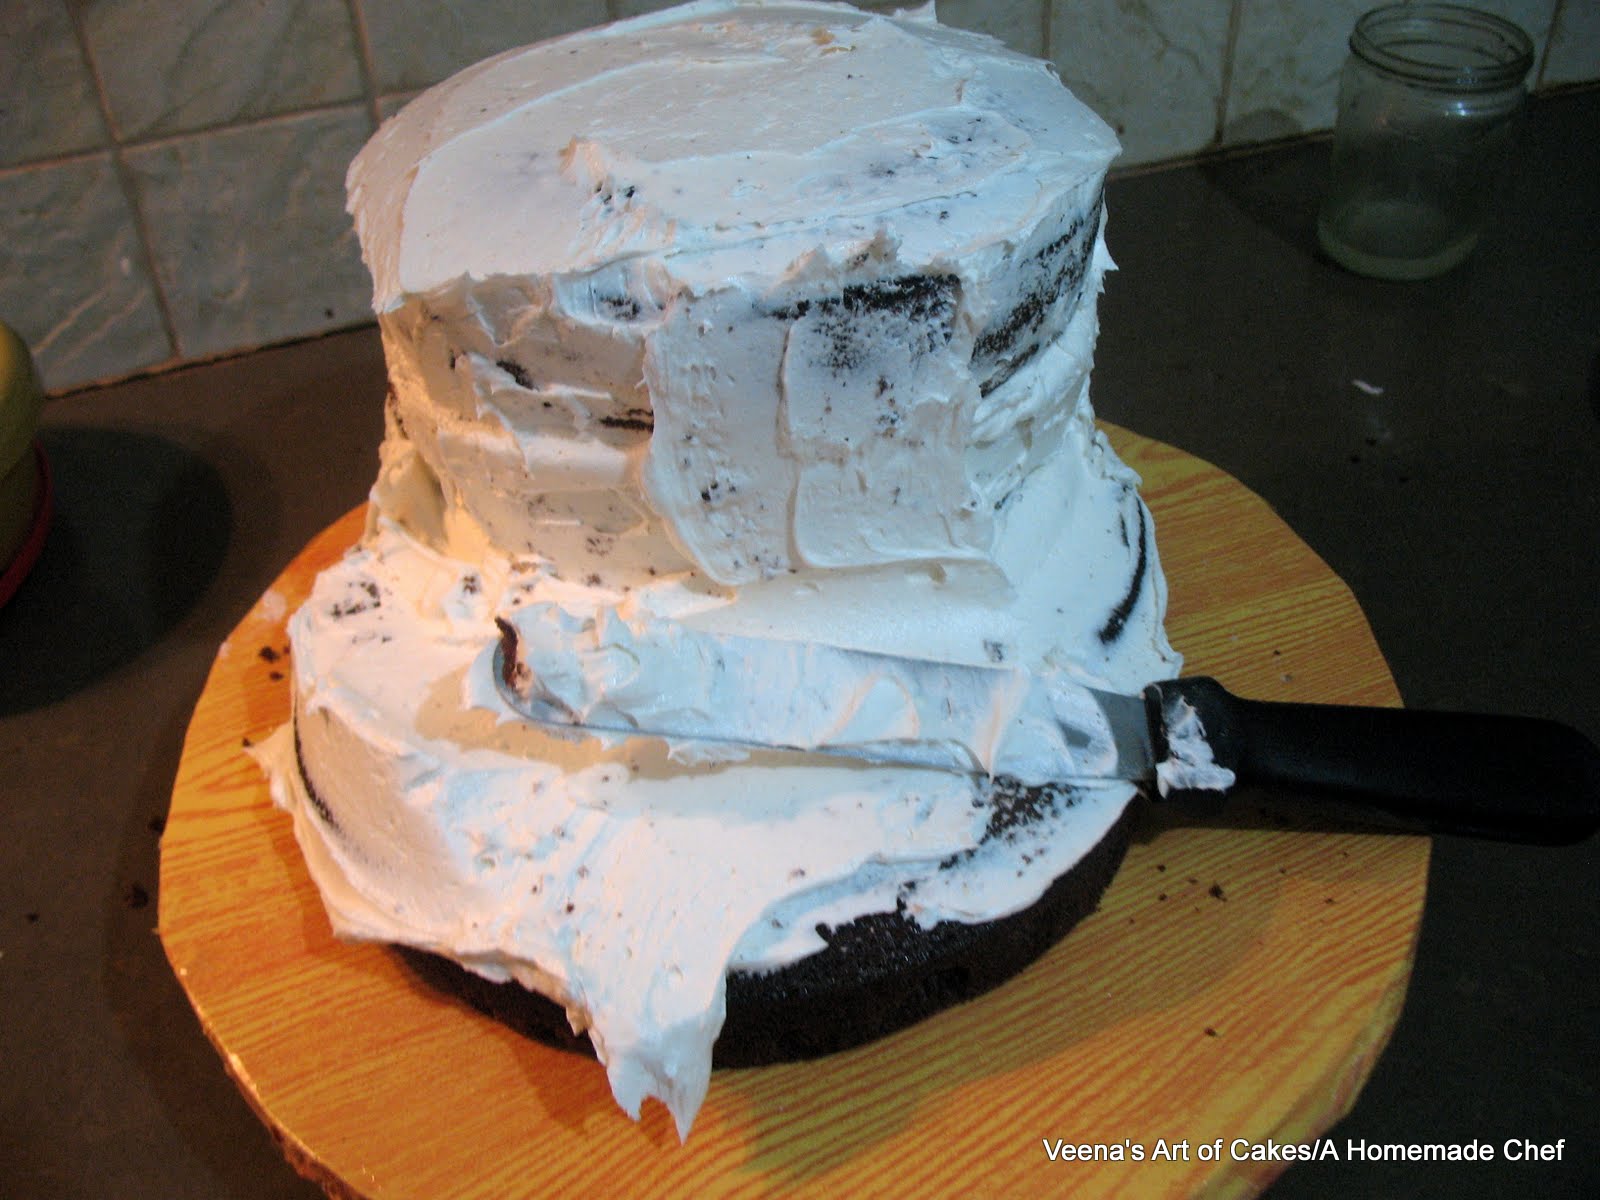
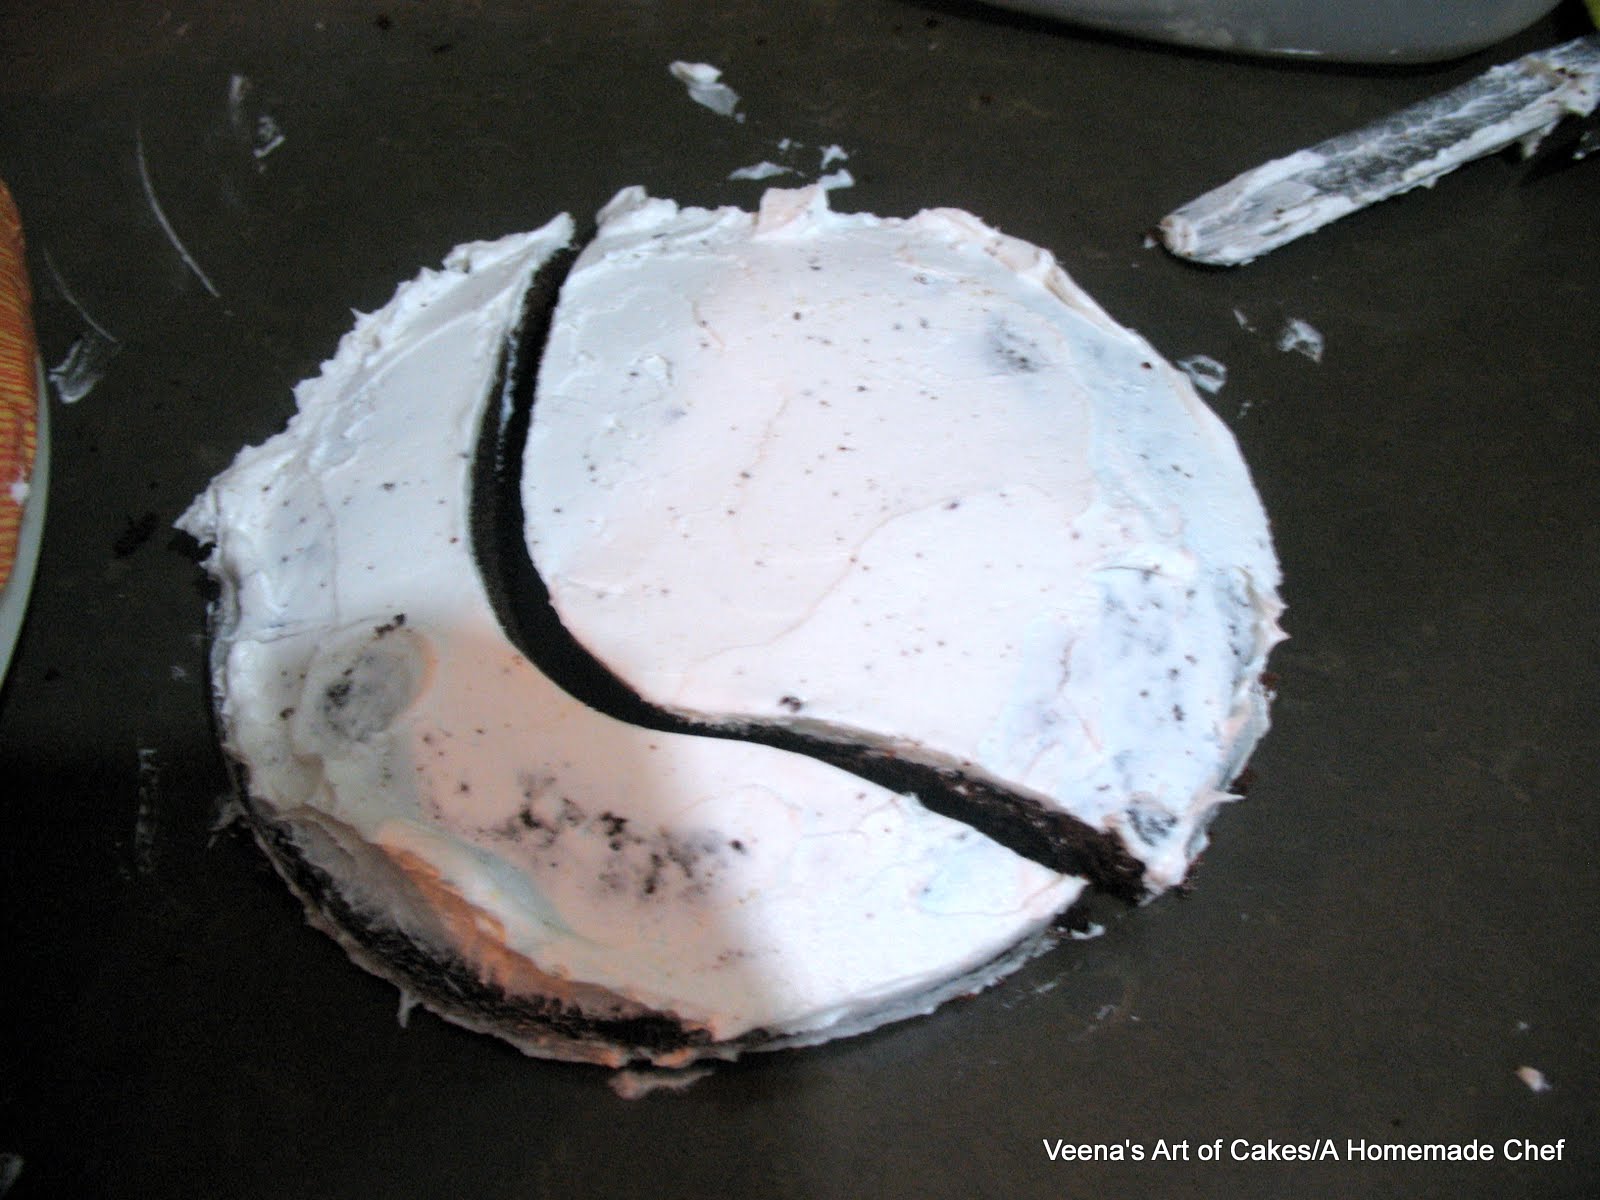
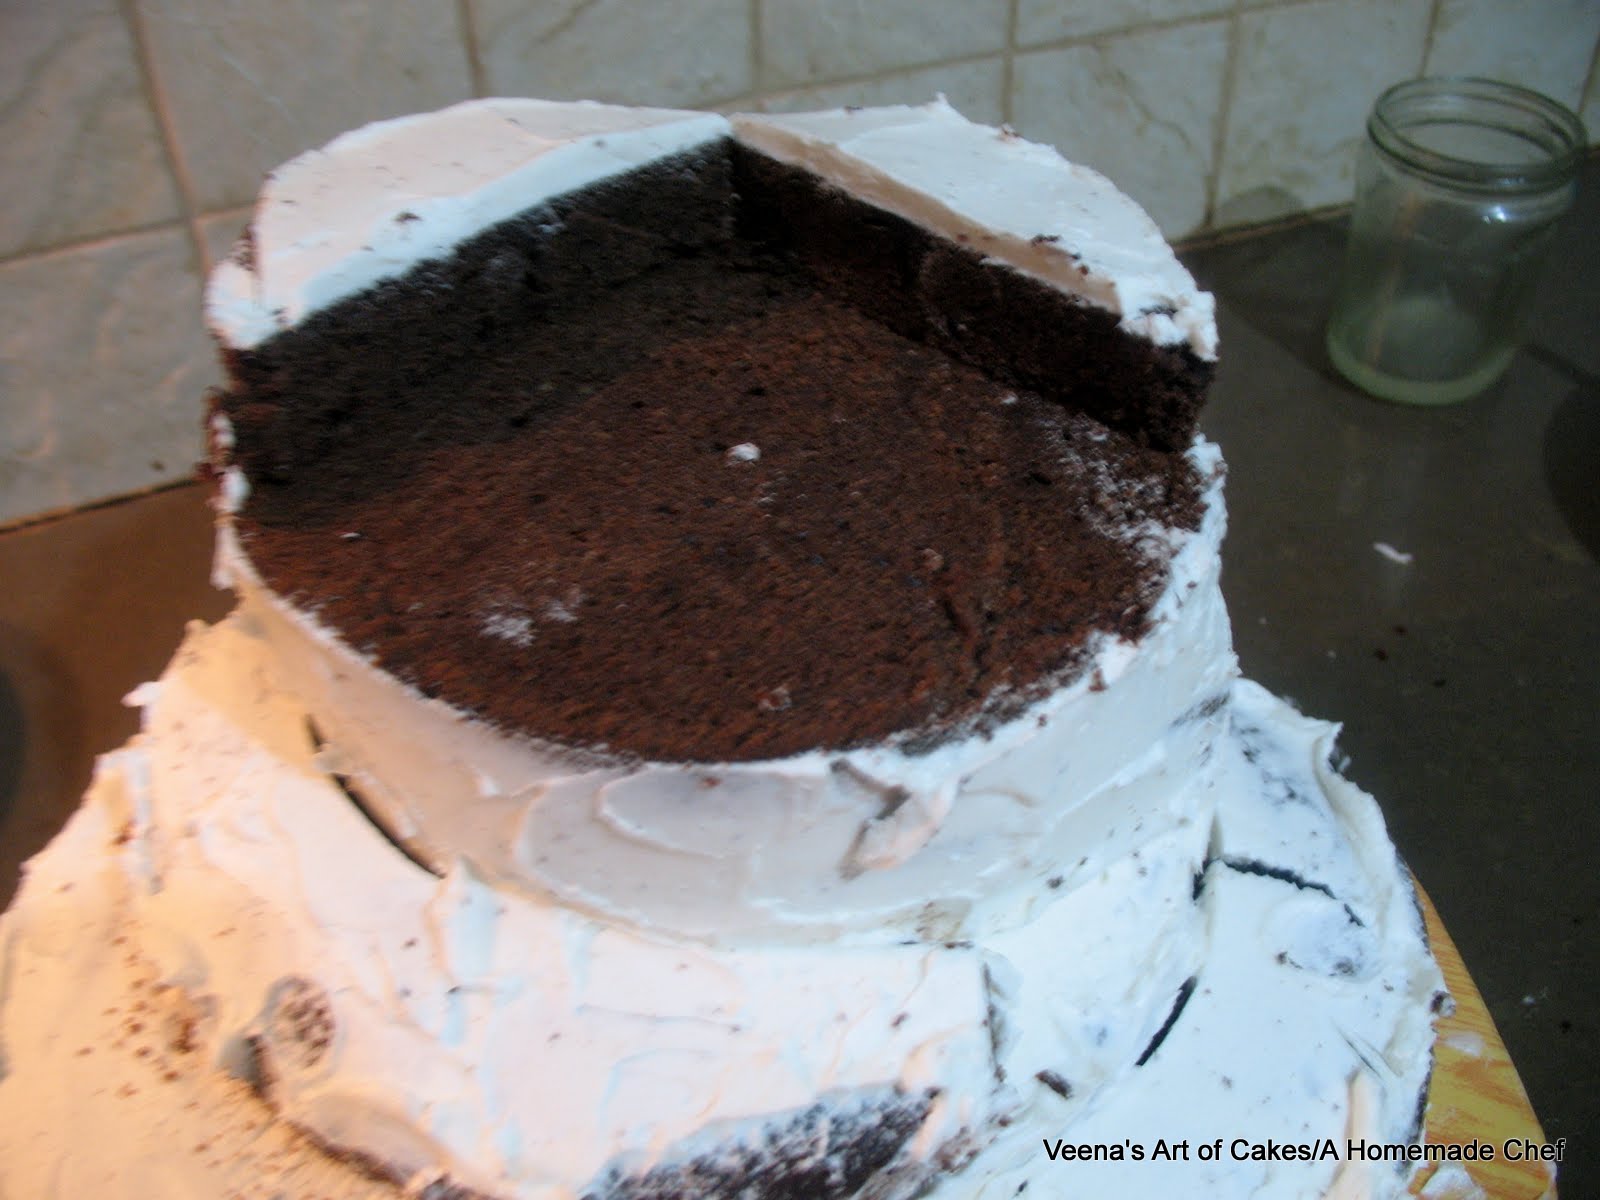
However, i changed my mind and decided to add more character to the bottom part. So I cut off the top half the top tier.
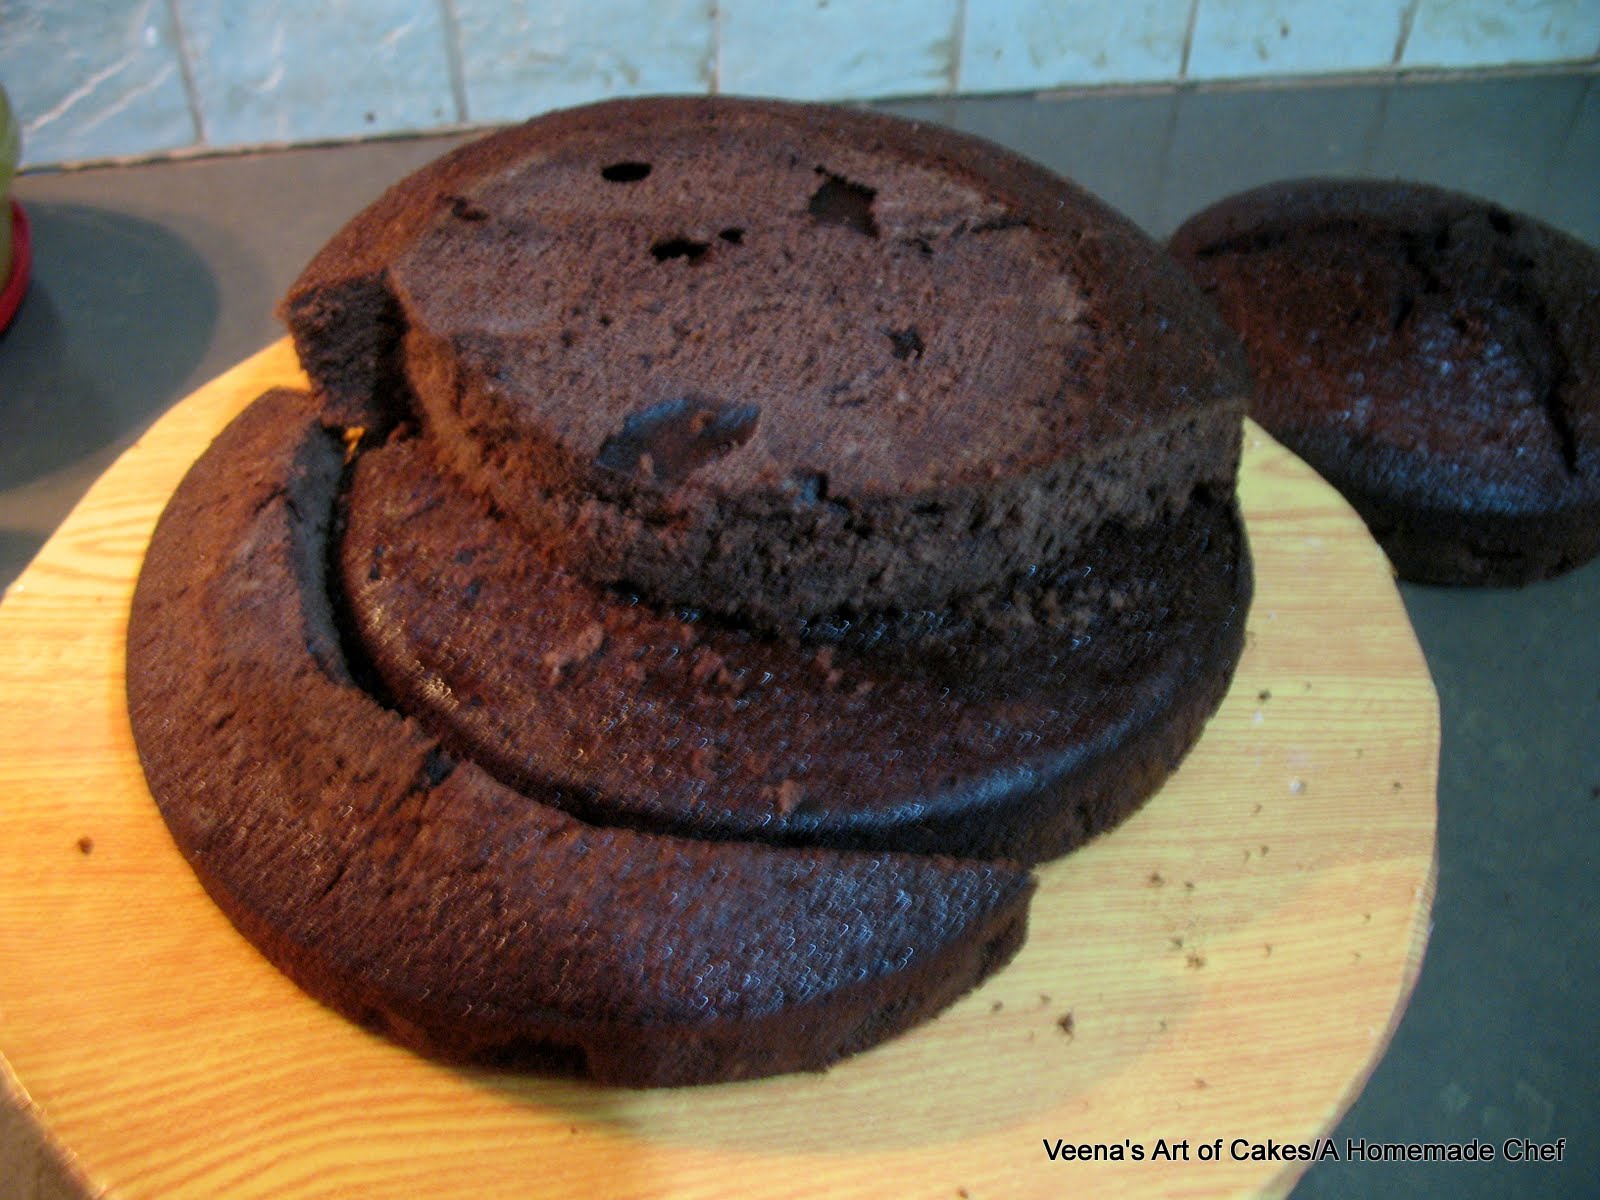
Here it is.. I cut it like so..
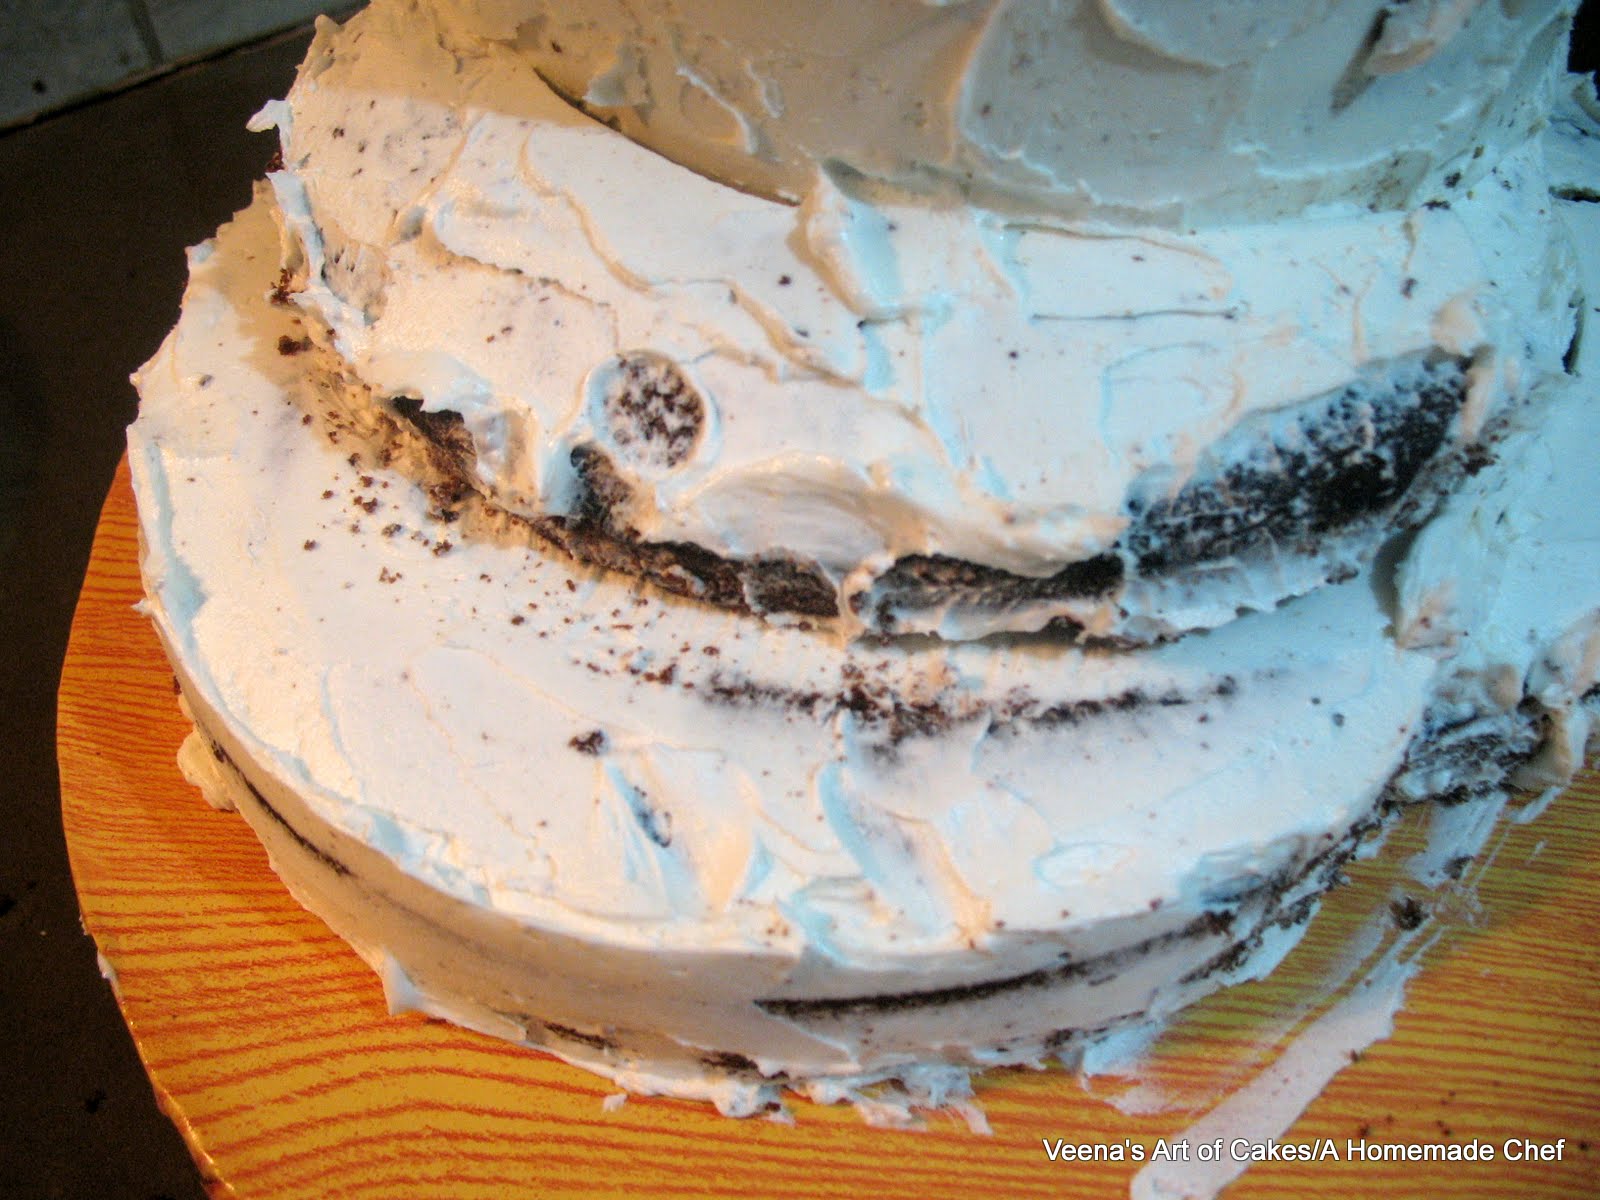
and place the smaller cut around the bottom tier on the cake board. But at the back.
And the other piece I cut in half and place it back on the top... like so..
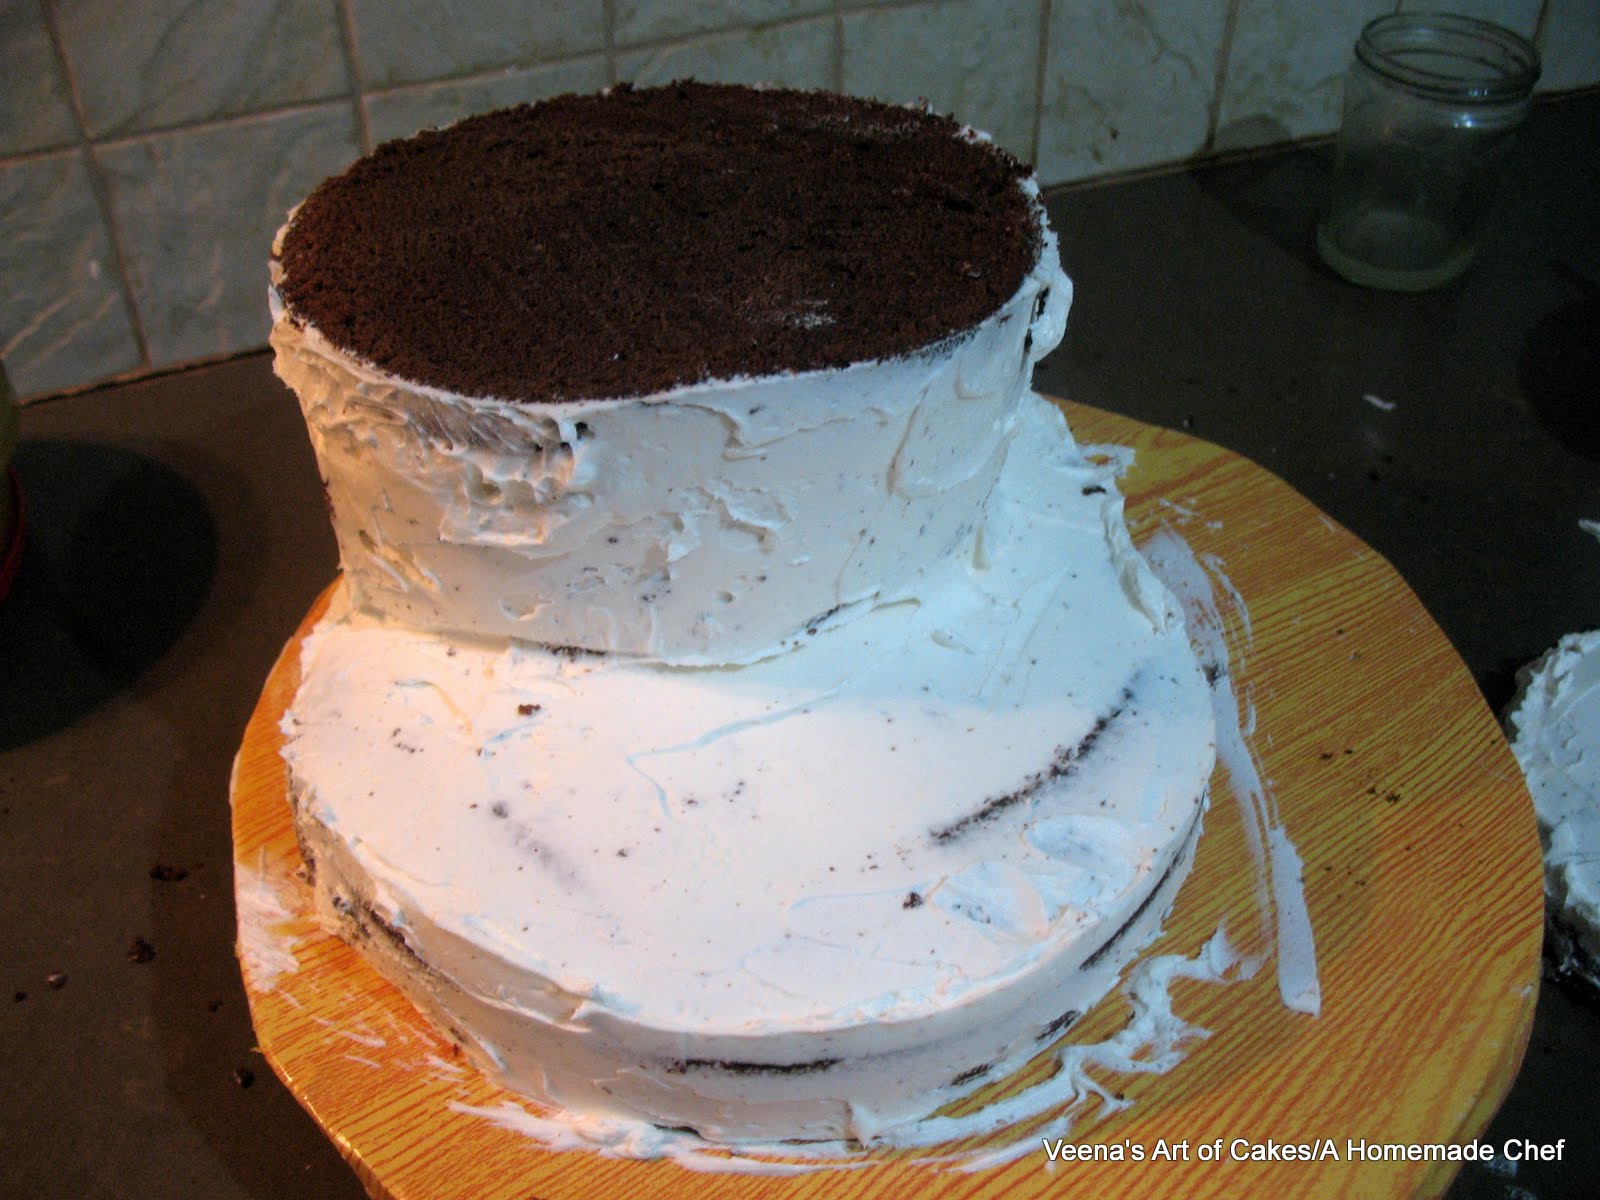
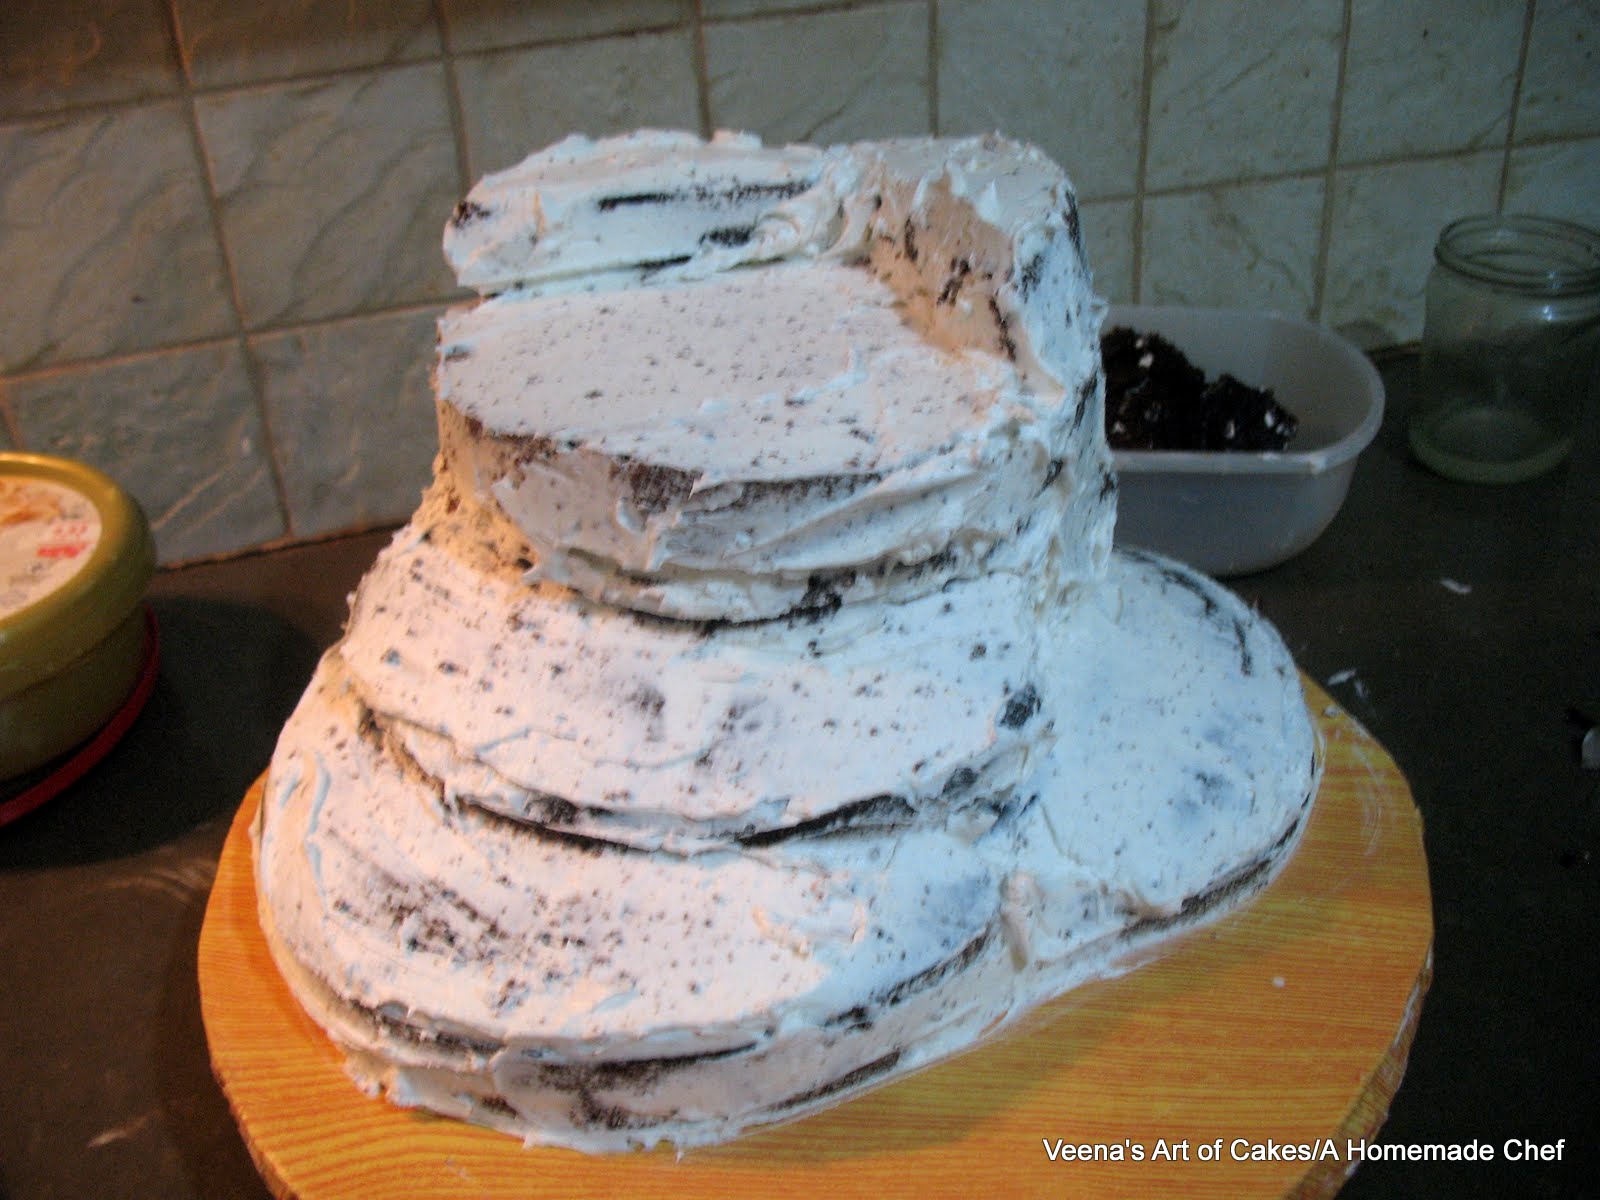
And this is what I had. Again covered with buttercream.
Chilled it and applied a second coat of buttercream.
For this cake I wanted to hand pain rather then add colored fondant. I though that would be the best way to add more shades. Of Course if you have an air brush so much better.. But I don't....not yet.
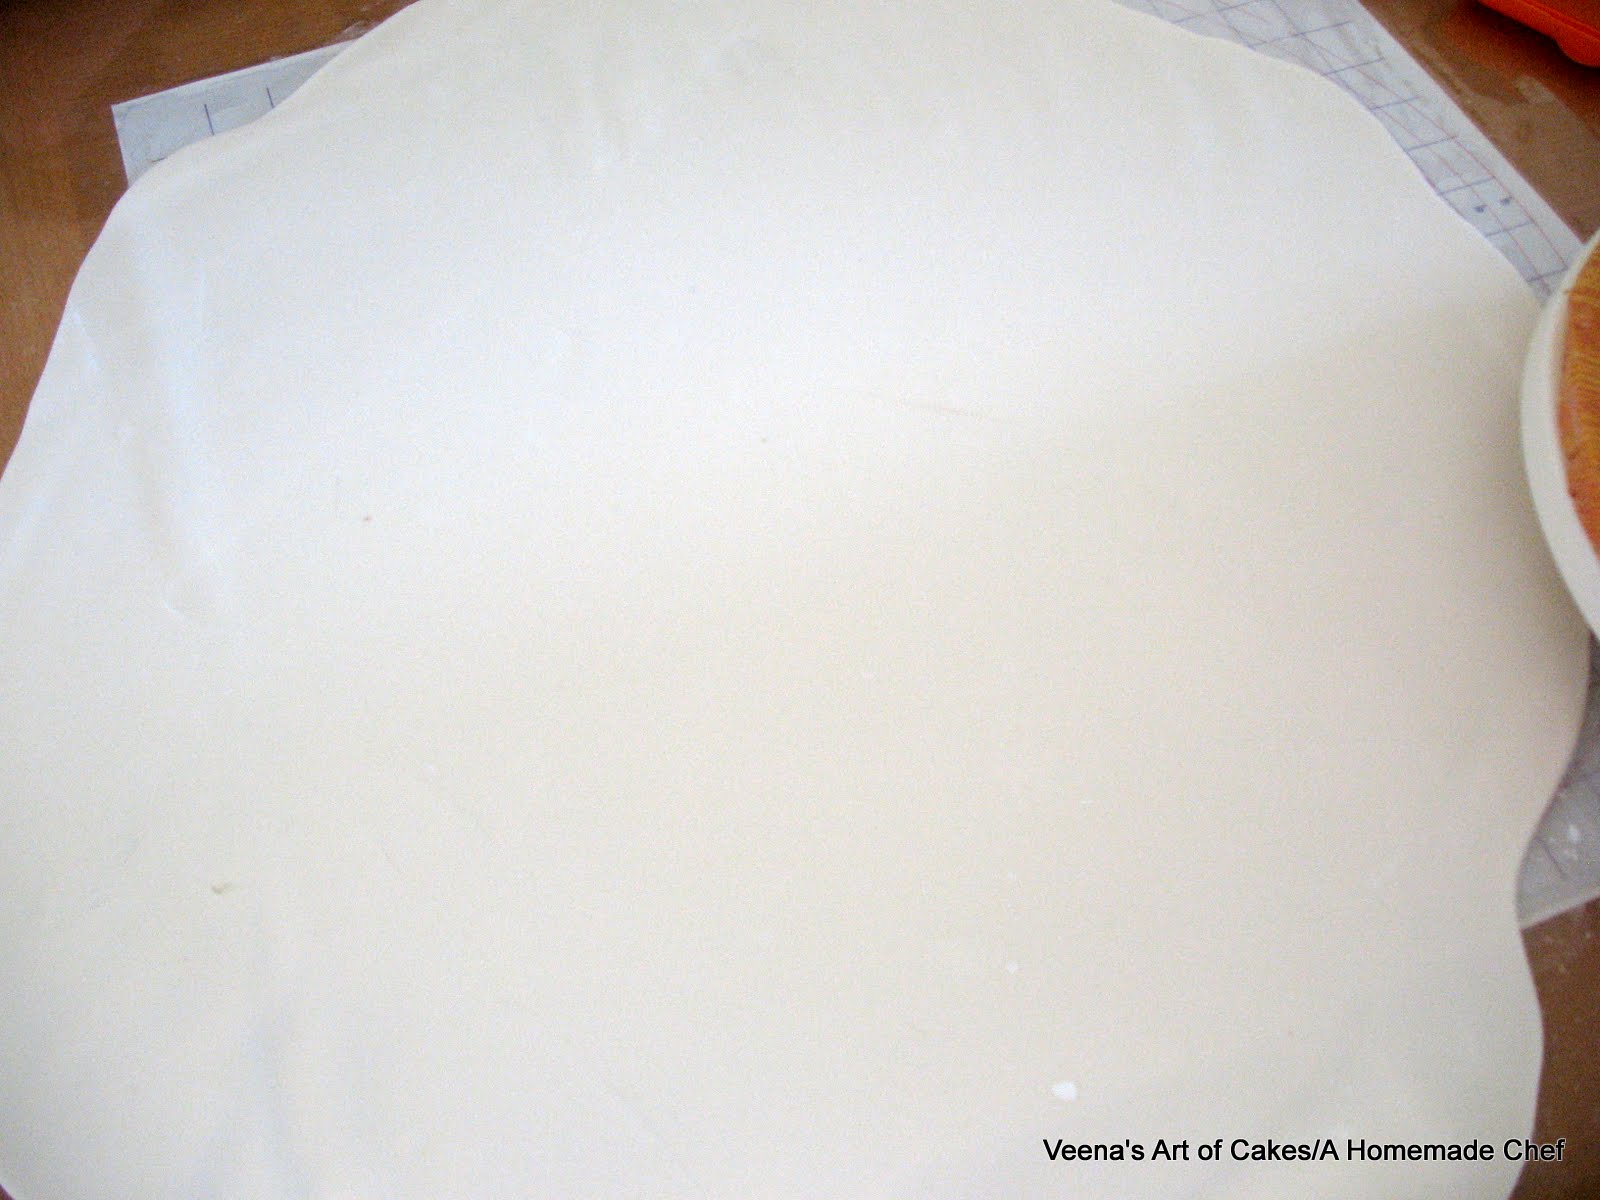
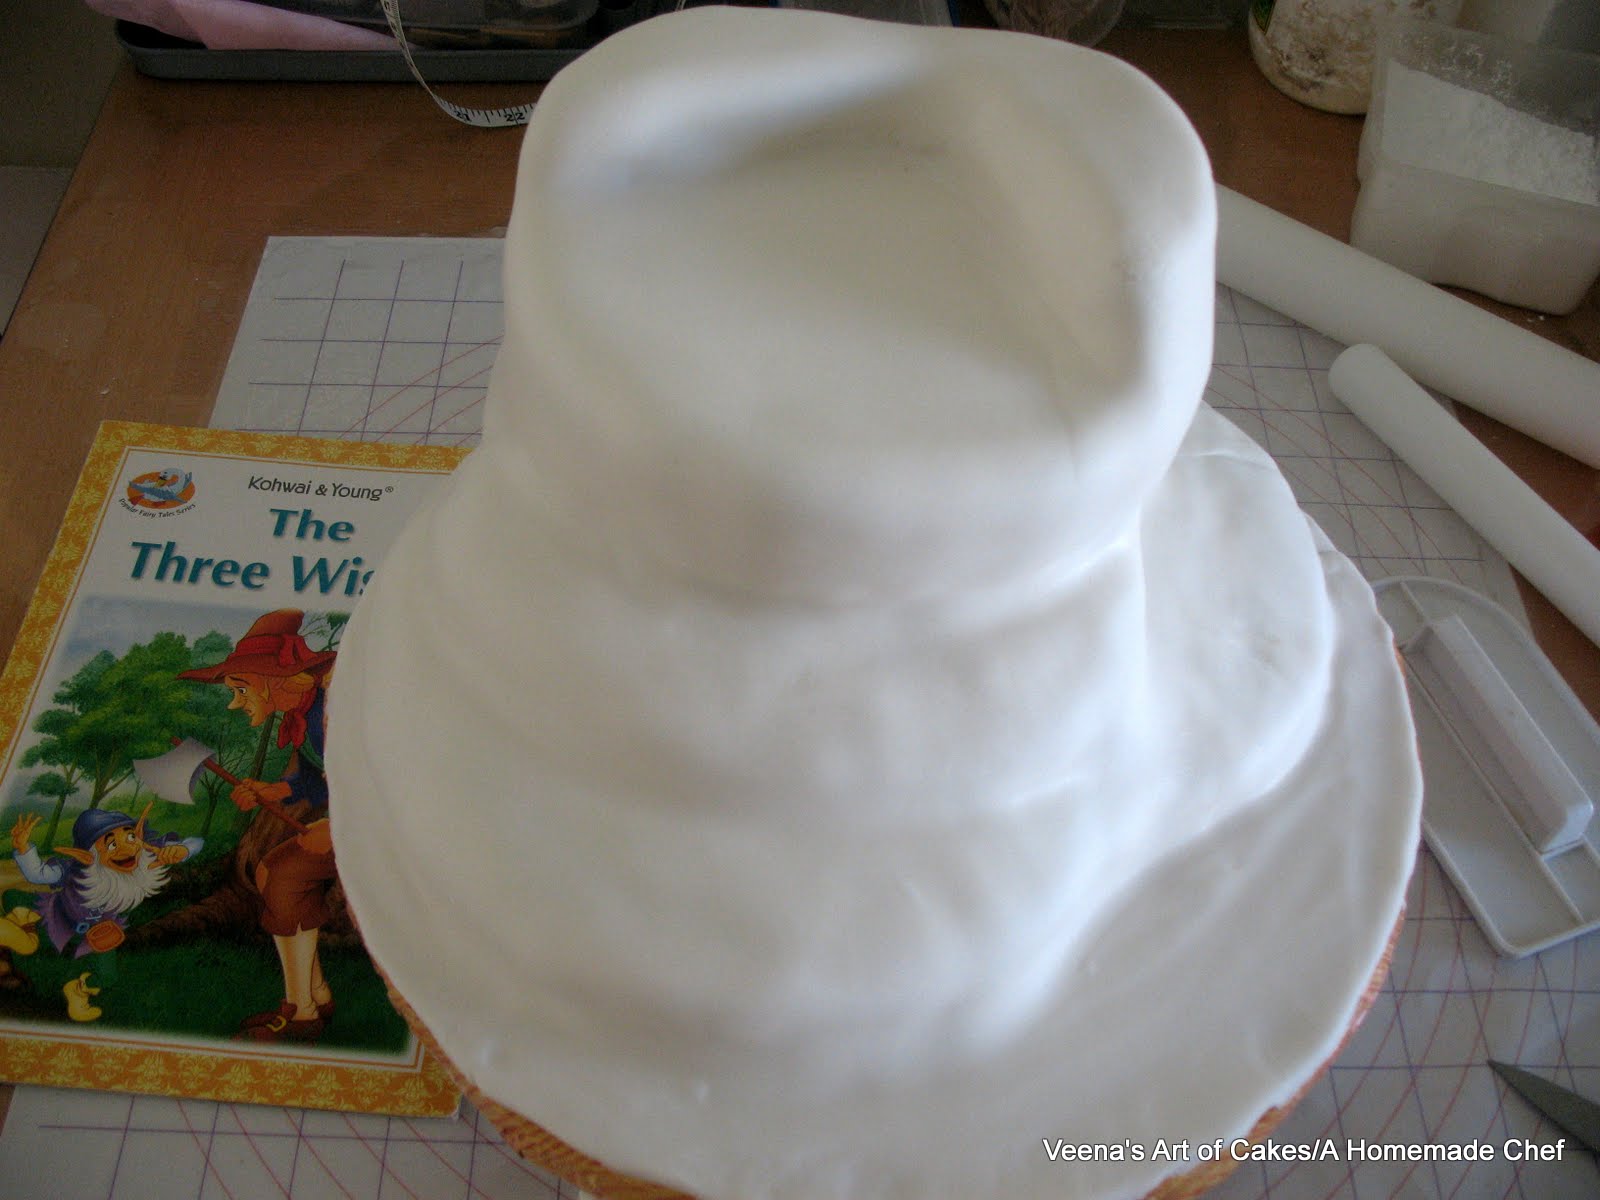
I rolled white fondant.
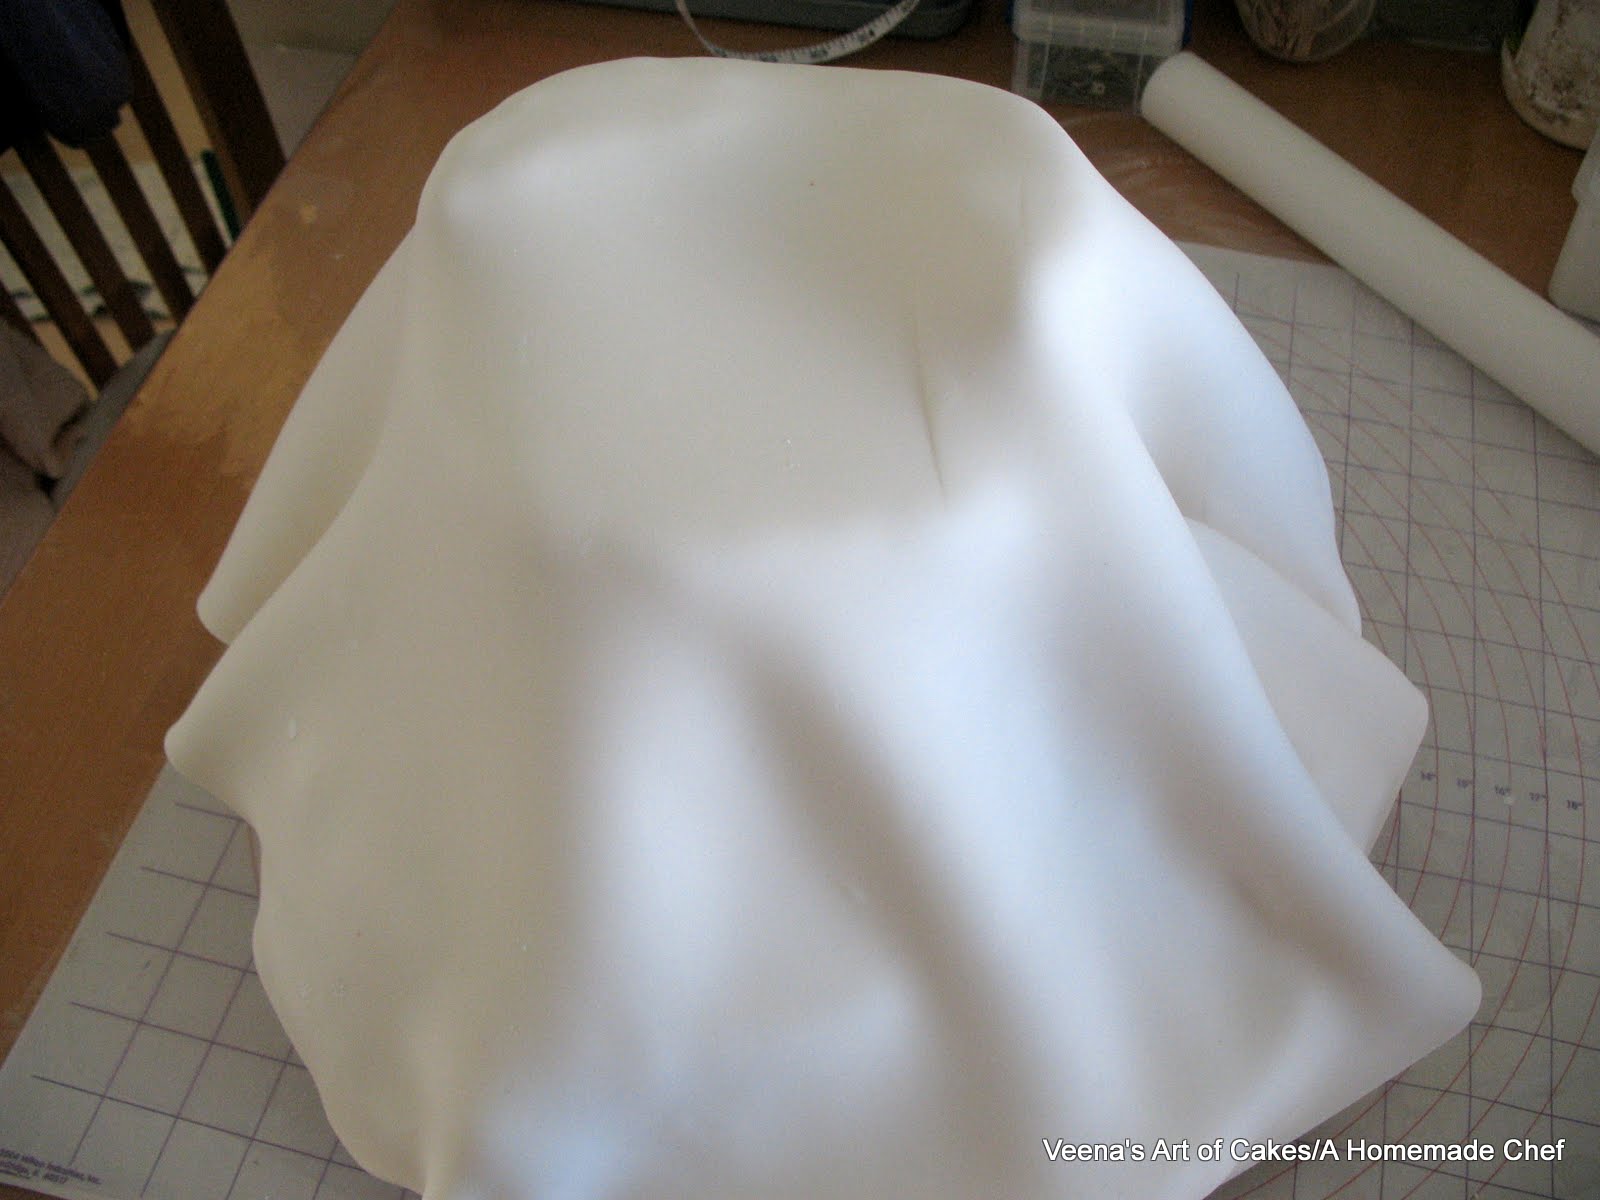
Draped the cake like any other cake. Just a bit bigger and more corner to smooth. Slow, easy and gentle is the key.
And there you see.. All draped.. No cuts, no folds. If you do have some breaks or stretching don't worry you can hide it under the stones and grass..
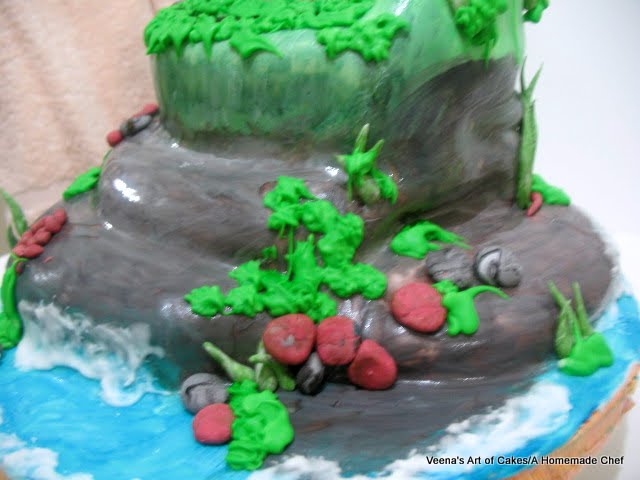
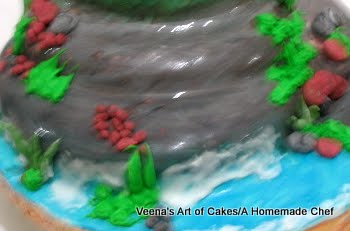
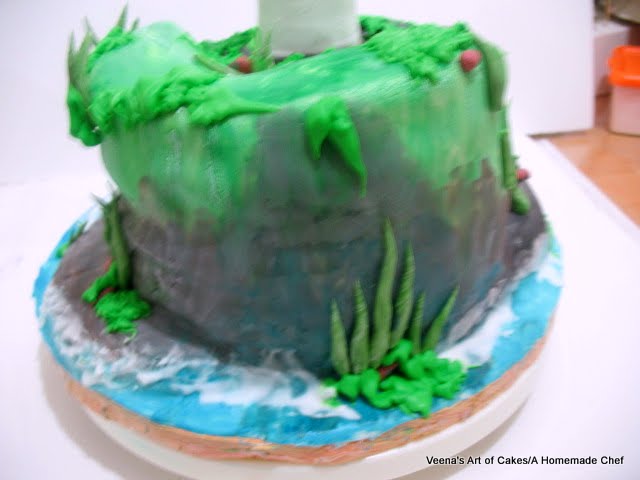
Fun time.. Paint!
Here's what I did with my paint and brush.. It's all how you vision your cake..
Next, add details.
Stones - roll small uneven balls, flatten them and place randomly. Make them in different shades or marbled paste.
Grass. I made some with gum paste. Again nothing perfect just roll between your fingers into long tapering logs.
I also made grass with Royal Icing. So now I had two different shades of grass and greens.
I used white and blue Royal icing for the water..
Here's the back ...
Here's the front.
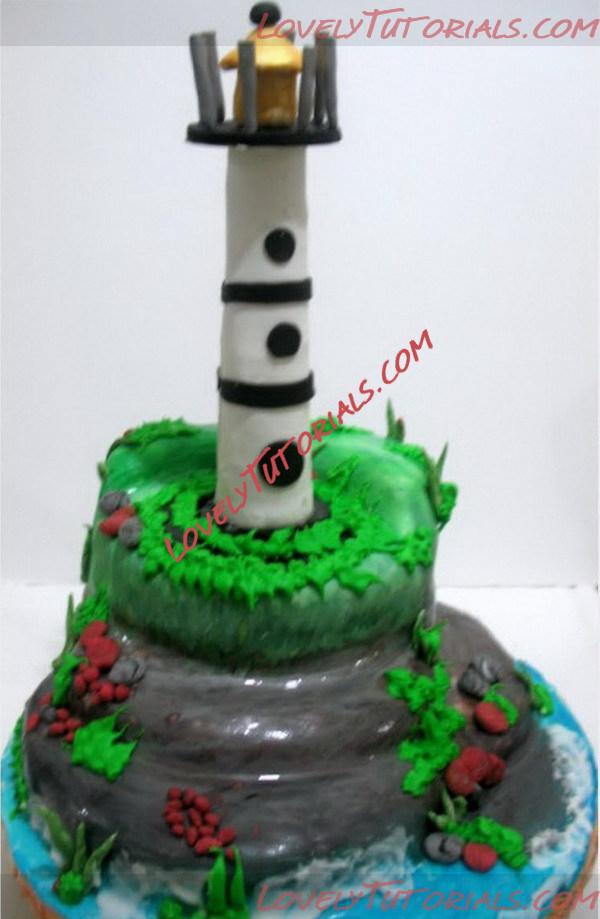
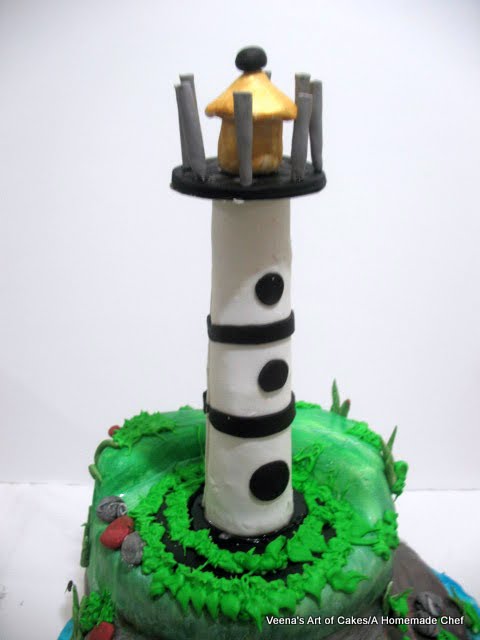
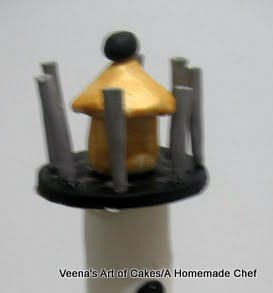
Now for the light house. The model I had was rally so simple so I did not take any pictures.
I use a thick paper to roll into a tapering roll and then used that as my template. Covered it with Gum paste to make the tower. Added the details such as black holes and black strips. When dry I removed the paper roll from inside. and attached it to a black gum paste disc on the bottom which was then covered with green grass. .
.
For the top of the tower. I used spaghetti to roll the small sticks. and shaped the house free hand out of gum paste. Then painted it with gold luster dust.
I used royal icing to attach everything together as well as to attach it to the cake.
This cake traveled an hour by car and survived the drive..
|
 |
|
–ú–Ķ—ā–ļ–ł
|
3d bizcocho, 3d bolo, 3d cake, 3d dort, 3d kage, 3d kager, 3d kake, 3d kek, 3d pastel, 3d tarta, 3d torta, 3d torte, 3d torti, 3d torty, 3d őļő≠őĻőļ, addńĪm-addńĪm, addńĪm-addńĪm t…ôlimat, adńĪm, adńĪm adńĪm, adńĪm adńĪm y√∂nergeler, artesanatos passo a passo, askel askeleelta, bemutat√≥, bolando bolos, cake decorating, cake decorating techniques, confeitando bolos, creazione e decorazione torte, c√©im ar ch√©im, decoracion de pasteles, decoraci√≥n de tortas, decorada en fondant, decorare le torte, decorazioni, deko fondant, dekorace na dort, dekoracija, dekoracije, dekorasyon, dekor√°cie, etap pa etap, fender, fimo, flower paste, fondan, fondant, fondente, fondente di zucchero, fotopostup, foundant, gam wrth gam, gebak, glazuur, gradatim, gum pasta, gum paste, gumpaste, hakbang-hakbang, hand-made, handmade, hap pas hapi, hatua kwa hatua, how to, how-to's, instrucŇ£iuni, instrukcijas, instrukcje, jak na, kage dekoration, kagedekoration, kakebaking, korak, korak po korak, korak za korakom, korak za korakom navodila, korak-po-korak upute, koristeet ja koristelu, krok, krok po kroku, krok za krokem, krok za krokom, krok-za-krokem, langkah demi langkah, las instrucciones, las t√©cnicas, le tecniche, les techniques, light house cake tutorial, lukie, l√©p√©srŇĎl l√©p√©sre, marshmallow, masa flexible, master-class, master-klasse, master-klasy, meistras klasńós, metodikas, mistr tŇô√≠dy, modeling paste, modelling past, motivtorten, n√°vod, oppl√¶ringen, pamoka, pap, pas, pas a pas, pas cu pas, pas √† pas, pas-cu-pas, pas-√†-pas et mod√®les, paso, paso a paso, pass pass, passo, passo a passo, passo dopo passo, passo-a-passo, passo-passo le istruzioni, pasta de miel, paŇĚon post paŇĚo, postup na 3d torty, postupak za ukrasavanje, p√Ętisserie, samm-sammult, schmelzend, schritt f√ľr schritt, schritt f√ľr schritt anleitung, schritt-f√ľr-schritt, schritt-f√ľr-schritt-anleitungen, skref fyrir skref, soli pa solim, stap, stap vir stap, stap voor stap, stap-voor-stap, stap-voor-stap instructies, steg for steg, steg f√∂r steg, steg-f√∂r-steg, steg-f√∂r-steg-instruktion, step, step by step, step-by-l√©p√©sre, step-by-step, step-by-step instructions, sugarcraft, sugarpaste, suikerglazuur, technieken, techniken, techniki, techniky, technik√°k, techniques, tecnicas de decoracion, tecniche, tehnici, tehnike, teknikker, teknikler, tips och trix, torte, torte decorate, torten dekorieren, torti, trin, trin for trin, trin-for-trin, trin-for-trin instruktioner, trinn, trinn for trinn, trinn-for-trinn-instruksjoner, trucs et questions sur la d√©coration de gateaux, tutorial, tutoriale, tutorias, tutorias/ideas para decorar los bizcochos, tutoriel, tutorijal, tŠĽęng b∆įŠĽõc, t√•rtbottnen, t√•rtor, t√©cnicas, ukraŇ°avanje torti, uputstvo za dekoraciju, urratsez urrats, zuckermasse, ŗłāŗłĪŗĻČŗłôŗłēŗł≠ŗłôŗĻāŗłĒŗłĘŗłāŗłĪŗĻČŗłôŗłēŗł≠ŗł ô, ŗļāŗļĪŗĽČŗļôŗļēŗļ≠ŗļôŗļóŗļĶŗĽāŗļĒŗļćŗļāŗļĪŗĽČŗļôŗļ ēŗļ≠ŗļô, ŗ™Čŗ™§ŗęćŗ™§ŗ™įŗęčŗ™§ŗęćŗ™§ŗ™į, ŗ≤Ļŗ≤āŗ≤§ ŗ≤Ļŗ≤āŗ≤§ŗ≤Ķŗ≤ĺŗ≤óŗ≤Ņ, ŗ§łŗ§úŗ§ĺ ŗ§ēŗ•áŗ§ē, ŗ§üŗ•ćŗ§Įŗ•āŗ§üŗ•čŗ§įŗ§Ņŗ§Įŗ§≤ ŗ§ģŗ§ĺŗ§łŗ•ćŗ§üŗ§į ŗ§Ķŗ§įŗ•ćŗ§ó, ŗ§ēŗ§¶ŗ§ģ, ŗ§ēŗ§¶ŗ§ģ ŗ§łŗ•á ŗ§ēŗ§¶ŗ§ģ, ŗ§ēŗ§¶ŗ§ģ ŗ§¶ŗ§į ŗ§ēŗ§¶ŗ§ģ ŗ§®ŗ§Ņŗ§įŗ•ćŗ§¶ŗ•áŗ§∂, ŗ§§ŗ§ēŗ§®ŗ•Äŗ§ē, ŗ¶ßŗ¶ĺŗ¶™ŗßá ŗ¶ßŗ¶ĺŗ¶™ŗßá, ŗģ™ŗģüŗģŅŗģ™ŗĮćŗģ™ŗģüŗģŅŗģĮŗģĺŗģē, ŗįłŗĪćŗįüŗĪÜŗį™ŗĪć ŗį¨ŗĪÜŗĪĖ ŗįłŗĪćŗįüŗĪÜŗį™ŗĪć, ŠÉĒŠÉĘŠÉźŠÉěŠÉĚŠÉϊɆŠÉ?ŠÉēŠÉźŠÉď, √©tape, √©tape par √©tape les instructions, √∂ńüretici, šłÄś≠•šłÄś≠•šĺÜ, šłÄś≠•šłÄś≠•śĚ•, Ňĺingsnis, Ňĺingsnis po Ňĺingsnio, ŚģóŚłęÁīöśēôÁ®čԾƚłÄś≠•ÔľĆšłÄś≠•šłÄś≠•ÁöĄśĆáÁ§ļÔŅ Ĺ ÔŅĹśäÄŤ°ďÔľĆudŇĺbenik, ŚįĎ„Āó„Āö„Ā§, Ť£Ěť£ĺŤõčÁ≥ē, Žč®Í≥Ąž†ĀžúľŽ°ú, ŽßĆŽď§Íłį ž†úžěĎ Í≥ľž†ē, ő≤őģőľőĪ, ő≤őģőľőĪ ŌÄŌĀőŅŌā ő≤őģőľőĪ, ő≤őģőľőĪ ŌÄŌĀőŅŌā ő≤őģőľőĪ őŅőīő∑ő≥őĮőĶŌā, őŅőīő∑ő≥őĮőĶŌā ő≤őģőľőĪ ő≤őģőľőĪ, ŌÄőĪőĹŌĄőĶŌÉŌÄő¨őĹőĻ art, ŌĄőĶŌáőĹőĻőļő≠Ōā, ŌÜŌĀőŅőĹŌĄőĻŌÉŌĄőģŌĀőĻőŅ, –ī–Ķ–ļ–ĺ—Ä–į—Ü–ł—Ź –Ĺ–į —ā–ĺ—Ä—ā–ł —Ā—ā—ä–Ņ–ļ–į –Ņ–ĺ —Ā—ā—ä–Ņ–ļ–į, –ł–Ĺ—Ā—ā—Ä—É–ļ—Ü–ł—Ź, –ļ–ĺ—Ä–į–ļ –Ņ–ĺ –ļ–ĺ—Ä–į–ļ, –ļ–į–ļ —Ā–ī–Ķ–Ľ–į—ā—Ć, –ļ—Ä–ĺ–ļ –∑–į –ļ—Ä–ĺ–ļ–ĺ–ľ, –ļ—Ä–ĺ–ļ –∑–į –ļ—Ä–ĺ–ļ–į–ľ, –ĺ—ā –ī–Ĺ–Ķ—Ā –∑–į –ī–Ĺ–Ķ—Ā, –Ņ–ĺ–ļ—Ä–ĺ–ļ–ĺ–≤–ĺ, –Ņ–ĺ—ą–į–≥–ĺ–≤–ĺ, –Ņ–ĺ—ą–į–≥–ĺ–≤—č–Ķ —Ą–ĺ—ā–ļ–ł, –Ņ–į–ļ—Ä–ĺ–ļ–į–≤–į, –ľ–ł–Ĺ–ł–į—ā—é—Ä–į, –ľ–ļ, –ľ–ļ —ā–ĺ—Ä—ā –ľ–į—Ź–ļ, –ľ–į–Ļ—Ā—ā–ĺ—Ä-–ļ–Ľ–į—Ā–į —É—Ä–ĺ–ļ, –ľ–į–Ļ—Ā—ā–į—Ä-–ļ–Ľ–į—Ā, –ľ–į–Ļ—Ā—ā–Ķ—Ä-–ļ–Ľ–į—Ā, –ľ–į–Ļ—Ā—ā–Ķ—Ä-–ļ–Ľ–į—Ā–ł, –ľ–į—Ä—ą–ľ–Ķ–Ľ–Ľ–ĺ—É, –ľ–į—Ā—ā–ł–ļ–į, –ľ–į—Ā—ā–Ķ—Ä-–ļ–Ľ–į—Ā—Ā, –∑–ī —ā–ĺ—Ä—ā, –∑–ī —ā–ĺ—Ä—ā–į, —Ä—É—á–Ĺ–ĺ–Ļ —Ä–į–Ī–ĺ—ā—č, —Ä—É—á–Ĺ–į—Ź —Ä–į–Ī–ĺ—ā–į, —É–ļ—Ä–į—ą–Ķ–Ĺ–ł–Ķ —ā–ĺ—Ä—ā–ĺ–≤, —Ā–į—Ö–į—Ä–Ĺ–į—Ź –ľ–į—Ā—ā–ł–ļ–į, —É—Ä–ĺ–ļ–ł –Ņ—Ä–ł–ļ—Ä–į—ą–į–Ĺ–Ĺ—Ź, —Ā—ā—ä–Ņ–ļ–į, —Ā—ā—ä–Ņ–ļ–į –Ņ–ĺ —Ā—ā—ä–Ņ–ļ–į, —Ā—ā—ä–Ņ–ļ–į –Ņ–ĺ —Ā—ā—ä–Ņ–ļ–į –ł–Ĺ—Ā—ā—Ä—É–ļ—Ü–ł–ł, —ā–ĺ—Ä—ā–į —Ā—ā—ä–Ņ–ļ–į –Ņ–ĺ —Ā—ā—ä–Ņ–ļ–į, —ā–Ķ—Ö–Ĺ–ł–ļ–ł, —ā–Ķ—Ö–Ĺ–ł–ļ–į, —ā–Ķ—Ö–Ĺ—Ė–ļ–į, —ā—É—ā–ĺ—Ä–ł–į–Ľ, —ā—É—ā–ĺ—Ä—Ė–į–Ľ, —ā—ć—Ö–Ĺ—Ė–ļ–į, —á–Ķ–ļ–ĺ—Ä –Ņ–ĺ —á–Ķ–ļ–ĺ—Ä, —ą–į–≥ –∑–į —ą–į–≥–ĺ–ľ, —Ė–Ĺ—Ā—ā—Ä—É–ļ—Ü—č—Ź, —Ė–Ĺ—Ā—ā—Ä—É–ļ—Ü—Ė—Ź, ◊¶◊Ę◊ď ◊ź◊ó◊® ◊¶◊Ę◊ď, ◊©◊®◊ô◊? ◊ď◊ē◊®◊ö ◊©◊®◊ô◊?, ŔāōĮŔÖ ō®ŘĀ ŔāōĮŔÖ  |
|