
15.06.2021, 14:53
|
|
Администратор
|
|
Регистрация: 10.03.2016
Сообщений: 1,002
|
|
 Mandala Cake Tutorial
Equipment Required
• Cakes: 5" round x 3" high, 6" round x 6" high
• 6" round x 3" high polystyrene dummy
• 8" round cake board
• Sugarpaste
• Flower paste
• 150g firm peak royal icing
• Rainbow Dust Lustres: Metallic Light Silver, Pearl White
• Rainbow Dust ProGels: Sky Blue, Orange
• Rainbow Dust Cake Craft Pens: Orange, Red, Dark Gold, Yellow, Grape Violet, Dusky Pink, Holly Green, Teal, Royal Blue, Sky Blue
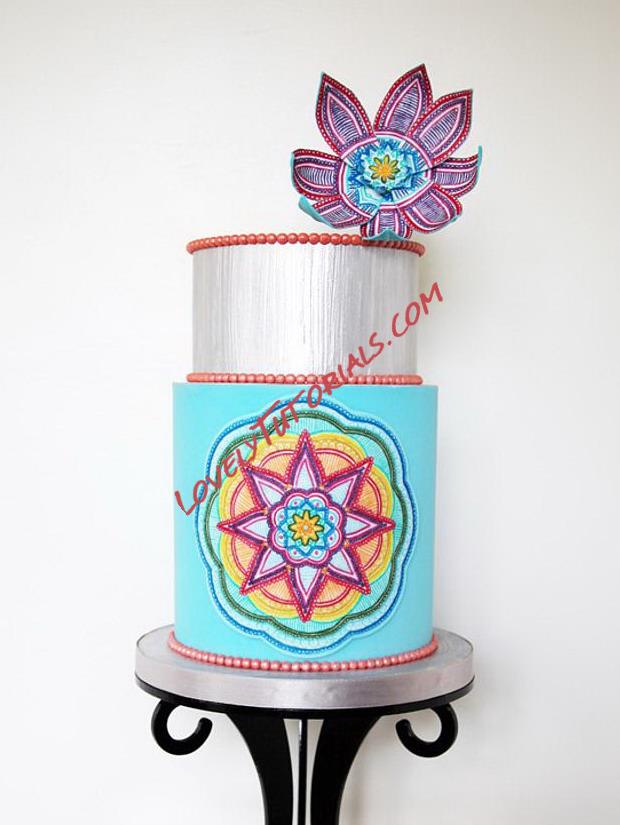
• Edible glue
• Confectioner's glaze
• Glaze cleaner
• Trex/shortening
• Non-stick grooved board
• Dimpled foam mat
• Small non-stick rolling pin
• Brushes
• Palette
Palette knives: cranked, small straight Craft knife Wire cutters Needle nosed pliers Scissors Medium ball tool Scribe tool Half width floral tape Florist wires: 22 gauge, 26 gauge Lily cutters Daisy cutters Cling film Paper towels Medium flower pic Cotton wool buds Pearl head pins 15cm silver satin ribbon Narrow double-sided tape
For the flower base, cut a 22 gauge wire into thirds. Bend a hook in one end. Form a 2g cone of flower paste. Touch the tip of the hook in edible glue and thread down the cone as shown. Shape and remove excess. Indent the top with the ball tool. Leave to dry overnight.
Step 2.
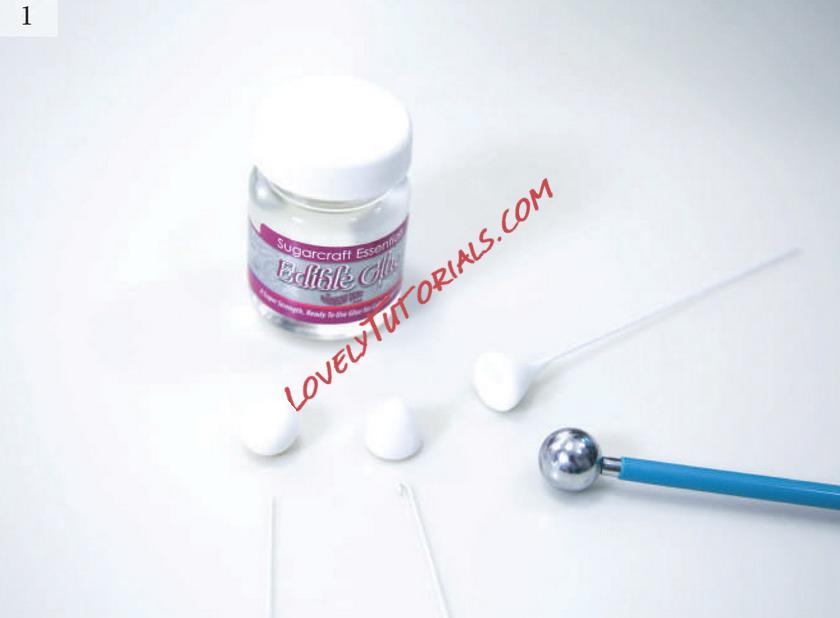
For the flower top, roll out 1mm thick flower paste and cut out three daisies.
With a little edible glue, layer largest to smallest, interleaving petals. Leave on the foam to dry overnight. Attach to the flower base using royal icing.
Step 3.
Roll out 1mm thick flower paste over the largest groove on the board. Cut out a petal and trim a point into the tip.
Step 4.
Cut a 26 gauge wire into thirds and insert three quarters up the ridge. Pinch at the base and remove excess. Curve into a gentle S. Leave to dry on foam for several hours or overnight. Make eight.
Step 5.
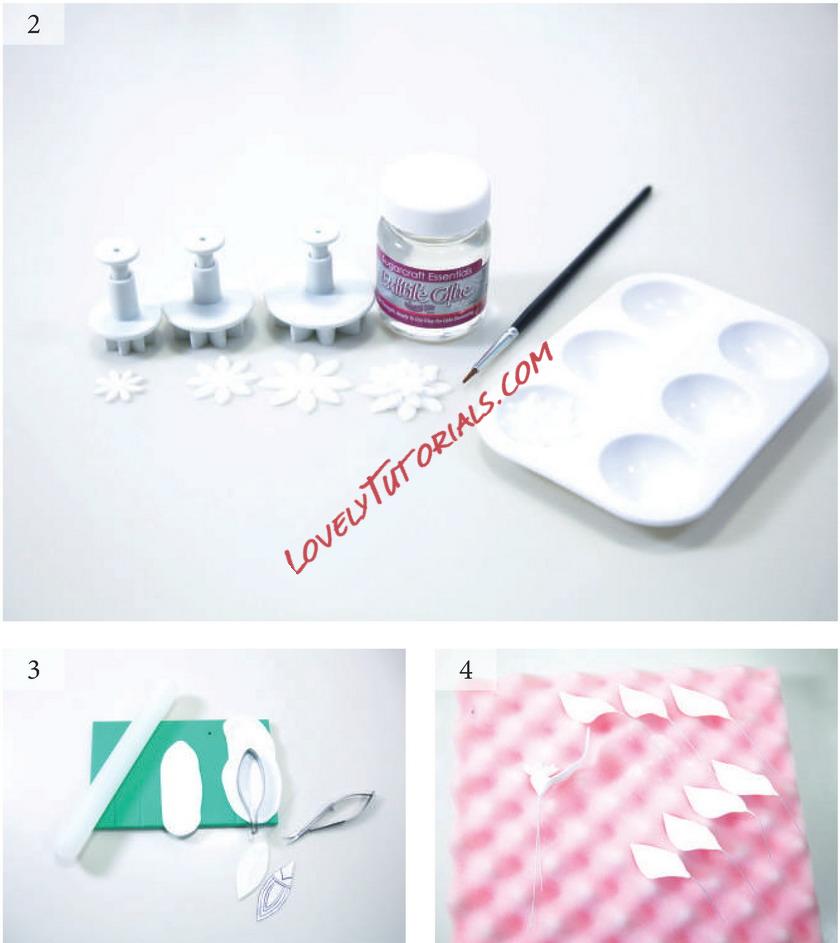
Draw the petal pattern using the template. Use the thicker tip of the pink pen to draw lines across. Draw the red guideline and fill between that and the edge. Fill the rest of the pattern. Next, draw a pattern onto the flower centre using a different colour and design on each set of leaves. Use the fine tip to get into crevices. Use Sky Blue thinly on the back and sides of each petal and the base of the flower centre. Leave to dry overnight.
Step 6.
For brushed metal texture, starting from the back of the top tier, paddle a thin layer of royal icing in a 3" wide section onto the side using the cranked palette knife.
Step 7.
Lightly dampen a medium flat brush and blot excess. Starting at the beginning of the section, sweep upwards through royal icing to form vertical ridges. Clean the brush regularly. If it drags, it's too dry. If it leaves no marks and dissolves, the icing is too wet. Go back over while it's wet until happy with the lines. If not happy, scrape off the icing and start again. Tidy the tip and base of the tier as you go by removing excess with the small palette knife. Repeat for the whole tier. Cover the top of each tier and the board using a smaller flat brush and the small palette knife for narrower sections. Sweep in a circular motion from the outside in so ridges look like age lines on a tree stump.
Step 8.
Line the area with foil to protect from glaze and make cleaning easier. Put equal amounts of white and silver dusts into a shot glass or the palette. Tip in a little glaze and mix - the consistency should be like single cream. Pour a little cleaner into another glass and put paper towel down. Apply paint all over textured areas, working into ridges. Use two coats if the colour looks patchy once dry. Regularly clean the brush so dried flakes don't deposit onto the cake. This can also happen if paint is too thick - if you make a mistake, dip a cotton bud into cleaner and gently rub it off. Highlight ridges with pearl dust prepared the same way. Use the side of the brush so only the ridge tips are coloured. Go over more pronounced ridges for greater depth.
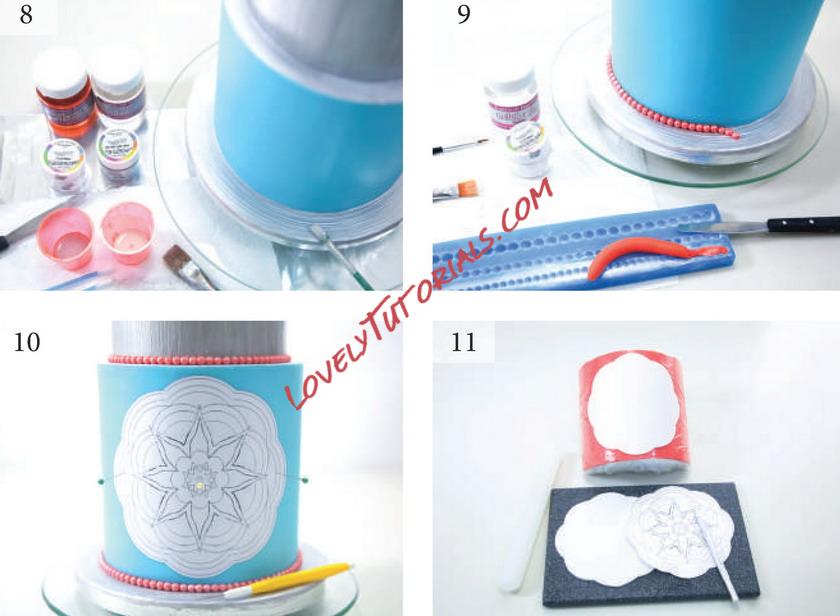
Step 9.
For the border, mix shortening into orange flower paste until it doesn't feel sticky.
Dust the smallest bead on the mould with pearl dust to help release. Make a snake of paste and push in. Trim excess. Stretch the mould gently and turn over. Coax the
pearls out. If the paste is sticking, pop in the freezer for 10 minutes or start again, dusting with a little icing sugar after pearl dust. Glue the border to the base of the blue tier and the base and top of the top tier.
Step 10.
Centre the mandala template on the front of the cake and attach using pins. Scratch a line around then remove. Fill holes with royal icing to keep the cake sealed.
Step 11.
Cover the dummy with cling film. Roll out a 2mm thick circle of white flower paste. Apply a little shortening to the board and place the circle on top. Cut around the mandala template, gently lift the paste and centre on the dummy tier. Push a pin through the centre of the plaque. Leave for several hours or overnight to firm.
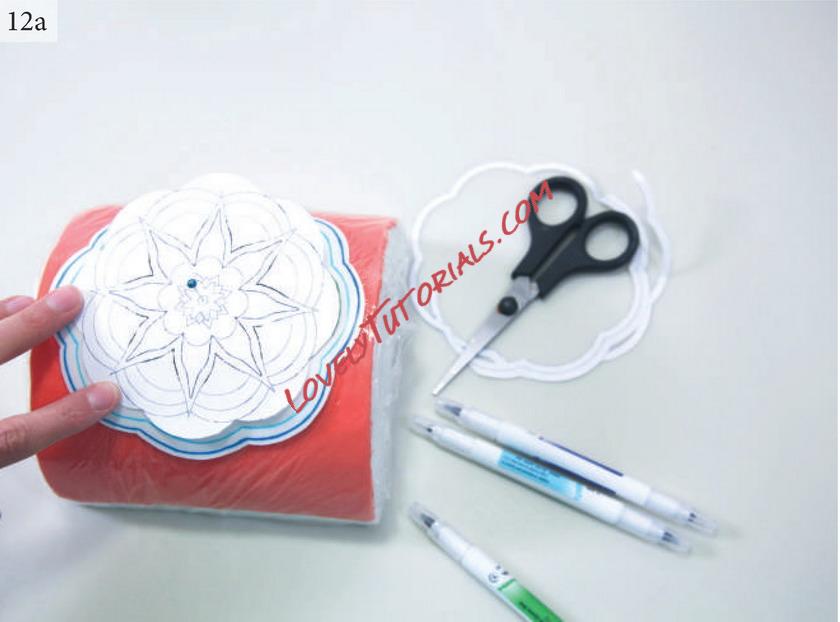
Steps 12a & b.
From the outside in, cut down to consecutive guidelines. Attach each time using the centre hole and a pin. Sketch around one scallop to get the spacing right, the rest can be freehand. When you get to the star pattern and smaller, draw around as these are not as easy to apply freehand.
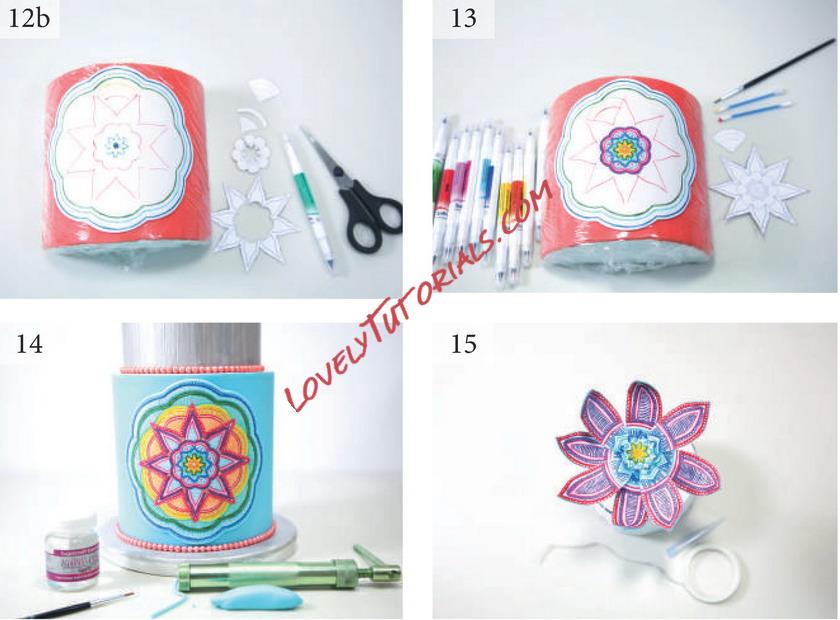
Step 13.
Guidelines from outside in are: Royal Blue, Sky Blue, Holly Green, Teal, Dark Gold,
Red, Red, Dusky Pink, Holly Green. Once applied, fill fine detail from the inside out. Patterns are stars, circles, lines, arches, but you can use the template to create your own. The overall look will vary depending on how dense the pattern is. The flower is less dense than the mandala. Leave to dry for an hour.
Step 14.
Stick the mandala to the cake using royal icing. Soften sky blue sugarpaste using a little cooled boiled water and shortening until quite soft and not sticky. Extrude enough to go around the mandala. Glue around the mandala. Glue a blue dot of sugarpaste to the centre of the plaque over the hole.
Step 15.
Wire the flower together using floral tape in two layers of four. Insert into the top tier using the pic
Огромная благодарность Автору Natasha Shomali за Мастер-класс
|


