
25.07.2011, 20:19
|
|
Администратор
|
|
Регистрация: 07.09.2010
Сообщений: 7,669
|
|
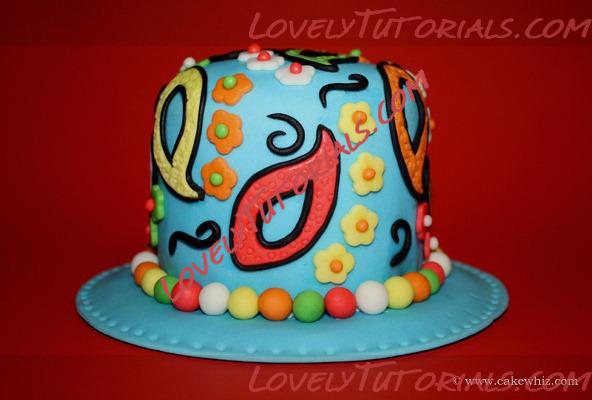
 абстрактный цилиндр-Abstract cake with tutorial
спасибо огромное Abeer за МК
слова и фото автора
I have seen cakes with cut-out designs and to me, they are just GORGEOUS! These designs are made using various cookie/fondant cutters and honestly, with the number interesting cutters in the market these days, you can design your cake in SOOOO many ways!
 Cake and cake board Step 1:
Ice your cake with frosting and then cover it with marshmallow fondant (I make my own fondant and did a tutorial on it here).
Cover your cake board with fondant as well.
Step 2:
Using Wilton tip 3, make holes around the border of the cake board (Who knew decorating tips could have more than one use?  ) )
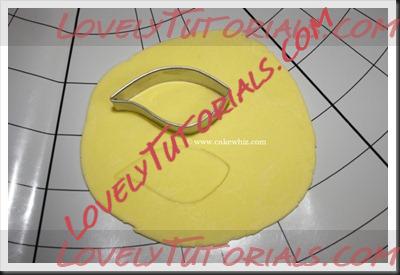
Leaves Step 1:
Using a medium cutter from the Wilton leaf set, cut out fondant leaves in different colors.
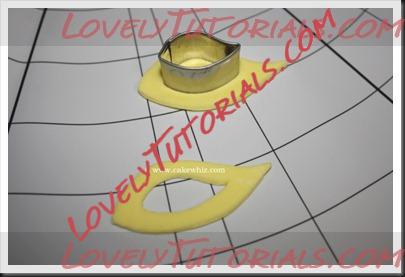
 Step 2:
Using the smallest cutter in the Wilton leaf set, cut out the center of the fondant leaf and discard it. You now have a hollow fondant leaf.
Step 2:
Using the smallest cutter in the Wilton leaf set, cut out the center of the fondant leaf and discard it. You now have a hollow fondant leaf.
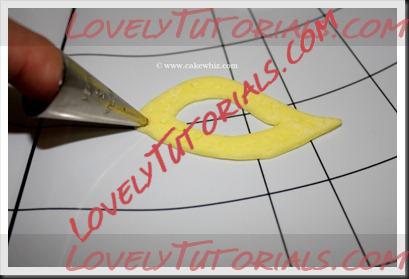
 Step 3:
Very gently, use Wilton tip 3 to emboss holes on your hollow leaf. Do not press all the way. Press with just enough force that a circular indentation forms.
Step 3:
Very gently, use Wilton tip 3 to emboss holes on your hollow leaf. Do not press all the way. Press with just enough force that a circular indentation forms.
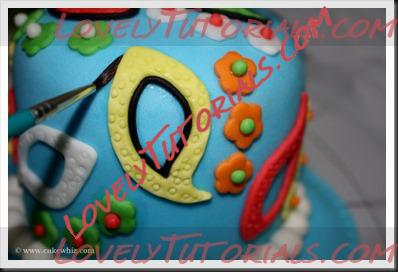
 Step 4:
Brush the back of your hollow leaf with some water and and glue it to your cake
Also, brush some water along the interior of your hollow leaf. You will see why very soon….
Step 4:
Brush the back of your hollow leaf with some water and and glue it to your cake
Also, brush some water along the interior of your hollow leaf. You will see why very soon….
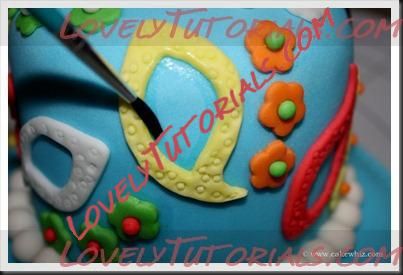 Step 5:
Roll out black fondant into long ropes (I have no idea what else to call them…hehe).
Step 5:
Roll out black fondant into long ropes (I have no idea what else to call them…hehe).
 Step 6:
Place a rope around the water mark you made on that hollow leaf.
Cut the end of the black rope with a toothpick.
Step 6:
Place a rope around the water mark you made on that hollow leaf.
Cut the end of the black rope with a toothpick.
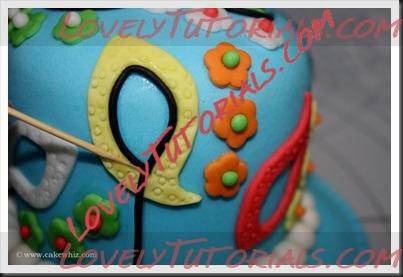 Step 7:
Now, brush the outside of the leaf with water.
Step 7:
Now, brush the outside of the leaf with water.
 Step 8:
Place another black rope around the water mark. Cut the end using a toothpick.
NOTE: Instead of using fondant to make ropes, you can also fill a decorating bag with black icing and pipe these “rope” designs.
Step 8:
Place another black rope around the water mark. Cut the end using a toothpick.
NOTE: Instead of using fondant to make ropes, you can also fill a decorating bag with black icing and pipe these “rope” designs.
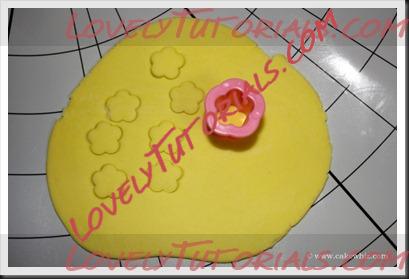
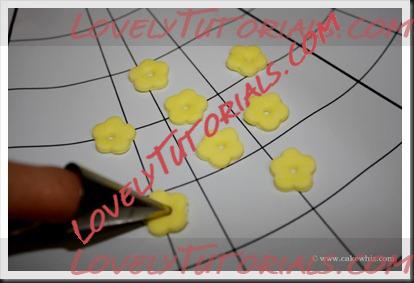
Flowers Step 1:
Using the smallest flower cutter from the Wilton flower set, cut out fondant flowers in different colors.
 Step 2:
Using Wilton tip 3 again , make holes in the center of each flower and discard the tiny circles.
Step 2:
Using Wilton tip 3 again , make holes in the center of each flower and discard the tiny circles.
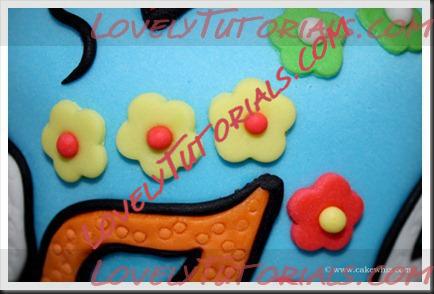
 Step 3:
Brush the back of each flower with some water and paste it to the cake.
Roll out small balls of colored fondant and stick them into the center of flowers with some water
Step 3:
Brush the back of each flower with some water and paste it to the cake.
Roll out small balls of colored fondant and stick them into the center of flowers with some water
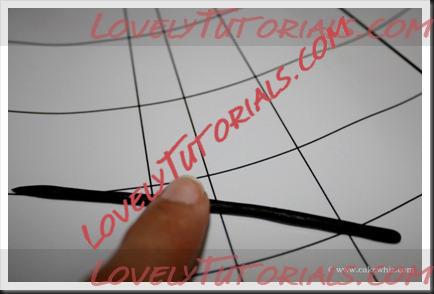
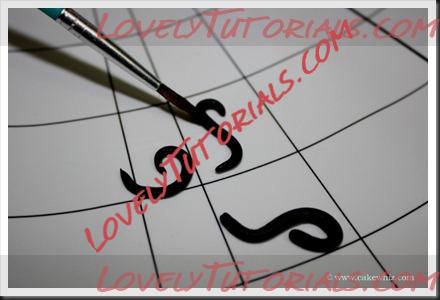
Swirls Step 1:
Roll out a few black ropes again.
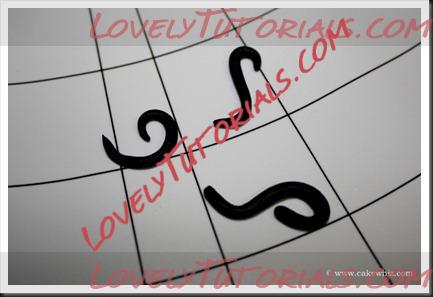
 Step 2:
Using your fingers, shape them into random “swirly” shapes.
Step 2:
Using your fingers, shape them into random “swirly” shapes.
 Step 3:
Brush the back of these swirls with very little water.
Step 3:
Brush the back of these swirls with very little water.
 Step 4:
Paste them all over your cake in a random manner.
NOTE: Instead of using fondant to make swirls, you can also fill a decorating bag with black icing and pipe swirly shapes.
Step 4:
Paste them all over your cake in a random manner.
NOTE: Instead of using fondant to make swirls, you can also fill a decorating bag with black icing and pipe swirly shapes.
Border For the final touch on your cake, make small balls out of fondant in different colors and paste them around the bottom of your cake as a border. I used icing to stick them.
And here is the finished cake. Pretty colorful…eh?
Like I said earlier, there are so many other possibilities out there. Try this whole process in different colors or just one color. Try different cutters. Emboss the fondant in different ways. Be creative and have fun with it!
|


