Огромная благодарность Elizabeth Marek за Мастер-класс
 Supplies you need!
• Large sheetcake-sized cardboard
• Buttercream
• Filling (if desired)
• Offset spatula
• Fondant dyed mint green ( I use a 75/25 mix of marshmellow fondant and wilton)
• Black fondant
• Grey fondant
• Small amount of red fondant
• Black food color
• New paintbrush
• Flat-edged tool
• Two lollipop sticks
• Sharp serrated knife
• New x-acto knife
• Fondant smoother
Step One: Bake Cakes! You will need two 6″ square cakes and two 8″ square cakes. You can do a round or big sheetcake if that’s all you have but this is what I used. Don’t be worried about the recipe of cake you use as long as it’s nice and has had time to cool! I usually bake my cakes the day before. Let them cool COMPLETELY before wrapping them in plastic wrap to set over night. I do not refrigerate as this dries them out.
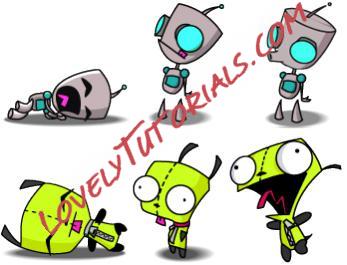
Step Two: Sculpting the Gir cake! This is the photo I used for inspiration for Gir. I printed it out and kept it by me for reference. You could also make a template by blowing this up on a copy machine and cutting it out but I like freestyle better

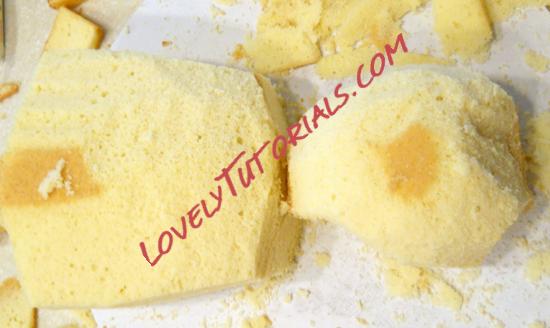
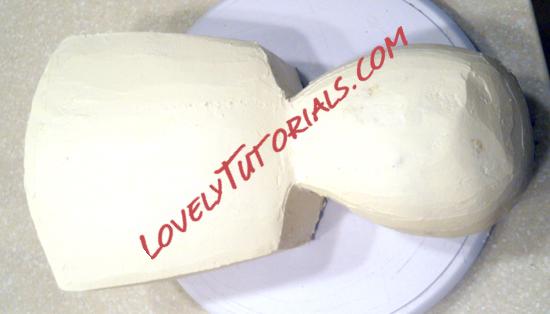
Stack your cakes on top of each other without buttercream and place the larger cake stack at the top for the head and the smaller cake stack below for the body. Put these cakes on a large sheetcake-sized cardboard. Start shaping the head by trimming the bottom corners down to make it shaped more like Gir. Start trimming the body and rounding out the belly.
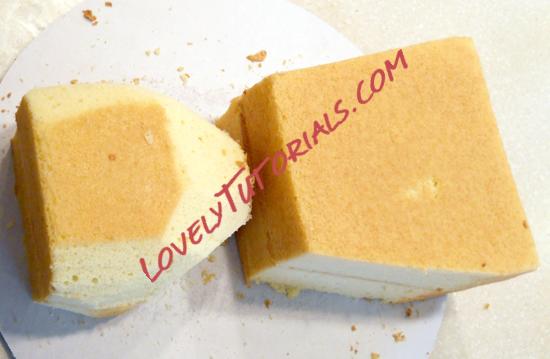
Continue trimming little by little (you can always cut more but you can’t put the cake back on, so go slow!) Compare to your printout often
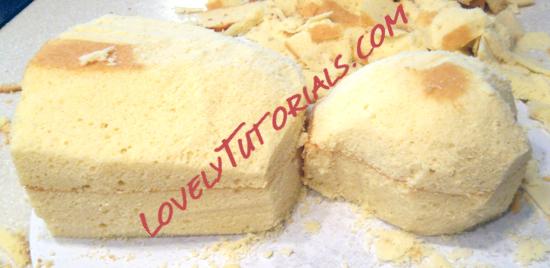
Keep in mind Gir’s head has a little roundness to the front and isn’t flat. The top of his head and bottom is rounded as well. In hind sight, I think I should have made Gir’s head a little shorter but I was TRYING to think about photos and tutorials lol
Make me proud and do better, he he.
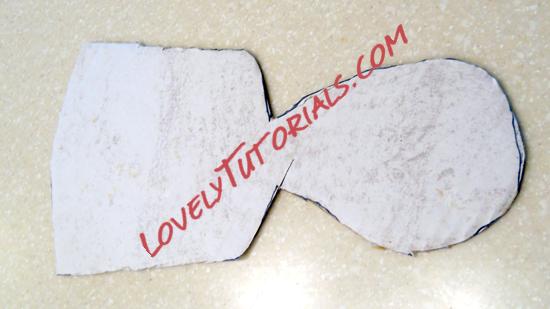
 Step 3: Cut Out the Support Board.
 Ok so now that we have the shape we want, trace the shape of the cake onto the board. Remove cake and cut out the shape. This board will support the cake and keep your final board cleaner. This step is not necessary, you can trim right on your final covered board but it might be a bit messy looking and require some cleanup after buttercream
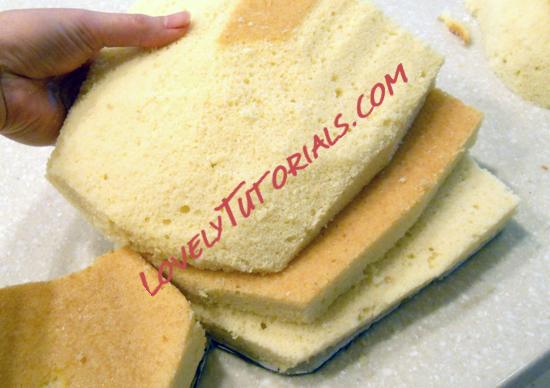
 Step 4: Time to split the cakes!
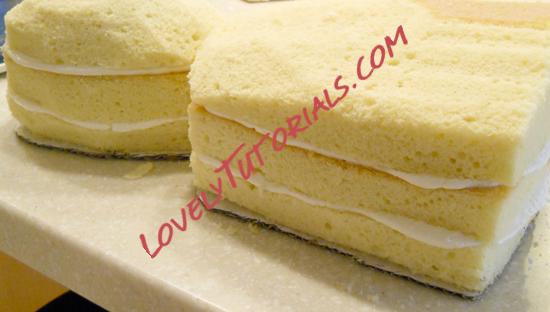
 Cut the bottom cake in half by holding a long, sharp serrated knife level and cut slowly. Let the knife do the work! Because we carved the top cake a lot in the shaping process, we don’t need to split that cake. You should have three levels of cake now
Split the head and the body.
 Step 5: Fill the cakes with yumminess!
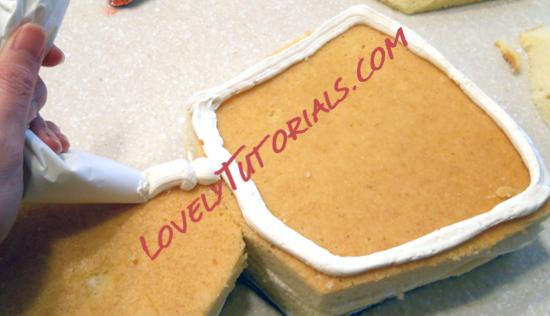
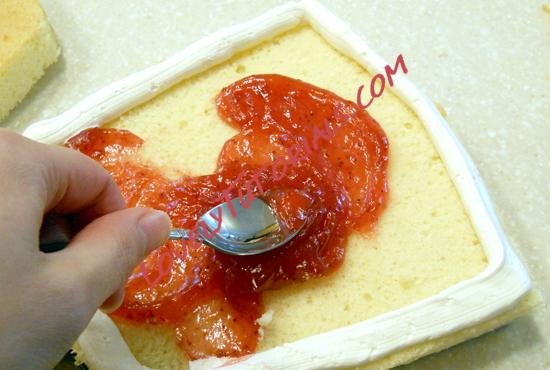
 I am going with a strawberry puree but you can fill with whatever you like. If you do use a filling make sure you dam the cake with a bead of frosting so the filling doesn’t squish out. Also don’t use too much! A little goes a long way. You can also just do buttercream for filling. I use a parchment triangle for filling but you can use a plastic baggie with the corner trimmed off to do a buttercream dam.
Spoon in some filling and spread thinly. Don’t forget to lick the spoon

Place the middle layer back on and fill the same way. Place the top layer on and now we’re ready to crumb coat!
 Step 6: Crumb coating.
 This is essential for sculpted cakes. It is a thin layer of buttercream applied to the cake and then chilled. This seals in crumbs and allows for a clean look when applying the fondant. Here is a short video of me crumb coating the gir cake after it has been filled.
After crumb coating, pop your cake in the freezer for about 20 minutes to firm up the cake and the buttercream but not so long that the cake freezes and makes the fondant sweat when you bring it out. Apply another layer of buttercream to make the edges nice and crisp. Take your time on this. The cleaner your edges, the better your fondant will look. Don’t use too much buttercream or your edges will be very rounded. A quarter inch is plenty
Place back in the freezer and chill another 10 – 20 minutes.
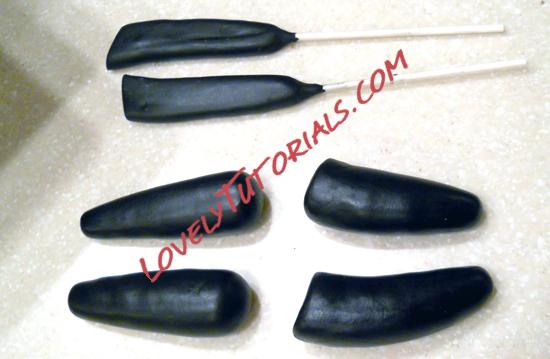
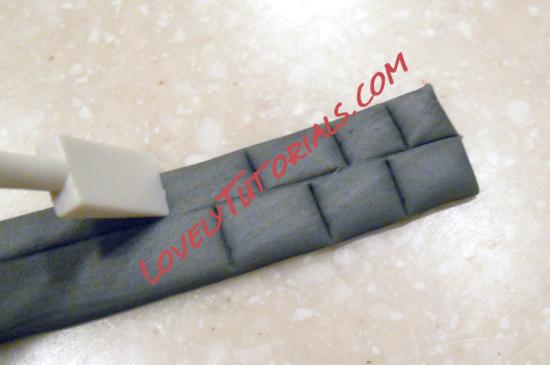
Step 7: Details. While the cake is doing it’s final chill, take your black fondant and make some arms and legs. I add tylose so that they dry stiffer but it isn’t necessary. Form some antennae and trim the edge flat. Insert the lollipop stick into the antennae. You also need to make a zipper, eye lashes and a nose. If you feel like it would be easier, you can do this after you cover the cake in fondant so you can compare what you are making to the cake to make sure the details are not too big or small.
Use your flat edged tool to make the zipper pattern.
 Step 8: Fondant!
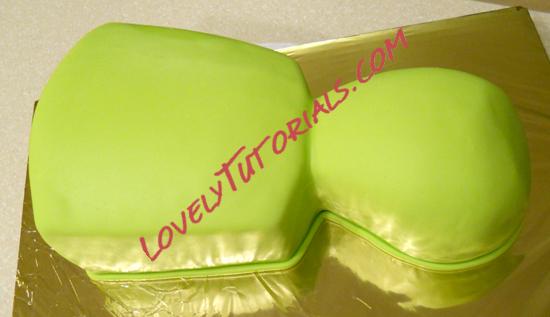
 Right before you take out the cake, roll out your green fondant. Shoot for too big rather than just big enough. The bigger the piece, the easier it will be to get the folds out of the fondant around the edges. Try to roll the fondant out to about a quarter inch thick so you don’t get tears but you don’t want it to be TOO thick or it will be hard to cut. Here is a video of me covering Gir in fondant. I roll the fondant up onto a tube and then drape it over the cake. Usually, I just pick the fondant up and place it on the cake but rolling the fondant up onto a tube will probably prevent tearing for beginners.
Use your fondant smoother to get out all the lumps and bumps. Fingers leave fingerprints!
 Step 9: More Details!
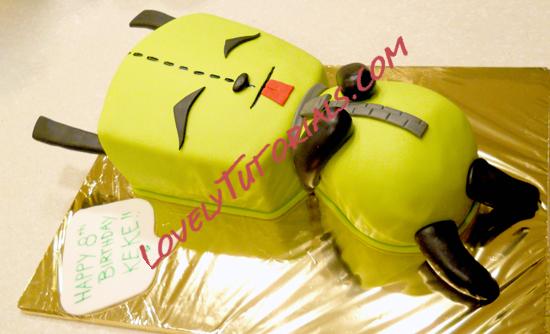
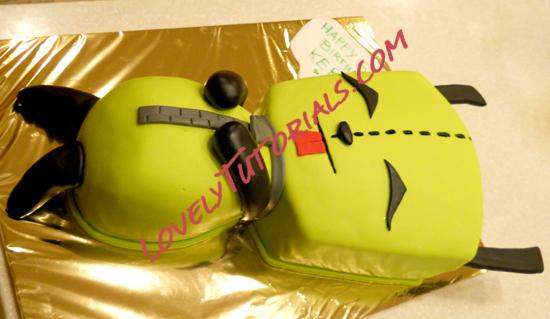
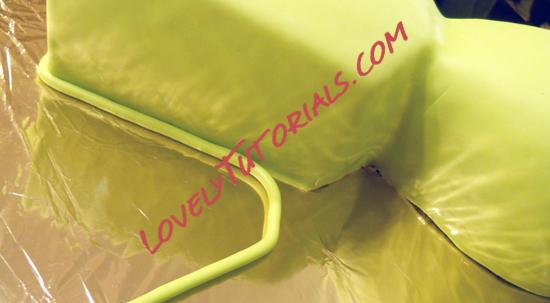
 After your cake is trimmed, roll out a piece of green fondant into a rope. Place around the bottom edge to hide the rough edges.
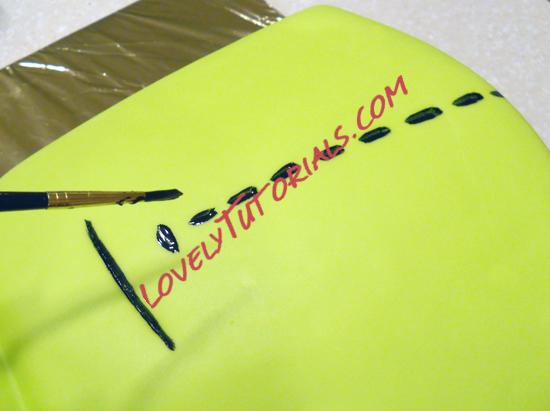
Paint on the stitch-marks and mouth-line with the black food color.
Cut out a tongue and glue on the rest of the facial features with a small amount of water on your clean brush. Put the antennae in as well as the zipper and lastly, the arms and legs. These stick better if you wet them lightly and then allow them to become tacky before attaching to the body. Smoosh edges down to make it secure.
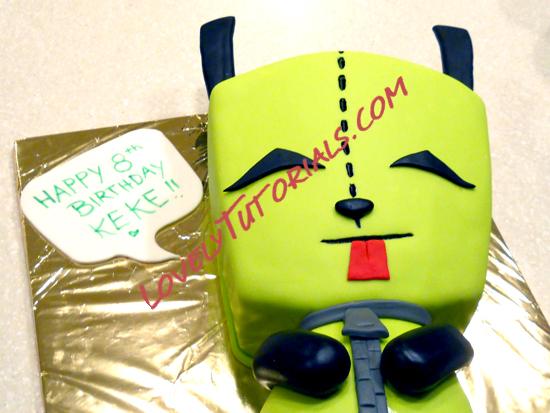
Personalize the cake with some rolled out white fondant shaped as a talk bubble. Remember to wipe off all those fingerprints BEFORE you take a photo (unlike me) ha ha.