|
|
МК торт "3Д Тигр" -3D Tigr cake tutorial V2
|

29.10.2014, 19:18
|
|
Местный
|
|
Регистрация: 23.04.2014
Сообщений: 207
|
|
 МК торт "3Д Тигр" -3D Tigr cake tutorial V2
Огромная благодарность Donnalicious Cakes за Мастер-класс
So I started off with a 12" square sponge cake and 16" cake drum.
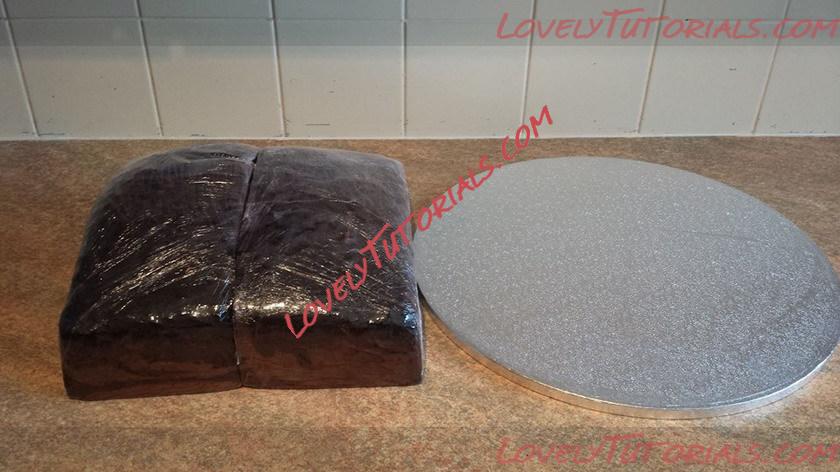
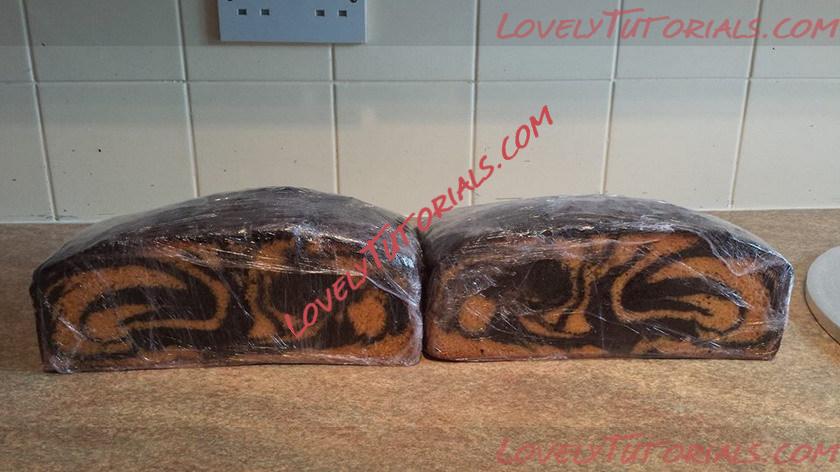
I have sliced it in half and this is the pattern on the inside. I thought it would be even better to be tiger on the inside as well as on the outside
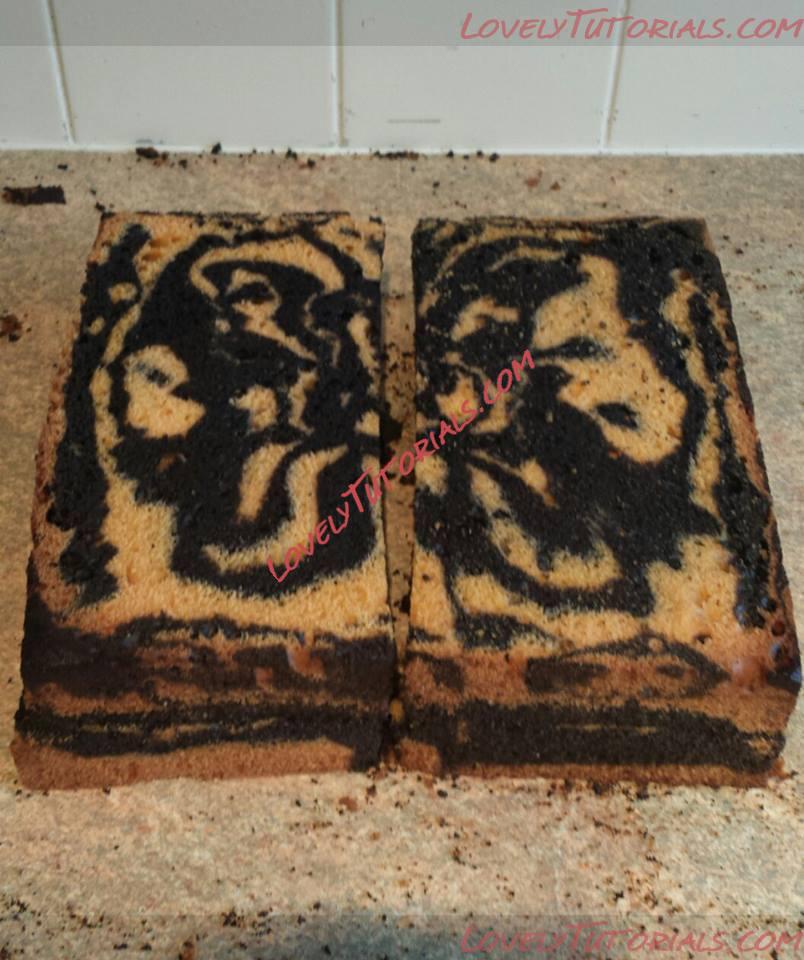
I have used a cake leveller to level both cakes and slice in half ready to carve
I stacked 3 of the halves on top on one another and then cut the 4th slice into 3.
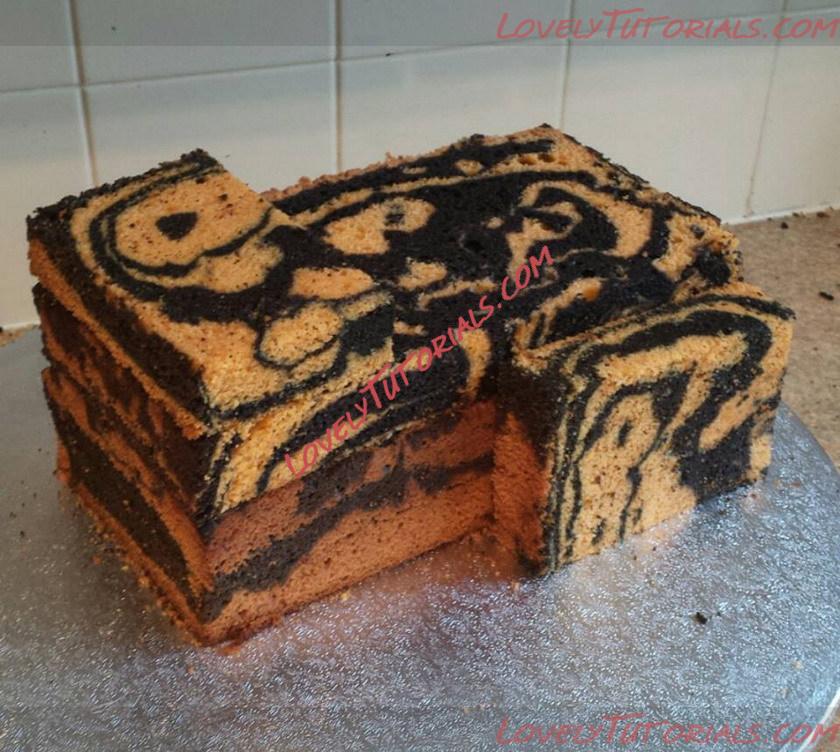
I decided the neck piece wasn't needed after all so put a thin slice on the top instead to give it its curve. I then carved it to start giving it a little shape.
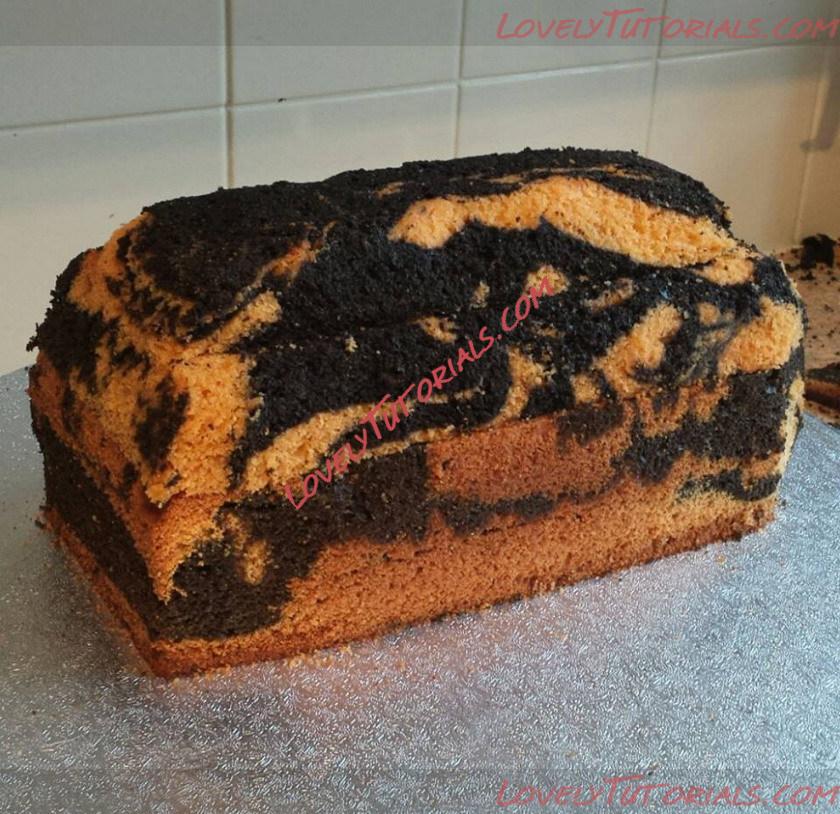
These are the 2 hind legs pieces.
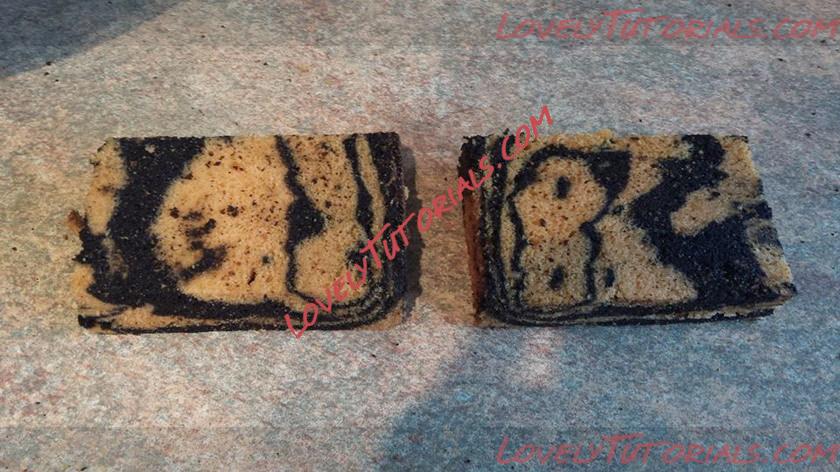
I carved and rounded them off to get there shape.
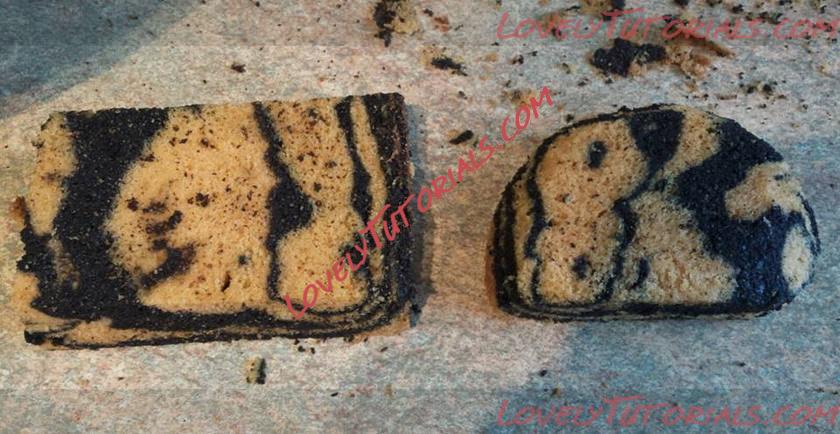
They are now carved and ready to go on the cake.
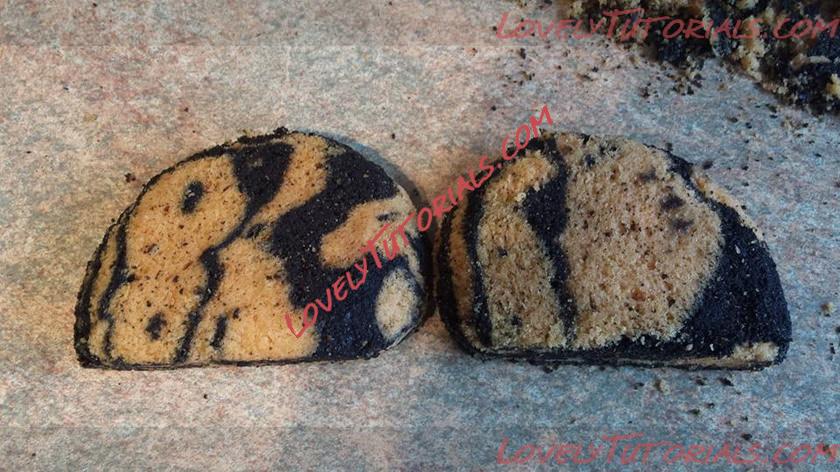
This picture was to give you and idea on how much wastage comes from a sculpted cake. However it doesn't all quite get wasted as I use it to make a cake pop mix
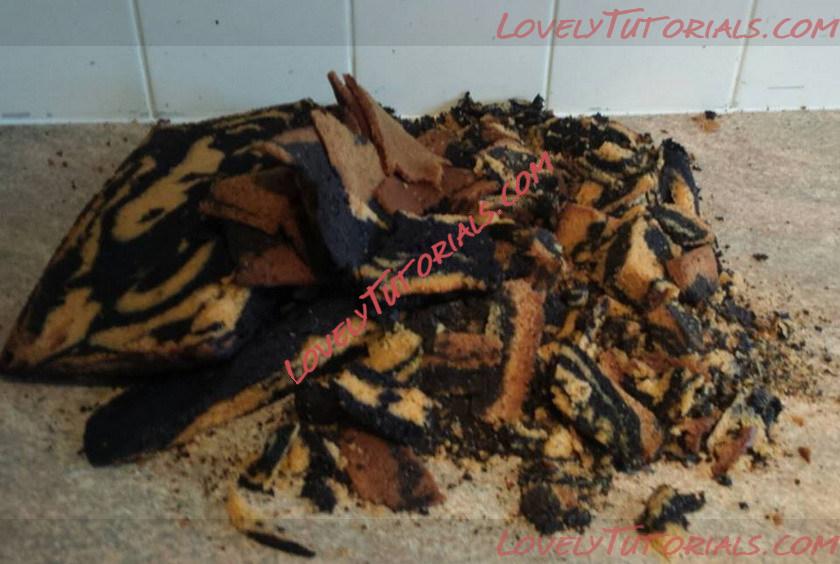
I use 2 other cut offs to make the front legs.
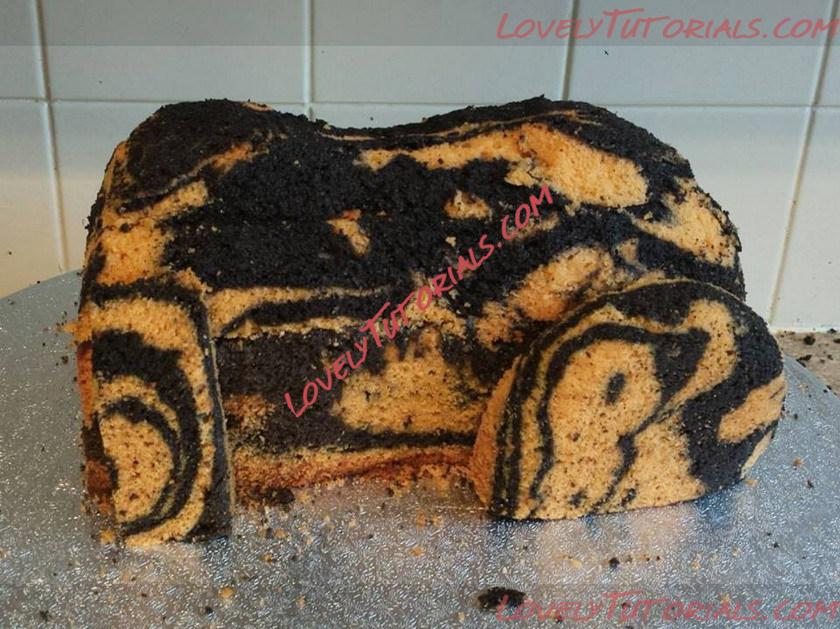
I have now fully carved it now to the desired shape.
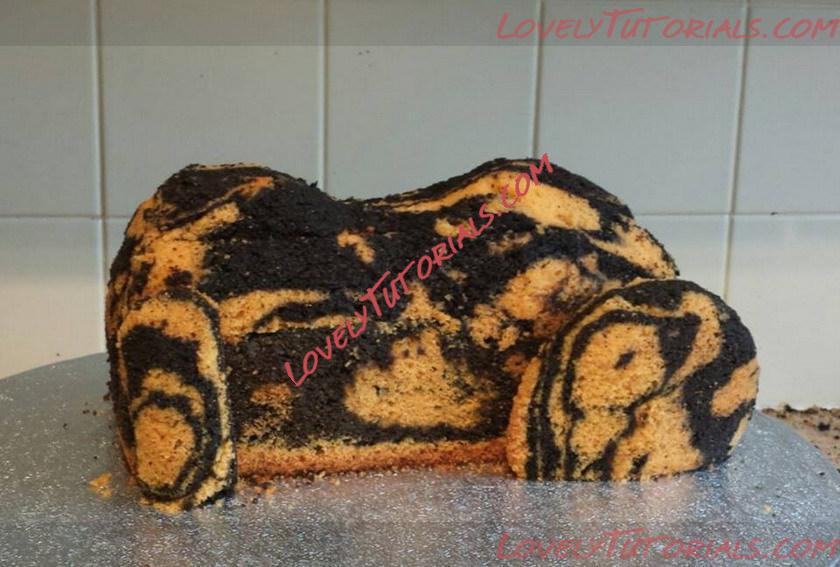
You have o make sure you look at it from all angles to make sure its even and the correct shape needed.
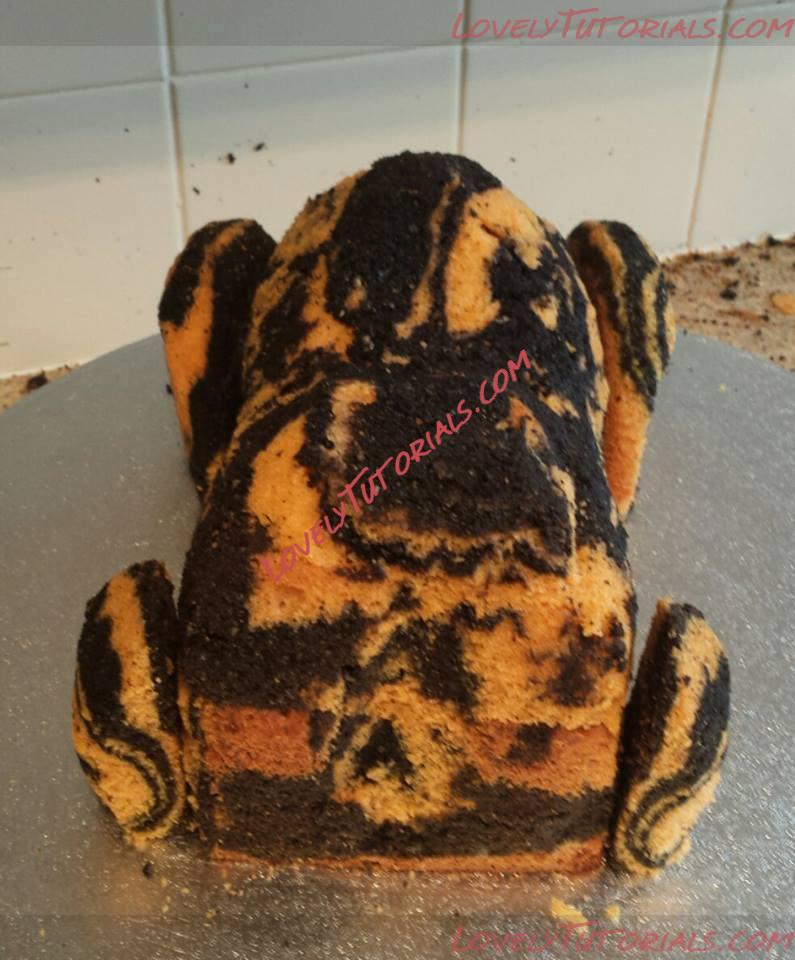
I decided it need a little more off his front legs. I'm now happy and ready to do the crumb coat.
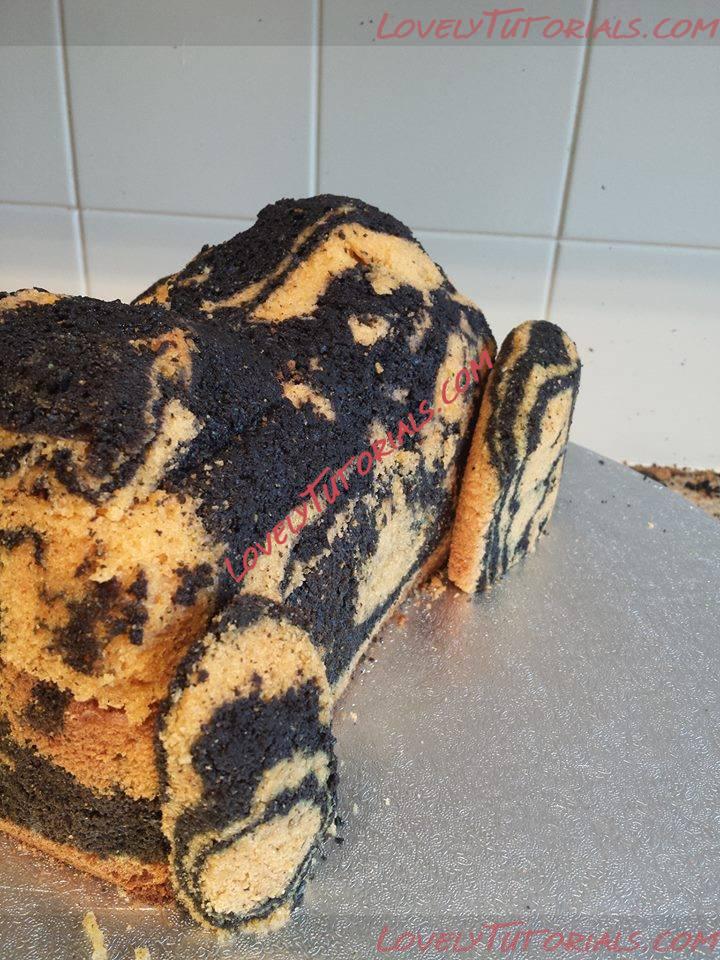
I have now filled the cake with buttercream and put a thin layer over the whole cake. This is called your crumb coat.
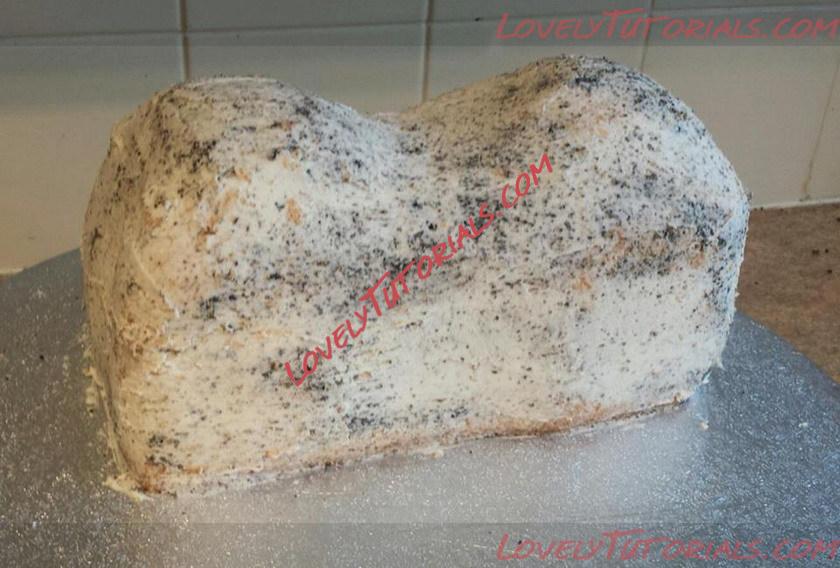
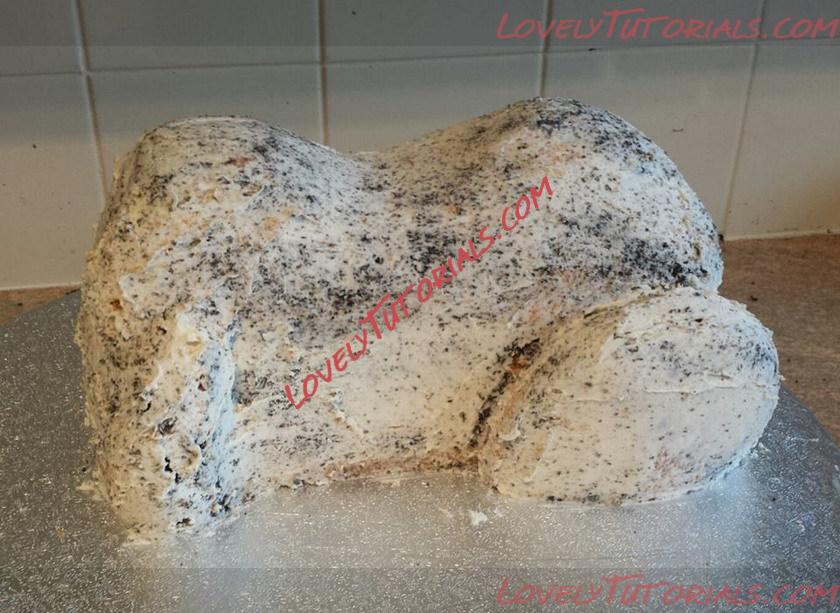
I then stick the other pieces to the cake and cover these too. I then put it the freezer for a few minutes to harden up. This makes it easier to put the 2nd coat of buttercream on ready for the icing.
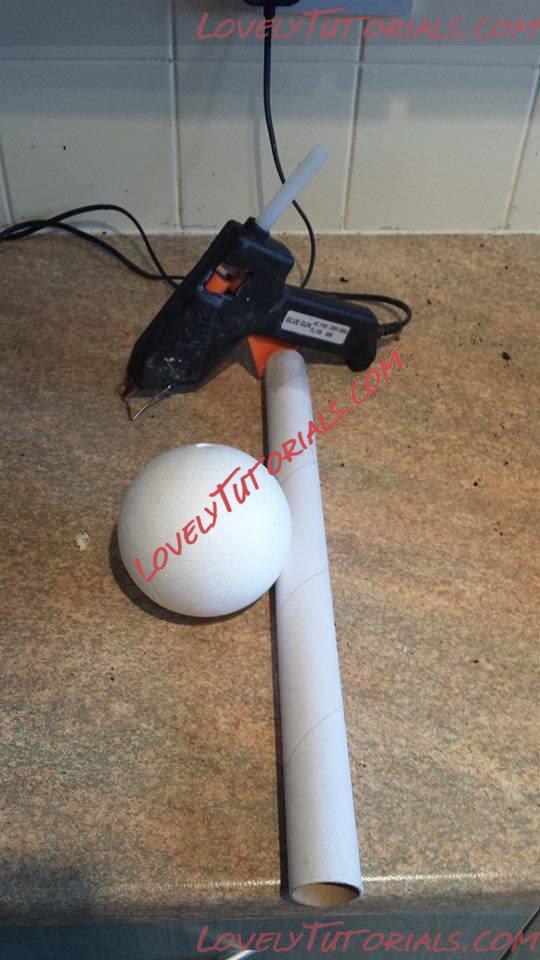
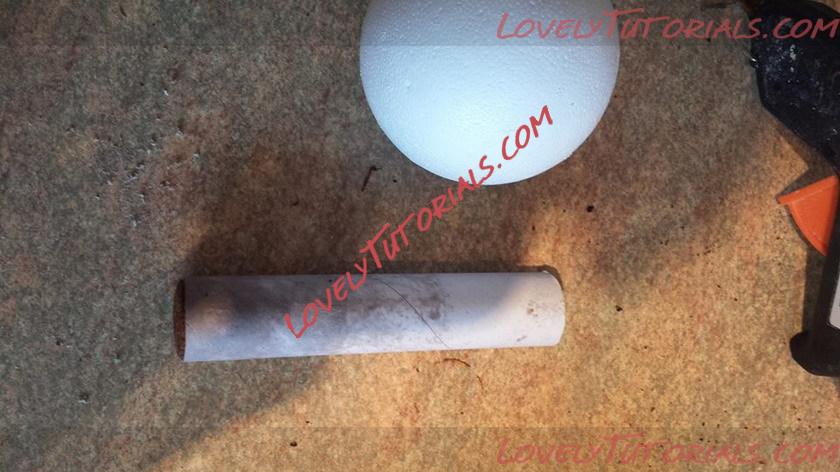
I have now got my tube support a polystyrene sphere and glue gun ready. This is to make the support for the head. this will be inedible and removed before eating the final cake.
I place the support tube into the cake where im wanting the head to go. I then make a mark as to where it needs to be cut off.
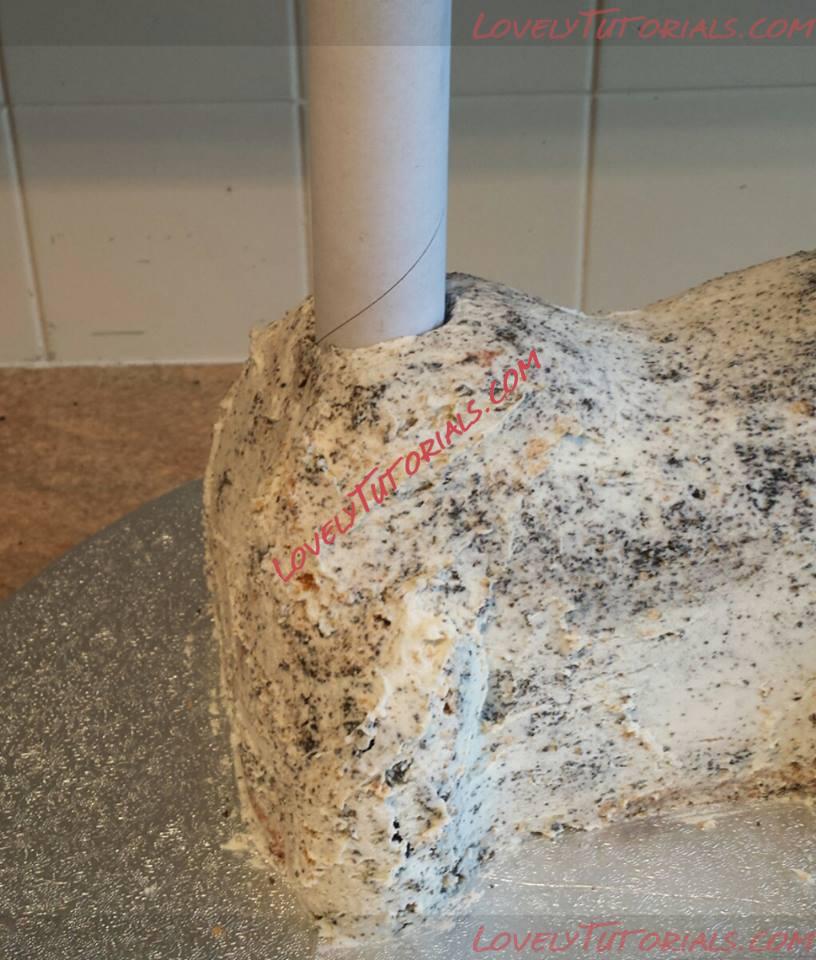
I then cut the tube to the required size and use the glue gun to keep the ball on after pushing it in slightly so its nice and snug. I also rub a thin layer of trex onto the tube before putting it in the cake.
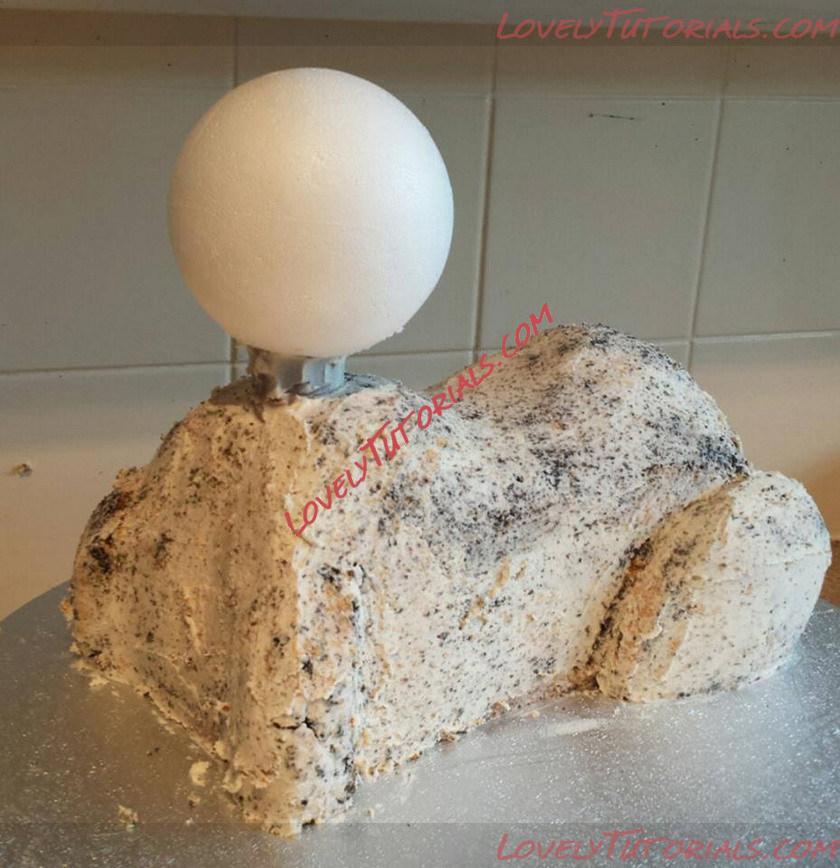
This is what it looked like once put back together. Now it is ready to start adding the features to his face and body.
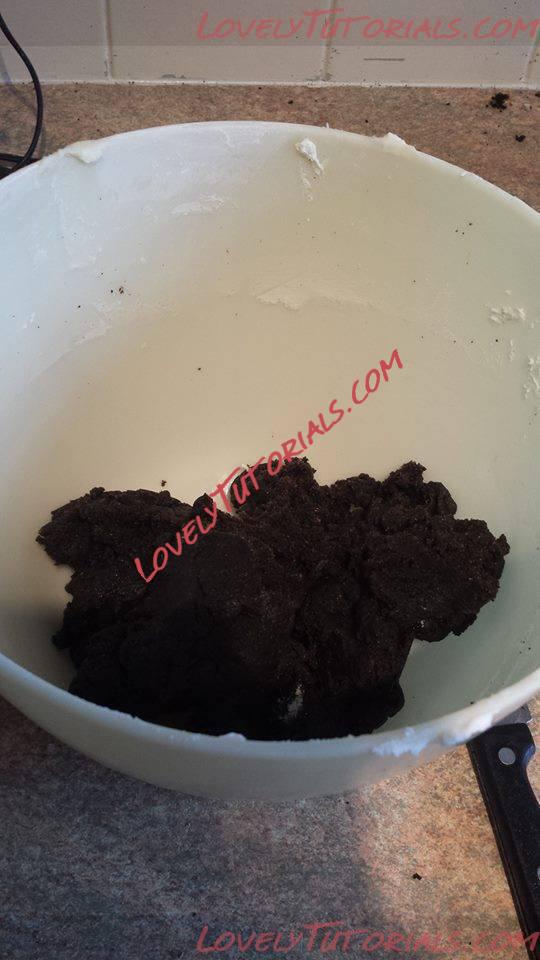
This is the left over cake, made into cake pop mixture. I find this extremely useful to add more detail to carved cakes and its a lot nicer to eat then loads of sweet icing
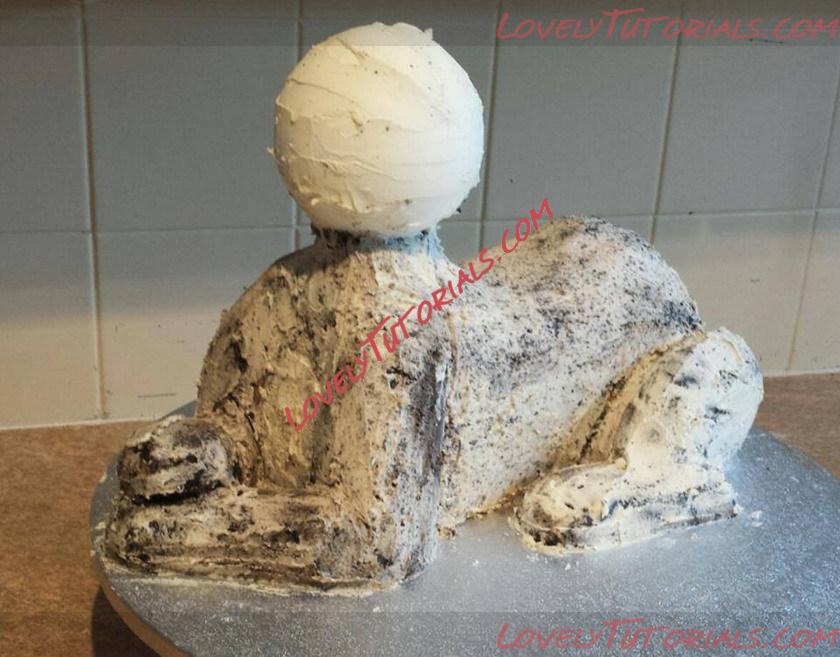
I have now used the mix to make the rest of the tigers legs and also butter creamed the head.
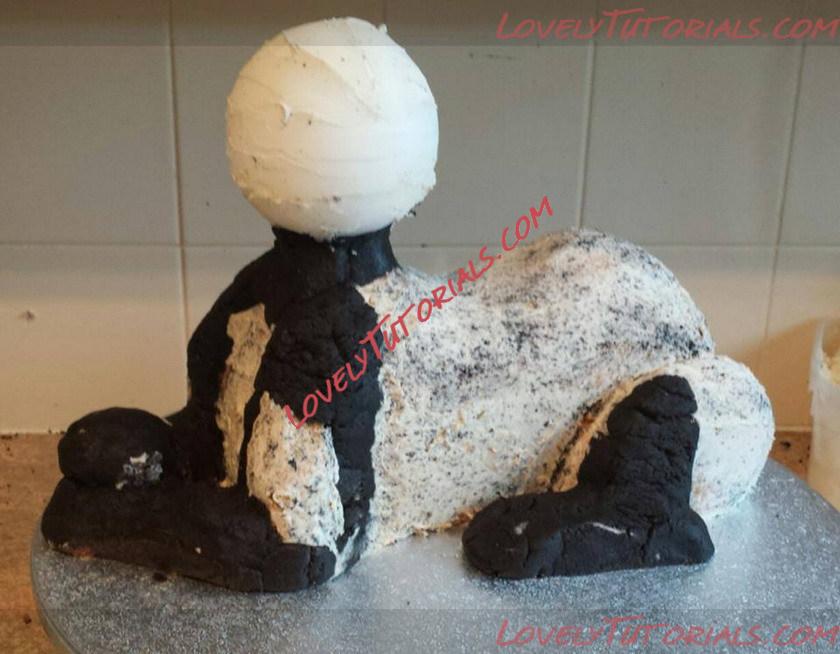
Crumb coated once again ready for the icing to be applied.
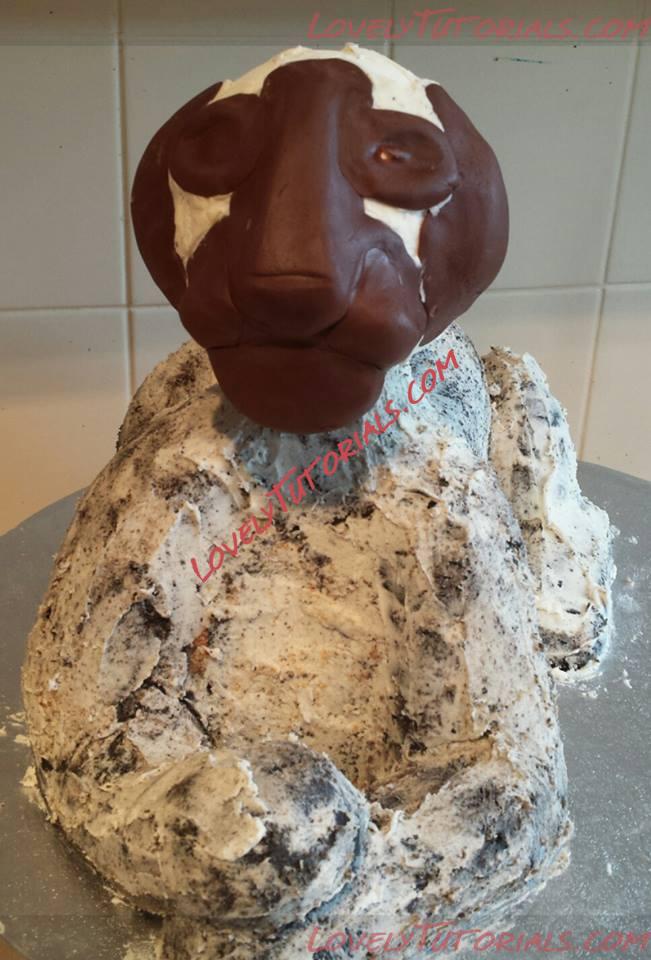
I have used Chocolate icing to make the features as it moulds really well together and is very pliable
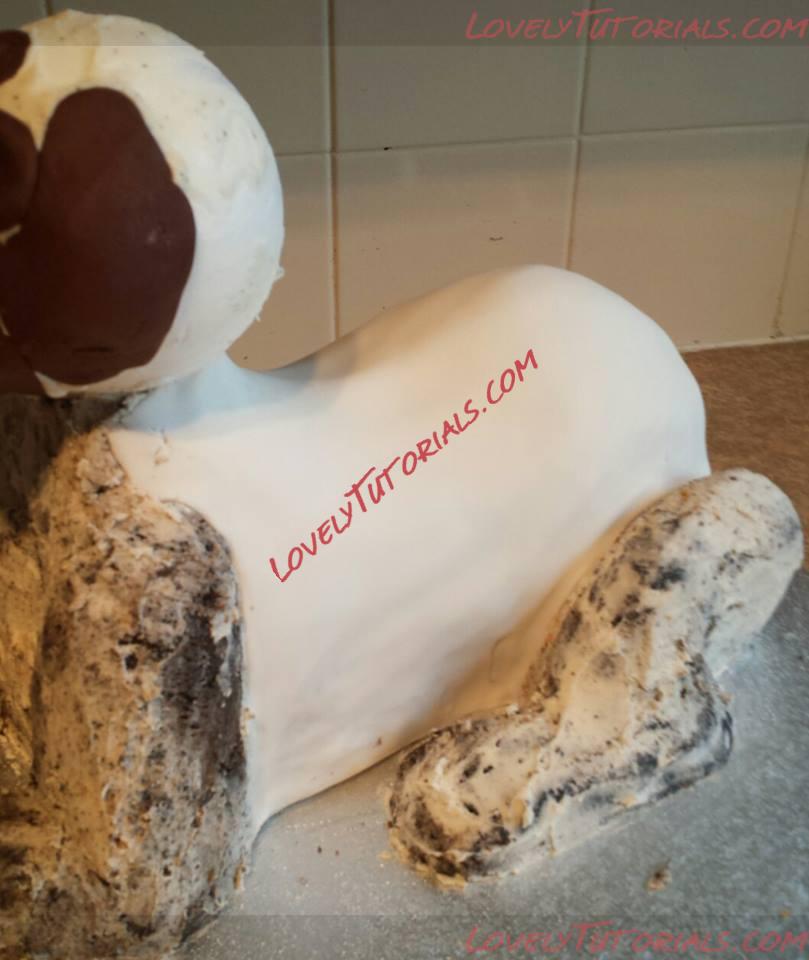
I have now rolled out my normal white icing out and smoothed it over his body and trimmed it up. I find it easier to do it in sections rather then trying to cover it all in one go.
I have now used a variety of different tools to indent the icing to create a fur effect. This makes it look more realistic

I then do the same for the other parts of the tiger cub.
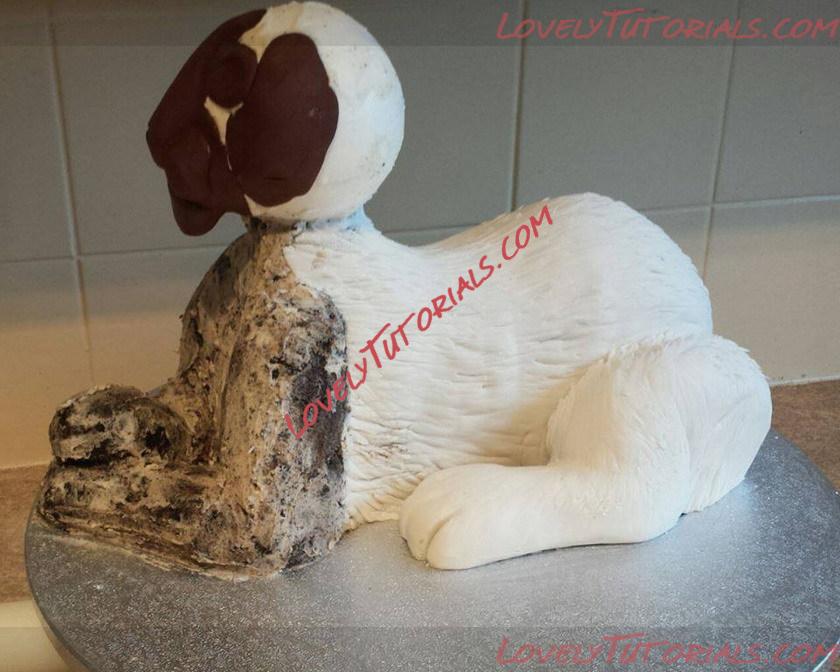
Where I join 2 bits of icing together I brush a very small mount of water on to make it slightly tacky so they stick together nicely.
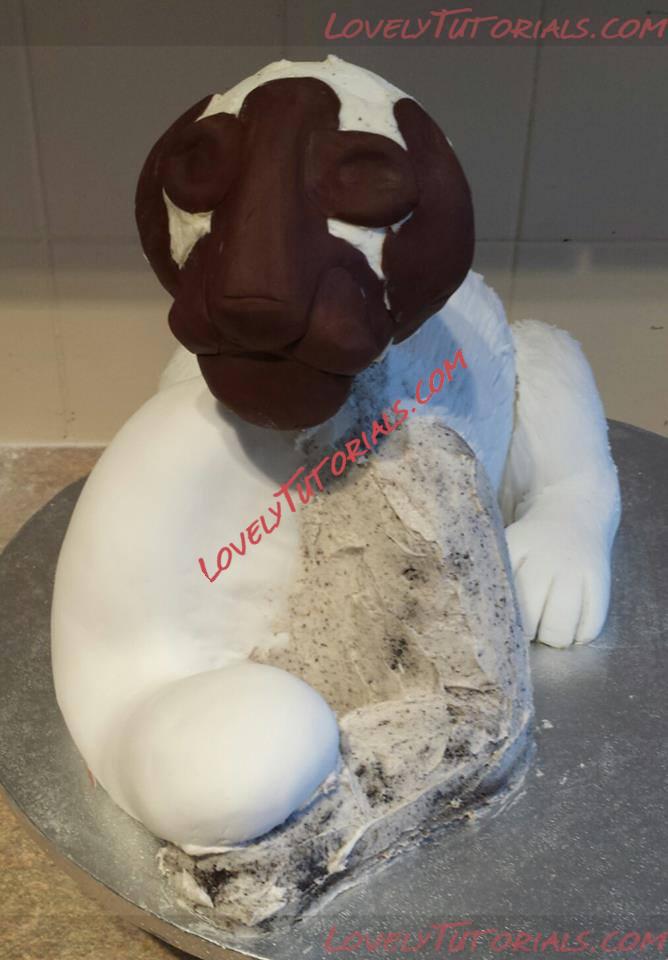
Another view
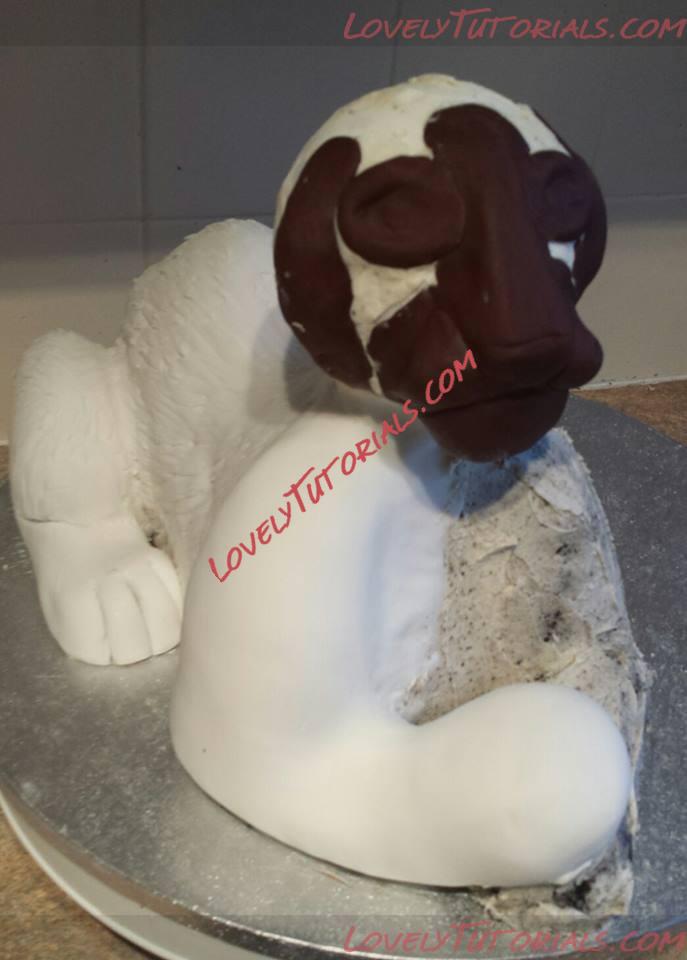
I then complete the final leg and do the fur effect on the other legs too.
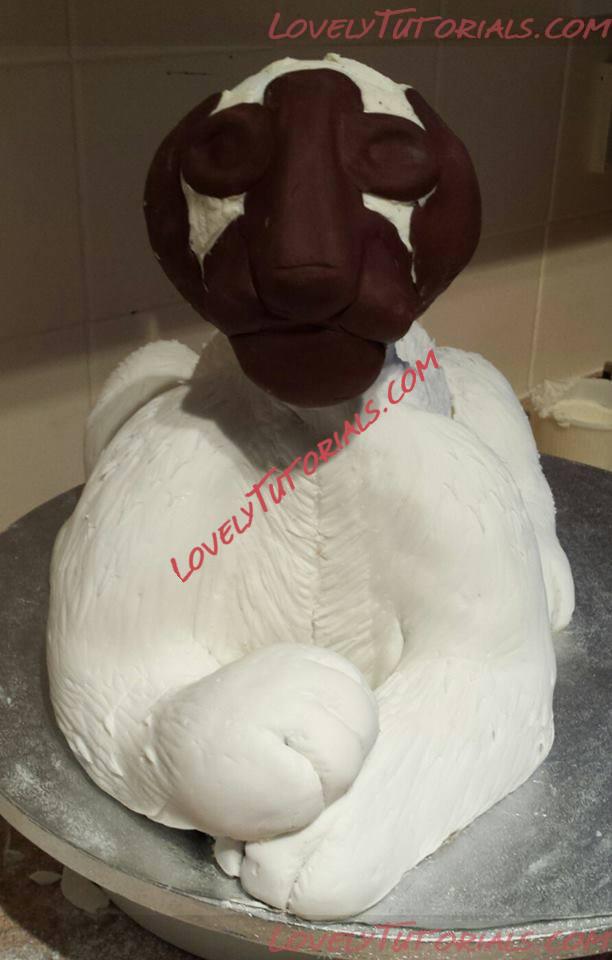
All done, just have a final check and do any final tweaks
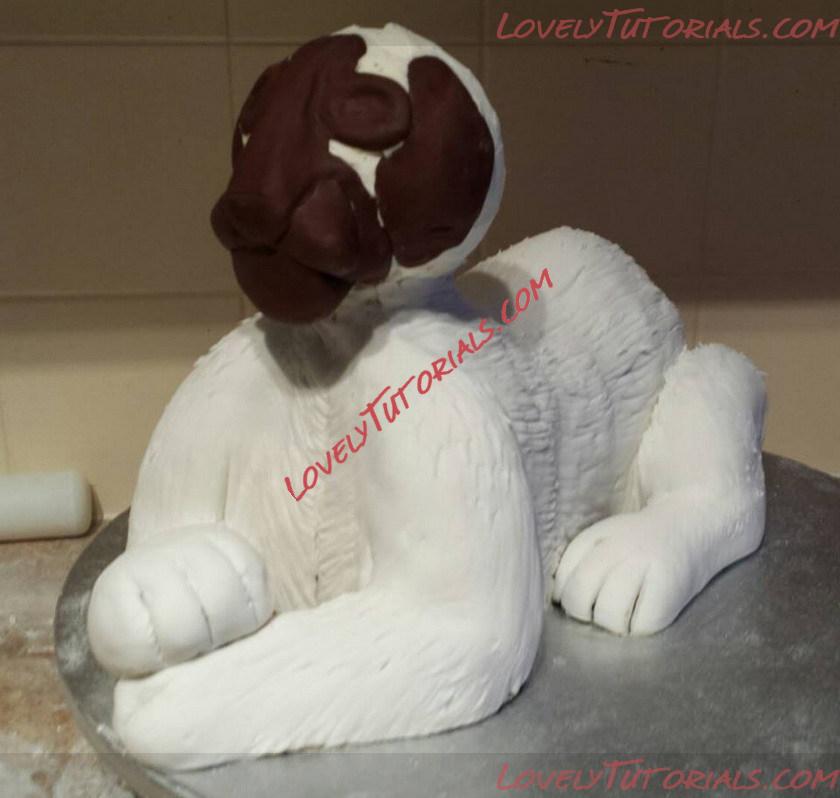
I can now make a start on his head. I brushed over the whole head with cooled boiled water and a clean brush to make it tacky for the icing to stick to. Then just mould the icing over nice and slowly working it all in and around the features. Once tHis Is done I use various sugarcraft tools again to make the details.
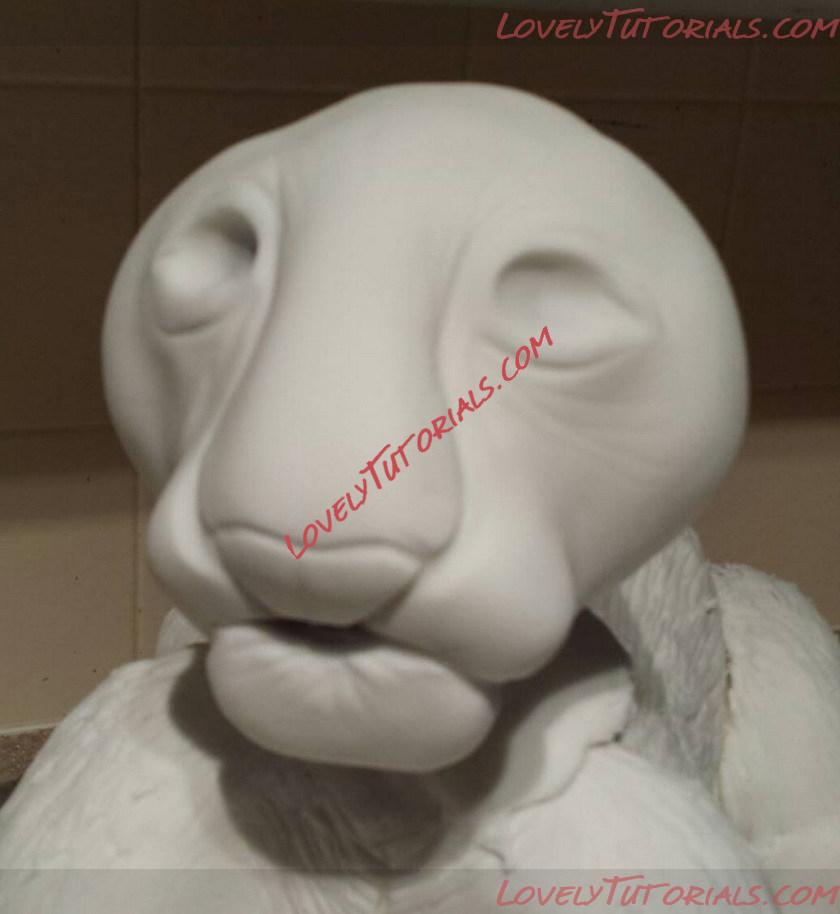
I then add extra icing bits to his face to build it up till I feel happy with it, once happy I then do the final details and fur impression. I decide to leave he eyes until after its airbrushed.
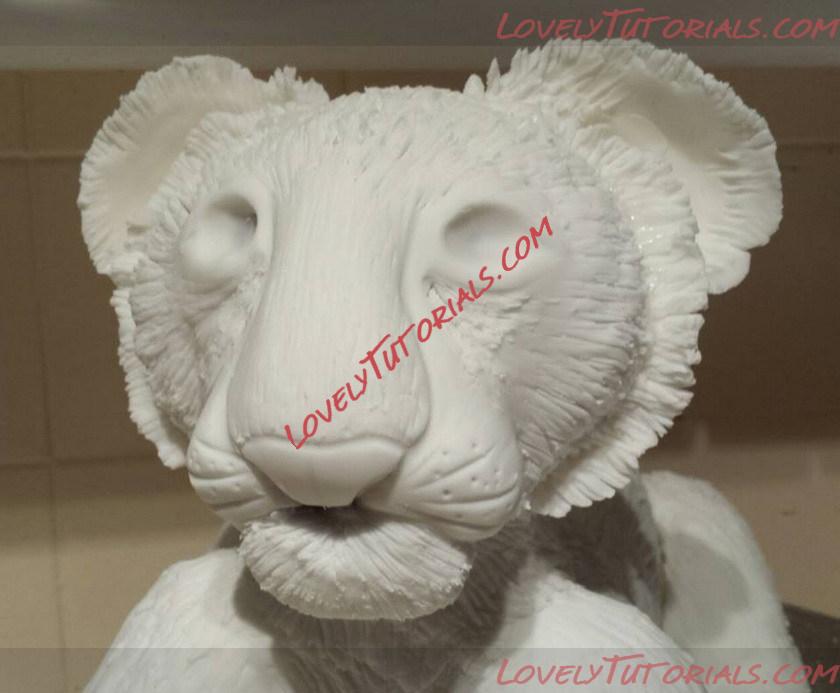
Now it all covered I do the final checks to make sure im happy with the final result.
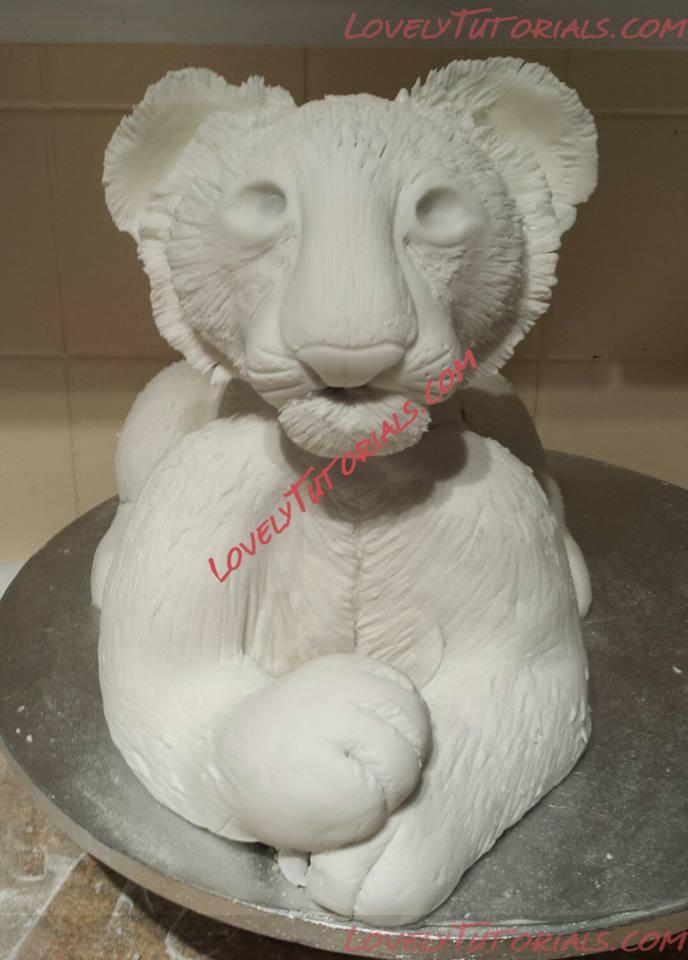
A little more icing was needed to thicken his neck but now im happy.
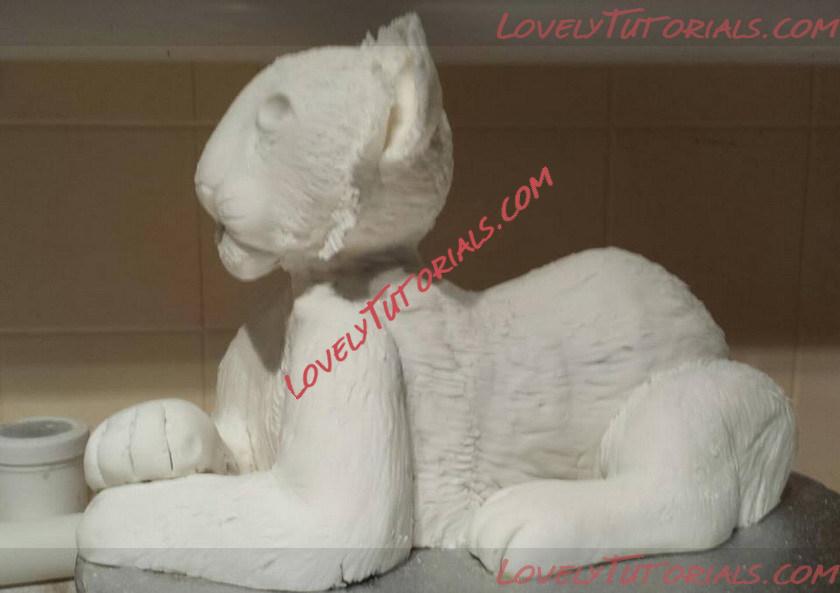
Im now happy with him and leave him to harden overnight ready for airbrushing.
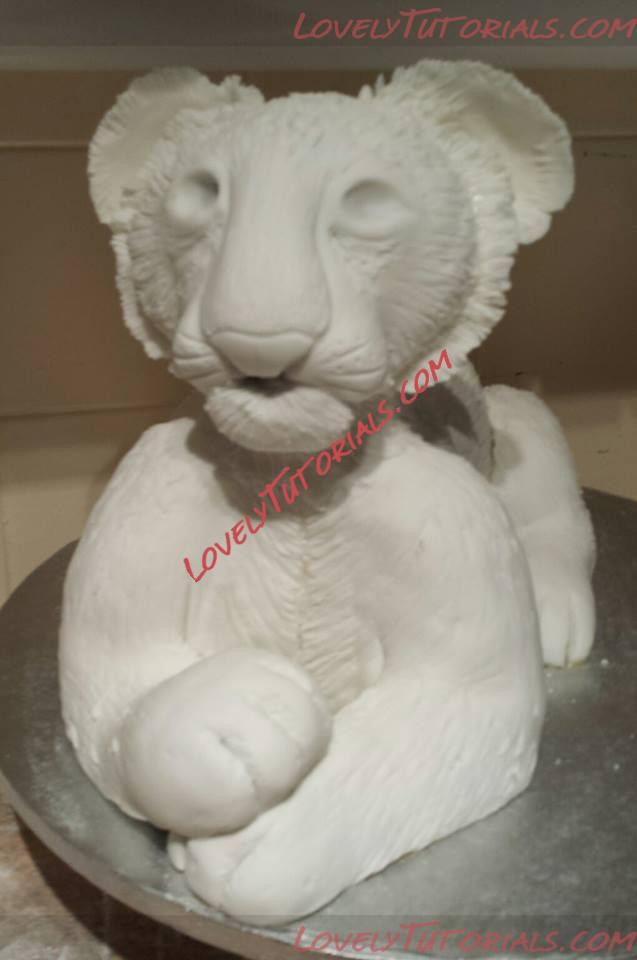
I also add his tail!
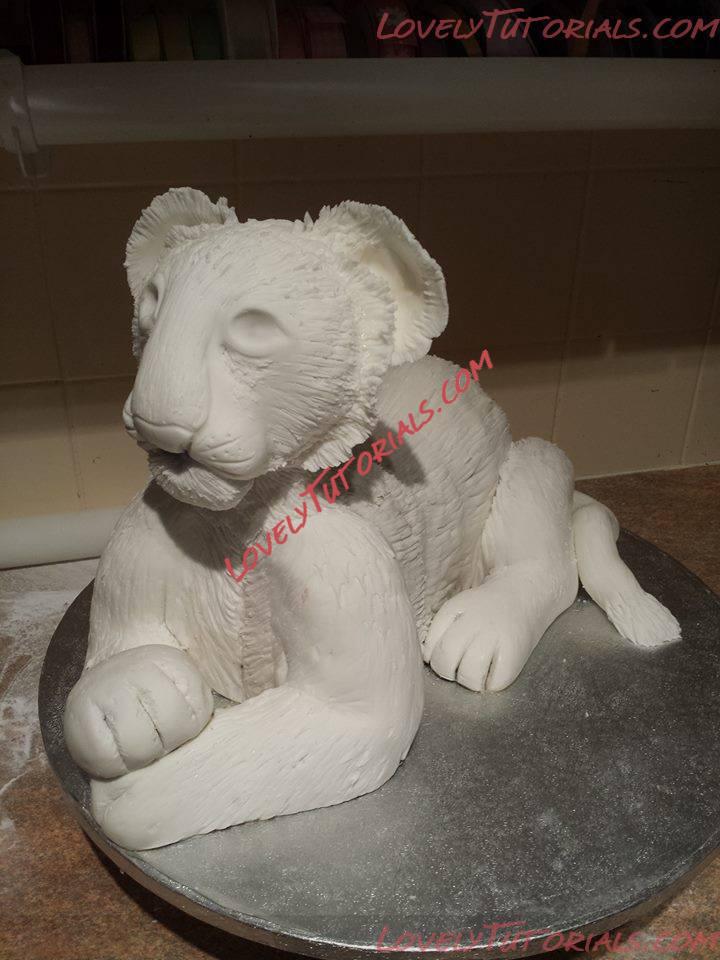
The trick with airbrushing is to build it up slowly so I start off with a very subtle creamy orange fOr his undertones.
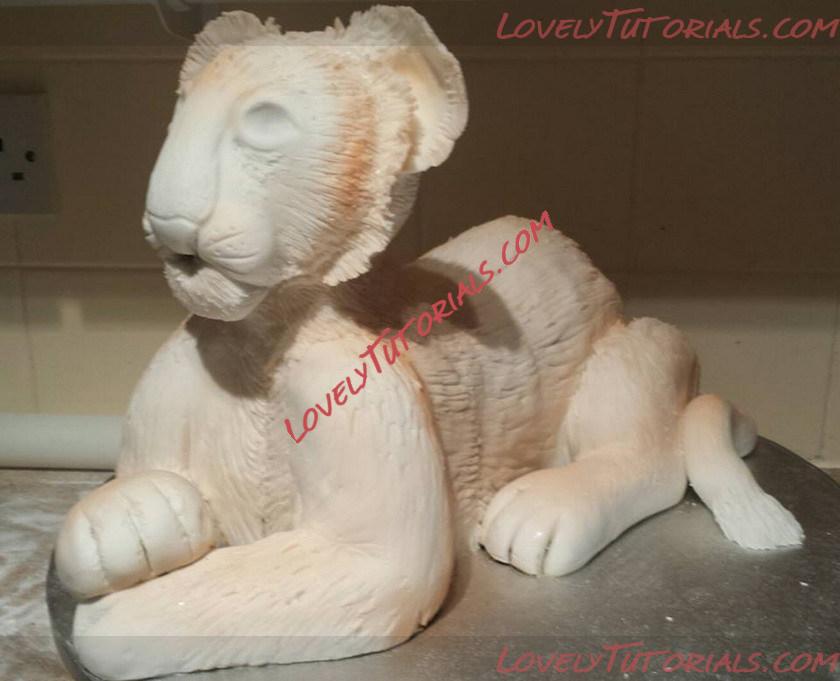
I then go slightly darker orange to start building the pattern and detail up
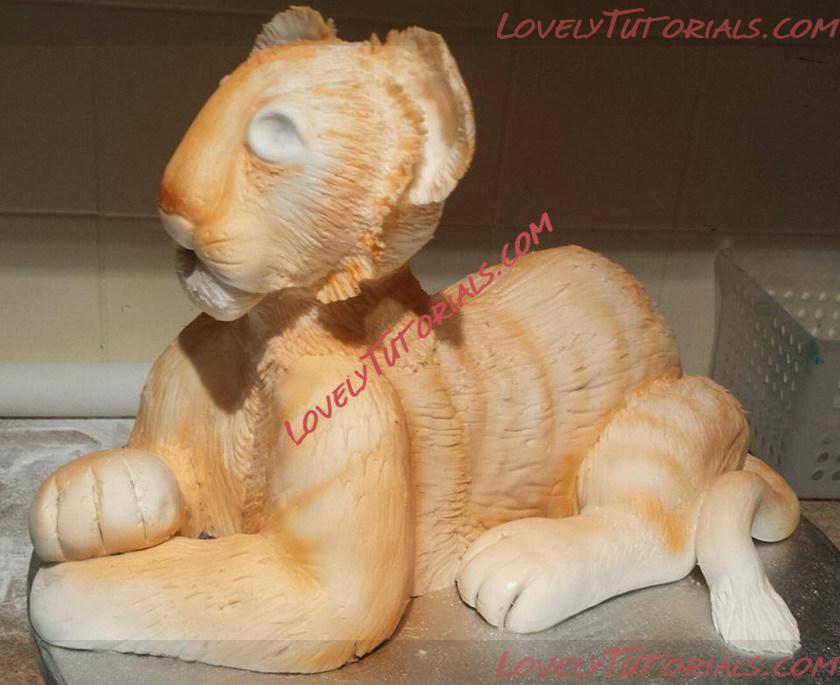
I keep building it up till im happy.
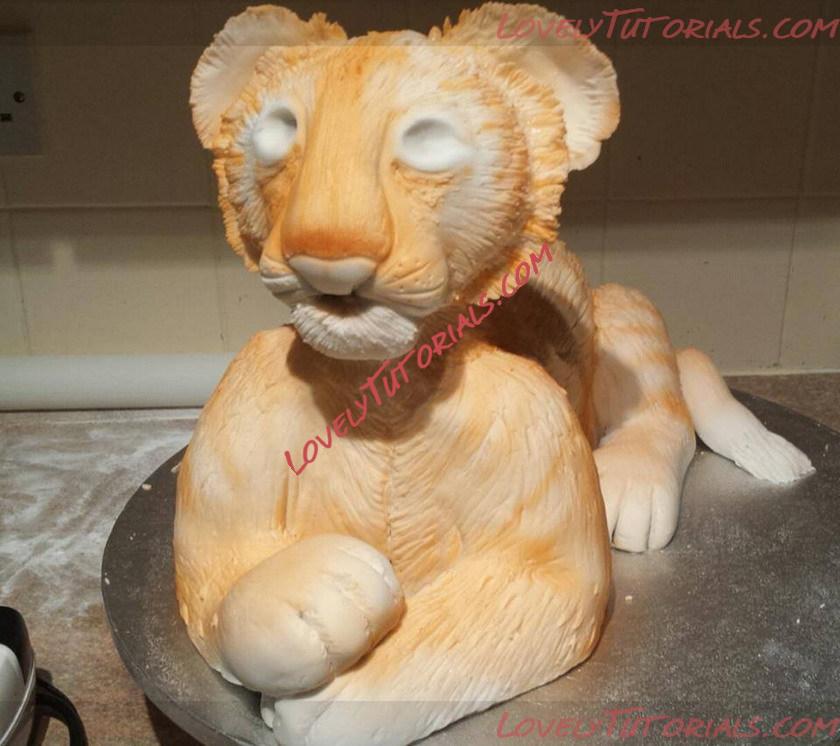
I then go to a light brown to add that extra dimension to his face.
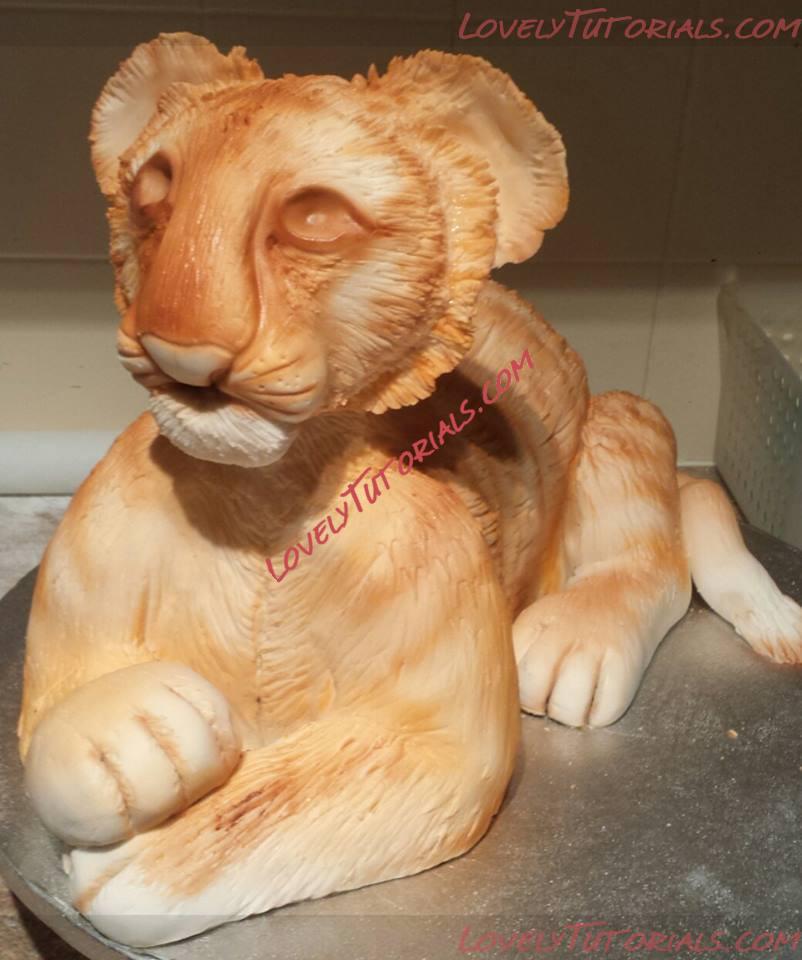
I feel happy with amount of orange he has now so I move on to his black stripes.
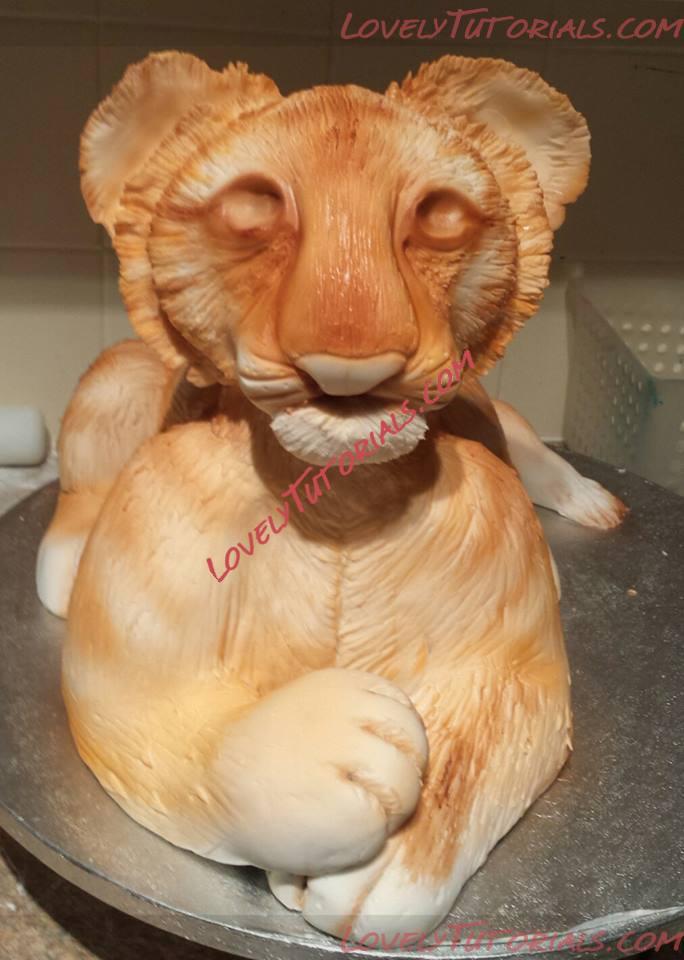
I use the black To create the detail in his face and his stripes on the rest of him.
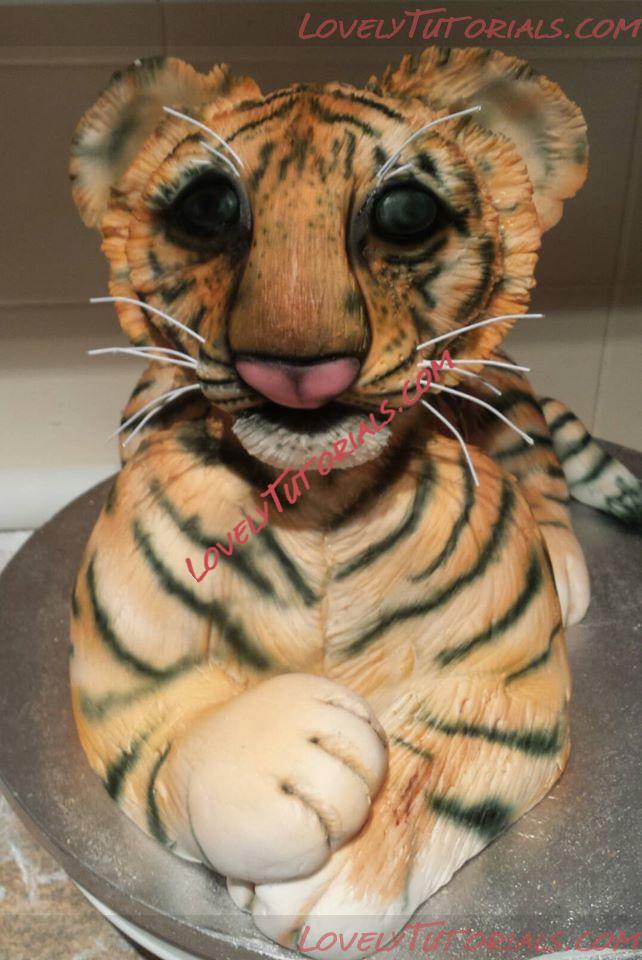
I decided his cheeks wasn't quite chubby enough so I added so more icing to fatten him up and add his eyes.
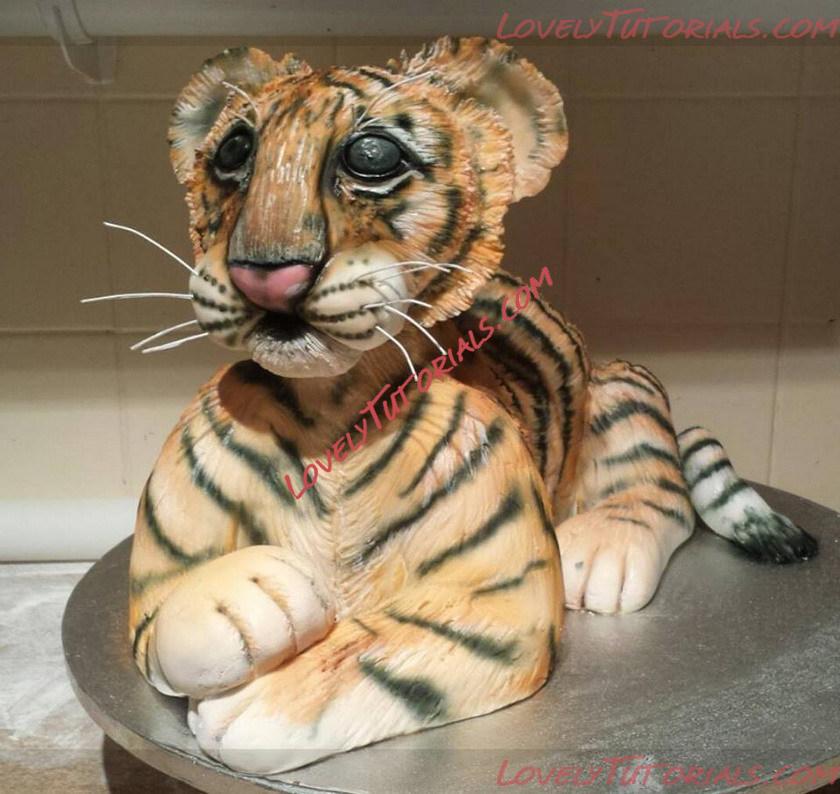
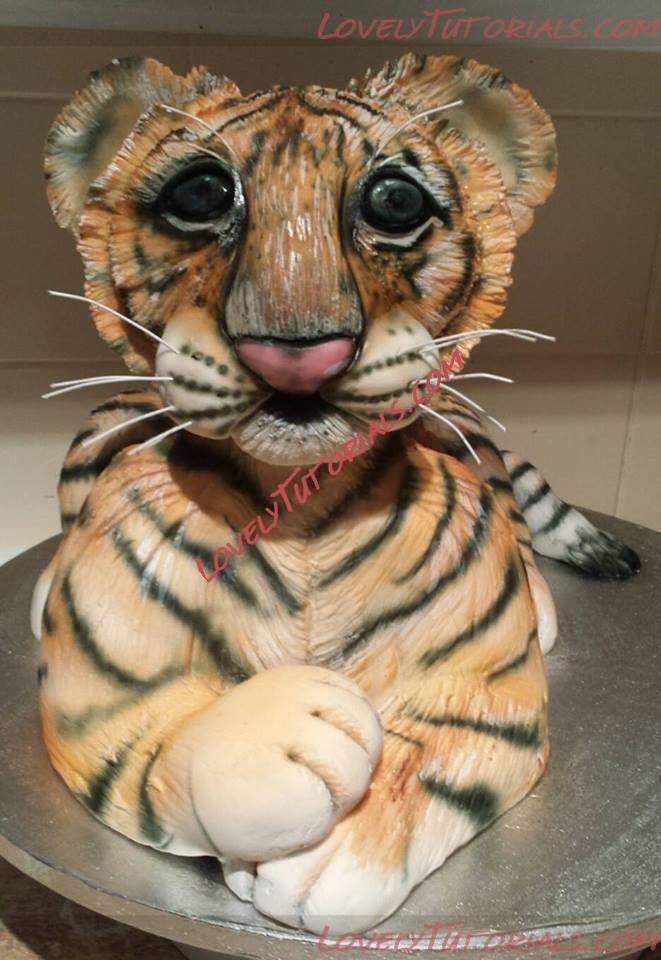
I painted his highlights with a brush to really make him come alive. I also cut some florist wire to use for his whiskers and eyebrows to just finish his face off.
I used green buttercream to spread around him and then use a grass nozzle to pipe the grass tufts around. Then for the final touch I add the name age and ribbon around the board and he is complete.
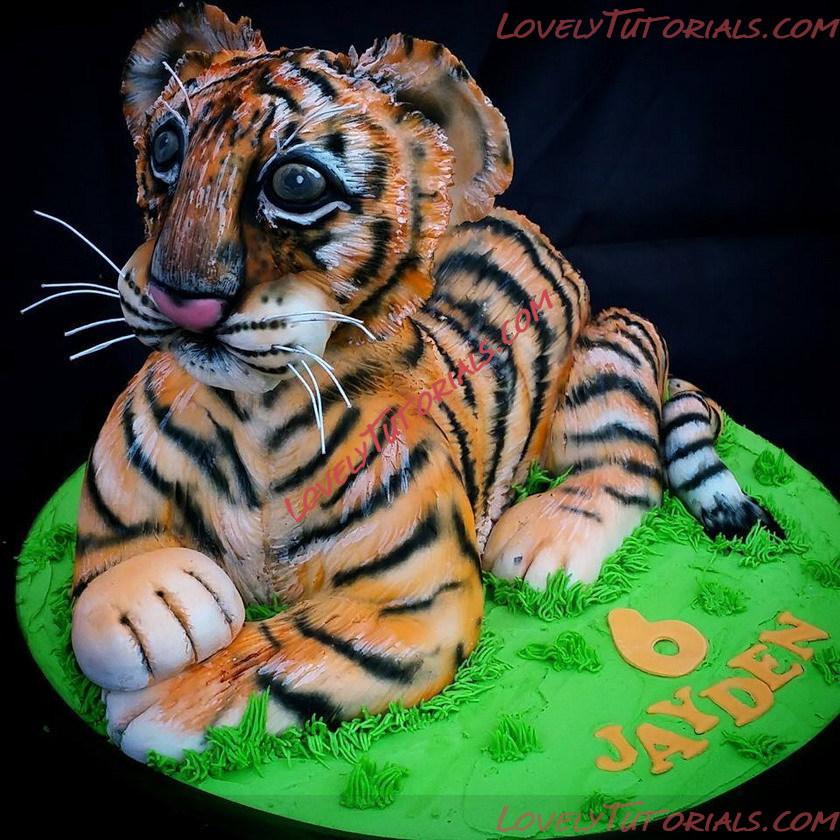
I take some photos outside in natural light and it makes all the difference.
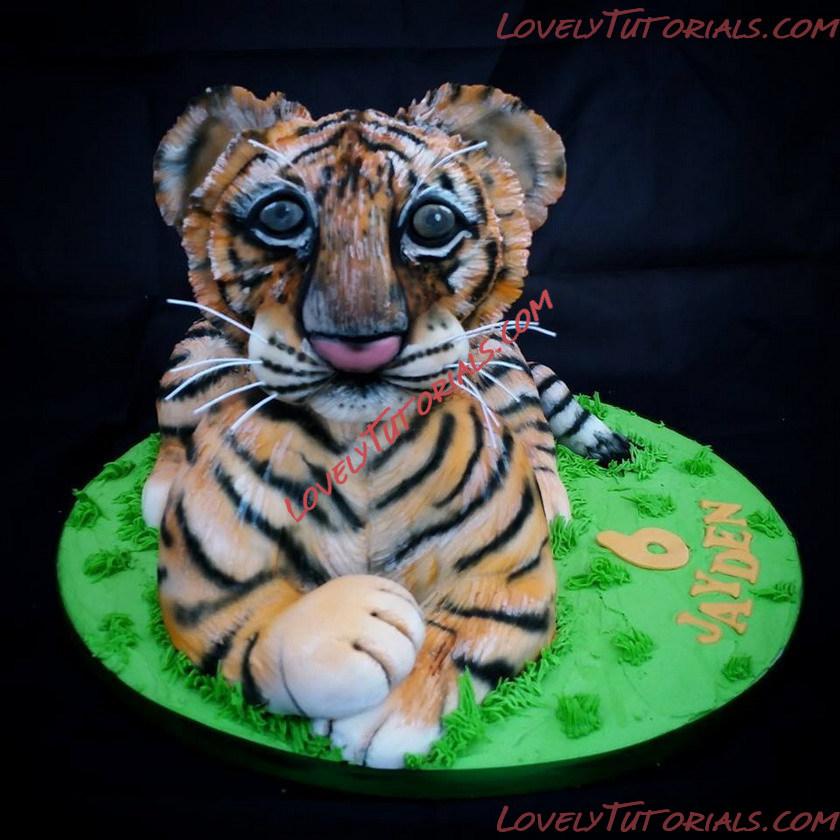
All his colours and details really pop out now.
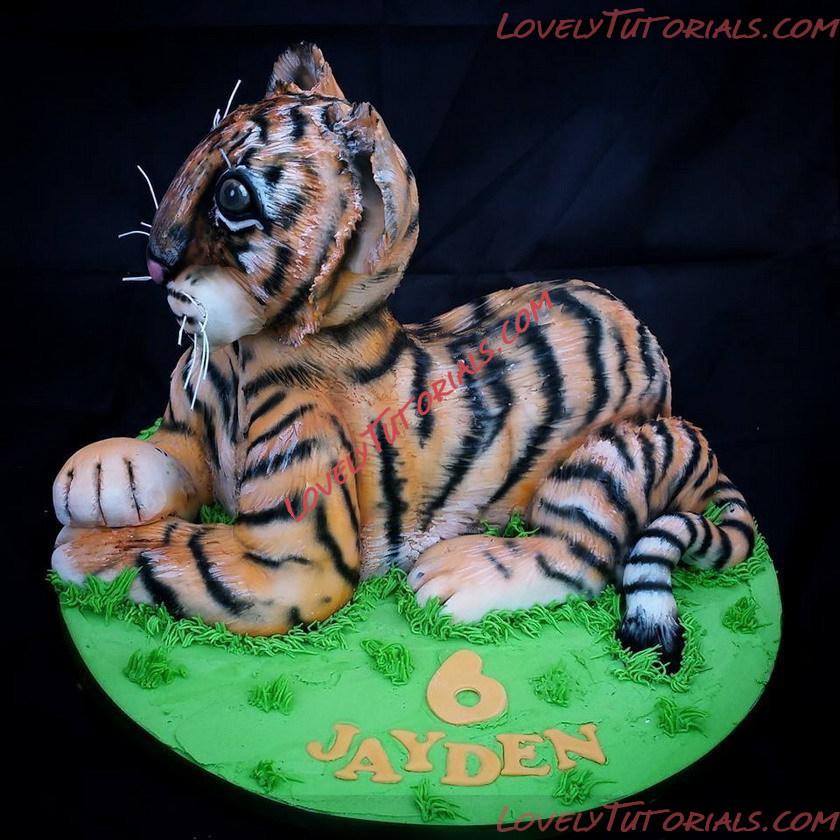
I really hope you enjoyed seeing how he was made and find it useful. This is my 1st attempt at a tutorial so any constructive comments or feedback will be welcomed.
Последний раз редактировалось Arinka; 31.10.2014 в 19:07.
|
 |
|
Метки
|
3d bizcocho, 3d bolo, 3d cake, 3d dort, 3d kage, 3d kager, 3d kake, 3d kek, 3d pastel, 3d tarta, 3d tigr cake tutorial, 3d torta, 3d torte, 3d torti, 3d torty, 3d κέικ, addım-addım, addım-addım təlimat, adım, adım adım, adım adım yönergeler, animal cake, animal crustulam, animalia tarta urrats, artesanatos passo a passo, askel askeleelta, az állatok torta, bemutató, bestoj kuko, bolando bolos, bolo tigr paso a paso bolo animal, bolo tigr passo a passo bolo animal, cacen cam tigr gan cacen gam anifeiliaid, cake decorating, cake decorating techniques, cake hewan, cake tigr hap pas hapi, cake tigr krok po kroku, cake tigr langkah demi langkah, ciasta zwierząt, confeitando bolos, creazione e decorazione torte, céim ar chéim, céim ar císte tigr le císte chéim ainmhithe, decoracion de pasteles, decoración de tortas, decorada en fondant, decorare le torte, decorazioni, deko fondant, dekorace na dort, dekoracija, dekoracije, dekorasyon, dekorácie, dier koek, dier taart, djur kaka, dyr kage, dyr kake, dzīvnieku kūka, dýra köku, eläinten kakku, etap pa etap, fender, fimo, flower paste, fondan, fondant, fondente, fondente di zucchero, fotopostup, foundant, gam wrth gam, gebak, glazuur, gradatim, gum pasta, gum paste, gumpaste, gyvūnų pyragas, gâteau tigr étape par étape gâteau des animaux, haiwan kek, hakbang-hakbang, hand-made, handmade, hap pas hapi, hatua kwa hatua, hayop cake, hayvan kek tarafından tigr pasta adım, heyvan tort ilə tigr tort addım, how to, how-to's, instrucţiuni, instrukcijas, instrukcje, jak na, kage dekoration, kagedekoration, kakebaking, kejk tigr pass pass kejk annimali, korak, korak po korak, korak za korakom, korak za korakom navodila, korak-po-korak upute, koristeet ja koristelu, krok, krok po kroku, krok za krokem, krok za krokom, krok-za-krokem, langkah demi langkah, las instrucciones, las técnicas, le tecniche, les techniques, loomade kook, lukie, lépésről lépésre, marshmallow, masa flexible, master-class, master-klasse, master-klasy, meistras klasės, metodikas, mistr třídy, mnyama, modeling paste, modelling past, motivtorten, nga tortë kafshëve, návod, opplæringen, pamoka, pap, pas, pas a pas, pas cu pas, pas à pas, pas-cu-pas, pas-à-pas et modèles, paso, paso a paso, pass pass, passo, passo a passo, passo dopo passo, passo-a-passo, passo-passo le istruzioni, pasta de miel, pastel tigr paso por paso pastel animales, pastís tigr pas per pas pastís animals, paŝon post paŝo, postup na 3d torty, postupak za ukrasavanje, pâtisserie, samm-sammult, schmelzend, schritt für schritt, schritt für schritt anleitung, schritt-für-schritt, schritt-für-schritt-anleitungen, skref fyrir skref, soli pa solim, stap, stap vir stap, stap voor stap, stap-voor-stap, stap-voor-stap instructies, steg for steg, steg för steg, steg-för-steg, steg-för-steg-instruktion, step, step by step, step-by-lépésre, step-by-step, step-by-step instructions, sugarcraft, sugarpaste, suikerglazuur, technieken, techniken, techniki, techniky, technikák, techniques, tecnicas de decoracion, tecniche, tehnici, tehnike, teknikker, teknikler, tier kuchen, tigr bolo, tigr bánh, tigr bánh từng bước động vật bánh, tigr cacen, tigr cake, tigr cake hakbang sa pamamagitan ng hakbang, tigr cake step by step, tigr císte, tigr dort, tigr dort krok za krokem, tigr etap gato pa gato bèt etap, tigr gato, tigr gâteau, tigr kage, tigr kage skridt for skridt, tigr kaka, tigr kaka skref fyrir skref, tigr kaka steg för steg, tigr kake, tigr kake trinnvis, tigr kakku, tigr kakku askel askeleelta, tigr kejk, tigr kek, tigr kek langkah demi langkah, tigr keki, tigr keki hatua kwa hatua keki, tigr koek, tigr koek stap vir stap, tigr kook, tigr kook samm-sammult, tigr kuchen, tigr kuchen schritt für schritt, tigr kue, tigr kuko, tigr kuko paŝo post paŝo, tigr kūka, tigr kūka soli pa solim, tigr pas tort tort cu animale pas, tigr pastel, tigr pastela, tigr pastís, tigr placenta, tigr placentam gradatim, tigr sütemény, tigr taart stap voor stap, tigr tarta urratsa, tigr tigr蛋糕蛋糕,一步一步,动物蛋糕, tigr tigr蛋糕蛋糕,一步一步,動物蛋糕, tigr tort, tigr torta, tigr torta korak po korak, tigr tortë, tigr પગલું, tigr કેક, tigr ಕೇಕ್, tigr পিষ্টক, tigr পদক্ষেপ, tigr கேக், tigr కేక్, tigr เค้ก, tigr ტორტ�?, tigr 케이크, tigr κέικ, tigr торта, tigr торта стъпка по стъпка, tigr торта чекор по чекор, tigr עוגה, tigr کیک، tigr کیک قدم قدم، جانوروں کیک کی طرف سے, tigra tortu krok za krokom, tigras pyragas žingsnis po žingsnio, tigras tortas, tigre tortu, tigrケーキ、ステップバイtigrケーキス テップ、動物のケーキ, tips och trix, torta animali, torta tigr korak za korakom, torta tigr lépésről lépésre, torta tigr passo dopo passo, torte, torte decorate, torten dekorieren, torti, torto živali, trin, trin for trin, trin-for-trin, trin-for-trin instruktioner, trinn, trinn for trinn, trinn-for-trinn-instruksjoner, trucs et questions sur la décoration de gateaux, tutorial, tutoriale, tutorias, tutorias/ideas para decorar los bizcochos, tutoriel, tutorijal, từng bước, tårtbottnen, tårtor, técnicas, ukrašavanje torti, uputstvo za dekoraciju, urratsez urrats, zuckermasse, zvierat tortu, zvířat dort, ขั้นตอนโดยขั้นตอ� � � �, પ્રાણી કેક દ્વારા કેક પગલું, ຂັ້ນຕອນ cake tigr ໂດຍຂັ້ນຕອນ cake ສັດ, ຂັ້ນຕອນທີໂດຍຂັ້ນ� � � �ອນ, ઉત્તરોત્તર, ಪ್ರಾಣಿ ಕೇಕ್ ಮೂಲಕ tigr ಕೇಕ್ ಹಂತದ, ಹಂತ ಹಂತವಾಗಿ, ಹೆಜ್ಜೆ, सजा केक, पढ़ें कदम, पशु केक द्वारा केक कदम, ट्यूटोरियल मास्टर वर्ग, अधिक पढ़ें केक, कदम, कदम से कदम, कदम दर कदम निर्देश, तकनीक, পশু পিষ্টক দ্বারা পিষ্টক পদক্ষেপ, ধাপে ধাপে, படி, படிப்படியாக, விலங்கு கேக் மூலம் tigr கேக் நடவடிக்கை, స్టెప్ బై స్టెప్, జంతు కేక్ ద్వారా tigr కేక్ దశల, దశ, ცხოველთა ტორტ�?, ნამცხვარ�? tigr ეტაპობრ�?ვად, ეტაპობრ�?ვად, étape, étape par étape les instructions, öğretici, 一步一步來, 一步一步来, žingsnis, žingsnis po žingsnio, životinjskog tortu, 宗師級教程,一步,一步一步的指示� � � � �技術,udžbenik, 少しずつ, 裝飾蛋糕, 동물 케이크로 tigr 케이크 단계, 단계, 단계적으로, 만들기 제작 과정, κέικ tigr βήμα προς βήμα, κέικ ζώων, βήμα, βήμα προς βήμα, βήμα προς βήμα οδηγίες, οδηγίες βήμα βήμα, παντεσπάνι art, �?יגר ש�?יקל, �?יגר ש�?יקל שרי�? דורך שרי�?, τεχνικές, φροντιστήριο, декорация на торти стъпка по стъпка, инструкция, корак по корак, как сделать, крок за кроком, крок за крокам, от днес за днес, покроково, пошагово, пошаговые фотки, пакрокава, миниатюра, мк, мк торт "3д тигр", майстор-класа урок, майстар-клас, майстер-клас, майстер-класи, маршмеллоу, мастика, мастер-класс, животински торта, животиња торту, животное торт, жывёла торт, зд торт, зд торта, ручной работы, ручная работа, украшение тортов, сахарная мастика, уроки прикрашання, стъпка, стъпка по стъпка, стъпка по стъпка инструкции, тигр колач, тигр колач корак по корак, тигр торт, торт тигр крок за кроком, торт тигр шаг за шагом, торт тыгр крок за крокам, торта стъпка по стъпка, тварина торт, техники, техника, техніка, туториал, туторіал, тэхніка, тыгр торт, чекор по чекор, шаг за шагом, інструкцыя, інструкція, עוגת חיה, כייַע ש�?יקל, צעד אחר צעד, צעד אחר צעד tigr  |
|

