Огромная благодарность Donnalicious Cakes за Мастер-класс
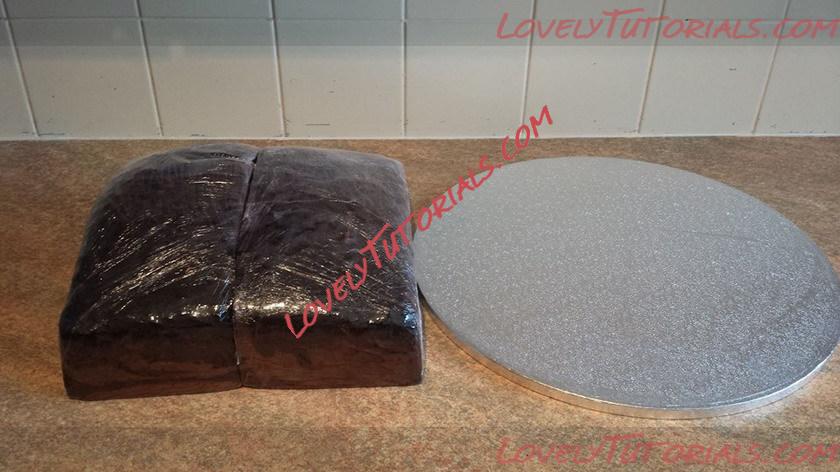
So I started off with a 12" square sponge cake and 16" cake drum.
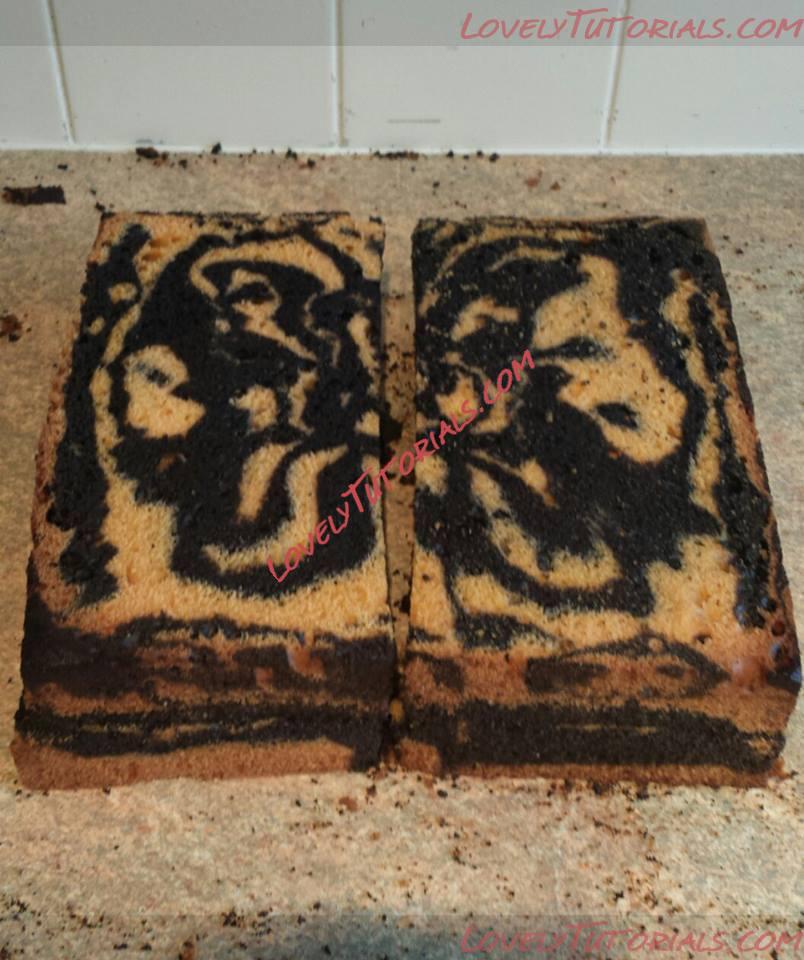
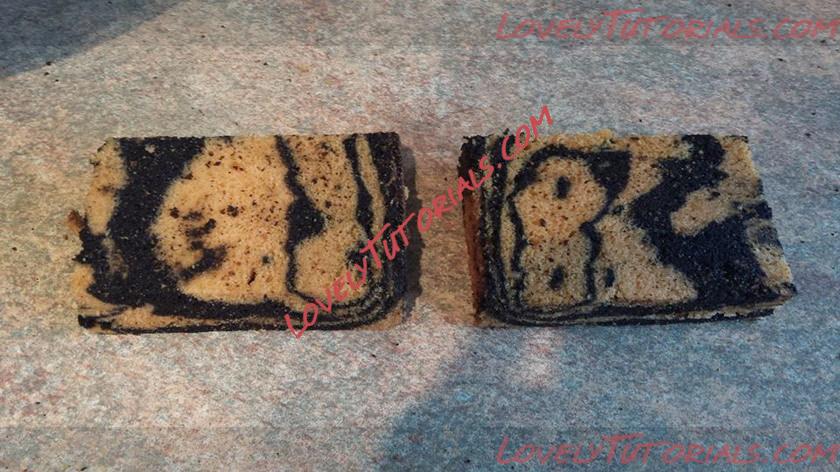
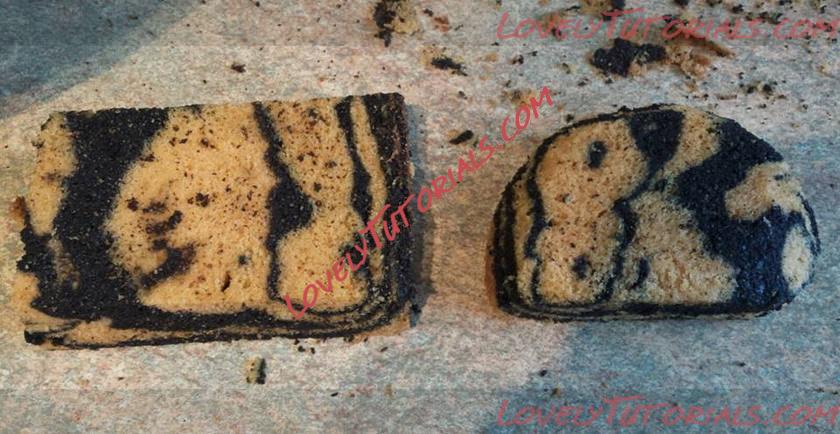
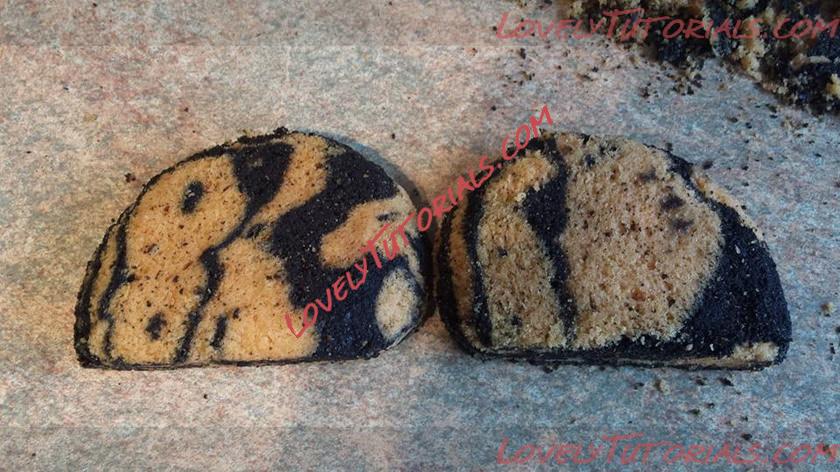
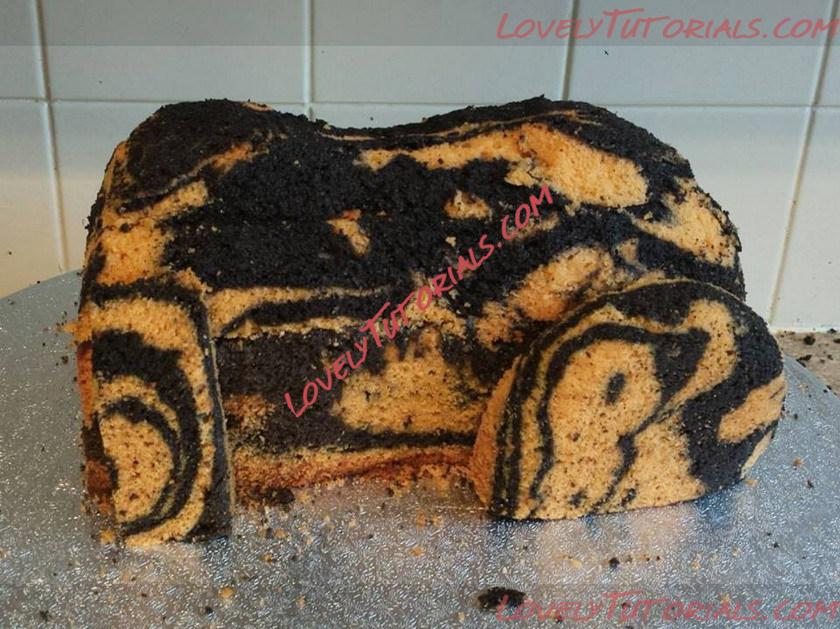
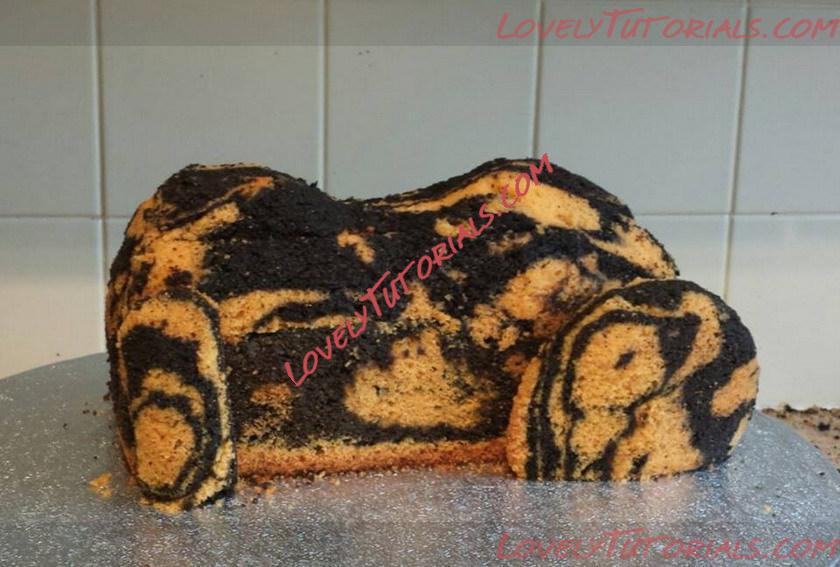
I have sliced it in half and this is the pattern on the inside. I thought it would be even better to be tiger on the inside as well as on the outside

I have used a cake leveller to level both cakes and slice in half ready to carve
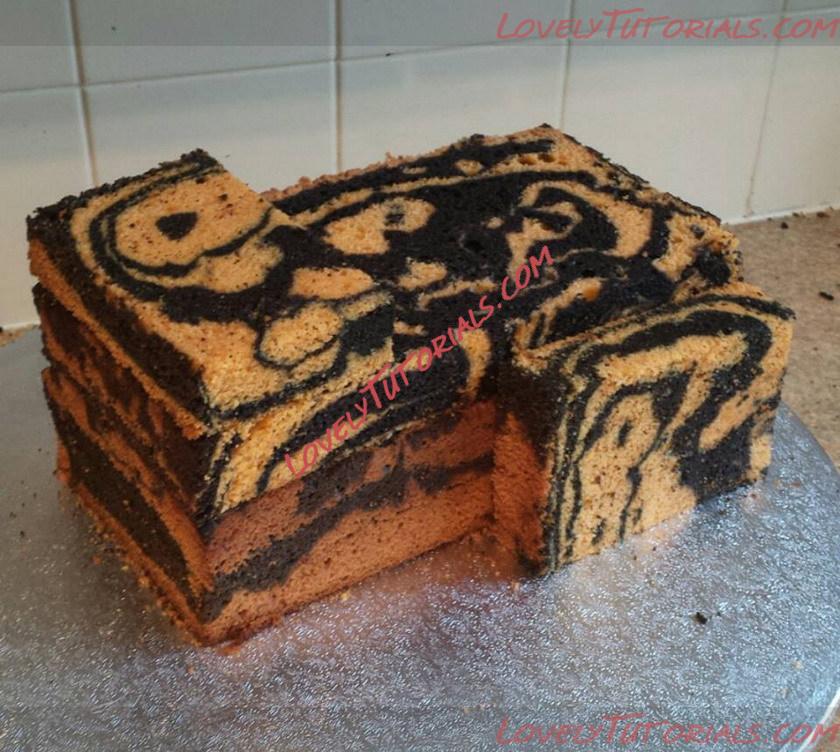
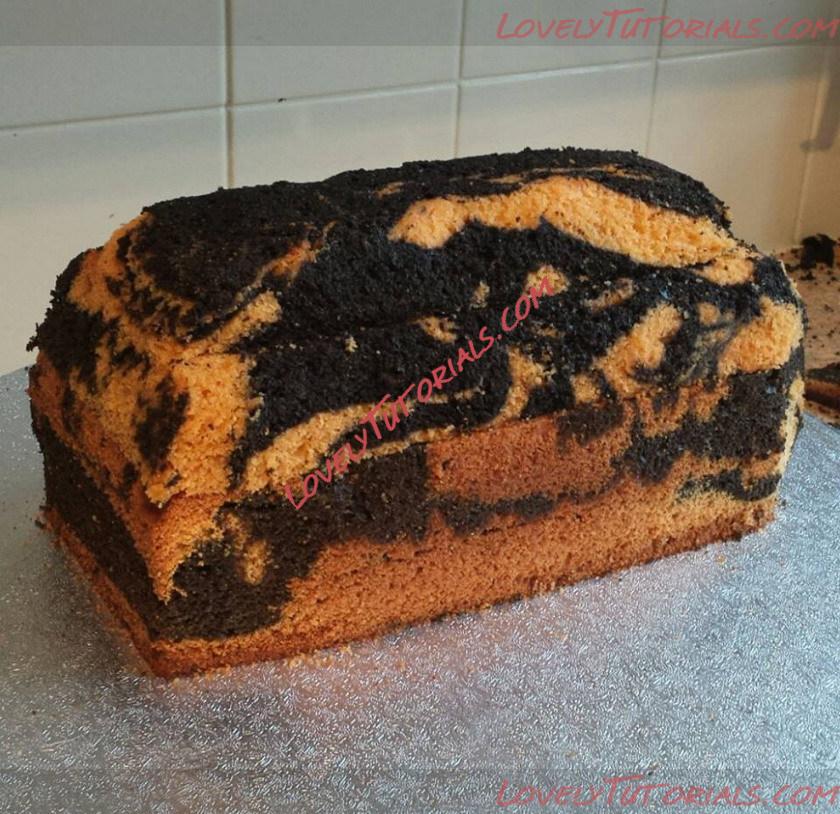
I stacked 3 of the halves on top on one another and then cut the 4th slice into 3.
I decided the neck piece wasn't needed after all so put a thin slice on the top instead to give it its curve. I then carved it to start giving it a little shape.
These are the 2 hind legs pieces.
I carved and rounded them off to get there shape.
They are now carved and ready to go on the cake.
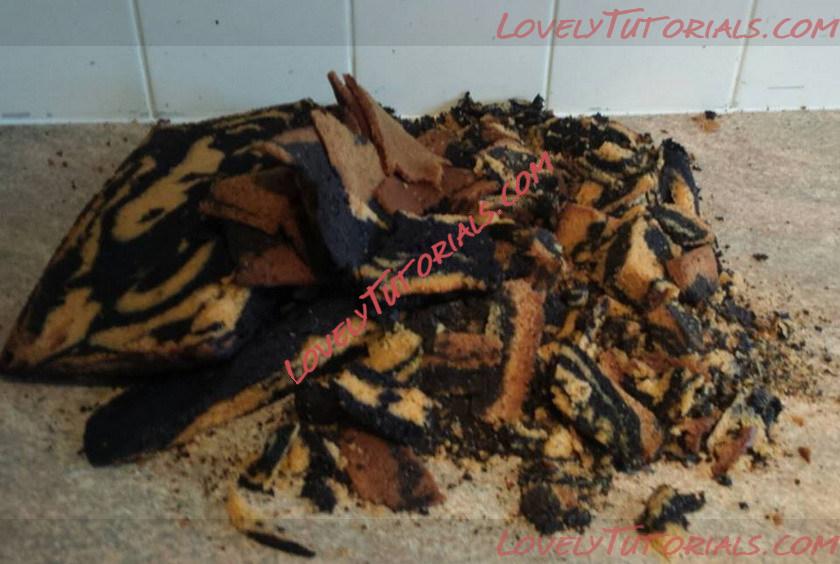
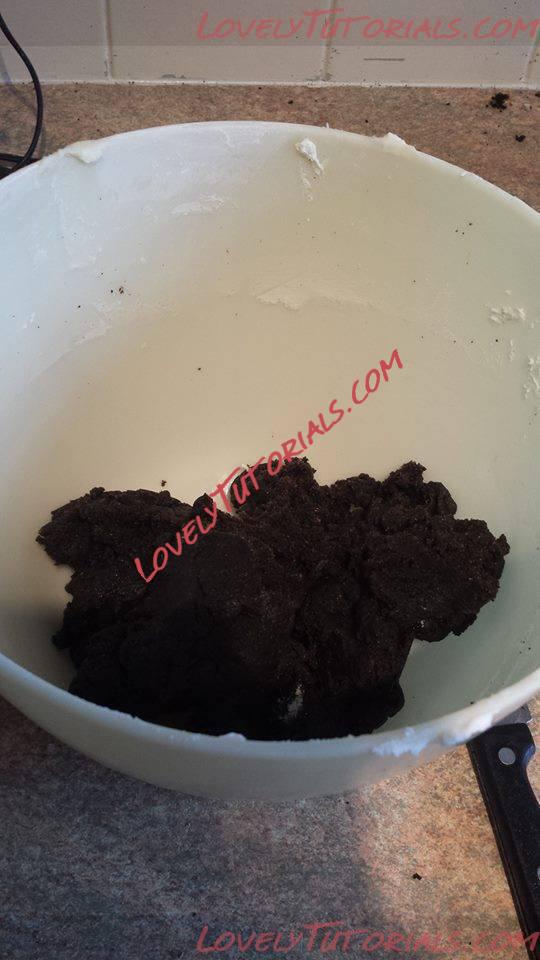
This picture was to give you and idea on how much wastage comes from a sculpted cake. However it doesn't all quite get wasted as I use it to make a cake pop mix
I use 2 other cut offs to make the front legs.
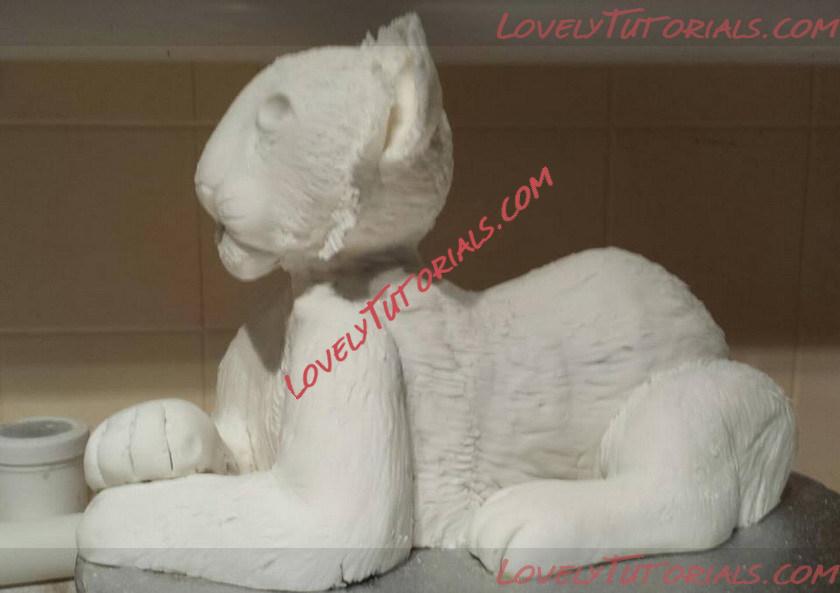
I have now fully carved it now to the desired shape.
You have o make sure you look at it from all angles to make sure its even and the correct shape needed.

I decided it need a little more off his front legs. I'm now happy and ready to do the crumb coat.
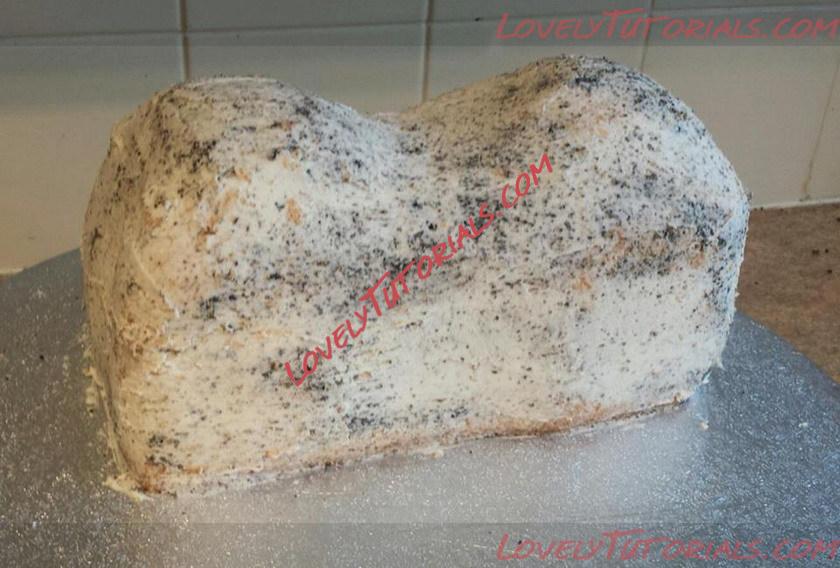
I have now filled the cake with buttercream and put a thin layer over the whole cake. This is called your crumb coat.
I then stick the other pieces to the cake and cover these too. I then put it the freezer for a few minutes to harden up. This makes it easier to put the 2nd coat of buttercream on ready for the icing.
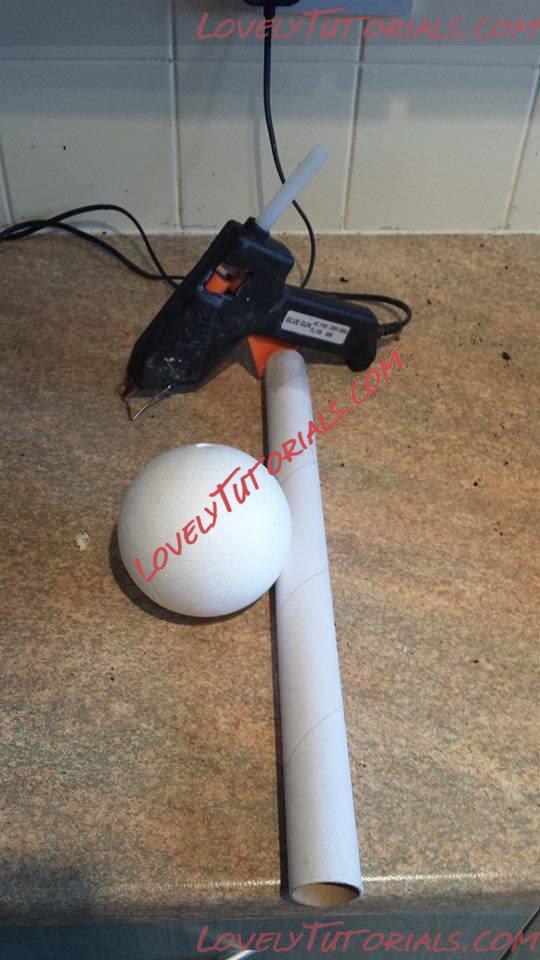
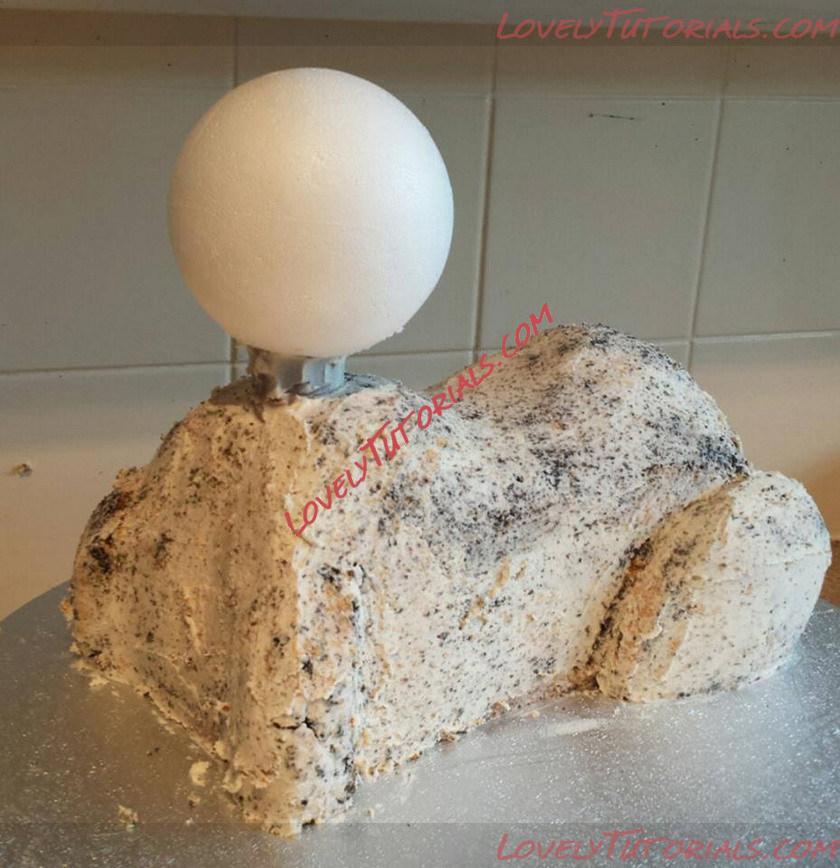
I have now got my tube support a polystyrene sphere and glue gun ready. This is to make the support for the head. this will be inedible and removed before eating the final cake.
I place the support tube into the cake where im wanting the head to go. I then make a mark as to where it needs to be cut off.
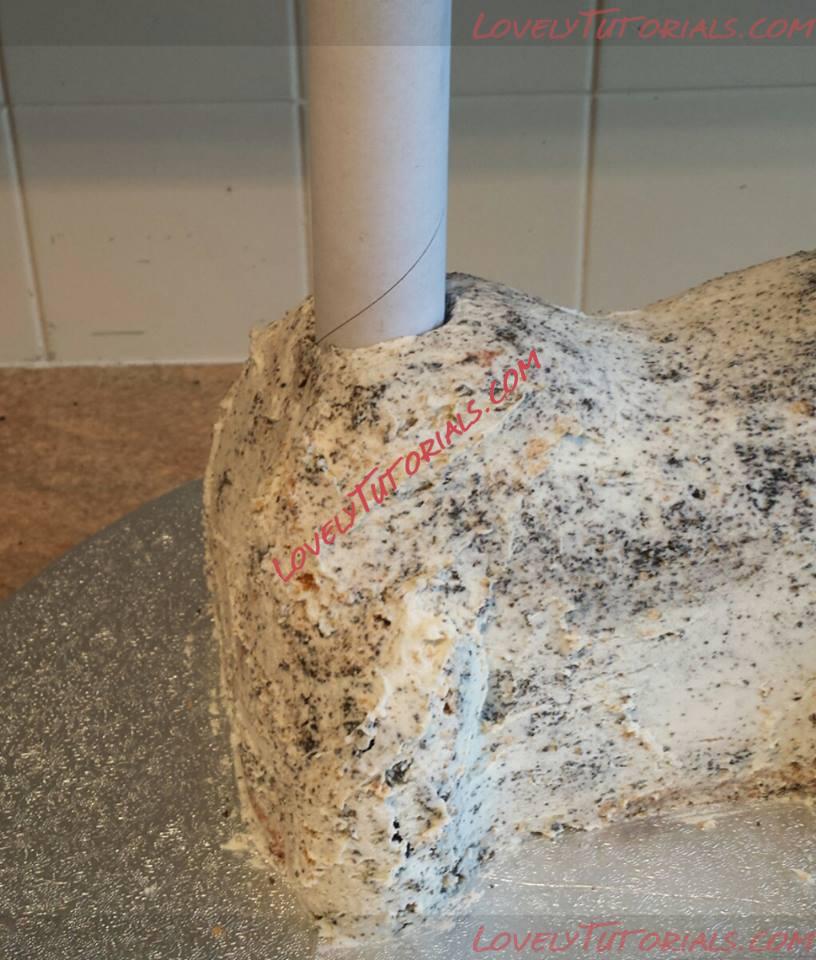
I then cut the tube to the required size and use the glue gun to keep the ball on after pushing it in slightly so its nice and snug. I also rub a thin layer of trex onto the tube before putting it in the cake.
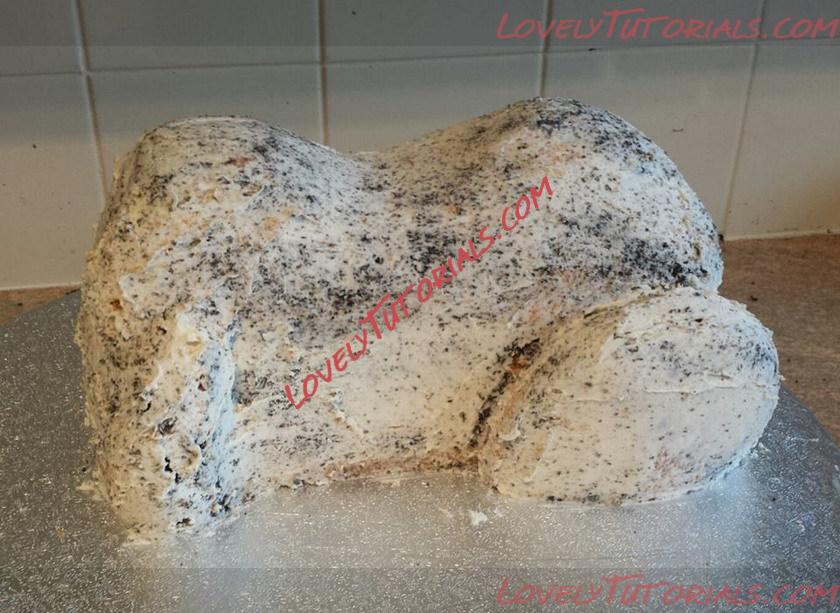
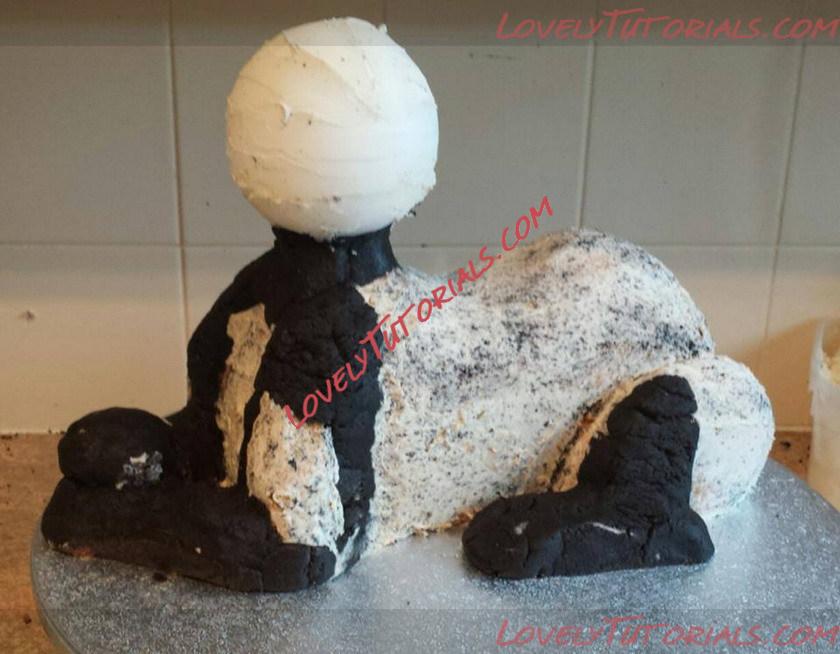
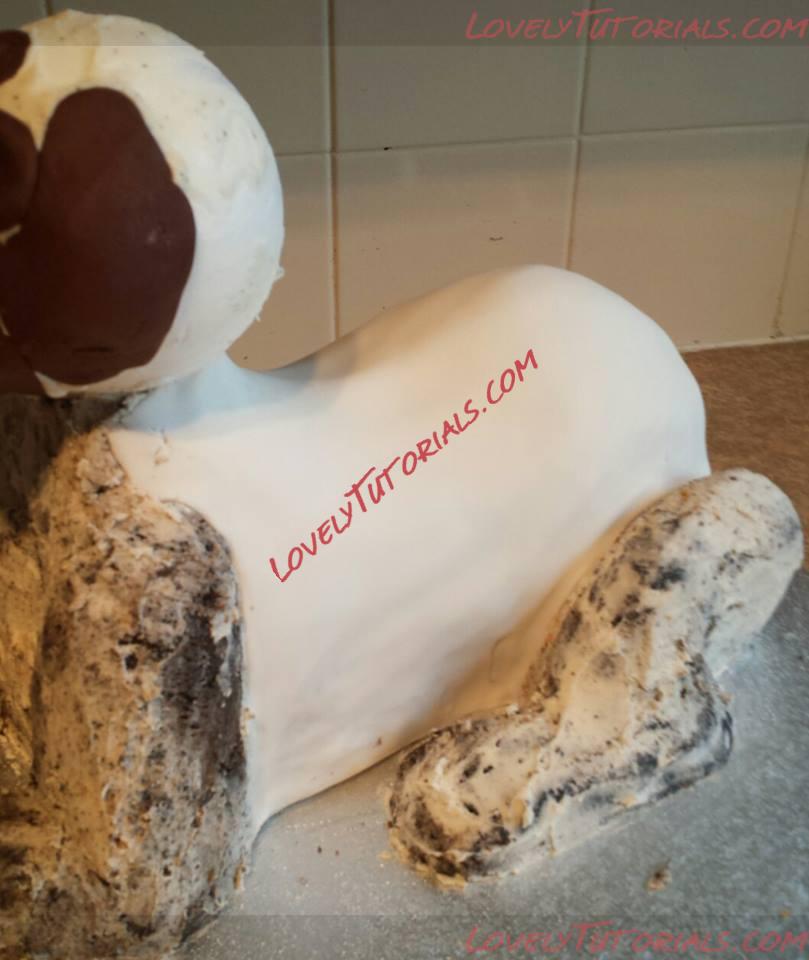
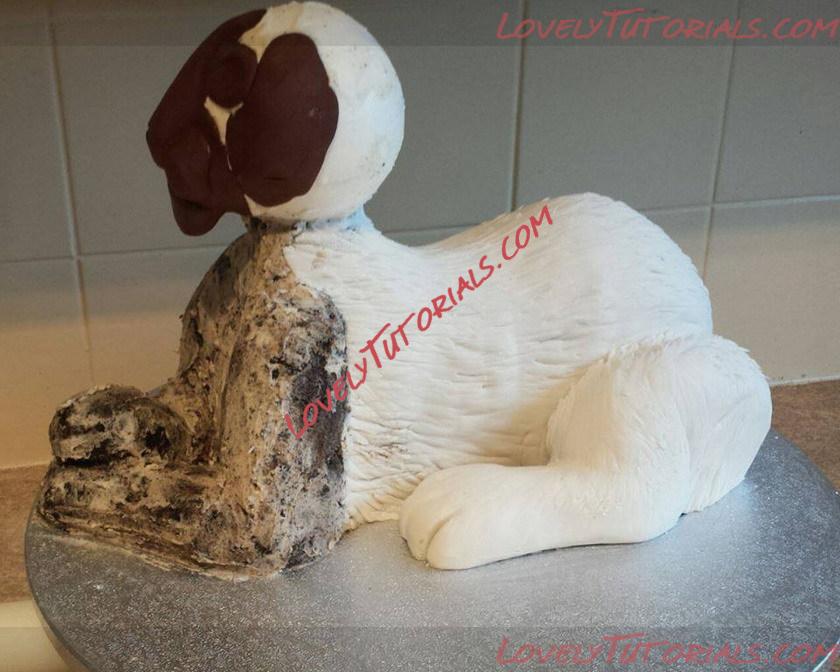
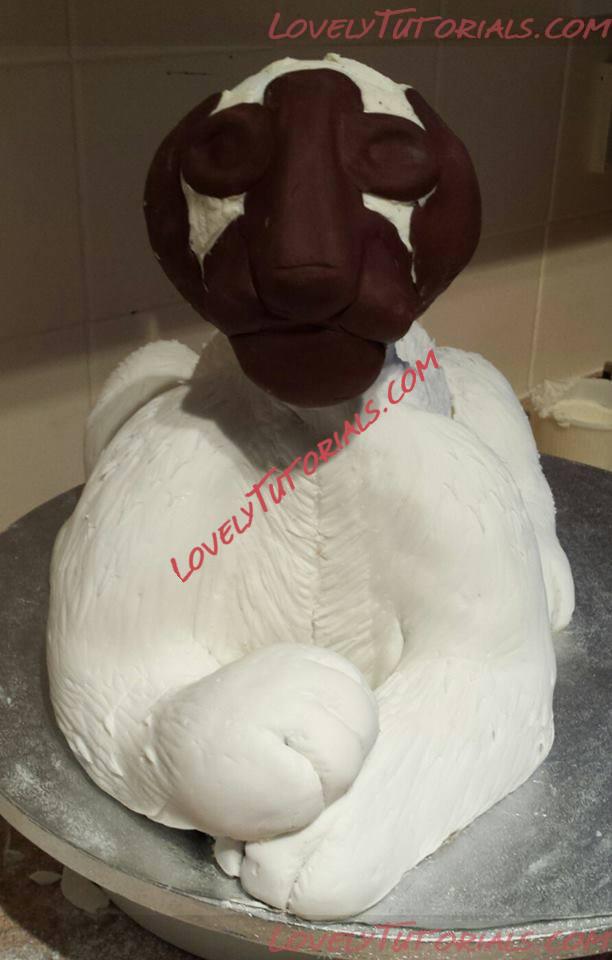
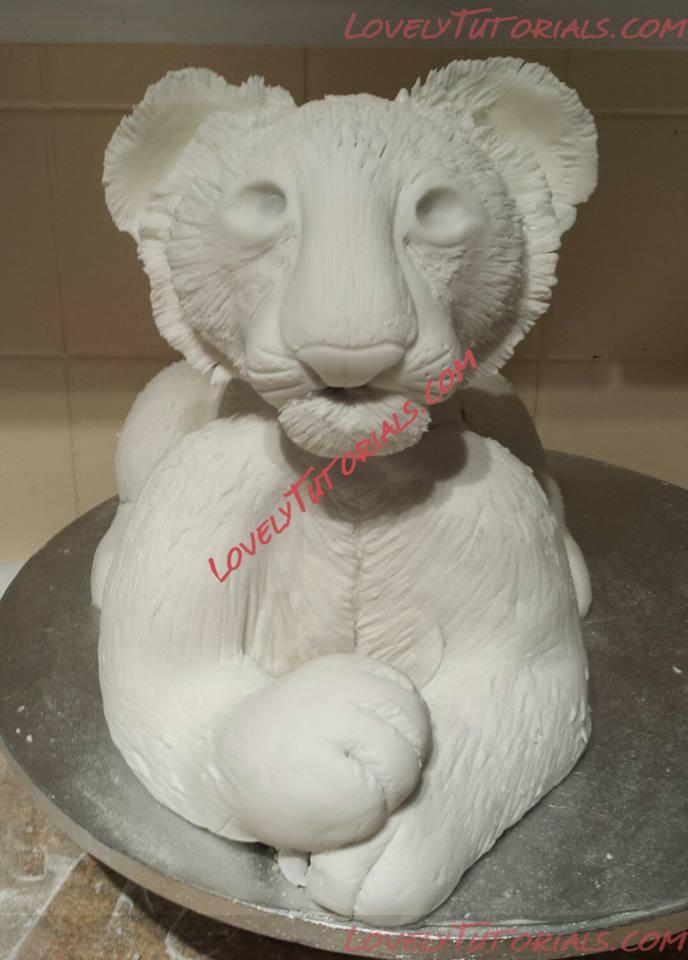
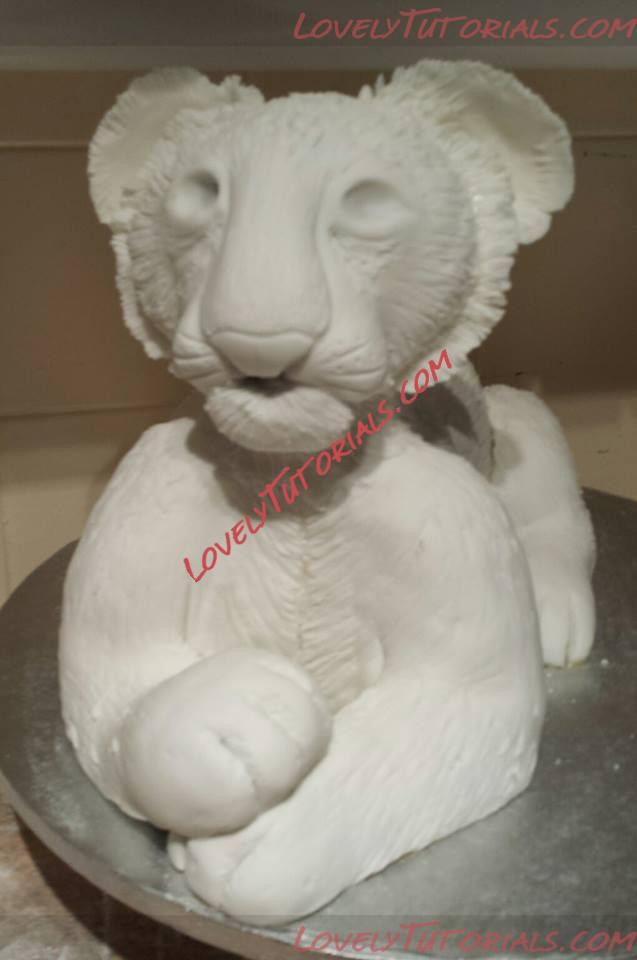
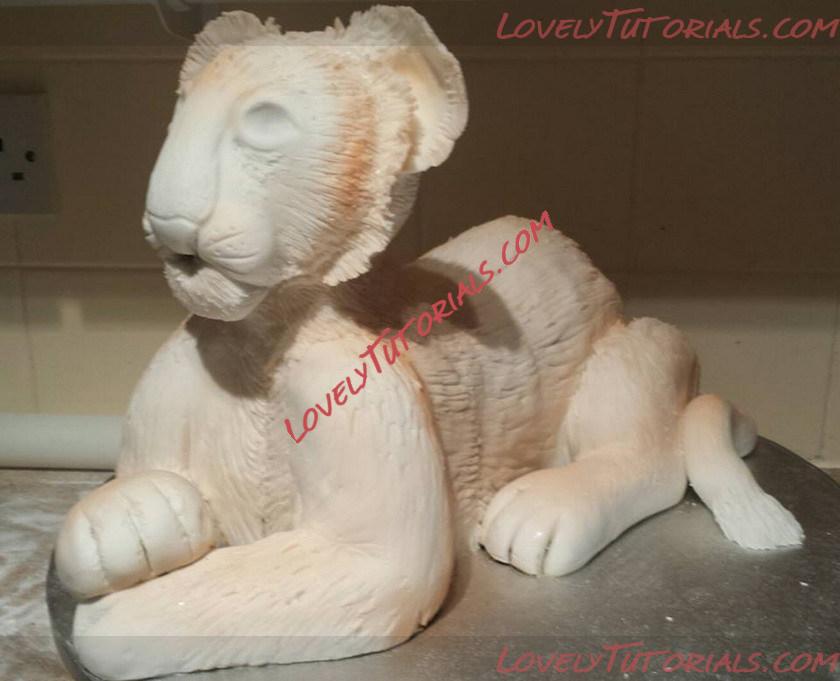
This is what it looked like once put back together. Now it is ready to start adding the features to his face and body.
This is the left over cake, made into cake pop mixture. I find this extremely useful to add more detail to carved cakes and its a lot nicer to eat then loads of sweet icing
I have now used the mix to make the rest of the tigers legs and also butter creamed the head.
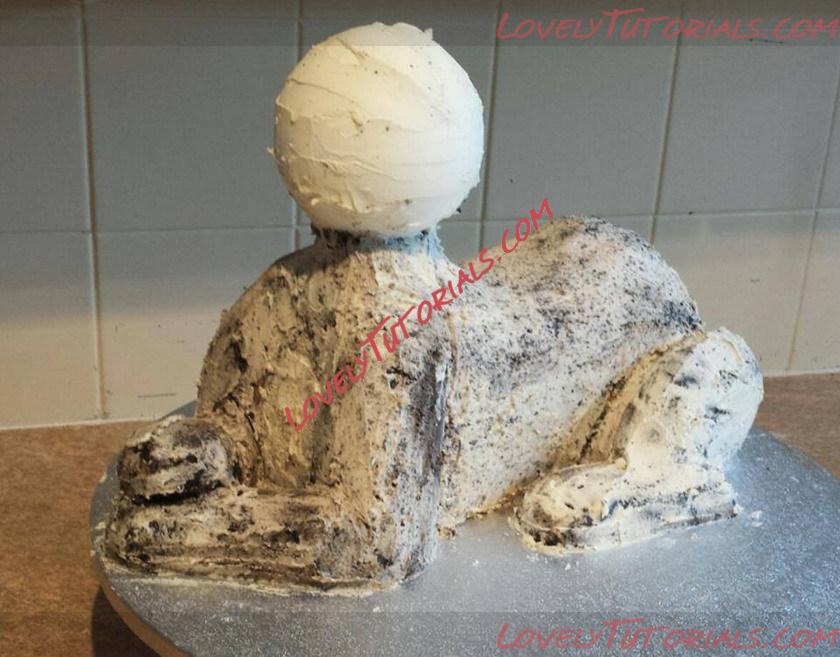
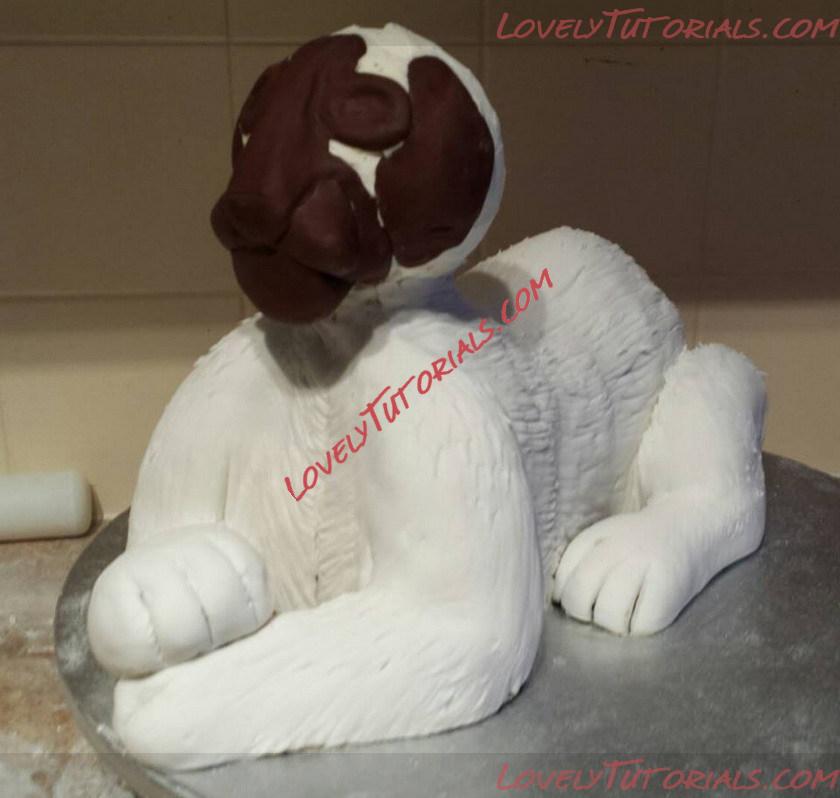
Crumb coated once again ready for the icing to be applied.
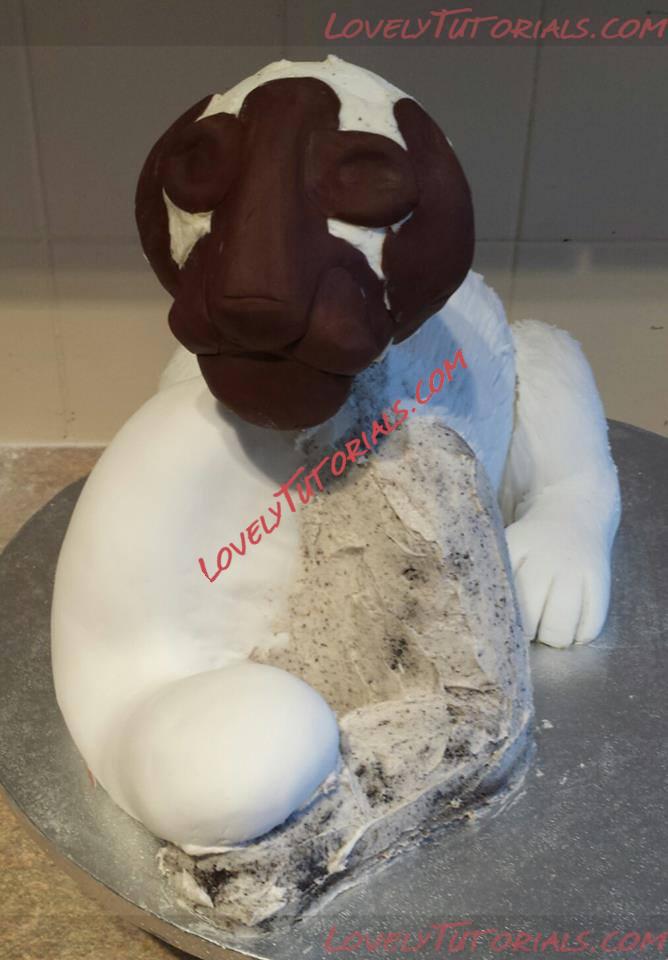
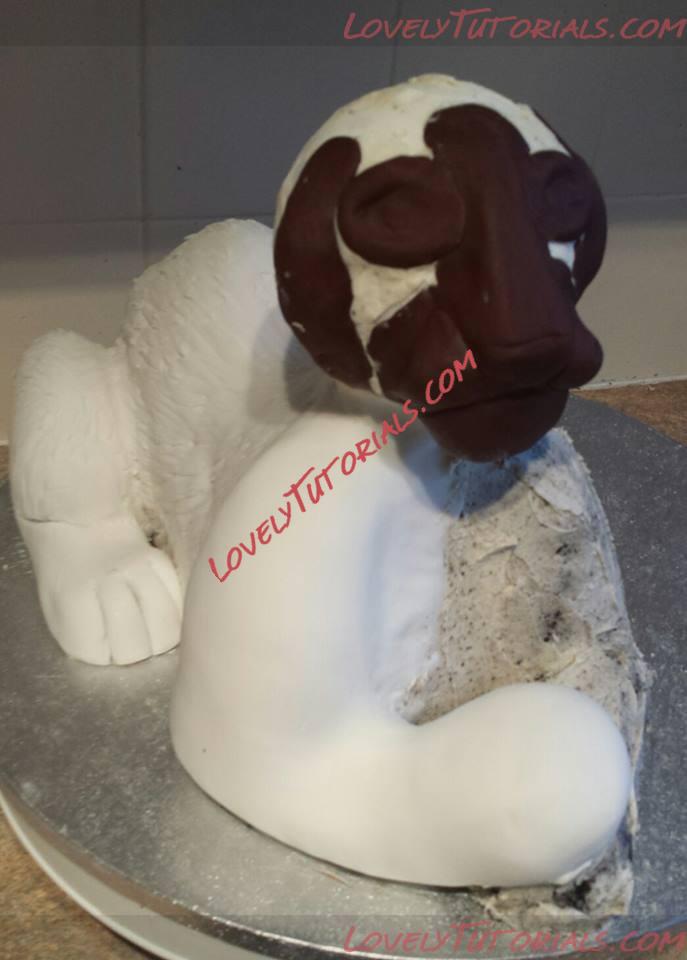
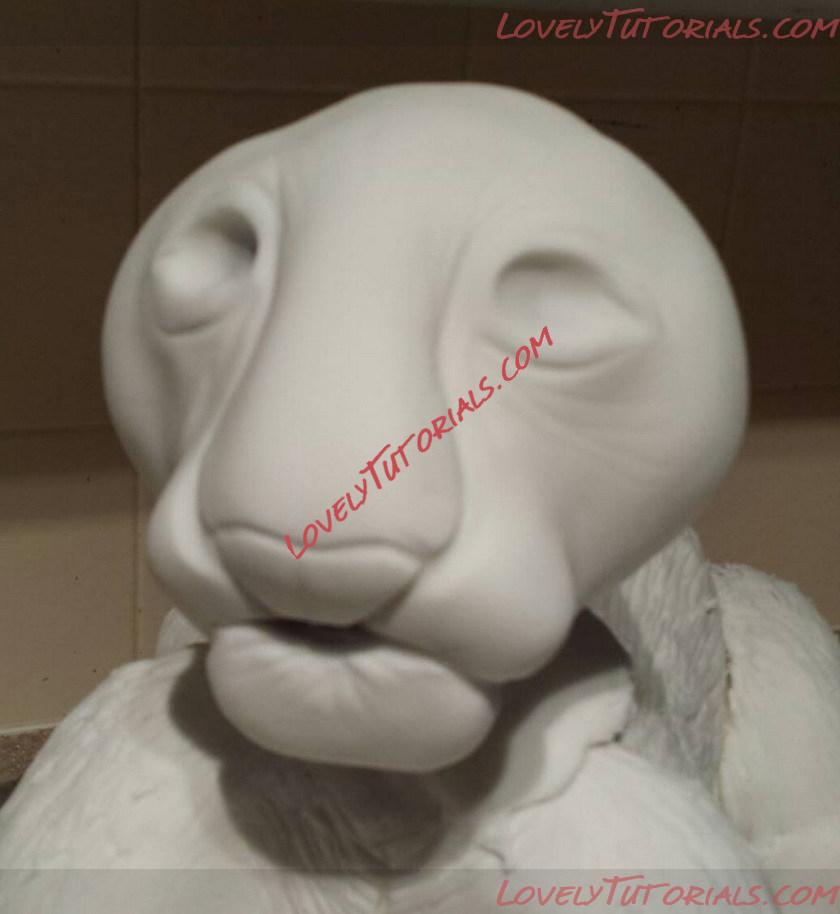
I have used Chocolate icing to make the features as it moulds really well together and is very pliable

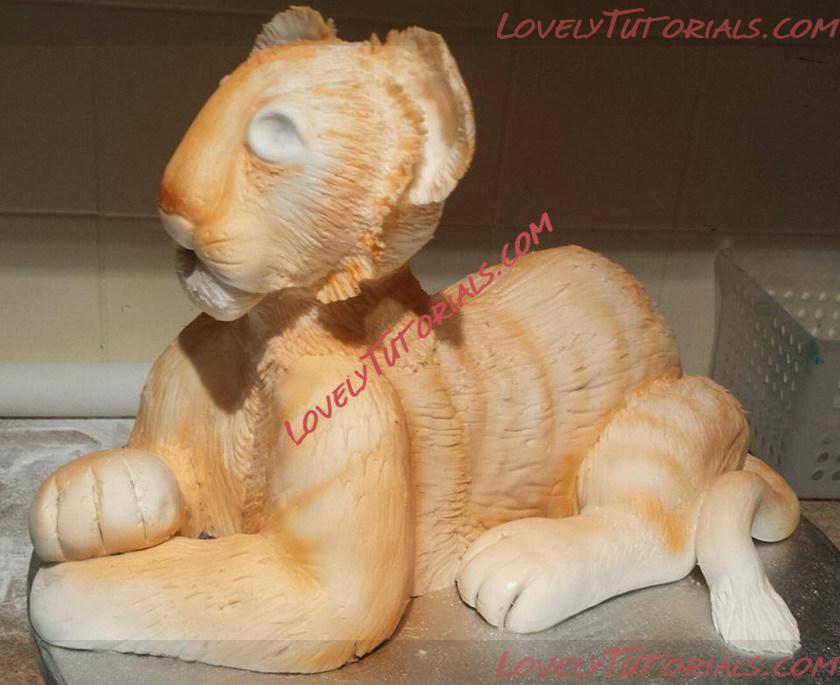
I have now rolled out my normal white icing out and smoothed it over his body and trimmed it up. I find it easier to do it in sections rather then trying to cover it all in one go.
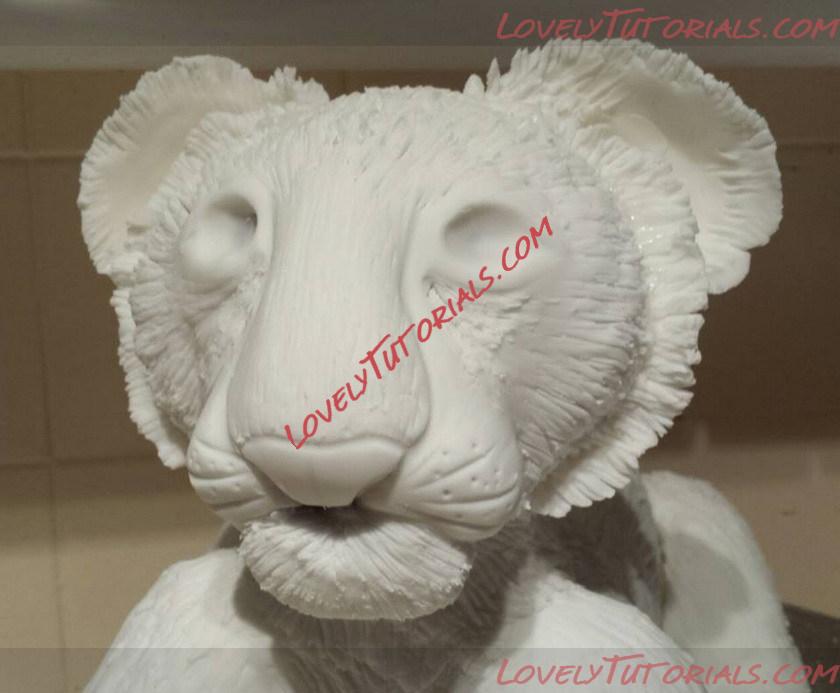
I have now used a variety of different tools to indent the icing to create a fur effect. This makes it look more realistic

I then do the same for the other parts of the tiger cub.
Where I join 2 bits of icing together I brush a very small mount of water on to make it slightly tacky so they stick together nicely.
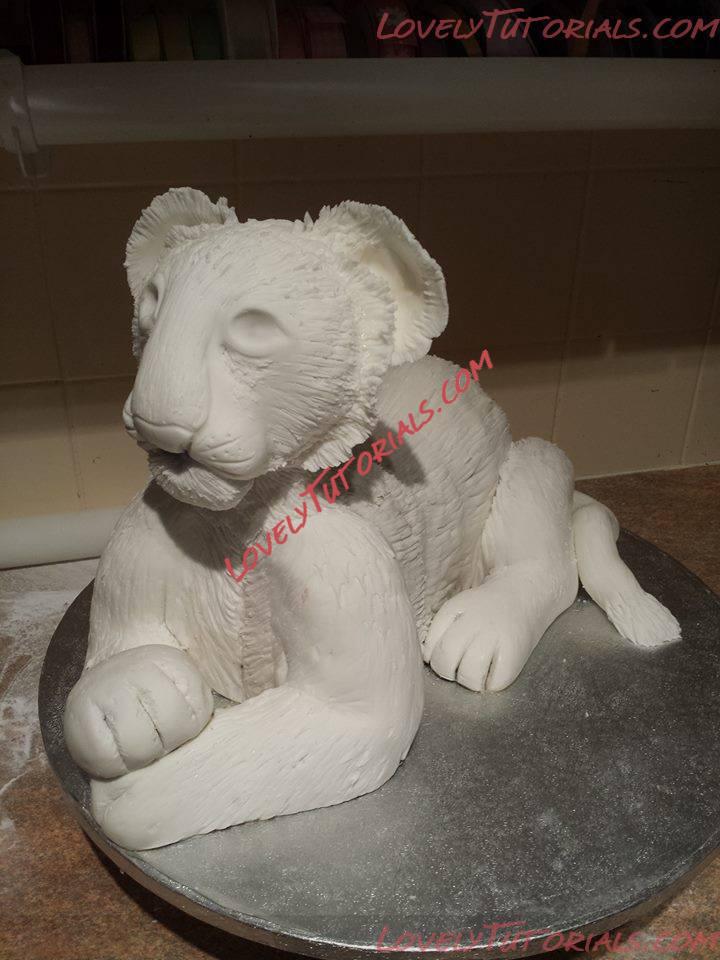
Another view
I then complete the final leg and do the fur effect on the other legs too.
All done, just have a final check and do any final tweaks
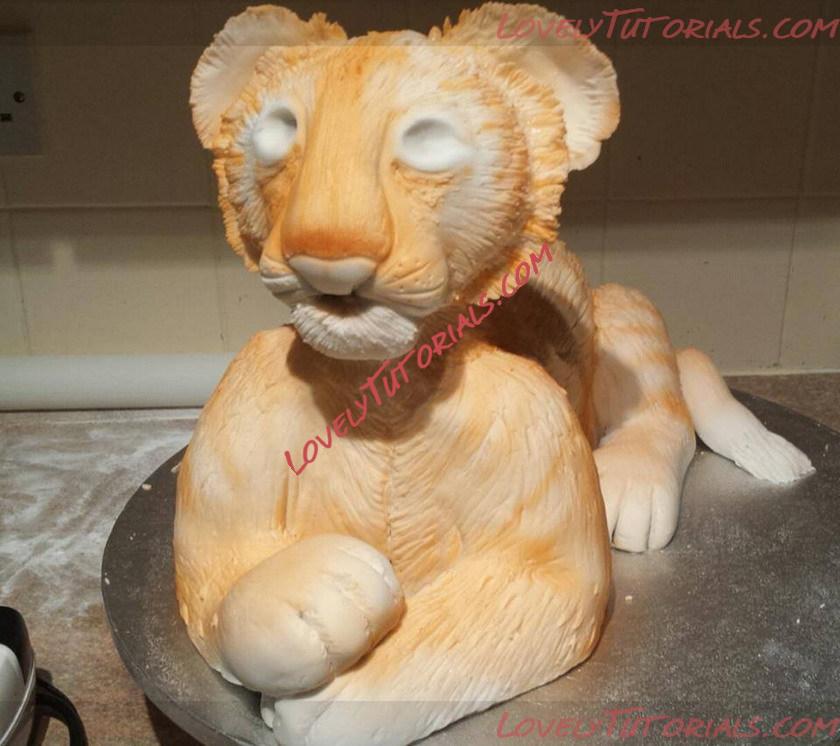
I can now make a start on his head. I brushed over the whole head with cooled boiled water and a clean brush to make it tacky for the icing to stick to. Then just mould the icing over nice and slowly working it all in and around the features. Once tHis Is done I use various sugarcraft tools again to make the details.
I then add extra icing bits to his face to build it up till I feel happy with it, once happy I then do the final details and fur impression. I decide to leave he eyes until after its airbrushed.
Now it all covered I do the final checks to make sure im happy with the final result.
A little more icing was needed to thicken his neck but now im happy.
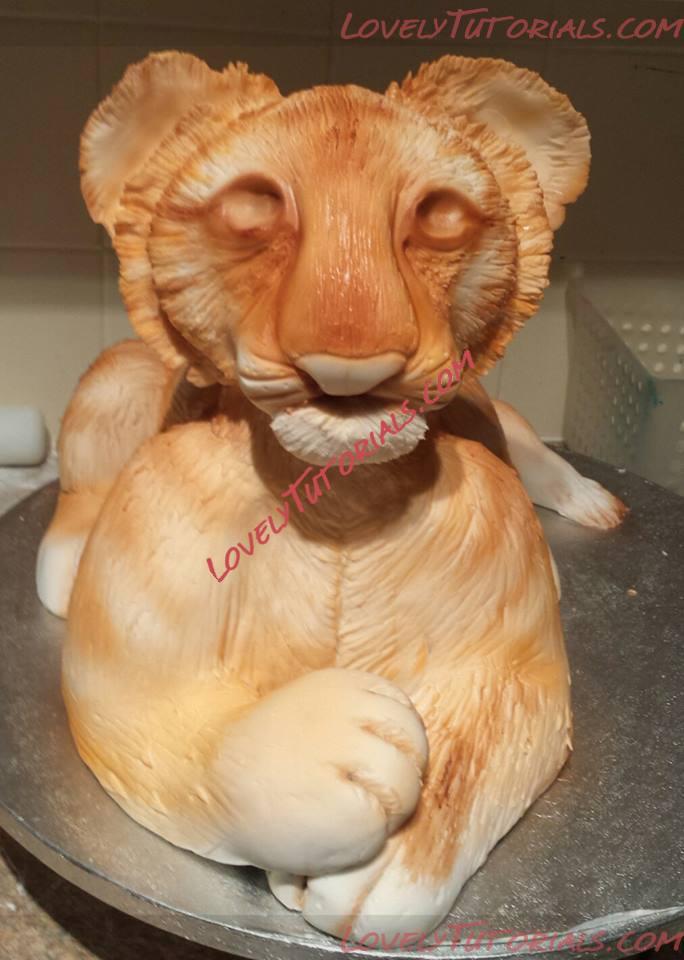
Im now happy with him and leave him to harden overnight ready for airbrushing.
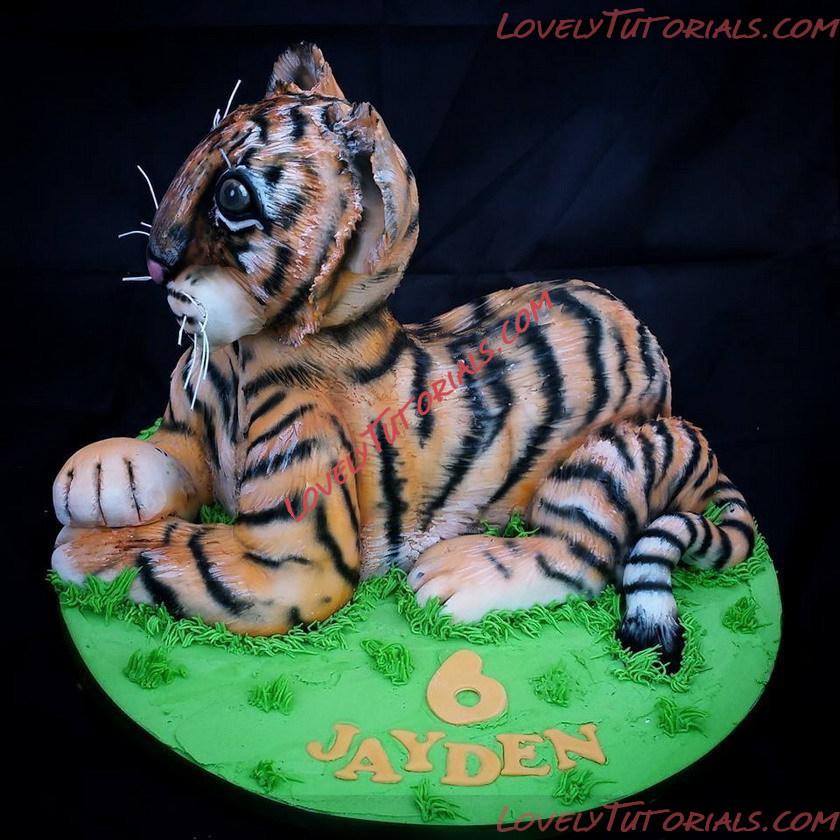
I also add his tail!
The trick with airbrushing is to build it up slowly so I start off with a very subtle creamy orange fOr his undertones.
I then go slightly darker orange to start building the pattern and detail up
I keep building it up till im happy.
I then go to a light brown to add that extra dimension to his face.
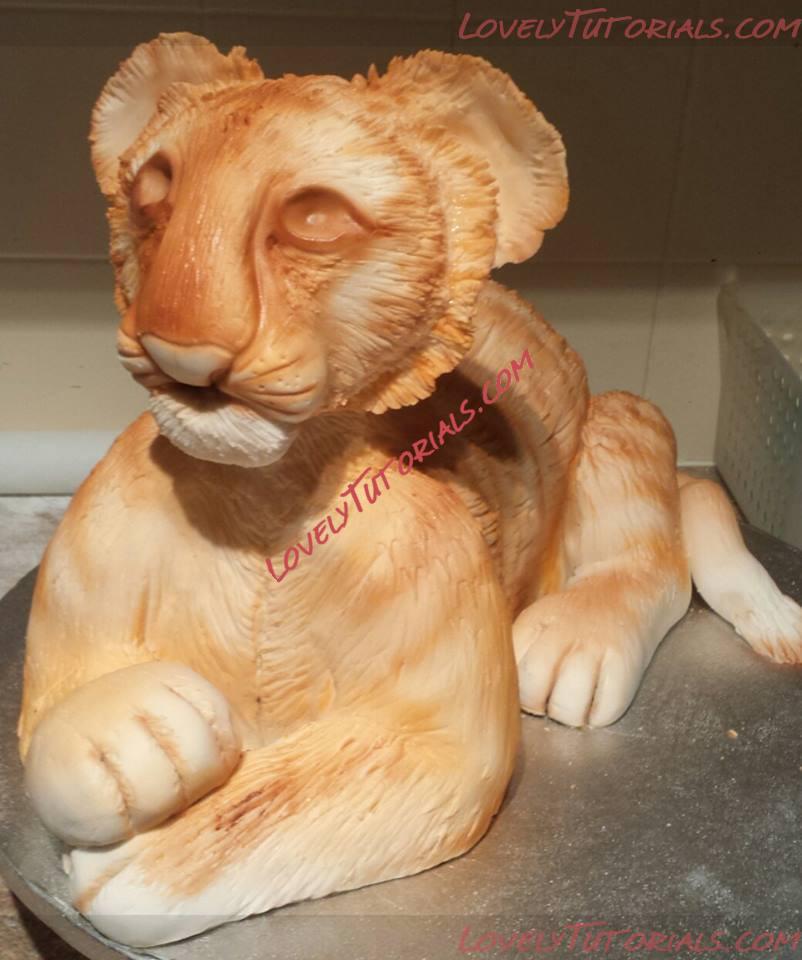
I feel happy with amount of orange he has now so I move on to his black stripes.
I use the black To create the detail in his face and his stripes on the rest of him.
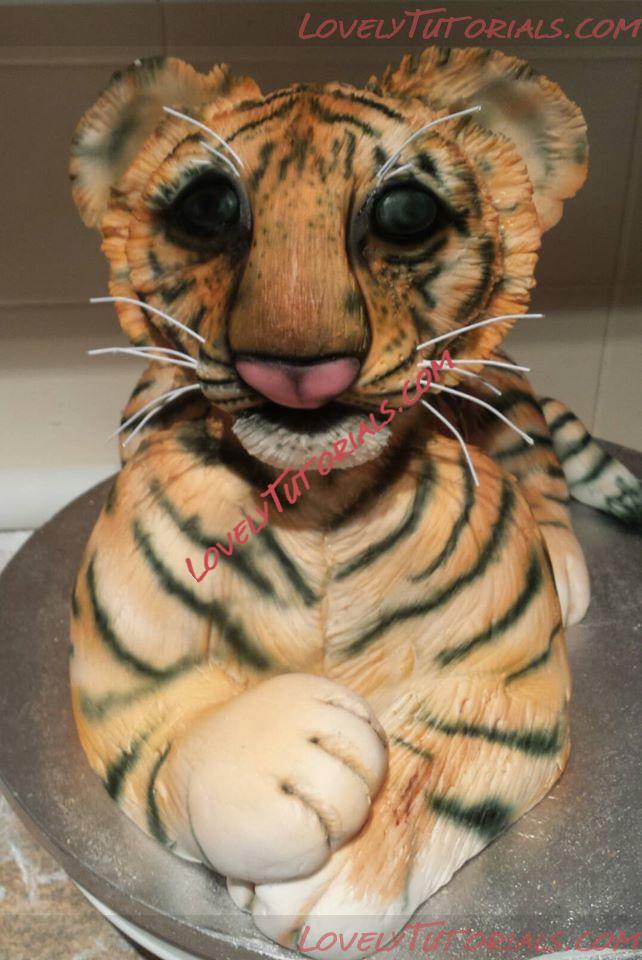
I decided his cheeks wasn't quite chubby enough so I added so more icing to fatten him up and add his eyes.
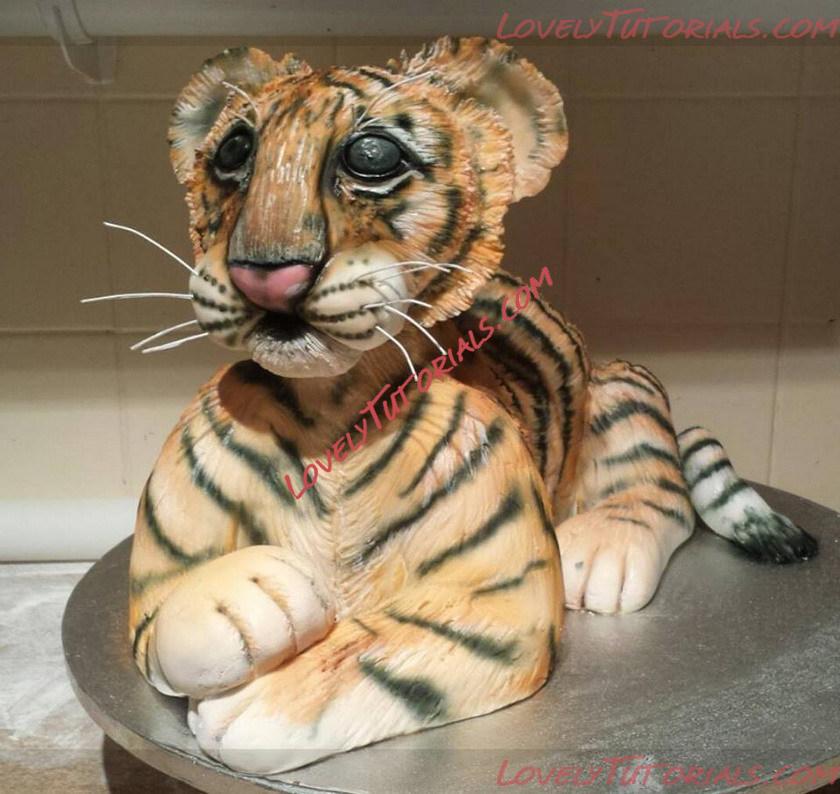
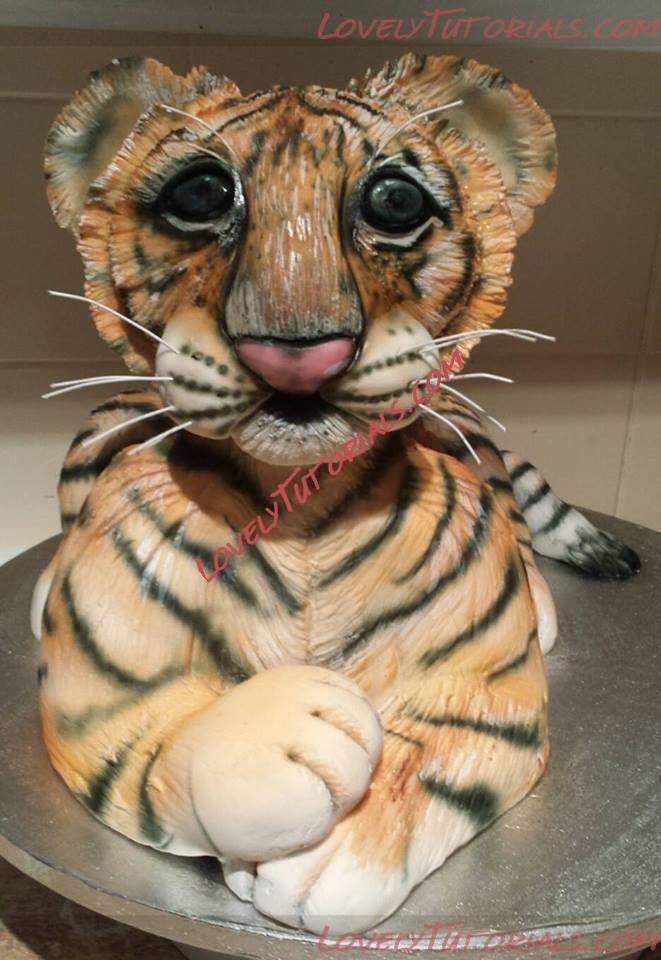
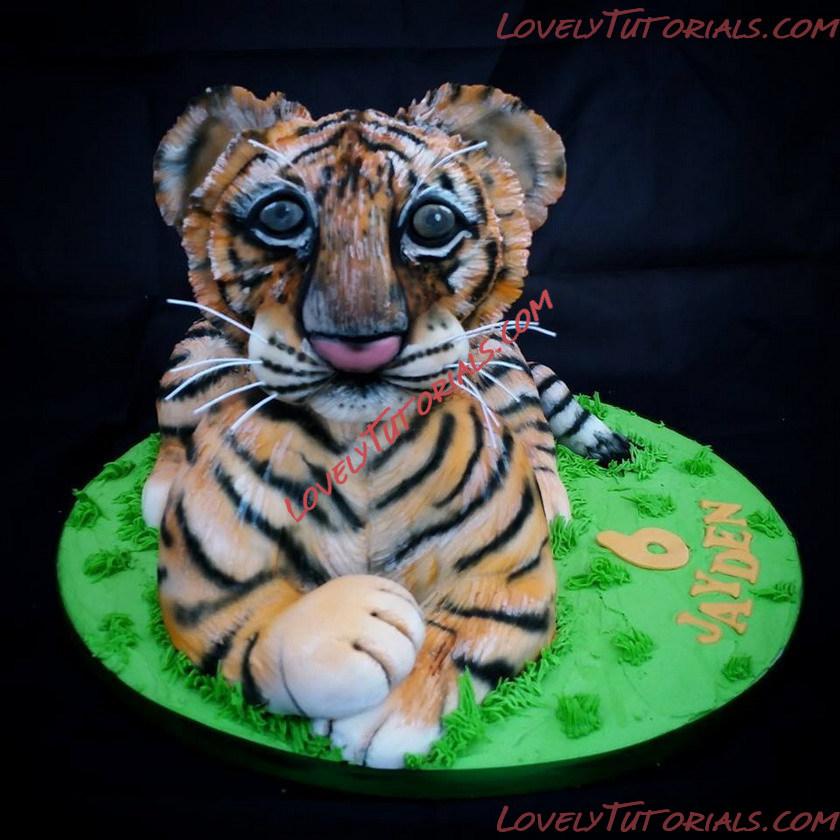
I painted his highlights with a brush to really make him come alive. I also cut some florist wire to use for his whiskers and eyebrows to just finish his face off.
I used green buttercream to spread around him and then use a grass nozzle to pipe the grass tufts around. Then for the final touch I add the name age and ribbon around the board and he is complete.
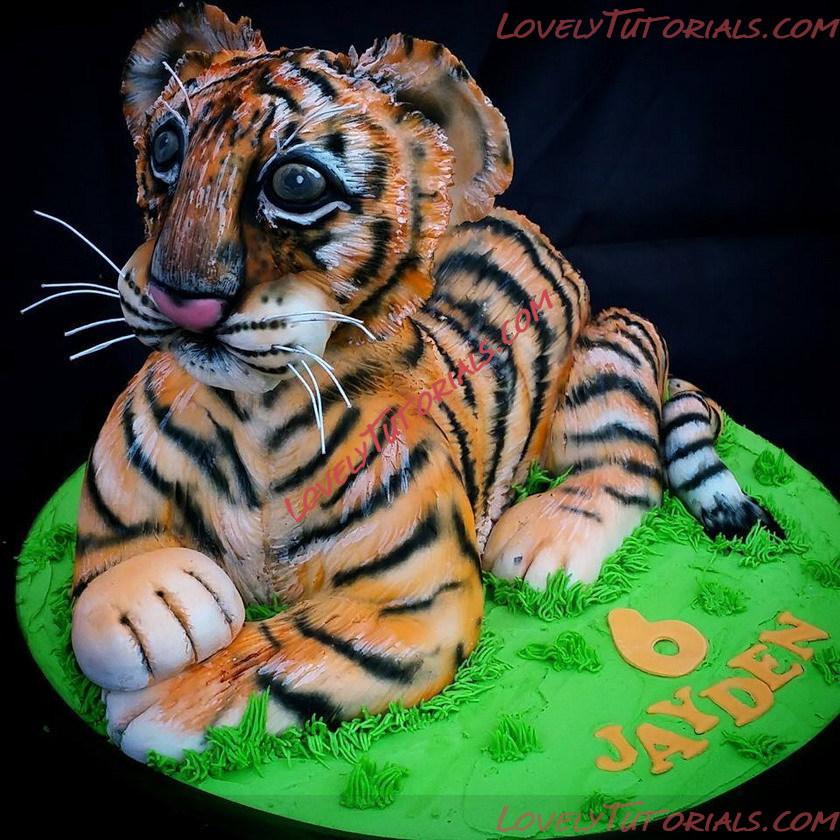
I take some photos outside in natural light and it makes all the difference.
All his colours and details really pop out now.
I really hope you enjoyed seeing how he was made and find it useful. This is my 1st attempt at a tutorial so any constructive comments or feedback will be welcomed.