|
|
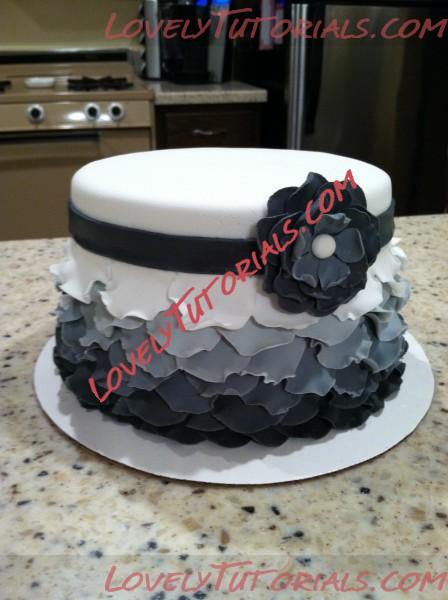
МК торт украшенный лепестками -How To Make A Layered Petal Cake V2
|

04.06.2012, 10:54
|
|
Администратор
|
|
Регистрация: 07.09.2010
Сообщений: 7,669
|
|
 МК торт украшенный лепестками -How To Make A Layered Petal Cake V2
Огромная благодарность Автору ChrisJack1 за Мастер-класс

I had quite a few cakesters ask how I made the Pretty & Petite petal cake, so I decided to make a tutorial to share.  You may find along the way an easier method since this was my first attempt at this technique. I hope it helps!!
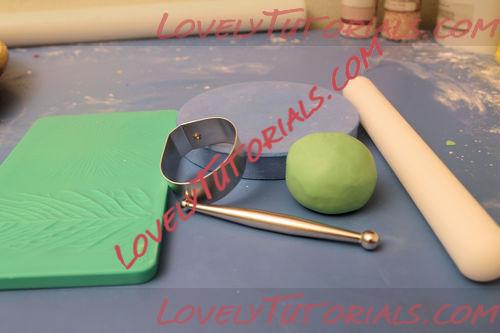
List of Materials
- Colored Fondant
- Small Rolling Pin
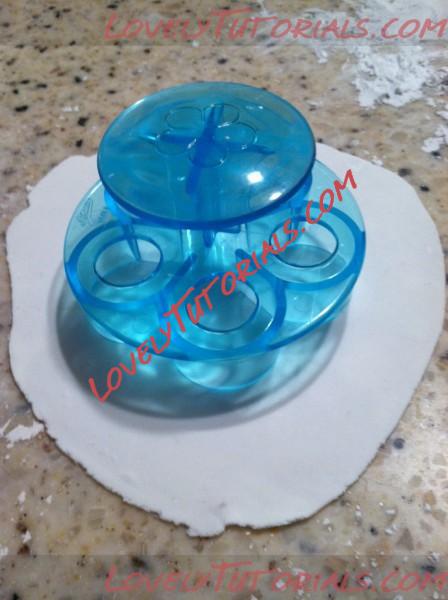
- 5 Petal Cutter (mine is made by Ateco)
- Sharp Cutting Tool
- Ball Sculpting Tool
- Foam Pad
- Paint Brush
- Water
- Fondant Covered Cake

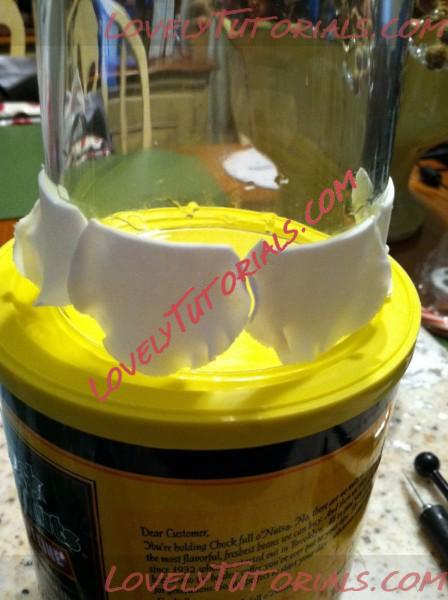
Gather your materials. Your cake should have a base cover of fondant on it at this time.
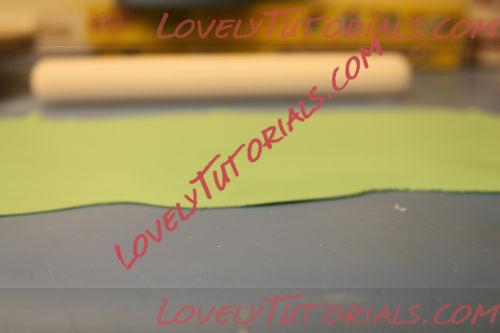
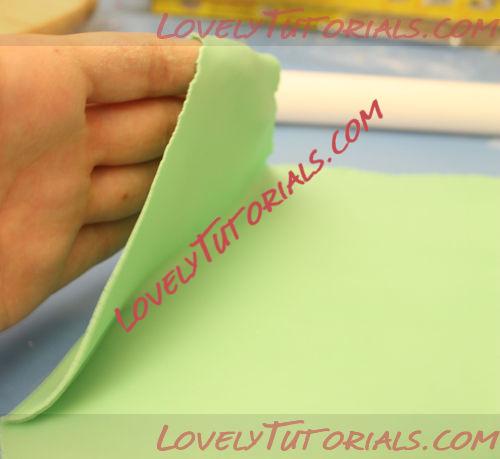
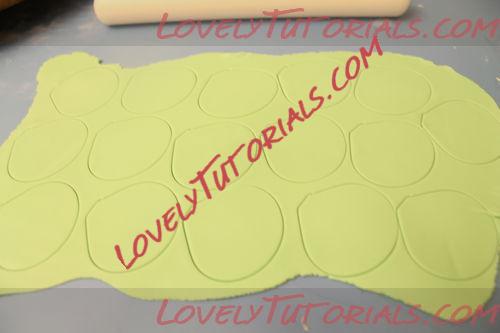
Roll the fondant out fairly thin – the thinner the fondant the more “frill” you will get from the petal. Use your 5 petal cutter to cut out your petals. I rolled out enough fondant to do several flowers at once to save time. They will stay soft if you keep them under plastic wrap.
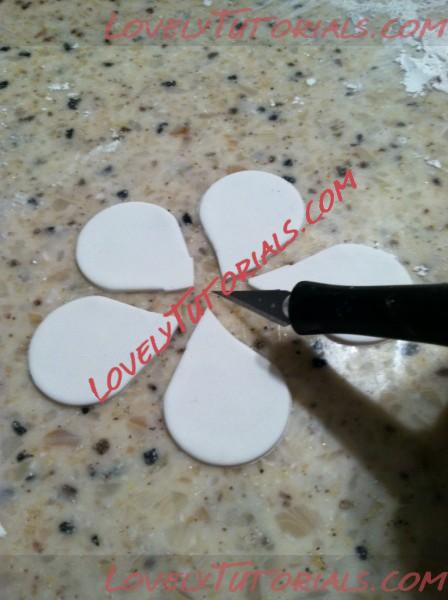
Use your sharp cutting tool to separate the petals. You can do this after you frill, but I found before to be easier.
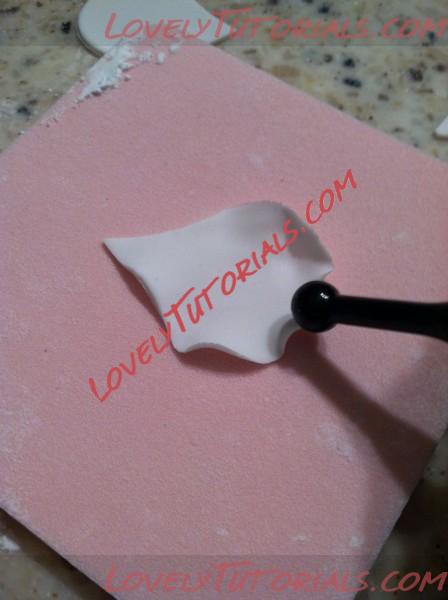
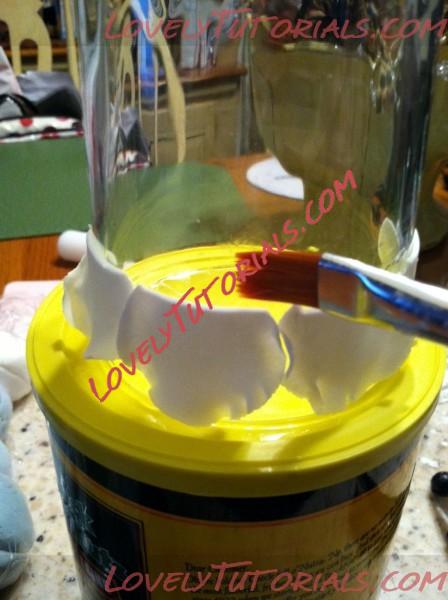
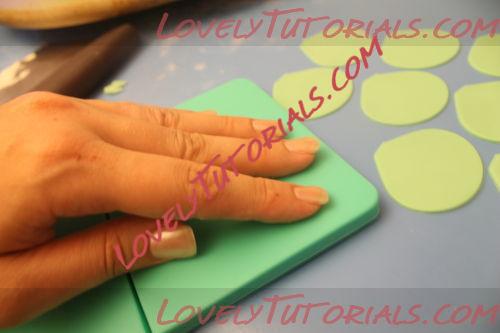
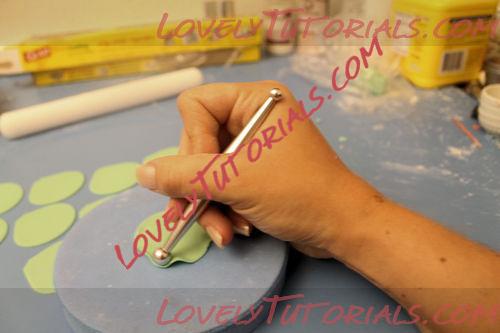
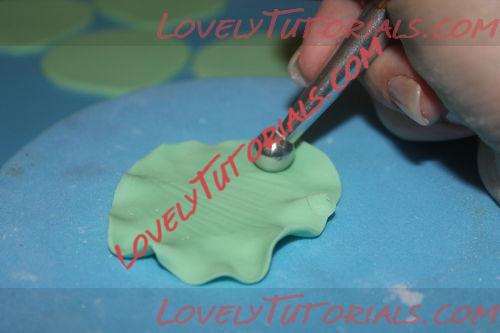
I used the small end of my ball tool to run along the edge of the petal. If your tool is plastic and has a seam, be sure to use the side of the ball so it doesn’t tear the fondant. Running half of the ball on the petal and half on the foam pad will give you a great result. I used the pointed tip as a “handle” while I worked with each petal.

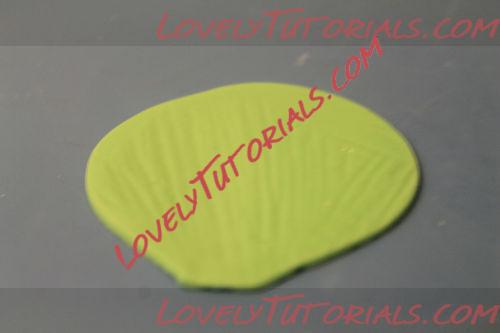
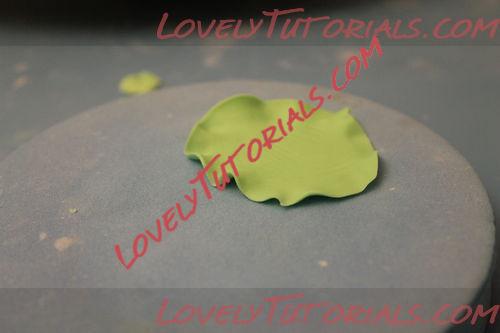
Cut the point of your petal away with your sharp tool so you can line them up along the cake more evenly.
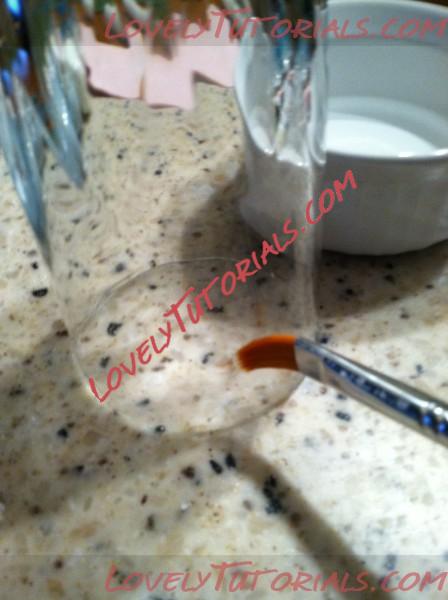
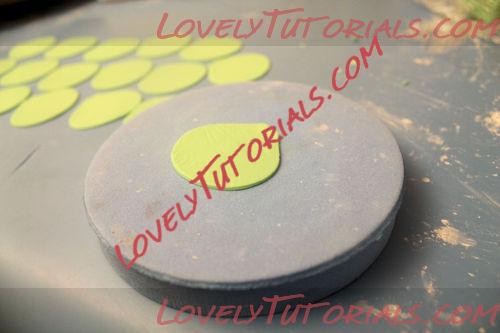
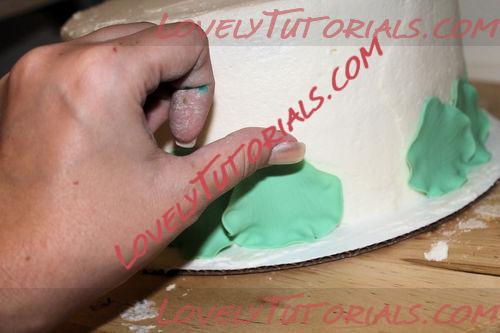
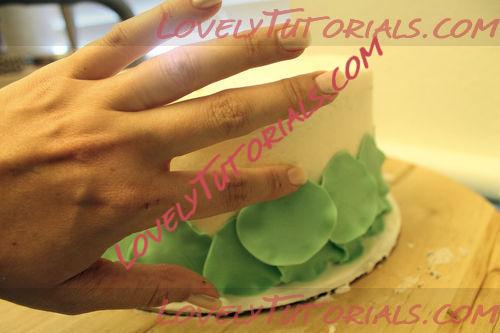
Take your brush and water and run it around the area of the cake here you want to place your petal. Be sure to only wet where the top of your petal will go so the whole thing doesn’t stick to the cake. If this happens, you won’t get the airy result you’re looking for. Think of a Post-it notepad. Only the top of the page is sticky.
Place your petals along the side of the cake, being sure you try to keep your line straight. You can use a toothpick to lift the petals up here and there for a pretty effect.
Wet the area above the row you just placed, being sure again to only wet the area where the top of the petal will touch.
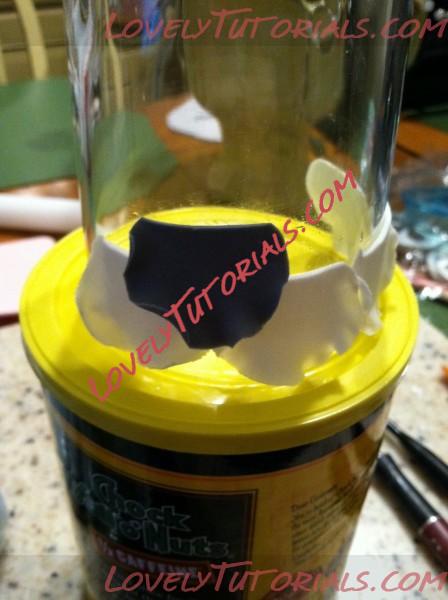
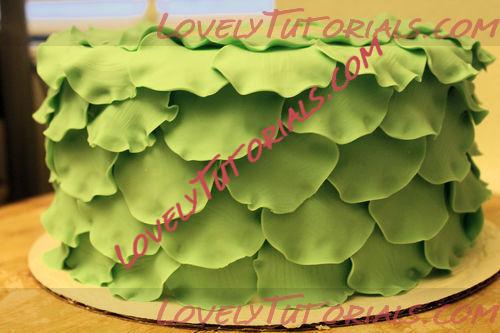
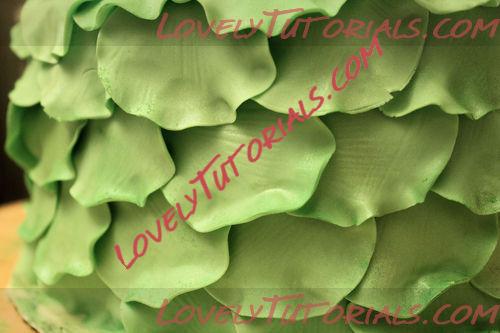
Start your second row of petals above the first. Be sure to position this row so that the petals cover the seams of the first set. The way you would stack bricks.
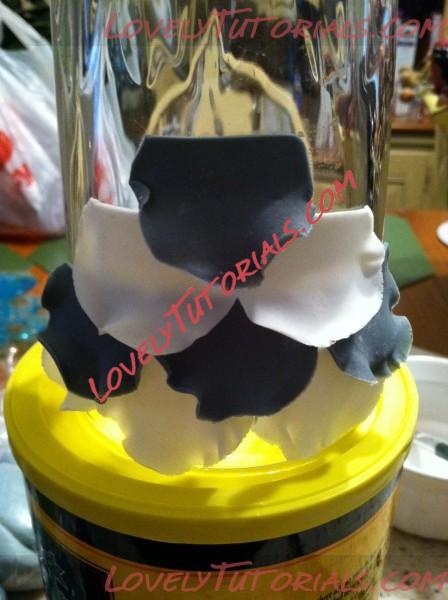
I’ve used to different color petals here so you can see the brick effect. Practicing on a glass or bowl is a great way to work on your technique before using it on a cake. Thank you for looking and good luck!!
|
11.10.2012, 08:33
|
|
Администратор
|
|
Регистрация: 07.09.2010
Сообщений: 7,669
|
|
Petal cake tutorial
Огромная благодарность Автору WhiskMeAwayCakes за Мастер-класс
This is my first time doing a tutorial, I hope you guys like and it find it helpful! Please let me know if you have any questions.
First, you will need some materials
- fondant
- a ball tool
- foam pad
- rose petal cutter (or any oval/round petal cutter would work)
- veining mat
Roll out your fondant until very thin, about the same as you would do if making a flower
This is how thin I rolled mine out. If its too think it will be hard to frill the edges
Use the cutter to cut out as many petals as you can fit in your fondant

Use the veiner to vein each petal. This is optional but I liked the look and texture it gave
Place each petal on your foam mat to frill
Using the ball too, frill the edges of the petal. Just use a circular motion on the very edges and dont press too hard or it will tear.
Finished petal
Attach the petal to the cake, starting at the bottom and working your way around, then up. I attached it to buttercream so I didnt need any glue or water. If you are attaching to fondant, or your buttercream has already crusted, use a small dab of piping gel or water only to the top of the petal
Finished with all the petals
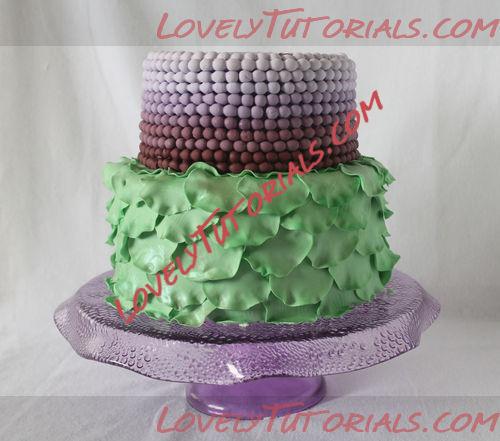
I used a mixture of petal dust and luster dust on the petals after they were attached to give depth and color to it. This was for a mermaid cake to resemble the tail so I wanted it to have a shimmery look.
The finished cake!
|
 |
|
Метки
|
addım-addım təlimat, adım, adım adım yönergeler, artesanatos passo a passo, bemutató, bolando bolos, cake decorating, cake decorating techniques, confeitando bolos, decoracion de pasteles, decoración de tortas, decorada en fondant, decorare le torte, decorazioni, deko fondant, dekorace na dort, dekoracija, dekoracije, dekorasyon, dekorácie, fender, fimo, fotopostup, frill, hand-made, handmade, how to, how to make a layered petal cake, how-to's, instrucţiuni, instrukcijas, instrukcje, jak na, kage dekoration, kagedekoration, kakebaking, korak, korak za korakom navodila, korak-po-korak upute, koristeet ja koristelu, krok, krok po kroku, krok za krokem, krok-za-krokem, las instrucciones, las técnicas, le tecniche, les techniques, master-class, master-klasse, master-klasy, meistras klasės, metodikas, mistr třídy, motivtorten, návod, ombre, opplæringen, pamoka, pap, pas, pas-cu-pas, paso, paso a paso, passo, passo a passo, passo-a-passo, passo-passo le istruzioni, petal, postupak za ukrasavanje, ruffle, schritt für schritt anleitung, schritt-für-schritt, schritt-für-schritt-anleitungen, stap, stap-voor-stap, stap-voor-stap instructies, steg for steg, steg-för-steg-instruktion, step, step by step, step-by-lépésre, step-by-step, step-by-step instructions, technieken, techniken, techniki, techniky, technikák, techniques, tecnicas de decoracion, tecniche, tehnici, tehnike, teknikker, teknikler, torte, torte decorate, torten dekorieren, torti, trin, trin for trin, trin-for-trin, trin-for-trin instruktioner, trinn, trinn for trinn, trinn-for-trinn-instruksjoner, tutorial, tutoriale, tutorias, tutorias/ideas para decorar los bizcochos, tutoriel, tutorijal, técnicas, ukrašavanje torti, uputstvo za dekoraciju, सजा केक, ट्यूटोरियल मास्टर वर्ग, कदम, कदम दर कदम निर्देश, तकनीक, étape, étape par étape les instructions, öğretici, žingsnis, žingsnis po žingsnio, 宗師級教程,一步,一步一步的指示� � �技術,udžbenik, 裝飾蛋糕, βήμα, βήμα προς βήμα οδηγίες, οδηγίες βήμα βήμα, παντεσπάνι art, τεχνικές, φροντιστήριο, инструкция, как сделать, крок за кроком, крок за крокам, покроково, пошагово, пошаговые фотки, пакрокава, миниатюра, мк, мк торт украшенный лепестками, майстор-класа урок, майстар-клас, майстер-клас, майстер-класи, мастер-класс, ручной работы, ручная работа, украшение тортов, уроки прикрашання, стъпка, стъпка по стъпка инструкции, техники, техника, техніка, туториал, туторіал, тэхніка, шаг за шагом, інструкцыя, інструкція  |
|


