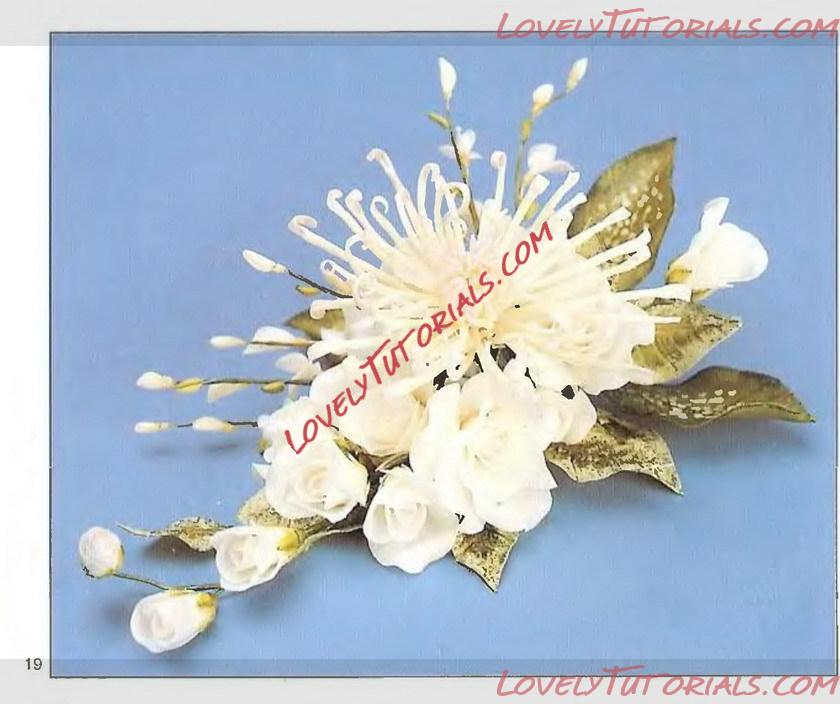

Spider Chrysanthemum (by Kath Swansbra) (see Illustration 19)
1. Attach a pea sized ball of White flowerpaste to the hooked end of a 20 gauge wire*. Paint Tylose glue onto the top half of the ball and dip into Yellow semolina. Leave to dry.
V
2. Roll out White Flowerpaste and cut out 1 - DY5 daisy. Cut each petal in half lengthways. Transfer to the Orchard Pad (PD1) and ball each petal from the outside in (see Illustration 20).
Transfer to a soft sponge and cup in the centre by pressing with the balling tool.
3. 'Glue' lower half of the dried centre from Step 1 and thread the set of petals up the wire and curl closely round the centre.
4. Repeat Steps 2 and 3 with 1 more DY5, glueing the whole of the outside of the first DY5 and interleaving the petals.
* Hint: When you paint Tylose glue onto the end of your wires, leave the tip dry so that it does not unravel.
5. Repeat Step 2 with DY4, but cut each petal lengthways twice. Glue the outside of the DY5 in Step 4 and thread the DY4 up the wire and wrap round, interleaving the petals.
6. Take a very small ball of White flowerpaste and roll out on your hand into a thin sausage shape, about 1 1/2" long. Glue one side of it and press into position on the side of the centre from Step 5, with the top bent over in towards the top of the centre. This is easier if the sausage is a little too long. Nip off the excess at the bottom with a cocktail stick. Avoid getting a clump of paste on the underside of the flower (see Illustration 21).
7. Repeat Step 6 with 3 more symmetrically round the base, and then about 15 more, positioning them all round the centre, more or less symmetrically filling in the gaps, keeping the tops level.
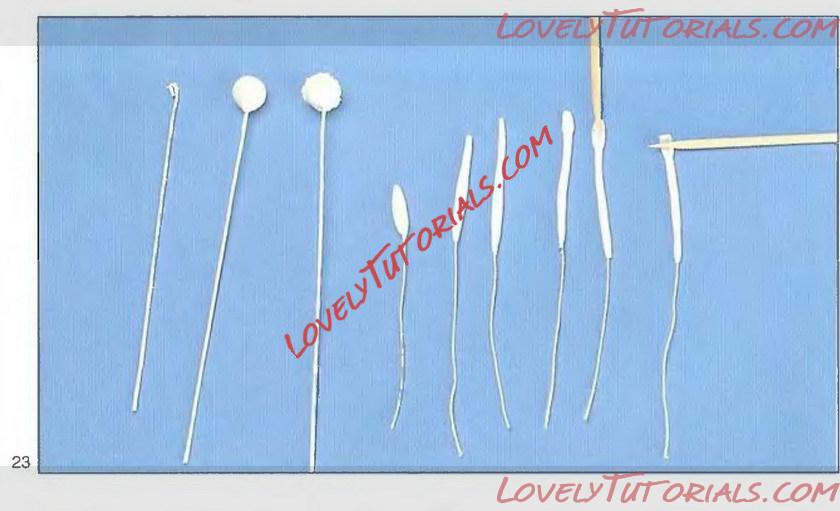
8. Ray-florets (see Illustration 22). 'Glue' a small log of White flowerpaste onto the end of a piece of Scientific wire (about 36 gauge 2 1/4 long), and roll out into a thin sausage shape over the end of the wire. The wire is only about 1/1 into the paste. Roll it as thin as you can between 1" and 1 1/4 long, without letting the wire show through. Flatten about '/.," of the end with a cocktail stick. About 15 should be just bent over at the lop. and a curve put in the wire, so that, when taped to the centre, they curve out a little.
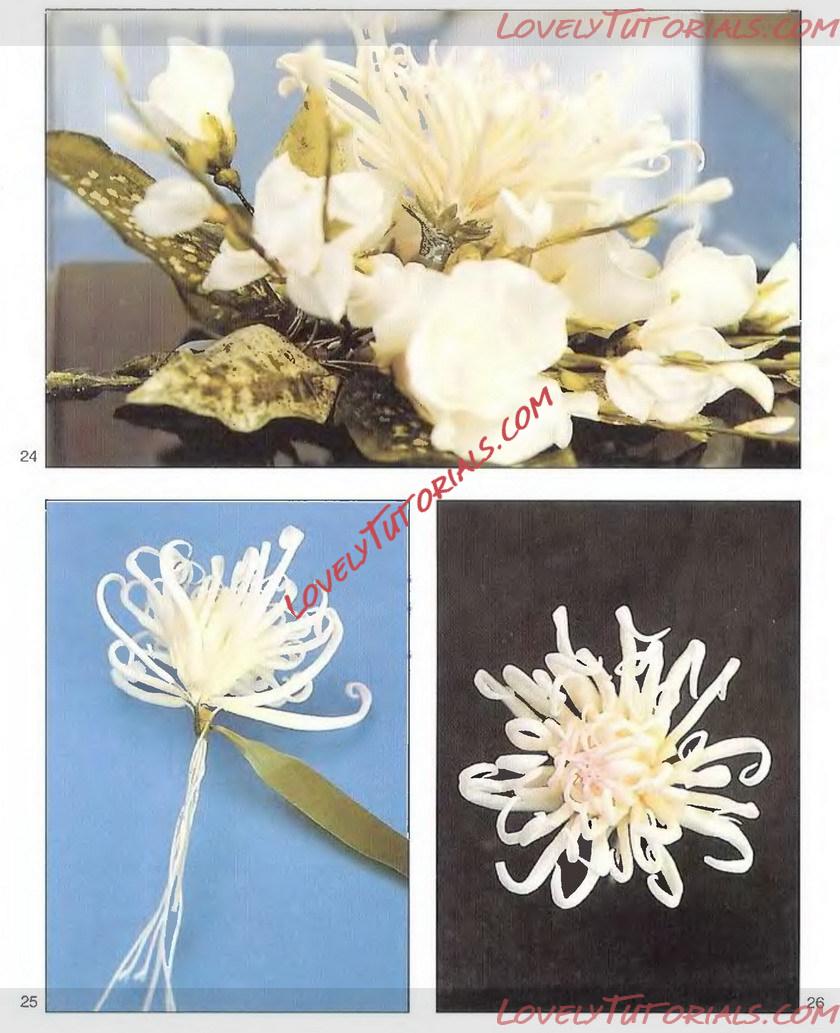
9. About 15 others, after flattening, should have the cocktail stick pressed along the length at the end, to give the illusion of hollowing out, and the wire bent out as before. Curl tip forwards over a cocktail stick.
10. Repeat Step 9 for about 18 more, but 1 1/2 long and the wire a little straighter. Curl tip back (see Illustration 23).
11. Colour all the items from Steps 8 to 10 with a touch of Rose Leaf Green petal dust at the base and Pale Pink at the tips.
12. Commence wiring the wires of the ray-florets to the centre 20 gauge wire with rose wire, binding them in one place to hold them steady, for when you tape them together with V2 width Green florists tape, leaving about VV1 of bare wire on the ray-florets immediately below the centre. Place the shorter ones near the centre and the longer ones curling out. Some can be bent back (see Illustrations 25 & 26).