Огромная благодарность Denise за Мастер-класс
Making a curved board for your cakes
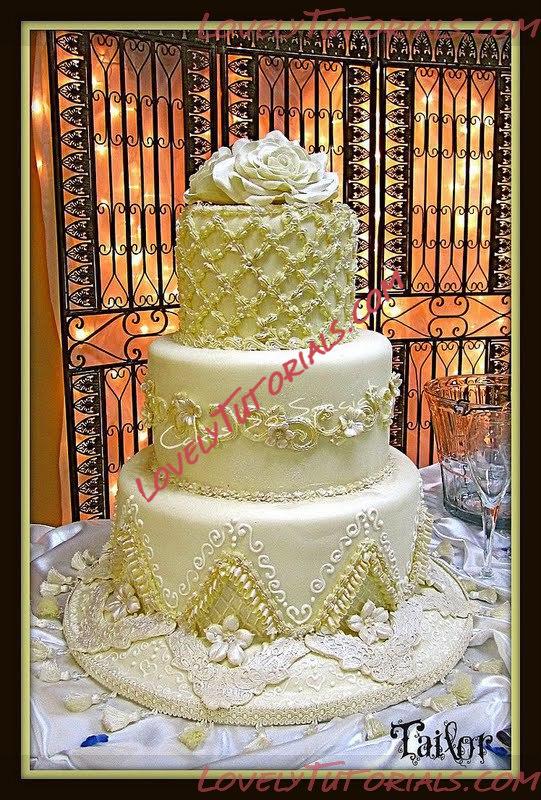
I recently made a wedding cake for my niece, Tailor. She wanted a cake with piping, not molded lace. I showed her some cakes that I had done in the last year with royal icing piped details and we designed her a small cake. I wanted the board to be curved up - not flat and since this was for a family member and a gift, I could essentially "play" with this cake.
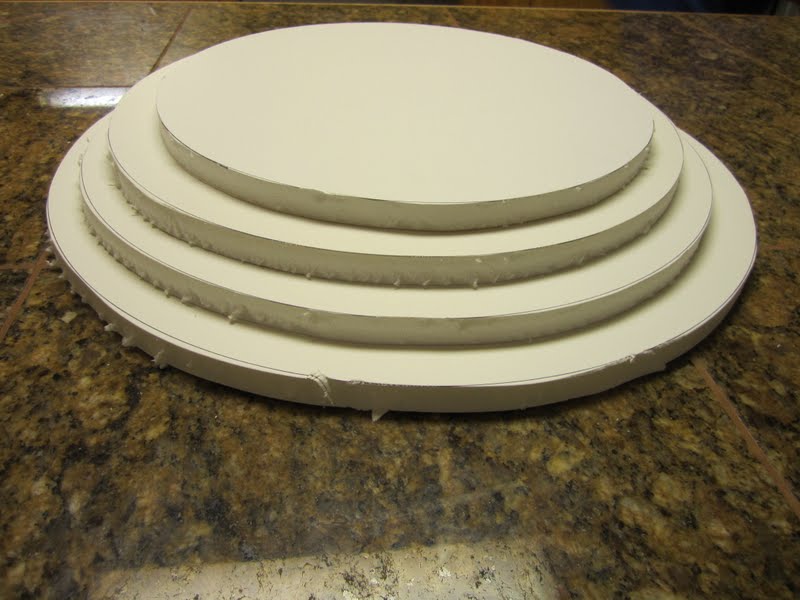
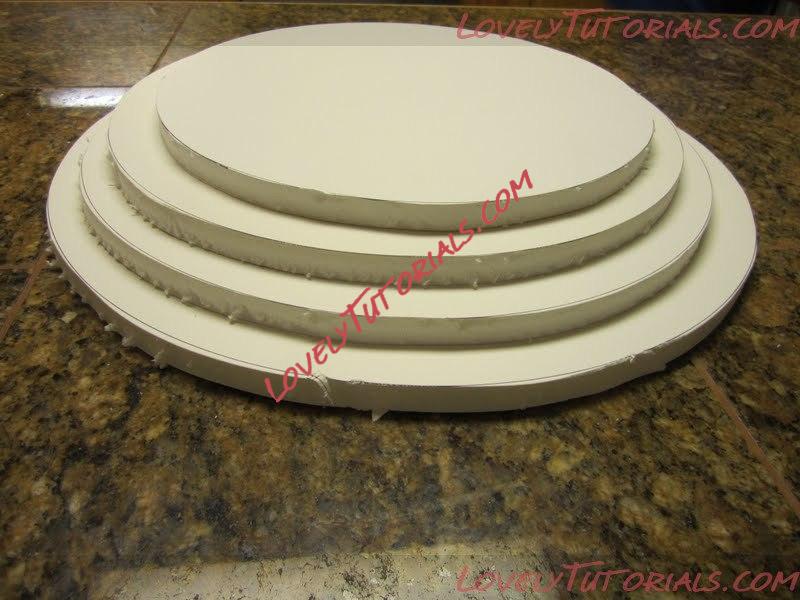
The bottom cake was a 12" cake that was on a 1/2 piece of foam core board cut to the exact size of the cake. Make a batch of royal icing (I think you could use chocolate in the cooler months or even buttercream to do this with.)
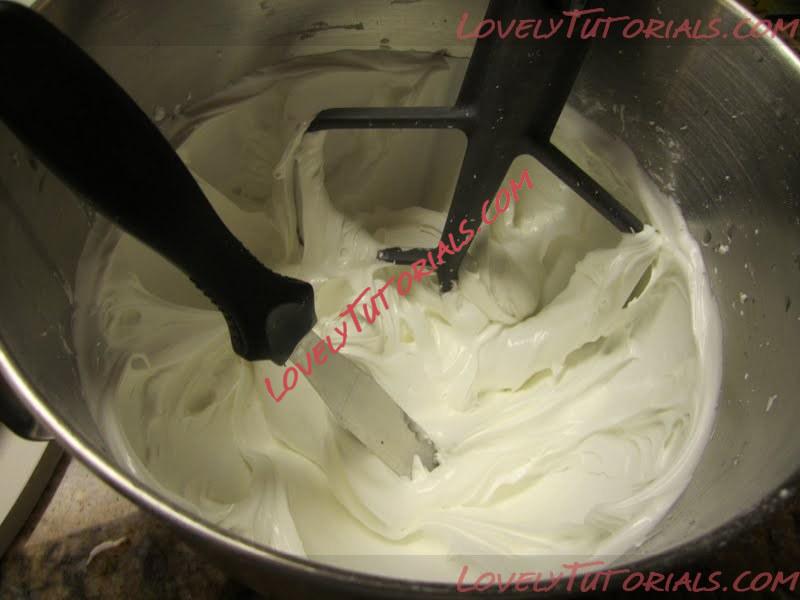
Royal Icing
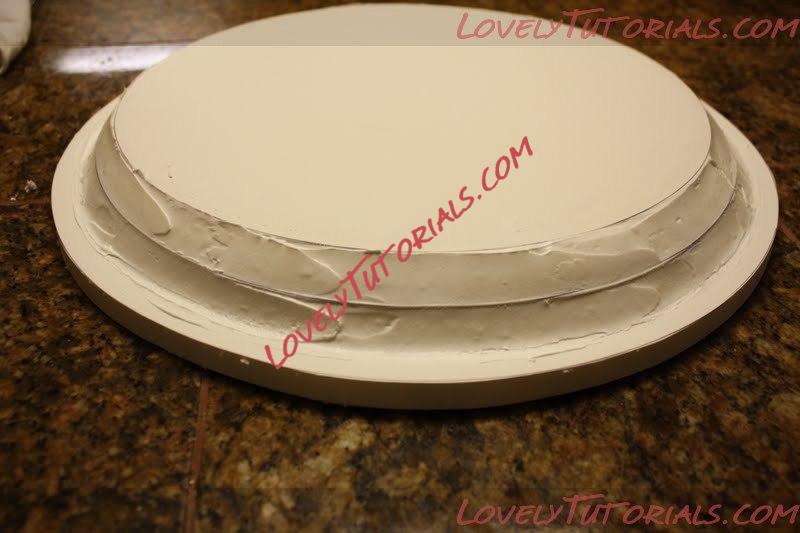
I then used a 13", 14" and 15" round pans turned upside down
(so that I was actually drawing a slightly bigger circle) and cut them out.
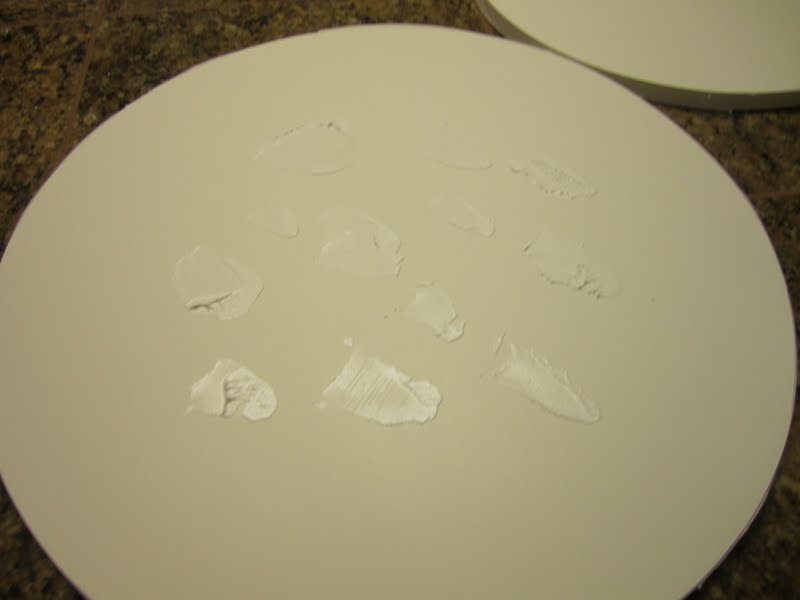
Dab Royal Icing on the bottom board and add the next size to the top of it and then do the same to the next board. Let dry til set.

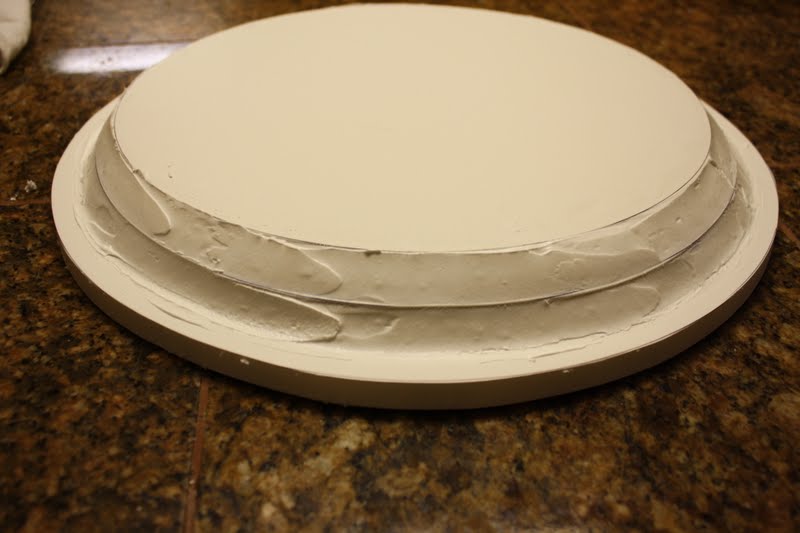
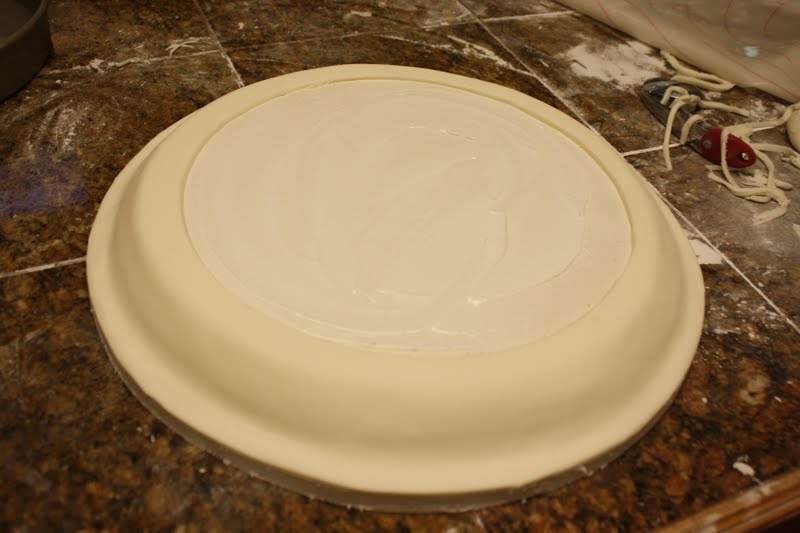
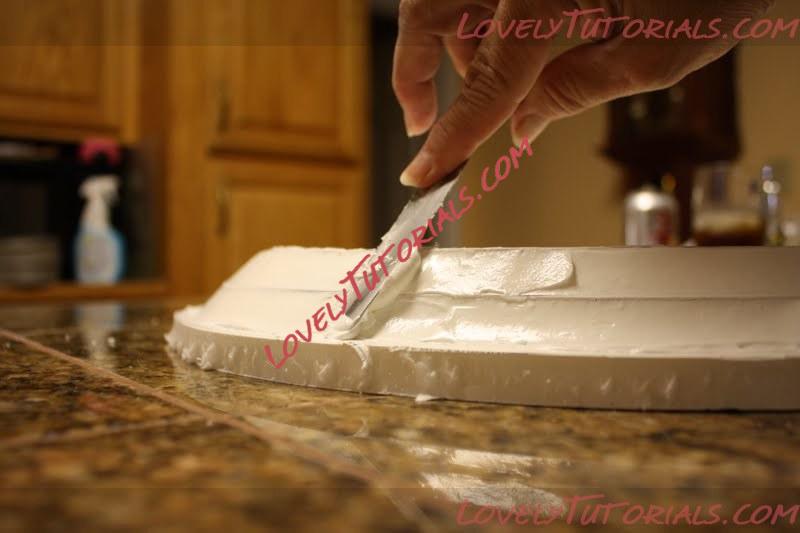
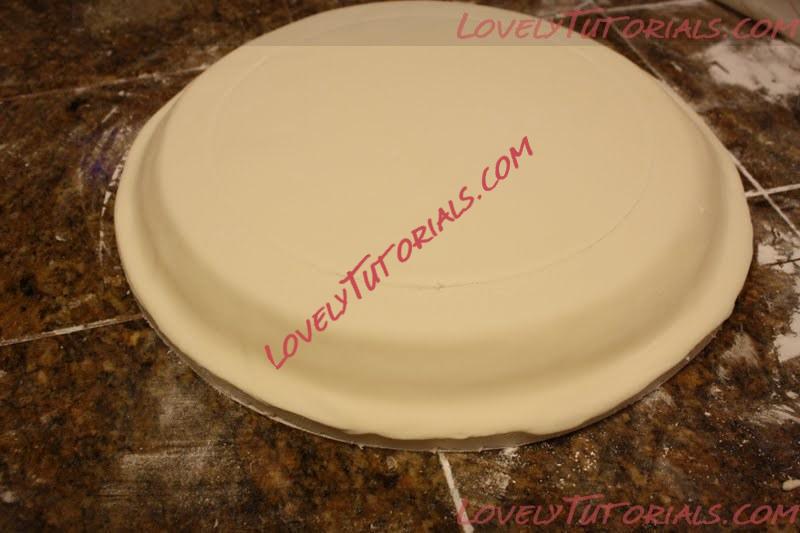
Fill in between the boards with royal icing, smoothing as you go
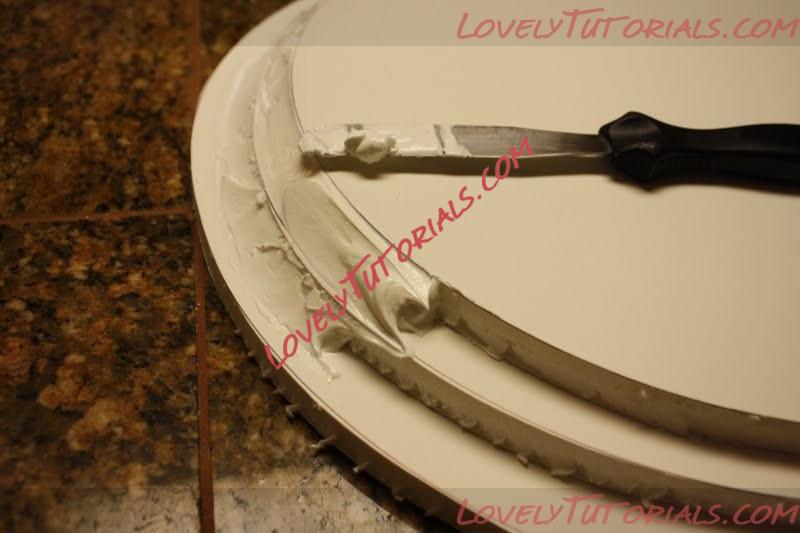
Go around the board holding your palette knife at an angle to completely fill in the spaces between the boards.
Set it aside and let it dry to the touch.
This can be made way in advance or the day of the wedding.
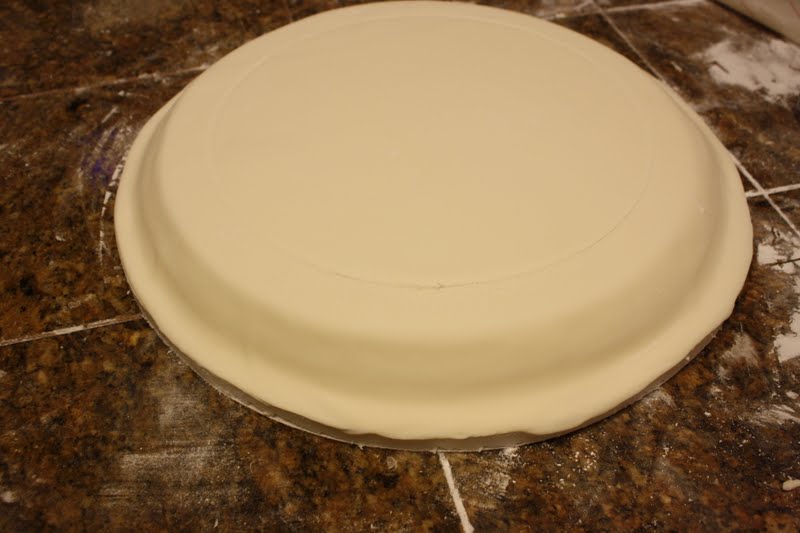
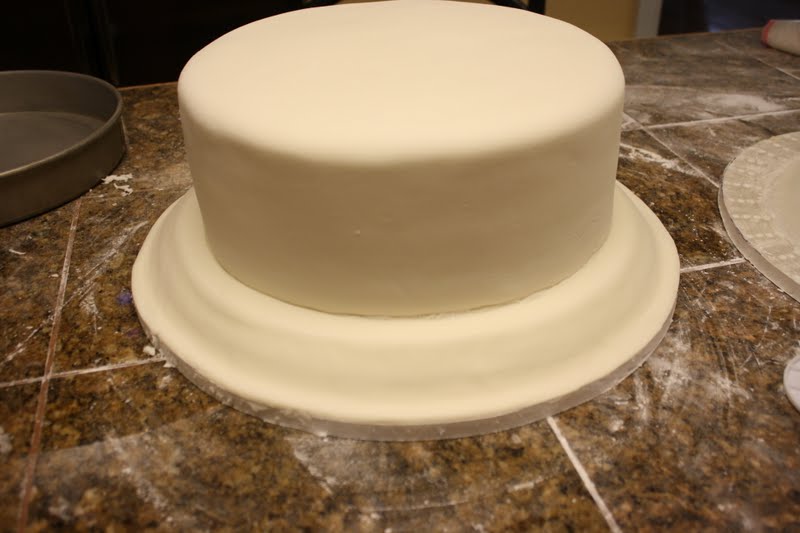
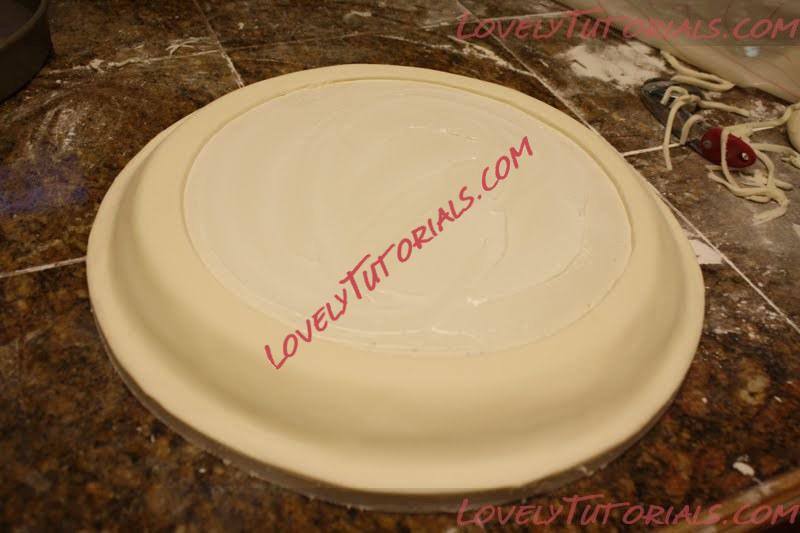
Cover the board with fondant and mark the center the same size as the cake.

Cut the center out and remove the fondant circle where the cake will be set.
Dab in royal icing to hold the cake in place.
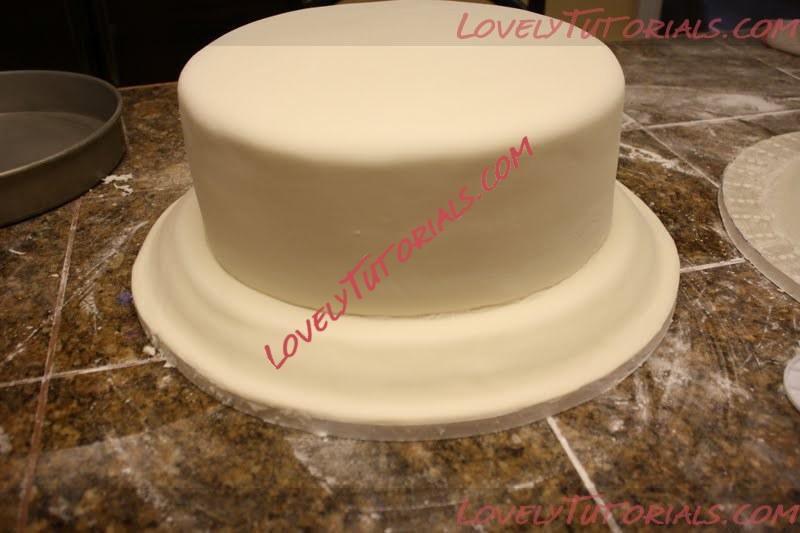
Place cake into the opening on the board.
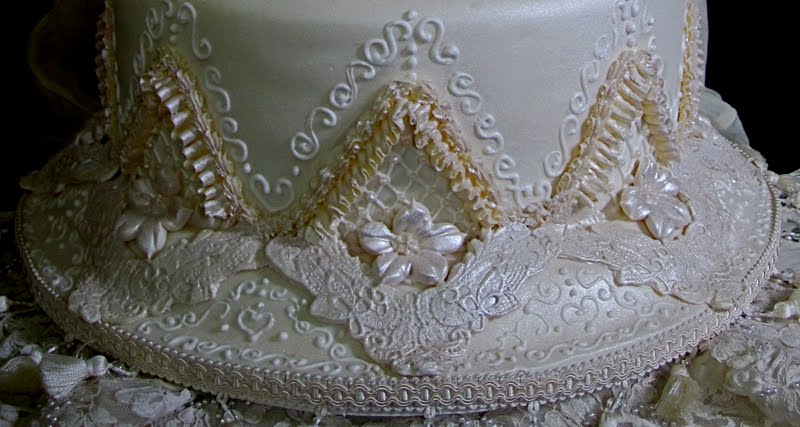
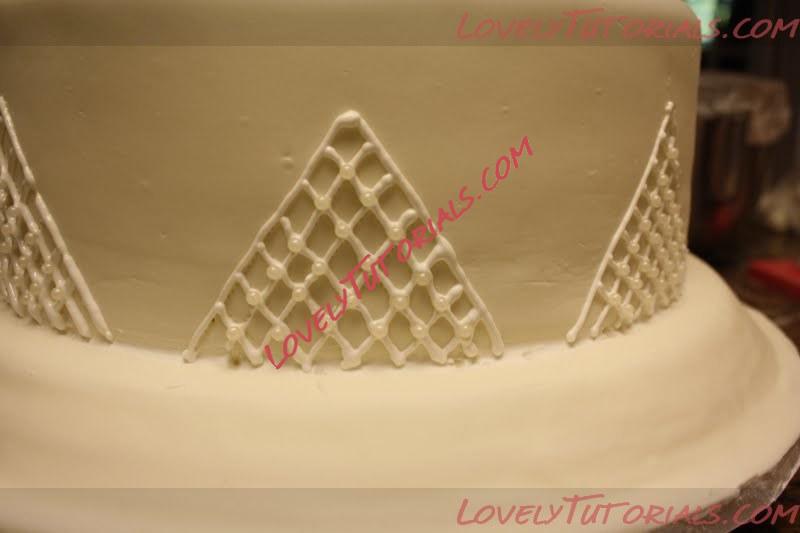
I then ran a bead of royal icing around the seam. I then sectioned it off to add in the lattice and pearls.
I added pressed lace pieces below the lattice, piped a ruffle with a shell on top of that, used a pressed flower petunia (you can get the lace piece and petunia cutter/veiner from Jennifer Dontz's Sugar Delites. I piped royal icing details and used luster dust to bring out a pearl sheen to the board. I added a piece of tasseled gimp to the edge of the board to finish it off.

Voila!!!! A board that is very romantic and part of the cake decor.