|
|
Как слепить фигурку девочки -How to sculpt girl figurine V4
|

28.10.2015, 20:15
|
|
Администратор
|
|
Регистрация: 28.01.2015
Сообщений: 541
|
|
 Как слепить фигурку девочки -How to sculpt girl figurine V4
Огромная благодарность vivalasugarcake за Мастер-класс
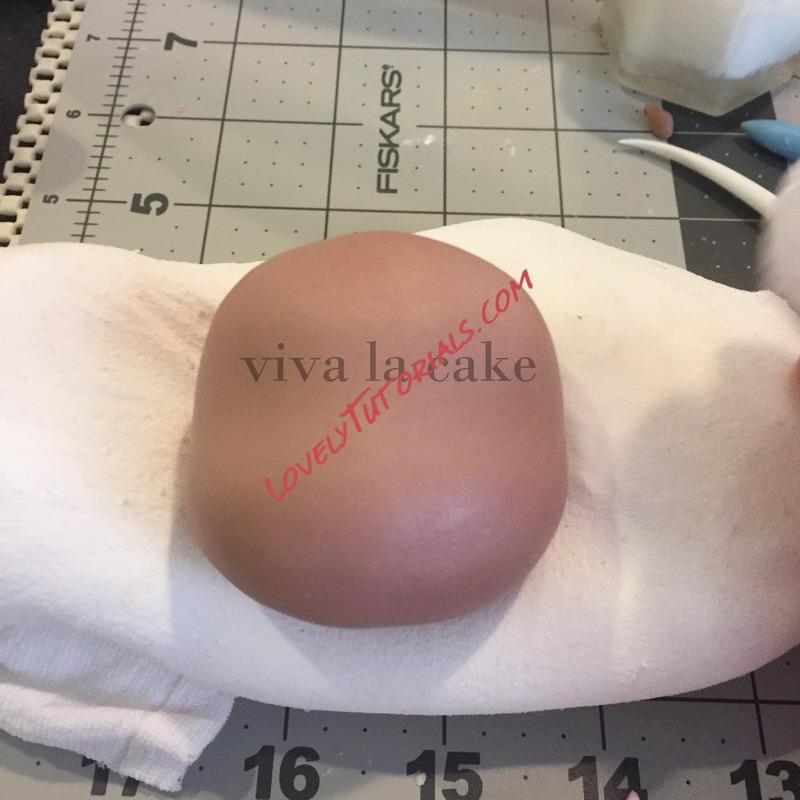 
I start with about 70 grms of fondant mix with gumpaste (50/50). If you have checked my previous tutorials, you might know already that I love adding a styrofoam ball inside. There are important reasons why I do this:
- it cuts the amount of fondant you might use so that makes the head not so heavy
- you can get a more rounded head
- the head can be attached to the internal body support and also glue it, which gives a lot of more stability
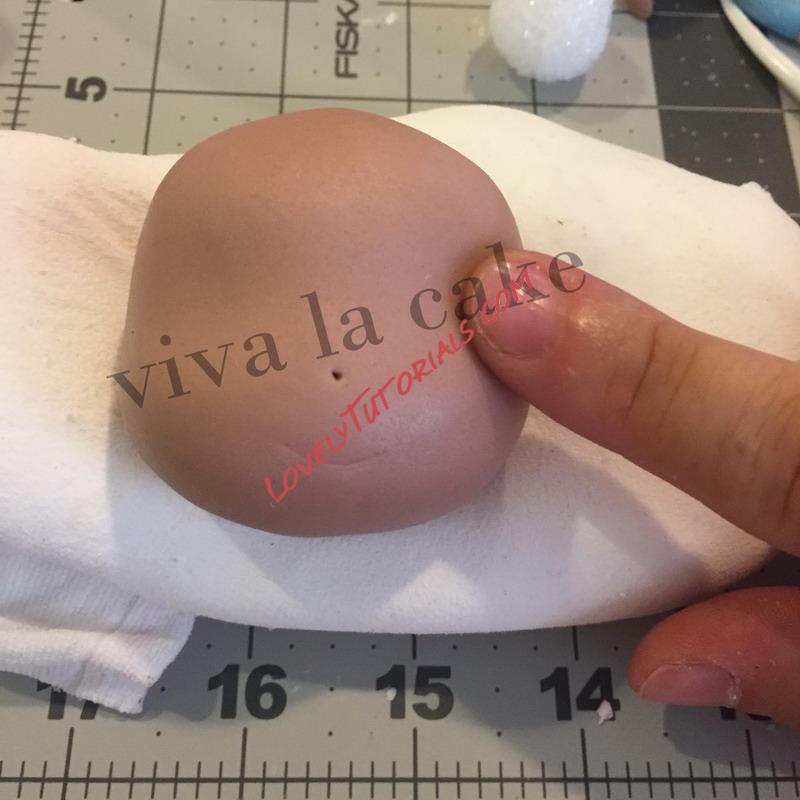 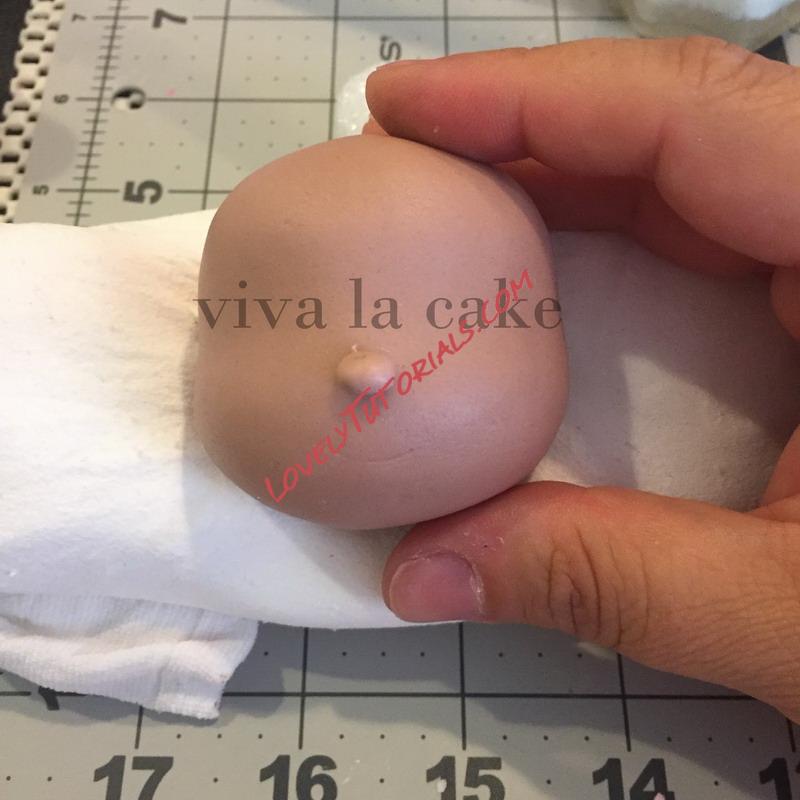
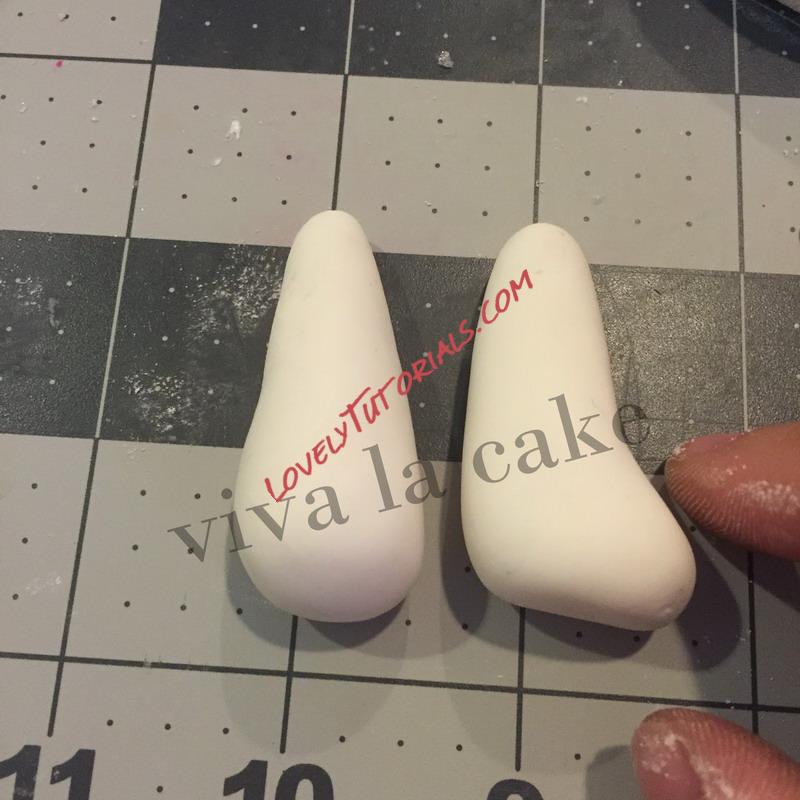
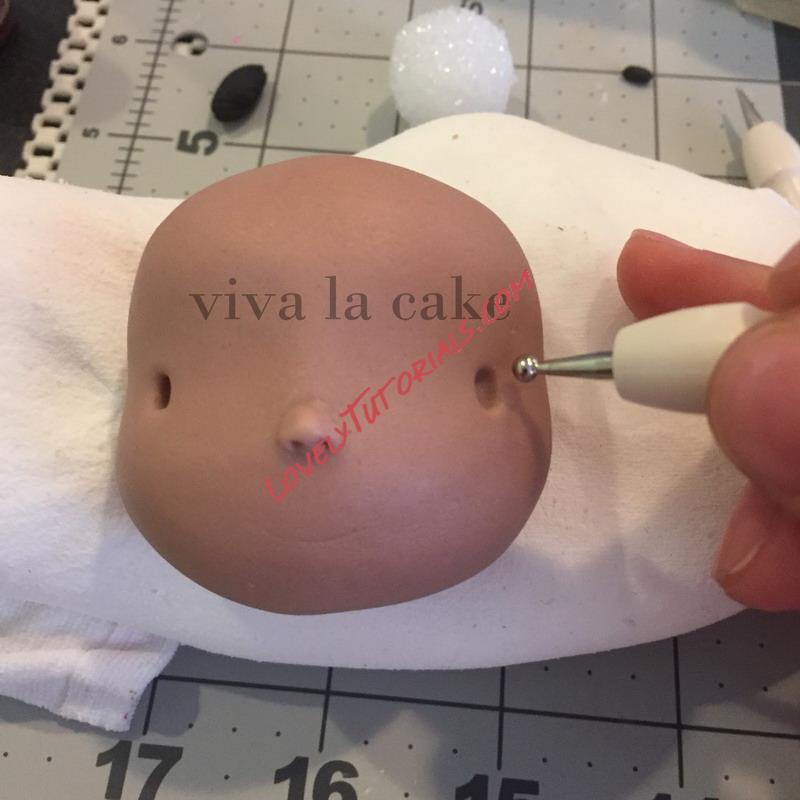
I am marking where I would like to place the nose and the mouth so you can have a better idea where it should go. Nose is basically a tiny little piece of fondant in a more oval shape than rounded.
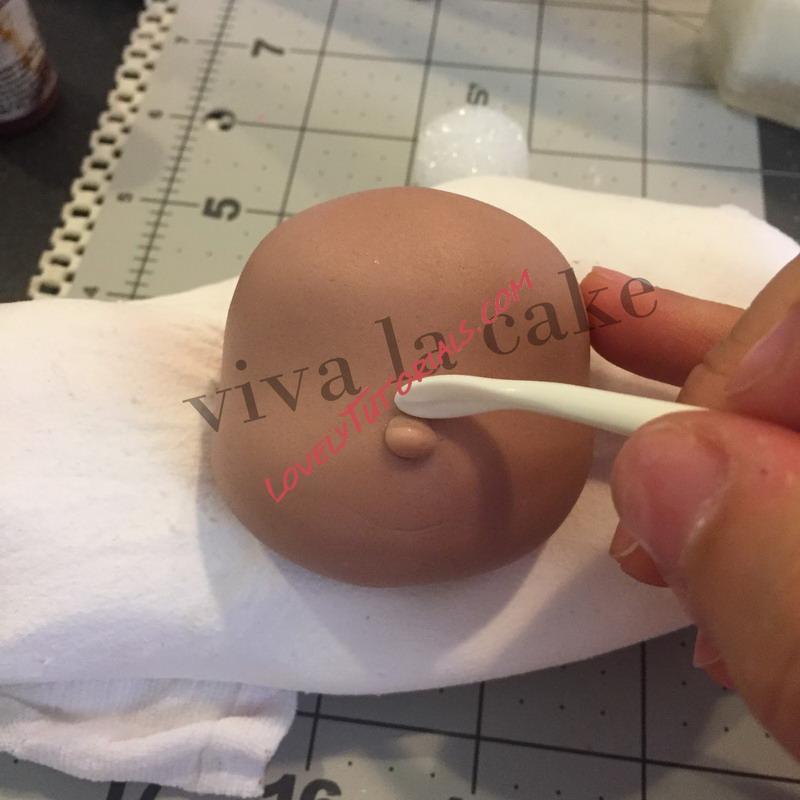 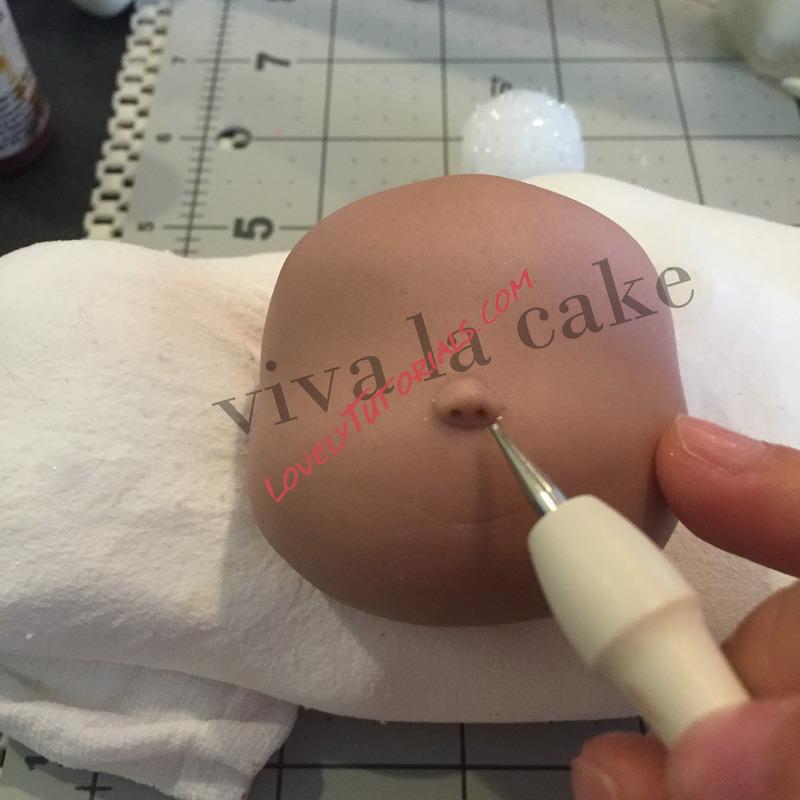
Smooth the nose with the dresden tool and mark nostril with the smallest ball tool
 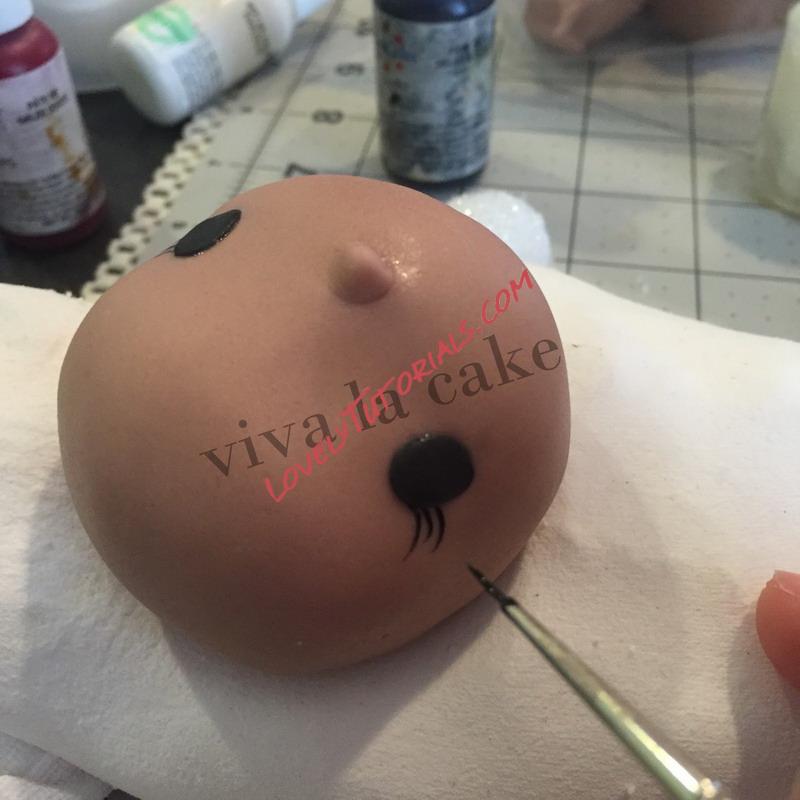
For this topper I wanted a more cuter, sweeter look. You can achieve a different look just by the position of the eyes. Positioning the eyes so far apart, give the look of a more angelical look, too close together eyes give a more goofy look. (looks like that is a good topic to discuss on another tutorial). I am marking the eyes just for you to see it as a reference, you really don't need to do that, unless you feel more comfortable. Two little pieces of fondant to form the eyes, again more oval shape than rounded. Paint the eye lashes using a extra fine brush I use 000 or 5/0
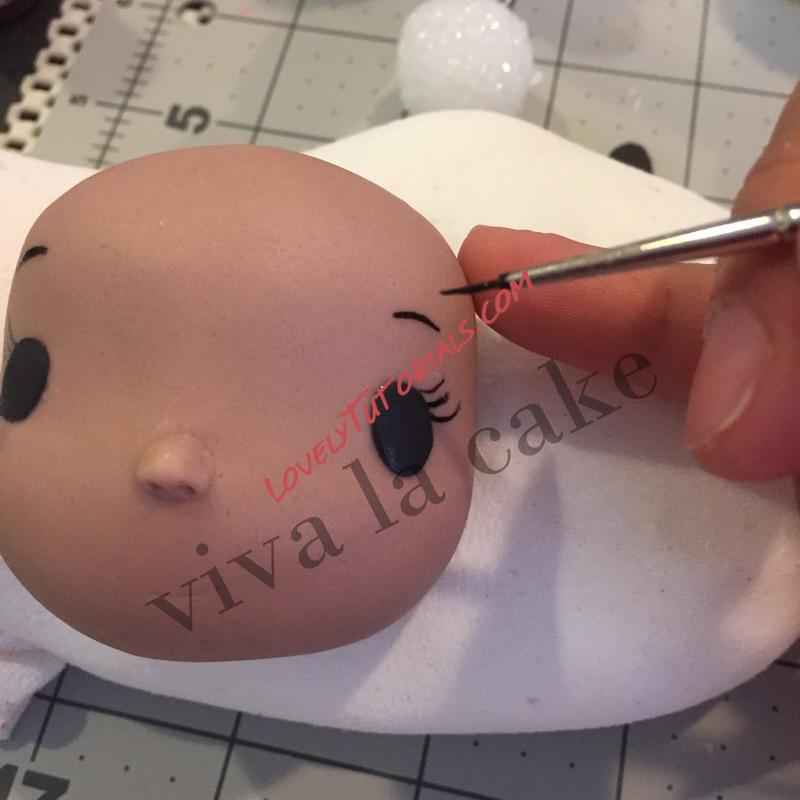 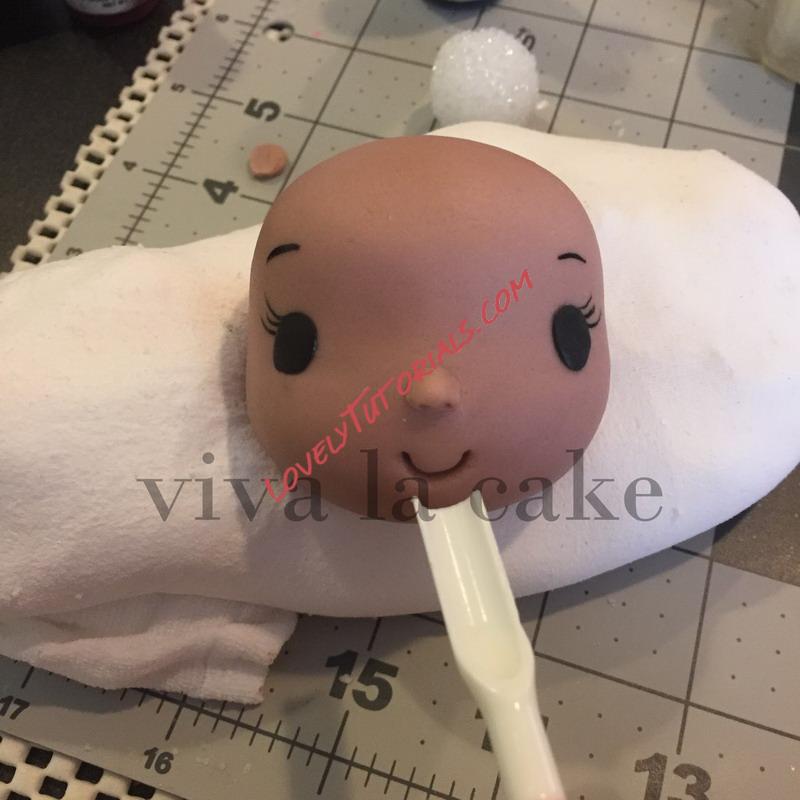
keep adding details for the eyes, making sure to put your pinkie finger somewhere where you can get some support and your hand will not shake that much. If by any chance you mes it up, clean it really quick with clear alcohol or vodka. Using one modeling tool , mark the mouth, you can also use a #12 round piping tip or even just a straw cut in half ( get the idea) Please don't ever stop yourself from making something because you don't have the "Tool", check around and reinvent it with what you have!!!
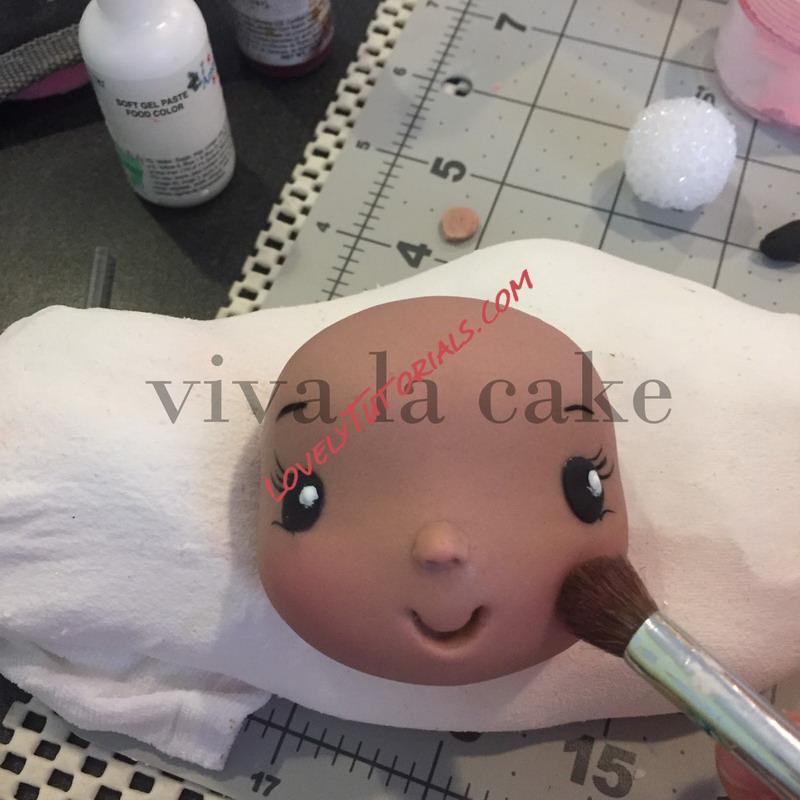 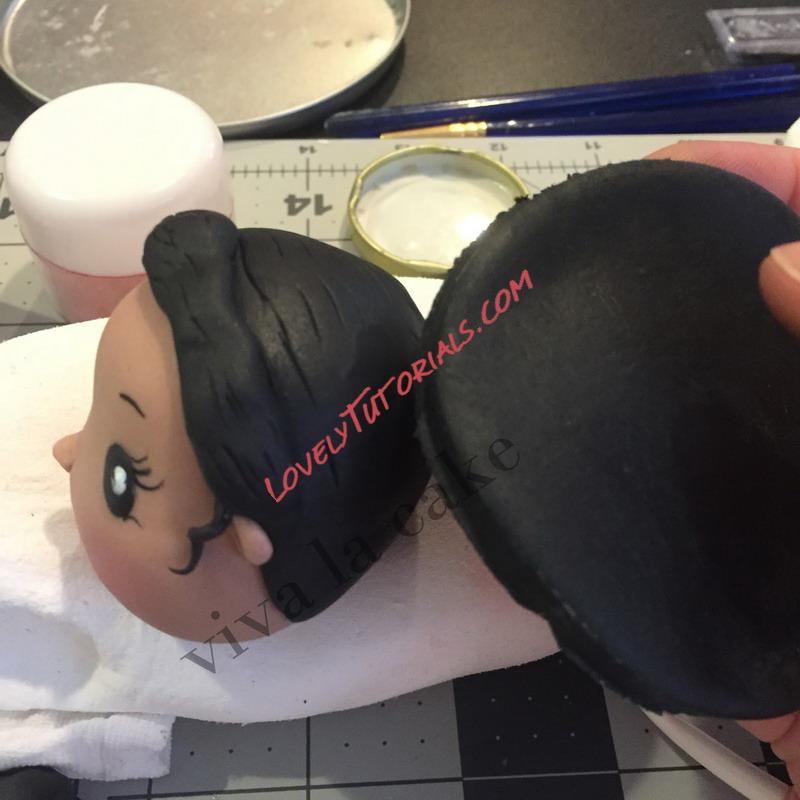
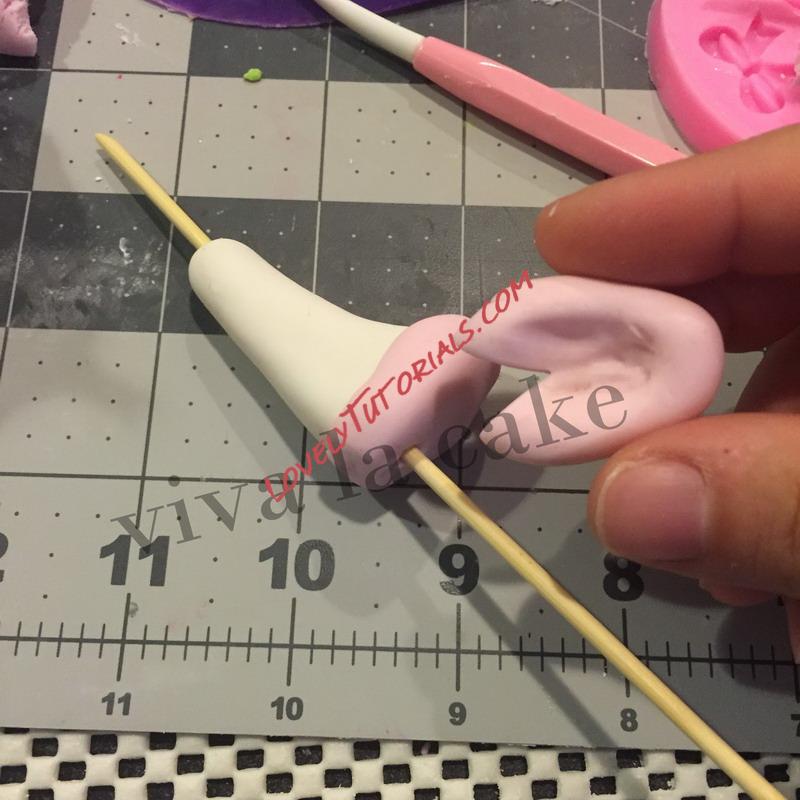
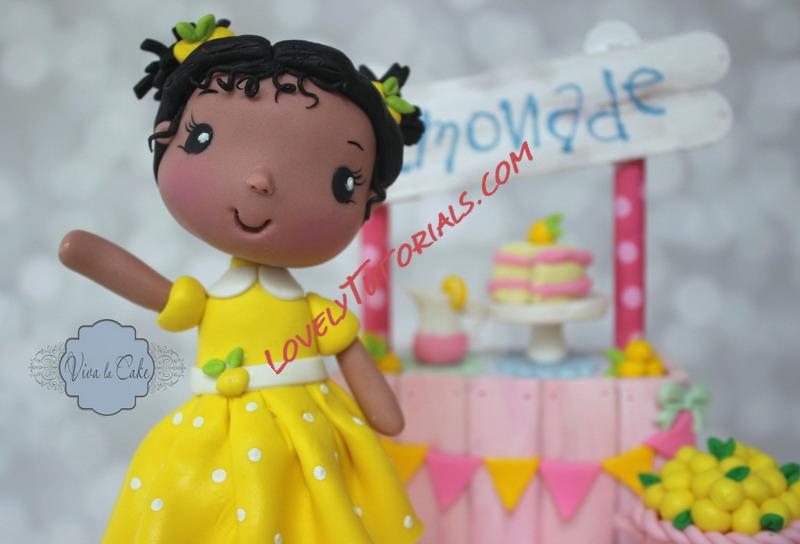
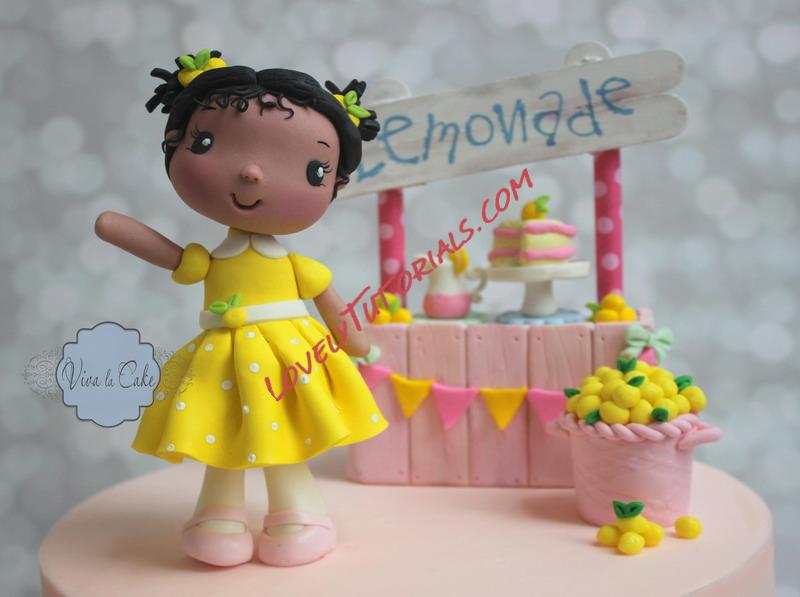
Put some color on her cheeks, white dots to bring some light to her eyes and cover her head with a piece of fondant, add the ears which should be one bit down from eye level
 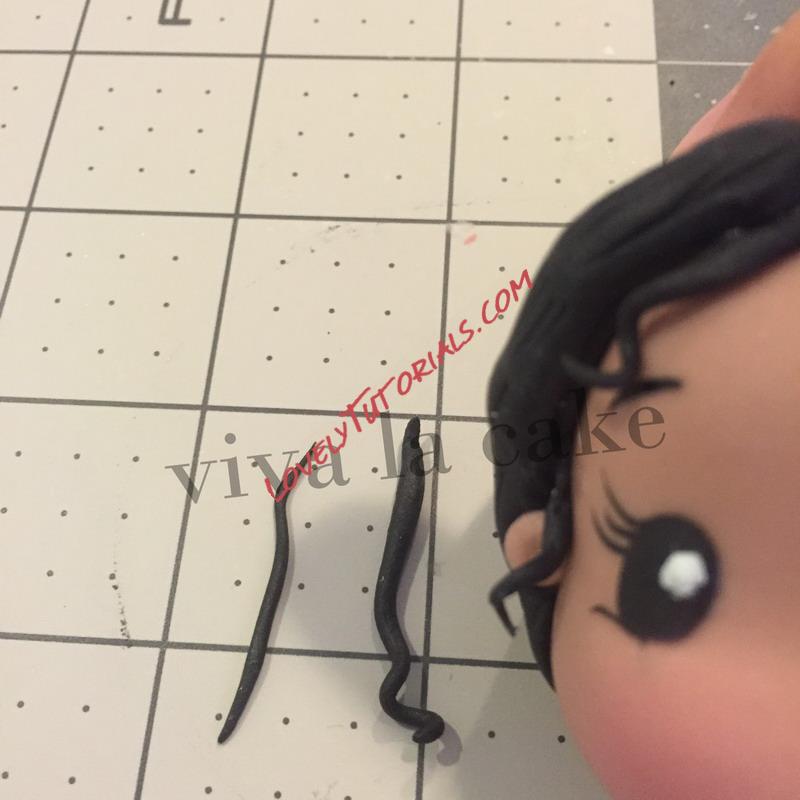
She is meant to have curly hair, so I rolled a piece of fondant, and pressed it in different parts so it can look waved. Roll some tiny pieces of fondant to make some cute curls to place around her face.
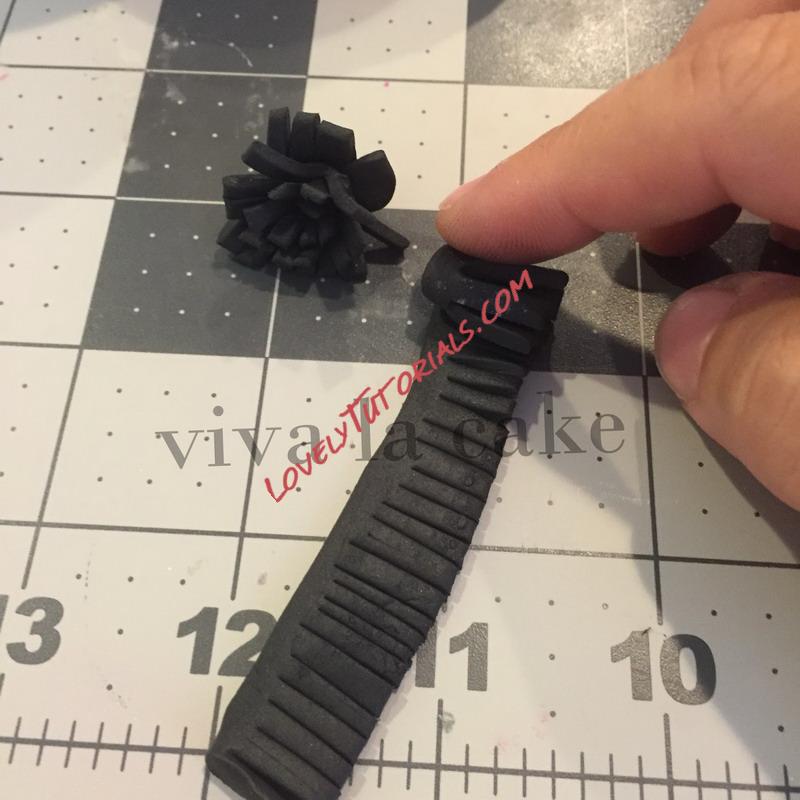 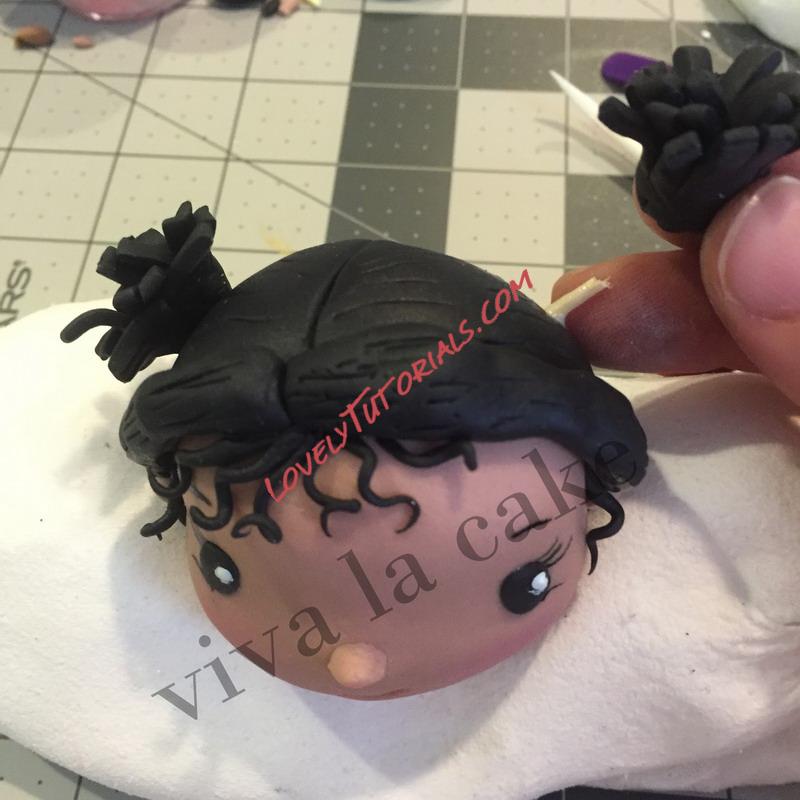
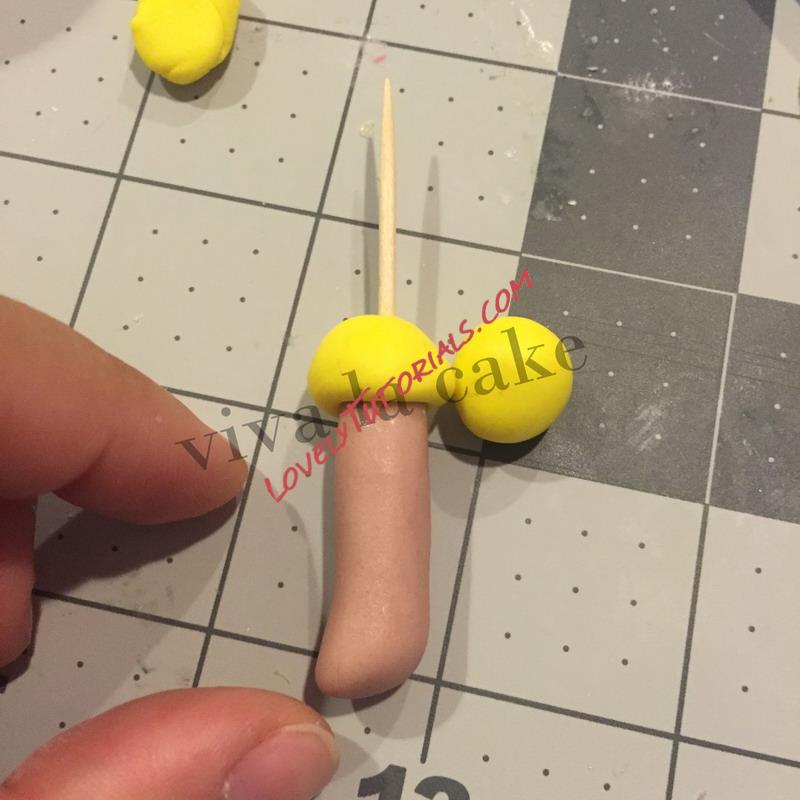
for the puffy piggy tail Roll two pieces of fondant of the same size, cut some lines avoiding one edge, then roll it and separate the pieces a bit to make it look fluffier. Add half toothpick on each side of the head and glue the hair as sort of piggy tails,You can even add some little bows , i added some lemons.
Time for the legs, roll two pieces of fondant, these are about 25 grms each, add some wooden dowels, make sure to leave enough to be inserted inside the cake, Set apart and let dry for a while.
Add the shoes and make the arms. One of the arms is waiving so add a toothpick and let rest for a while.
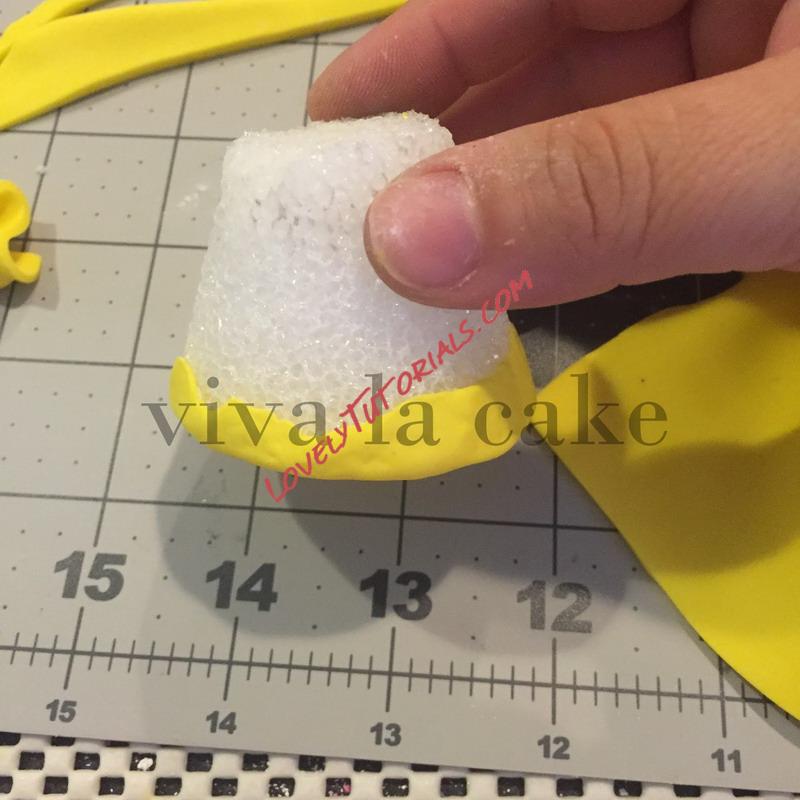
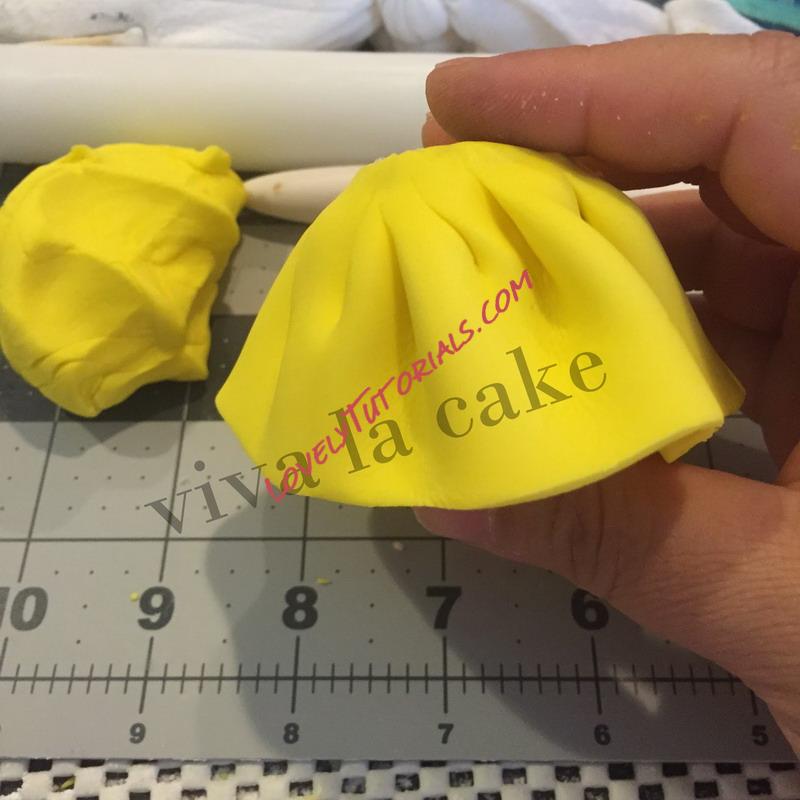
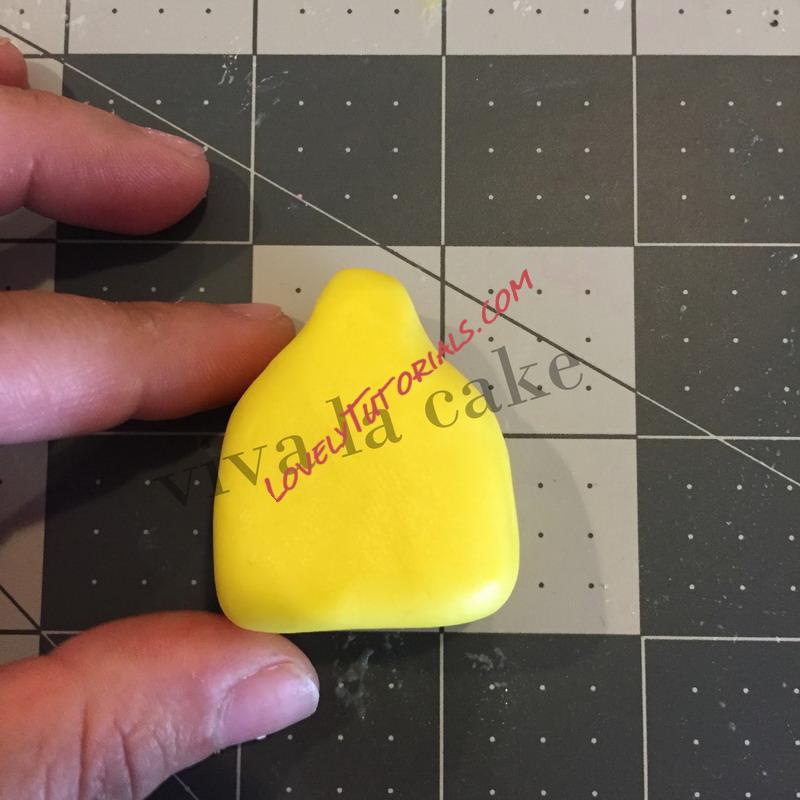
For the bottom part of the dress, I use a small styrofoam cone, but if you have trouble finding it , you can always use rice krispie treat modeled into a cone.I cover the bottom of the cone, where I will place the legs later. Roll a large piece of fondant and fold it all around the cone so you can get the skirt .
 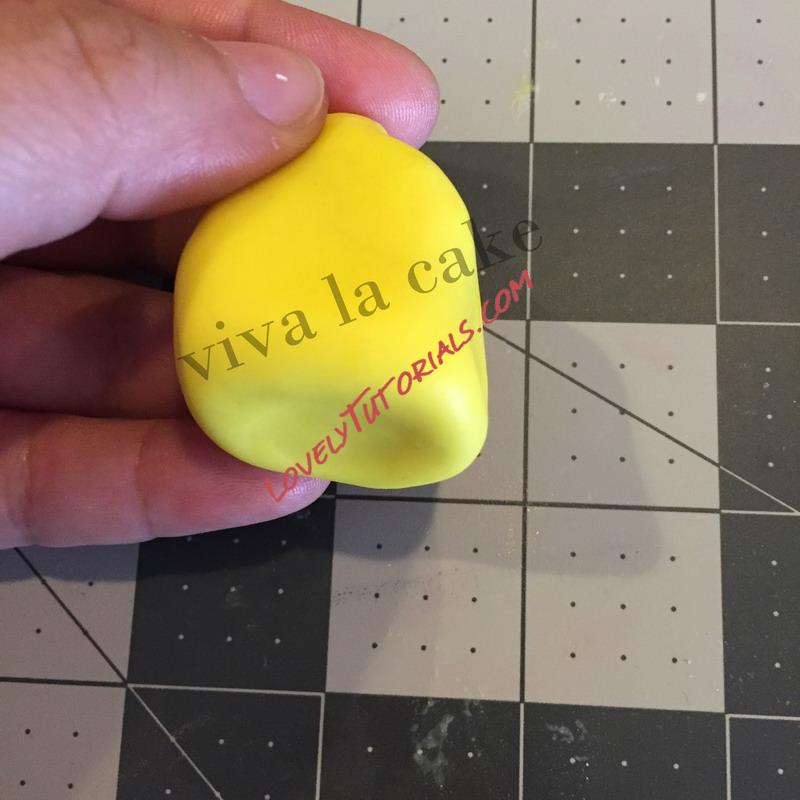
Take a little piece of fondant for the upper body, make sure to press your thumb on the bottom part so it can easily fit on the skirt. Make sure to add some extra details, I am trying to make this tutorial as simple as possible and the pictures a more as a reference.
|
 |
|
Метки
|
3d figures, addım-addım təlimat, adım, adım adım yönergeler, alimentando os gansos menina, artesanatos passo a passo, bemutató, birthday cake, biscuit, bolando bolos, bolos decorados, cake decorating, cake decorating techniques, cake topper, cake toppers, cake tops, cerâmica plástica, character figures, characters, chica, children's cake, cold porcelain, confeitando bolos, curso de modelado, decoracion de pasteles, decoración de tortas, decorada en fondant, decorare le torte, decorazioni, deko fondant, dekorace na dort, dekoracija, dekoracije, dekorasyon, dekorácie, dievča, djevojka hranjenje guske, dívka, especializada em modelagem de biscuit, female, fender, figur kager, figuras, figure making tutorials, figuren, figures, figurice, figurice od fondana, figurine on the cake, figurines, figurinhas, figurky, figúrky, figür modelleme, fillette, fimo, fixando a cabencinha, flicka utfodring gäss, flower paste, fondan, fondant, fondente, fondente di zucchero, fotopostup, foundant, gansos niña de alimentación, gebak, girl, girl feeding geese, girl in a hat step by step, girl in corset dress step by step, girl with infant figurines step by step, glazuur, gum pasta, gum paste, gumpaste, gęsi karmienia dziewczyna, hand-made, handmade, how to, how to sculpt baby girl figurine, how-to's, hrănirea fată gâşte, husi dievča kŕmenie, husy dívka krmení, instrucţiuni, instrukcijas, instrukcje, jak na, jente, jente fôring gjess, kage dekoration, kagedekoration, kakebaking, korak, korak za korakom navodila, korak-po-korak upute, koristeet ja koristelu, krok, krok po kroku, krok za krokem, krok-za-krokem, kız, kız besleme kaz, la modélisation, las instrucciones, las técnicas, le tecniche, les techniques, lukie, lány etetés liba, marcipanové figurky, marshmallow, marsipanfigurer, masa flexible, master-class, master-klasse, master-klasy, meisje, meisje voeden ganzen, meistras klasės, menina, mergina kūdikį žąsų, metodikas, mistr třídy, modelado, modelagem, modelando a barriga, modelando a cabencinha, modelando a perninha, modelando as maozinhas, modelando o cabelinho, modelando o corpinho, modelando os bracinhos, modelando os pezinhos, modelare, modelerte figurer, modeling, modeling paste, modeliranje, modellazione, modelleme, modellering, modellieren, modellierpaste, modelling, modelling past, modelləşdirmə, modelovanie, modelování, modelování krok za krokem, modelowanie, motivtorten, mädchen, mädchen fütterung gänse, nourrir les bernaches fille, návod, návody a postupy, návody na květy a lístky, opplæringen, orelhas, ozdoby, pamoka, pap, pas, pas-cu-pas, pas-à-pas et modèles, paso, paso a paso, passo, passo a passo, passo-a-passo, passo-passo le istruzioni, pasta de goma, pasta de miel, pasta flexible, pasta laminada, pige, pige fodring gæs, pintura dos olhos, pocelana fria, polymer clay, polymer clay) girl, postupak za ukrasavanje, pravljenje figurica za torte, pâtisserie, předměty z marcipánu, qız, ragazza, ragazza alimentazione oche, schmelzend, schritt für schritt anleitung, schritt-für-schritt, schritt-für-schritt-anleitungen, sculpting, soggetti, souvenirs, standing girl figurine making tutorial, stap, stap-voor-stap, stap-voor-stap instructies, steg for steg, steg-för-steg-instruktion, step, step by step, step-by-lépésre, step-by-step, step-by-step instructions, styrofoam, sugarcraft, sugarpaste, suikerglazuur, technieken, techniken, techniki, techniky, technikák, techniques, tecnicas de decoracion, tecniche, tehnici, tehnike, teknikker, teknikler, telgopor, topo de bolo, topo do bolo, topos de bolo, torte, torte decorate, torten dekorieren, torti, trin, trin for trin, trin-for-trin, trin-for-trin instruktioner, trinn, trinn for trinn, trinn-for-trinn-instruksjoner, trucs et questions sur la décoration de gateaux, tutorial, tutoriale, tutorias, tutorias/ideas para decorar los bizcochos, tutoriel, tutoriels, tutorijal, tyttö ruokinta hanhia, técnicas, udžbenik, ukrašavanje torti, uputstvo za dekoraciju, zuckerfigürchen, zuckermasse, सजा केक, ट्यूटोरियल मास्टर वर्ग, कदम, कदम दर कदम निर्देश, तकनीक, मॉडलिंग, モデル, étape, étape par étape les instructions, öğretici, 一步, 一步一步的指示術, žingsnis, žingsnis po žingsnio, 宗師級教程, 建模, 裝飾蛋糕, 黏土教程, βήμα, βήμα προς βήμα οδηγίες, οδηγίες βήμα βήμα, παντεσπάνι art, τεχνικές, φροντιστήριο, χήνες σίτιση κορίτσι, декорация на торти стъпка по стъпка, девочка, дзяўчынка, дівчинка, инструкция, как сделать, как слкпить девочку -how to sculpt gumpaste (fondant, как слепить фигурку девочки, крок за кроком, крок за крокам, гуси девушка кормления, гуси дівчина годування, гусі дзяўчына кармлення, гъски момиче хранене, покроково, полимерная глина, пошагово, пошаговые фотки, пакрокава, персонажи, миниатюра, мк, мк лепка "девочка кормит уточек", мк лепка "девочка в шляпке стоя", мк лепка "девочка в шляпке", мк лепка "девушка в платье с корсетом", мк лепка "девушка с младенцем", моделиране, момиче, майстор-класа урок, майстар-клас, майстер-клас, майстер-класи, маршмеллоу, мастика, мастер-класс, лепка, ліплення, ручной работы, ручная работа, украшение тортов, сахарная мастика, уроки прикрашання, стъпка, стъпка по стъпка инструкции, торта стъпка по стъпка, техники, техника, техніка, туториал, туторіал, тэхніка, фигурки, фигурка на торт, фимо, фігурки, фігуркі, холодный фарфор, шаг за шагом, інструкцыя, інструкція  |
|