04.06.2012, 10:14
|
|
Администратор
|
|
Регистрация: 07.09.2010
Сообщений: 7,669
|
|
 МК "3Д платье торт с рюшами" -How to make a Pink Ombre Ruffle Dress Cake V1
Огромная благодарность Автору Bubble and Sweet за Мастер-класс
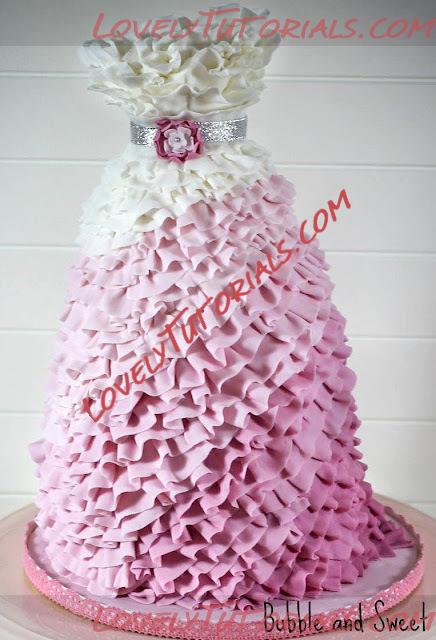
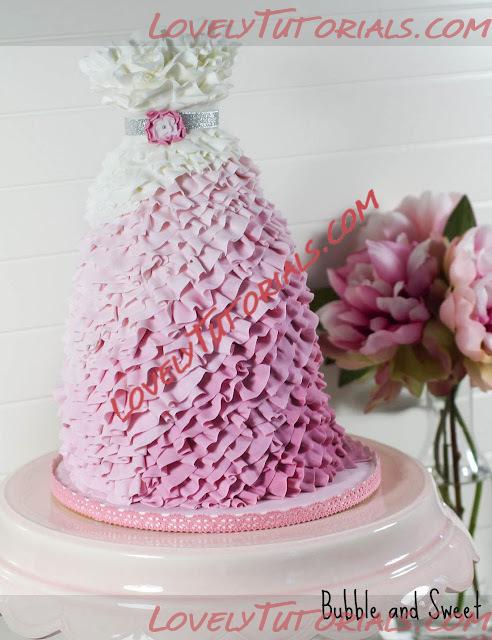
Pink Ombre Ruffle Dress Cake instructions
Like always this is just the way I did it. I trimmed my cake as I was adding the layers, mostly to save ganache and for me doing it this way the end cake ends up less lopsided. Also my ganache was very, very firm as we had a cold snap the day I was making this cake. I have not provided any recipes as I am trusting that you have a little cake experience if you are making this cake. Conversion to inches approximates.
5 cakes 16cm (6 ") wide by 8 cm (3") high (mine were in graduating shades of pink and white)
1 X 16 cm (6") cake board - very sturdy
1 X 23cm (9") cake board - very sturdy
White ganache (you will need to use about 600grams white chocolate)
off set spatula
Cake dowel
Ready roll fondant (pettince)
dusky pink/ burgandy food color
Cake smoothers X 2
large rolling pin
small sharp knife
small rolling pin
ruffling/frilling tool
non stick petal pad/foam (see here for example) optional for thinner ruffles
cornflour/ cornstarch
small brush and water
* Fondant dries out very fast. You must work quickly and keep in an airtight container when not in use. Knead well before use.
**Some people may prefer to use a pasta machine to roll the ruffles very thin, that is more than ok, I say do what makes you happy and works 
Knead the fondant well and using the food color make 4 different shades ranging from pale pink through to a deep dusky pink. Make double of the paler pink.
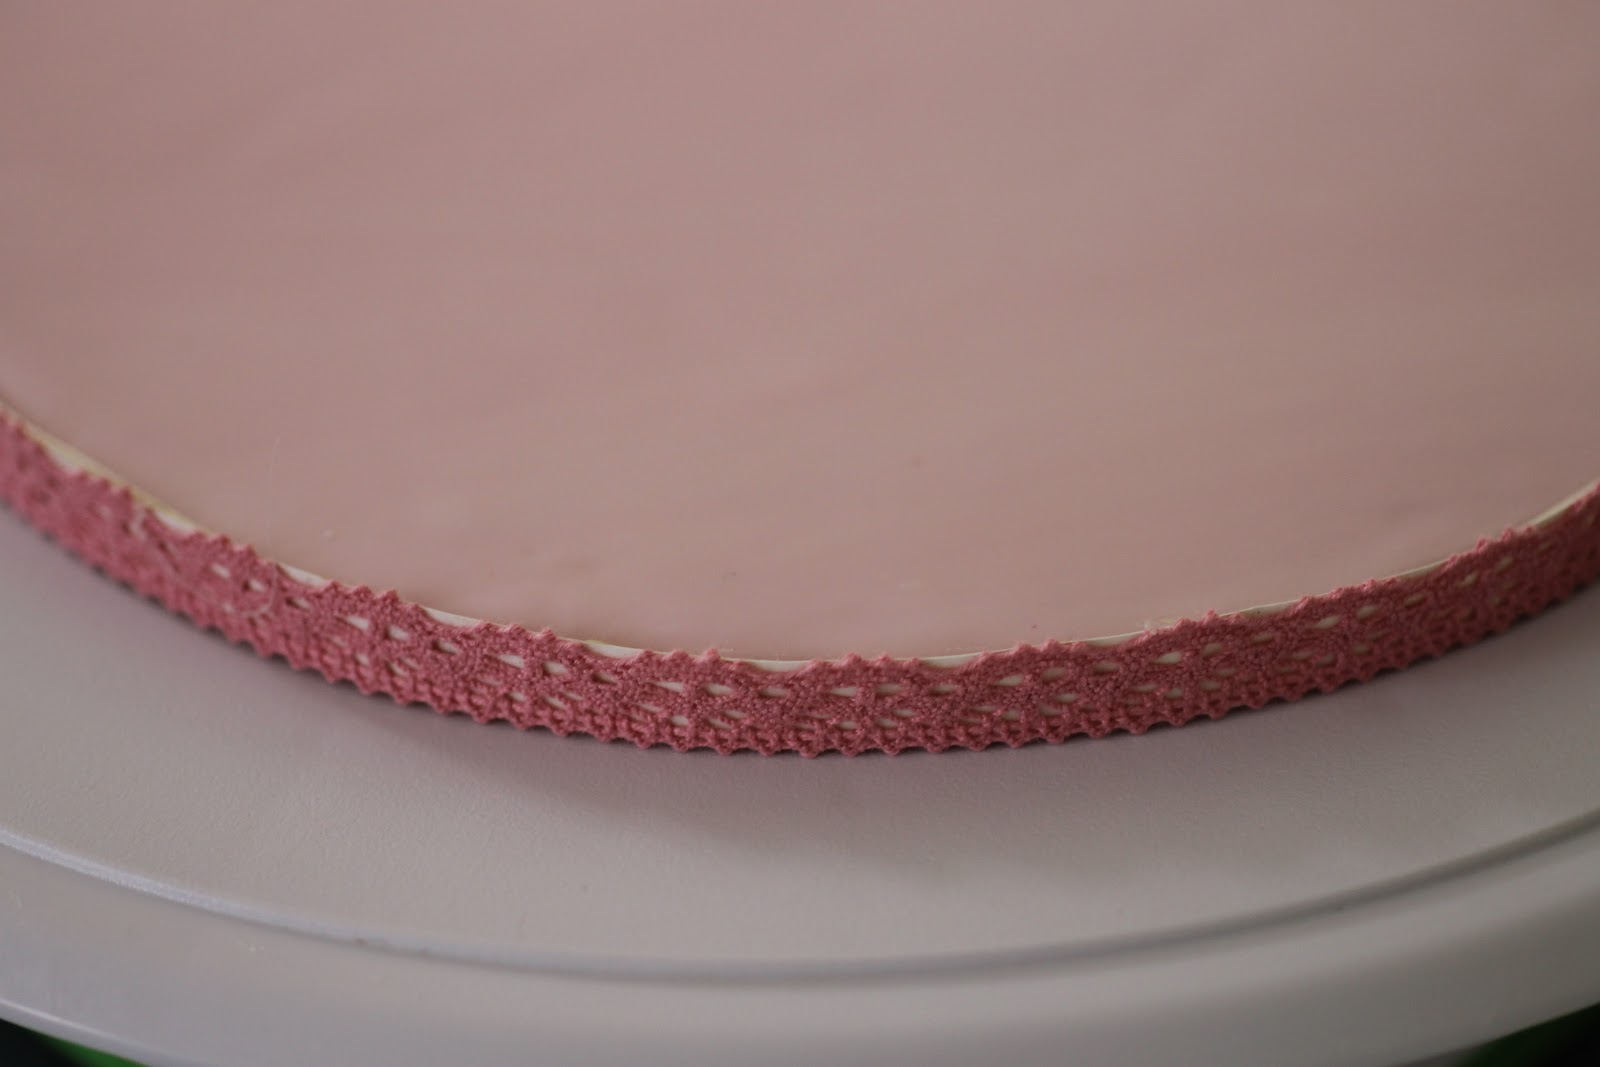
Cover the 23cm (9") cake board with the paler pink fondant and allow to set overnight. If you like you can attache ribbon around the edge of the board using double sided sticky tape or a hot glue gun.
Cut the brown edges of the tops, bottoms and sides of the cakes.
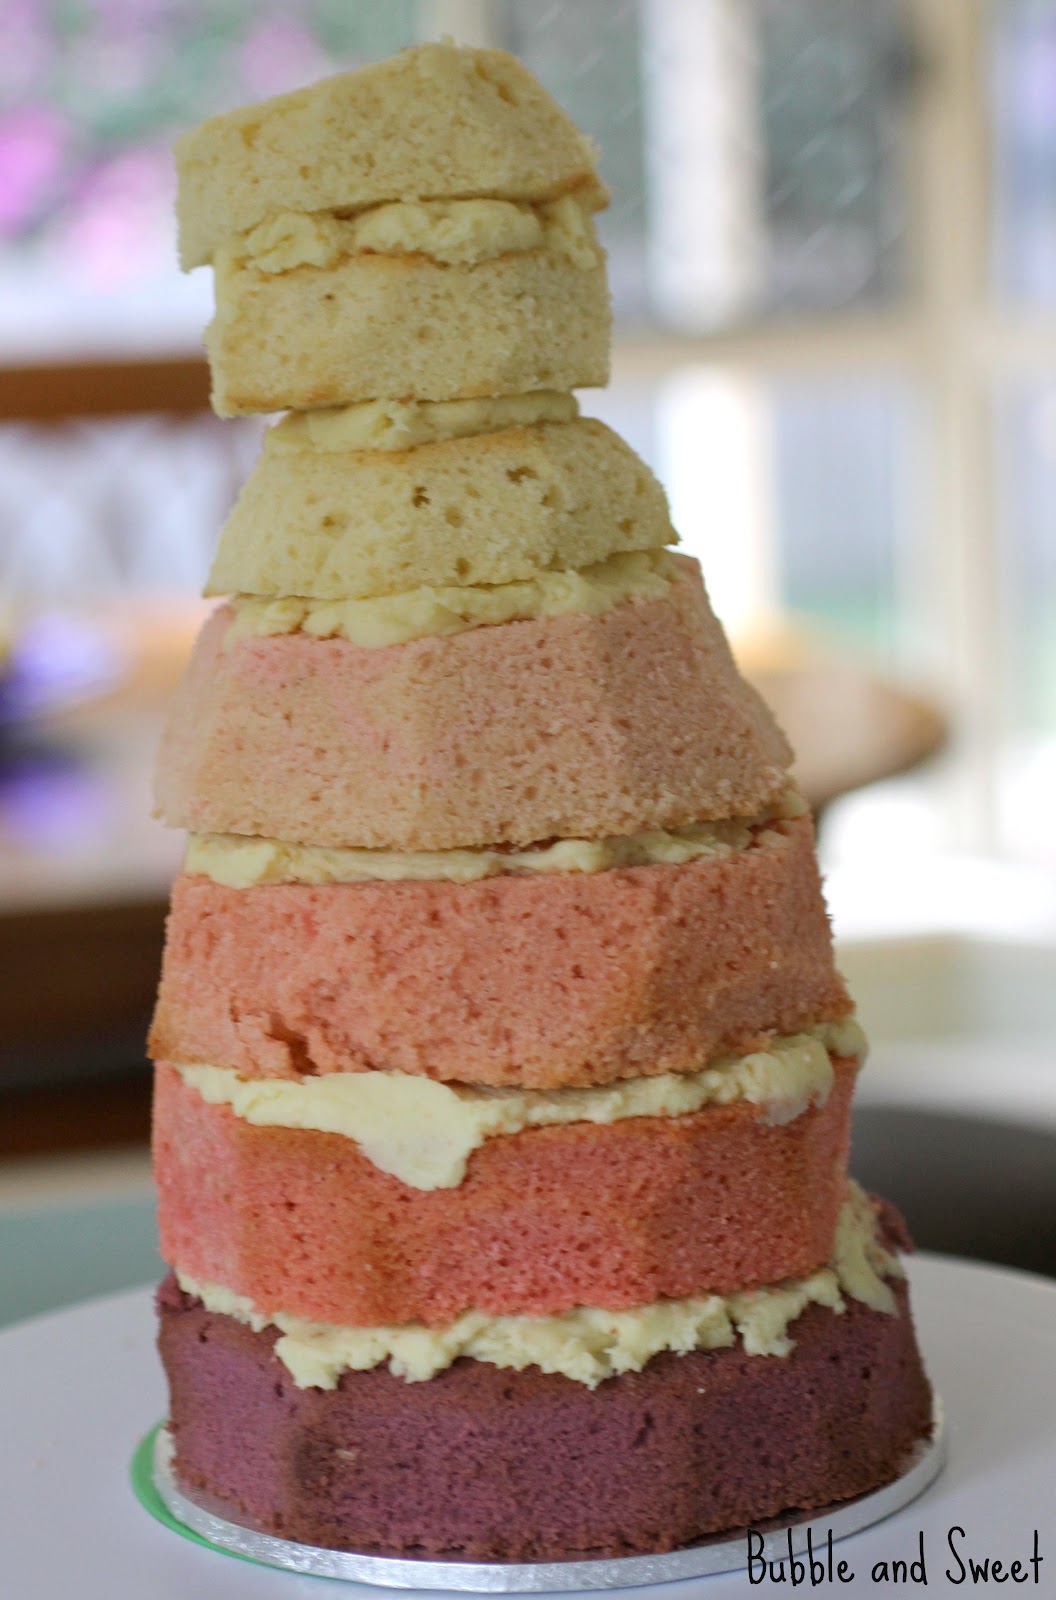
Place a small amount of ganache onto the 16cm cake board and press the first cake layer (darkest pink) onto the board.
Top the first cake layer with a thick layer of ganache, press on the second cake layer (medium pink) and pop into the fridge to chill a little.
Eeek I know this looks messy, but I just can't sweat the little things when I know it's all gonna get covered with ruffles, it's not in my nature.
Remove from the fridge and carve a little of the second cake layer off so that it is a bit smaller that the first layer. Add more ganache to the top of the second layer and press on the 3rd layer of cake (light pink). I trimmed my 3rd cake a bit before popping it onto the ganached 2nd layer. Place in fridge to chill.
Add the 4th layer (palest pink) using the same process and trimming as the other layers and the final white layer. As the white layer will be very small, make sure to carve it off one side as you need the rest to make the bodice. You should be able to get another 2 layers from the white cake, add them to the cake ganaching and chilling in between each layer.
Once the final white cake layer is added add a dowel down the center of the cake. To add a dowel push it into the middle of the cake piercing each layer, draw a line at the top of the cake and then remove the down and cut it down to size. Return the dowel to the center of the cake.
Make sure the ganach is well set and then carve the cake to get the dress shape you need.
Ganache around the sides and top of the cake and allow to set.
Do a second layer of ganache around the cake making sure the finish is as smooth as possible. You may need to use a hot knife, spatula or smoothing tool.
Cover the cake with white fondant. I did this in 2 sections, the smaller top bodice section first and then the skirt. It is possible to do this as the cake will be covered with ruffles which will hide any joins.
Knead the fondant and then roll out with a large rolling pin until quite thin, trim to a circle that will be large enough to come down just under the waist. Lift the fondant over the cake, center and press is down on the cake making it as smooth as possible. I wasn't able to get it smooth enough so I trimmed some excess of at the back and rubbed over it with the smoothers until the join wasn't noticeable
OK still messy and a bit too bumpy - don't worry it's about to get covered.
Roll out more fondant, this time in a longish rectangle to wrap around the skirt joining together at the back and trimming off any excess from the back and bottom. Use cake smoothers to get the finish as neat as possible. With a knife mark on the dress little indents to indicate where you are going to change the ruffle colours.
Using some edible glue attach the white fondant covered dress cake onto the 23 cm pink covered board.
If you have a cake turntable you can pop the cake onto the turntable but it is not essential.
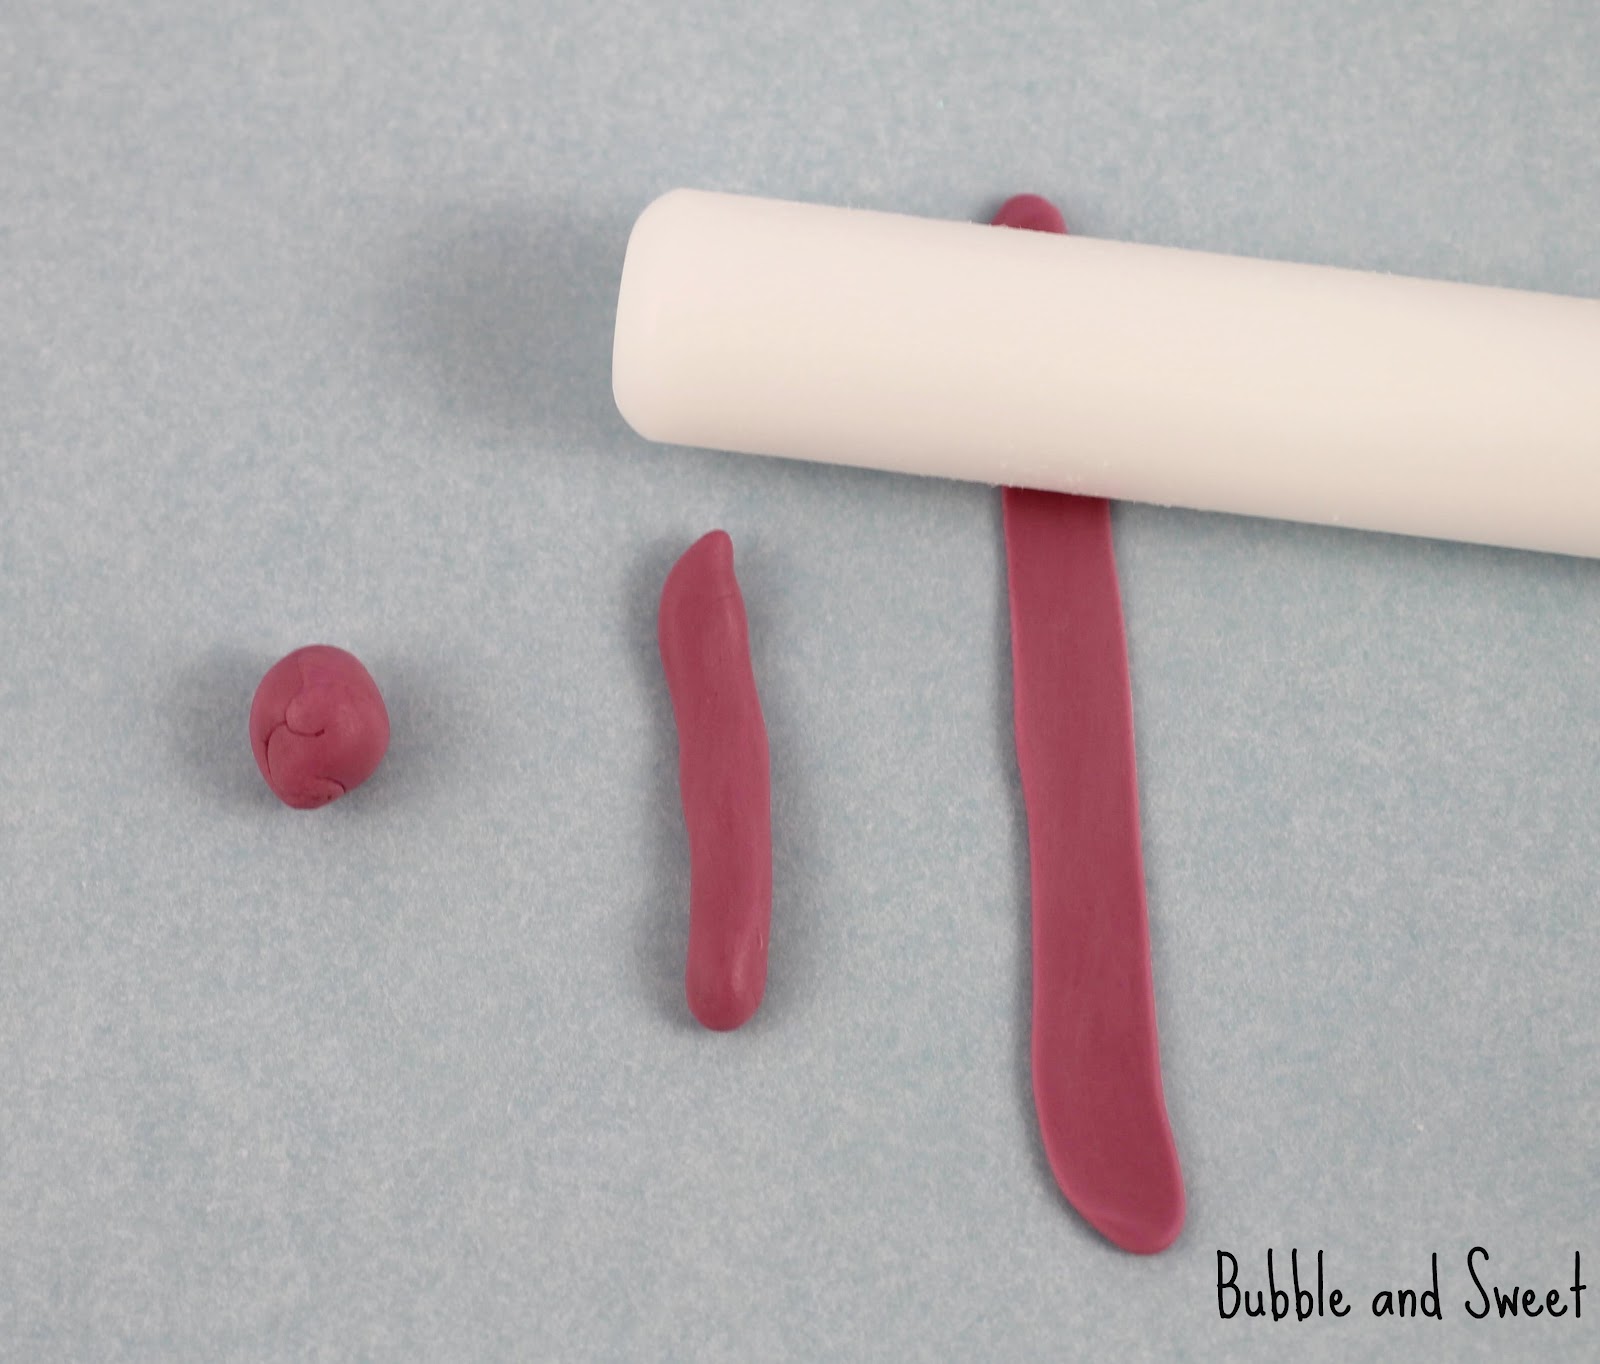
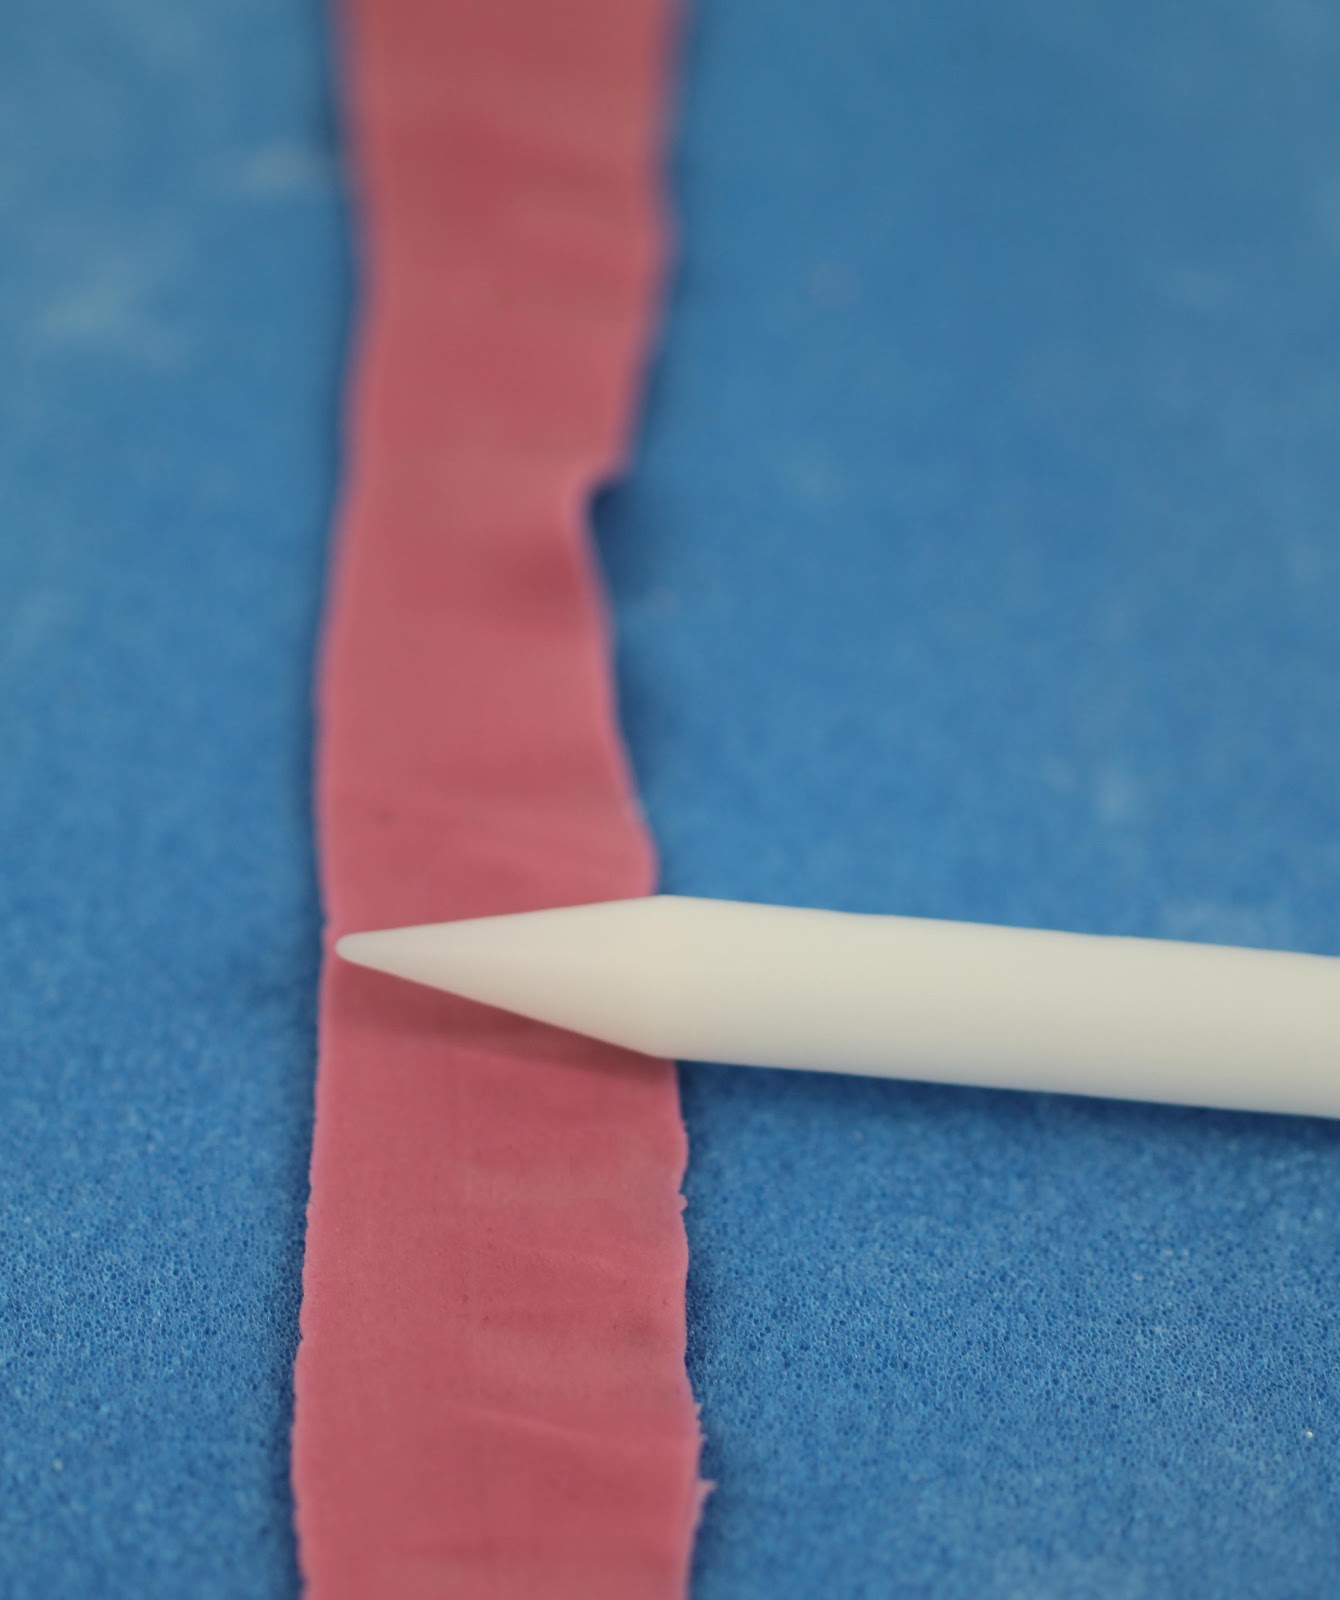
To Make the fondant ruffles dust the workbench with cornflour (cornstarch), take a piece of fondant about 1 1/2 tsp and shape it into a rectangle, using the small rolling pink roll in out into a long strip. As you roll you may need to press the sides in carefully with the sides/heels of you hands to stop it from getting too wide. (or if you find that is not working you can always use a sharp knife to trim it back to size) Keep rolling until the strip is quite thin. I like to pick the strip up after each roll to ensure it is not sticking to the bench and when necessary dust underneath again.
Pick the strip of fondant up and place it onto the non stick foam. Using the middle section of the frilling tool roll back and forth (like using a rolling pin) to make the strip even thinner, you will probably get it to double in length.
Then use the edge of the frilling tool rolling back and forth to frill one edge of the strip a little more.
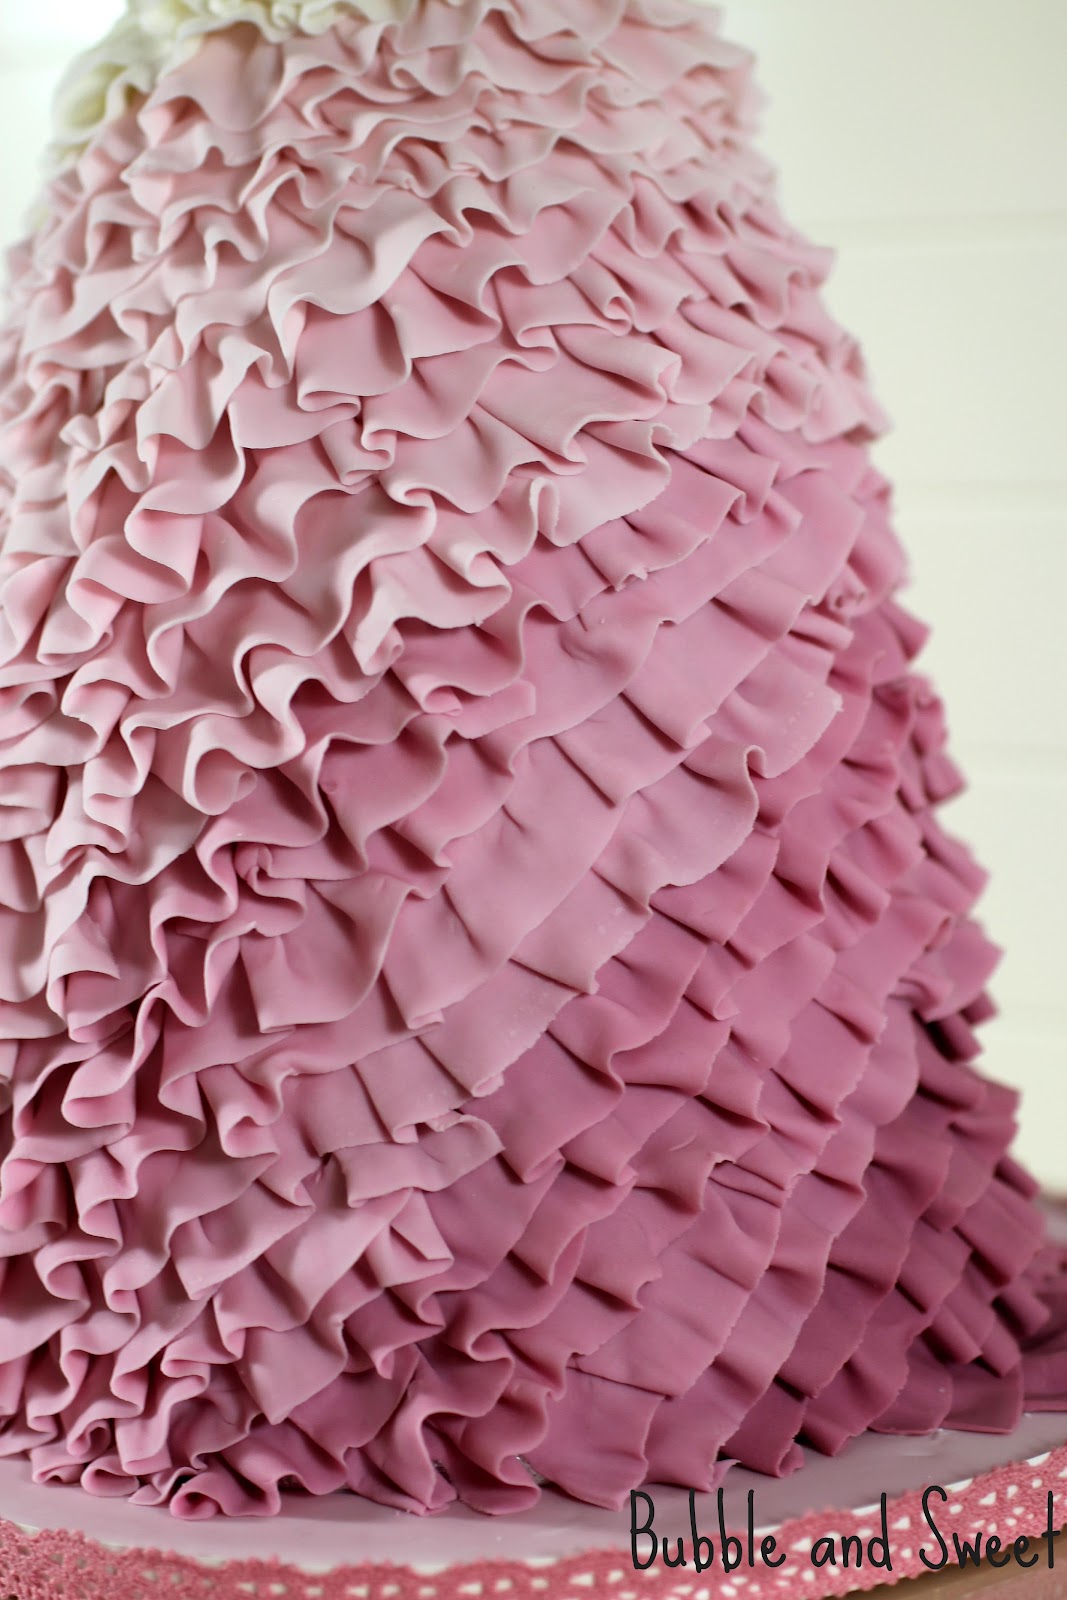
For this dress I made the first couple of dark dusty pink ruffles wider than normal to look like a bit of a swishy tail at the side.
Attach this strip of fondant to your cake cone starting at the bottom right corner. As the color is graduating diagonally you will need to start the first ruffle off just on one side with a short length approximately 8 to 10 cm (3 to 3.5 ") long. Brush on a very small amount of water to the cake cone and press the fondant strip onto the cake. I tried to gather the strip to make it appear more ruffly (see picture).
Continue making strips of fondant and attaching them to the dress cake working your way up diagonally until you reach the indicator you have marked in the dress, then switch over to the medium pink fondant.
Cover the skirt of the dress up to the waist in this way, switching to a lighter color at each of the indicators.If your length of fondant runs out don't worry just start off with a a new strip at the same spot you finish off the last strip.
To get a full looking skirt I have in some sections added extra short lengths of ruffles ie. the ruffles did not circle the whole cake around they were only about 8 to 15cm(3 to 5 ") long.
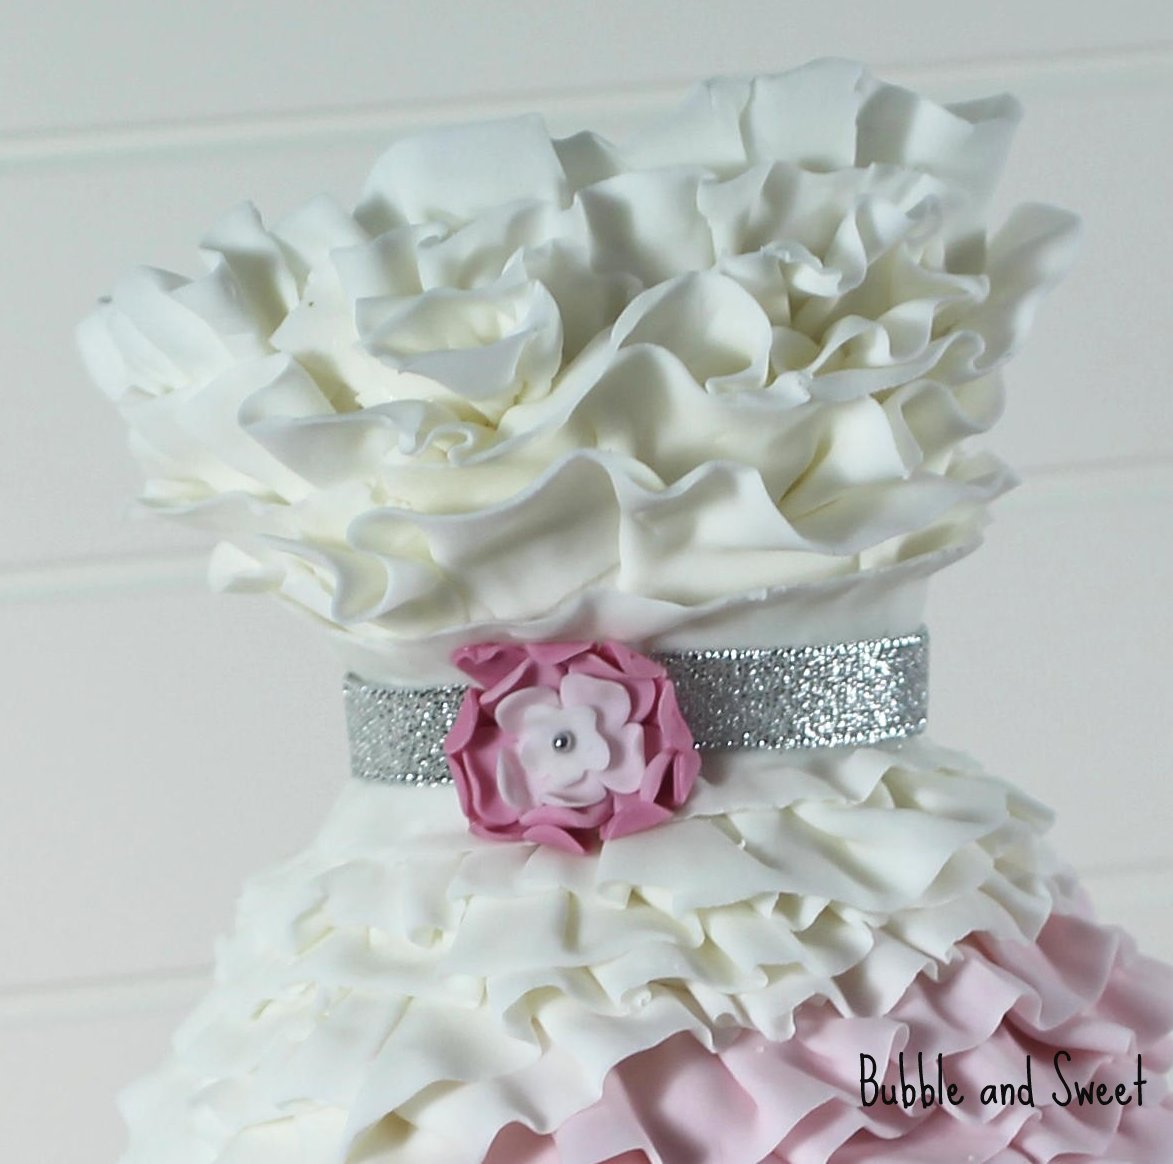
When you get to the waist, stop working from the bottom and start attaching the ruffles from the top, 'bustline' of the dress and work down the the waist. I added 3 or 4 extra short ruffles in the bust area to fill it out a bit.
Continue the ruffles attaching downwards until you reach the waist.
Make one final strip of fondant. With this strip use the ruffle tool on both sides and attach it to the waist along it's middle so that the edge ruffles lift up at the bottom and top. Making this finish as smooth as possible without adding extra gthering.
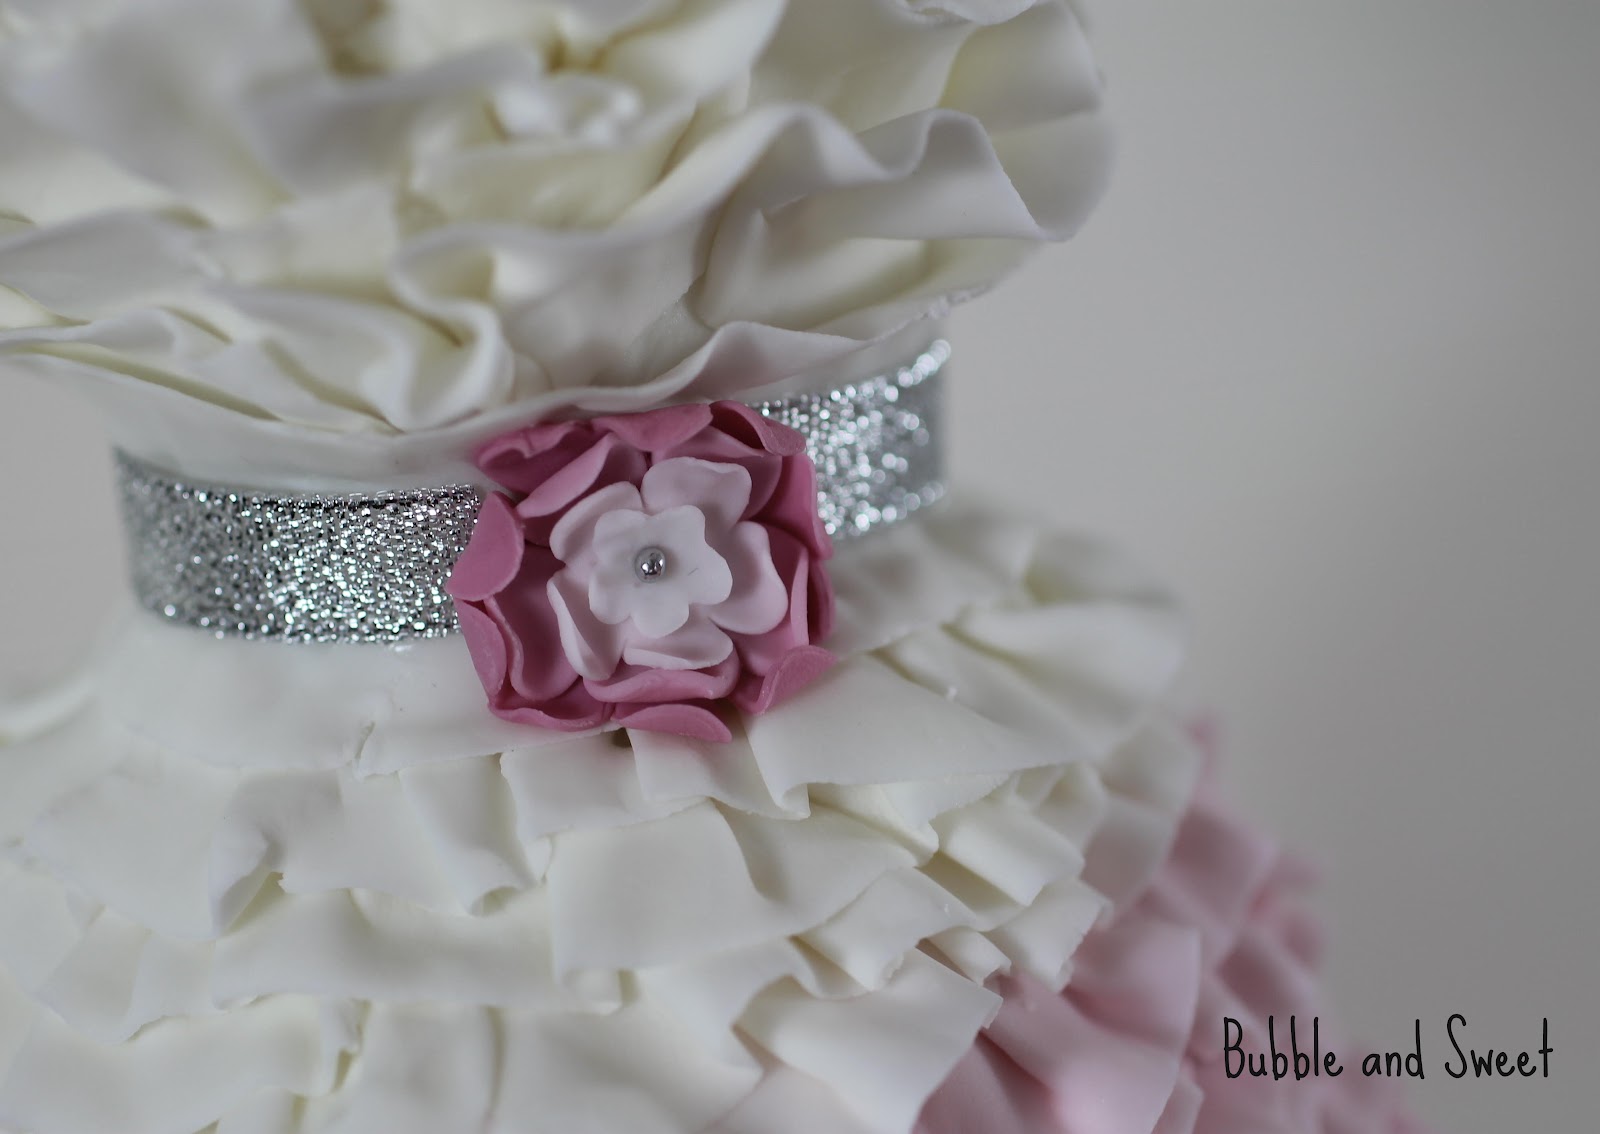
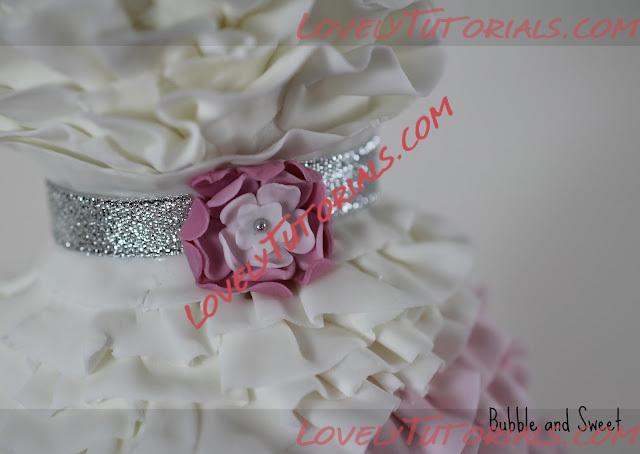
I attached a length of non edible material ribbon to the cake with edible glue and added a flower made from some of the leftover fondant.
To make the flower I cut out 4 different sized blossoms popped them on the non stick foam and using a boning tool thinned out the flowers. I attached then together using edible glue, added a silver sprinkle and then used a modeling tool to bend the petals in a little.
|