Огромная благодарность Автору Butterfly Cakes Bradford за Мастер-класс
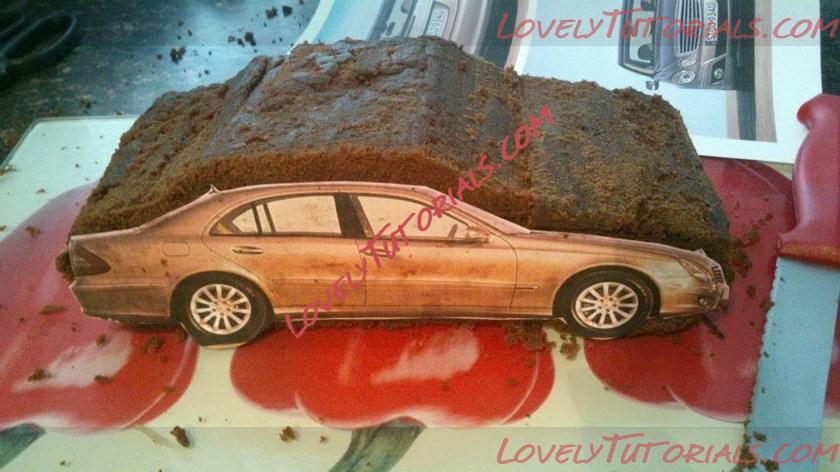
This Mercedes Benz E-Class Cake was made out of a 10 inch square mud cake which was cut into half and placed one piece on top of another.
I then carved the side profile of the cake (with a serrated knife) using a printed image of the car which was held up against the cake.
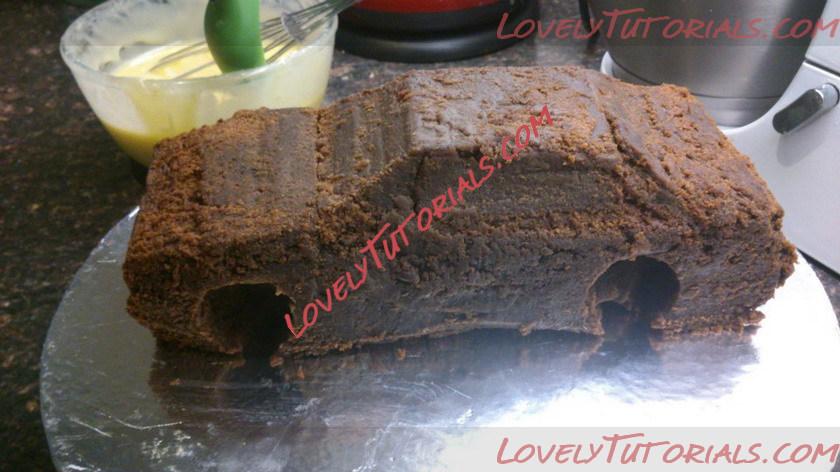
I then carved the roof of the car which was slightly narrower than the base of the car at a slight tilt until I reached the bottom of the window level. I also cut out the tires with a circle cutter.
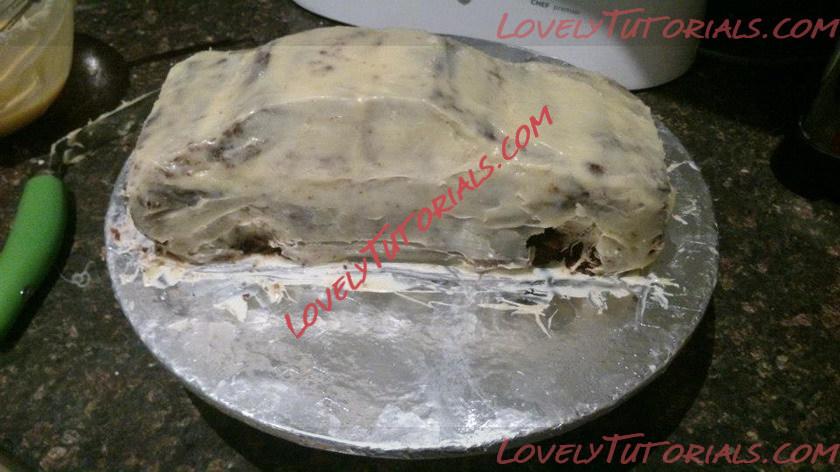
Next I cut the entire cake into three vertical sections (which I admit made me nervous) and filled with white chocolate ganache. I then covered the whole cake as neatly as possible with which chocolate ganache using a pallet knife.
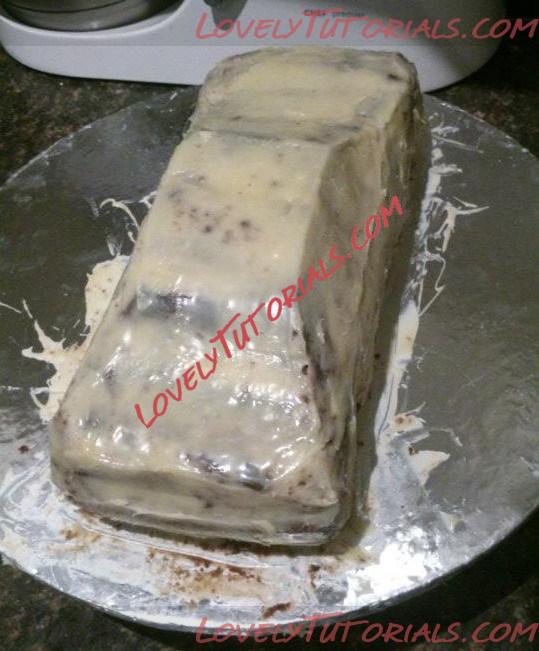
I then let the ganache set and smoothed again with a palet knife dampened with warm boiled water. This was so that the fondant had something to stick to.
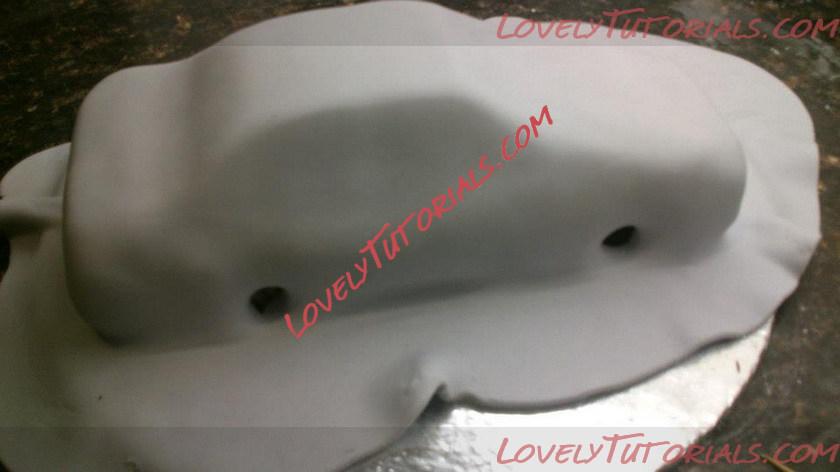
I then rolled out some light grey fondant (tinted using edible black gell colour) to about 1/4 inch thickness and covered the cake, smoothing the corners first (with the palm of my hands) before the rest of the car. I then slit into the tire areas and tucked excess fondant into cake.
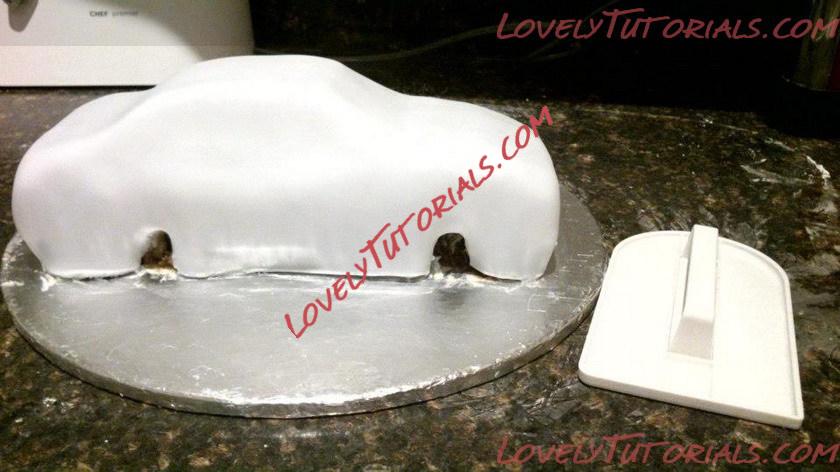
I then trimmed the excess fondant with a butter knife and smoothed over the surface of the cake with a cake smoother.
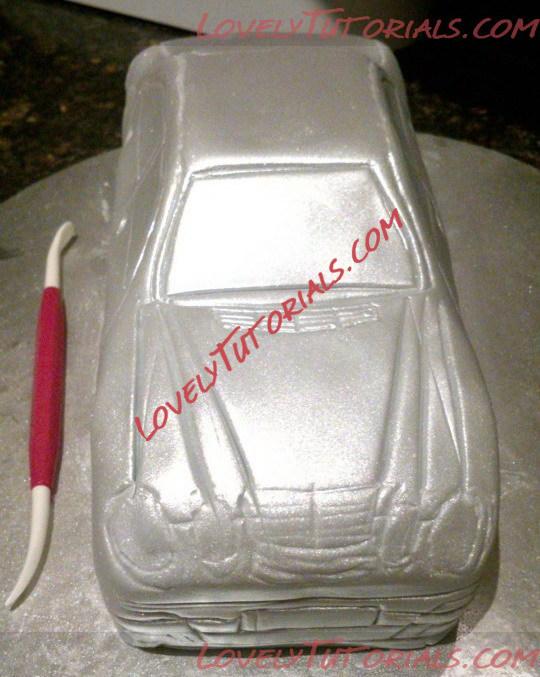
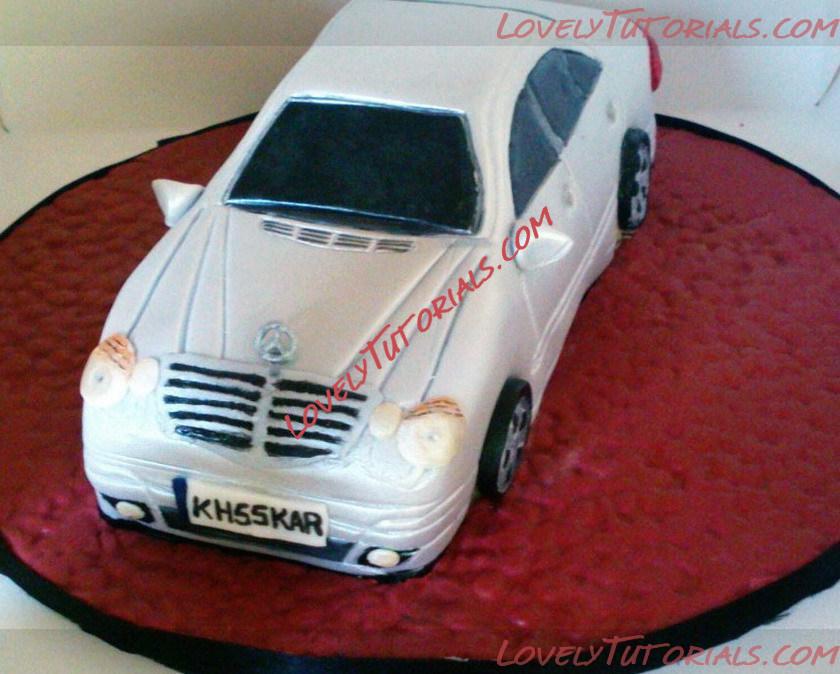
Then I spray painted the car with silver edible lustre spray and began to mark out the details of the car using a dresden tool.
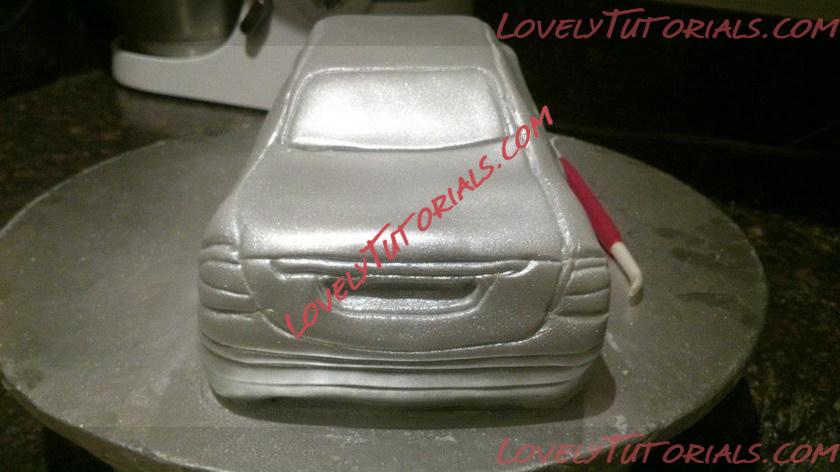
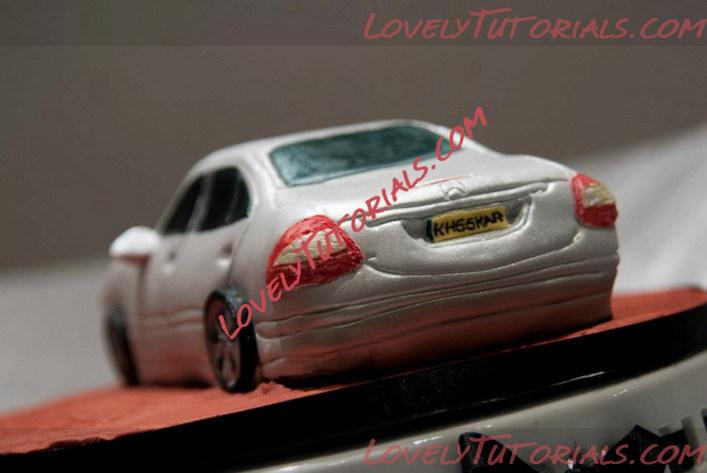
(Back details impressed using photo images of car...)
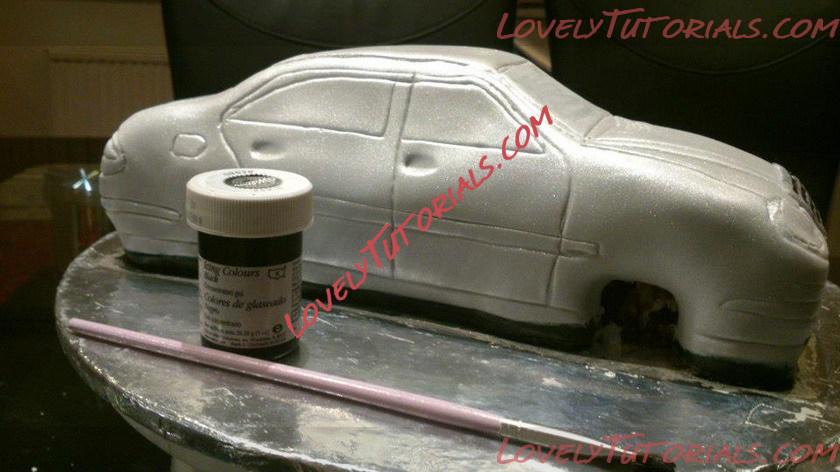
I then used edible black gell colour diluted with a little cool boiled water to paint around the bottom of the car cake to give it a 'raised' impression.
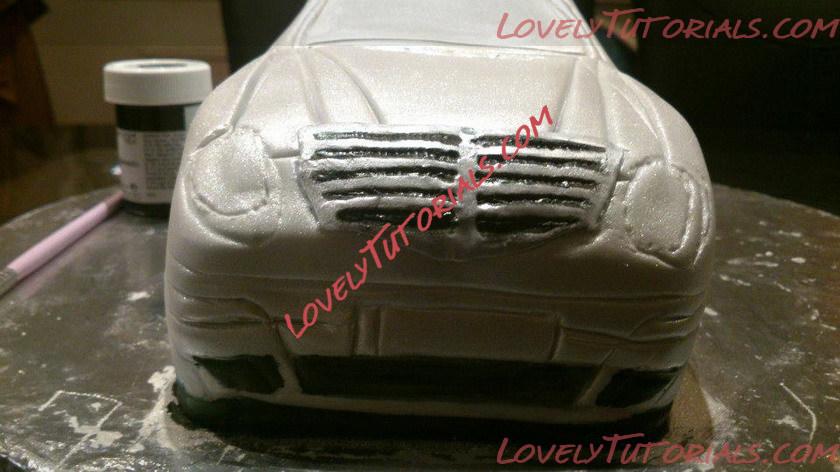
I then painted on details of the grill and the front bumper
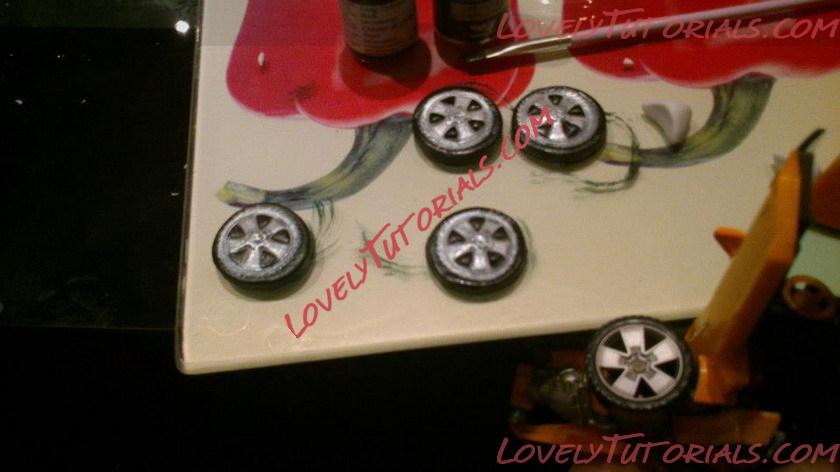
I made tires and side lights out of fondant mixed with a little Tylo powder. I used the tire of a toy car to make the impression (this was thoroughly cleaned beforehand with detergent and detol!) and then cut around these using a circle cutter. These were painted with the same black gell and liquid edible silver lustre for the rims. I allowed these to dry overnight so that they were firm. The side lights were shaped with my fingers into rounded triangular shapes.
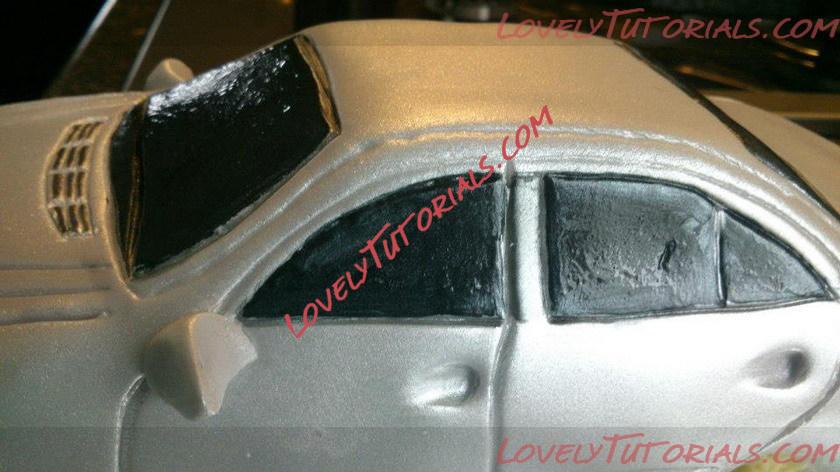
I then attached the side lights using a little piece of dry spaghetti strand inserted into each of them and inserted these into the car with some edible glue to help them stick. I also painted the windows with edible black gel mixed with a little cool boiled water and once this had dried went over them with confectioners glaze.
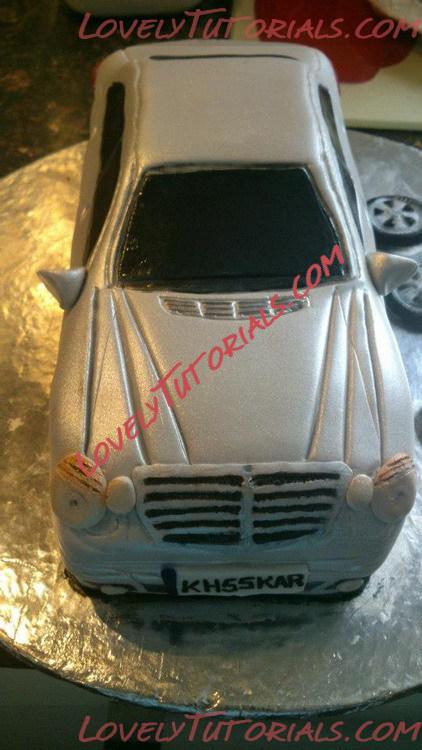
Finally I made front/back number plates and head/back lights using fondant rolled out and cut to shape with an craft knife and attached to cake using edible glue. The details were completed with various colour edible ink pens/gels. The ALMOST finished product......

Last but not least the all important Mercedes Benz logo! This was done by piping royal icing (mixed with a litlle black gell and silver edible lustre) free hand onto grease proof paper (allow to dry for a few hours at least) and slowly release and lift using thin palet knife and place onto front of car, attaching it with a little edible glue/royal icing.