Огромная благодарность Автору Linda за Мастер-класс
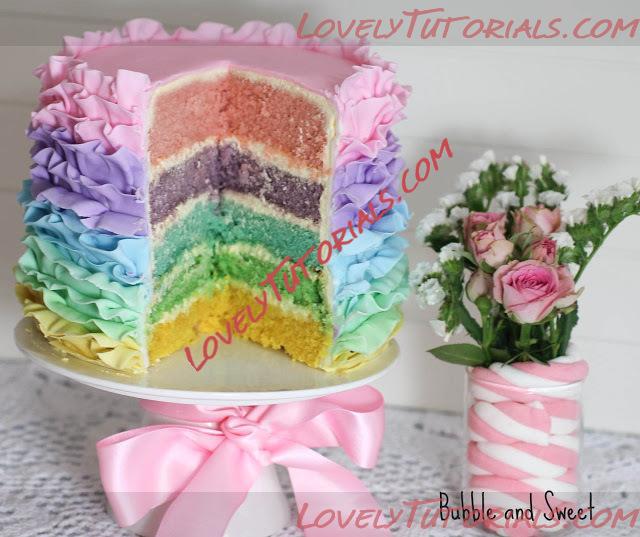
 Ruffled Butter Cream Rainbow Cake
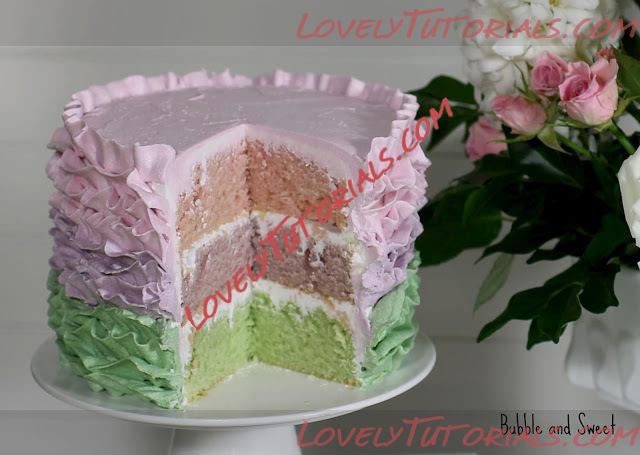
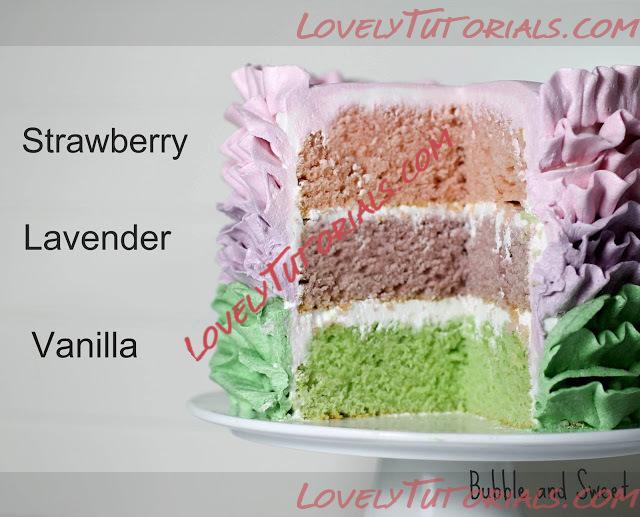
Baked cake layers in pink, lilac and green *
sturdy cake board in the size of your cakes
White Frosting (recipe below)
various gel food colors (I used dusty pink, vintage blue and moss green)
off set spatula
#406 Wilton tip
3 disposable piping bags
a cake turntable or a cake stand
# the #406 Wilton piping tip is one of the large sizes that do not fit into regular couplers. It looks like a 104 petal tip but is twice the size.
The night before you decorate the cake color color 1 cup each of the frosting pink, lilac and green, if you like you can add some flavor during this step. I made the pink strawberry and the lilac lavender flavor.
Cut the brown crusty edges off the cake layers.
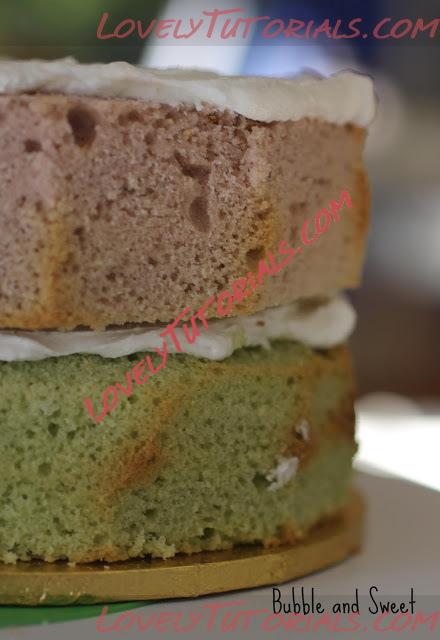
Place the green cake layer onto the cake board and place a good dollop of frosting on top. Use the offset spatula to spread evenly around the top of the cake and place the lilac layer of cake on top of the first green layer pressing down lightly.
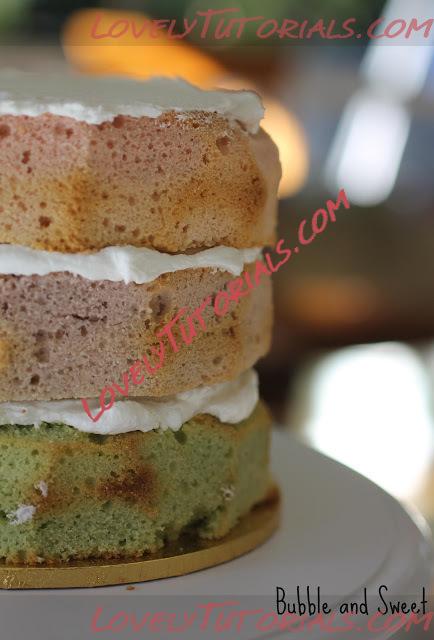
Repeat the process adding more frosting and then the final pink layer of cake.
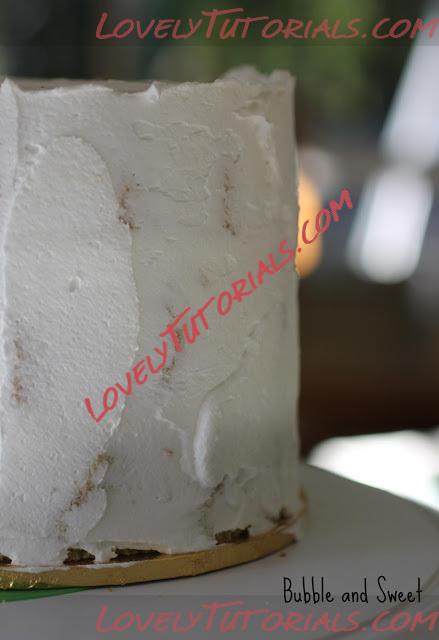
Using as little frosting as possible give the cake a coating of the white frosting using the offset spatula and smoothing the top as much as possible. Pop the frosted cake into the fridge until the frosting is firm to touch.
** I was working on a cake turntable up to this step. So that I did not have a cake board in the finished cake I used a large cake lifter, inserted it between the bottom cake layer and the cake board and lifted the cake onto my serving cake stand. You don't need to do this step I'm just explaining as some people think it's weird when I don't have a board in the instructions and then not in the pictures.**
One the frosting is firm to touch frost the top with a thin layer of pink frosting. Smooth as much as possible using the bottom of the offset spatula. If you have a special tool for smoothing you can use that instead.
Cut off the end of a disposable piping bag and place the tip in the end. Fill the bag with about 1 cup of the pink frosting.
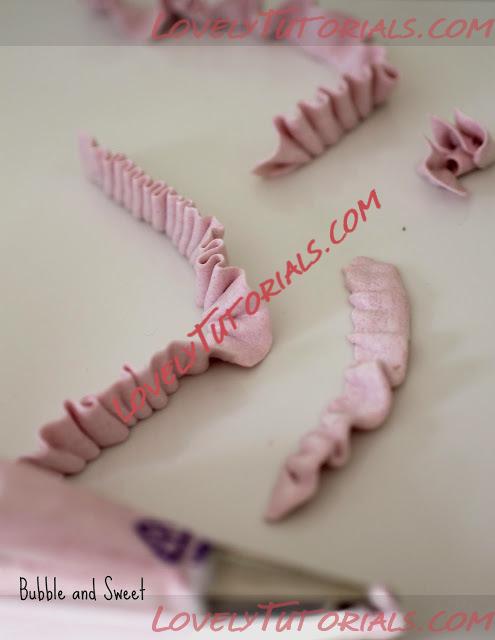
** You might like to get a feel for the bag and tip and do a few practice squeezes onto a clean plate or parchment paper to work out how you like the ruffles. I like to attach the bottom thicker edge of the tip to the surface and then pull sideways slowly moving my hand back and forth, parallel to the surface being frosted.**
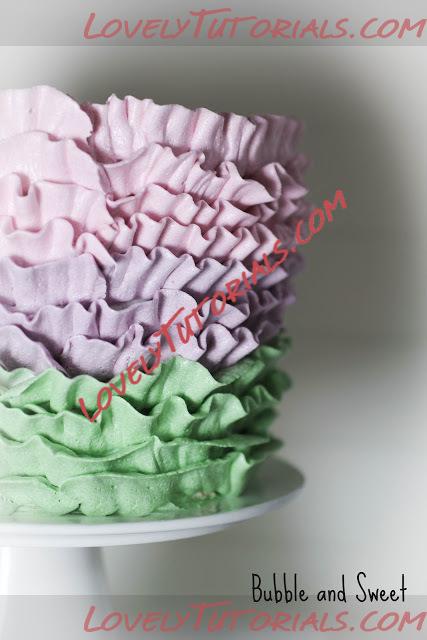
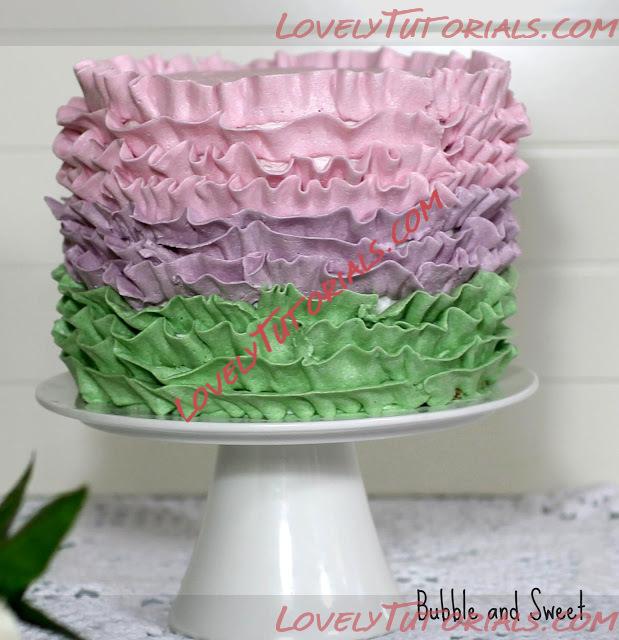
Starting at the top of the cake frost a layer of pink ruffles. Hold the larger/bottom opening of the tip to the top edge of the cake and move around the cake slowly with small up and down movements.If you are right handed it will be easier to move around the cake anti-clockwise (reverse for left handed).
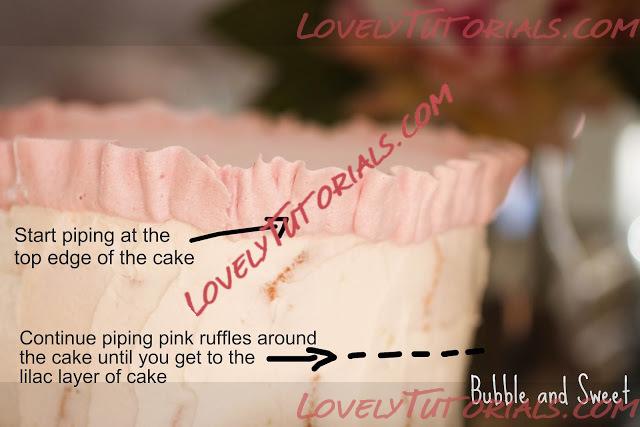
I held the piping bag with my right hand and the cake stand with my left hand spinning the cake and keeping the piping bag in the same general spot just moving up and down slightly. Doing it this way a row of piping took about 15 seconds. However if you do not have a stand or turntable you can do the ruffle in sections lifting and restarting as you turn your plate around.
Pipe another 2 or 3 ruffle layers around the whole cake trying to keep the ruffles as close to the one above as possible until you can see that you have covered the top cake layer. If you have only used a thin layer of white frosting to cover the cake layers you should be able to see when you reach the end of the pink cake.
I only had one tip so I had to remove it and wash in warm soapy water with a tip cleaner.
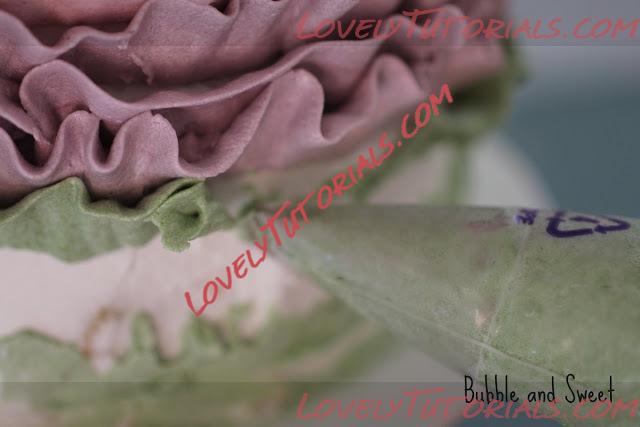
This here is where I was fixing up the mistake, but it kinda shows how to hold the piping tip to the cake. It's really hard to take a photo of yourself piping 
Cut the end of another disposable piping bag, place the tip in the end and fill the bag with the lilac frosting and pipe 3 or 4 layers of ruffles around the cake until you reach the end of the lilac cake layer.
Repeat the process with the green frosting around the bottom green cake layer.
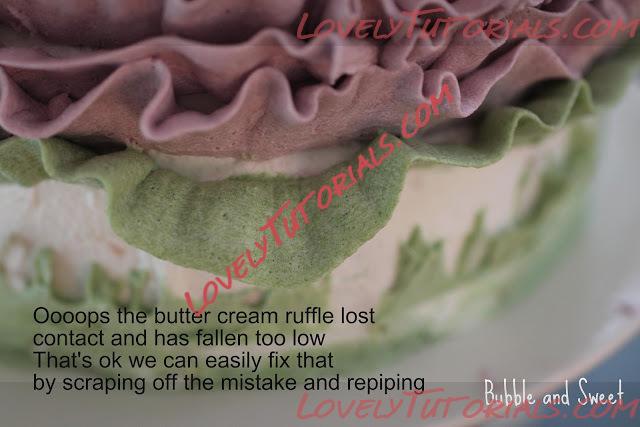
If during the piping process you make a mistake, you can simply remove the messy section with a clean small offset spatula or knife and recipe just the removed section, but this should be done before the next layer is piped underneath.
The cake is best served within a day. It can be stored in the fridge, just remove an hour or so before serving to allow to come to room temperature.
White Frosting
500g icing sugar sifted (1 lb and 1 5/8oz powdered sugar)
350g white vegetable shortening * or crisco (around 2 cups) (12 3/8 oz)
1/4 cup warm water
1 tsp vanilla extract (I normally use real vanilla extract but I used clear vanilla flavor in this recipe)
In the bowl of a large stand mixer using the whisk attachment, mix the icing sugar and warm water until combined.
Add the vegetable shortening and whisk at high for around 10 to 15 minutes or until the mixture is very light and fluffy.
Add the vanilla extract and mix until combined.
You may add any color or flavor at this stage to achieve your desired frosting.