Method
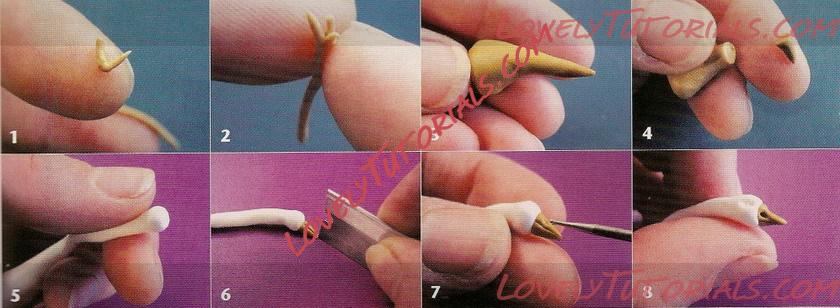
1 and 2 Make up the legs
and feel by forming a V shape from a little roll of ochre and pale cream mix. Add a 5traight roll of the same mix and stick it together by gently rolling the join between your fingers. Make two of these (for each goose) and put them to one side on a ceramic tile or an ovenproof plate.
3 For the heak, form a little
more of the same mix into a cone .shape.
4 Cut off the end of the cone shape to a triangular
length no longer than about 5mm long.
5 For the long neck of the bird, take some white clay and make up a gently graduating tube with a ball-shaped end (for the head). Stick the beak onto the end of it.
6 With a blade, score through the beak so that it has the appearance of being able to open and close.
7 and 8 I'ress the ball-ended tool into the beak to form the nostrils and into the upper hall of the head on both sides to form the eye sockets. These may look a little macabre, so pinch them a bit to close them up.
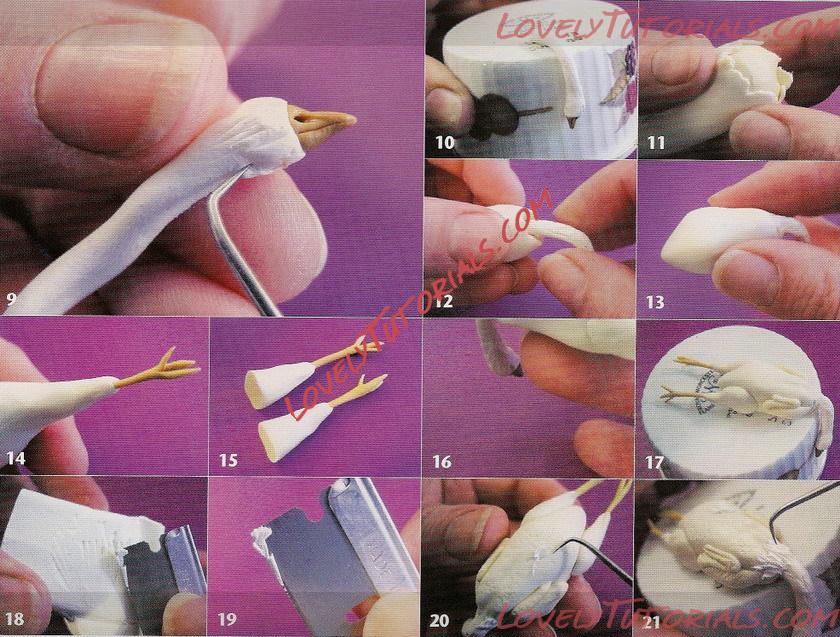
9 With a dental tool, scribe short, irregular lines to give the impression of the bird's neck feathers.
10 Cut the head and neck off the bulk of the clay at approximately 3cm along. Lay the head over an upturned ramekin dish (or similar), or put straight onto a plate if you want to make a hanging goose. Set these in your oven along with the feet.
11 The plucked goose has a more yellowish character than chickens and turkeys, so make up a cane of cream mix wrapped with foundation colour mix 2 by the same method as the chicken.
12 Make a body, around the
same size or a little larger than the chicken, but not as large as the turkey. Add the now hardened goose head into the neck end and firm up the material around the join.
13 The goose's body is weighted more to the lower end so try to reflect this in your modelling,
14 and 15 Make the legs
from the same cane, but fairly small as goose legs are not at all meaty.
16 Attach the legs to the body of your goose.
17 Attach the wings by the same technique as for the chickens - with one slight difference - the wings of a goose are somewhat longer than the chicken or turkey.
18 and 19 This next step may take a little practice, and do exercise some care with the blade. Using the single-sided blade at 90' to a block of white clay, gently scrape tiny bits of clay from the block with a sort of picking motion. These white scrapings form the bird's feathers.
20 With your dental tool,
carefully transfer the feathers onto the body of the goose.
21 Add more feathers where the body meets the neck and the thin legs join the drumstick. Set the whole goose to harden in the oven.