Огромная благодарность
Angie Scarr за Мастер-класс
Method
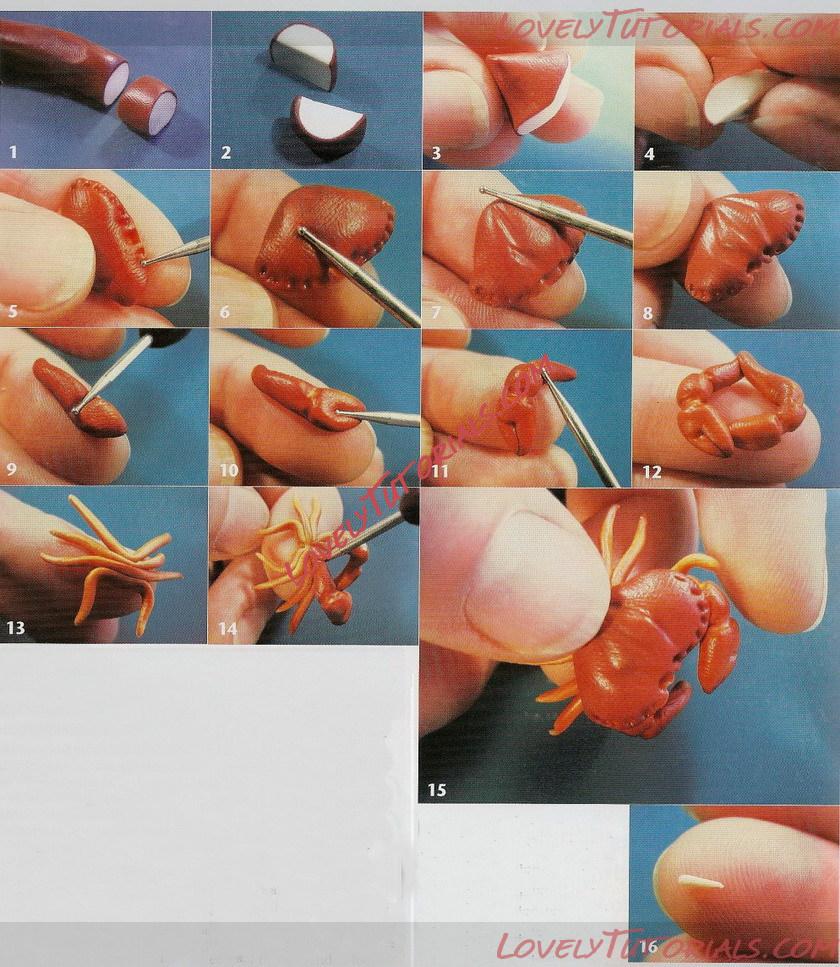
1 Form a 1.25 cm diameter combination cane with a middle section of cream-coloured clay and a skin of red/brown. Cut a 1.25cm section from this cane.
2 Cut this piece of cane in half lengthways.
3 Take one half and enclose the skin over one end.
4 Gently bring the skin over the other end to form the front of the carapace, the crab's outer shell.
5 Using a ball-ended tool first make two eyeholes, then indent all the way round the leading edge of the carapace.
6 and 7 Using the edge of the same tool, press gently onto the top of the carapace to form an open-ended diamond shape.
8 Mark a central indentation to this shape.
9 Make two long teardrop
shapes from the original clay cane by narrowing it and pinching the ends to enclose the centre, very much like the lemons (see page 61). Roll the edge of the ball-ended tool around this shape and flatten the end to form a claw shape.
10 and 11 Press the tool light through the claw part to divide it into two clasping claws, and gently press a line at an angle to simulate the hinge. Score, too, another line above to simulate the next section of claw. Repeat this process for the crab's other daw, but forming the hinge on the other side.
12 Now join the two claws securely together.
13 Roll the cane even thinner (thereby making the skin narrower and lighter in colour), then make four little crab leg rolls and attach them side by side.
14 Join the claws to the
legs, pressing them veiy firmly together.
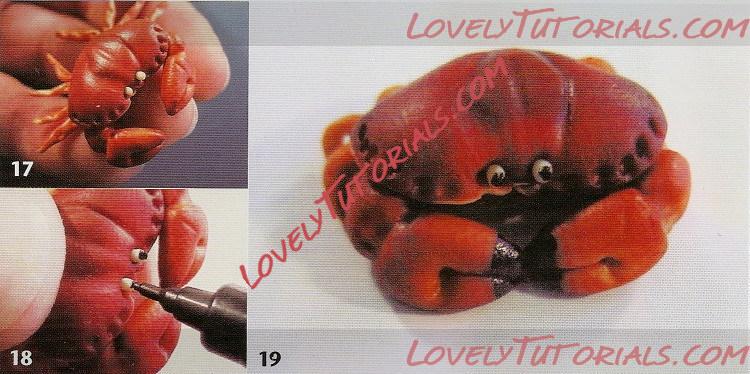
15 Attach this set of legs to
the underside of the carapace.
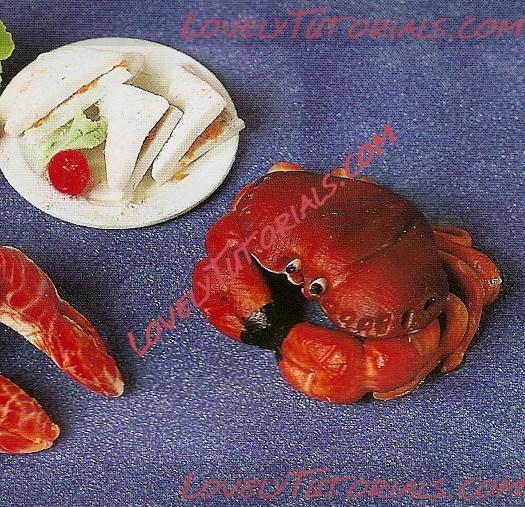
16 Make several tiny elongated teardrop shapes from cream-coloured clay and pre-harden.
17 Press these into the eye sockets. Press, too, the ball-ended tool gently onto the legs at three points each. Tuck the legs under the carapace and harden the crab in the oven.
18 Once hardened, use a permanent black pen to mark the ends of the eyes and the very ends of each claw.
19 Your cute little crab is now complete!