Огромная благодарность
Angie Scarr за Мастер-класс
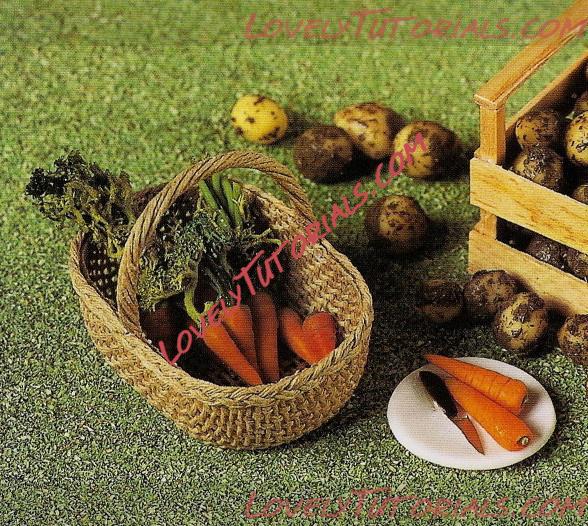
These projects are perfect for starting off your fruit and vegetable stall. The key technique is to show how to develop the surface qualities of the models. To make the potatoes and carrots look more realistic, I have created a 'mud' effect by combining scenic scatter and brown acrylic paint. And for the carrot tops, I return to the world of the model shop for scenic lichen.
Method
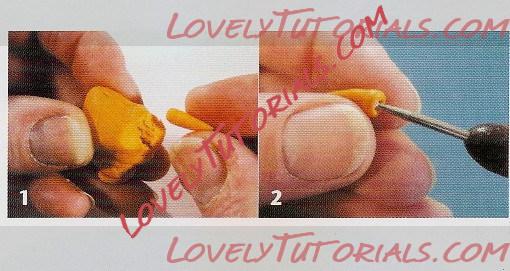
1 Make several small cone shapes bom the orange clay.
2 Using a ball-ended tool, make a hole in the top of each cone shape. Roll the ball around at an angle to undercut the edge all the way round; this enables you to have a firmer hold to add the stalk.
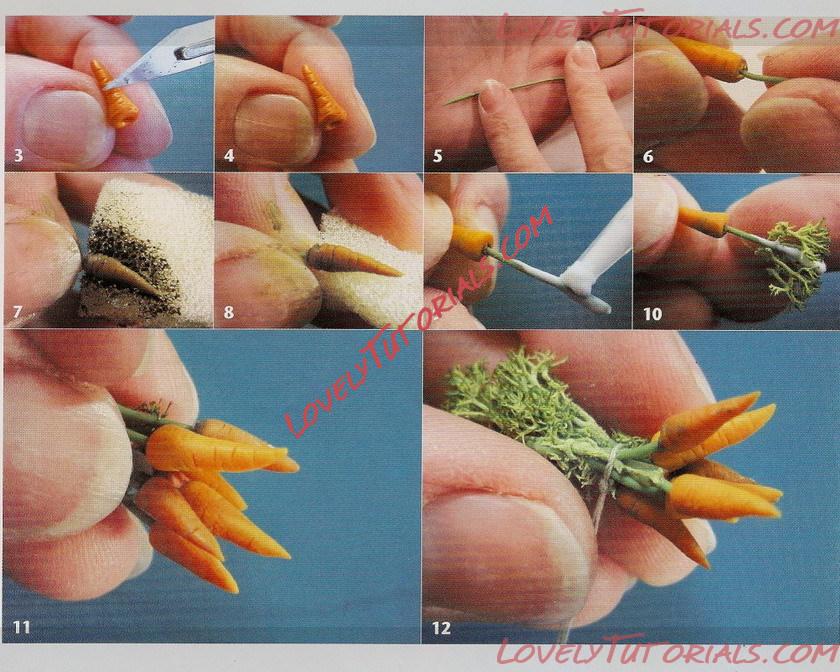
3 and 4 Mark little lines across the carrot using the back of a scalpel blade. Just to be safe, if you suffer from poor eyesight or arthritis, or have shaky hands, please use a dental tool to score these lines instead. Set these in the oven before the next stage.
5 Roll several very narrow stalks of green clay mixed with Mix Quick, translucent clay, or Sculpey Superflex, depending on what you have to hand.
Alternatively, you can extrude strips using a clay gun. Again, set to harden in the oven.
6 When bolh the carrots and the green strips are set, glue them together, using either PVA glue or by inserting a little soft clay into the hole, and then push the stalk in firmly. Pop them back into the oven to harden again.
7 and o When the carrots have cooled, hold them by the stalks and apply brown acrylic
paint with a sponge to simulate earth. Quickly rub fhe paint off again with a clean part of the sponge so only a little is left behind, mostly in the grooves you have made.
9 Cut the stalks 1.5-2cm
in length. Run a little PVA glue along the end of the green stalk.
10 Stick a tiny piece of green scenic lichen to the end of each stalk.
11and 12 Leave the scenic lichen carrot tops to dry.
Gather the carrots up in bunches of between five and seven and tie them securely together with sewing thread.