Огромная благодарность
Angie Scarr за Мастер-класс
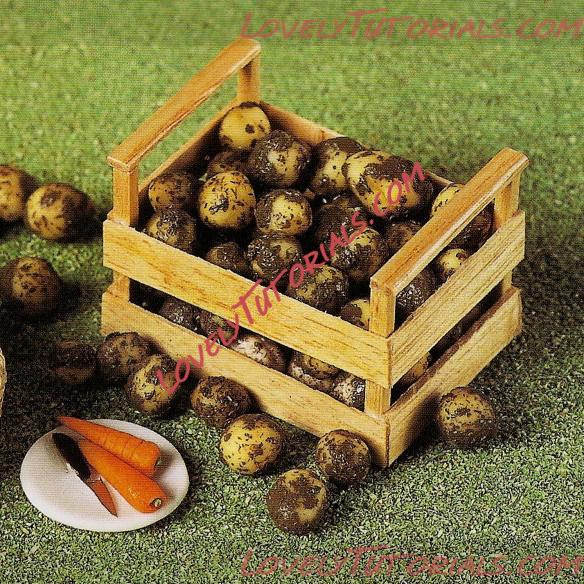
These projects are perfect for starting off your fruit and vegetable stall. The key technique is to show how to develop the surface qualities of the models. To make the potatoes and carrots look more realistic, I have created a 'mud' effect by combining scenic scatter and brown acrylic paint. And for the carrot tops, I return to the world of the model shop for scenic lichen.
Method
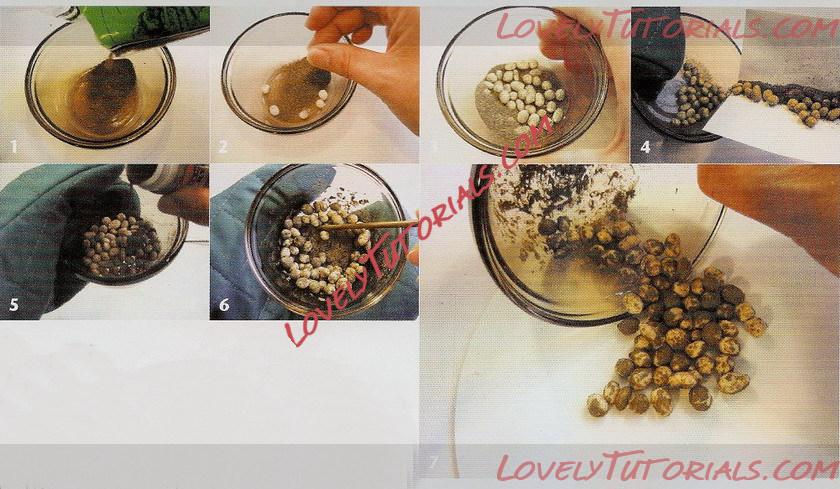
1 Pour a little scenic scatter into a small ovenproof dish.
2 Roll several tiny potato shapes in varying sizes (just like real potatoes). If you wish, use a cocktail stick to prick eyes in them and simply drop them into the scenic scatter.
3 Shake the potatoes into the scenic scatter, ensuring they are evenly covered with the surface material. Leave the potatoes and the scenic scatter in the bowl and then bake in the oven at the normal recommended temperature.
4 While the potatoes are still hot, and working quickly, tip the potatoes onto a piece of folded paper and then lightly roll the potatoes back into the bowl leaving most of the scenic scatter on the paper which you can reuse at another time.
5 and 6 Drizzle a little brown water-based acrylic paint into the bowl. Stir quickly around using some kind of stirrer - a cocktail stick or kebab skewer will do - so that the paint partly picks up some scenic scatter and partly coats the potatoes, just enough that you still have the creamy potato colour showing through. The heat of the potatoes will help the paint to dry quickly and achieve the patchy effect.
7 Leave the potatoes to dry. Later on you can glue them together with PVA glue into a fruit and vegetable box or crate, a basket or sack, or your own alternative display.
Once you have finished this last part, wash your bowl straightaway so that it is easier to remove the paint. If you leave it until later, you will have move trouble - believe me, I have lots of experience!