Огромная благодарность Angie Scarr за Мастер-класс

This project features another effective outing for the clay gun. It is a great piece of equipment for miniature food-making, opening up many possibilities for trying out different textures. In addition to food items, the clay gun can be used to make the interior bases for other objects, like the vegetable crates and boxes.


Method
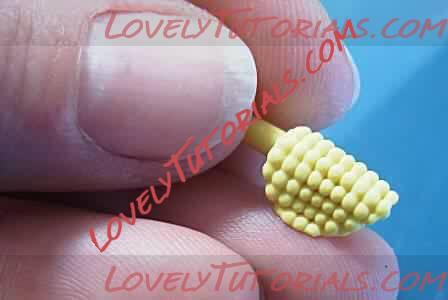
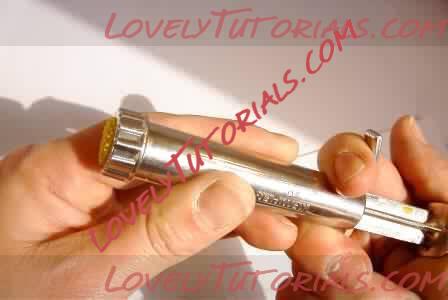
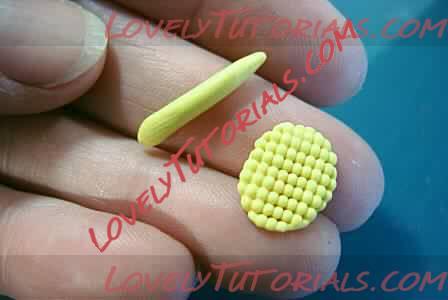
1 Soften and warm your clay and, if necessary, add a little Mix Quick until it is almost sticky. This helps it to extrude and to stick together. Put a little in your clay gun and extrude 2 or 3mm . Press the top of this with your thumb until it sticks together and forms a skin across the top of the clay gun.
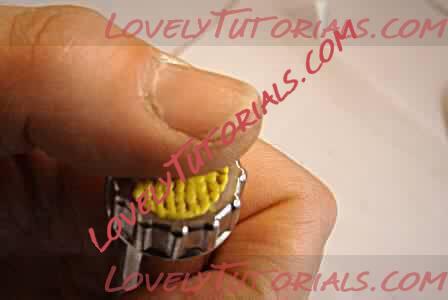
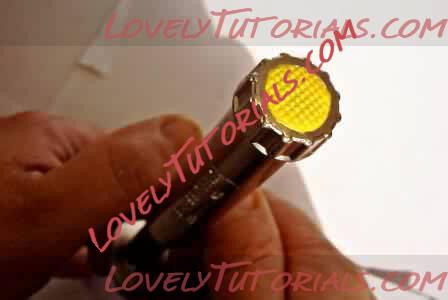
2 Very gently extrude a little more of the material so that little bulges form on the surface. With practice you will get used to looking for the moment just before the skin gives out. This is when you should stop.
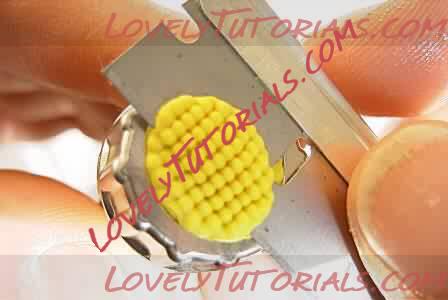
3 Using a single-sided blade, carefully run the blade over the surface of the clay gun so that you take off the whole circular skin and leave the metal almost clean.
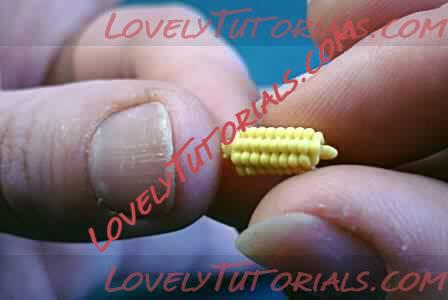
4 and 5 Make a tiny clay cone for the centre and wrap the circle of imprinted clay around it. This forms the unsheathed corncob.
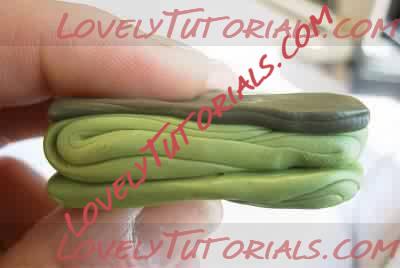
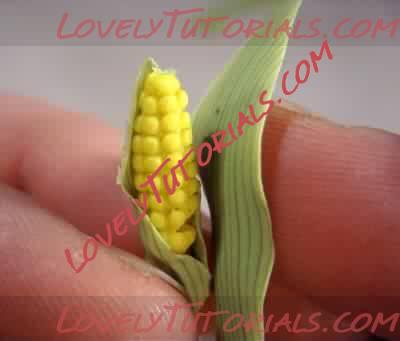
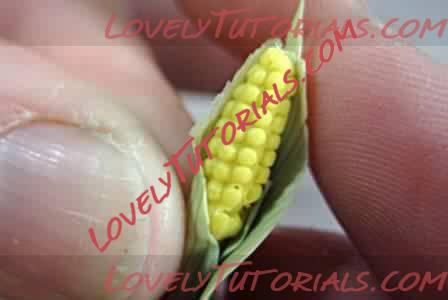
6 To make the skin, form a stack of green and a thinner layer of olive.
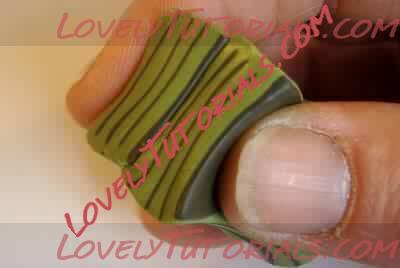
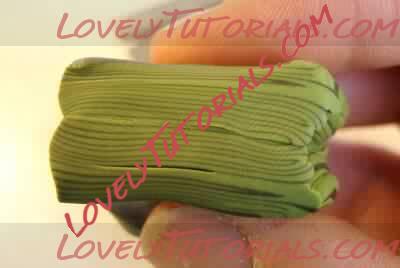
7 Cut and stack the clay many times to get fine lines.
8 Carefully cut wafer thin strips of the stack. This takes rather a lot of practice and you must follow the instructions for using the blades safely.
9 Wrap the skin around the corncob, ensuring the thinnest bits are at the top. You now have one completed corn on the cob.