
25.07.2011, 19:33
|
|
Администратор
|
|
Регистрация: 07.09.2010
Сообщений: 7,669
|
|
 Рубашка торт-How to make a shirt cake
спасибо огромное Abeer за МК
слова и фото автора
Have any of you seen cakes that look like a shirt? They are quite popular for Father’s day celebrations and Dad’s birthdays, retirements e.t.c.
I thought the idea of a shirt cake was brilliant! But, most shirt cakes I have seen are rectangular in shape and let me tell you one thing: I don’t think there is anything I hate more than working with rectangular cakes…lol. They are a pain, especially when you are trying to cover them in fondant. *sighs*
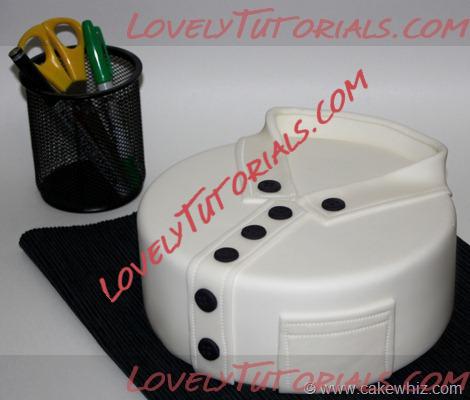 I wanted to replicate the same idea but on a circle cake. Surprisingly enough, it wasn’t as much work as my flower cakes and I think it turned out pretty decent. So, if you want a manly cake, make this!
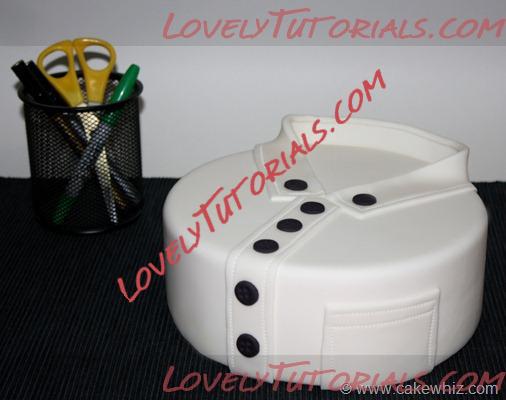 I think I will make this for my dad next time he visits and this time, I might add a tie instead of the buttons. Won’t that be cool?
  Here are the steps:
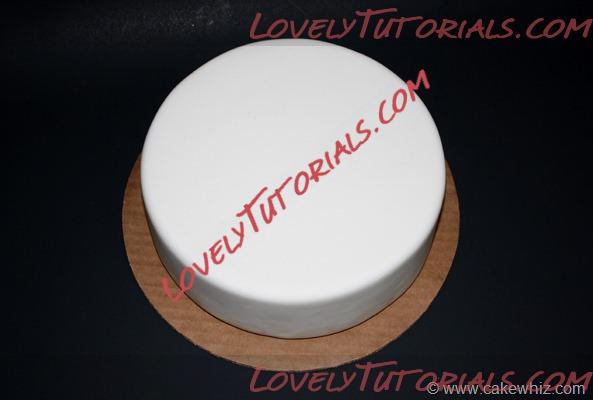
Step 1:
Here are the steps:
Step 1:
Bake your cake (dimensions: 8 by 3) and let it cool. Then, cover it in fondant. You can pick any color you want. I wanted a classic white shirt so I stuck to white fondant.
 Step 2:
Cut a white strip which is 2 inches wide and about 20 inches long.
 Step 3:
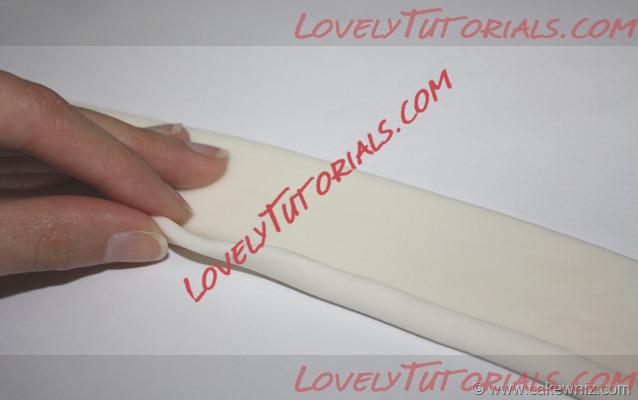
Fold one side of the strip inward …about half an inch. This will be the shirt’s collar.
 Step 4:
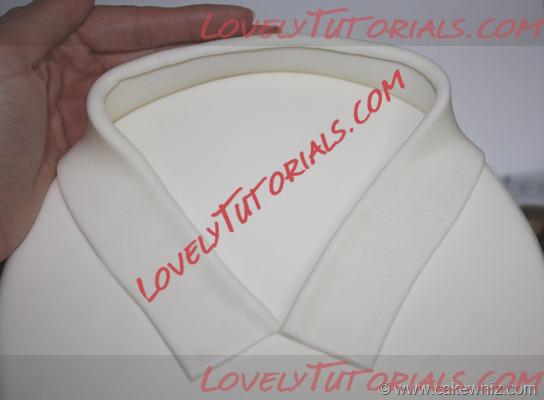
Using some water, stick the center of this strip around the top edge of your cake and stick the sides of the strip on top of the cake. It’s hard to explain  . Hopefully, this picture helps. . Hopefully, this picture helps.
 Step 5:
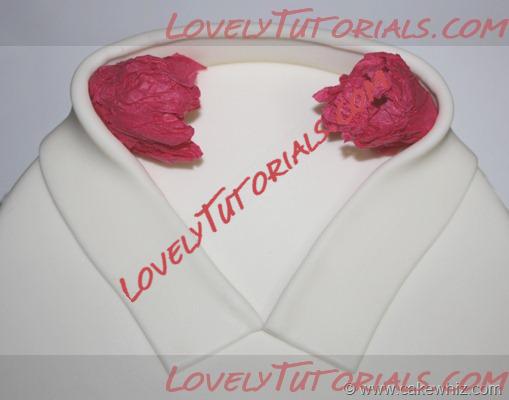
Get some gift wrapping tissue paper and crumple it up. Place these on the sides of your collar so that it doesn’t lose its shape.
 Step 6:
Cut another white strip which is also 2 inches wide and about inches long.
 Step 7:
Using some water, place this below your collar. Make sure it’s in the center. This will be your button line. 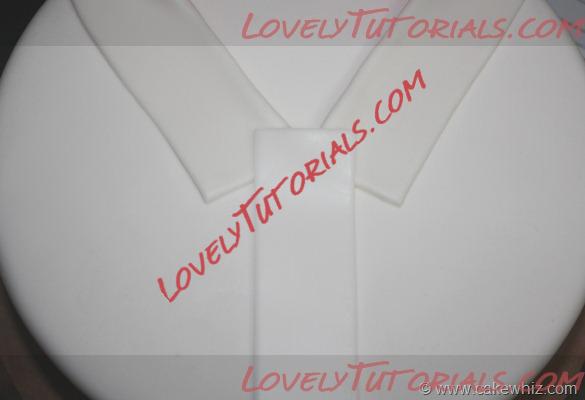 Step 8:
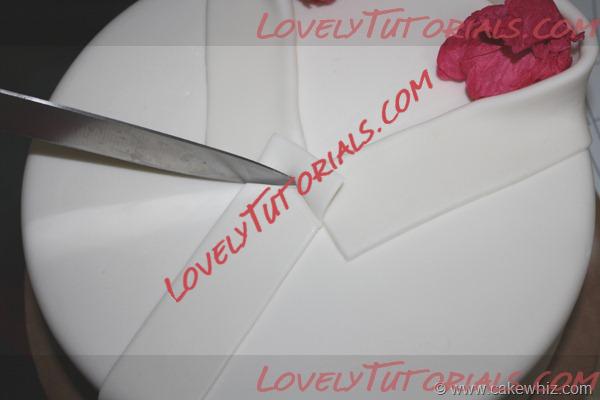
Cut off excess fondant on top of this strip with a knife….
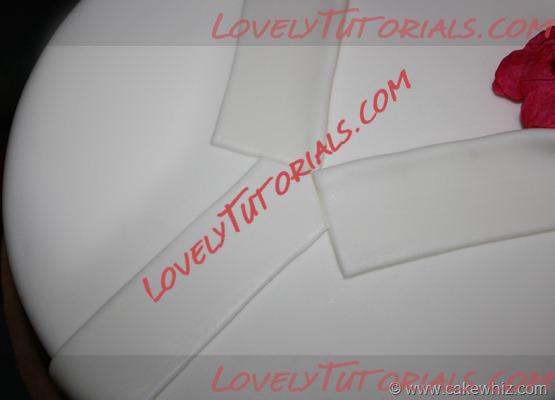
 … until it looks like this.
 Step 9:
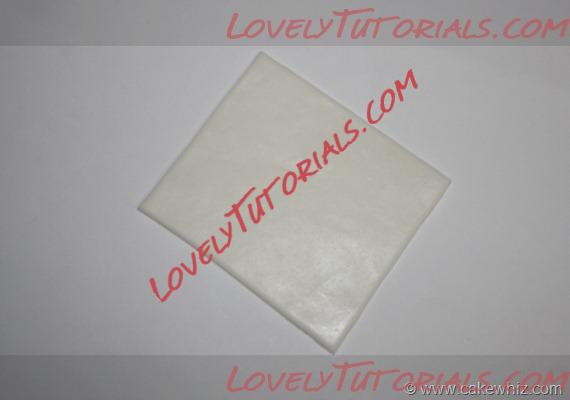
Cut a rectangular piece of white fondant (mine was roughly 3 by 2 inches). This will be the shirt’s pocket.
 Step 10:
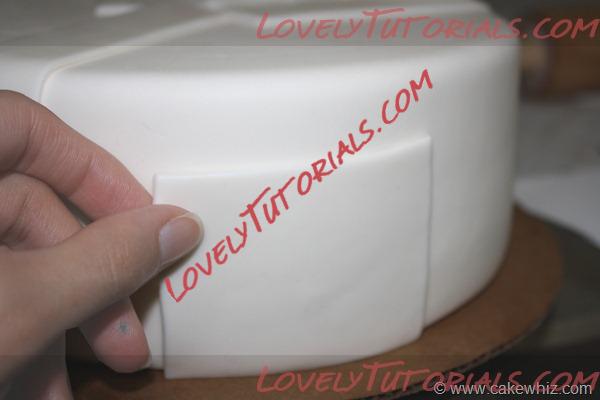
Using water, stick this piece on the side of your cake or wherever you want this pocket to be.
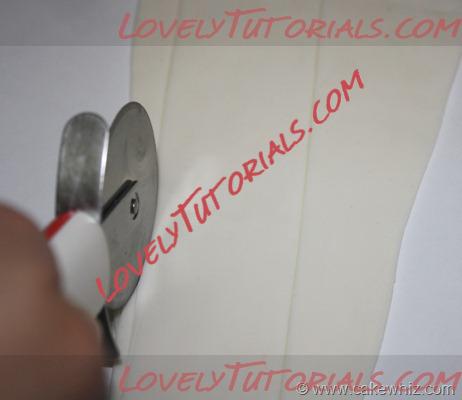
 Step 11:
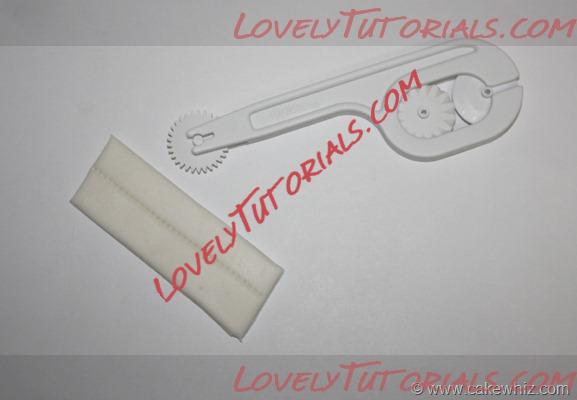
This is not exactly a step but I have to share an awesome product with all of you. I recently bought Wilton’s cutter/embosser and I love it! You can use it to make stitch marks on your shirt cake ….
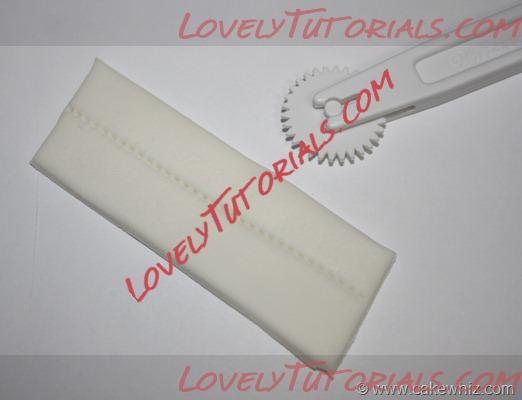
 …Here is a close-up of a random strip on which I used this cutter. Isn’t it fantastic?!
 Step 12:
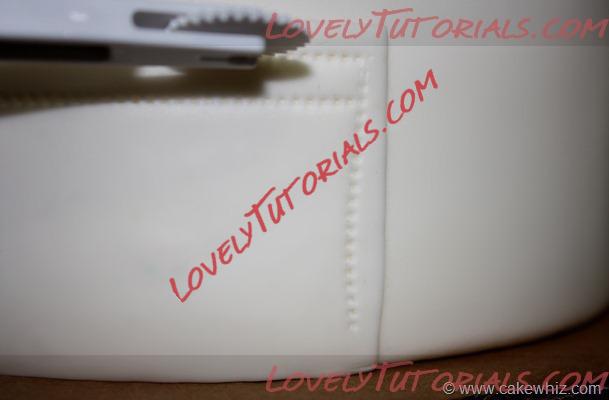
Use this cutter to make stitch marks around the collar, the button line and….
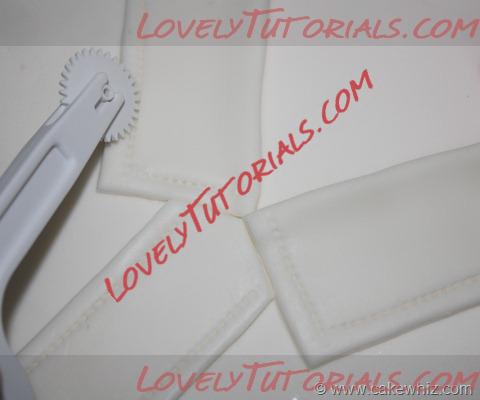 …. even the pocket. I think this cutter/embosser really gives a “shirty” feel to this cake!
 Step 13:
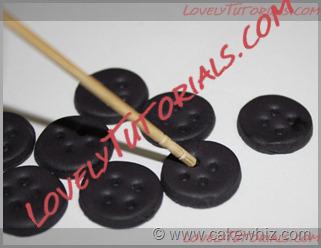
For the buttons, cut out a few circles using the smallest cutter from Wilton’s circle cutter set.
 Step 14:
Use the back of your toothpick to make 4 tiny holes in these buttons.
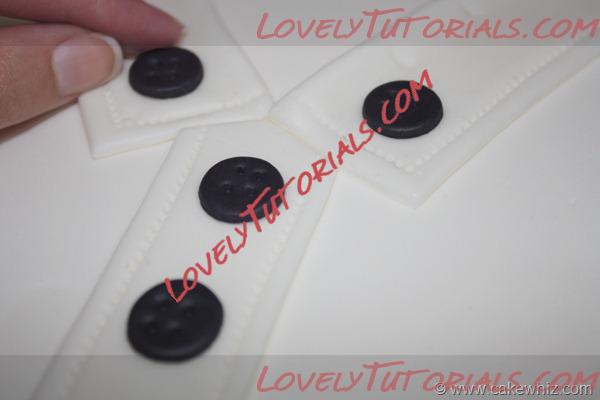
 Step 15:
Using some water, stick these along the button line and collar.
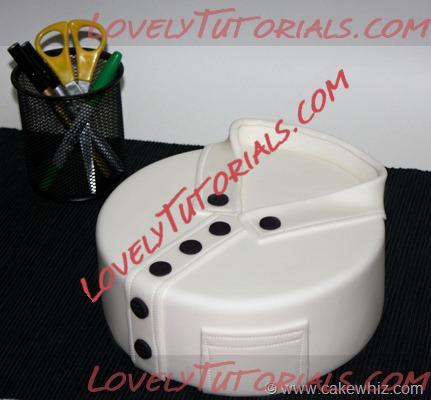
 Let it all dry and this is what you will end up with…
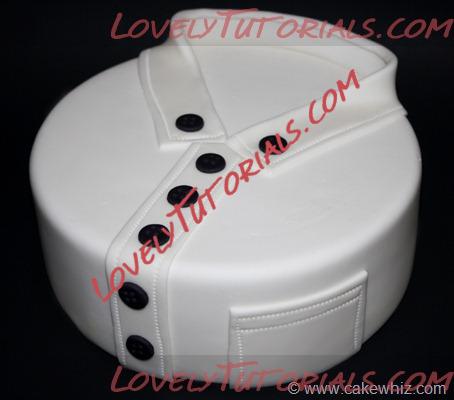 That’s about it for my shirt cake. Hope you enjoyed this tutorial.

|