Огромная благодарность cutesweetthings за Мастер-класс
What fun I had making this little beauty! He is only 10″ long but ever inch is packed with dynamite!
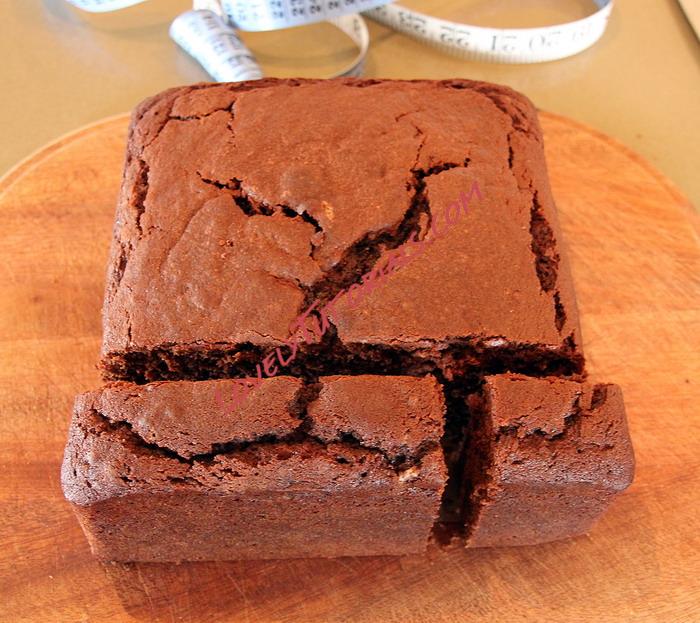
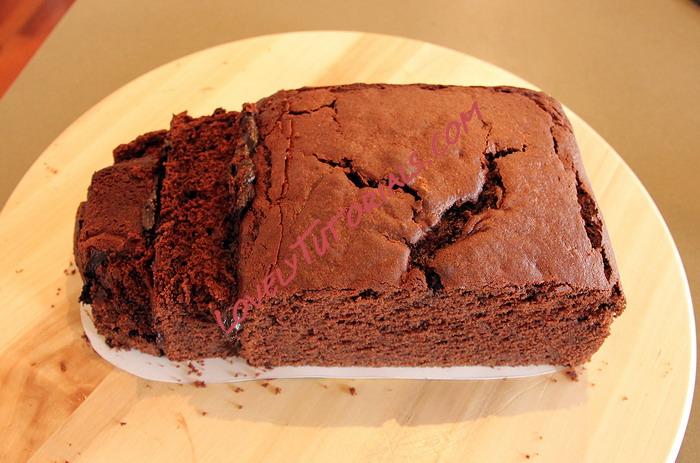
The cake inside is based on a 7″ square Chocolate cake (not a mud cake) with dark chocolate ganache covered in sugar paste.
MATERIALS
A sheet of card with a shiny or wax side for the set up board
A 12″ square cake board
950g red sugar paste
400g black sugar paste
300g yellow sugar paste
a small amount of white sugar paste
a tiny amount of blue sugar paste
Tylose powder
TO MAKE THE 7″ SQUARE CHOCOLATE CAKE
165g soft butter
300g caster sugar
2 tsp vanilla essence
3 eggs
65g SR flour
200g plain flour
1 tsp bicarbonate of soda
70g cocoa powder
250ml buttermilk
For the ganache
750g of dark chocolate
300ml pure cream
METHOD
1. Preheat oven to 180C. Lightly grease tin and line the base. Beat the butter, sugar and vanilla with electric beaters until light and fluffy. Add eggs one at a time, beating well after each addition. Transfer to larger bowl and fold in combined flours, bicarbonate of soda and cocoa alternatively with the buttermilk.
2. Spoon into tin and smooth the surface. Bake for between 1hr and 1hr 10 mins. A skewer inserted into the centre should come out clean. Leave the cake in the tin to cool for at least 5 mins before turning onto a wire rack to cool completely.
TO MAKE THE GANACHE
Heat the cream until it just starts to bubble, pour over chocolate (which you have blitzed in the food processor to coffee granules size) and let it sit for about a minute to melt. Use a hand whisk to blend it all together then set aside to cool.
Your ganache at this point will be thin. You will have to let it set overnight until it thickens to a slightly thicker peanut butter consistency. Since I don’t have the patience to wait, I just let it cool to room temperature and then pop it in the fridge (don’t cover because you might get condensation). It would usually set in the fridge in about an hour or two. If it sets too hard, just microwave it in 10 second intervals (keep mixing it whenever you take it out).
For full information on making ganache and covering your cake with ganache just check out this page
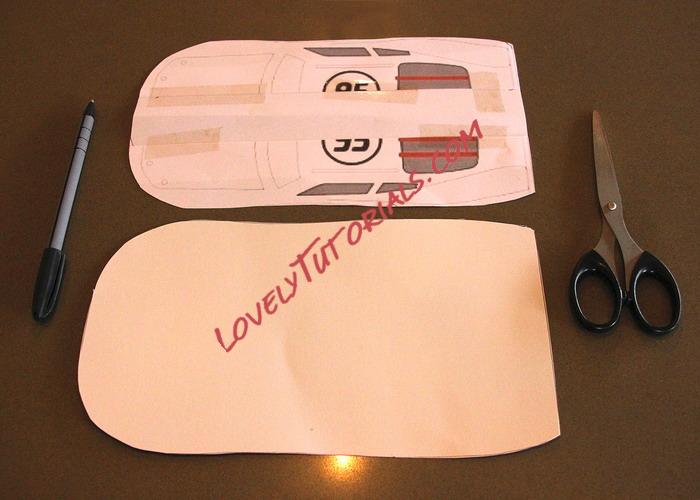
SET UP BOARD
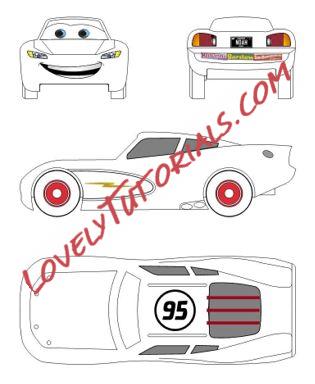
Use the plan below to help design the shape of your template. Enlarge the plan by 140% in a copier so that the car measures 10″ in length. Widen the car by adding a strip of paper down the middle of your template so that the car measures 5.5″ in width. This shape makes the best use of your cake pieces and it also looks cute for a young persons birthday ( Flynn was turning 3).
Lightening McQueen plans
Lightning McQueen plans
1 1mb
Use this template to cut out your set up board from a piece of card with the wax/shiny side up.
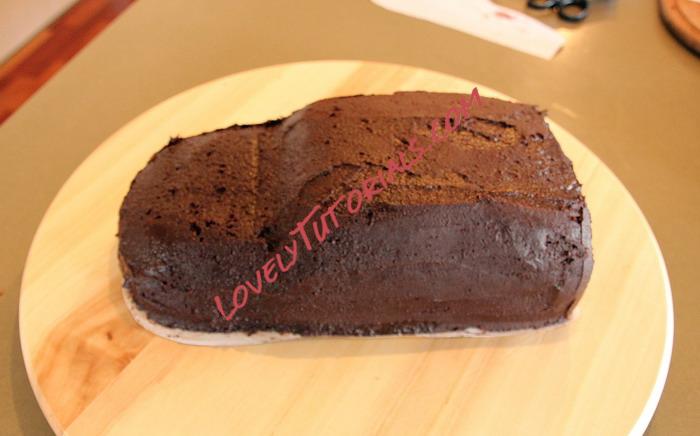
CARVING THE CAKE
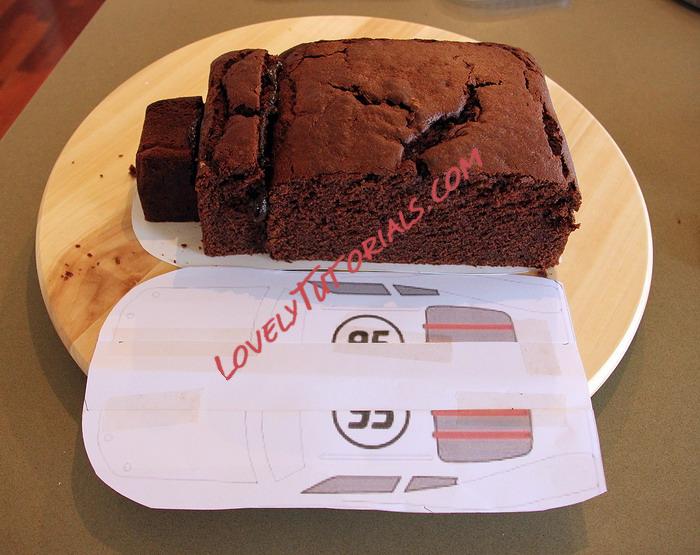
Cut the cake into 3 pieces
7″ x 5″
4.5″ x 2″
2.5″ x 2″
2 1mb
Use a little ganache or Royal Icing to stick the pieces of cake to the set up board. Use ganache to join pieces together.
3 1mb
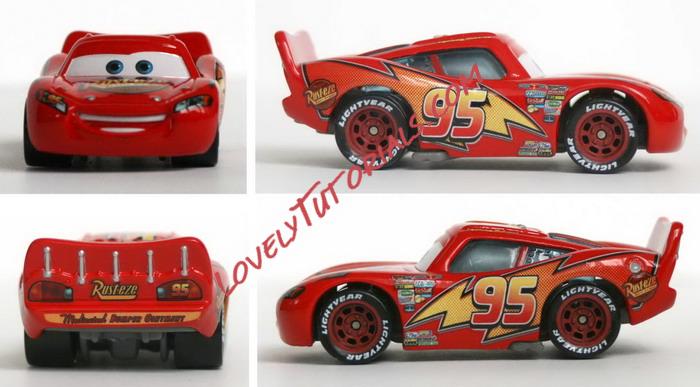
Enlarge one of the ‘side on’ pictures of Lightning McQueen below till the car measures 10″ long. Cut it our and hold against your cake as you carve to get the correct outline / shape.
Toy car details
Toy car details
As you start to carve the shape of the car, don’t throw out any lumps of cake but instead use them to fill in some empty spaces.
4 1mb
Once you are happy with the shape of your car cover it in a thin layer of ganache (a crumb coat) and place in fridge.
5 1mb
Crumb coat
Remove from fridge when hard and with this nice firm base you will be able to add more ganache and smooth it to the required shape.
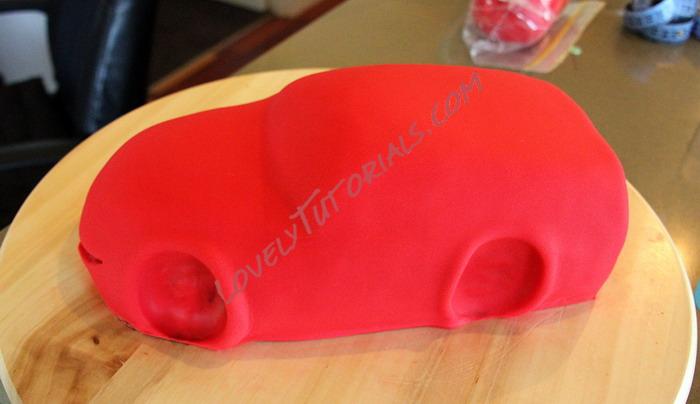
Use a round cutter to cut out the wheel arches.
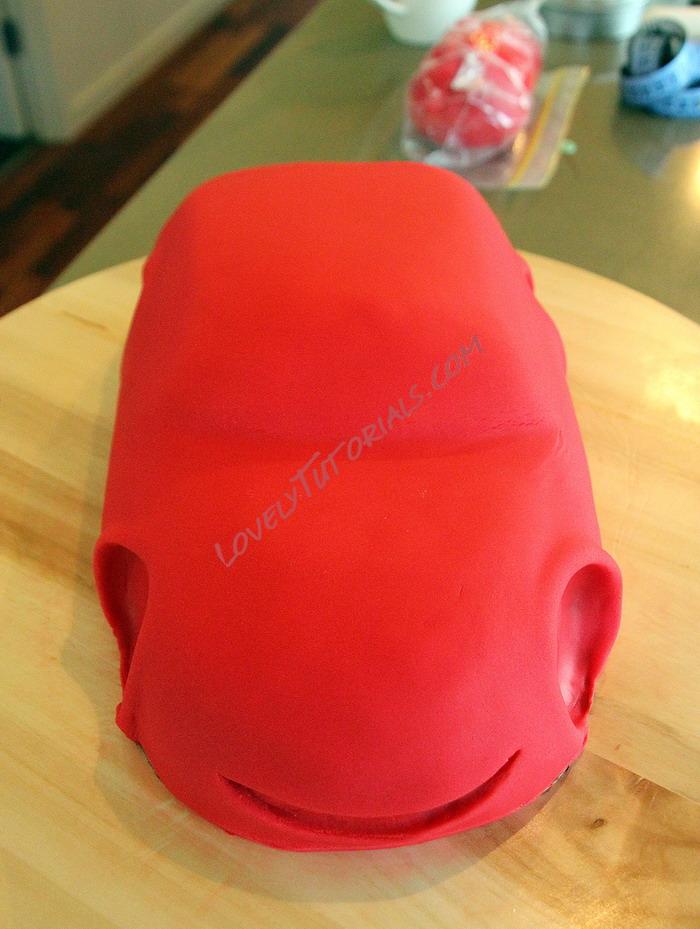
Roll out your red sugar paste and cover the car in one go. I used a ball tool to press the sugar paste into the wheel arches.
7 1mb
While the sugar paste is still soft use a skewer or similar to fashion a smiling mouth shape.
6 1mb
Cut out a spoiler template in paper to fit the car and use it to cut out your spoiler from a nice thick piece of red sugar paste (add some CMC or Tylose powder to the sugar paste to help firm it up). This will take some time to harden, maybe even overnight.
8 1mb
Cut out hubcaps and thick wheels using the ‘side on’ picture of Lightening McQueen as a guide the the size. Add Tylose powder to the wheels to help them harden.
The wheels
Leave the spoiler and wheels to dry out, meanwhile continue with the rest of the car details.
Use the ‘side on’ picture of Lightning McQueen as a guide to make the lightening bolt.
Lightening Flash
Coloured modelling paste
Coloured modelling paste i.e. sugar paste + Tylose powder
Make the two intermediate shades by mixing together some red and yellow.
Making the number
Making the number 5
Rust-eze
Using this Rust-eze image as your inspiration, design a badge with the name of your choice.
Flynn
Use yellow Royal Icing to pipe Flynn on to the badge or cut out some thinly rolled sugar paste.
Cut out the rear window and attach.
Rear Window
Cover your 12″ cake board with black sugar paste and place Lightning McQueen diagonally on top.