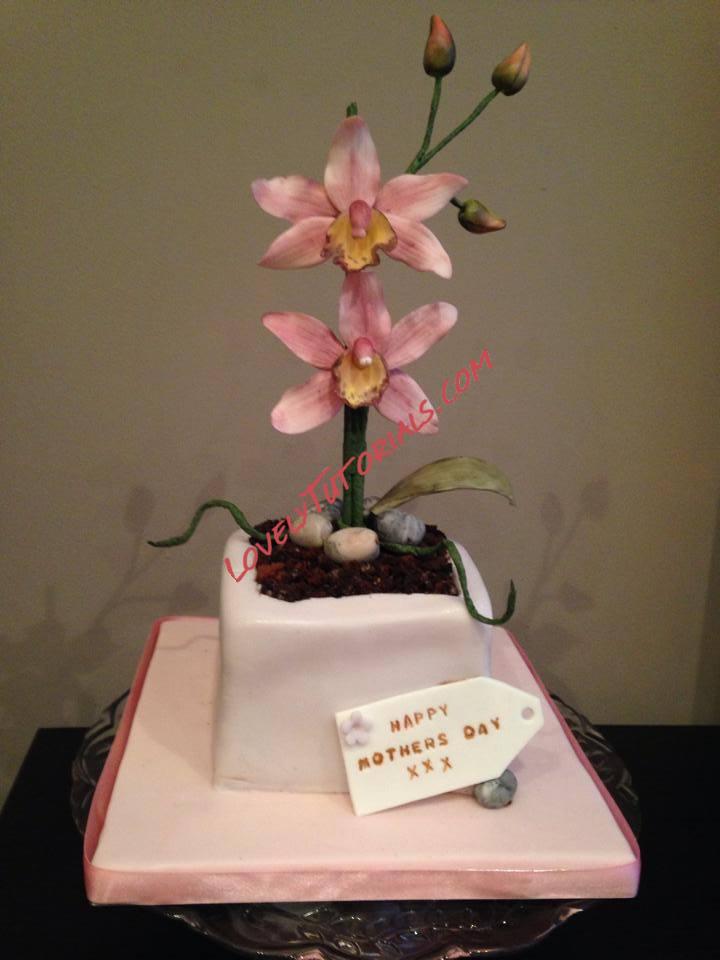
Огромная благодарность Little Sugar Boutique за Мастер-класс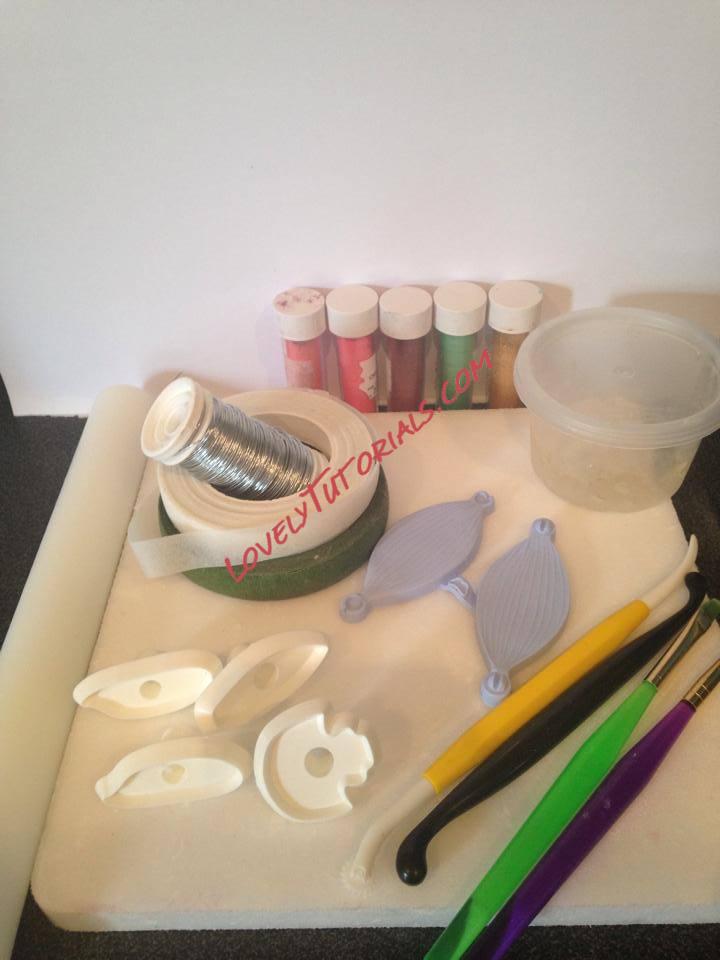
To make my Cymbidium Orchids will need.....
•White flower paste or gum paste
•Edible glue (I make my own with tylose powder)
•Dusting colours
•Foam mat
•Veining tool
•Ball or bone tool
•Orchid cutters
•Orchid petal veined
•Rolling pin
•Florist wire
•Florist tape
•Various sized paintbrushes
•Egg box •Corn flour
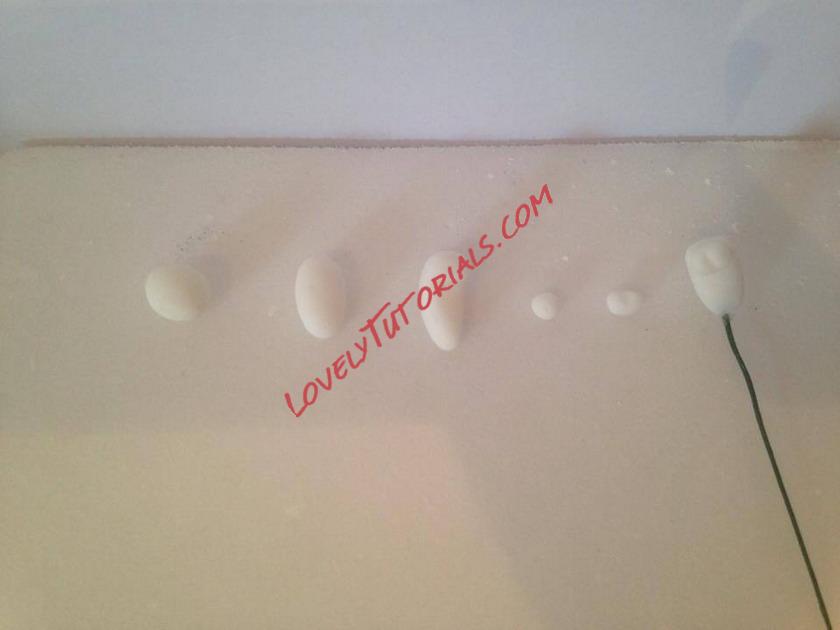
1. For the buds take a small ball of flower paste and roll it into a ball
2. Pinch the end of the ball to make in into a cone shape
3. Gently push the end of the cone to one side so it bends
4. Use the veining took to score three lines around the bud from the tip of the cone to the bottom
5. Take a piece of wire covered in florist tape and bend the top to make a tiny hook shape. Dip into the edible glue and insert into the bottom of the bud.
6. Make as many as you need then set aside to dry. These will be dusted later.
For the Orchid throats..,,
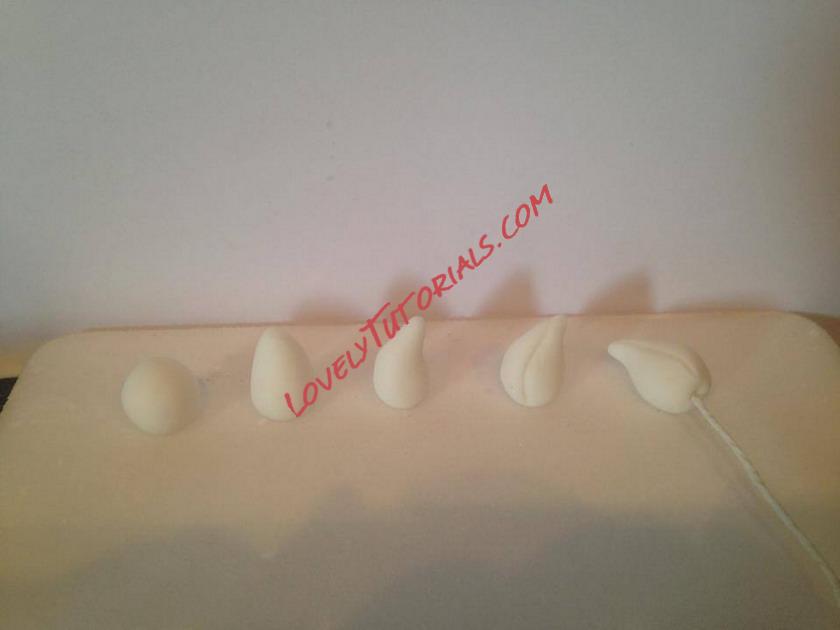
1. For the throat first take a small ball of flower paste and roll it into a sausage shape
2. Bend one end of the sausage over and use you fingers to pinch the other end in slightly so that it is fattest at the bended end
3. Push you finger against the bended end to make it flat
4. Take another tiny ball of flower paste. Score it across the middle with the veining tool so that it slightly flattens your ball. Brush with glue and stick to the bended end of the throat
5. Dip a piece of wire in the glue and push into the throat so your bended end is at the top
6. Make as many as you need (1 per orchid) and set aside.
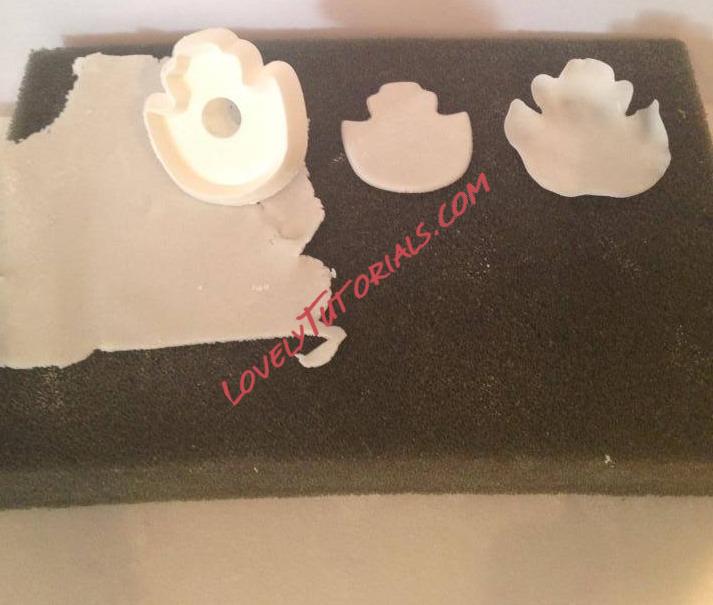
For the Orchid lip....
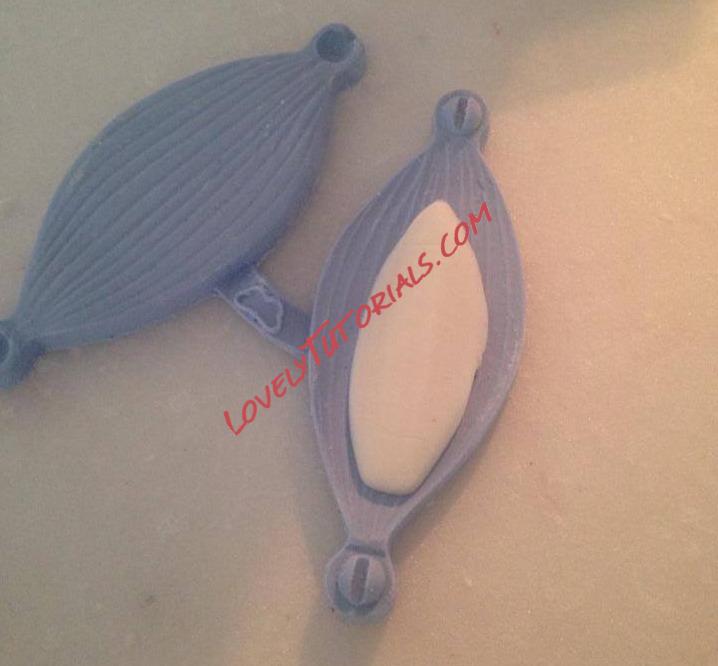
1. Thinly roll out your flower paste using a dusting of cornflower to stop it sticking to your work surface
2. Cut out the lip using your orchid cutter
3. Use the ball or bone tool to soften the edges
4. Use the ball or bone tool in the centre of lip until it start to form a cup shape
5. Make one lip for each of your throats. Leave to dry for a few minutes.
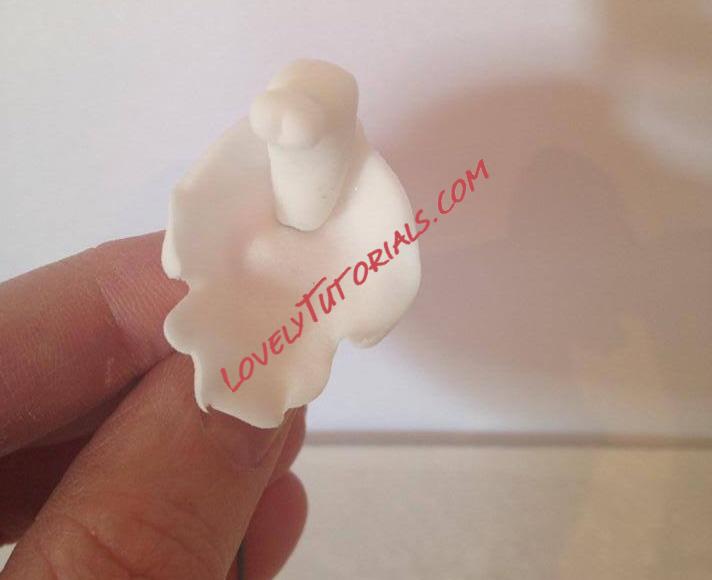
Assemble the throat and lip...
1. Brush the base of the throat with glue
2. Push the wire through the back (widest part) of the lip about 3mm in from the edge
3. Wrap the overhanging 3mm of paste around the back of the throat to secure it
4. Use your fingers to shape it.
Вложение 102139
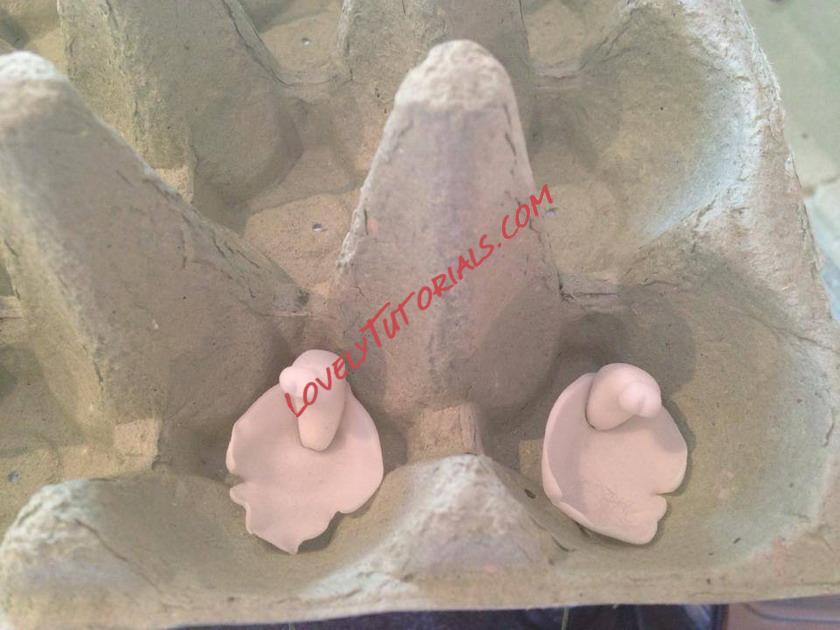
Leaving the flowers to dry....
1. Take a large egg box and pierce a hole in the bottom of each cavity with a cocktail stick. Balance the box on a couple of glasses so it is elevated
2. Push the wired flowers through the holes so that the lip is sitting in the cavity
3. Leave to dry for a few hours or overnight. These will be dusted and painted later.
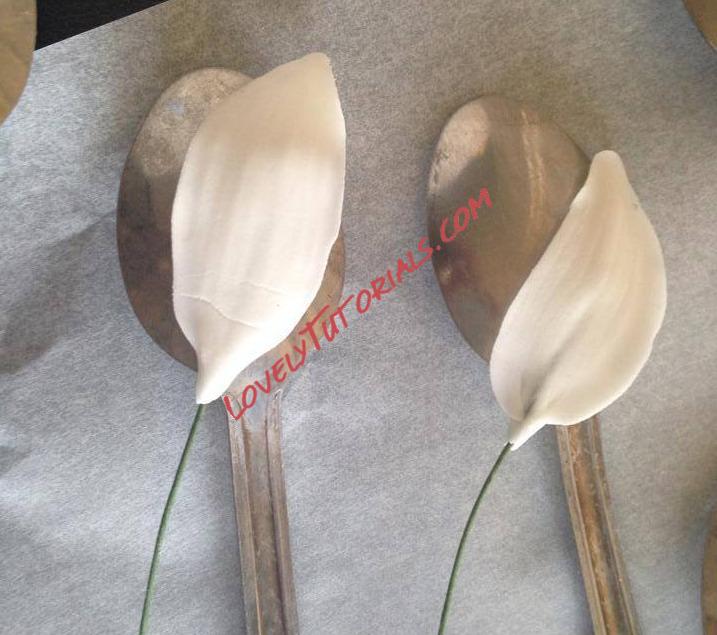
To make the orchid petals...
1. Roll out your flower paste to about 1.5mm thick
2. Using a thin rolling pin, frilling stick or bamboo stick start from the middle and roll the paste out on both sides so you are left with a ridge down the centre
3. Place your straight petal cutter so that the thickest part of the flower paste is in the centre of the petal and cut out one per orchid

4. Vein the petal using your orchid petal veiner
5. Gently soften the edges using the ball or bone tool. You can manipulate the shape slightly to make it less 'perfect' if desired
Dip a wire in edible glue and insert into the thick part of the petal. Gently push in about 5mm
7. Leave to dry over the back if a teaspoon to give it a more natural curved shape
8. Repeat this process for the other petals/sepals. You will need 5 in total per orchid. Check which shapes are in your cutter set. As a general rule you will need one straight slightly wider petal for the back sepal and four smaller, slightly curved petals. I would suggest looking at some photos of real orchids as there are so many different varieties!
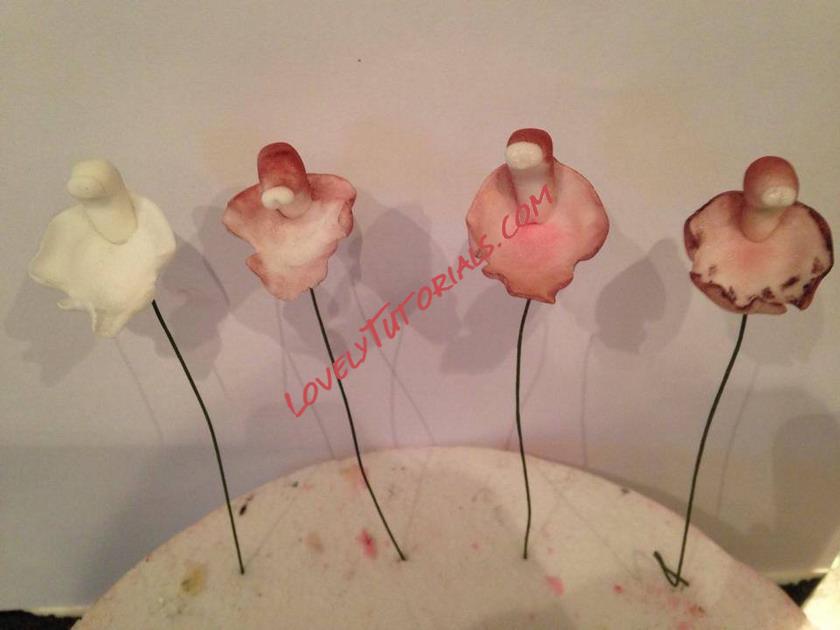
To dust the buds....
1. Starting at the base blend a dark green petal dust about half way up the bud. Dust the score lines all the way up using a flat edge brush
2. Using a pale pink dust start at the top and blend down halfway to meet the green
3. Use a deeper pink dust to go over the green score lines and shade parts of the bud to give it some depth
4. Take a nude colour dust and apply to the whole bud using circular motions to blend all the colours and mute them to give a more natural look
5. You can now steam the buds over a saucepan of water if you want to give them a subtle sheen.

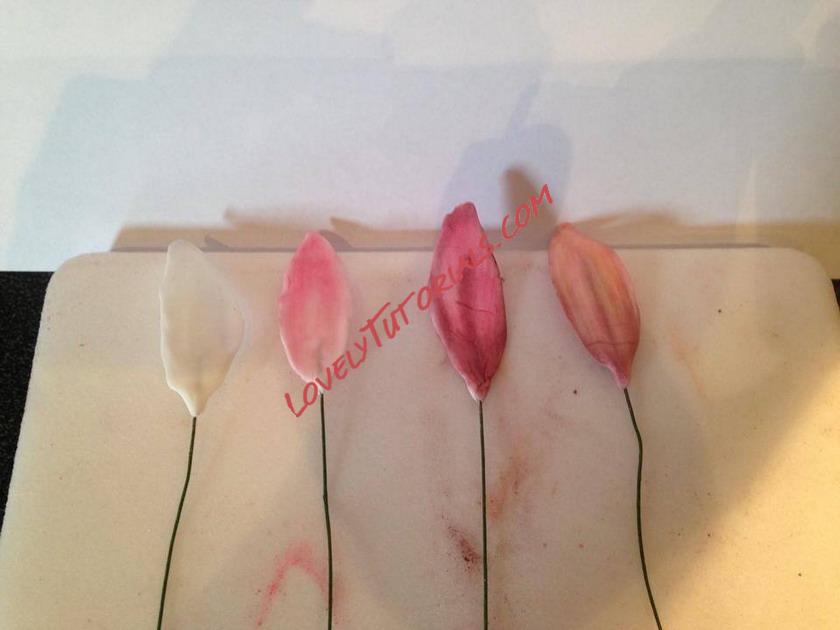
To dust the petals....
1. Rough dust the petal using long strokes in pink
2. Add shading and a line up the centre using a darker pink or magenta dust
3. Blend the colours using a nude dust
To dust the throat and lip...
1. Dust the back and top of the throat with the dark pink or magenta
2. Use the same colour to dust the edges of the lip blending on towards to middle
3. Add some lighter pink and yellow accents in the centre of the lip
4. Use some of the darker pink mixed with vodka to paint on the details
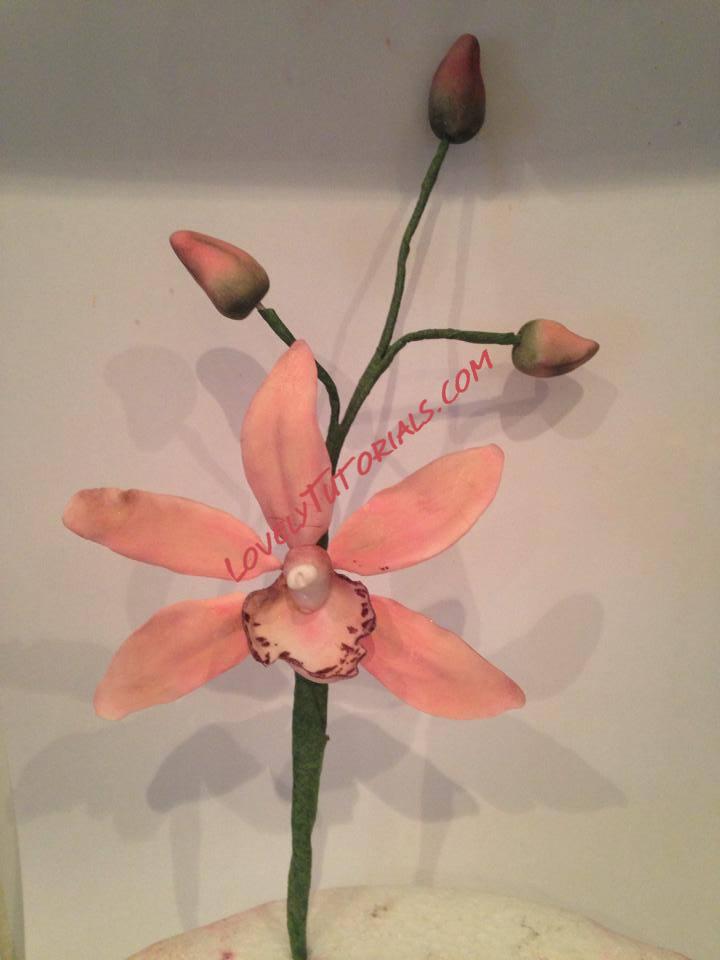
To assemble the Orchid...
1. Wire three petals together in a triangle using florist tape
2. Add the next two petals
3. Wire in the throat and lip
4. Wire buds together
5. Wire orchid to buds