Огромная благодарность Автору Jackie за Мастер-класс
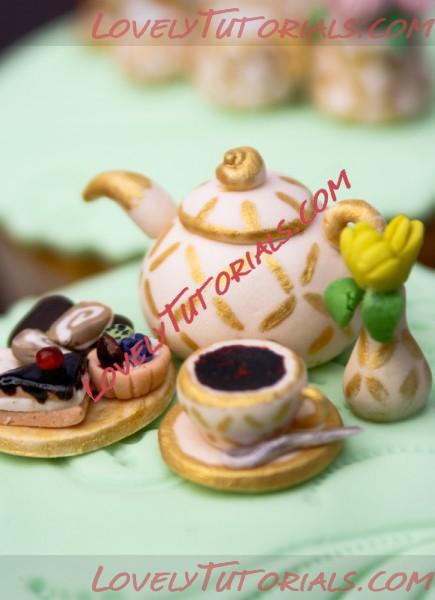
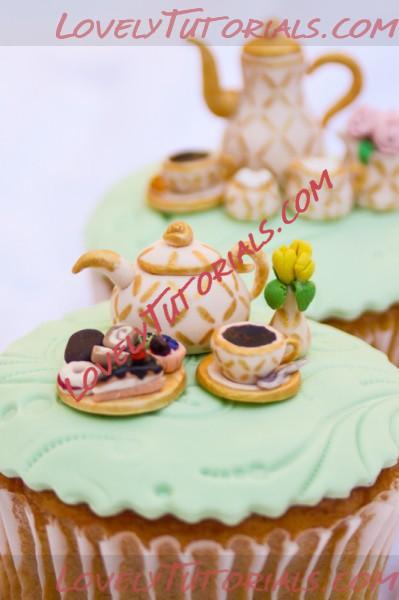
Sometimes the best things come in teeny, tiny packages, and this is certainly the case with Michelle Goldberg’s adorable cupcake toppers. Michelle is an expert at taking everyday objects and transforming them into miniature sugar forms. In this tutorial, Michelle shows how to create a miniature fondant tea set to adorn the top of your cupcakes—perfect for a Mother’s Day brunch!
Supplies:
- Fine Tip Paint Brush
- #3 Icing Tip For Cutting Circles
- Nonstick Surface
- White Fondant
- Gold Luster Dust
- Vodka
 POT AND LID
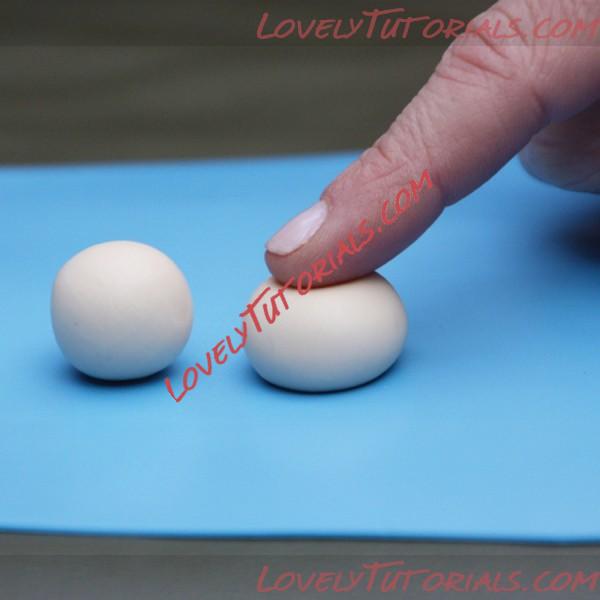
1. Roll fondant into a ball. Using your index finger, gently push down and flatten the very top of the ball where teapot lid will be placed.
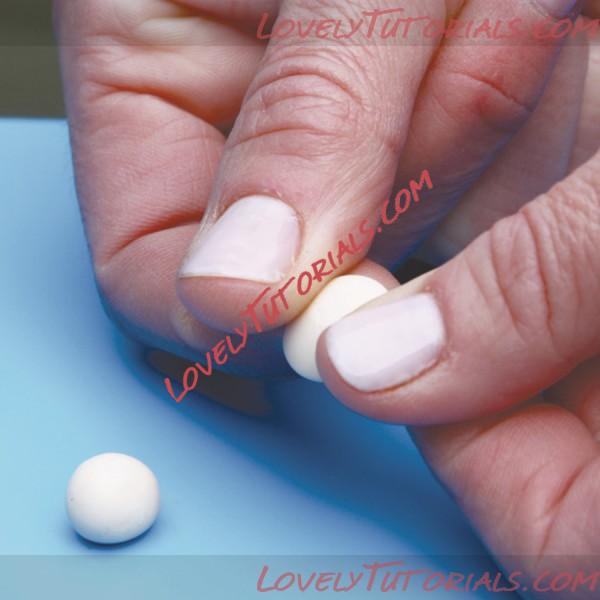
2. Roll a very small amount of fondant into a ball. Using two fingers, flatten the bottom of ball on a nonstick surface, and slope the sides a bit to create a slightly domed lid for your teapot.
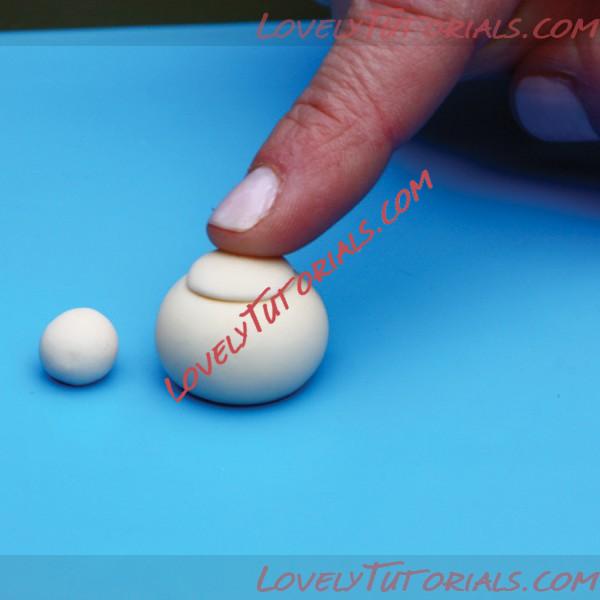
3. Using a dab of water, glue the teapot lid onto your teapot
 SPOUT, HANDLE AND LID EMBELLISHMENT
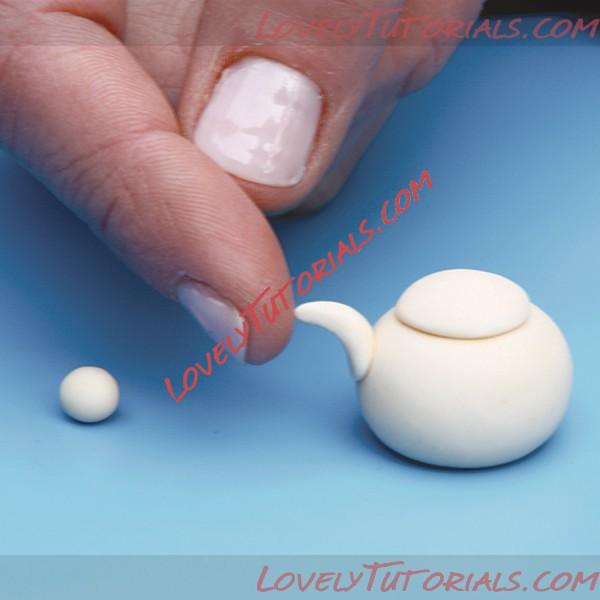
4. Using a very small amount of fondant, create a curved shape that is pointed at one end, and flatten it on the opposite end, which will be glued onto the teapot.
5. Glue the spout in place with water.
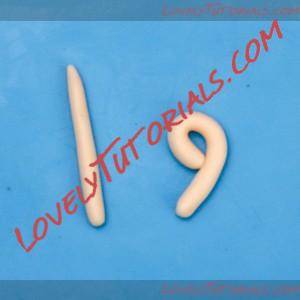
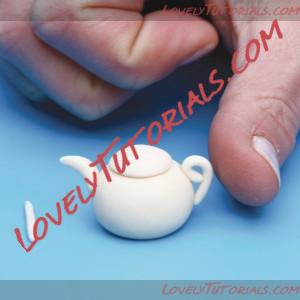
6. Roll a very small amount of fondant into a log. Create a number 9 shape, and glue the handle in place with water.
7. For the lid embellishment, take a tiny piece of fondant, and roll it into a very thin log. Roll it up onto itself to create an embellishment that looks somewhat like a tiny rosette.
8. Glue into place with water.
 TEACUP
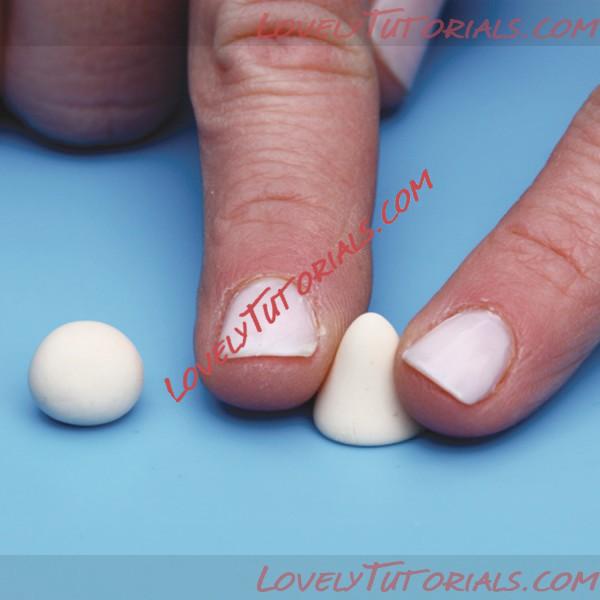
9. Roll a small amount of fondant into a ball. Use two index fingers to create a rounded point at the top, creating a flat bottom and a cone-like shape.
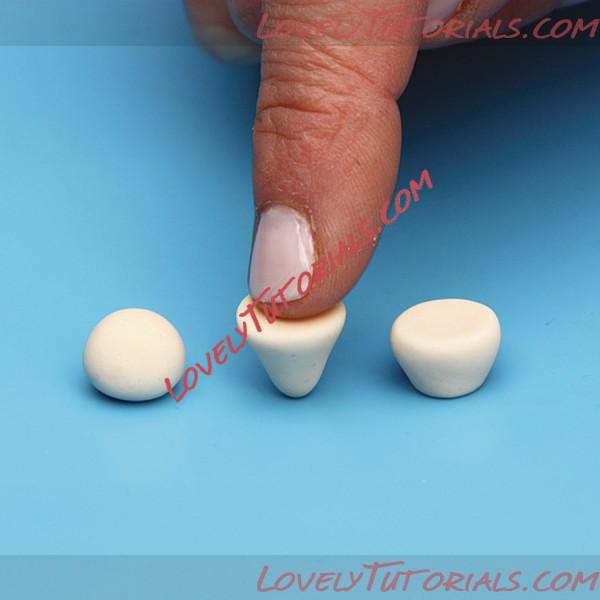
10. Flip the cone upside down, and gently flatten the point slightly to create the bottom of the teacup.
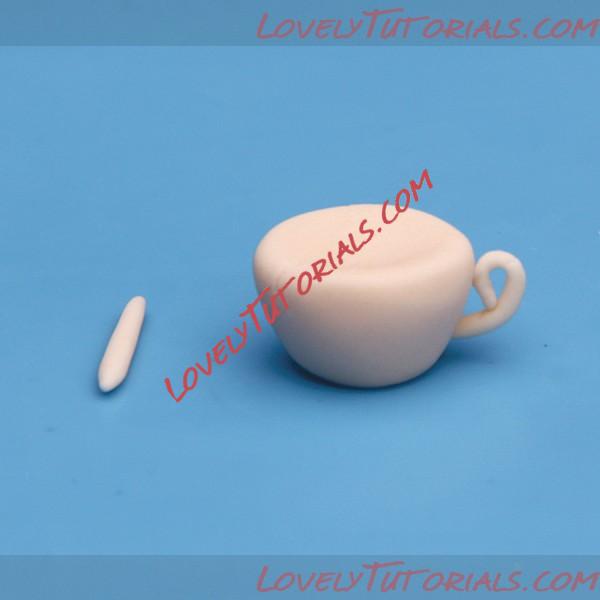 TEACUP HANDLE
11. Roll a very tiny amount of fondant into a log. As in Step 6 when creating the teapot handle, form the log into a number 9 shape, and glue it into place.
 SAUCER
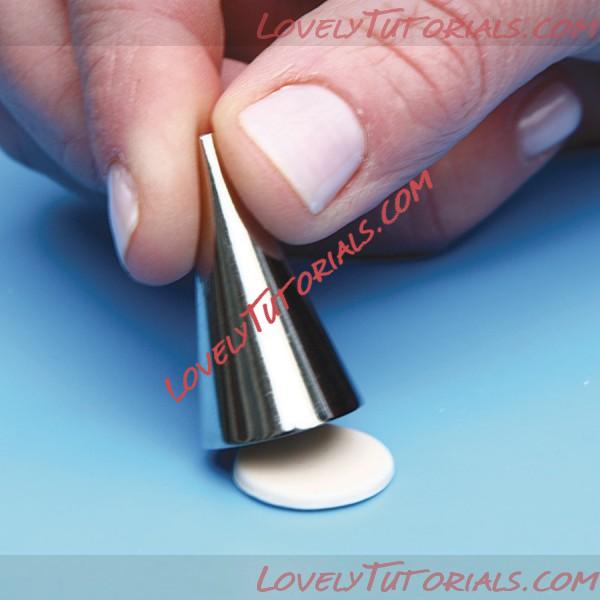
12. Roll out a small amount of fondant, and cut out a small circle using the bottom opening of a decorator’s tip. Smooth out edges.
13. Use the teacup previously made in order to create the indentation on the saucer where the teacup will sit.
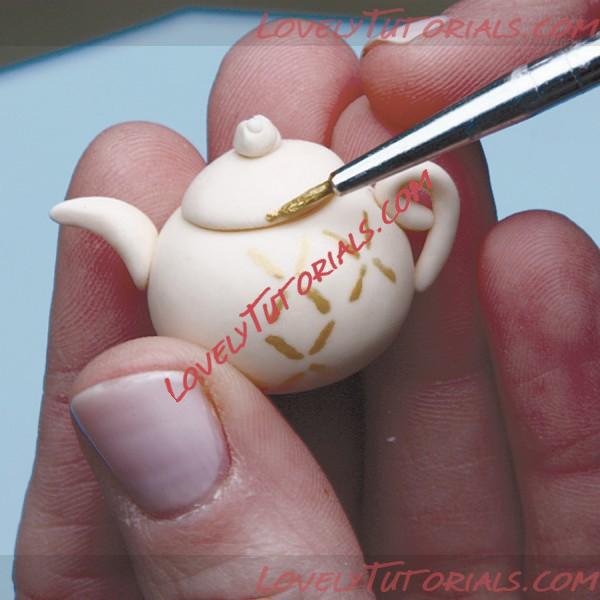 DECORATING
14. Using vodka, a small amount of gold luster dust and a fine paint brush, carefully decorate the teapot and cup. Line the lid, the saucer, and the teacup edge with a gold trim. Paint the handles, spout and lid embellishment with gold, and then paint the letter X repeatedly on the surface of the teapot and teacup. You may decorate according to your own preferences and add as many accessories to your tea set as you like!