Показать сообщение отдельно
  #3  
Старый 08.05.2013, 15:39
Arianka Arianka вне форума
Администратор
 
Регистрация: 05.03.2013
Сообщений: 698
По умолчанию

11. Colour a small piece of fondant red (or blue, purple or orange) and roll it out to a thin long strip, making sure it is long enough to wrap around the top part of the cake. With the sharp knife, shape the strip as shown in the first picture below. Apply the strip to the cake using either buttercream or shortening (I've found that shortening can sometimes work better).


Название: Ninja Turtle Cake tutorial 12.jpg
Просмотров: 1

Размер: 128.8 КбНазвание: Ninja Turtle Cake tutorial 13.jpg
Просмотров: 0

Размер: 99.3 КбНазвание: Ninja Turtle Cake tutorial 14.jpg
Просмотров: 0

Размер: 112.5 Кб
12. Combine the trimmings from the red fondant and roll out again. You want to carve a triangle and two short strips with pointed ends to form the knot at the back of the turtle's head. Place the strips over the triangle as shown below and fold in the corners of the triangle to create the "knot". Then with buttercream or shortening, stick the whole piece to the back of the turtle head where the first strip you put overlaps.
Название: Ninja Turtle Cake tutorial 15.jpg
Просмотров: 0

Размер: 135.2 КбНазвание: Ninja Turtle Cake tutorial 16.jpg
Просмотров: 1

Размер: 149.0 КбНазвание: Ninja Turtle Cake tutorial 17.jpg
Просмотров: 0

Размер: 122.3 КбНазвание: Ninja Turtle Cake tutorial 18.jpg
Просмотров: 0

Размер: 117.0 Кб


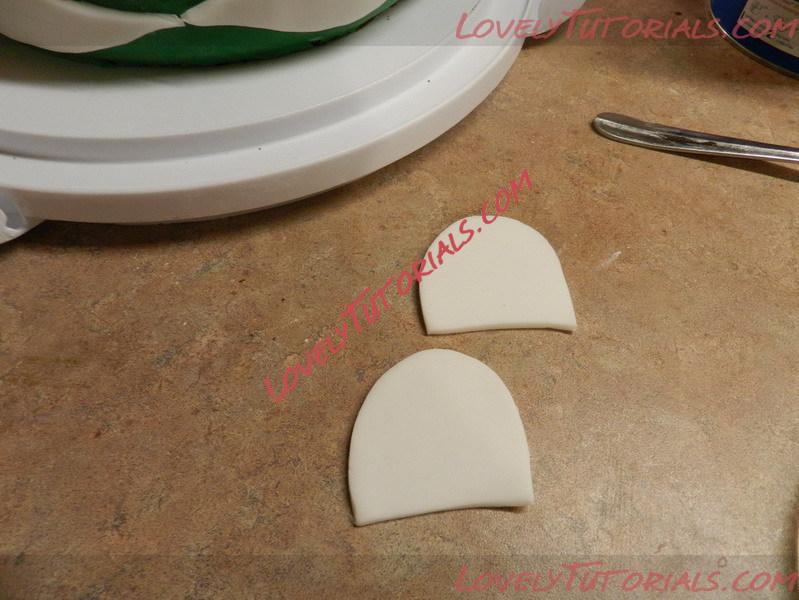
13. Roll out a piece of white fondant over icing sugar so that it is not at all sticky. Fold the fondant over itself so that you have two layers. Carve out a side of the mouth/teeth (below-left) and a shape for the eyes (below-right). By doubling up the fondant, you only have to crave out one of each the mouth and the eye and they will be symmetrical.

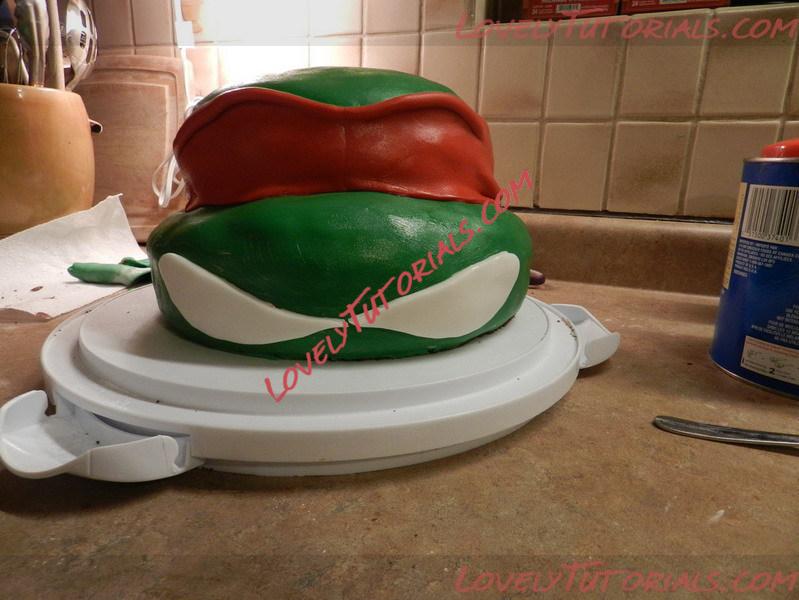
14. Apply the mouth and the white of the eyes to the face of the turtle using buttercream or shortening, shaping them to look the way you want.


Название: Ninja Turtle Cake tutorial 19.jpg
Просмотров: 1

Размер: 115.1 КбНазвание: Ninja Turtle Cake tutorial 20.jpg
Просмотров: 0

Размер: 124.3 Кб
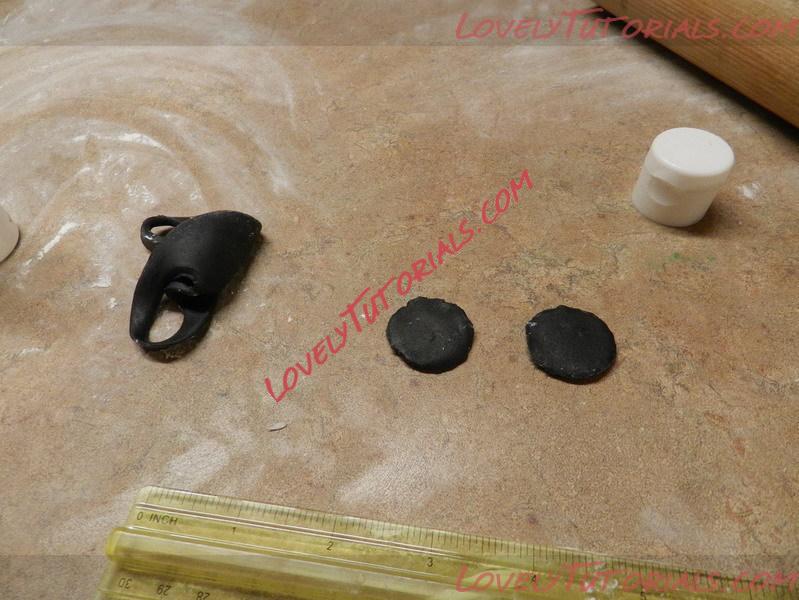
15. Colour a very small amount of fondant black. Using a small cookie cutter or bottle cap, make two small circles. Trim the top off each circle and apply them to the white of the eyes, shaping them as you want.

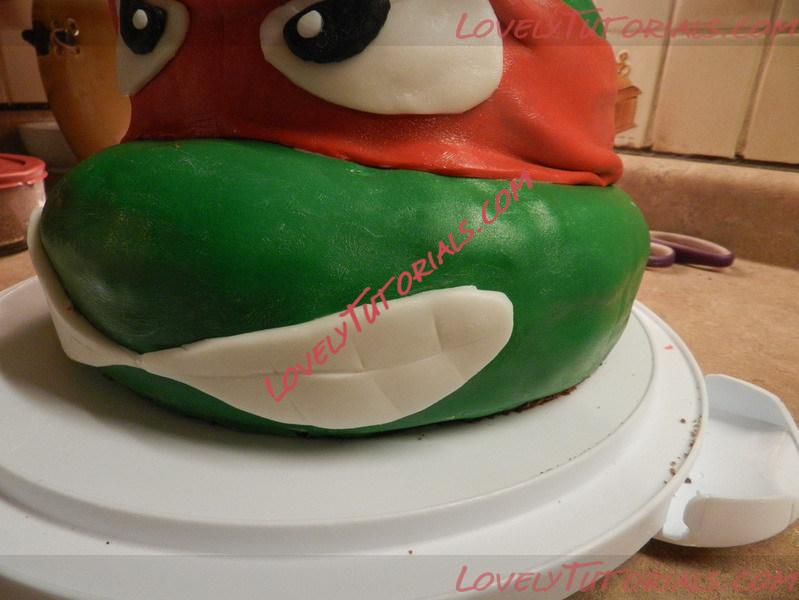
16. Use a small amount of the white fondant trimmings to create the small inner circles of the eyes, as shown below, and apply them to the black.
Название: Ninja Turtle Cake tutorial 21.jpg
Просмотров: 0

Размер: 147.7 КбНазвание: Ninja Turtle Cake tutorial 22.jpg
Просмотров: 0

Размер: 122.1 Кб


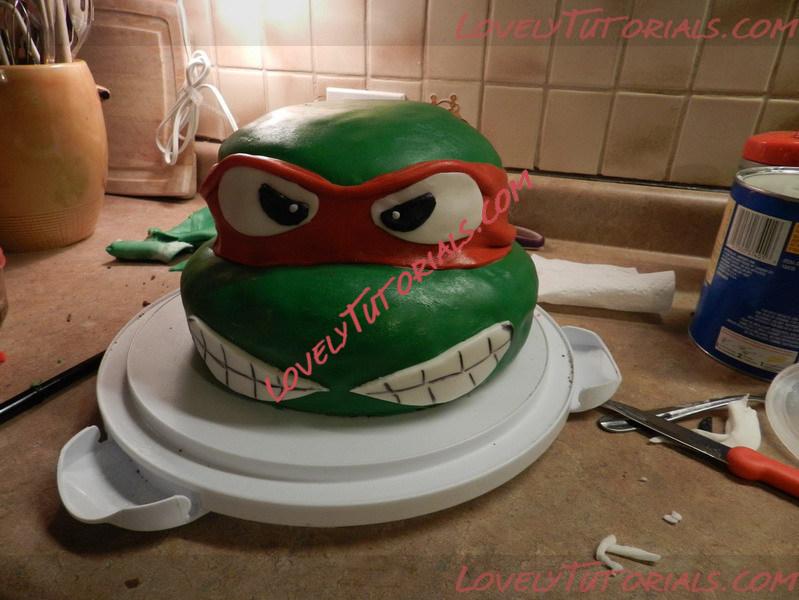
17. Using the side of a toothpick, carve indents into the mouth area to create the illusion of teeth.

18. If you want, using a black food decorating pen, or some black gel colour at the end of the toothpick, trace the indents to define the teeth.
Название: Ninja Turtle Cake tutorial 23.jpg
Просмотров: 0

Размер: 96.7 КбНазвание: Ninja Turtle Cake tutorial 24.jpg
Просмотров: 0

Размер: 113.9 Кб


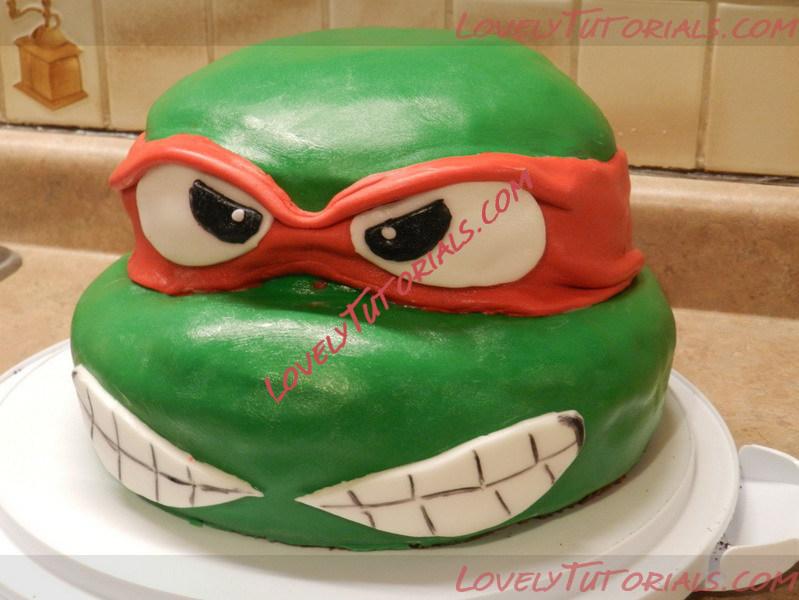
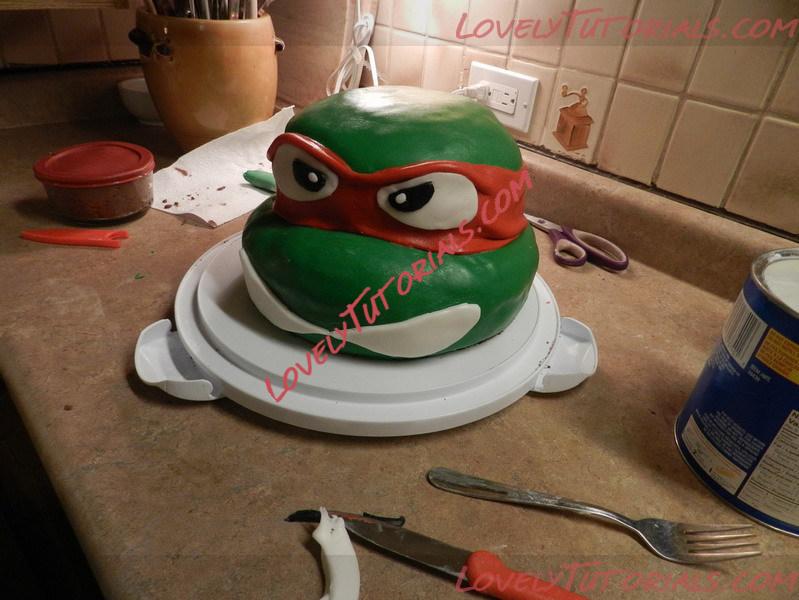
19. Pinch the headband a little between the eyes, clean it off and you're done!

20. Watch as your toddler gives you a look or horror as you serve him his favourite character's head on a platter and slice into it for all to enjoy!

Название: Ninja Turtle Cake tutorial 25.jpg
Просмотров: 0

Размер: 100.6 Кб
Ответить с цитированием