Огромная благодарность Автору homespooled за Мастер-класс
 MATERIALS:
One 10" x 3" round cake, baked and cooled
Two 8" x 3" round cakes, baked and cooled
Buttercream frosting
White Fondant
Gel food colours in green, black and red (or blue, purple or orange depending on which ninja turtle you are making)
A sharp non-serrated knife
Vegetable shortening
Toothpick
Butter knife
DIRECTIONS:
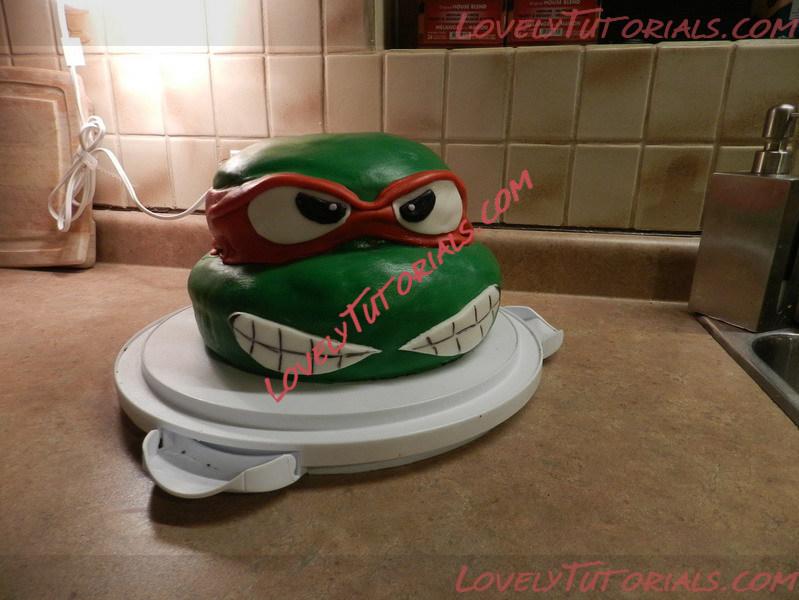
1. Slice all 3 cakes in half horizontally to create 6 layers. If you don't have one of those fancy doo-dads to help you make it even and you don't generally have a steady hand when it comes to these things, insert toothpicks along the mid-edge of each cake to serve as your guide.
2. Trim the rounded top of the larger cake and of ONE of the smaller cakes to flatten them out a bit. Leave one of the smaller cake tops rounded to serve at the very top of the turtle head.
3. Place the bottom layer of the larger round cake on the cake board. I like to place pieces of parchment paper under the cake in strips, so that are easily removed without having to lift the cake. This helps with clean-up a little later on.
4. Spread a small amount of buttercream frosting over this first layer of cake, then put the top half of the larger cake on top of it, face-down. Spread a small amount of buttercream on top of that layer (and each subsequent layer).
5. Place the bottom layer of one of the smaller cakes on top of the first two layers. Make it so that it is placed more towards the back of the larger circle, as shown below. Add the top layer of the smaller cake (which was trimmed in step 2) face-down as the 4th layer, then top the whole thing off with the rounded layer of small cake. You'll have one layer of cake that is unused.
6. Trim the very top of the cake, as well as the 2nd layer from the bottom (top section of large cake) so that the edges are rounded out. If any large pieces crumble off here, stick them back to the cake using buttercream frosting.
7. Using some cake you trimmed off, or if there are no pieces big enough, the unused layer of cake, create a bump over the 2nd layer of cake that sticks out, where the nose will be under the mask.