|
|
МК кружева из мастики, фонданта -Fondant Lace Tutorials V1
|

21.09.2012, 15:26
|
|
Администратор
|
|
Регистрация: 07.09.2010
Сообщений: 7,940
|
|
|
21.09.2012, 16:27
|
|
Администратор
|
|
Регистрация: 07.09.2010
Сообщений: 7,940
|
|
 DIY: Lacy Sugar Doilies
Огромная благодарность Автору Carrie Sellman за Мастер-класс

|
21.09.2012, 17:05
|
|
Администратор
|
|
Регистрация: 07.09.2010
Сообщений: 7,940
|
|
Огромная благодарность Автору The Little Cake Patch за Мастер-класс
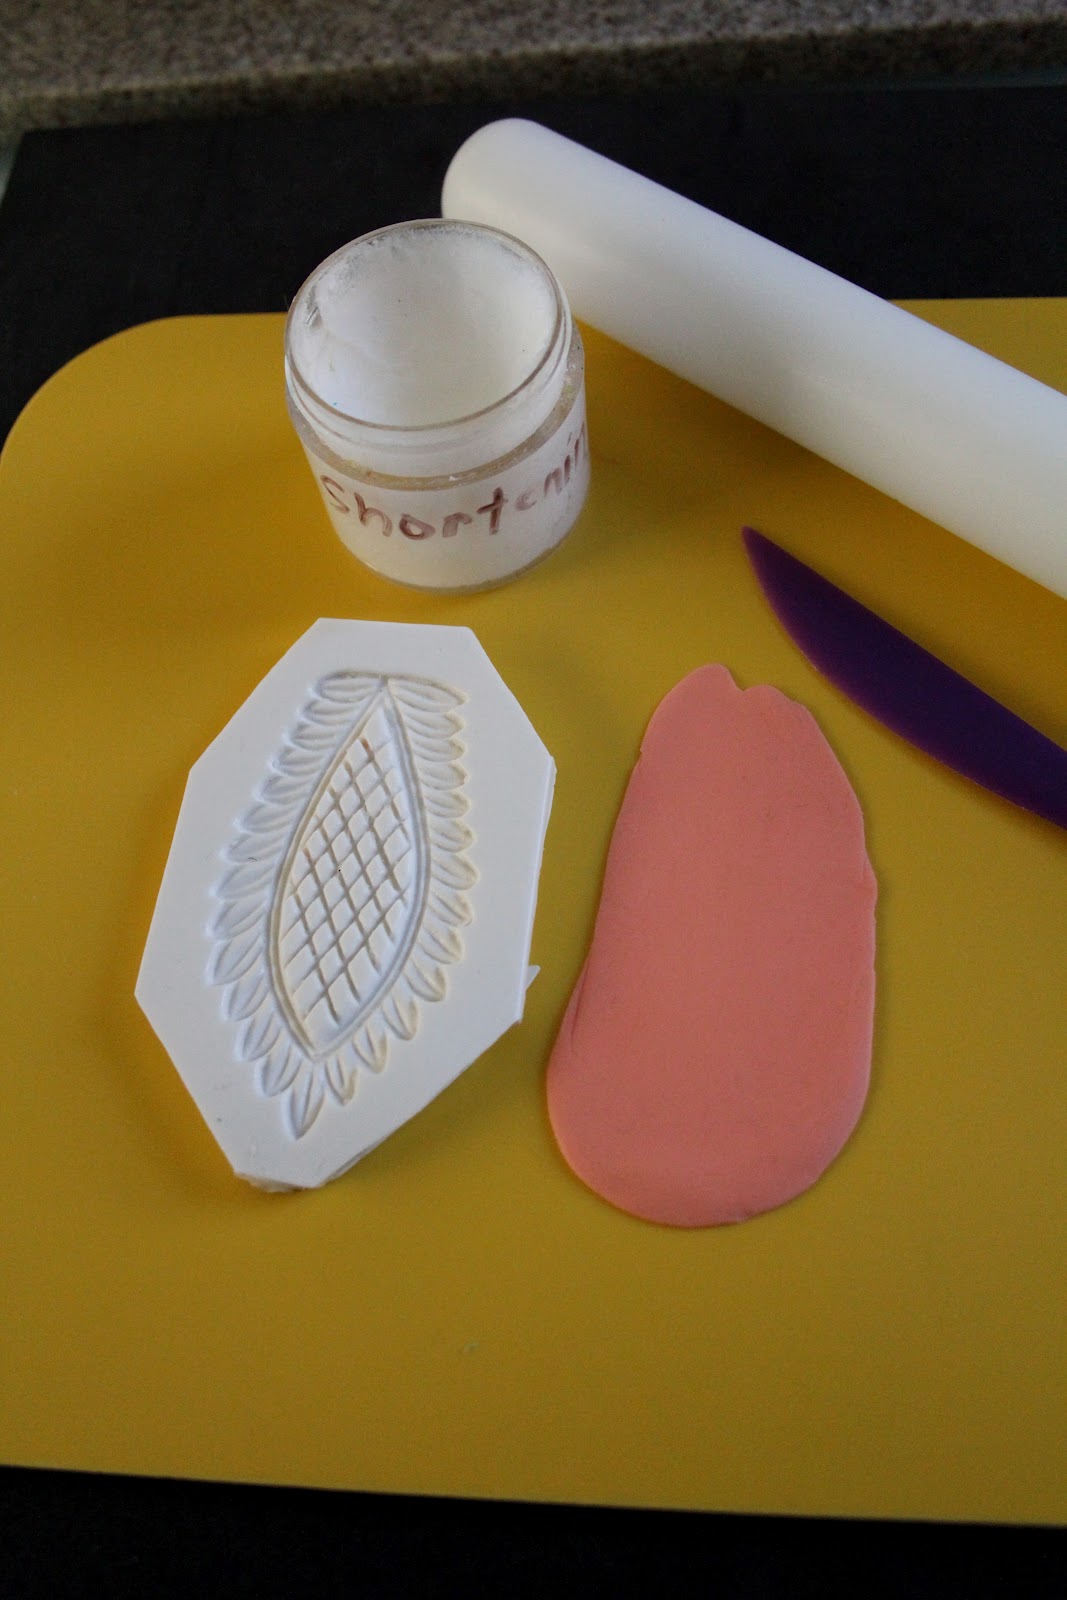
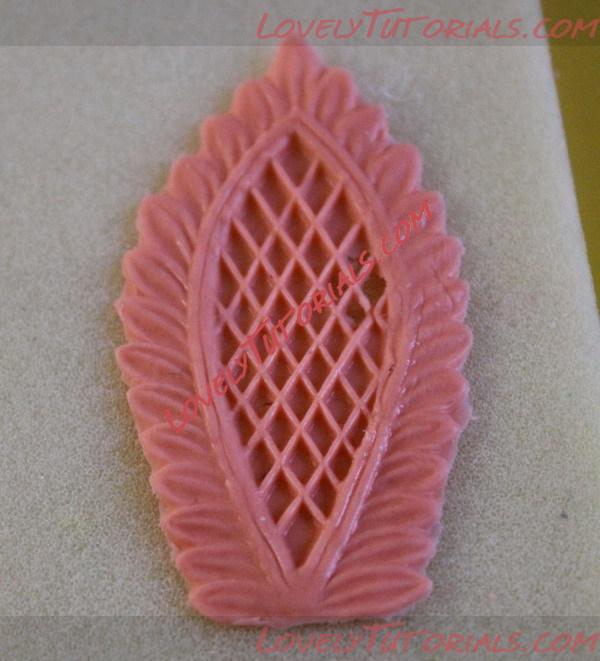
I tried doing the the pieces using fondant, it works but we have to consider the time and the structure of fondant. Fondant cannot be thinned out as much as we can thin out a gumpaste. And because the product will be a thin and delicate piece we need more elasticity and a more stronger paste to do the project. Therefore, we have to use gumpaste to deal with the Jabot Mold. The fondant can be mixed with a little amount of tylose powder to add strenght and elasticity. The RTU (ready to use) gumpaste is conveniently available in the market. There are many recipes by different cake experts for homemade gumpaste.
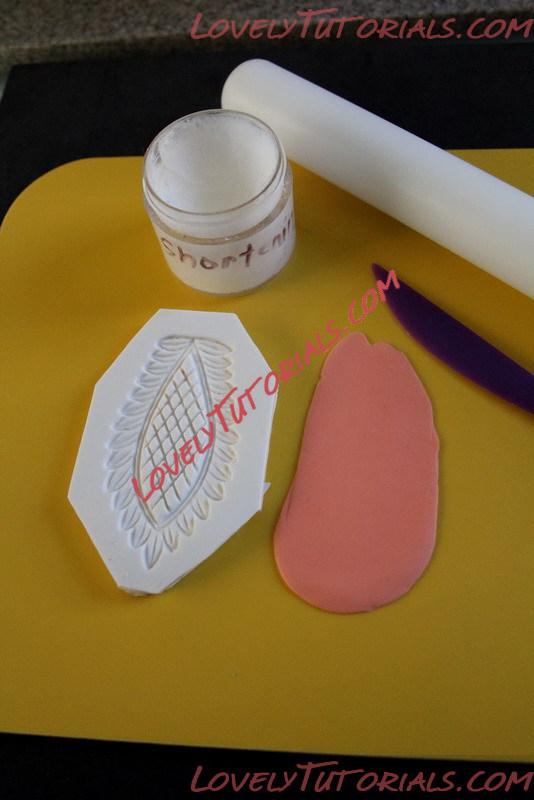
Materials:
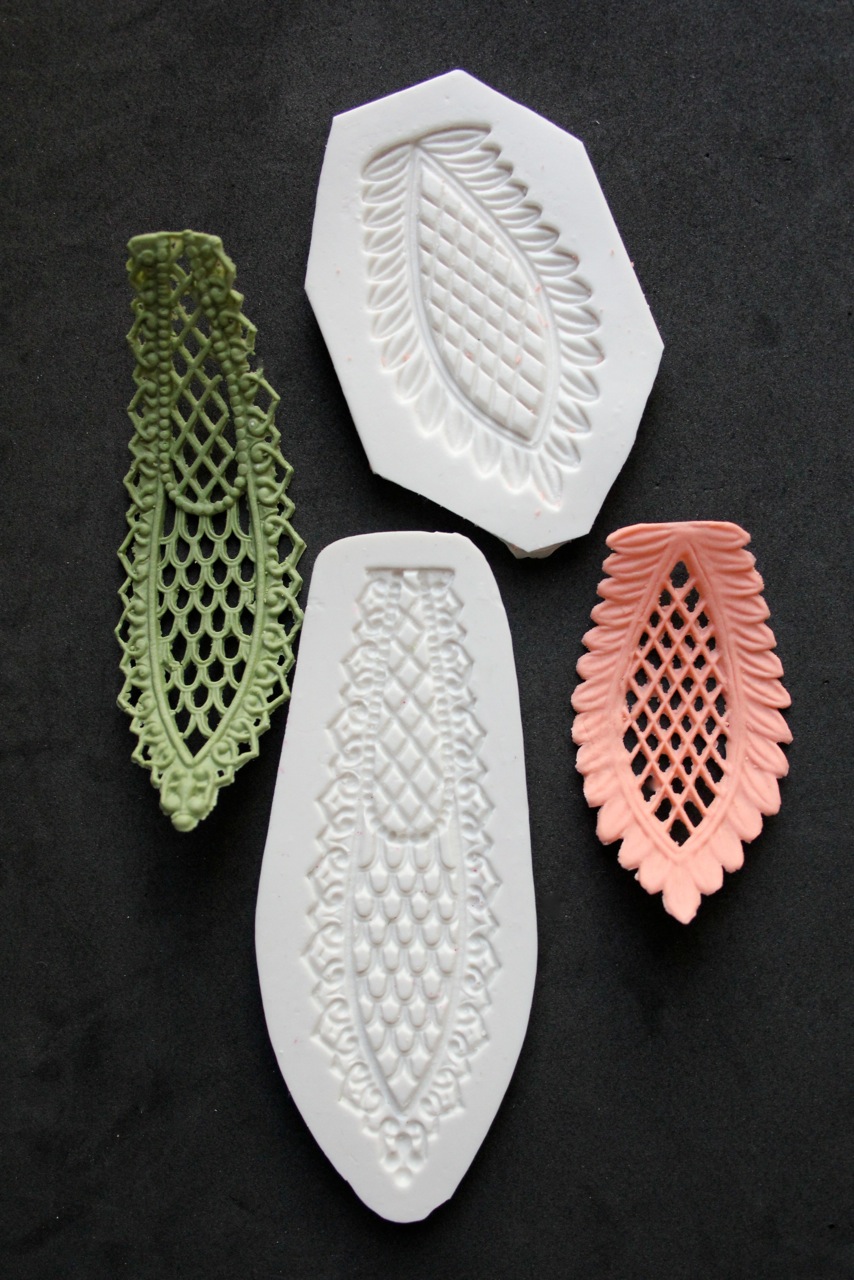
DTC's Jabot Silicone Molds
2 inch size ball of well kneaded gumpaste
shortening (crisco)
rolling pin
tooth pick
dresden tool
small fine clay knife
6 inch rolling pin
foam pad
steamer
forming mat
fine scissors
wire brush
Lots of patience!
Knead the gumpaste well and form a sausage , place the rolling pin on the sausage lengthwise and flatten it out in the middle making sure that you crate a thin well .
Roll sides, lengthening and widening the paste.
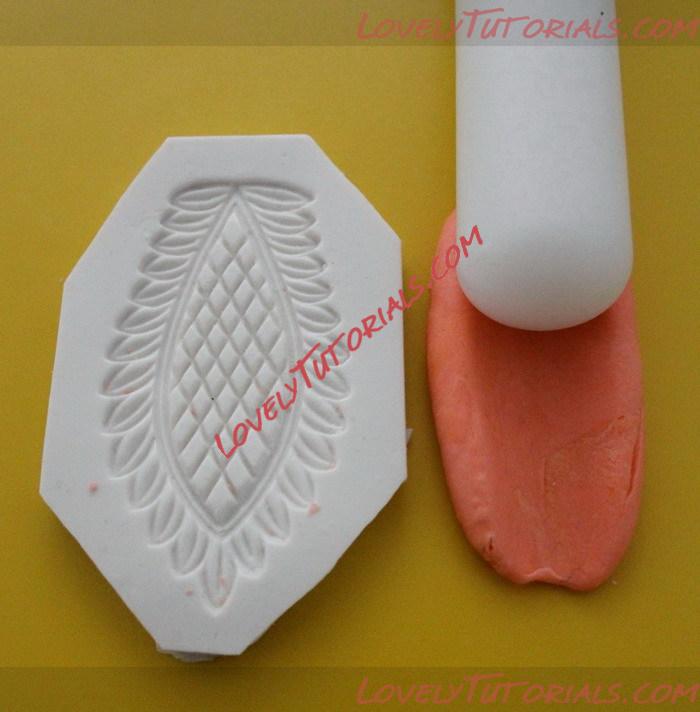
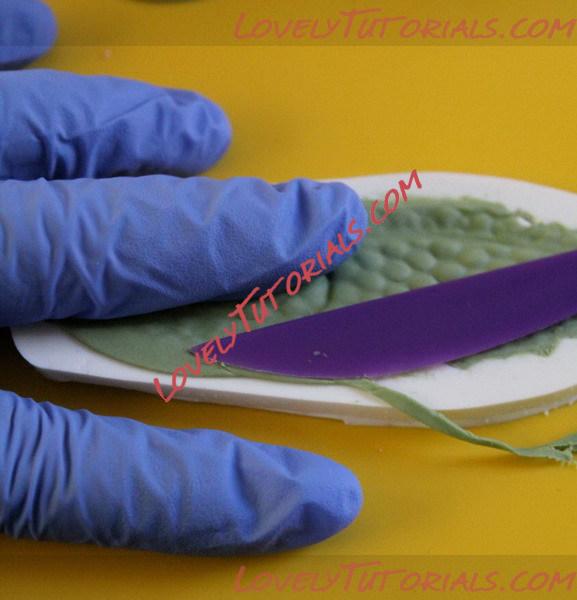
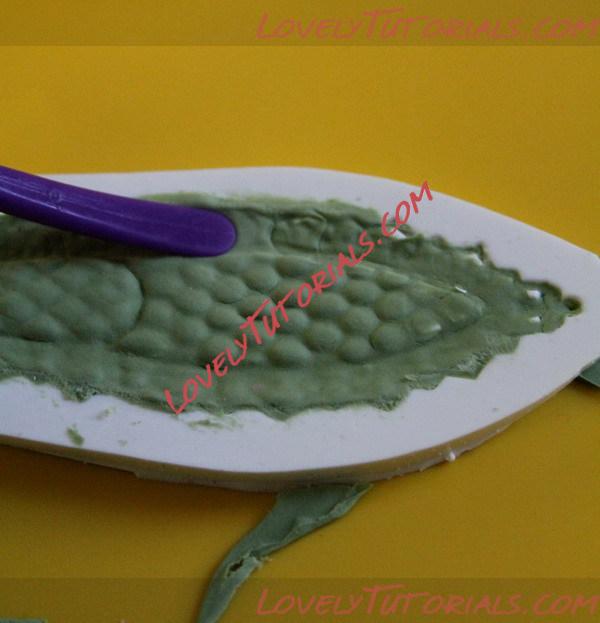
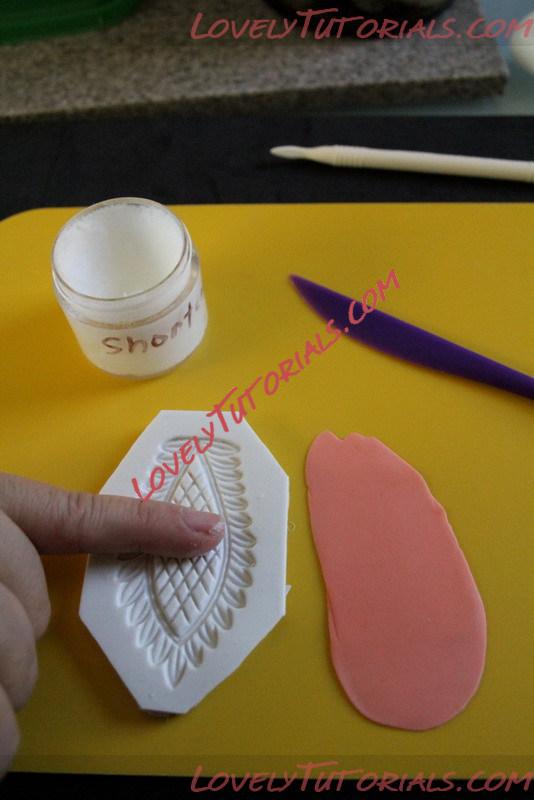 Rub a small amount of crisco on the mold. Lay the sheet of gumpaste you just rolled and press gently but firmly to the mold making sure that the gumpaste adheres and goes through the nook and crannies of the details.
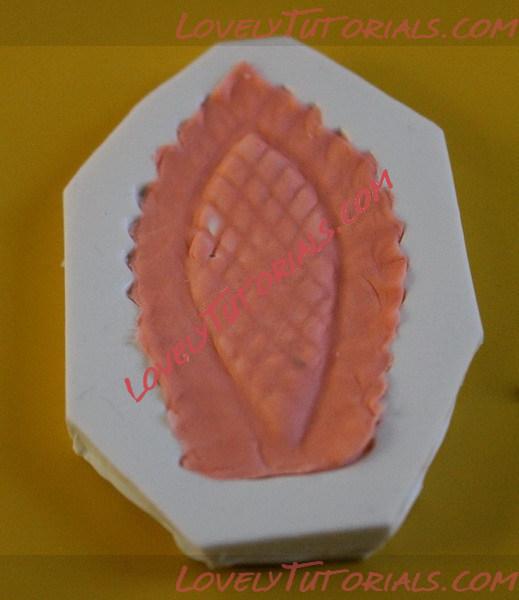 Make sure the middle portion is thin enough that you can almost see the mold through.
 Trim the edges and smoothen the edges with your fingers.
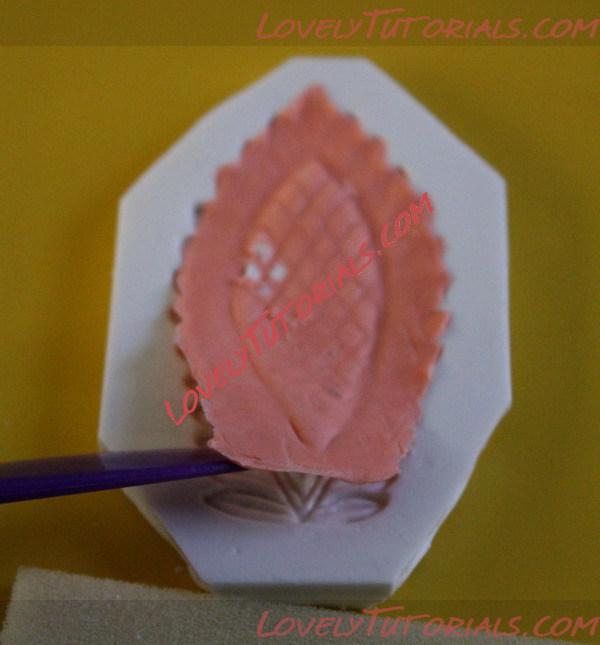
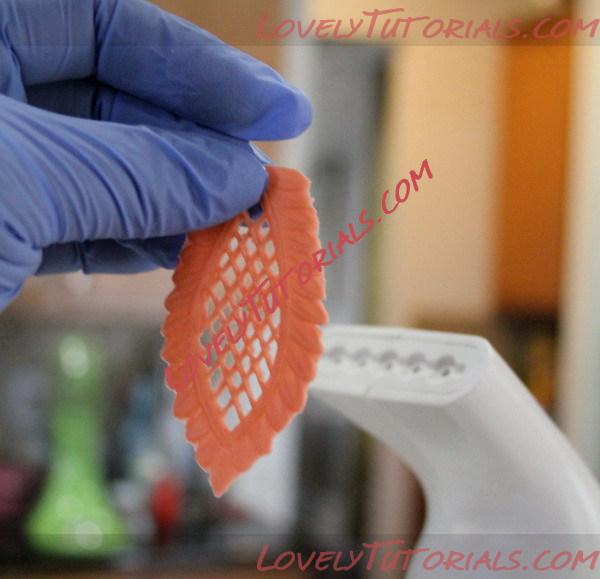
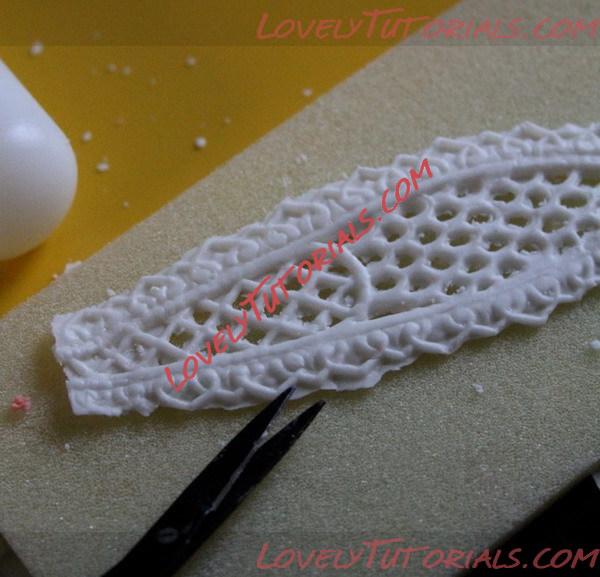
 Try to lift the gumpaste off the mold, this is an event that may may you nervous, you shouldn't be, as the shortening you rubbed on the mold will help you lift it up effortlessly!. Lift slowly and check if you got the details. If you left out some, return it back to the mold and press the part where it needed the details with your clay knife.
 If you need to patch some broken strings, this is the time to do it. Dont worry if there are film of gumpaste still on the piece, we will clean it out later.
 Lay the piece on a foam pad and let it dry for 10-15 minutes.
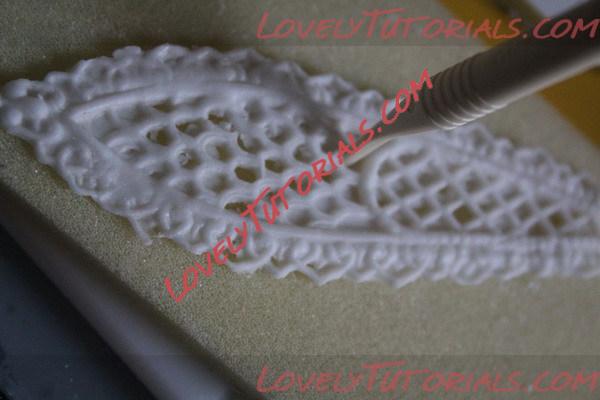 If the piece has slightly hardened a bit after 15 minutes, take your dresden tool or toothpick, poke the film of gumpaste on the foam.
 It is easier to poke the dried film than when it is moist.
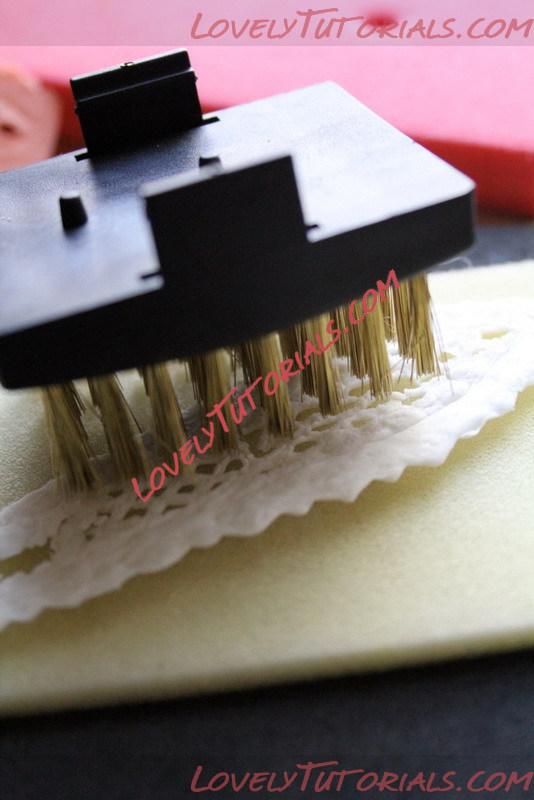 Yes, the back part of the piece will look messy, you can clean it out using the wire brush, but be gentle. Do everything on top op the foam pad so to keep the piece still and safe.
 Steam the back portion of the piece to clean out any remaining bits of gumpaste scraps.
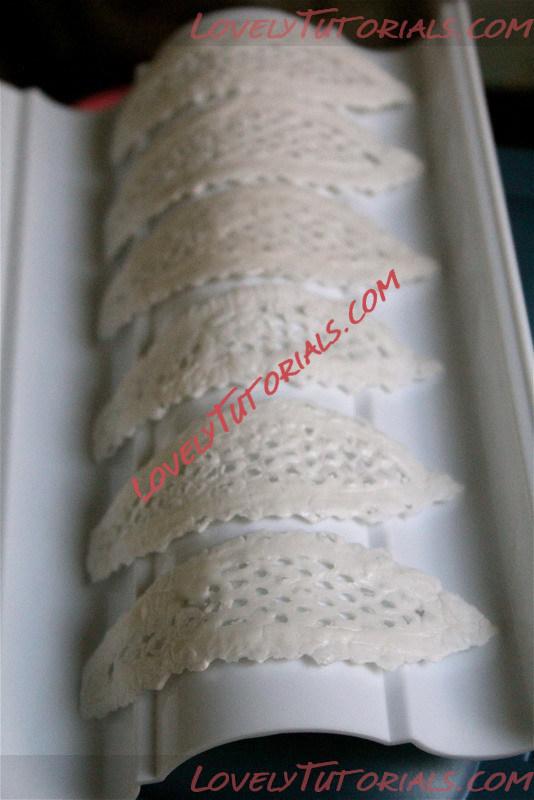
Let the pieces dry to form on the forming mat for a curved look. If you dont have a forming mat, use a roll paper towel.
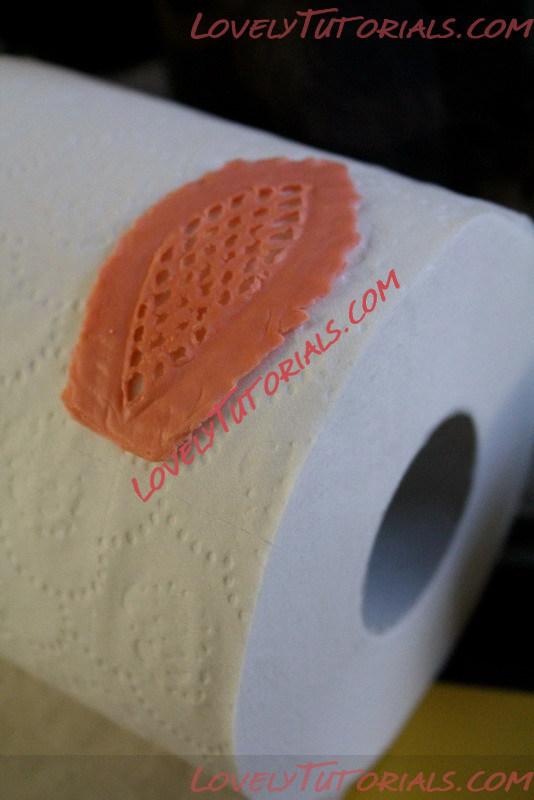 If you want it flat, just lay it on top of a foam or a box with a paper towel.
Note : dry it front side down since the back portion has been steamed. Remember that the back part is moist and will stick on to anything if you dry it back side down.
If you want it flat, just lay it on top of a foam or a box with a paper towel.
Note : dry it front side down since the back portion has been steamed. Remember that the back part is moist and will stick on to anything if you dry it back side down.
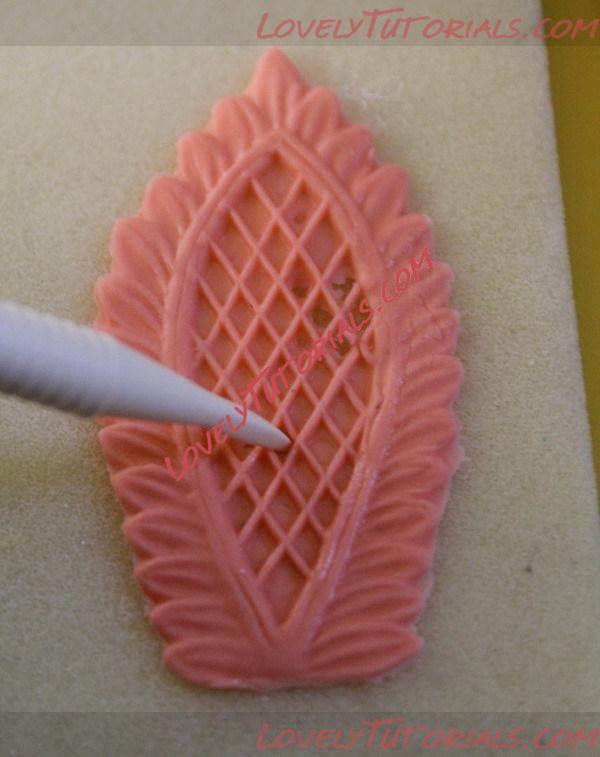
when the piece has dried up totally dried up you can go back and trim the edges and the details for a more cleaner look.
 I hope this short tutorial has been helpful in dealing with the jabot mold.
|
21.09.2012, 18:41
|
|
Администратор
|
|
Регистрация: 07.09.2010
Сообщений: 7,940
|
|
|
21.09.2012, 22:46
|
|
Администратор
|
|
Регистрация: 07.09.2010
Сообщений: 7,940
|
|
Огромная благодарность Автору findyourcake за Мастер-класс


|
22.11.2012, 21:05
|
|
Администратор
|
|
Регистрация: 07.09.2010
Сообщений: 7,940
|
|
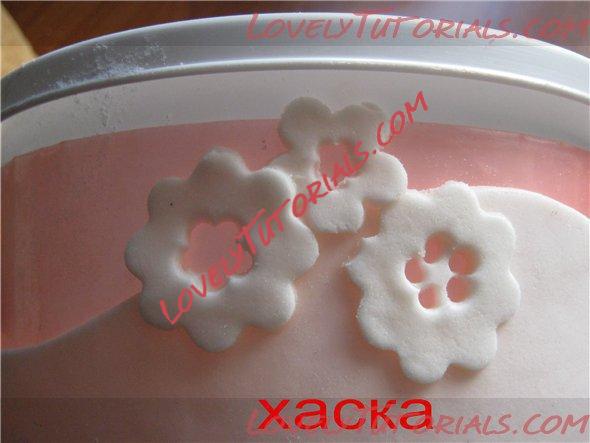
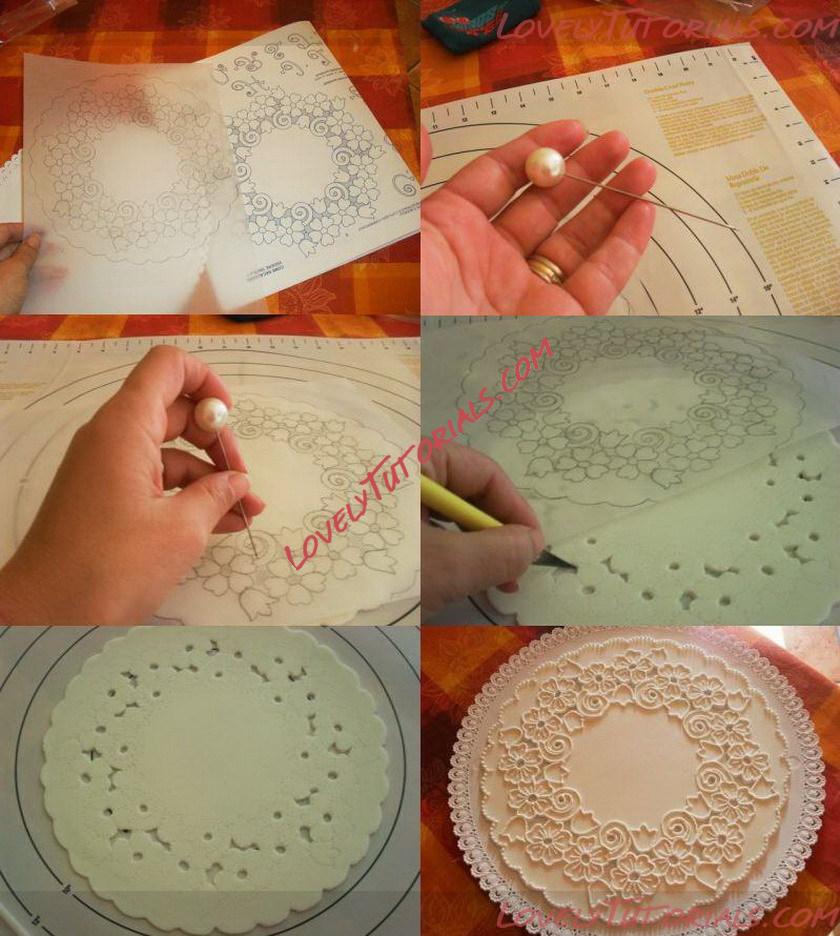
МК взят с сайта hlebopechka.ru Огромная благодарность Автору-Хаска
И так ришелье - кружева.
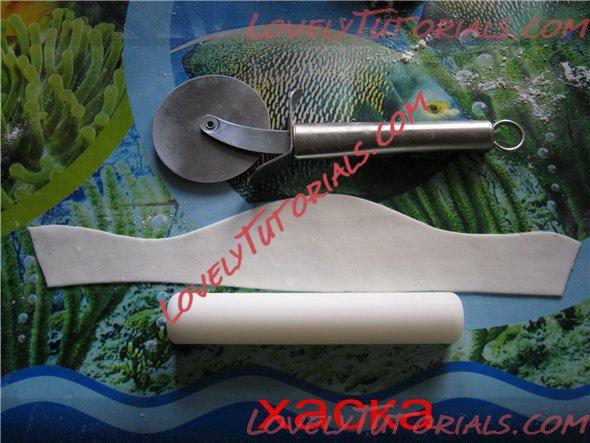
Нам понадобиться:
-мастика желатиновая
-айсинг
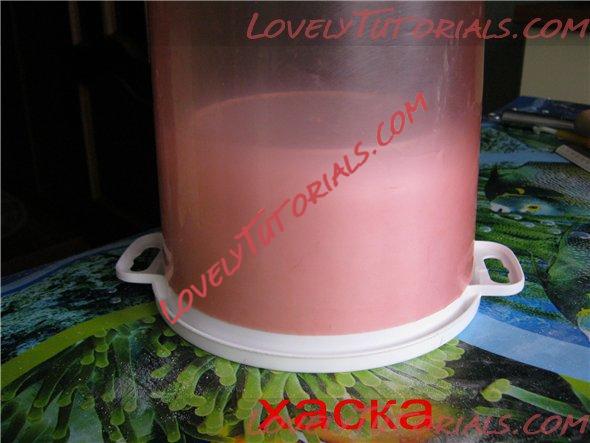
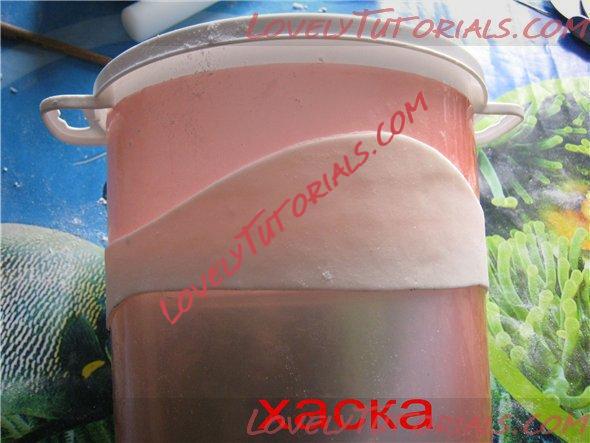
-круглая форма на которой будут сушиться кружева (у меня пластиковая кастрюлька для микроволновки)
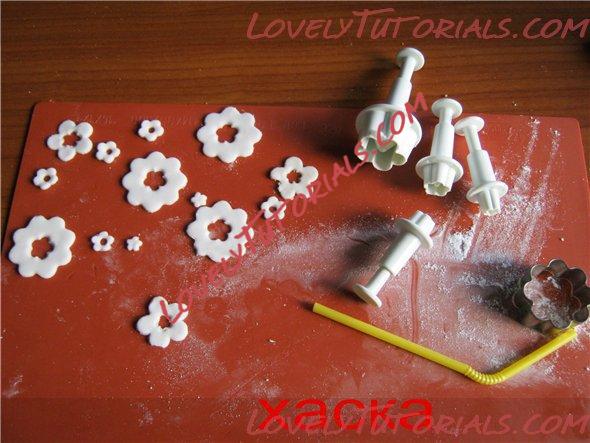
-формочки для цветов 2-3 размеров
- пластиковый файл
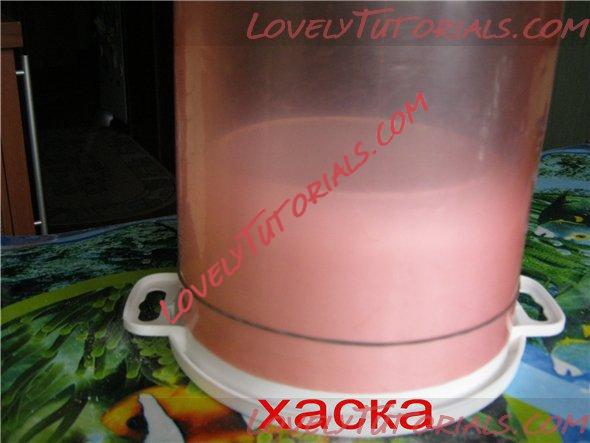
Берем форму на которой будут сушиться кружева.
Оборачиваем пластиковым файлом. Закрепляем при помощи скотча. На файл надела еще резинку, которая будет поддерживать снизу мастику.
Раскатываем желатиновую мастику и вырезаем произвольно из нее волну. Накладываем на файл и даем ей там отдохнуть, пока занимаемся цветочками.
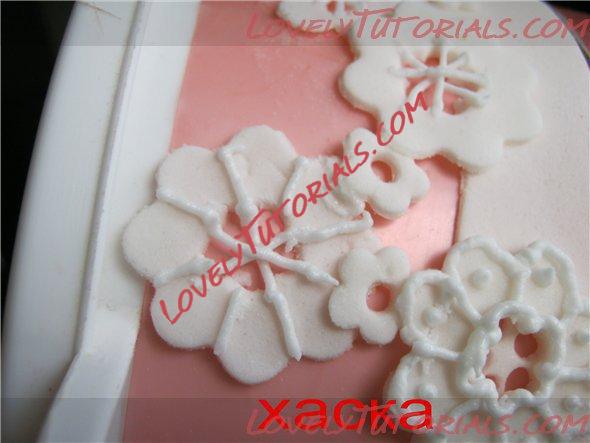
Вырезаем из раскатанной мастики цветочки трех размеров. Можно и двух и четырех размеров. Здесь уже, как вам больше нравится.
Теперь начинаем их приклеивать к мастике. Я приклеивала клеем из СМС. Можно тем же айсингом. Начинала с крупного цветка, а затем постепенно добавляла еще и между ними приклеивала цветочки меньшего размера.
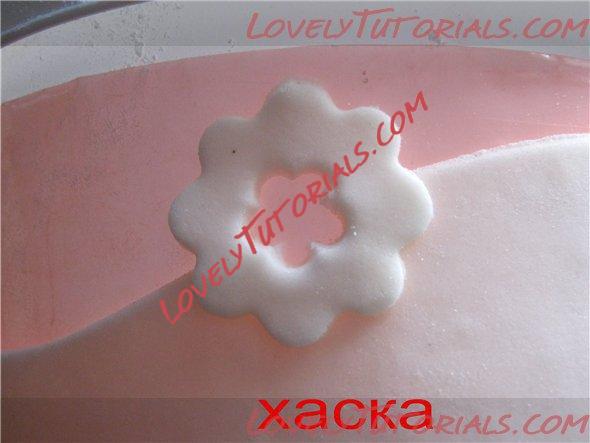
Пока мастика мягкая можно при помощи трубочки или какого другого инструмента выбирать не нужную мастику в местах, где цветок накладывался на мастику. Так чтобы повторялся контур цветка. Если цветок лежит полностью на мастике, то выбирается только середина.
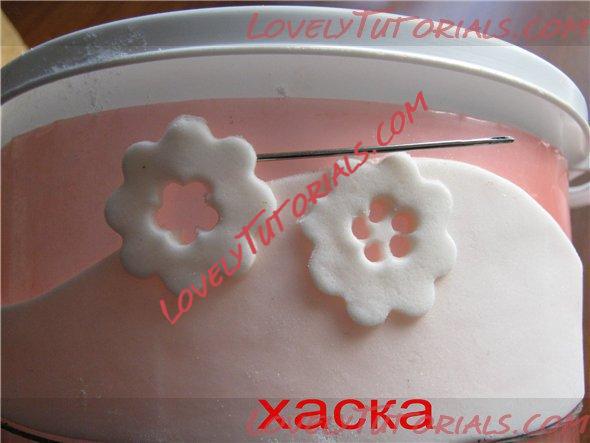
Цветочки располагаются хаотично. Я объединяла два крупных цветка более мелкими, подкладывая их вниз. Для того чтобы следующие цветочки подложить под уже приклеенные цветы, при помощи иголочки отводила их от пластикового файла. Клеить нужно достаточно аккуратно, промазывая только краешки цветов, которыми рисунок соединяется. Иначе кружева могут приклеиться к файлу и впоследствии их будет трудно снять не поломав.
Таким способом приклеиваем все цветочки по всей мастичной полоске.
После этого оставляем нашу заготовку до полного высыхания. Заготовку сушила два дня. При такой влажности можно сушить и больше. У меня до конца мастика не высохла, что привело впоследствии к поломке. 
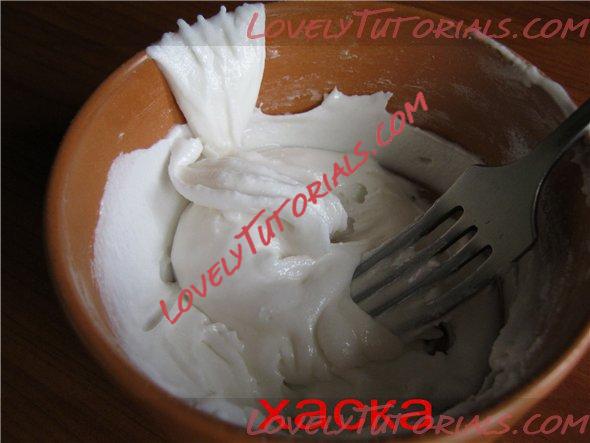
Делаем айсинг.
Хочу обратить ваше внимание на то, что здесь айсинг я замешивала чуть мягче, чем скажем для того чтобы рисовать ажурные детали.
Пропорции в этот раз брала такие.
белок 8г
сахарная пудра 66г
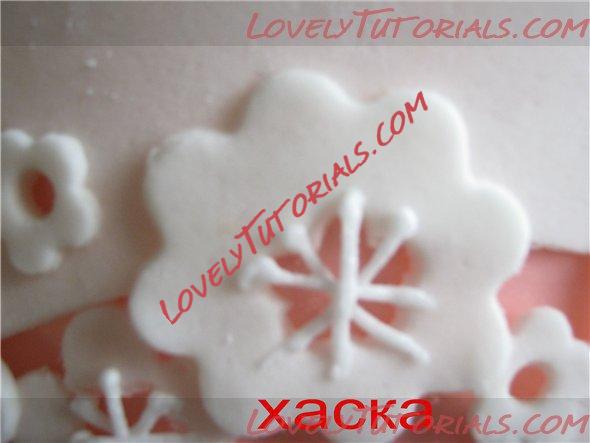
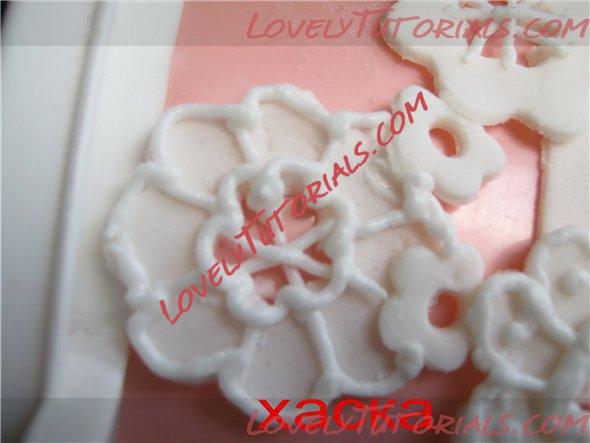
Разрисовывала цветочки насадкой с круглой дырочкой в 1мм. Можно делать просто корнетиком или одноразовым мешком.
Прорисовывала сначала прожилки у лепестков цветка. Затем сверху прикрывала все кончики прорисовкой по сердцевине цветка и по краю ( в вышивке это называется "швы кордоне"  ). Между цветочками кое где прямо по мастике, а иногда и по воздуху прорисовывала прожилки, имитируя нитки (правильно это оказывается называется "плетеные бридочки"   ).
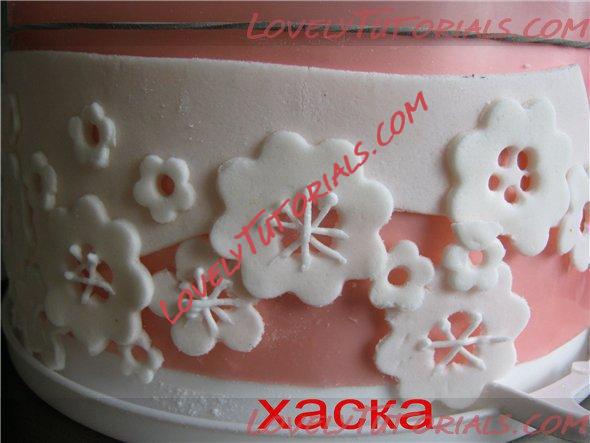   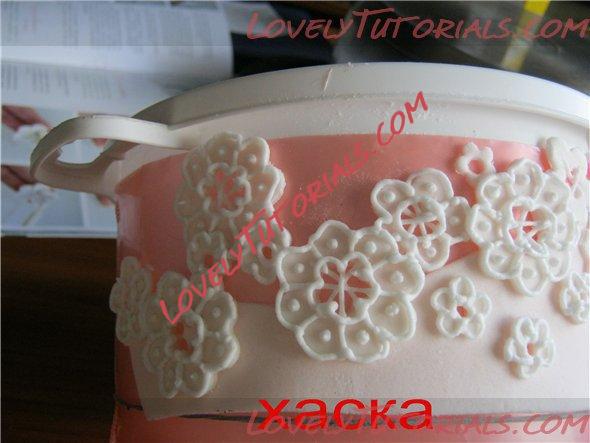 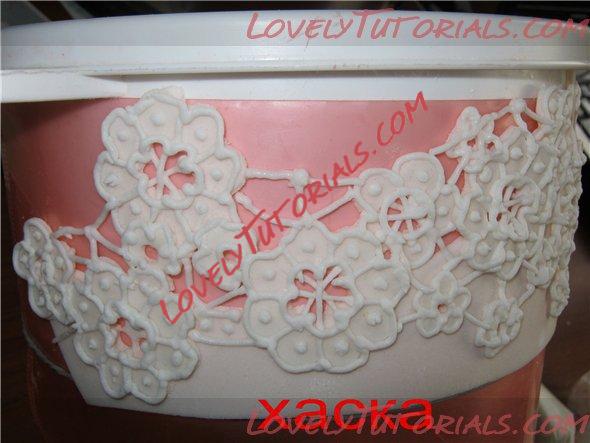
После полной прорисовки оставляем хорошо просохнуть. После чего аккуратно снимаем заготовку с файла.
|
25.11.2012, 13:04
|
|
Администратор
|
|
Регистрация: 07.09.2010
Сообщений: 7,940
|
|
Огромная благодарность Автору paly за Мастер-класс
|
 |
|
|
Метки
|
3d figures, addım-addım təlimat, adım, adım adım yönergeler, artesanatos passo a passo, bemutató, birthday cake, biscuit, bolando bolos, bolos decorados, cake decorating, cake decorating techniques, cake topper, cake toppers, cake tops, cerâmica plástica, character figures, characters, children's cake, cold porcelain, confeitando bolos, csipke, curso de modelado, dantel, dantelă, decoracion de pasteles, decoración de tortas, decorada en fondant, decorare le torte, decorazioni, deko fondant, dekorace na dort, dekoracija, dekoracije, dekorasyon, dekorácie, dentelle, encaje, especializada em modelagem de biscuit, fender, figur kager, figuras, figure making tutorials, figuren, figures, figurice, figurice od fondana, figurine on the cake, figurines, figurinhas, figurky, figúrky, figür modelleme, fimo, fixando a cabencinha, flower paste, fondan, fondant, fondant lace tutorials, fondente, fondente di zucchero, fotopostup, foundant, gebak, glazuur, gum pasta, gum paste, gumpaste, hand-made, handmade, how to, how-to's, instrucţiuni, instrukcijas, instrukcje, jak na, kage dekoration, kagedekoration, kakebaking, kant, korak, korak za korakom navodila, korak-po-korak upute, koristeet ja koristelu, krajka, krok, krok po kroku, krok za krokem, krok-za-krokem, la modélisation, lace, las instrucciones, las técnicas, le tecniche, les techniques, lukie, marcipanové figurky, marshmallow, marsipanfigurer, masa flexible, master-class, master-klasse, master-klasy, meistras klasės, metodikas, mistr třídy, modelado, modelagem, modelando a barriga, modelando a cabencinha, modelando a perninha, modelando as maozinhas, modelando o cabelinho, modelando o corpinho, modelando os bracinhos, modelando os pezinhos, modelare, modelerte figurer, modeling, modeling paste, modeliranje, modellazione, modelleme, modellering, modellieren, modellierpaste, modelling, modelling past, modelləşdirmə, modelovanie, modelování, modelování krok za krokem, modelowanie, motivtorten, návod, návody a postupy, návody na květy a lístky, nėriniai, opplæringen, orelhas, ozdoby, pamoka, pap, pas, pas-cu-pas, pas-à-pas et modèles, paso, paso a paso, passo, passo a passo, passo-a-passo, passo-passo le istruzioni, pasta de goma, pasta de miel, pasta flexible, pasta laminada, pintura dos olhos, pitsi, pizzo, pocelana fria, polymer clay, postupak za ukrasavanje, pravljenje figurica za torte, pâtisserie, předměty z marcipánu, renda, schmelzend, schnüren, schritt für schritt anleitung, schritt-für-schritt, schritt-für-schritt-anleitungen, sculpting, snøre, soggetti, souvenirs, spetsar, stap, stap-voor-stap, stap-voor-stap instructies, steg for steg, steg-för-steg-instruktion, step, step by step, step-by-lépésre, step-by-step, step-by-step instructions, styrofoam, sugarcraft, sugarpaste, suikerglazuur, technieken, techniken, techniki, techniky, technikák, techniques, tecnicas de decoracion, tecniche, tehnici, tehnike, teknikker, teknikler, telgopor, topo de bolo, topo do bolo, topos de bolo, torte, torte decorate, torten dekorieren, torti, trin, trin for trin, trin-for-trin, trin-for-trin instruktioner, trinn, trinn for trinn, trinn-for-trinn-instruksjoner, trucs et questions sur la décoration de gateaux, tutorial, tutoriale, tutorias, tutorias/ideas para decorar los bizcochos, tutoriel, tutoriels, tutorijal, técnicas, udžbenik, ukrašavanje torti, uputstvo za dekoraciju, zasznurować, zuckerfigürchen, zuckermasse, सजा केक, ट्यूटोरियल मास्टर वर्ग, कदम, कदम दर कदम निर्देश, तकनीक, मॉडलिंग, モデル, étape, étape par étape les instructions, öğretici, 一步, 一步一步的指示術, čipka, žingsnis, žingsnis po žingsnio, šnurovať, 宗師級教程, 建模, 裝飾蛋糕, 黏土教程, δαντέλα, βήμα, βήμα προς βήμα οδηγίες, οδηγίες βήμα βήμα, παντεσπάνι art, τεχνικές, φροντιστήριο, дантела, декорация на торти стъпка по стъпка, инструкция, как сделать, карункі, крок за кроком, крок за крокам, кружево, оздоблювати мереживом, покроково, полимерная глина, пошагово, пошаговые фотки, пакрокава, персонажи, миниатюра, мк, мк кружева из мастики, моделиране, майстор-класа урок, майстар-клас, майстер-клас, майстер-класи, маршмеллоу, мастика, мастер-класс, лепка, ліплення, ручной работы, ручная работа, украшение тортов, сахарная мастика, уроки прикрашання, стъпка, стъпка по стъпка инструкции, торта стъпка по стъпка, техники, техника, техніка, туториал, туторіал, тэхніка, фигурки, фигурка на торт, фимо, фонданта, фігурки, фігуркі, холодный фарфор, шаг за шагом, інструкцыя, інструкція  |
| Опции темы |
Поиск в этой теме |
|
|
|
|