Огромная благодарность Автору ROsie Dummer за Мастер-класс
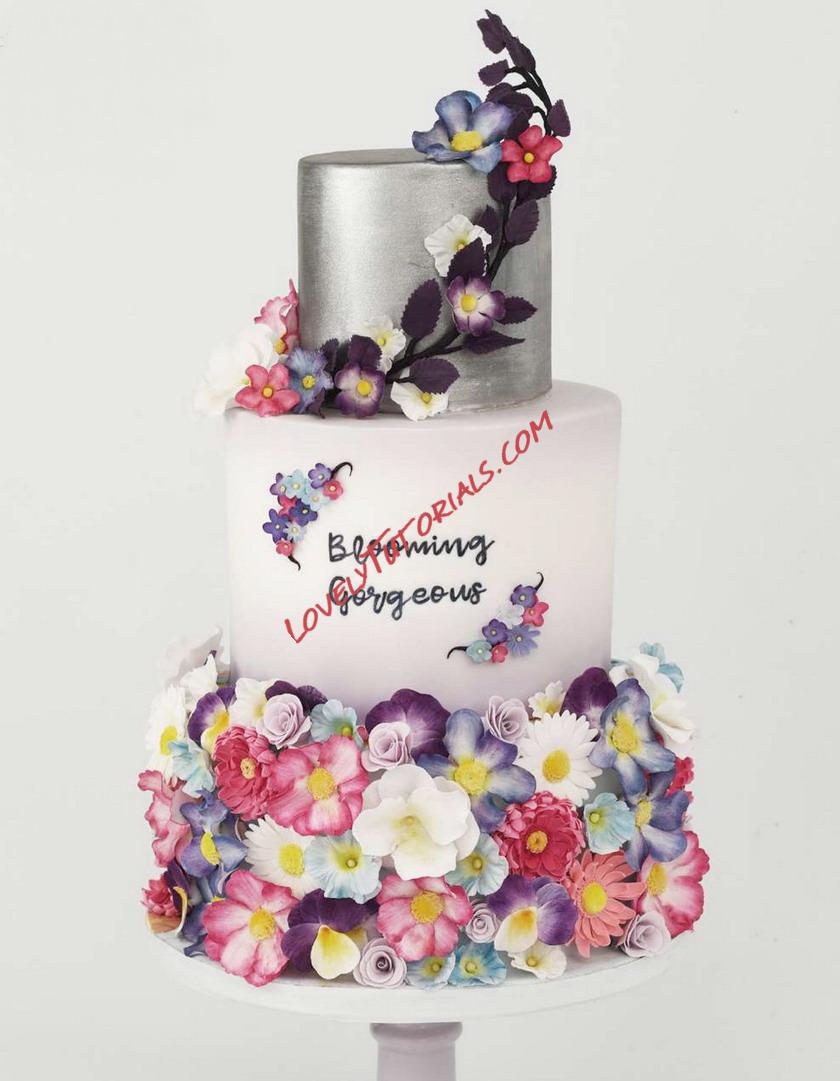
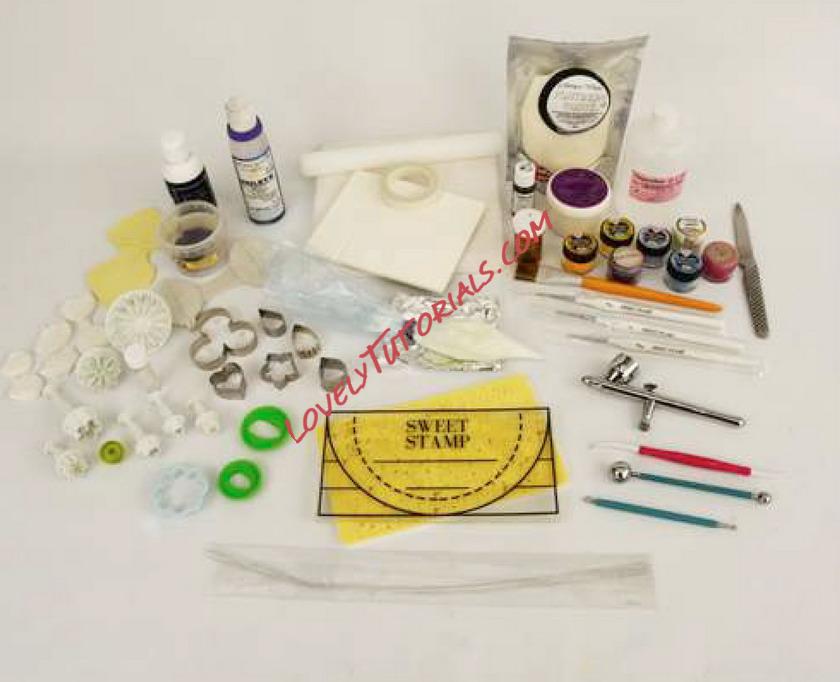

• Cakes: 10x5", 8x6", 5x5" • Dresden tool
• 12" cake drum • Veining tool
• SweetStamp Cookie Set • 26 gauge florist wire
(or font of choice) • Florist tape
• SweetStamp • Silver foil or flower
PickUpPad™ formers
• Airbrush • Petal dusts: blue,
• Airbrush colours: purple, ruby, yellow,
lavender, violet orange, green
• Brushes • Royal icing
• Yellow food colour • Cornflower
• Silver petal dust • Sugar glue
• Purple Edible Art • Dowels
Decorative Paint
• Flower paste: white,
deep violet
• Flower cutters
• Petal veiners
• Leaf cutters
• Leafveiner
• Veining board
• Rolling pin
• Foam pad
• Ball tools
Step 1.
Use the SweetStamp set shortly after the cake has been covered. Prepare the middle tier and choose the font.
Step 2.
Arrange letters on the handy template that comes with the PickUpPad™. The orientation of the letters in the tray will help confirm the alignment of the letters.
Step 3.
The best way to lift the letters out the tray is to soften a small ball of fondant and press onto the chosen letter. The letter will then lift out easily.
Step 4.
Place the PickUpPad™ over the word and press firmly.
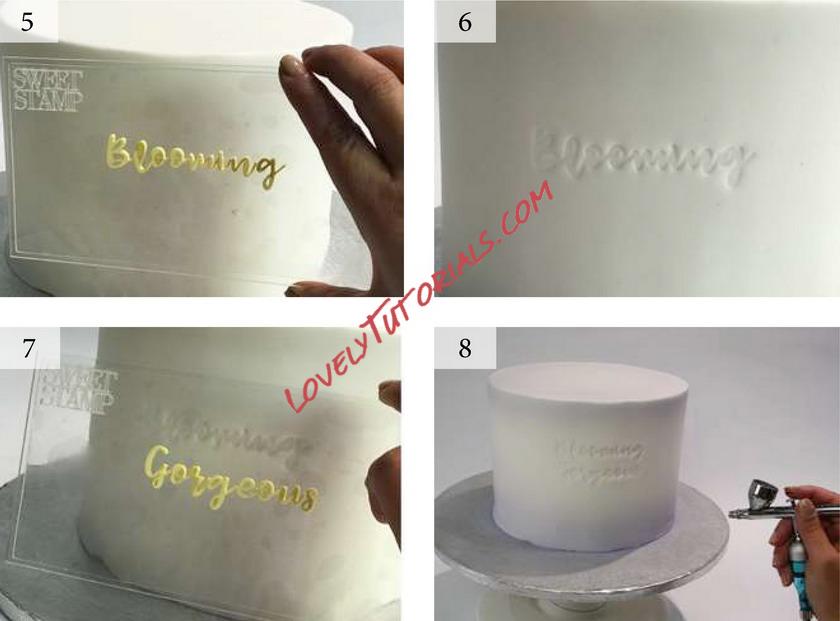
Step 5.
The word will stick to the pad so you can align on the surface of the cake. Press gently to create an impression on the fondant. On a curved surface, transfer pressure from one side to the other.
Step 6.
A light impression will make it easier to paint with clean edges.
Step 7.
Repeat for any further words.
Step 8.
Using lavender airbrush colour, mist around the top and bottom of the cake.
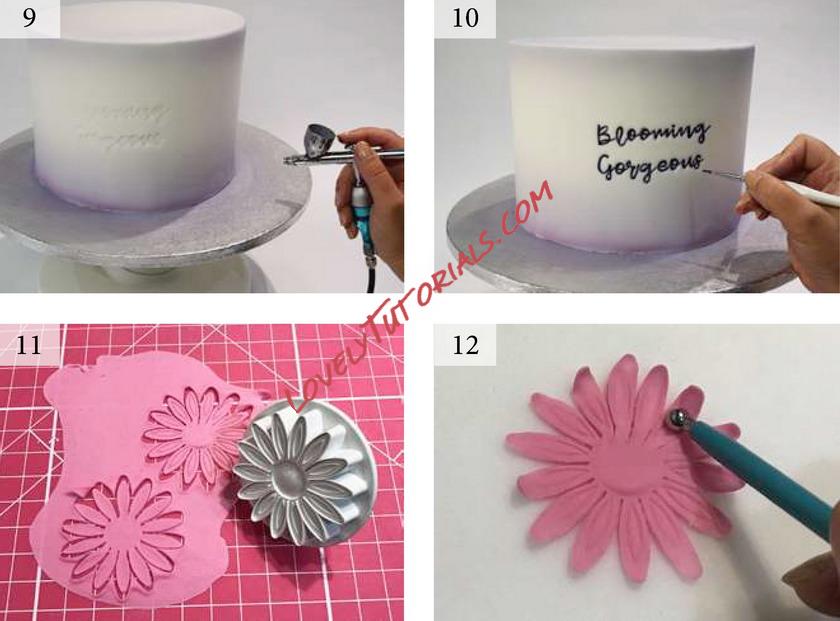
Step 9.
Using violet, airbrush a depth of colour around the base to create a gentle blend with the lavender.
Step 10.
Using purple edible paint and a SweetStamp 0 brush, fill in the impressions created with the SweetStamp set.
Step 11.
Start creating flower paste flowers before assembling the cake. Make many floral effects with simple cutters, for instance, a chrysanthemum/daisy cutter can be fairly versatile. Roll the paste nice and thin.
Step 12.
Once you have cut out the shape, place on the foam pad and use a ball tool to thin the edges. Draw a small ball tool in from the edge of each to curve upwards.
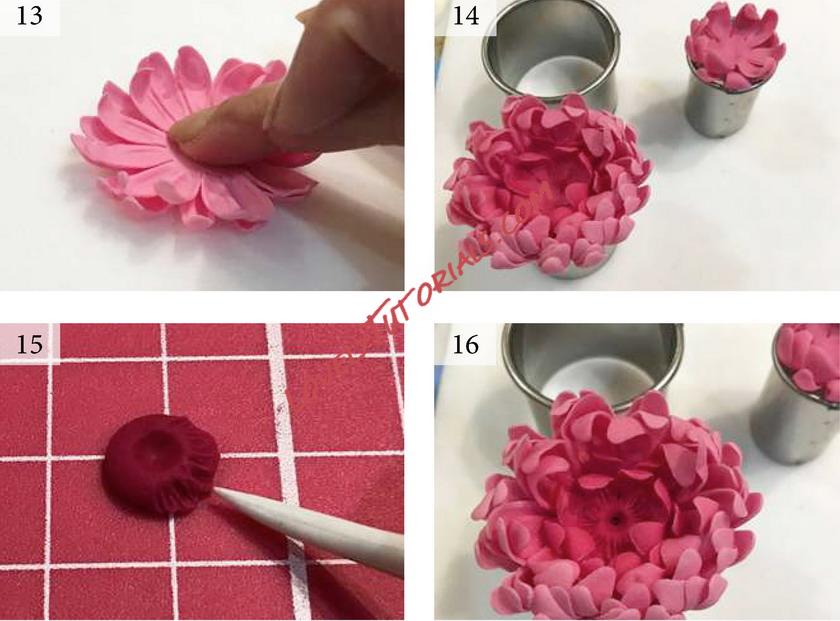
Step 13.
Leave the petals to air dry so they start to hold their position. When the petals start holding their shape, use sugar glue to stick layers together and press in the middle. Leave the flower like this to create a soft daisy.
Step 14.
Continue adding layers if you want a fuller flower. Use darker paste as you get closer to the middle to give depth. Use tin foil or pots to shape the flower how you want.
Step 15.
To form the centre, flatten a ball of dark paste and frill edges with the veining tool
Step 16.
Add to the centre of the flower. This will be the backdrop to the eye.
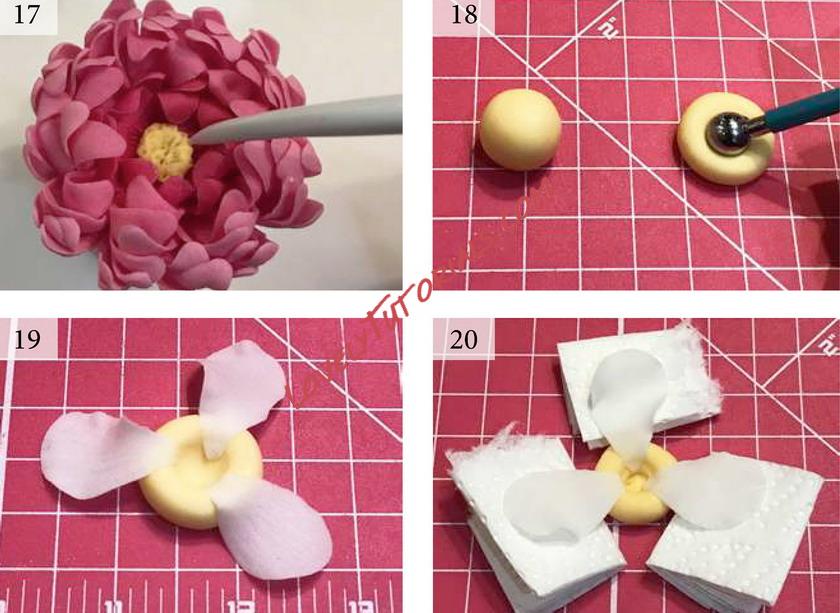
Step 17.
Create a centre with a ball of yellow. Use a little water or sugar glue to add to the
flower. With gentle strokes of the veining tool, create a more realistic centre.
Step 18.
To give the look of a raised bloom, create the flower on a false base. Use a ball of paste and add a dimple in the centre.
Step 19.
Once you have cut out the petals from paste, vein with the petal veiner then glue to the false base with sugar glue.
Step 20.
Use paper towel to support the first petals drying in a raised position. Let dry before adding a further three petals.
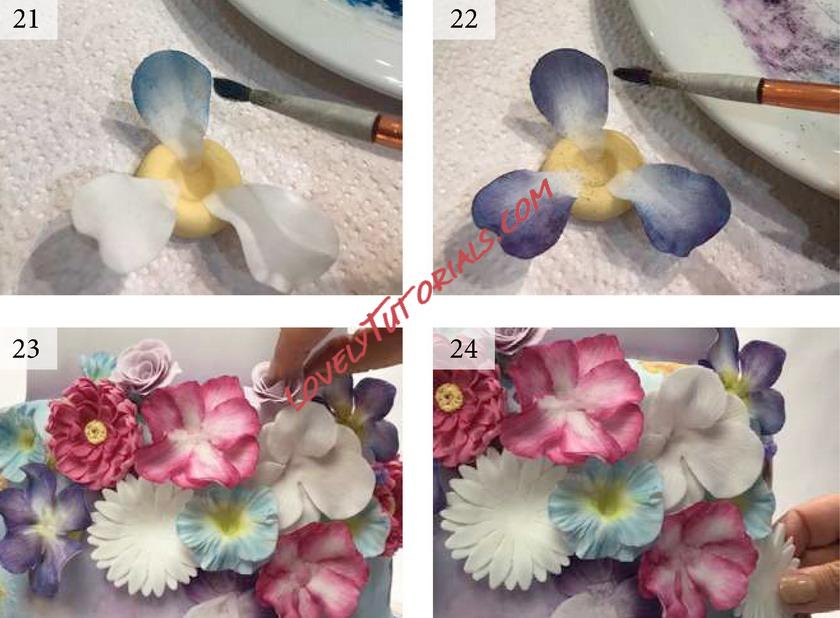
Step 21.
Once dry, dust each petal with blue dust. Step 22.
A further dry dusting of purple dust will create a lovely depth of colour.
Step 23.
Use royal icing or paste to attach the base onto the cake. Add the remaining petals once the base is secure to allow you to arrange the flowers nicely together.
Step 24.
With a combination of set and still pliable flowers, get the flowers close together to achieve a natural look to the arrangement.
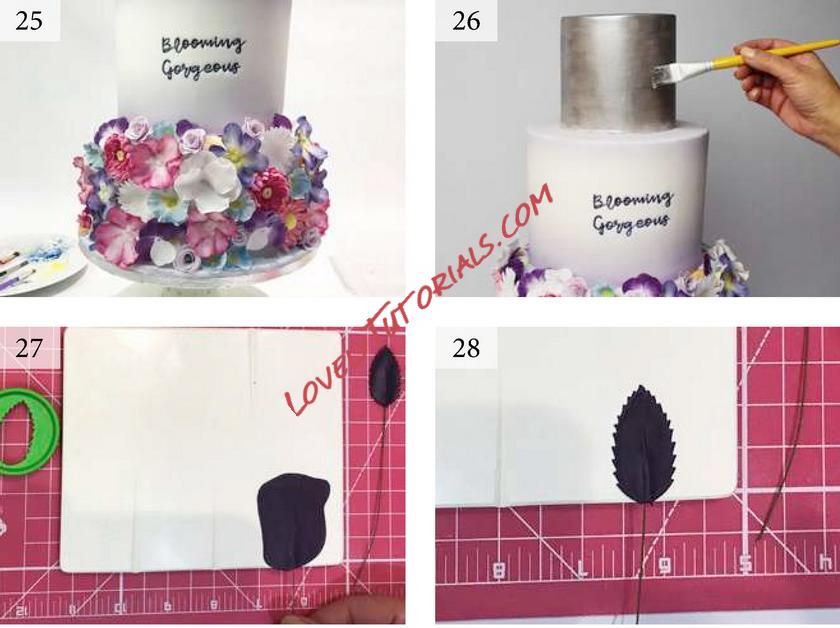
Step 25.
Fill the base tier with the blooms.
Step 26.
Dowel and add the top tier. Use dipping solution to paint silver dust.
Step 27.
To create the leaf spray, take deep purple paste and roll a small amount over the groove of the veining board. Take a short length of florist wire and guide through in the groove.
Step 28.
Cut with the leaf cutter keeping the wire central. You will need some small for the top and large for the bottom of the spray Peel away excess paste to get a clean edge.
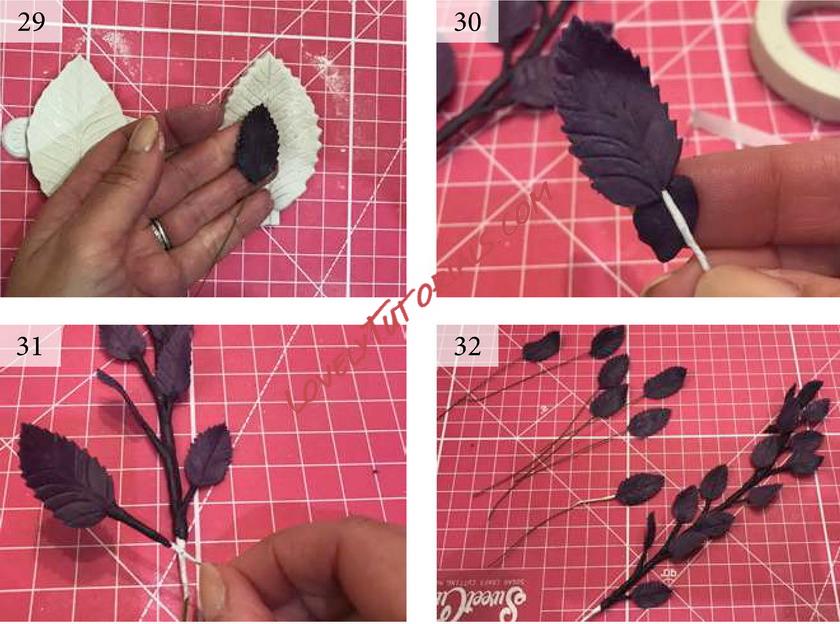
Step 29.
Press into the leaf veiner to create texture. Dust with cornflower if needed.
Step 30.
Wrap the wire at each base with florist tape. Split a normal width in half to keep it thin. Wrap a small amount of deep violet paste around the base. Roll and tease to create a thin coating.
Step 31.
Wrap the leaves together with florist wire. Put together where the paste ends. Hold and pinch the tape in place. Stretch as you wrap to release the adhesive.
Steps 32.
Wrap the main strand with paste between adding each leaf. Cut away excess wire.
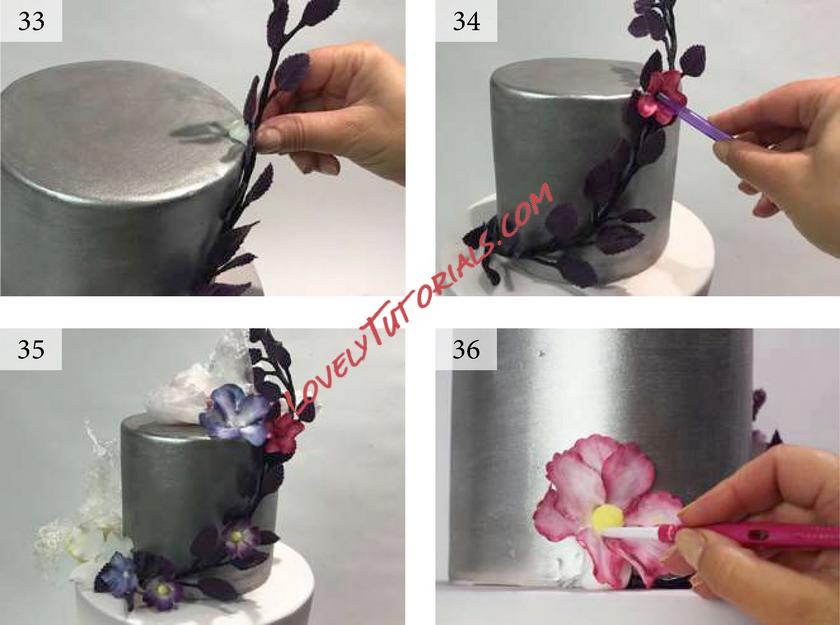
Step 33.
Attach the spray to the top tier using a little paste and sugar glue or water.
Step 34.
Hide joins using royal icing or gum paste to attach flowers.
Step 35.
Create feature flowers in situ and use plastic wrap or paper towel to support petals as they dry.
Step 36.
Hide the base end of the spray with flower petals.
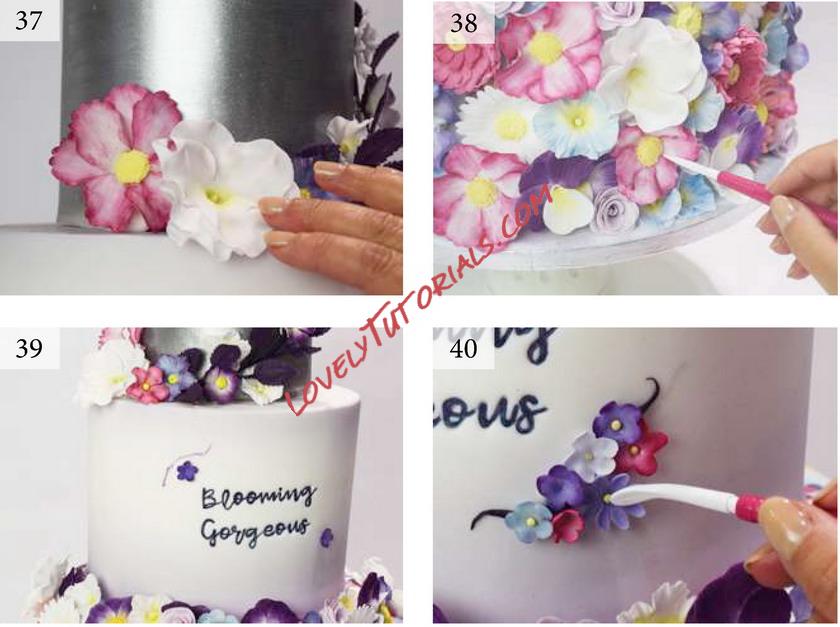
Step 37.
Use some big blooms to balance the arrangement.
Step 38.
Add the flower centres and do final dusting with yellow dust to give depth.
Step 39.
Highlight the message by mapping out a little spray of blossoms.
Step 40.
Add the blossoms with a little royal icing and pop a tiny ball of yellow paste in each centre with sugar glue. Add a final little flourish of purple paste to make it all blooming gorgeous.


