|
|
РңРҡ СӮРҫСҖСӮ "РҡРҫСҖРҫРұРәР° РәРҫРҪС„РөСӮ" -Chocolate Box Cake Tutorial
|

28.05.2013, 15:54
|
|
РҗРҙРјРёРҪРёСҒСӮСҖР°СӮРҫСҖ
|
|
Р РөРіРёСҒСӮСҖР°СҶРёСҸ: 05.03.2013
РЎРҫРҫРұСүРөРҪРёР№: 698
|
|
 РңРҡ СӮРҫСҖСӮ "РҡРҫСҖРҫРұРәР° РәРҫРҪС„РөСӮ" -Chocolate Box Cake Tutorial
РһРіСҖРҫРјРҪР°СҸ РұлагРҫРҙР°СҖРҪРҫСҒСӮСҢ РҗРІСӮРҫСҖСғ sweetnessandbite(Ann) Р·Р° РңР°СҒСӮРөСҖ-РәлаСҒСҒ
 Mmm, chocolate
I based this cake on one filled with lollies that I made last year for a friend of mine, and I wanted to share it here because itвҖҷs such a versatile cake. Who wouldnвҖҷt love a cake filled with sweets or chocolate?! {вҖңSomeone on a dietвҖқ you say? Well donвҖҷt say it, I hate being wrongвҖҰ) The colour scheme, lid decoration and choice of fillers can be changed however you like. It doesnвҖҷt have to be girly, you could totally bloke it up for a man. And you can change the shape, too; the first one I made was a square, but I wanted to change it up for this cake so I went with a hexagon shape, and tapered the bottom slightly for a mand stretch the ore elegant look. If you want to make a square or round cake, just follow the instructions using square or round boards. If you donвҖҷt want the taper, use boards that are all the same size.
IвҖҷve tried to break down the instructions into sections, with the bits and pieces youвҖҷll need listed at the start of each section. Best to read right the way through before you start.
After writing all out all of the instructions, IвҖҷve realised that I am quiteвҖҰ wordy (ahem, bossy) I apologise for that, I canвҖҷt help it, I must like telling people what to do or something. IвҖҷm making it worse now, so weвҖҷll just get on with it, shall we?
* Hexagon Chocolate Box Cake
{Cutting the Boards}
What you need: (For a hexagon cake)
~ 4 round cake boards - two that are the same size as your round cake, and two that are 2вҖқ smaller
~ Compass
~ Ruler
~ Pencil
~ Craft knife and cutting board
Check out this page on how to draw a hexagon . IвҖҷve written in out in my own words below, but the pictures in the link are super helpful. (Instead of drawing a circle like in the article, youвҖҷll be doing the steps using the round cake board)
Grab one of your larger round cake boards, and find the very centre. Place the needle of the compass on your centre mark pencil end out to the edge of the board. Without altering the distance between the needle and the pencil, place both ends against the edge of the board. Use the pencil to make a mark on the edge of the board. Now, again without adjusting the compass, place the needle end on the mark you just made, and mark the board again. Continue doing this the whole way around, until you have 6 evenly spaced marks.
If you find theyвҖҷre not evenly spaced, then either youвҖҷve accidentally moved the compass, or your board isnвҖҷt completely round, so youвҖҷll need to adjust things until the marks are as evenly spaced as you can get. Unless youвҖҷre making the cake for a geometry teacher, donвҖҷt worry too much if one section is slightly larger than the others.
Take your ruler and draw a line from one mark to the next, all the way around to get the hexagon shape. Use the ruler and craft knife to cut out the hexagon. WeвҖҷll call this board #1, and this the board you will use as a guide when you ganache the cake.
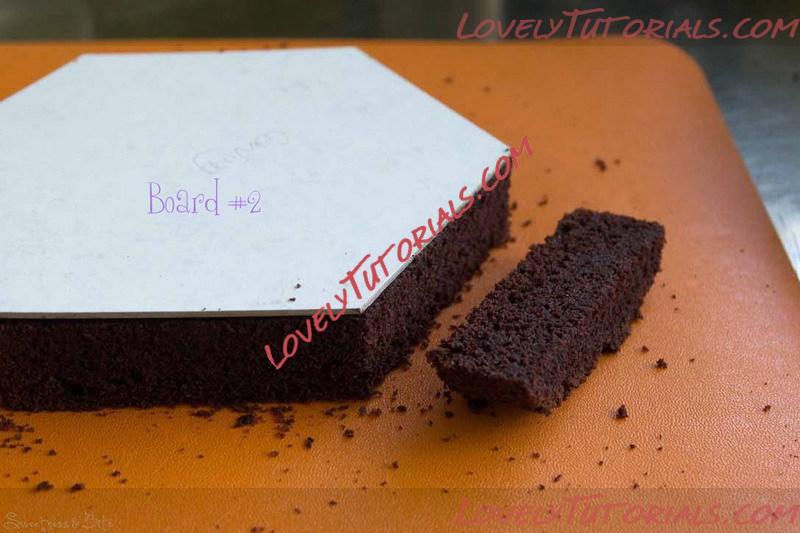
Now grab your other larger board, and draw around the hexagon board onto the round board (this just saves going through the compass process again). Use the ruler to measure in approximately 5mm/ ВјвҖқ the whole way around the hexagon, to make a smaller hexagon, and cut this out. This is board #2, and will be one of your carving guide boards. We want this smaller board for carving so you know youвҖҷll get a good 5mm thick layer of ganache around the cake to help support it. Wipe the boards with a little vodka or cake decoratorвҖҷs alcohol to clean the edges.
Follow these same steps with the smaller two round cake boards, making the hexagon shape (board #3), and then the smaller hexagon (board #4). Board #3 will be the final board that your cake stays on, and board #4 is your second carving guide board. Still with me?
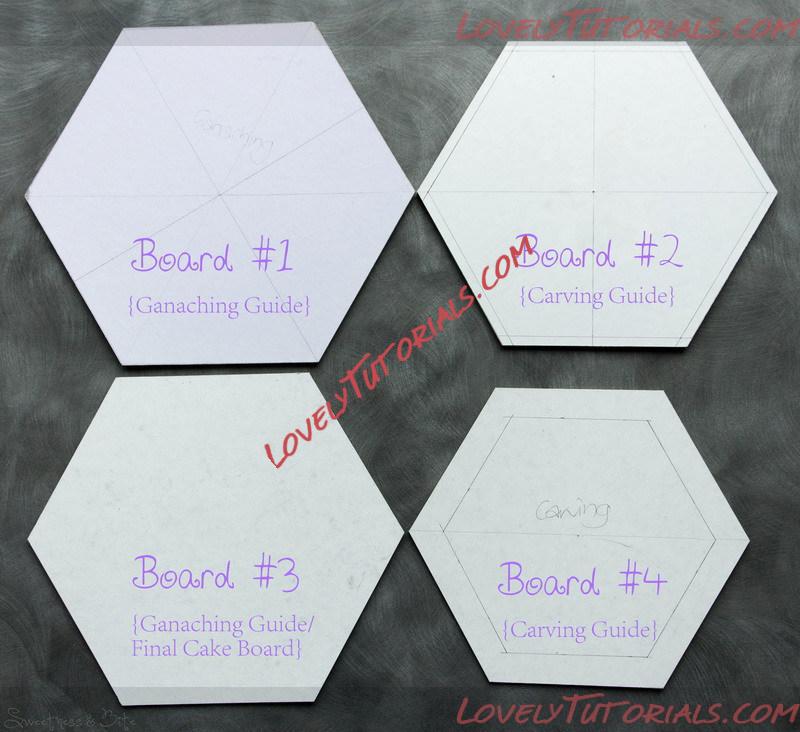 The four boards
(Ignore the extra pencil marks on my boards, they were experimental lines)
Onto a piece of baking paper, trace around boards #2 and #3 and cut them both out. Trace around board #1 onto two pieces of thick paper or thin cardboard and cut them out.
* {Carving The Cake}
While youвҖҷre carving and ganaching the cake, it may help to remember that youвҖҷre basically making the cake upside down. With the taper it is much easier to work with the larger side (what will be the top) on the bottom. If youвҖҷve decided against tapering your cake, then you can ignore the section on carving the cake and go straight to the ganaching. And if youвҖҷre not tapering the cake, you can ganache it right side up.
What You Need:
~ Cutting boards
~ Cake leveller or knife
~ Turntable
~ 2 ganaching boards/large cake boards
~ Non-slip mat
~ Sharp, long, non-flexible serrated knife (a sturdy bread knife is good)
~ Short, pointy serrated knife
~ Spatula (straight or off-set, whichever youвҖҷre comfortable with)
~ Ganache scraper вҖ“ your scraper needs to be at least the height of your finished cake, my cake was 6вҖқ high and my scraper is 8вҖқ
~ Small spirit level
~ Ruler
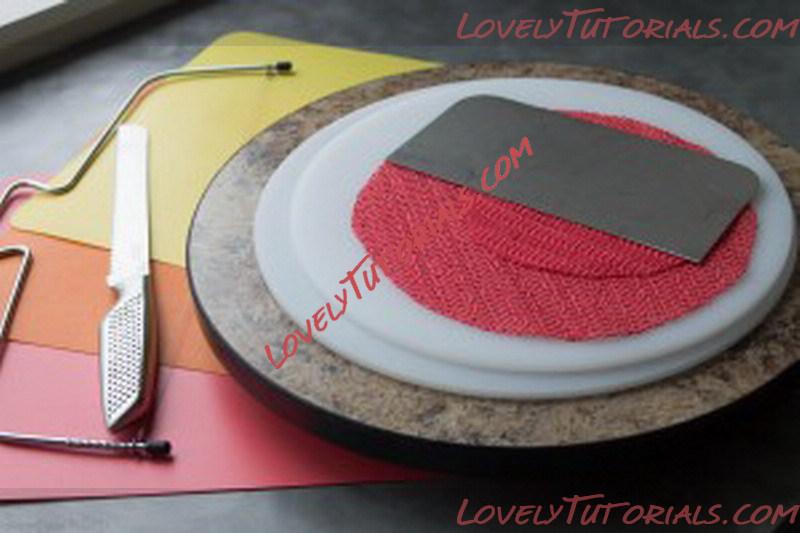 Some of the bits and pieces youвҖҷll need, turntable, cutting boards, ganaching boards, grippy mat, knife, cake leveller.
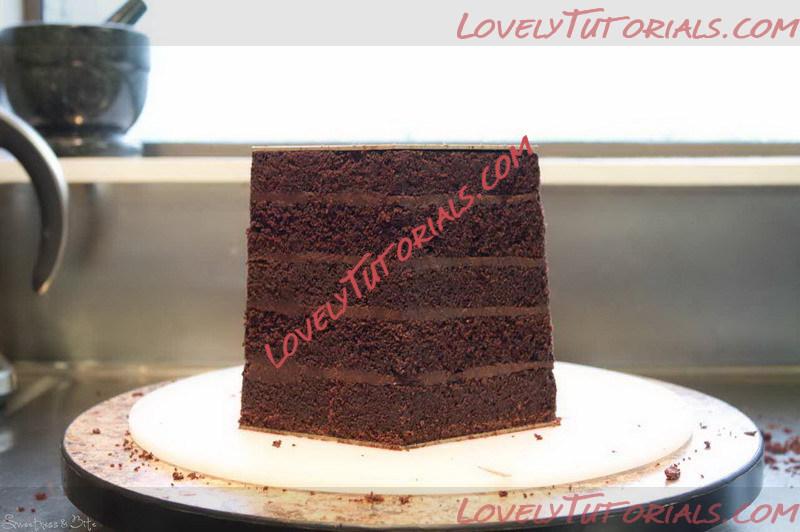
Cake вҖ“ Use a sturdy cake that will hold up to carving. Mud cake is ideal, I used gluten free devilвҖҷs food cake which isnвҖҷt particularly ideal, but since IвҖҷm used to working with it, it worked out ok. How high your cake needs to be depends on how high you want your box. I used two cakes that were each 3вҖқ high and split them into 3 layers each. I only ended up using 5 layers. Better to have too much cake than too little.
Ganache вҖ“ Dark, milk or white chocolate ganache, I used dark as it sets the firmest. * Split your cakes into even layers, whichever way you prefer. I used a wire cake leveller, and split my two cakes into three layers each. As they were thick layers I only ended up using 5 layers of cake, and I ended up with a finished cake about 6вҖқ tall.
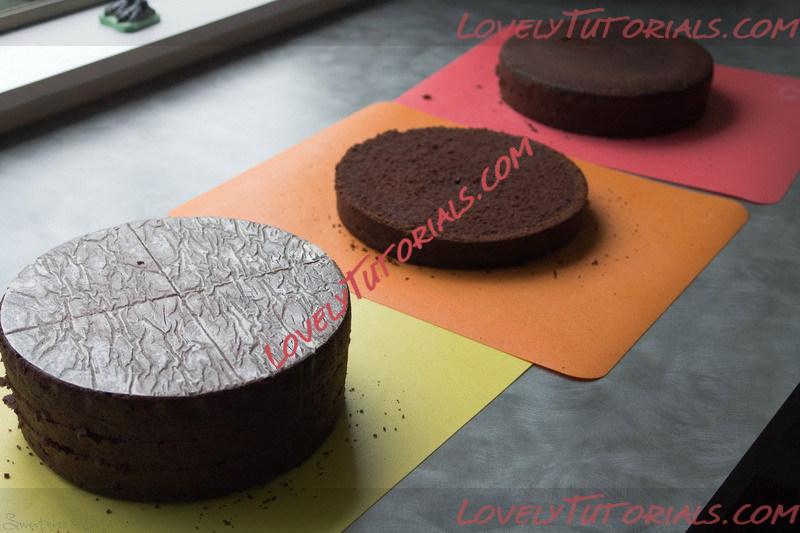 Cake layers, I split my two cakes into 3 layers each.
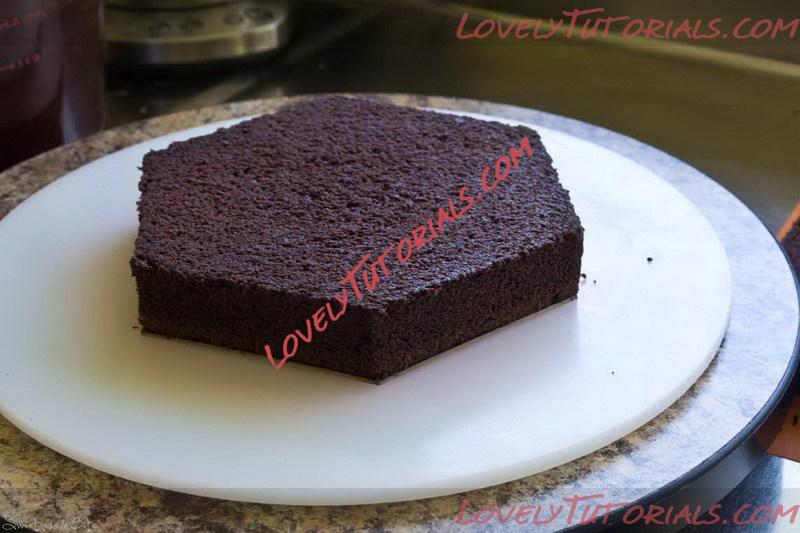
Take one layer of cake and place board #2 on top. Cut around the board, trying to keep your knife as straight as possible. Repeat for all your layers of cake.
 Trimming the round cake layers into hexagons
* 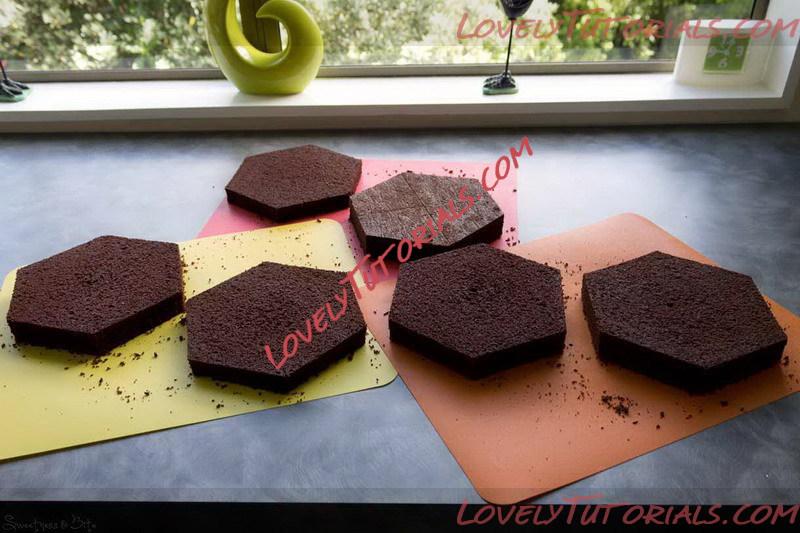 All trimmed up with somewhere to goвҖҰ
Place a piece of non-slip mat on your turntable, and put your setup board on top. Take the same board that you used above, board #2, and place this on a small piece of non-slip mat on your setup board.
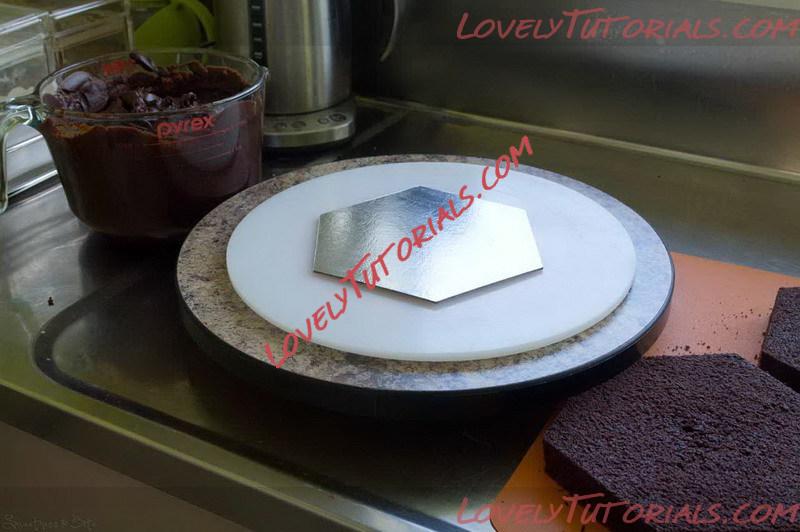 *
*  Dab a little ganache on the board before placing your first cake layer on top.
*  First cake layer
Smear a little ganache on the board and place a layer of cake on top. Set this aside for a minute. Spread an even layer of ganache onto another layer of cake and place the smaller baking paper cut-out onto the ganache. This will help when it comes to cutting out the indent in the cake that you will fill with goodies later. Take your cake layer that is attached to board #2, and flip that piece of cake over and onto the baking paper covered layer.
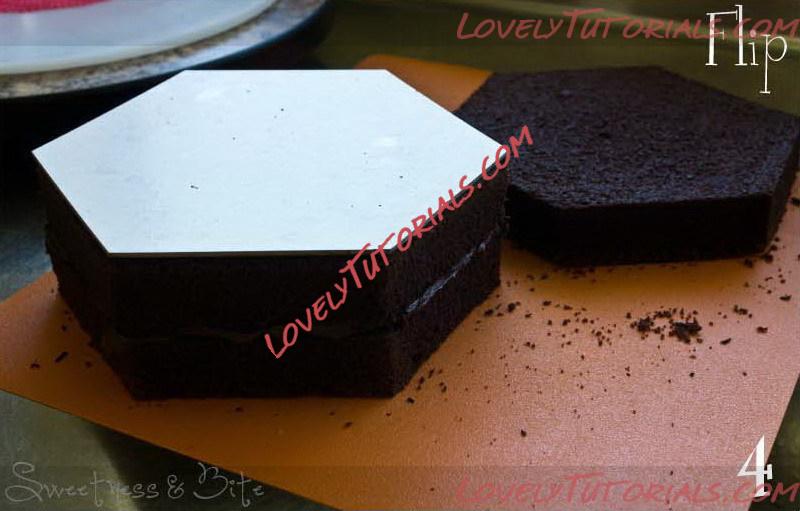
Now flip them both back over, so the board is on the bottom, and place this back on the non-slip mat. Note: I did it this way because I was using gluten free cake that was a little bit fragile. If youвҖҷre using mud cake, or another sturdy cake, you should be able to safely flip the baking paper-covered cake layer over and onto the other layer.
 Flip the two layers back over so the board is on the bottom again.
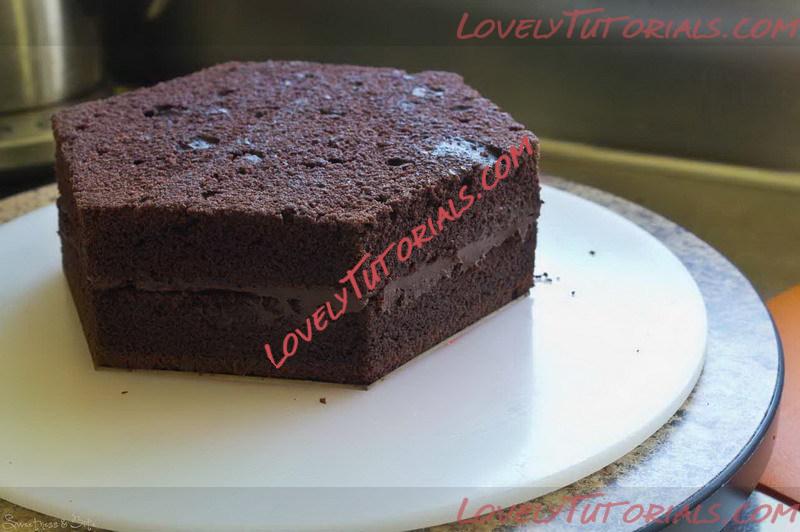
Spread ganache onto the top of the layer, and continue filling and layering up your cake. Be careful to make sure your layers line up.
Smear some ganache into the middle of the top layer of cake, and place board #4 on top. Use your ruler to check the board is centred, and to check that the points of your hexagon line up. Pop the whole cake into the fridge to let the ganache set.
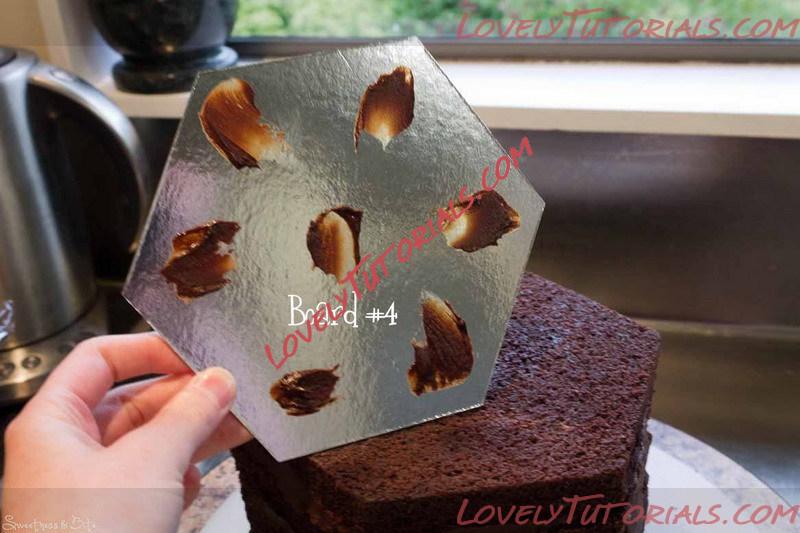 Attach board #4
*  Cake all layered up, with board #4 attached. Now fridge it!
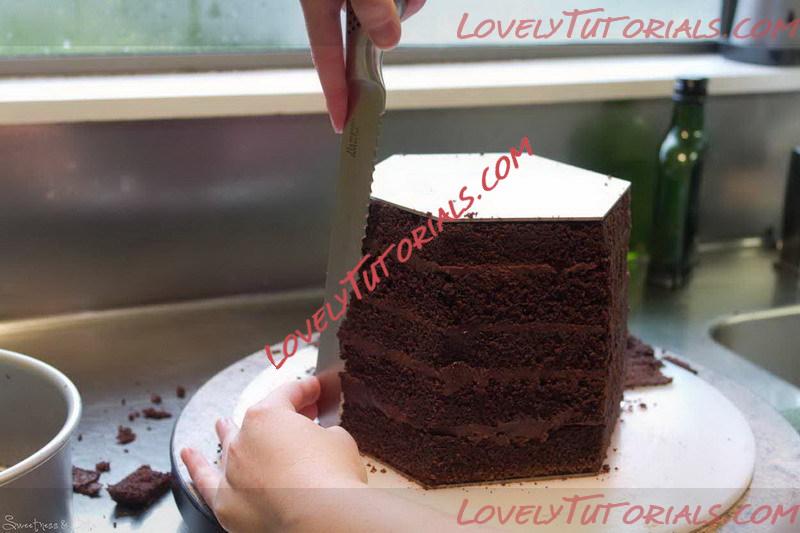
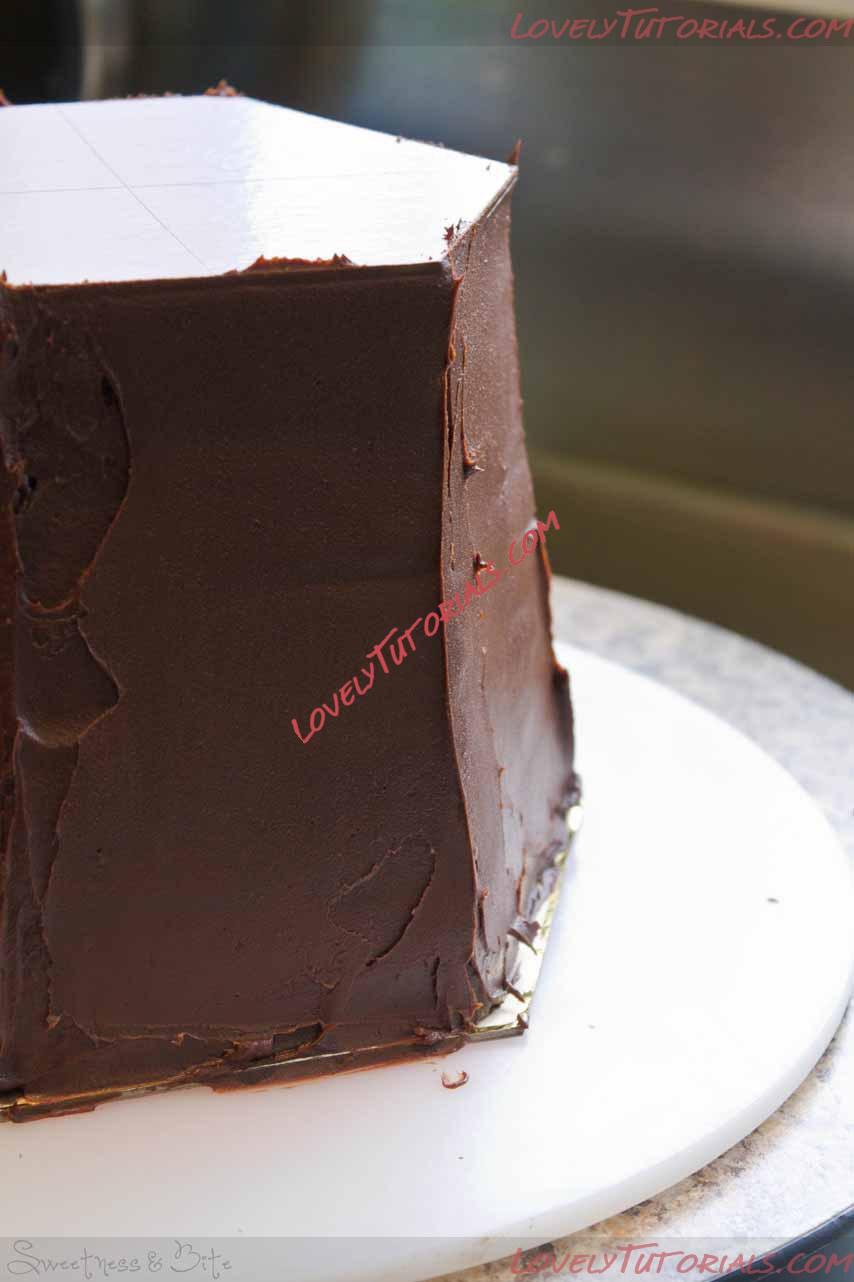
Time to hack at some cake! {YouвҖҷll have to excuse my pictures of the carving and ganaching, a big storm came in from the south as I was carving and even with the lights on it got so dark in our south-facing kitchen. I should have gotten out my tripod to avoid blurry, grainy pictures but, well, I didnвҖҷt. AnywhoвҖҰ}
If youвҖҷre not confident at carving cakes, then itвҖҷs fine to start with baby steps. Cut around each side of the hexagon, aiming your knife out at a slight angle. Cut down gradually, and check your progress by leaning the knife against the cake. YouвҖҷre aiming to be able to touch the knife to both boards at once.
 Start carving away the cake at the top, angling the knife out.
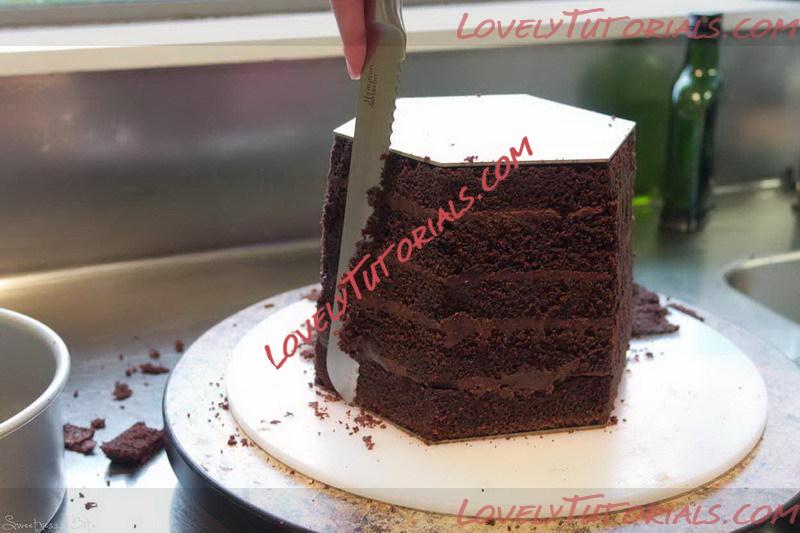
*  Work your way down the cake.
Once youвҖҷve cut most of the cake away, start scraping away the last bits of cake, with your knife pressed up against both boards.
 This is why you donвҖҷt want a flexible knife. Press the knife against both boards to shave away the cake.
*  Keep scraping away the cake til the sides are smooth.
When you do the corners, you need to come at them from one side and then the other. Aim to drag the knife past the corner, sawing gently up and down, to prevent pulling any chunks of cake away. If you do accidentally take a chunk out then itвҖҷs no big deal, you can fill it with ganache, but if you take out too much it can make the edges less stable and harder to ganache sharply. 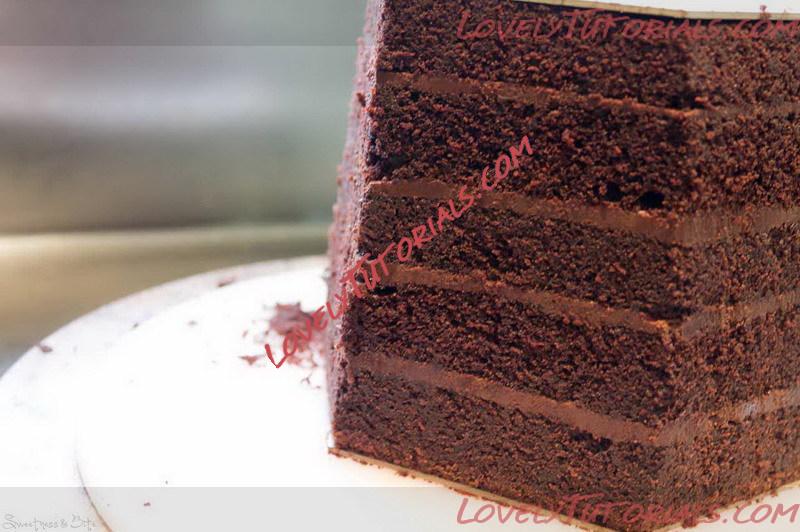 Can you see the lumpy bits on the corners? Needs a bit more work, gently scraping til the corners are smooth and sharp.
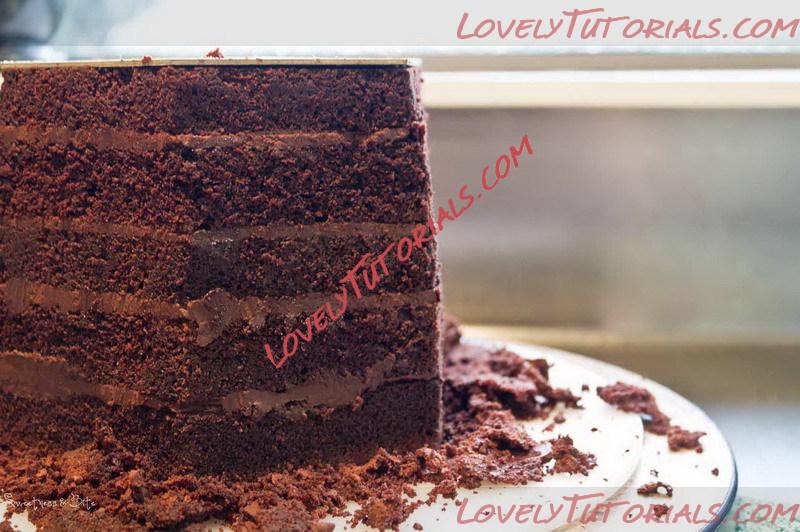
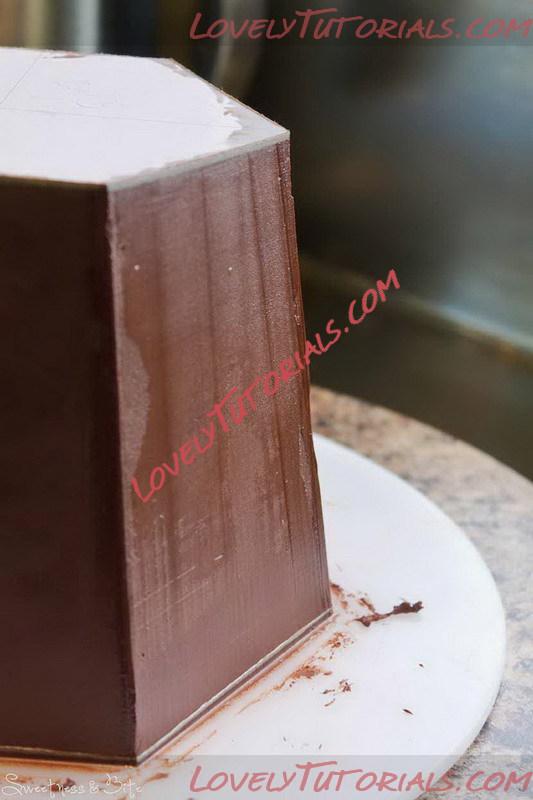
Keep scraping the cake away until the sides are straight and the corners are reasonably sharp and smooth. That totally makes sense.
 Smooth sides.
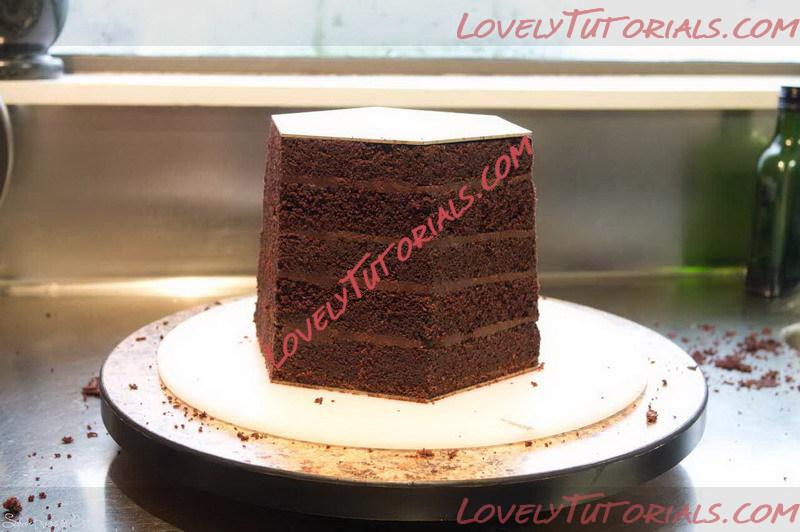
*  Not enough taper 
Now, you may notice in my pictures than there doesnвҖҷt seem to be much of a taper to the cake. ThatвҖҷs because I started with smaller boards that were only 1вҖі smaller, which means a taper of only ВҪвҖқ on each side. After flipping it over to check, I decided I wanted more taper so I cut myself some more boards that were 2вҖқ smaller, and carved the cake again.
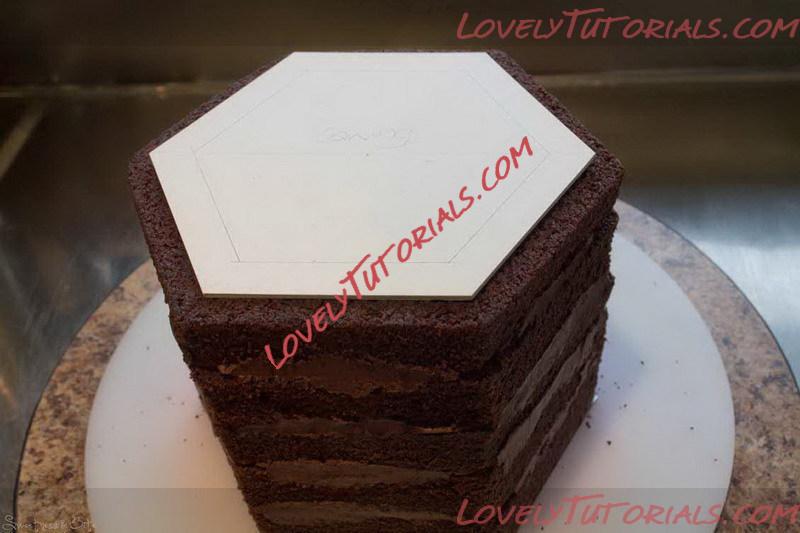
Once your cake is smooth all the way around, and you can see the edges of the boards, itвҖҷs time to ganache. Using a spatula, carefully lift off the top cake board. Replace it with board #3, sticking with some ganache.
 Flick off board #4 from the top of the cake, and replace with board #3.
Flip the whole cake over, and remove the bigger board. Take board #1 and use dabs of ganache to attach the bigger piece of baking paper that you cut out earlier.
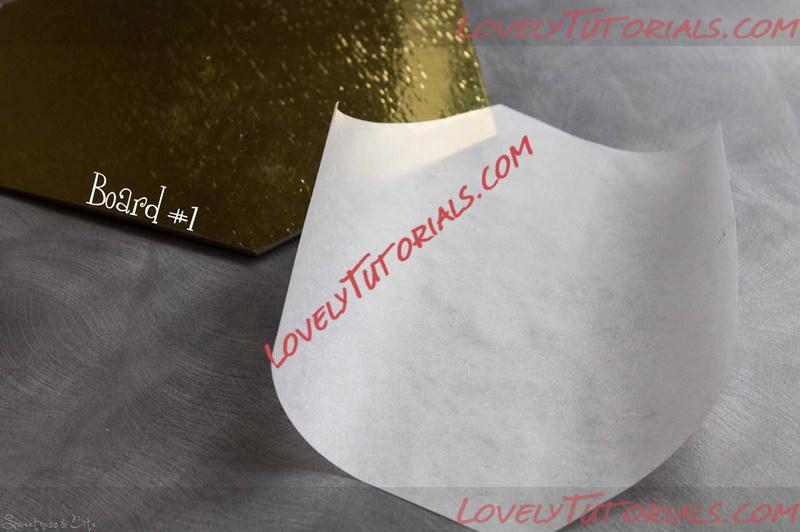 Board #1 and baking paper cutout
* 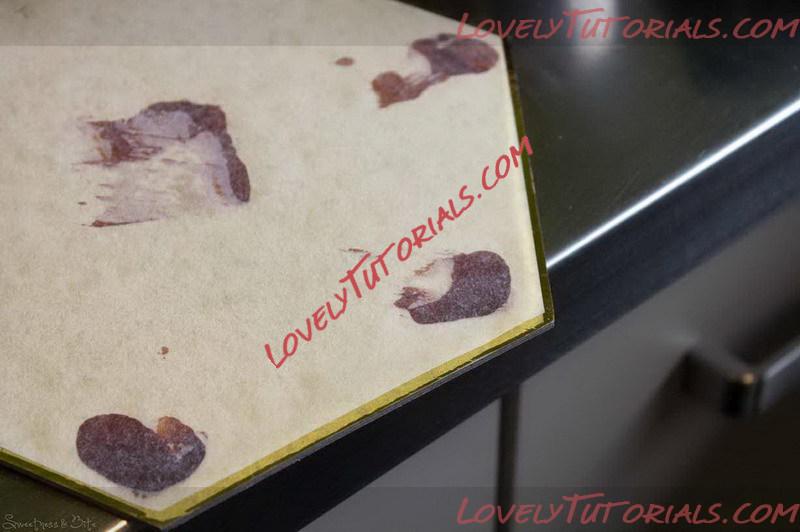 Use ganache to attach baking paper.
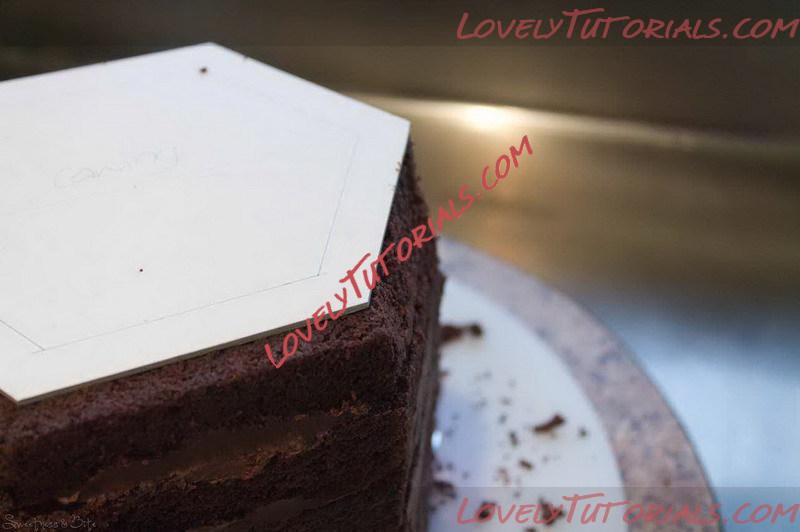
Dab some more ganache on top, flip the board over and attach it to the cake. Make sure the boards are centred, with an even amount of board showing the whole way around. Flip the cake over again, so the smaller side is back on top again.
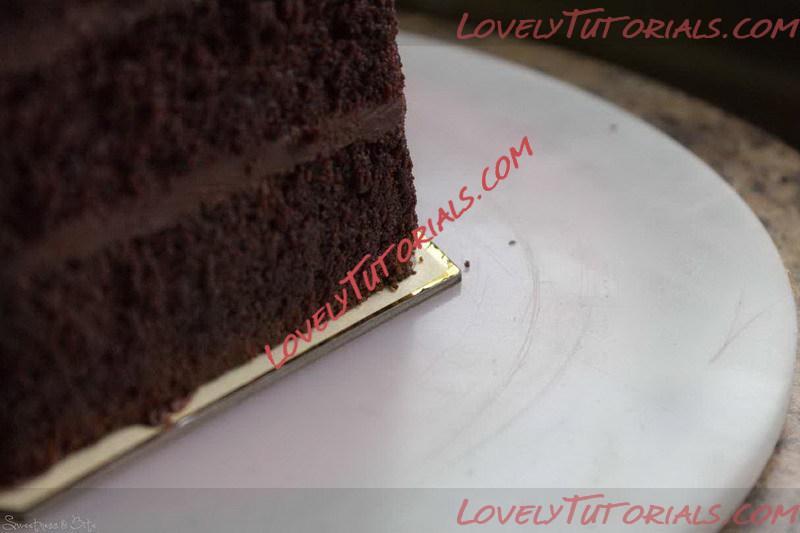 Check that both boards are centred, with an even amount of space the whole way around.
*
|
28.05.2013, 15:59
|
|
РҗРҙРјРёРҪРёСҒСӮСҖР°СӮРҫСҖ
|
|
Р РөРіРёСҒСӮСҖР°СҶРёСҸ: 05.03.2013
РЎРҫРҫРұСүРөРҪРёР№: 698
|
|
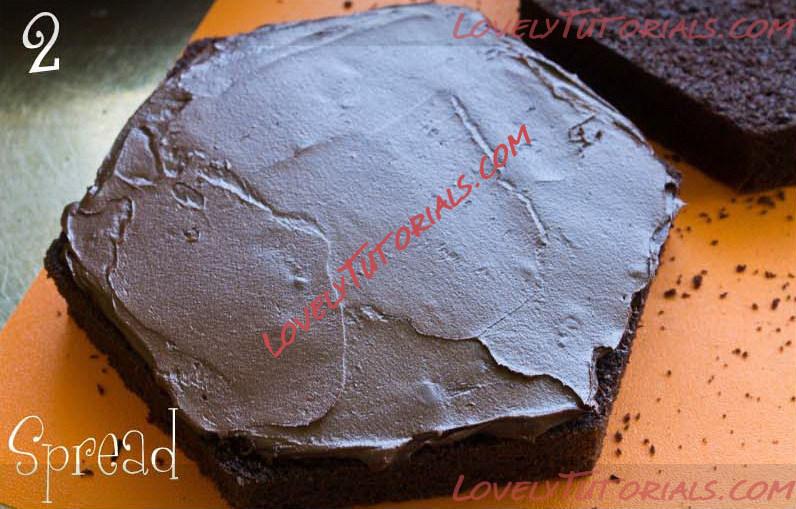
{Ganaching the Cake}
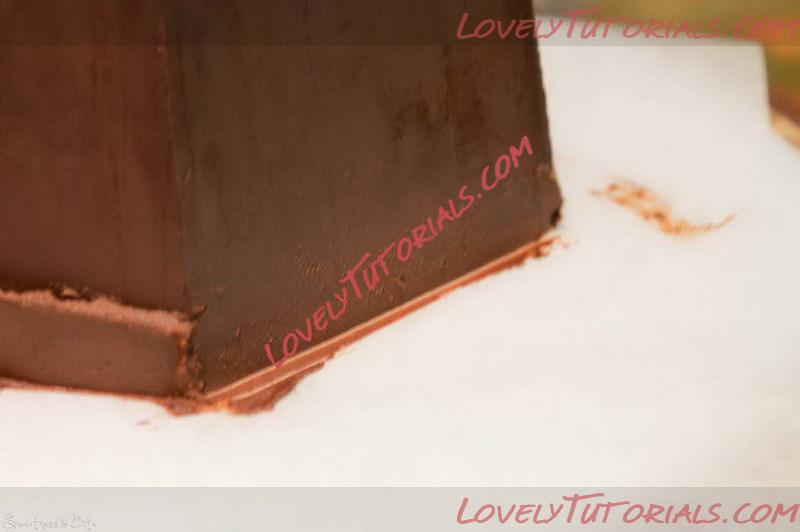
You can ganache the cake whichever way you prefer; this is just the way I do it. Ganaching a hexagon is a lot like ganaching a square cake {which IвҖҷm actually not very good at, but surprisingly this one came out ok} I start by smearing a thinner layer of ganache to seal the crumbs in, then spread a thicker layer on and scrape the excess off with the scraper pressed up against the two boards. Rinse the scraper under hot water and dry between scraping. To get sharp corners, scrape in one direction, smoothly taking your scraper past the corner. Then repeat in the other direction for the same corner. If the ganache is too soft and just smooshes (technical term) pop the cake in the fridge for a couple of minutes to firm the ganache up, then continue.
 Start slapping on the ganache, filling the gap between the board and the cake.
*  Keep adding ganache, then begin scraping the sides.
*  Scrape the sides, with your scraper pressed against both boards.
* 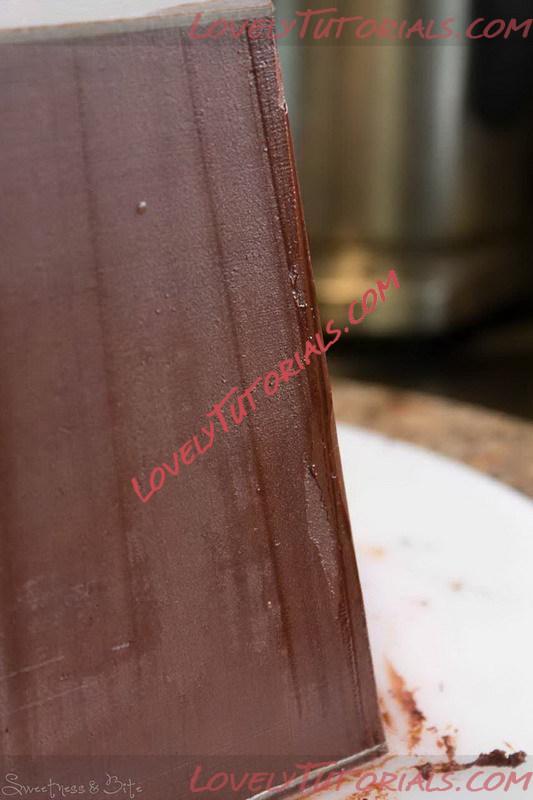 See the corner is still a little rough? I chilled it for a few minutes, then used my scraper again to smooth up to the corners.
Continue until the sides of the cake are smooth, and the corners are as sharp as you want them. Put the cake into the fridge until the sides have set firm.
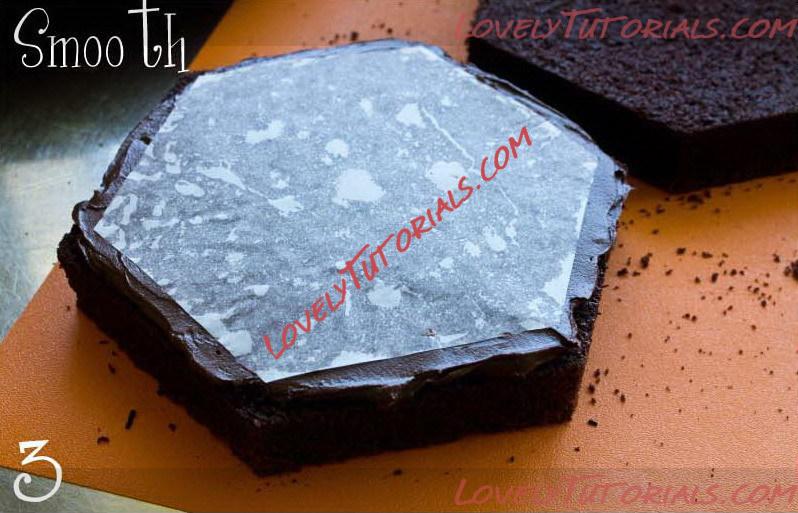
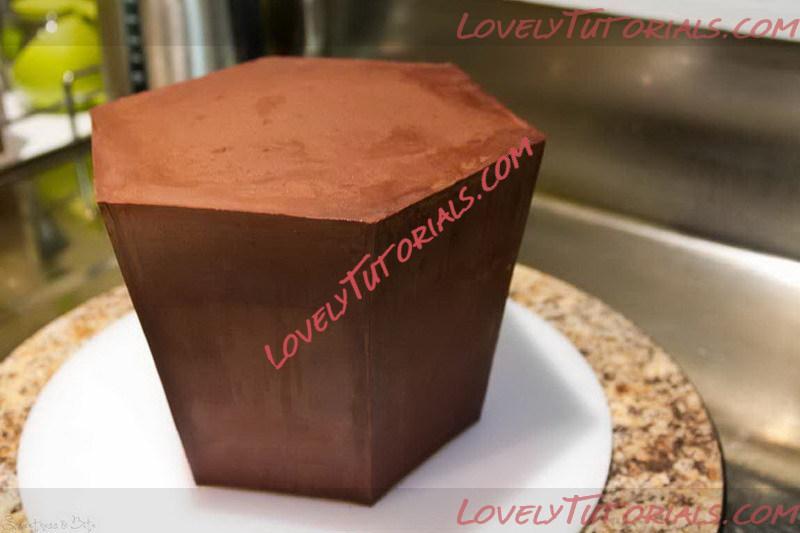
Flip the cake over onto another setup board with a piece of non-slip mat on it. Gently run a warm metal spatula around under the board (#1) and flick it off. If the baking paper doesnвҖҷt come off with the board, then gently peel it off. Spread ganache over the top of the cake and smooth it as best you can. Place a square piece of baking paper over the ganache and smooth the paper down and remove most of the air bubbles (I sometimes use a fondant smoother to do this).
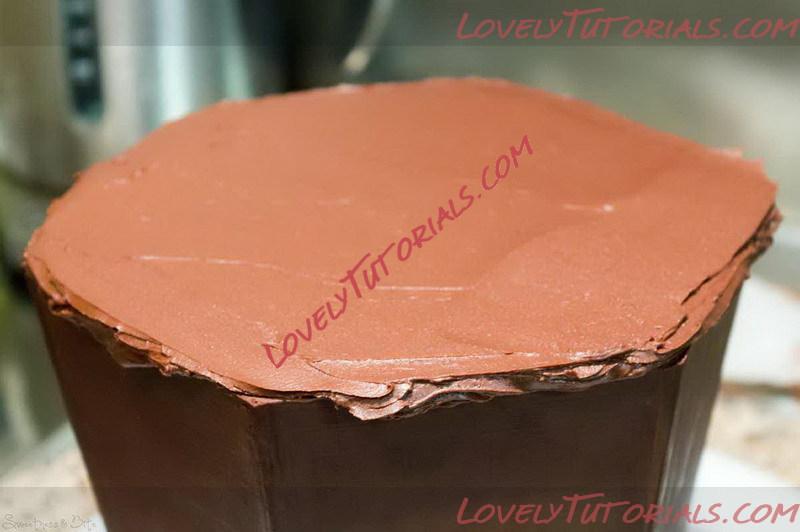 Spread ganache over the top and past the edges, then place a piece of baking paper on top and smooth.
Place the first setup board on top of the paper, and flip the cake over. Place a level on the cake, and press down gently until the cake is level. Use your scraper, pressed gently against the cake, to scrape away the ganache that has been squeezed out. Make sure you donвҖҷt angle the scraper inwards when you do this, or you will lose the straight top edge of your cake.
 The cake is flipped over again, and pressed down until level. Add more ganache to any bits that havenвҖҷt had lots of ganache squeeze out.
*  Scrape the excess.
Once itвҖҷs smooth, place the cake back in the fridge for around 30 minutes, until the ganache has set. Then flip the cake back over and carefully peel back the baking paper. Fill in any little holes around the edge with ganache, but donвҖҷt worry too much about the middle of the cake, as weвҖҷre about to cut that out. Put the cake back in the fridge while you make a guide to cut the indent.
 Flip the cake back over, peel off the baking paper and fill in any holes around the edges with a little more ganache.
Take the piece of paper that you drew the outline of board #1 on at the start, and measure in Вҫ of an inch (depending on how thick you want the вҖ?wallsвҖҷ of your box) around the edge of the hexagon. Cut out the shape and put it onto the top of your cake. Use a knife to score around the inside of the shape.
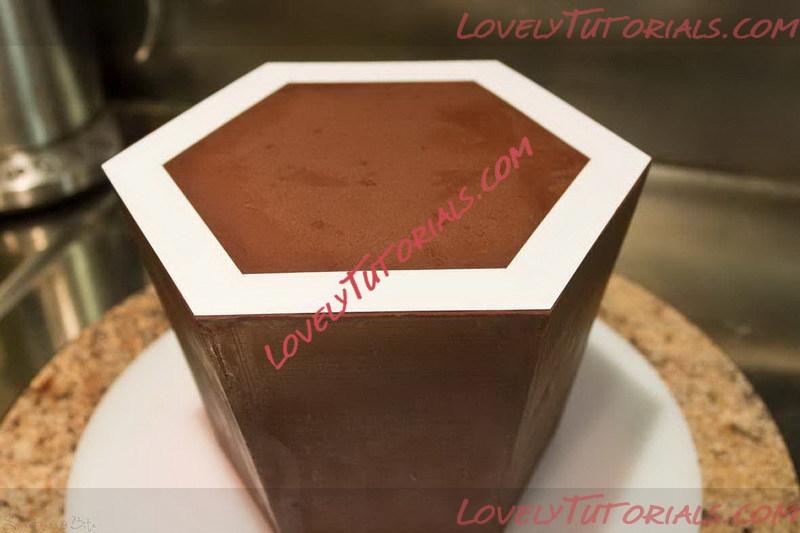 Cutting guide.
*  Cut down until you reach the baking paper.
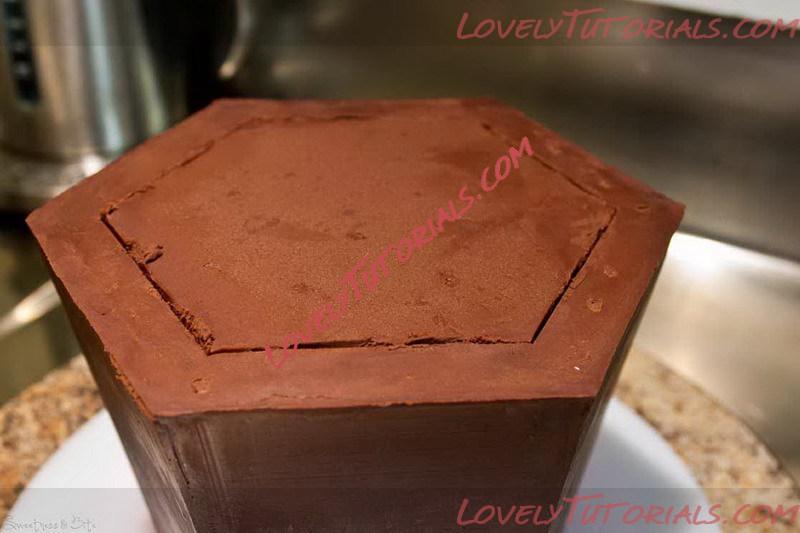
Using a small, sharp serrated knife, cut straight down through the ganache along the lines. You should feel the knife hit the baking paper, but try not to cut through it. Once youвҖҷve cut the whole way around, begin carefully prying the cake out. When youвҖҷve exposed the baking paper, cut through so you can get a grip on it, then gently pull it out. It may be tucked between the cake layers, so be careful not to pull too hard or you may rip it.  Start removing the middle, the ganache will probably come off first, then carefully pry out the cake.
* 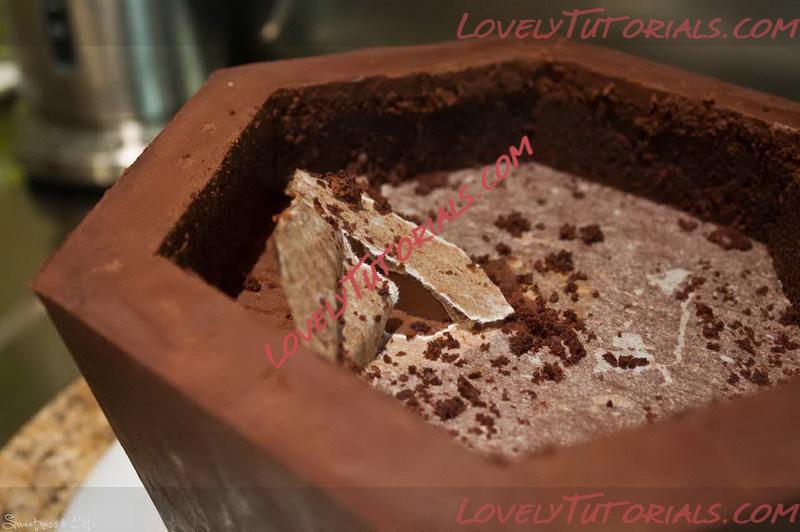 Carefully pull out the baking paper.
Using a small spatula (I use a small wedge-shaped spatula that artists use) ganache the inside edge of the box. You donвҖҷt have to be too fussy, as any lumpy bits will be covered by the вҖ?tissue paperвҖҷ, but you do want to make sure the cake is sealed. Go around the whole cake with a hot metal spatula, smoothing out any rough bits.
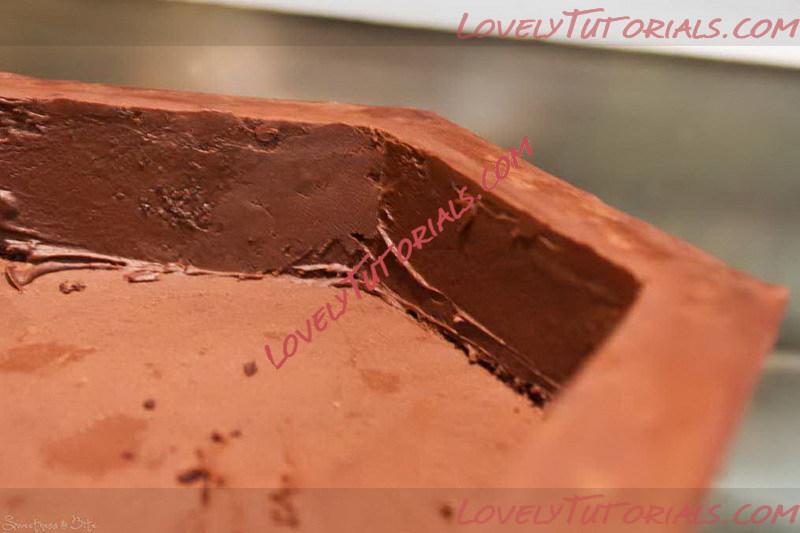 Ganache the exposed insides.
I decided the indent was a bit deep (due to my thick cake layers) so I warmed up some ganache and poured it in, letting it pretty much self-level, making the indent a little bit shallower.
Leave the ganached cake to set overnight.
* {Covering the Cake}
YouвҖҷll need:
Fondant-ing paraphernalia
~ Rolling pin and/or pasta machine
~ Fondant smoothers
~ Cornflour/icing sugar shaker
~ Sharp knife and/or razor and/or scalpel
~ Vodka (or sugar syrup, but vodka dries faster and leaves less of a mess on the edges of the cake)
~ Paintbrush.
The easiest way to cover this cake is with panels on each side of the hexagon. I chose to make a template to make it even easier, although some trimming is still required. To make the template, measure the top and bottom width of a side of the cake, and the height. You need to add a couple of inches to the top of the template, and about half an inch at the bottom. My template didnвҖҷt give me quite enough excess at the top, but if youвҖҷre putting the piece of fondant вҖңtissue paperвҖқ into the indent, then this isnвҖҷt a big deal as it will be covered.
If youвҖҷre not confident you can quickly place the piece in the right place, then add a little extra to the sides of your template as well. The key to getting nice, neat, sharp corners and top edges on this cake is quick placement and trimming of each piece. The good thing is that the last piece you attach is the best side to be the front (itвҖҷs the only side with no exposed fondant edge), so you will have practiced all the way around before you come to what will be the front. Make sure youвҖҷve got all your fondant-ing bits and pieces handy, this makes it easier to work quickly.
Place the cake on a smaller cake board, or as I did, a tin of cutters. This raises the cake up so itвҖҷs easier to trim the bottom of the fondant neatly. Use a couple of bits of grippy mat to hold everything in place.
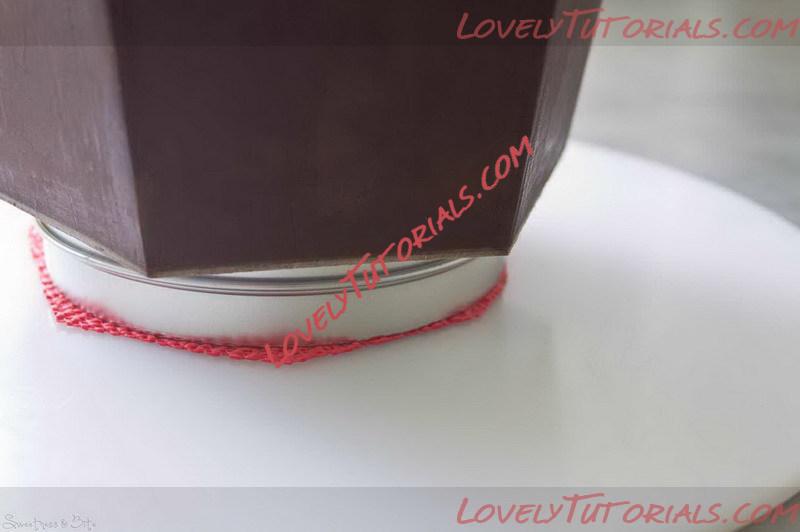 Raise up your cake so you can easily trim the bottom of the fondant.
Roll out your fondant (I used my pasta machine to roll out the strips to ensure even thickness, #2 on my machine was perfect) then place your lightly cornflour or icing sugar dusted template on top. Cut around the template, (I found it easier to use a big kitchen knife so I could cut each side in one cut, saves dragging your knife through the fondant.)
Brush one side of the cake with vodka, making sure to brush right up and over the top edge of the cake and into the indent, and position your piece of fondant. I find it best to line up the left hand side of the fondant with the edge of the cake, and then I only need to trim the right side. Smooth the fondant against the cake, pushing out any air bubbles. Run your finger and thumb along the top edge to make sure itвҖҷs attached and to stop any cracking on the edge.
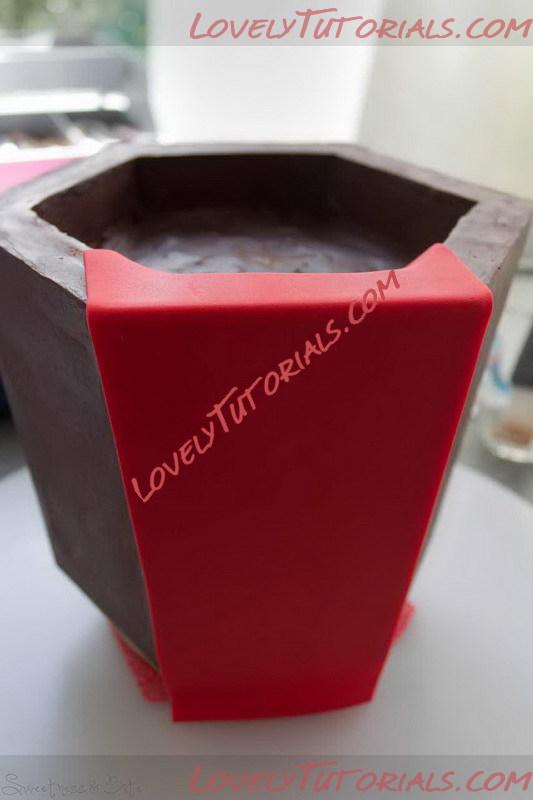 Smooth out any air bubbles, or prick any stubborn ones with a fine needle. Make sure you secure that top edge quickly.
Fold the top of the fondant gently down into the indent. It wonвҖҷt fit completely in the corners, so trim them carefully up to the top, and then cut on an angle from the inside corner of the top edge to the outside. Cut the same angle on the other side.
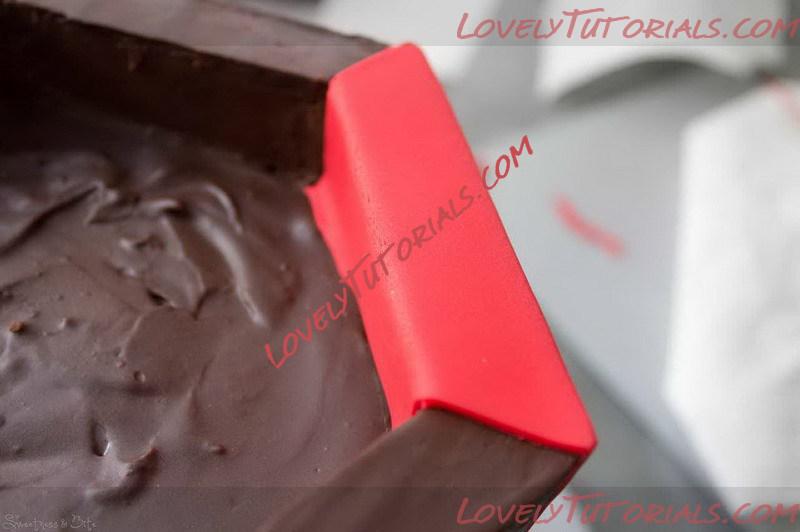 Cut the corners on an angle.
Trim down the right hand side of the fondant, trying to keep your knife flush with the side of the cake (I used a razor blade for this) and trim the bottom of the fondant, holding your knife against the cake board under the cake, to get a nice straight cut. Use two smoothers, one on top and one on the side of the cake to sharpen the top edge and smooth the edges.
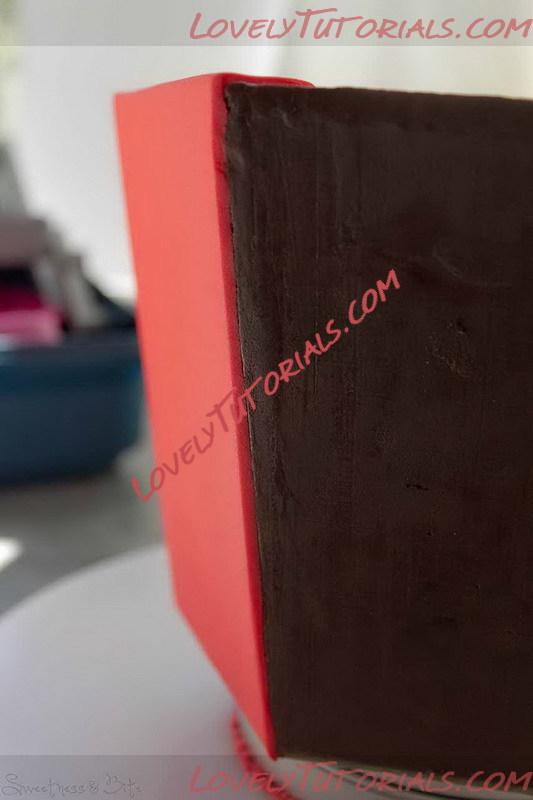 Cutting the right hand side, try to keep the knife flush with the cake.
Repeat the above steps to place the second piece. When you brush the side of the cake with vodka, make sure you carefully brush the side of the first piece of fondant. Hold the brush flush (haha) with the side of the cake to make sure you donвҖҷt get vodka on the front of the fondant. When you smooth the piece of fondant over the top of the cake, press it gently up against the first piece, to help you see where you will need to cut along the top where the pieces will join. Cut this first, smoothing the pieces together.
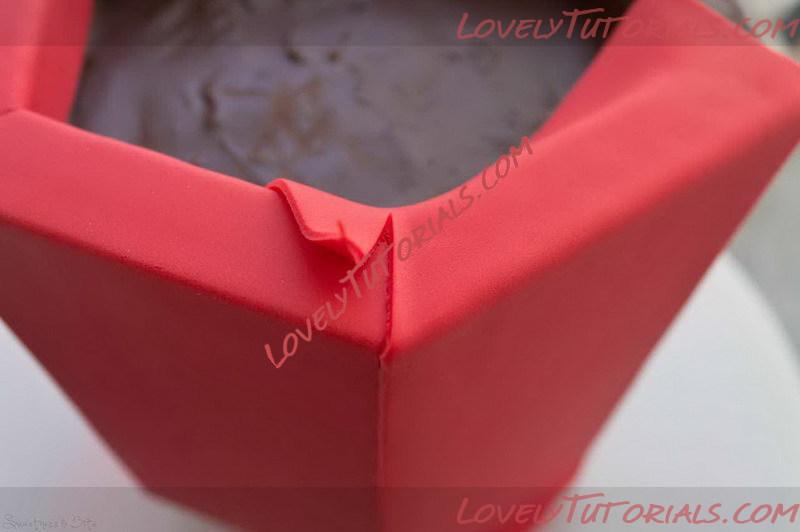 Trim the corners and smooth the join.
Trim along the right hand side as before. Do the next three sides the same way.
The final piece is a little trickier, to keep things neat you want to avoid needing to do much trimming on either side. If youвҖҷve noticed how much youвҖҷve trimmed from the right side of each other piece, then cut that much off the piece of fondant before you place it on the cake. (You could have done this the whole way around, but as there can be some variance in the sides, I found it easier to do each piece slightly bigger and trim.) If you need to trim the final side, do it carefully and with a sharp knife so the cut is neat, because you wonвҖҷt have another overlapping piece of fondant to help hide any messiness.
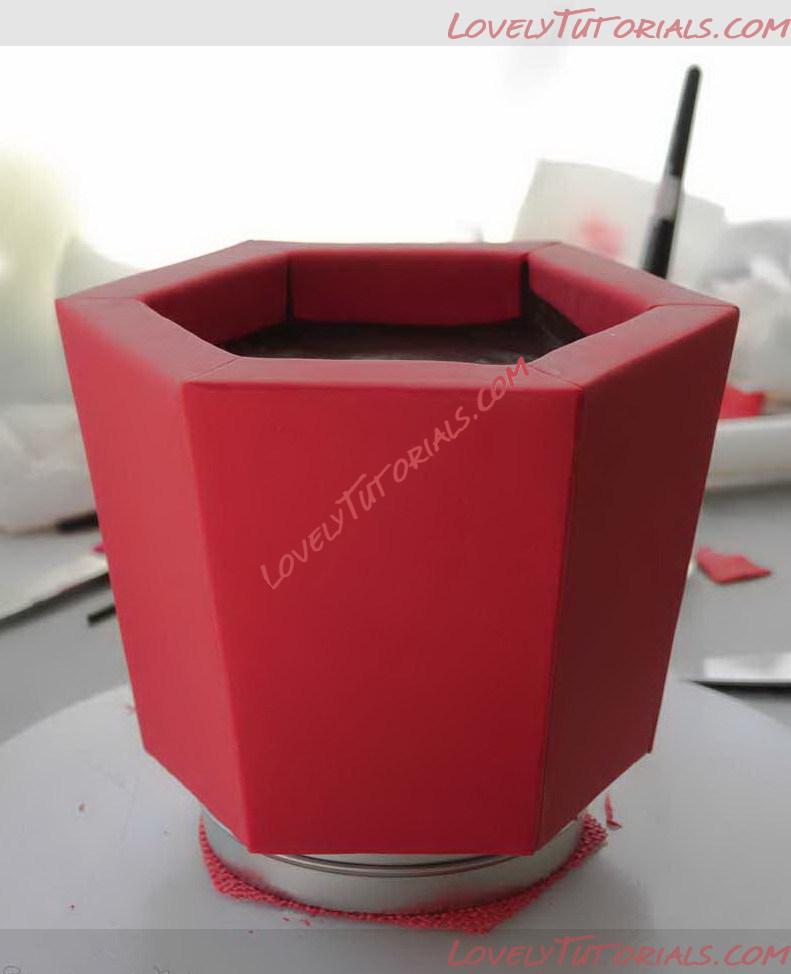 All covered.
Gently lift the cake off the tin and place it on another board (I put a piece of baking paper underneath to make sure the bottom of the fondant doesnвҖҷt stick to the board.)
To make the tissue paper piece for the inside youвҖҷll need that second piece of paper with the tracing of board #1. Thinly roll out some fondant, or gumpaste, or a mix of the two (which is what I used). Place your template on top, and cut around it, about another 1вҖқ out from the template. How much extra you cut is up to you, 1вҖқ will give you quite a bit of вҖңtissueвҖқ sticking up above the sides of the box, if you donвҖҷt want it up so far then you can cut it a little closer to the template. Working quickly so the paste doesnвҖҷt dry out too much, either use your fingers to smooth and thin out the edge, or place the piece on a piece of foam and thin the edges with a ball tool.
 The cut out piece, with the edges thinned slightly. DoesnвҖҷt matter at all if the edges arenвҖҷt straight anymore.
Place the piece into the indent of the cake, and press gently into the corners. It doesnвҖҷt have to fit perfectly; youвҖҷll be filling it up with goodies so you wonвҖҷt see it. Arrange the edges of the paste however you want, but as my mother tells me, вҖңdonвҖҷt tu-tu too muchвҖқ, it will look more natural the less you mess with it. Make sure that the вҖңtissueвҖқ doesnвҖҷt hang too far over on the side where you want your lid to sit. Note: If youвҖҷre planning to add decorations that go up over the edges of the box, do this before adding the tissue. I was only adding dots, so I did the tissue first.
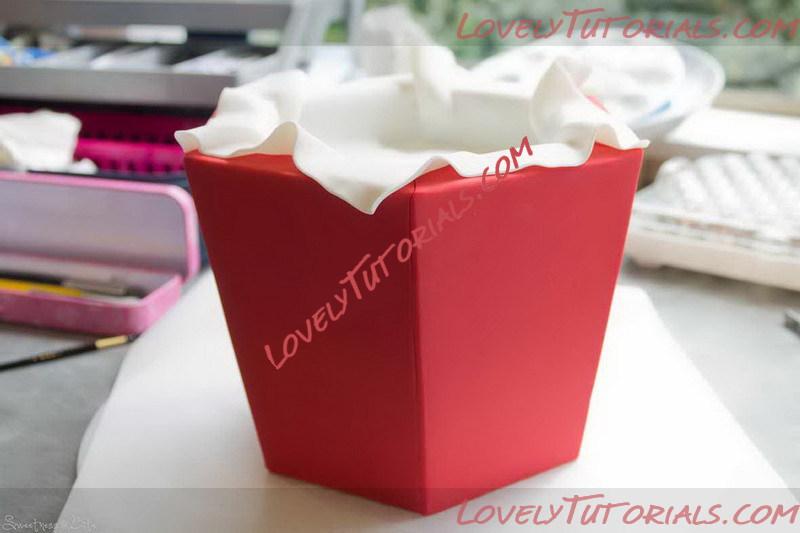 Arrange your tissue, tweaking the edges til they sit where you want.
Decorate the box however you want, I just added gold circles in a kind of rough pearl-drape pattern, and leave the fondant to dry (overnight is best, but an hour or two is ok.)
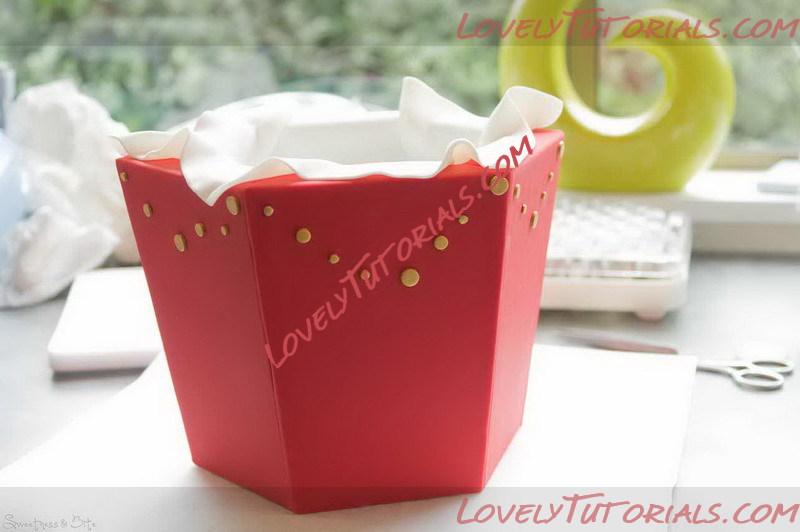 Time to decorate!
Carefully place the cake on your display board, and fill with lollies or chocolate. Prop the lid against the box. If you need to travel with the cake, I would suggest either leaving the lid separate and just placing it on when the cake gets where itвҖҷs going, or you can attach it to the board with royal icing or edible glue.
Shall I tell you how to make the lid as well? Why not, donвҖҷt think IвҖҷve talked enough yet at allвҖҰ.
*
|
28.05.2013, 16:15
|
|
РҗРҙРјРёРҪРёСҒСӮСҖР°СӮРҫСҖ
|
|
Р РөРіРёСҒСӮСҖР°СҶРёСҸ: 05.03.2013
РЎРҫРҫРұСүРөРҪРёР№: 698
|
|
{Making the Lid}
I made the lid in and around making the rest of the cake, but you could make it ages in advance if you wanted to, itвҖҷs not edible anyway so itвҖҷs not going to go off.
YouвҖҷll need:
~ ВҫвҖқ thick polystyrene
~ Craft knife & cutting board
~ Ruler
~ Sandpaper
~ Fondant tools вҖ“ rolling pin, smoothers, knife, etc..
~ For the rose вҖ“ flower making toolsвҖҰ ball tool, foam pad, wire, sugar glue, plus flower formers or soup spoons for drying the petals
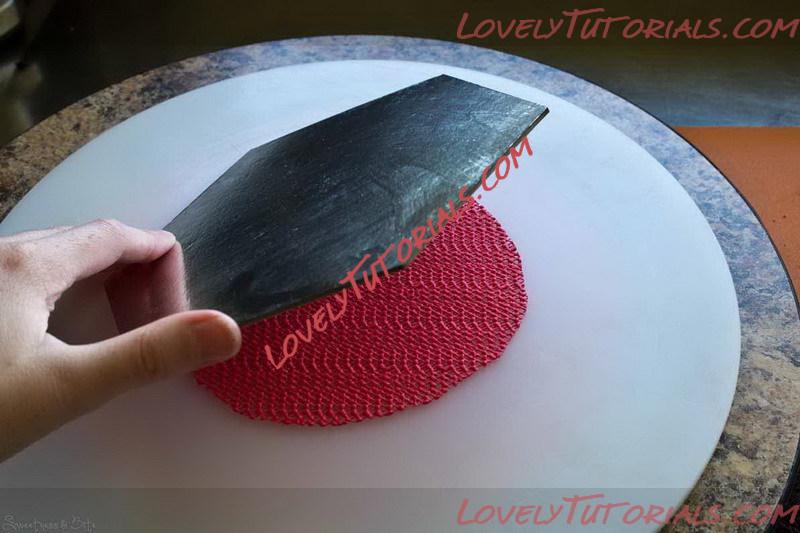
ItвҖҷs up to you whether you want your lid to taper or not, I decided that I did, coz I like to make things more difficult for myself. If you donвҖҷt want it to taper, just cut out a piece of polystyrene the same size as the top of your box.
To make a tapered lid, cut out a hexagon that is around ВјвҖқ bigger than the top of your box. On one side, measure in ВјвҖқ (or trace around board #2, or one of those templates if youвҖҷve kept them). Use a craft knife to cut around the lid, from the mark on that side, to the edge of the other side, creating a slant. Use sandpaper to refine the edges. Since youвҖҷre not actually placing the lid onto the top of the cake, if itвҖҷs a bit off size-wise, itвҖҷs no big deal.
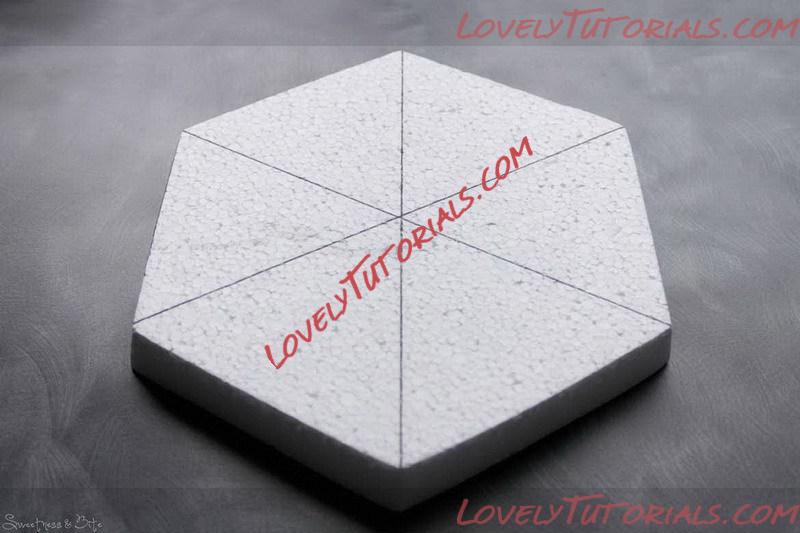 Cut out the hexagon, then taper the edges.
* 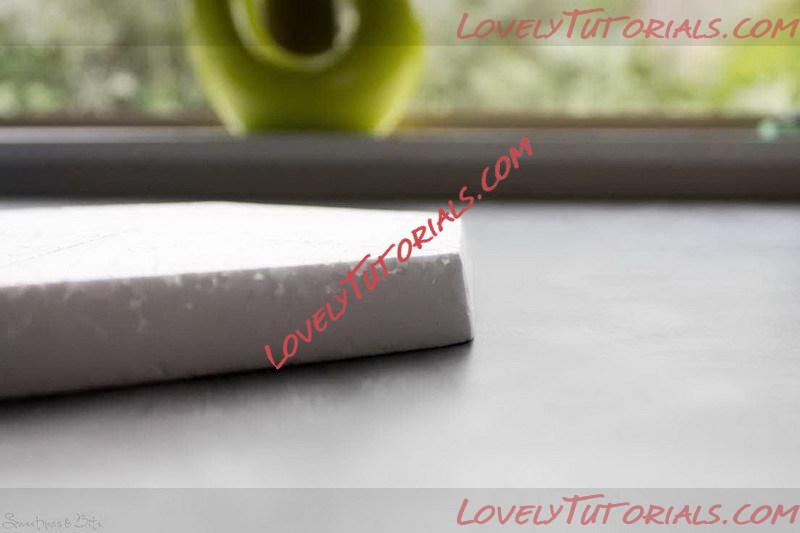 Use fine sandpaper to smooth the edges and refine the taper.
Brush the smaller side of the lid with vodka and cover with fondant or gumpaste. Trim around the edges and then leave to dry. I pressed a texture mat into mine after covering, but you can leave it plain if you want.
 Press a texture mat into the white gumpaste. This is the inside of the lid.
* 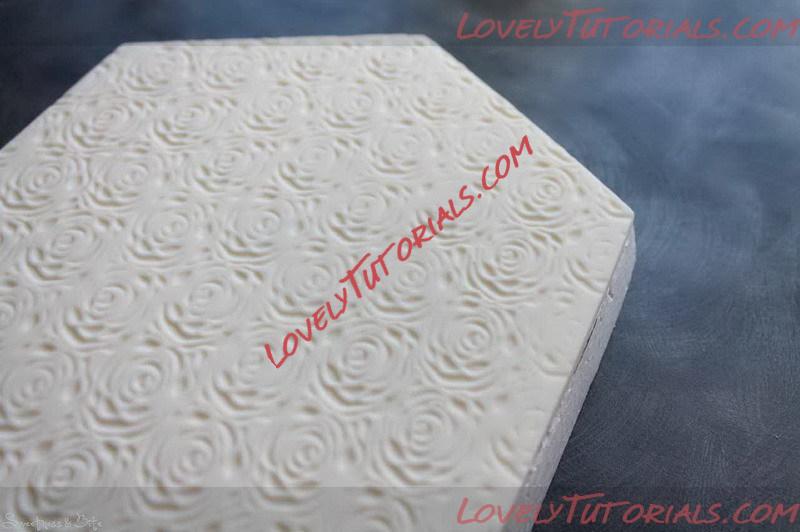 Adding the texture to the inside isnвҖҷt necessary, but itвҖҷs veeery pretty.
Cover the top of the lid, gently easing the fondant down over the edges. YouвҖҷll need to work quickly to get the paste down over the corners of the polystyrene and tucked down into the taper. It took me two goes to do this, the first time I was too slow and the edges cracked. Flip the lid over onto a piece of baking paper and trim the excess paste carefully with a sharp knife, scalpel or razor blade.
 Cover the top of the lid and trim the edges.
If you end up with some coloured paste from the top on the white, leave it to dry and then gently scratch off the coloured bits.
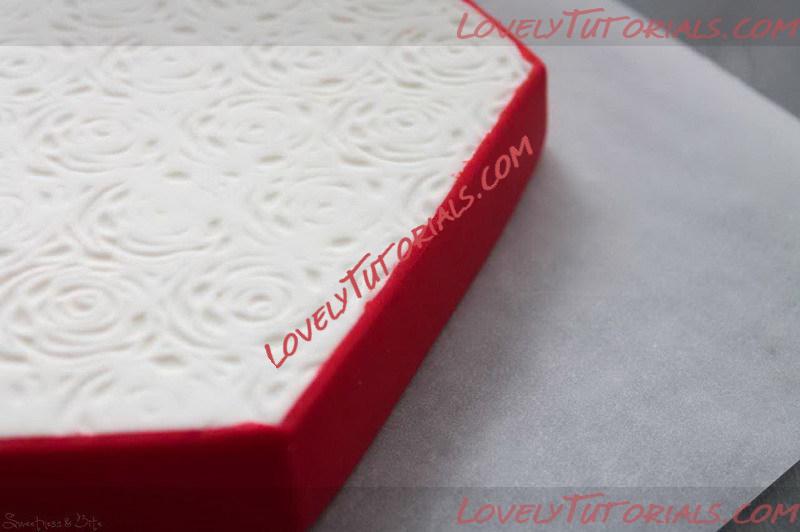 These rough bits of red fondant on the white are easily scratched off with a scalpel or razor blade once the fondant is dry.
Leave the lid to dry so you donвҖҷt dent it while you do the rose. 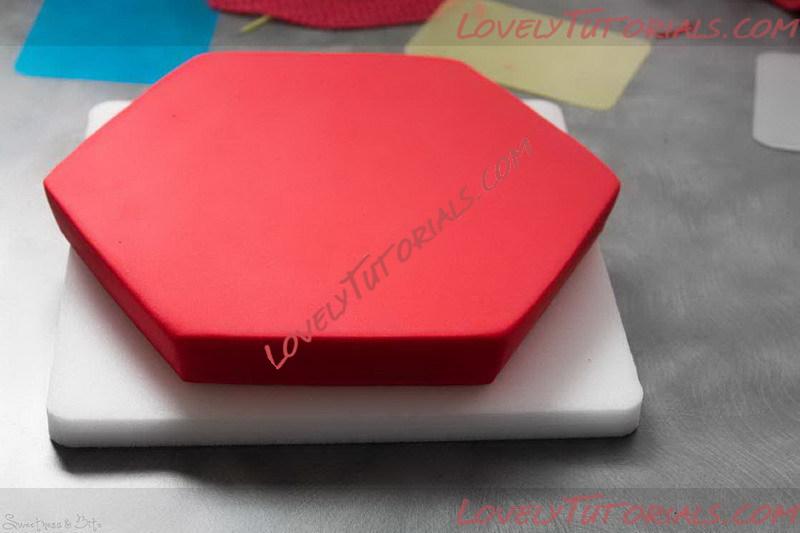 Time to dry
* {Making the Rose}
I wonвҖҷt tell you how to make a rose, coz IвҖҷm totally unqualified to do that. This was only the third rose IвҖҷve ever made, and I wasnвҖҷt 100% happy with it. I followed instructions in Alan DunnвҖҷs Wedding Cake DecoratorвҖҷs Bible, but there are plenty of online tutorials on making roses. Luckily for me, as this is a decoration on a вҖ?boxвҖҷ it doesnвҖҷt need to look botanically correct. At least thatвҖҷs what I kept telling myself.
Basically for this, you want to start by making an almost-full rose, (on a piece of thick wire, I used 18 gauge, or you could use a toothpick) and then leave it to dry.
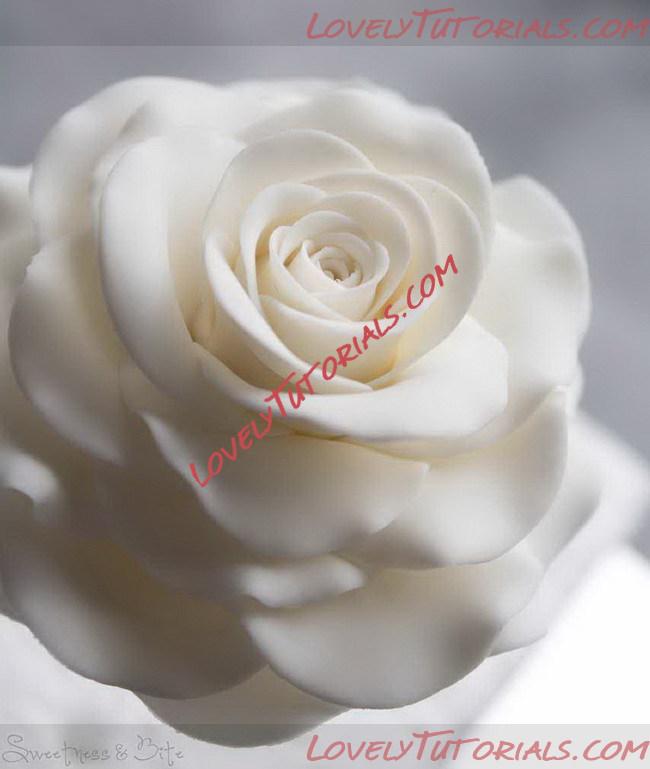 My almost-full, non-botanically correct rose.
While the rose is drying, make a template for the top of the lid (or recycle one from earlier, it doesnвҖҷt have to be exactly the right size, youвҖҷll see mine was a bit smaller) Fold the template to find the middle. Decide how far in from the edges of the lid that you want your rose to reach. Draw lines around it. Find something round to draw around that fits close you where your lines are. Centre it and draw around it, then cut the circle out.
Place the two pieces of template onto the lid, and push a pin through the centre to mark it onto the fondant. Remove the circle, leaving the outer piece.
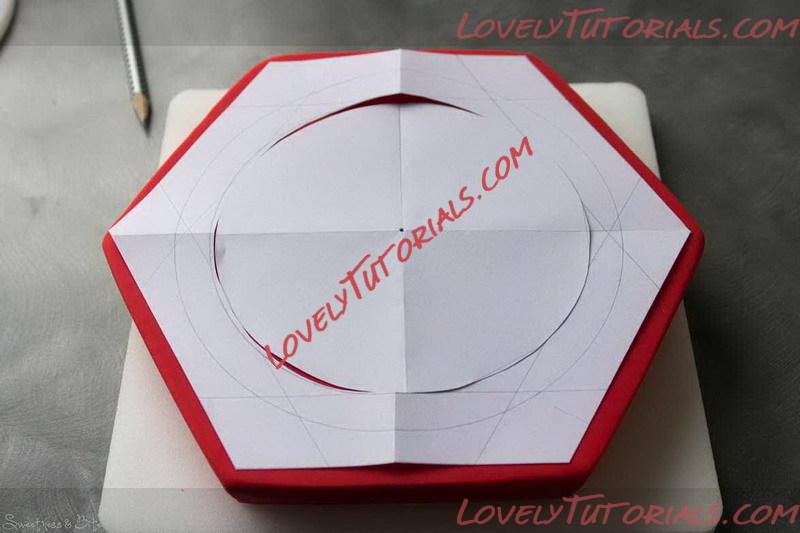 Lid template.
Start making your petals, exactly as you did them for the rose, and leave them to dry slightly with the edges curled back. I used some plastic flower formers, and also some soup spoons to dry my petals. You need to let the petals dry just enough to keep their shape, but still be slightly flexible. Place your first row of petals around the edge of the template, overlapping each piece slightly. Once youвҖҷve got them where you want them, stick them in place with a little edible glue.
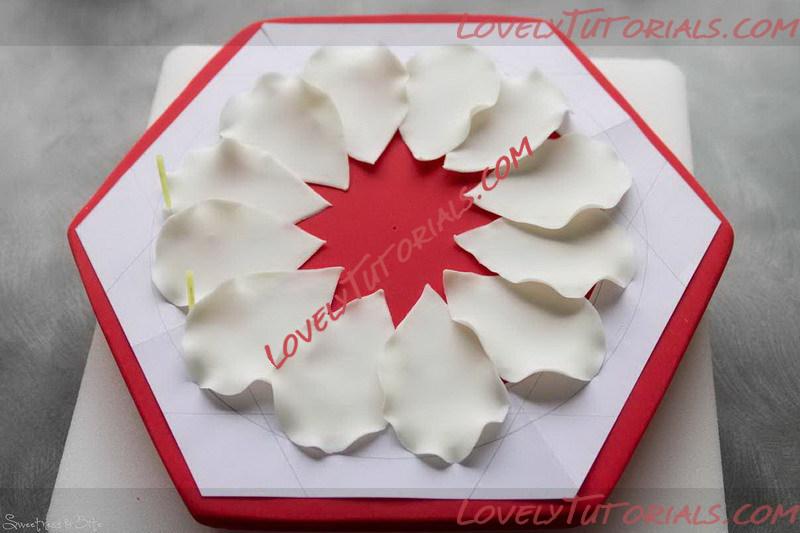 The first layer of petals. You can see on the left that I held the template in place with some acupuncture needles.
If any pieces sit too flat against the lid and you want to curl them a little, place small rolled up pieces of paper towel under them.
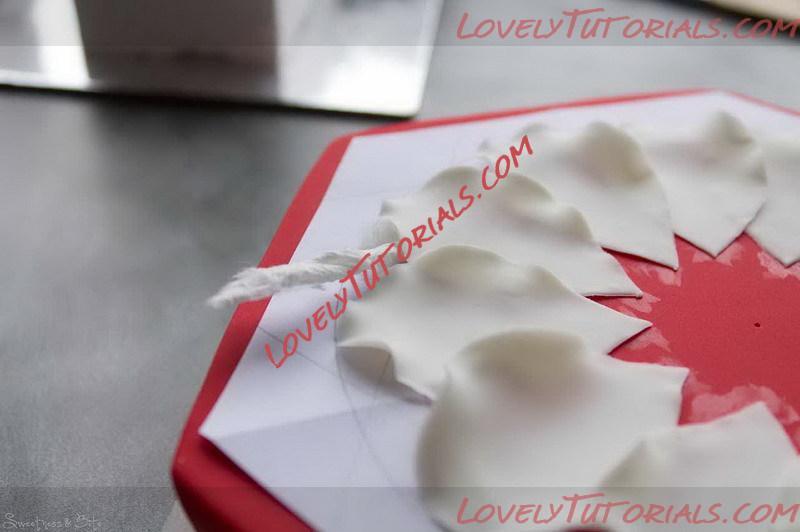 Use pieces of twisted paper towel to prop up droopy petals while they dry
Allow this layer to dry for 10 minutes or so (itвҖҷs fine for the other petals to keep drying on their spoons while you wait).
Lay out your second row of petals, overlapping them, and aiming to place the petals over the joins of the first layer. These petals should be a bit drier, and curve upwards slightly from how theyвҖҷve dried in the spoons. You can glue these ones as you go, and slide them into place if you need to. Prop up any pieces you need to with paper towels as before. Do the third row of petals the same way.
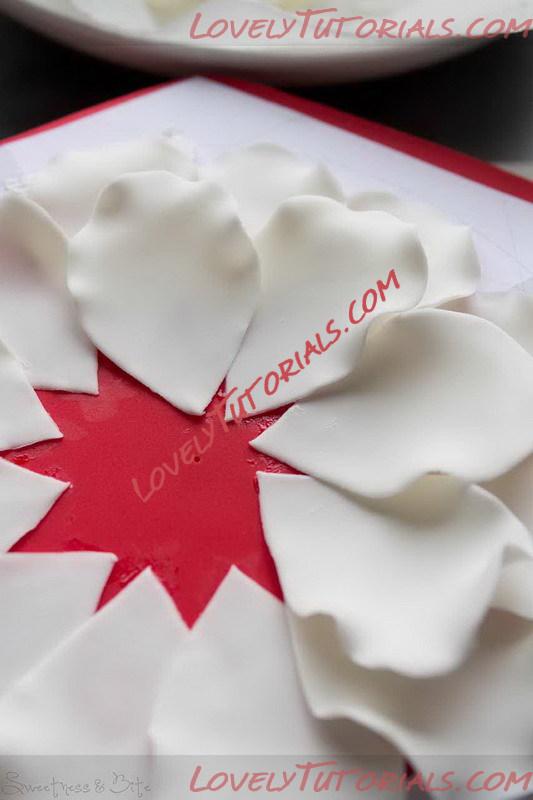 Placing the second row of petals. These should sit up slightly above the first layer.
* 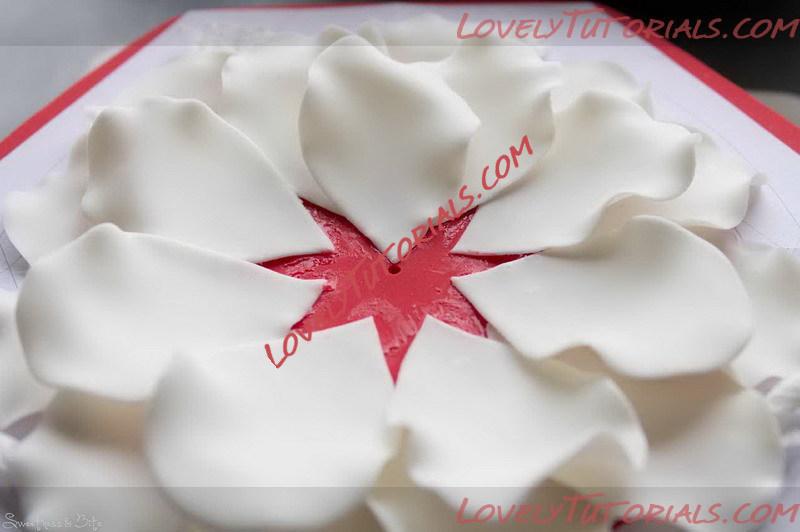 Starting the third row of petals. The points should reach the centre mark.
*  Third row of petals completed.
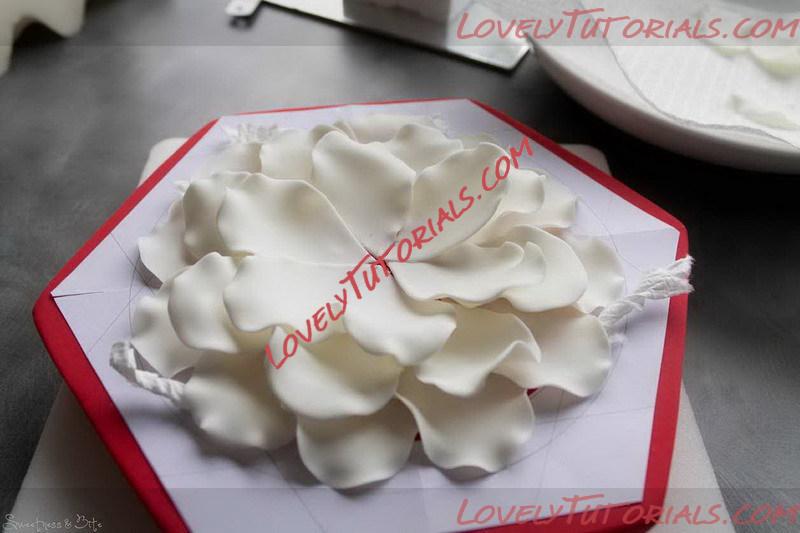
Take your dry-ish rose, and add one more layer of petals to it. Hang the rose upside down for a little while until those petals dry slightly.
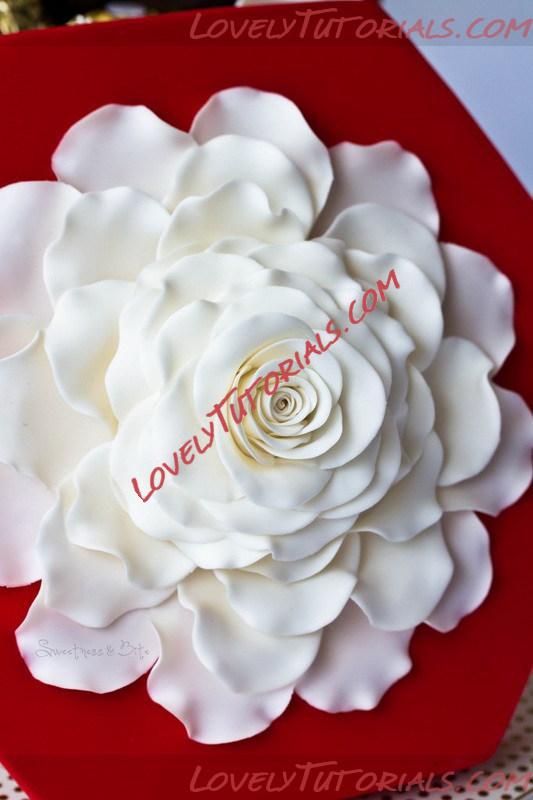
Carefully trim the wire of the rose slightly shorter than the thickness of the polystyrene lid. Brush the centre of the petals attached to the lid with a little edible glue, and then very gently push the rose into the centre. Tweak the petals if you need to, using a paintbrush. Cut through the paper template with small scissors and gently slide it out from under the petals. Let the rose dry for a couple of hours or, ideally, overnight.
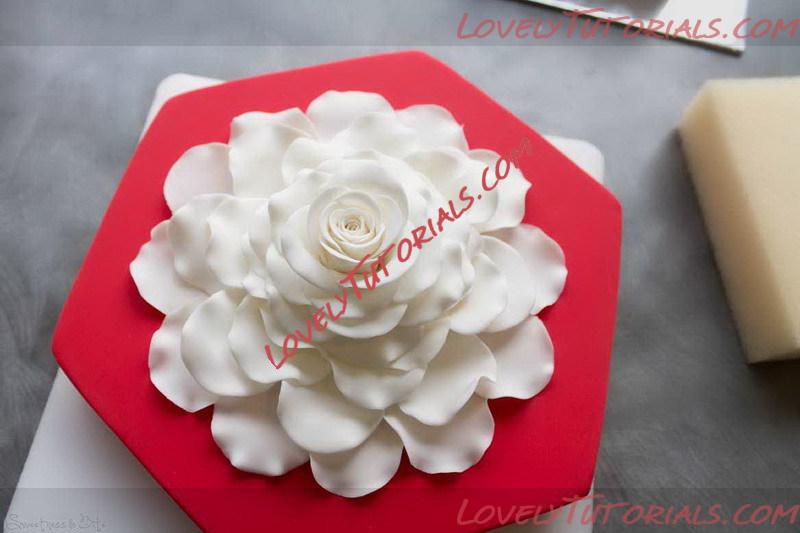 Completed rose.
So there you have it, one chocolate box cake with rose lidвҖҰ.
 *
*  I filled the cake with almond kisses, ferrero rochers, ferrero rondnoirs, sixlets, praline seashells and praline filled dark and milk chocolates.
*  *
And here is my original cake from last year, made for my good friend Robyn, who has a love of junk foodвҖҰ
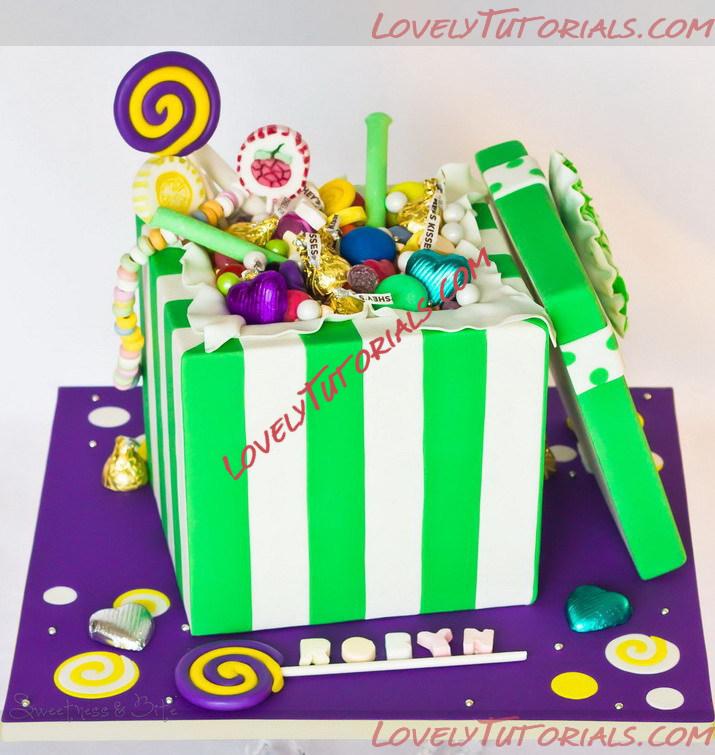 Cake filled with jelly beans, lollipops, chocolate hearts, HersheyвҖҷs kisses, jelly hearts, fizzy letters, fruit tingles, tiny jubes, giant smarties, green and white sixlets, candy necklace, spearmint & peppermint pencils, and handmade modelling chocolate вҖ?lollipopsвҖҷ
* 
|
 |
|
РңРөСӮРәРё
|
3d bizcocho, 3d bolo, 3d cake, 3d cake "box of chocolates, 3d dort, 3d kage, 3d kager, 3d kake, 3d kek, 3d pastel, 3d tarta, 3d torta, 3d torte, 3d torti, 3d torty, 3d ОәОӯО№Оә, addДұm-addДұm tЙҷlimat, adДұm, adДұm adДұm yГ¶nergeler, artesanatos passo a passo, bemutatГі, bolando bolos, bombonijera, bonboniГ©ra, box of chocolates, boГ®te de chocolats, caja de chocolates, cake decorating, cake decorating techniques, chocolate box cake tutorial, chokladask, confeitando bolos, cutie de bomboane, decoracion de pasteles, decoraciГіn de tortas, decorada en fondant, decorare le torte, decorazioni, deko fondant, dekorace na dort, dekoracija, dekoracije, dekorasyon, dekorГЎcie, doboz bonbon, fender, fimo, flower paste, fondan, fondant, fondente, fondente di zucchero, fotopostup, foundant, gebak, glazuur, gum pasta, gum paste, gumpaste, hand-made, handmade, how to, how-to's, instrucЕЈiuni, instrukcijas, instrukcje, jak na, kage dekoration, kagedekoration, kakebaking, konfekteske, korak, korak za korakom navodila, korak-po-korak upute, koristeet ja koristelu, krok, krok po kroku, krok za krokem, krok-za-krokem, las instrucciones, las tГ©cnicas, le tecniche, les techniques, lukie, marshmallow, masa flexible, master-class, master-klasse, master-klasy, meistras klasД—s, metodikas, mistr tЕҷГӯdy, modeling paste, modelling past, motivtorten, nГЎvod, opplГҰringen, pamoka, pap, pas, pas-cu-pas, paso, paso a paso, passo, passo a passo, passo-a-passo, passo-passo le istruzioni, pasta de miel, postup na 3d torty, postupak za ukrasavanje, pГўtisserie, saldainiЕі dД—ЕҫutД—s, scatola di cioccolatini, schachtel pralinen, schmelzend, schritt fГјr schritt anleitung, schritt-fГјr-schritt, schritt-fГјr-schritt-anleitungen, stap, stap-voor-stap, stap-voor-stap instructies, steg for steg, steg-fГ¶r-steg-instruktion, step, step by step, step-by-lГ©pГ©sre, step-by-step, step-by-step instructions, sugarcraft, sugarpaste, suikerglazuur, suklaarasia, technieken, techniken, techniki, techniky, technikГЎk, techniques, tecnicas de decoracion, tecniche, tehnici, tehnike, teknikker, teknikler, torte, torte decorate, torten dekorieren, torti, trin, trin for trin, trin-for-trin, trin-for-trin instruktioner, trinn, trinn for trinn, trinn-for-trinn-instruksjoner, tutorial, tutoriale, tutorias, tutorias/ideas para decorar los bizcochos, tutoriel, tutorijal, tГ©cnicas, ukraЕЎavanje torti, uputstvo za dekoraciju, zuckermasse, аӨёаӨңаӨҫ аӨ•аҘҮаӨ•, аӨҹаҘҚаӨҜаҘӮаӨҹаҘӢаӨ°аӨҝаӨҜаӨІ аӨ®аӨҫаӨёаҘҚаӨҹаӨ° аӨөаӨ°аҘҚаӨ—, аӨ•аӨҰаӨ®, аӨ•аӨҰаӨ® аӨҰаӨ° аӨ•аӨҰаӨ® аӨЁаӨҝаӨ°аҘҚаӨҰаҘҮаӨ¶, аӨӨаӨ•аӨЁаҘҖаӨ•, ГҰske chokolade, Г§ikolata kutusu, Г©tape, Г©tape par Г©tape les instructions, Г¶Дҹretici, Еҫingsnis, Еҫingsnis po Еҫingsnio, е®—её«зҙҡж•ҷзЁӢпјҢдёҖжӯҘпјҢдёҖжӯҘдёҖжӯҘзҡ„жҢҮзӨәпҝ Ҫ пҝҪ пҝҪжҠҖиЎ“пјҢudЕҫbenik, иЈқйЈҫиӣӢзі•, ОәОҝП…П„ОҜ ОјОө ПғОҝОәОҝО»ОұП„О¬ОәО№Оұ, ОІО®ОјОұ, ОІО®ОјОұ ПҖПҒОҝПӮ ОІО®ОјОұ ОҝОҙО·ОіОҜОөПӮ, ОҝОҙО·ОіОҜОөПӮ ОІО®ОјОұ ОІО®ОјОұ, ПҖОұОҪП„ОөПғПҖО¬ОҪО№ art, П„ОөПҮОҪО№ОәОӯПӮ, ПҶПҒОҝОҪП„О№ПғП„О®ПҒО№Оҝ, РёРҪСҒСӮСҖСғРәСҶРёСҸ, РәРҫСҖРҫРұРәР° СҲРҫРәРҫлаРҙРҪРёС… СҶСғРәРөСҖРҫРә, РәРҫСҖРҫРұРәР° СҲРҫРәРҫлаРҙРҪСӢС… РәРҫРҪС„РөСӮ, РәР°Рә СҒРҙРөлаСӮСҢ, РәСҖРҫРә Р·Р° РәСҖРҫРәРҫРј, РәСҖРҫРә Р·Р° РәСҖРҫРәам, РәСғСӮРёСҸ СҲРҫРәРҫлаРҙРҫРІРё РұРҫРҪРұРҫРҪРё, РҝРҫРәСҖРҫРәРҫРІРҫ, РҝРҫСҲагРҫРІРҫ, РҝРҫСҲагРҫРІСӢРө С„РҫСӮРәРё, РҝР°РәСҖРҫРәава, РјРёРҪРёР°СӮСҺСҖР°, РјРә, РјРә СӮРҫСҖСӮ "РәРҫСҖРҫРұРәР° РәРҫРҪС„РөСӮ", майСҒСӮРҫСҖ-РәлаСҒР° СғСҖРҫРә, майСҒСӮР°СҖ-РәлаСҒ, майСҒСӮРөСҖ-РәлаСҒ, майСҒСӮРөСҖ-РәлаСҒРё, РјР°СҖСҲРјРөллРҫСғ, РјР°СҒСӮРёРәР°, РјР°СҒСӮРөСҖ-РәлаСҒСҒ, Р·Рҙ СӮРҫСҖСӮ, Р·Рҙ СӮРҫСҖСӮР°, СҖСғСҮРҪРҫР№ СҖР°РұРҫСӮСӢ, СҖСғСҮРҪР°СҸ СҖР°РұРҫСӮР°, СғРәСҖР°СҲРөРҪРёРө СӮРҫСҖСӮРҫРІ, СҒРәСҖСӢРҪРәР° СҲР°РәалаРҙРҪСӢС… СҶСғРәРөСҖР°Рә, СҒахаСҖРҪР°СҸ РјР°СҒСӮРёРәР°, СғСҖРҫРәРё РҝСҖРёРәСҖР°СҲР°РҪРҪСҸ, СҒСӮСҠРҝРәР°, СҒСӮСҠРҝРәР° РҝРҫ СҒСӮСҠРҝРәР° РёРҪСҒСӮСҖСғРәСҶРёРё, СӮРөС…РҪРёРәРё, СӮРөС…РҪРёРәР°, СӮРөС…РҪС–РәР°, СӮСғСӮРҫСҖиал, СӮСғСӮРҫСҖіал, СӮСҚС…РҪС–РәР°, СҲаг Р·Р° СҲагРҫРј, С–РҪСҒСӮСҖСғРәСҶСӢСҸ, С–РҪСҒСӮСҖСғРәСҶС–СҸ  |
|