
09.08.2017, 12:34
|
|
Администратор
|
|
Регистрация: 10.03.2016
Сообщений: 1,003
|
|
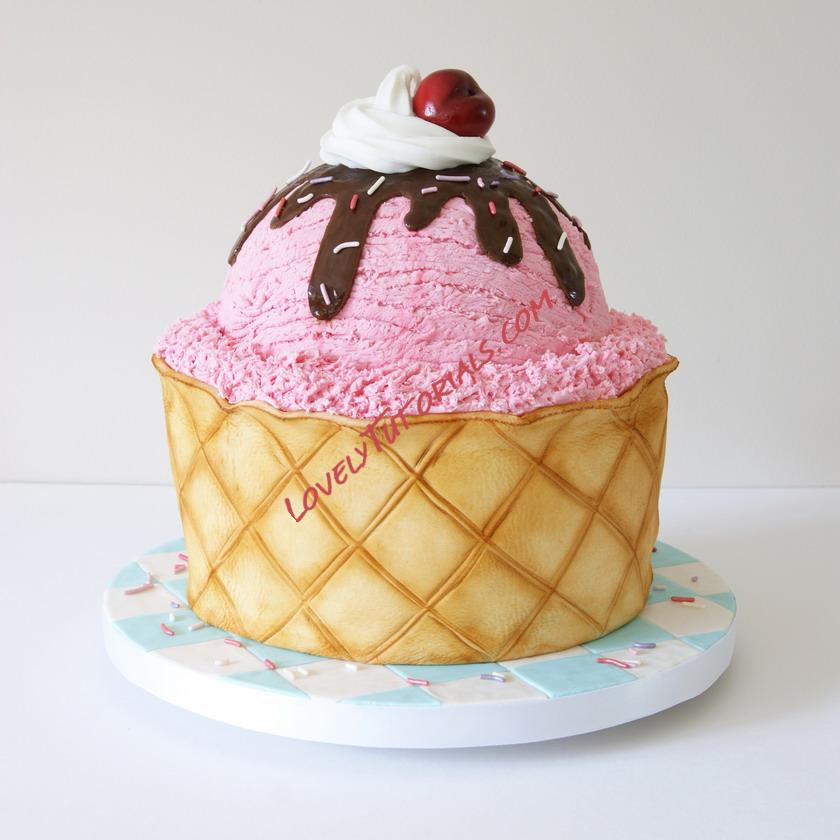
 Giant Ice Cream Cake TUTORIAL
Огромная благодарность Laura Loukaides за Мастер-класс
 - 4 Bubble Tea Straws
- 2kg White Vanilla Satin Ice Fondant*
- Rolling Pins, large & small
- Non-stick cutting mat (optional)
- Small square cookie cutter
- Food Gels: Pink, Blue, Red*
- Spray glaze
- Cake smoothers (optional)
- Diamond/Quilting impression mat
- Various Paintbrushes
- Dresden tool
- 9MM Icing tip (or larger)
- Edible dusts: Brown, Yellow, Red, & Black
Cake Boards needed:
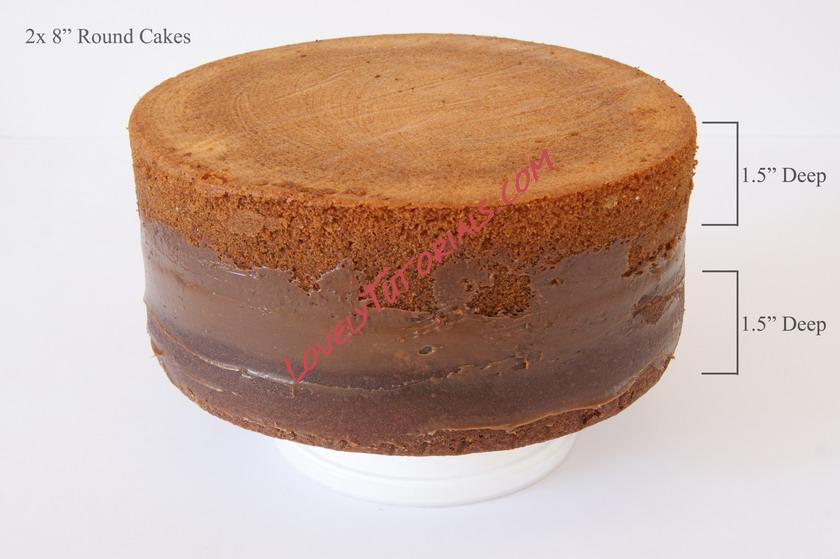
- 2x 8" Round cakes
- 6" Bowl of half ball cake
- 2x 6" Thin cake boards
- 10" Cake drum
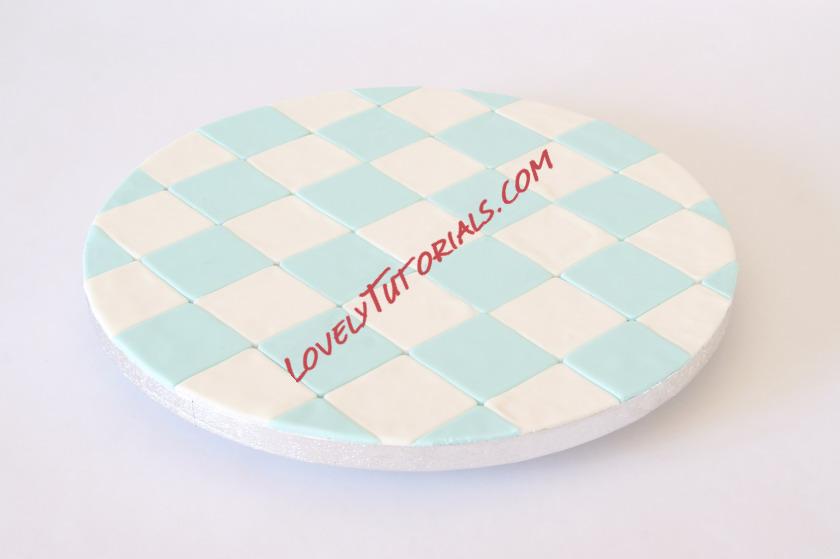
Preparing the Cake Board:
- Before you start the cake, you will first need to cover the board.
- For a 10" board, you will need 40-45 individually cut squares, half white, half blue. Sugarflair aqua was used for the blue color (or to skip this, use Satin Ice Baby Blue). It is recommended that you cut the tiles first, allowing them to dry for about 10 minutes before moving them onto the board, due to stretching out of place if they are moved too soon. If you are using a larger cake drum, you will need to cut more squares.
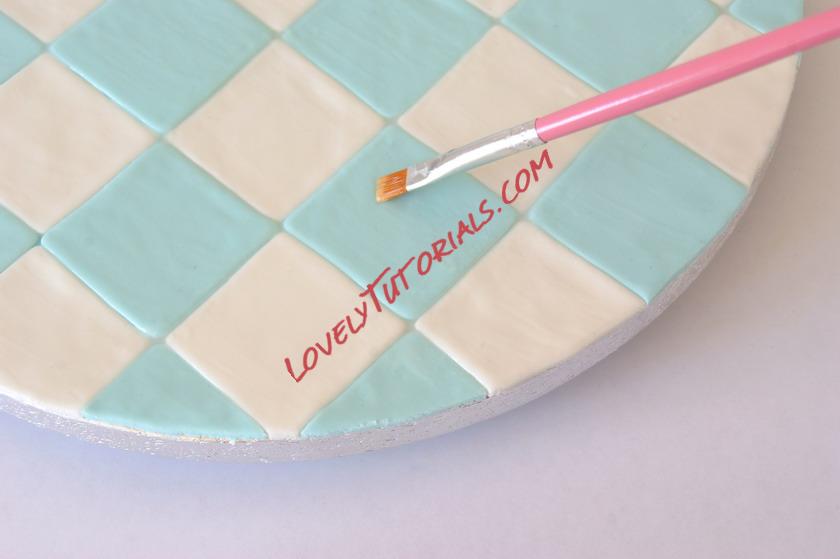
- This step is optional but it will give your board a subtle shiny textured finish - Using a little royal icing, fill any gaps in between the tiles. Seal the entire board with a little water using a clean paintbrush. Leave to dry completely.
  Making the Cherry:
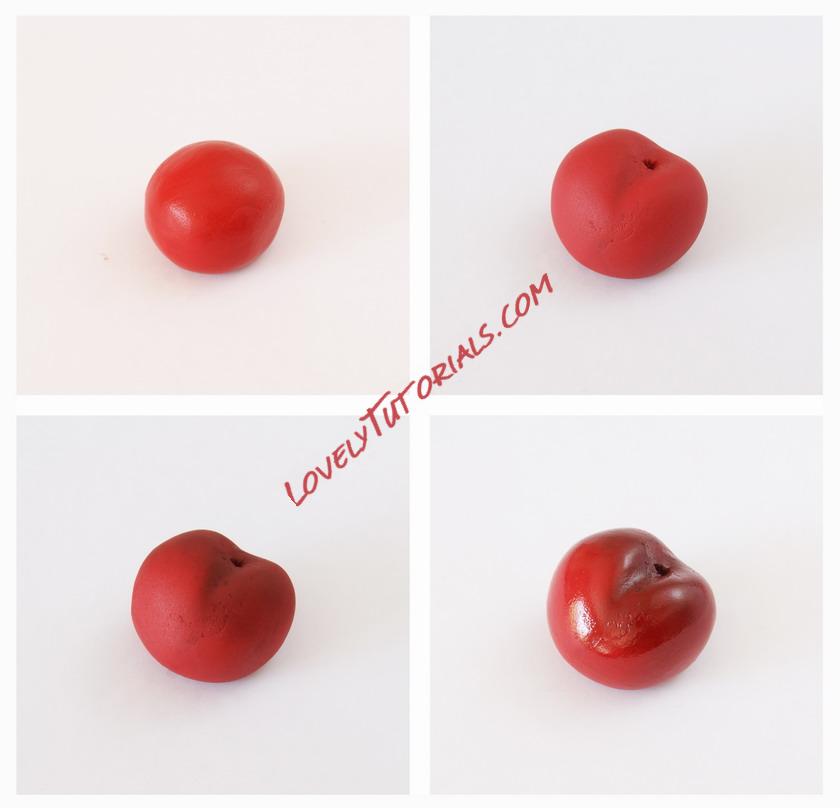
- The Cherry will need to dry before it is placed on the cake. You can either use fondant or gum paste. I have used fondant this time.
- Take a piece of white fondant, just under the size of a golf ball, and color using a deep red food gel (to skip this step, use our Red Satin Ice).
- Using the side of your little finger or paintbrush, dent the center of the ball and lightly roll back into a ball shape. Add a dent where the stem would have been using the end of a thin paintbrush or a cocktail stick. Leave the cherry to dry in a rounded former for at least 3 hours or overnight. Gumpaste is recommended if you need the cherry to dry quicker.
- Once the cherry has dried, mix together a little red and black petal dust. Using a smaller brush, shade the top and sides of the cherry to give it a deeper color.
- Finally, lightly spray the cherry using an edible spray glaze and leave to dry completely.
* Note: You will need the cherry to be dry before you begin work on your cake, if the fondant/gumpaste hasn't had enough time to dry, it's likely that the shape will get squashed or crack once it is pushed into the "whipped cream"
 Carving the Cake:
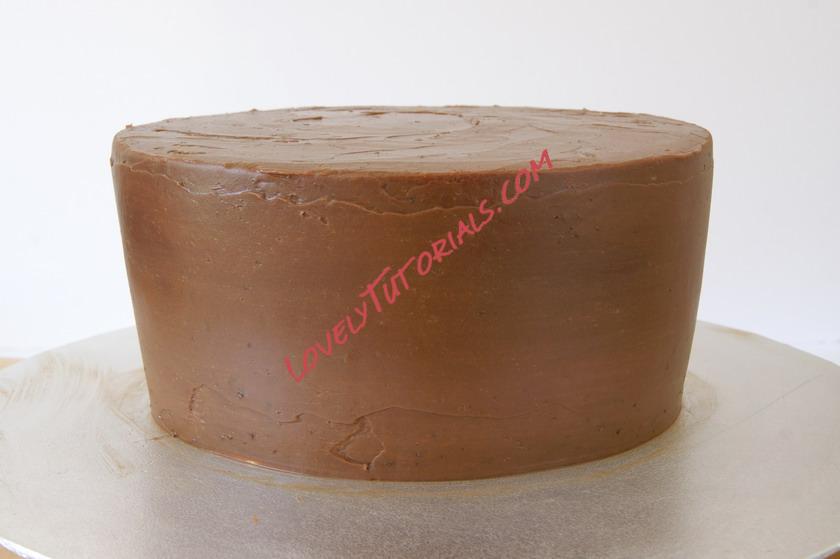
- Spread a small amount of ganache or buttercream onto a 6" cake board. As the cake is going to be carved, you will need the board to be smaller.
- Take two 8" round cakes (1.5" deep) and fill them both with ganache. It is preferable to fill and then carve, because the cake can go out of shape after the filling has been added.
- At this stage you can put the cake in the fridge to set up for a bit, but if you prefer to carve straight away, push four thick plastic straws or dowels into the cake. This will prevent some movement when carving and they will also act as support for the ice cream scoop.
- Using a serrated knife, carve the cake in line with the board at a slight angle, making sure that you do not go over as this can cause issues with covering the fondant.
- Using a clean pair of scissors cut the exposed straws away.
- They should sit in-line (or just under) the top of the cake.
- Ganache the entire cake.
 Adding the Waffle Texture:
- Next, roll a long rectangle of white fondant, enough to go around the cake, and emboss using a diamond impression mat. The fondant will need to be about 1" taller than the cake. You can go ahead and apply this on the cake now, but if you would prefer to add some texture to the "waffle bowl" you will need to dry the fondant for about 5 minutes. Drying fondant adds texture. As you move the fondant, you will notice it stretch and crack in a few places, but don't worry, this will add the texture once the color is applied.
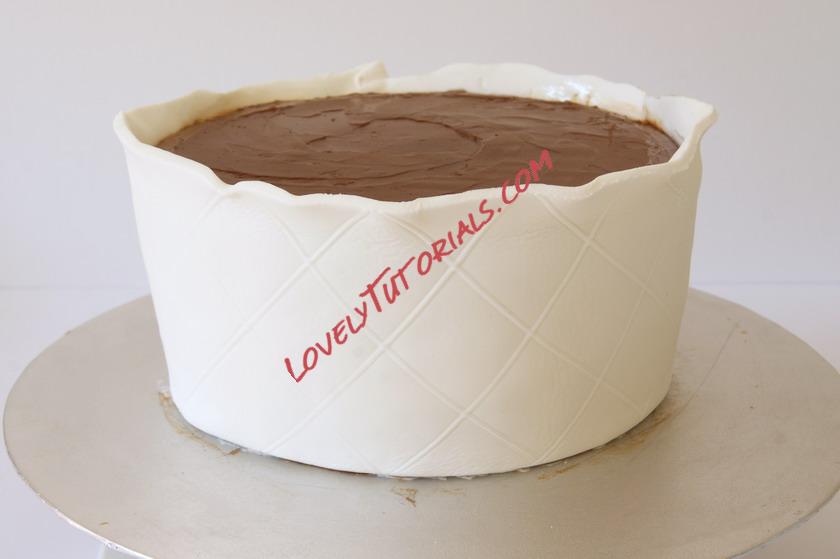
- After the fondant has been applied to the cake, lightly dent the exposed edges.
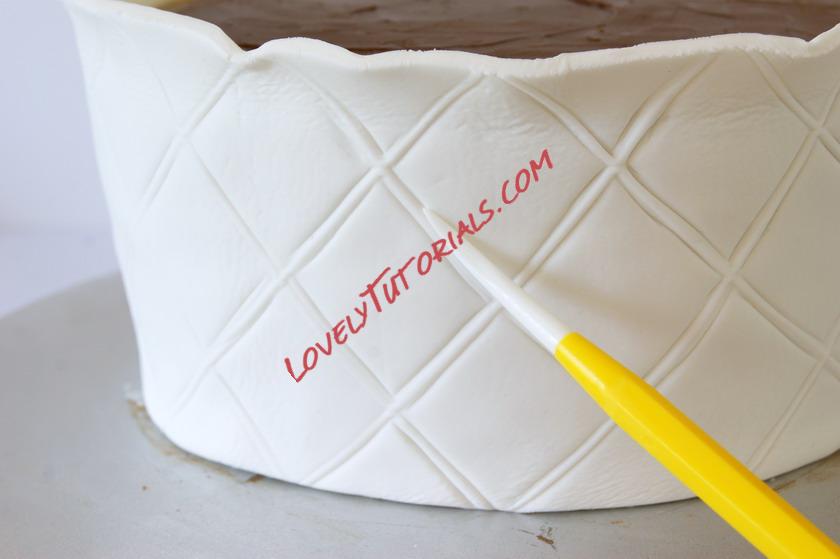
- You can leave the bowl like this and color now if you prefer, but it is recommended enhancing the waffle pattern to give you a better result.
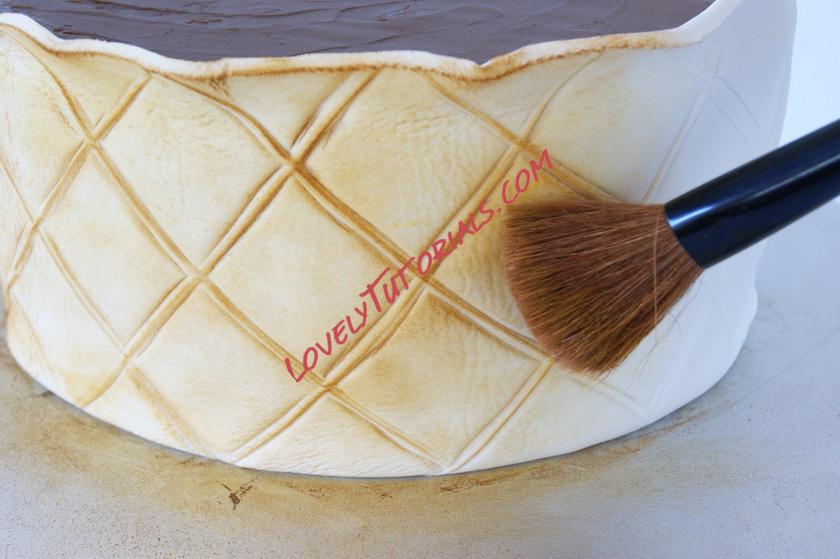
- Using a dresden tool, cocktail stick, or scriber, trace the lines around the diamond shapes as shown in the photo.
 Coloring the Waffle Bowl
* Note: There are a few ways to color the waffle bowl. You can either color your fondant a light brown color, airbrush straight onto the white fondant, or you can dust the cake using edible food dusts. For this tutorial - edible food dust was the preferred method because the dust will enhance the lines as you add more color, and the finish of the dust itself makes the fondant "bread" and other edible food cakes seem more realistic.
- For the waffle bowl, you will need a light brown dust. I miss two colors to achieve this - brown and yellow.
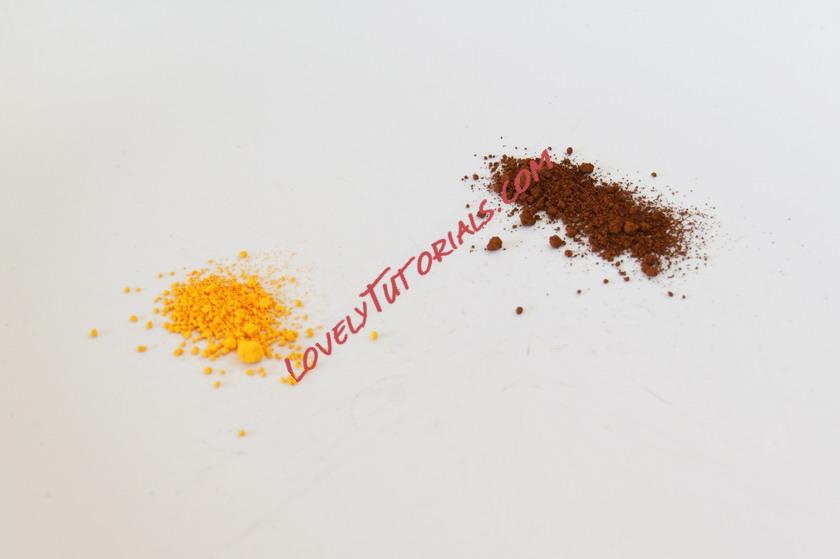
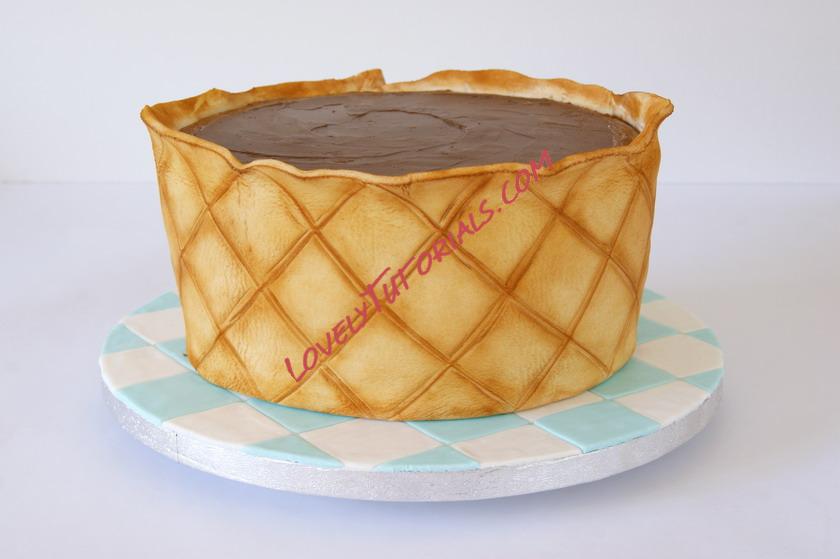
- Make sure to tap away any excess dust in your brush before applying color to the cake. Always test your color on a sample patch of separate fondant before applying to the cake. Using a large dry brush, dust the entire cake.
- Continue dusting the cake until you achieve an even coverage of dust. You can also use a smaller brush around the waffle pattern to enhance the lines. Once you are happy with the color, place the cake on the finished cake board.
 Making the Ice Cream Scoop
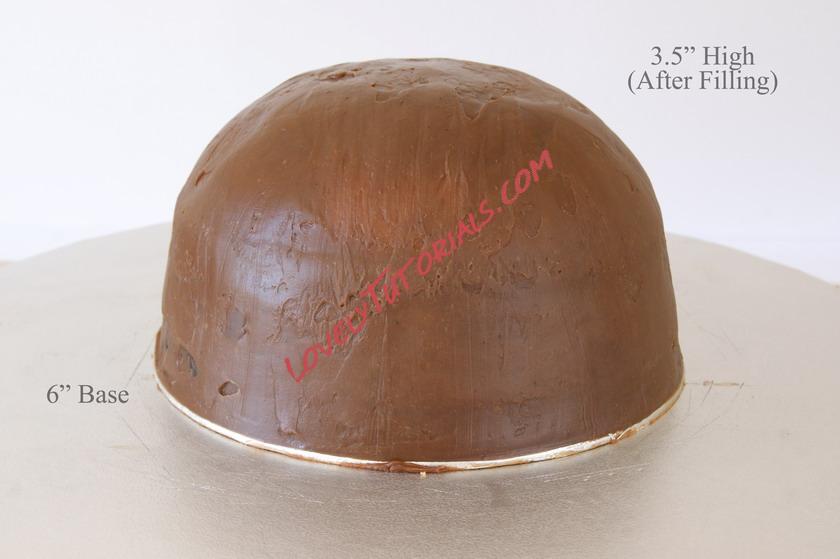
- Place a 6" bowl cake on a 6" cake board. Fill and coat in ganache or buttercream. For this cake I have used a 6" oven proof Pyrex bowl, but you can use a half ball pan if you have one, or you can also carve the shape using two 6" round cakes.
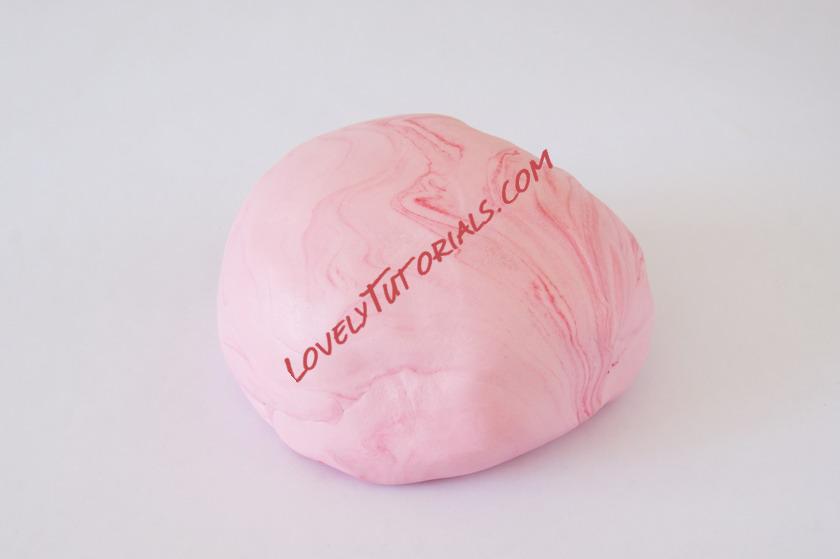
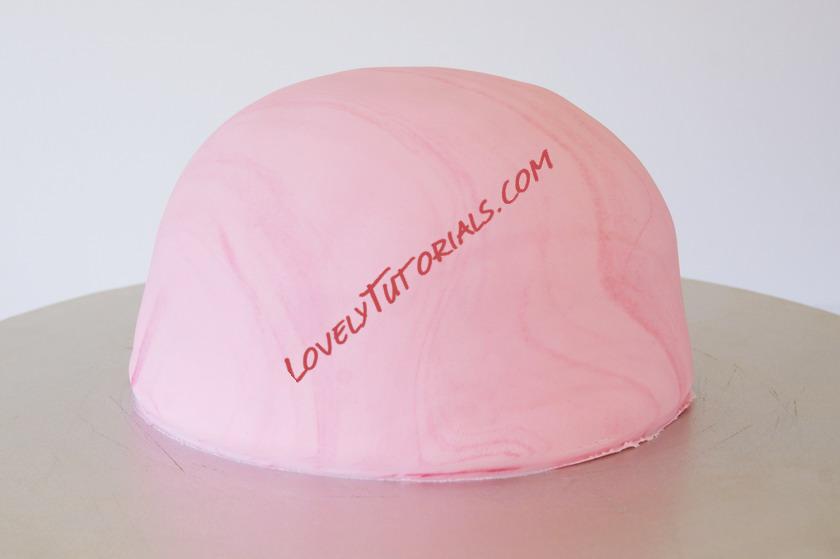
- Next, take enough fondant to cover your ice cream scoop and add a little pink food gel to create a light pink color (to skip the coloring step, using Satin Ice Baby Pink or Pink and White mixed). To create the marble effect, add another small amount of pink gel and twist the fondant to create the effect.
- Cover the cake and cut away the excess. Keep the fondant clean as you will need this for the next step.
 Creating a Realistic Ice Cream Effect
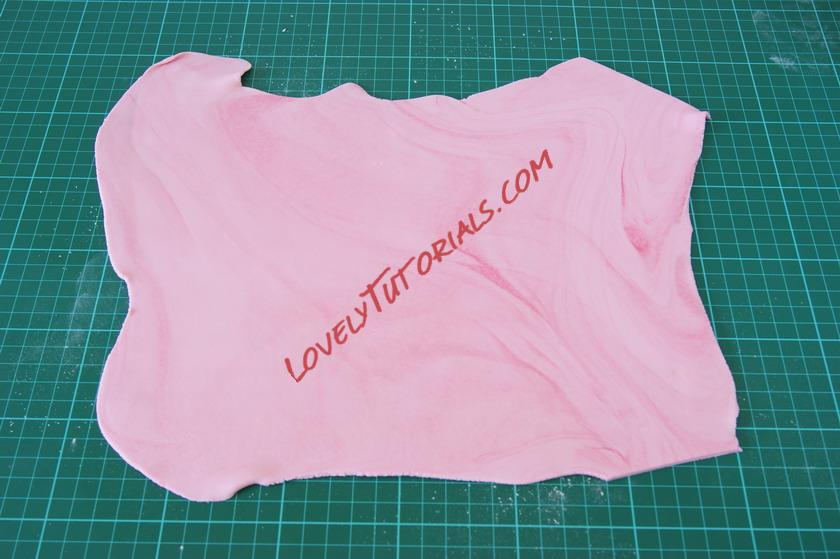
- Roll out the excess fondant onto a powdered surface to about 3mm. Leave the fondant to dry flat for about 10-15 minutes. If you're in a warm climate, make sure you have generously powdered your surface with corn flour before laying your fondant to dry to ensure your fondant will not stick.
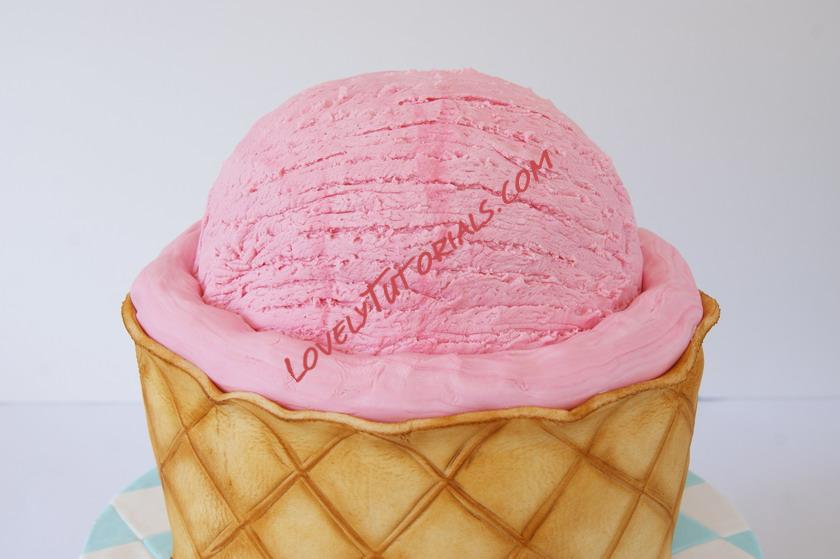
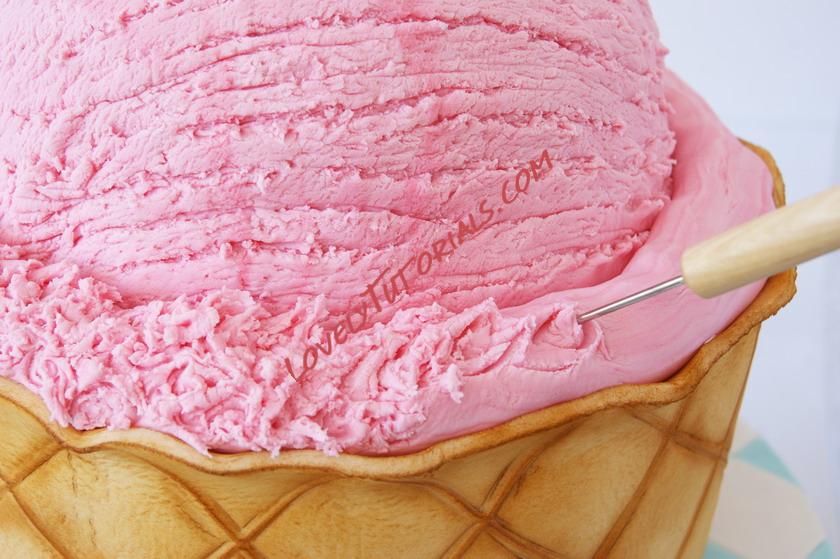
- Brush a little water all over the covered scoop. Gently stretch the dried fondant until cracks begin to appear. Place the fondant over the scoop. Using a cocktail stick or scriber tool, mark horizontal lines over the scoop. As you mark the fondant, you should see jagged lines appear (this is caused by the fondant being deliberately dried). If the fondant isn't dried enough, you can also "fluff up" the fondant using circular motions with the scriber tool.
- Color another portion of white fondant to match the scoop. Roll out a long rope and using your fingers, press the fondant to create uneven levels. Apply using a little water or piping gel.
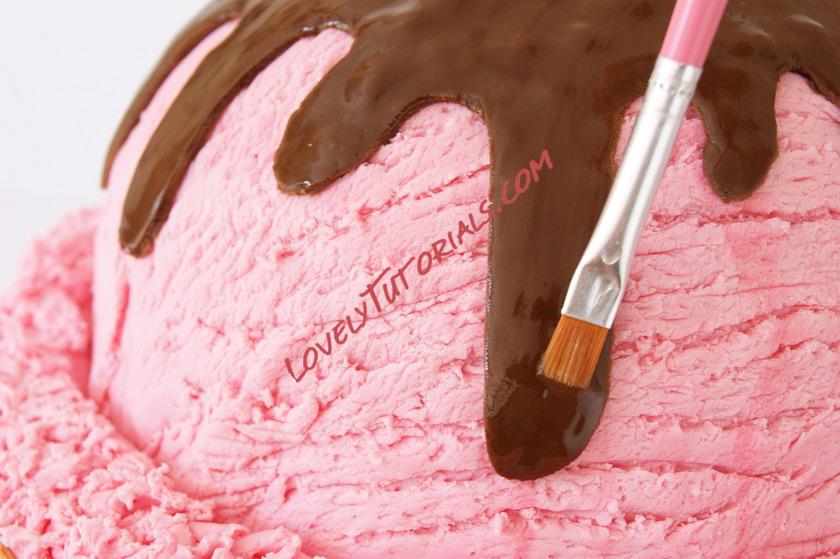
  Making Chocolate Sauce
- Next, using either a chocolate fondant, or a brown colored fondant, cut out a splash shape and then apply to the top of the ice cream scoop.
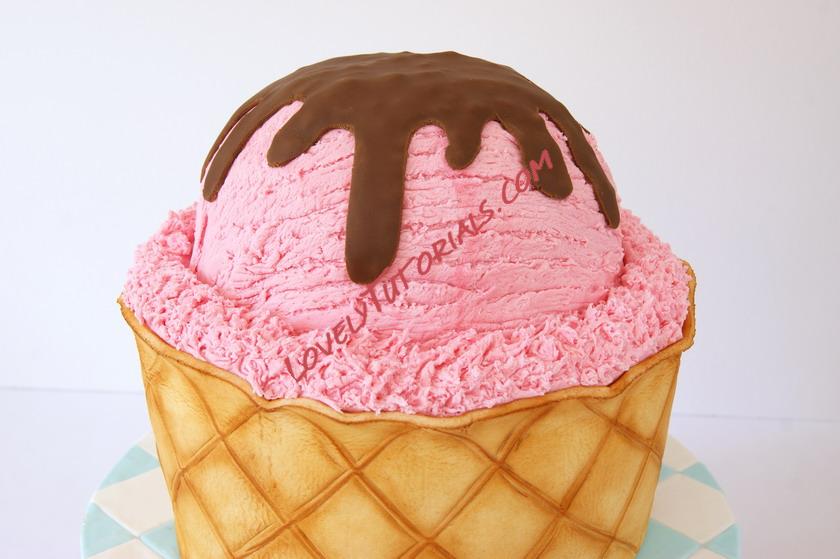
- Using an edible glaze, piping gel or water, create a shiny surface on the "chocolate sauce"
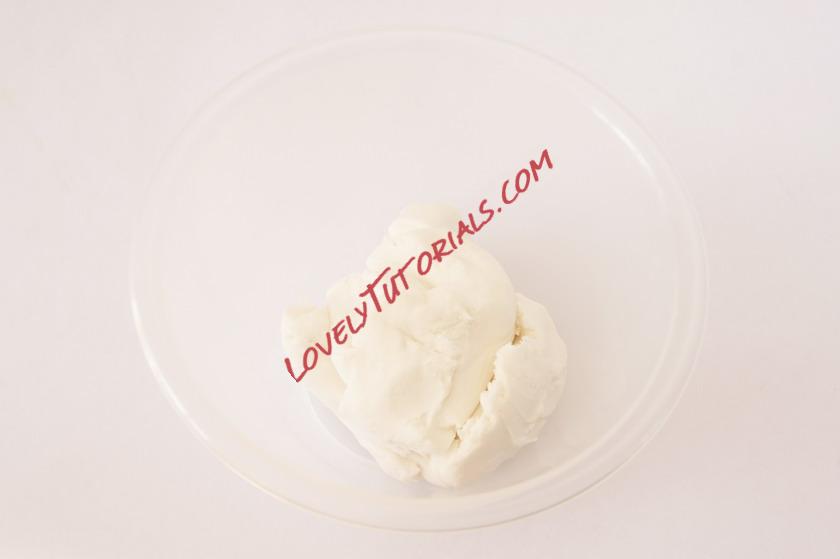
 Making the Whipped Cream
* Note: This part can be done a few different ways. To make the "whipped cream" for the top of the ice cream, you can either use a white buttercream or a white colored ganache. Fondant was preferable for this type of decoration, as it will not melt in warm temperatures once it's dry. It's VERY important to test your mix before applying it to a cake, if your fondant mix isn't thick enough it will melt down the cake. I will explain how you can prevent this.
- Take a handful of white fondant and knead in your hands until soft. Place in a small mixing bowl. Next, add a small amount of water, begin with adding one tablespoon at a time. Using a wooden spoon, mix the fondant and water together. Add enough water until you achieve the consistency of thick buttercream. Then add royal icing sugar to the mix, add enough until the fondant is of a thick consistency. The fondant should be able to hold its shape once you pipe it.
- Using a large, or extra-large open star icing tip, pipe a clean swirl in the center of the scoop. This should be roughly the size you would pipe on a regular cupcake.
* Note: if your fondant is not thick enough, it will start to spread and lose its shape. To ensure this does not happen, pipe a small swirl on a sample piece of fondant and leave it for about 15 minutes, when you come back, the swirl should have held its shape. If the fondant has "melted" you will need to add more royal icing sugar to the mix and test again.
- Before the "cream" sets, gently push the cherry into the fondant.
- Finally, add some large sprinkles to the chocolate sauce. Apply using a little water. If you don't have any large sprinkles, you can make your own by rolling out thin ropes of fondant and cutting them to size.
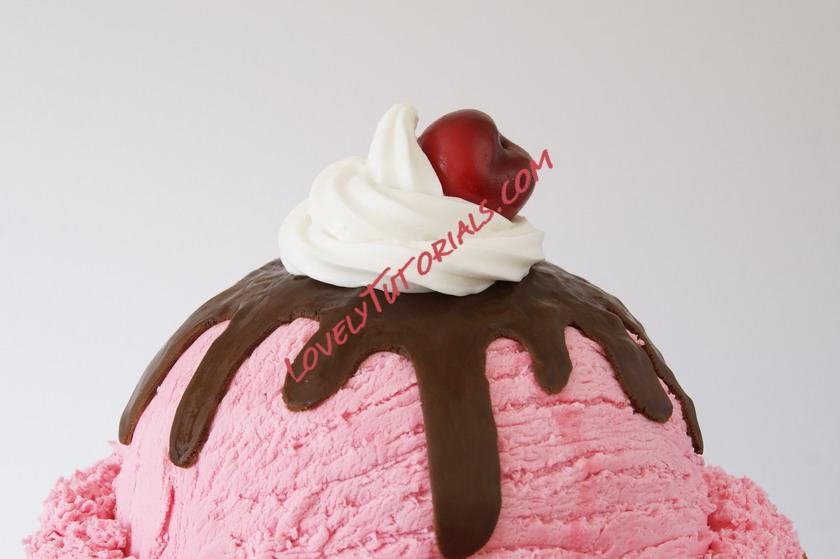 Enjoy!
|


