|
|
ะะ ัะพัั 3ะ ัะพะฑะฐะบะฐ -carved 3D dog cake tutorial V2
|

26.08.2012, 21:30
|
|
ะะดะผะธะฝะธัััะฐัะพั
|
|
ะ ะตะณะธัััะฐัะธั: 07.09.2010
ะกะพะพะฑัะตะฝะธะน: 7,940
|
|
 ะะ ัะพัั 3ะ ัะพะฑะฐะบะฐ -carved 3D dog cake tutorial V2
ะะณัะพะผะฝะฐั ะฑะปะฐะณะพะดะฐัะฝะพััั ะะฒัะพัั SugarpasteFairy ะทะฐ ะะฐััะตั-ะบะปะฐัั
You could adapt this to different breeds (even different animals!) and make it in a variety of sizes. I used a 14 inch board and two chocolate sponge cakes baked in 2 cup and 4 cup pyrex bowls. This isnโt a difficult cake to create but IS time consuming (it probably took me a total of 6 or 7 hours).
Other ingredients/tools you would need are:
- buttercream to fill and cover the cake (I used chocolate)
- sugarpaste to cover the board and the cake and to model the features, legs, tail, toy (I used white, black, grey, brown, teddy bear brown, blue)
- gum tragacanth/CMC for the portion of sugarpaste covering the head
- modelling paste for the neckerchief (I used red)
- a black edible ink pen (for the neckerchief design and the detail on the toy)
- at least 3 long dowels
- a polystyrene/styrofoam ball for the head (I used a 20cm)
- royal icing/buttercream mix and paste colours (I used brown and sunflower yellow) to do the piping of the fur
- grass nozzle piping tip and bag for the fur
- clear piping gel for the eyes, nose and board
- white royal icing and small piping tip for the neckerchief design
- and some of the usual: rolling pin, cake smoother, knife, sugar glue, brush, scissors, ball tool, stitching tool, water spritzer
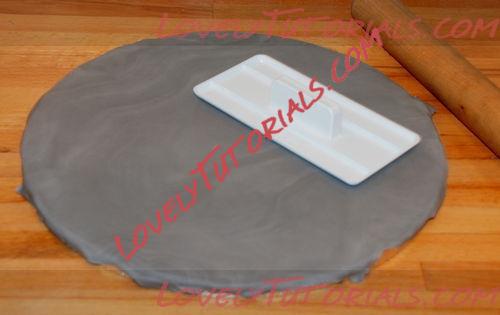
Step 1: Cover the cake board. I covered a cake board with grey sugarpaste, which I kneaded with a bit of black and white to get a sort of marbled effect like the tiles in Freddieโs house! (Personally, I think the board decoration of any cake is almost as important as the cake itself, and makes the cake look more convincing and finished.) I smoothed out the sugarpaste and trimmed the edges.
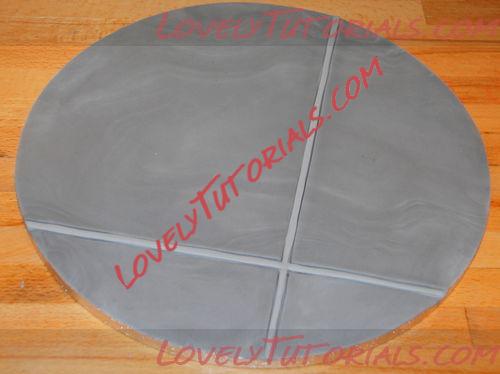
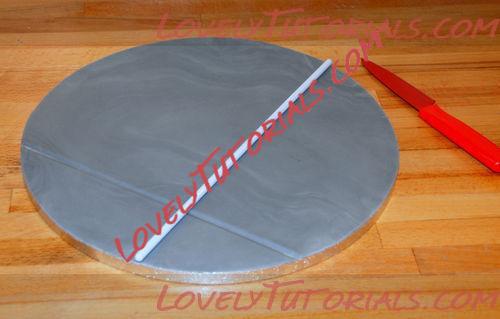
Step 2: Next, I used a dowel to imprint the grout lines for the โtilesโ. I just pressed them down and lifted straight off. Then I rolled out some light grey sugarpaste into long, thin lines and placed them into the impressions.
Step 3: And then I just smoothed them down with my finger and trimmed the edges.
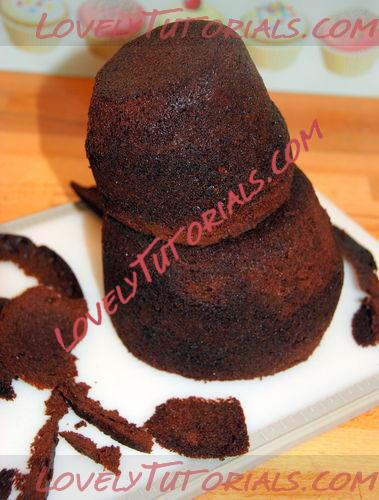
Step 4: Enter two chocolate sponge cakes that were baked in two pyrex bowls/jugs. I stacked them and carved them into the rough shape of a dogโs body. And when I was happy with the overall shape, I moved it onto the covered board and layered and covered the cake with buttercream.
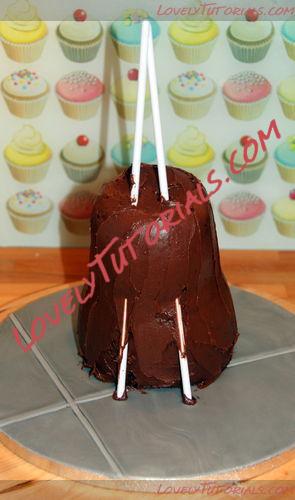
Step 5: Next, I used two dowels as shown, to hold up the cake, and also to act as a support for the front legs. A third dowel, that holds the head, comes into play a little later. Then I cut the tops off, level with the top of the cake.
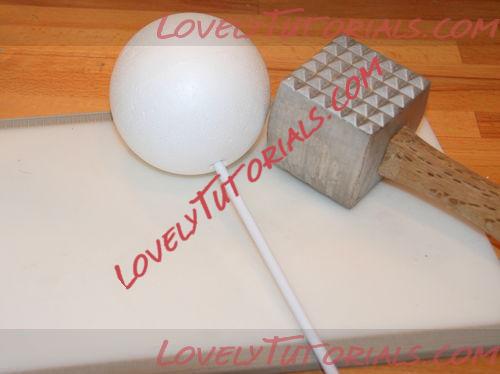
Step 6: Now for the head! For cakes like this I have learned, through a great deal of trial and error, that using a polystyrene (styrofoam) ball is the easiest option for me. I have tried making heads from cake, RKT (Rice Krispy Treats) and combinations of the two, but I find this method much less labour intensive and successful as far as keeping the entire cake upright and in one piece!!! SO, for Freddie, I found a ball that seemed to match the size I wanted and hammered a long dowel into it with my meat tenderiser! You could use a normal hammer, or even just brut force! (Lots of the tools I use are fairly unconventional as far as cake decorating goesโฆ but thatโs another story!)
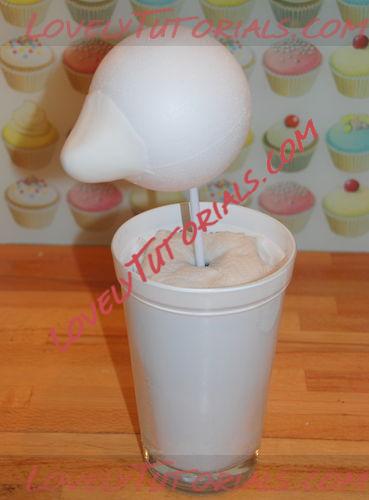
Step 7: Then, I found a pot with some old floral foam in it,covered that bit with some kitchen paper (paper towel) to make it less unsightly, and stuck the dowelled head into it. Now, you may ask, why didnโt I just stick it into the cake??? Well, that is because I had some modelling work to do to it first and I didnโt want the pressure of the modelling to make a bigger hole in the cake. Still with me? Right โ next, I used some sugar glue to stick a cone shape of plain white sugarpaste onto the โheadโ and smoothed it into the shape of a snout, making sure that the edges met as seamlessly with the ball as possible.
Step 8: Now this part is slightly tricky โ for me anyway! First, I spritzed the head with some water so the sugarpaste would adhere to it. Then, I rolled out a piece of sugarpaste, mixed with gum trag (or CMC โ to give it strength), the colour of the dog, big enough to cover the head (sort of!)
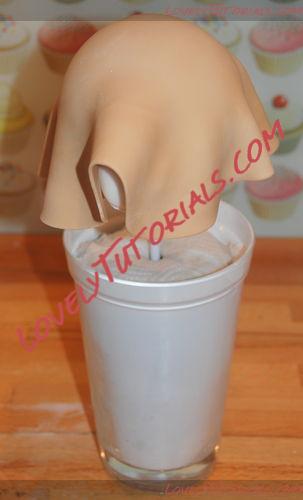
Step 9: And, as you can see from the photo, I smoothed it down and shaped it, using the natural folds of the fondant to form the ears.
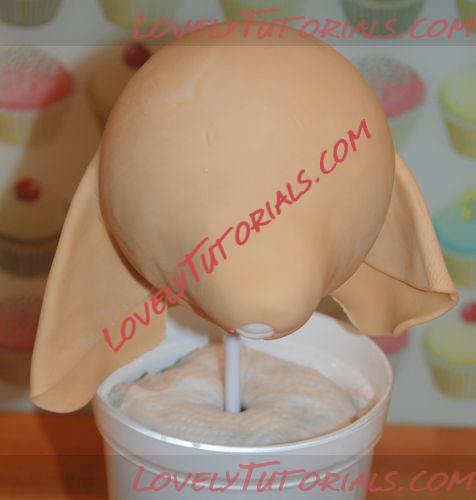
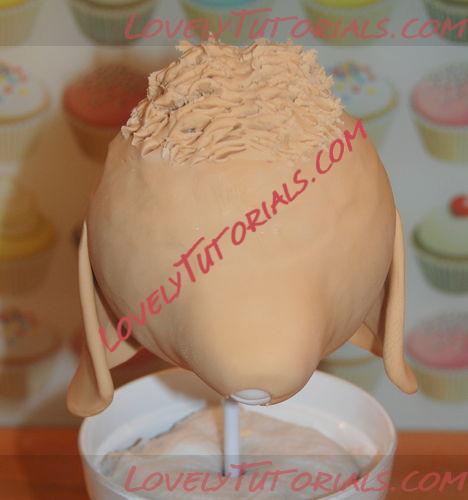
Step 10: Next, I trimmed the excess sugarpaste away to get the ears even, smoothed the rest of it under the head and added some more sugarpaste to the top of the head to get the shape better. Then, I used a blunt knife to mark the sugarpaste so that it would have a texture more like fur.
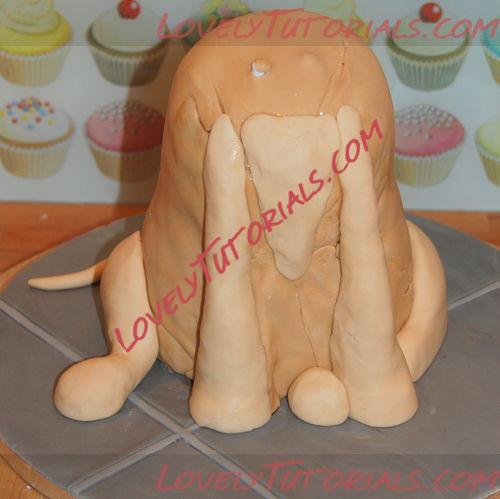
Step 11: I rolled out a large piece of sugarpaste and I covered the bodyโฆ
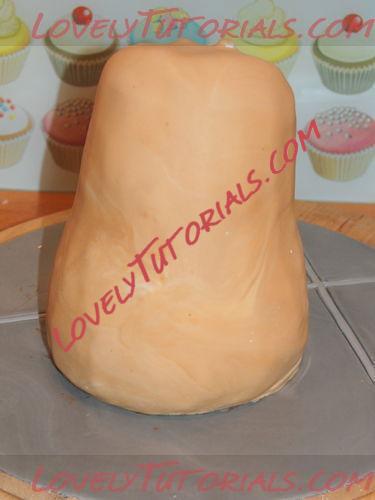
Step 12: It was pretty patchy and not at all acceptable by most cake decorator standards โ BUT it was only the base coat! Then, I modelled the legs and tail from long, fat sausage shapes of sugarpaste and placed them accordingly (I was using a photo of Freddie to help me!)
Step 13: I placed the head onto the body (with the dowel going right the way down). Then, I made the markings for the eyes (with a large round ball tool), and I started marking the texture for the fur on the torso with a blunt knife. I was actually going to do this all around the cake and leave it at that, BUT โ you can see some of the chocolate buttercream showing through because the sugarpaste was quite thin and then I realised that he wouldnโt look fluffy enough either โ so this is the stage that I thought to myself: this wonโt do โ Iโll have to go over the whole thing with PIPED icing! Now, if you wanted, you could use a sufficiently think layer of sugarpaste and texture it with a knife. This would be a good method for short haired dogs. But, as I realised, long hair would look more convincing if it was piped. Nevertheless, I continued texturing THIS cake because I thought it would look better under the piped icing and help the piped icing adhere to the sugarpaste. (I hope I havenโt lost you now!)
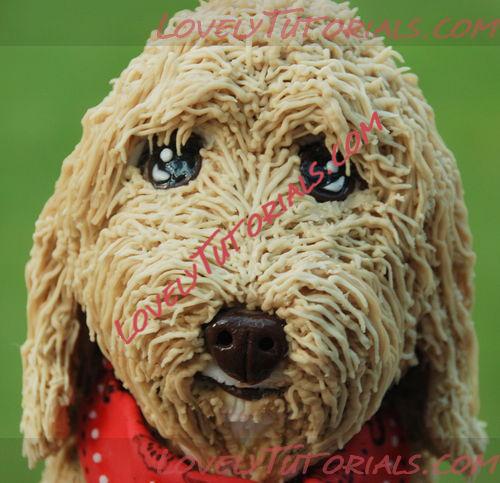
Step 14: Next, I had to make the facial features more prominent and realistic, so I used white sugarpaste attached with sugar glue to model the fur around the snoutโฆ
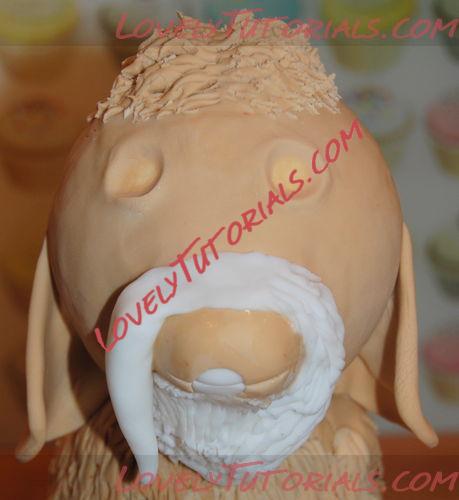
Step 15: The eyebrows were modelled the same way, and I used brown sugarpaste around the mouth and neck where the natural colour of the dog was darker. Then I added the eyes and nose. Sorry โ I donโt have any photos of the detail work that I did on the eyes. Eyes are always the trickiest part of a person or animal for me. I usually get caught up with the black and white parts and my husband makes comments like โOoooooooh, Iโm Freddie the spooky dogโ โ so no photos were taken at this stage, as I was too busy punching my husband and then trying to get it right! Suffice it to say that there was a brown circle of sugarpaste over the black that you see below, then another black circle for the pupil, and finally some white pieces to highlight. I used clear piping gel to paint over the eyes and nose and also for the tiles โ this makes them nice and shiny!

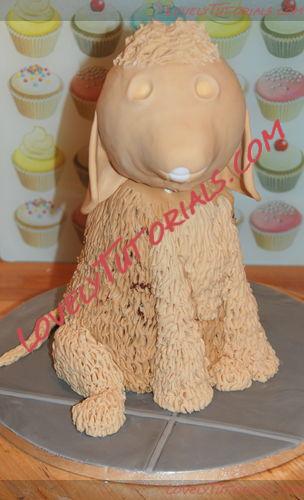
Step 16: The best thing that occurred to me while I was making this cake was to use a grass nozzle (a round flat-ended nozzle with lots of holes) to make the fur look more realistic. So, first I mixed up a royal icing/buttercream mixture โ and spent far too much time trying to get the consistency and colour just right (I used brown and yellow paste colours). Then I started at the bottom and worked my way up all around the dog. I also reserved some of the lighter icing while I was mixing it, and I used the lighter icing at the end, to highlight certain parts of the fur, especially around the face.
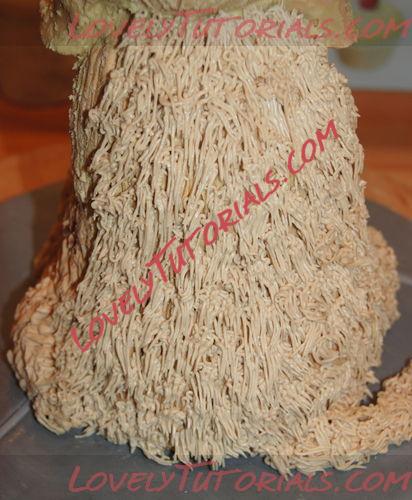
Step 17: The face wasnโt easy โ trying to build up the layers of fur, especially those that were long and hanging down around the ears and mouth. Spritzing a tiny bit of water on those areas before the piping seemed to help.
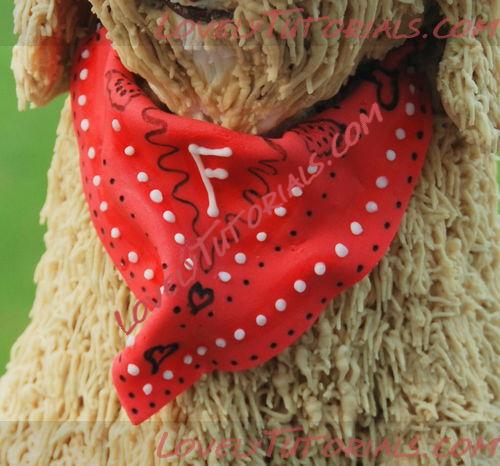
Step 18: For the neckerchief, I rolled out a thin layer of red modelling paste, cut it into a square, kept the off-cuts for the ties at the back, and decorated it with a black edible ink pen. Then I folded it over into a triangle shape and pressed it onto the fur icing around the neck. When it was attached I piped on the โFโ and white dots with royal icing.
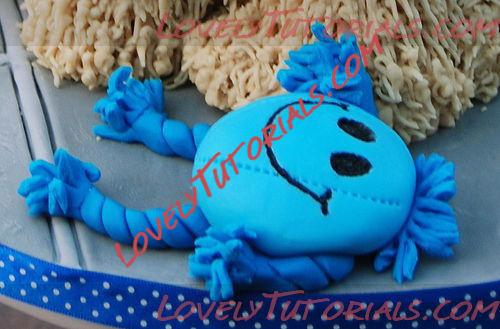
Step 19: Next, I made the little toy from two shades of blue sugarpaste. The body is just a flattened ball with stitching detail and eyes/mouth coloured with black edible ink pen. And the legs were two thin sausages of sugarpaste, twisted together. I cut the ends with some small scissors to make them look frayed.
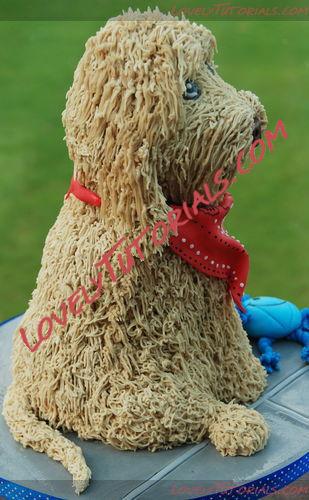
Step 20: Hereโs the side/back view of the dog with the neckerchief ends made to look as though they are knotted/tied around the back of the neck and with a bit of the black pen and royal icing detail.

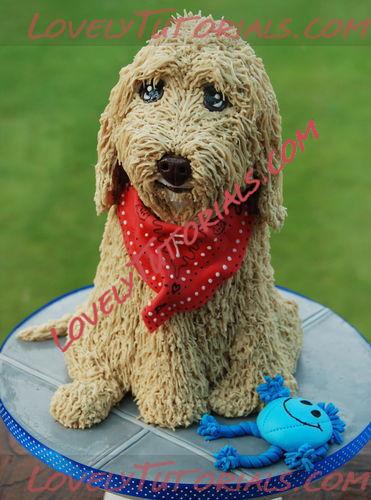
And voila! The finished Freddie ready to go!
|
 |
|
ะะตัะบะธ
|
3 d tutorial, 3-d dog cake, 3-ะด ัะพะฑะฐะบะฐ, 3d, 3d bizcocho, 3d bolo, 3d cake, 3d dog cake tutorial, 3d dort, 3d kage, 3d kager, 3d kake, 3d kek, 3d pastel, 3d tarta, 3d torta, 3d torte, 3d torti, 3d torty, 3d ฮบฮญฮนฮบ, 3ะด, addฤฑm-addฤฑm tษlimat, adฤฑm, adฤฑm adฤฑm yรถnergeler, animais, animali, animals, animaux, artesanatos passo a passo, baking, bemutatรณ, bolando bolos, bolo, bรกnh, cachorro, cake, cake decorating, cake decorating techniques, cane, carved 3d dog cake tutorial, carved cake tutorial, chien, chiot, ciasto, confeitando bolos, cucciolo, curso de modelado, cรฃo, cรขine, cรญste, cฤลฃel, decoracion de pasteles, decoraciรณn de tortas, decorada en fondant, decorare le torte, decorazioni, deko fondant, dekorace na dort, dekoracija, dekoracije, dekorasyon, dekorรกcie, djur, dog, dog cake, dort, dyr, dzฤซvnieki, fender, fimo, flower paste, fondan, fondant, fondant cake, fondente, fondente di zucchero, fotopostup, foundant, groom's cake, gum pasta, gum paste, gumpaste, gรขteau, hand-made, handmade, hayvanlar, heyvanlar, hond, how to, how to make 3d cakes, how-to's, hund, hvalp, instrucลฃiuni, instrukcijas, instrukcje, jak na, kage, kage dekoration, kagedekoration, kager, kaka, kake, kakebaking, kakku, kejk, kek, keks, kook, korak, korak za korakom navodila, korak-po-korak upute, koristeet ja koristelu, krok, krok po kroku, krok za krokem, krok-za-krokem, kuchen, kue, kuลพa, kรผรงรผk, kรถpek, kรถpek yavrusu, kลซka, la modรฉlisation, labrador, lacoste sculpted, las instrucciones, las tรฉcnicas, le tecniche, les techniques, los animales, making 3d sculpted cakes, marshmallow, masa flexible, master-class, master-klasse, master-klasy, meistras klasฤs, metodikas, mistr tลรญdy, modelado, modelagem, modelare, modeling, modeling paste, modeliranje, modellazione, modelleme, modellering, modellieren, modellierpaste, modelling past, modellษลdirmษ, modelovanie, modelovรกnรญ, modelowanie, motivtorten, nรกvod, opplรฆringen, pamoka, pap, pas, pas-cu-pas, paso, paso a paso, passo, passo a passo, passo-a-passo, passo-passo le istruzioni, pasta de miel, pasta flexible, pastel, pejsek s postupem, perro, pes, pes s postupem, pies, postup na 3d torty, postupak za ukrasavanje, puppy, schritt fรผr schritt anleitung, schritt-fรผr-schritt, schritt-fรผr-schritt-anleitungen, sculpted abs, sculpted arms, sculpted art, sculpted bodies, sculpted body, sculpted cake, sculpted face, sculpted faces, sculpted figures, sculpted head, sculpted heads, sculpted house, sculpted image, sculpting, stap, stap-voor-stap, stap-voor-stap instructies, steg for steg, steg-fรถr-steg-instruktion, step, step by step, step-by-lรฉpรฉsre, step-by-step, step-by-step 3d cake sculpting, step-by-step instructions, sugarcraft, sugarpaste, szczeniak, tarta, tarte, technieken, techniken, techniki, techniky, technikรกk, techniques, tecnicas de decoracion, tecniche, tehnici, tehnike, teknikker, teknikler, tiere, tort, torta, tortas, torte, torte decorate, torten dekorieren, torti, tortu, torty, trin, trin for trin, trin-for-trin, trin-for-trin instruktioner, trinn, trinn for trinn, trinn-for-trinn-instruksjoner, tutorial, tutoriale, tutorias, tutorias/ideas para decorar los bizcochos, tutoriel, tutorijal, tรฉcnicas, ukraลกavanje torti, uputstvo za dekoraciju, valp, welpen, welsh corgi, zvieratรก, zvรญลata, เคธเคเคพ เคเฅเค, เคชเคฟเคฒเฅเคฒเคพ, เคเคพเคจเคตเคฐเฅเค, เคเฅเคฏเฅเคเฅเคฐเคฟเคฏเคฒ เคฎเคพเคธเฅเคเคฐ เคตเคฐเฅเค, เคเฅเคคเฅเคคเฅ, เคเฅเคคเฅเคคเคพ, เคเฅเค, เคเคฆเคฎ, เคเคฆเคฎ เคฆเคฐ เคเคฆเคฎ เคจเคฟเคฐเฅเคฆเฅเคถ, เคคเคเคจเฅเค, เคฎเฅเคกเคฒเคฟเคเค, เนเธเนเธ, ใขใใซ, ใฑใผใญ, รฉtape, รฉtape par รฉtape les instructions, รถฤretici, ฤแปng vแบญt, ลพingsnis, ลพingsnis po ลพingsnio, ลพivali, ลกtene, ลกtฤnฤ, ลกuniukas, ลกuo, ๅ็ฉ, ๅฎๅธซ็ดๆ็จ๏ผไธๆญฅ๏ผไธๆญฅไธๆญฅ็ๆ็คบ๏ฟ ฝ ๏ฟฝ ๏ฟฝ ๏ฟฝๆ่ก๏ผudลพbenik, ๅปบๆจก, ็ฌ, ็ฌใๅญ็ฌใ, ็, ็๏ผๅฐ็๏ผpas, ่ฃ้ฃพ่็ณ, ่็ณ, ๋๋ฌผ, ์ผ์ดํฌ, ฮบฮญฮนฮบ, ฮฒฮฎฮผฮฑ, ฮฒฮฎฮผฮฑ ฯฯฮฟฯ ฮฒฮฎฮผฮฑ ฮฟฮดฮทฮณฮฏฮตฯ, ฮฟฮดฮทฮณฮฏฮตฯ ฮฒฮฎฮผฮฑ ฮฒฮฎฮผฮฑ, ฮถฯฮฑ, ฯฮฑฮฝฯฮตฯฯฮฌฮฝฮน art, ฯฮบฯฮปฮฟฯ, ฯฮตฯฮฝฮนฮบฮญฯ, ฯฯฮฟฮฝฯฮนฯฯฮฎฯฮนฮฟ, ะธะฝััััะบัะธั, ะบะฐะบ ัะดะตะปะฐัั, ะบัะพะบ ะทะฐ ะบัะพะบะพะผ, ะบัะพะบ ะทะฐ ะบัะพะบะฐะผ, ะบััะต, ะบััะตะฝัะต, ะฒะฐะปะปะธะนัะบะธะน ะบะพัะณะธ ะฟะตะผะฑัะพะบ, ะฟะพะบัะพะบะพะฒะพ, ะฟะพัะฐะณะพะฒะพ, ะฟะพัะฐะณะพะฒัะต ัะพัะบะธ, ะฟะฐะบัะพะบะฐะฒะฐ, ะผะธะฝะธะฐัััะฐ, ะผะบ, ะผะบ 3ะด ัะพะฑะฐะบะฐ, ะผะบ ัะพัั 3ะด ัะพะฑะฐะบะฐ, ะผะพะดะตะปะธัะฐะฝะต, ะผะฐะนััะพั-ะบะปะฐัะฐ ััะพะบ, ะผะฐะนััะฐั-ะบะปะฐั, ะผะฐะนััะตั-ะบะปะฐั, ะผะฐะนััะตั-ะบะปะฐัะธ, ะผะฐััะผะตะปะปะพั, ะผะฐััะธะบะฐ, ะผะฐััะตั-ะบะปะฐัั, ะถะธะฒะพัะฝะธ, ะถะธะฒะพัะฝัะต, ะถัะฒัะปั, ะทะด ัะพัั, ะทะด ัะพััะฐ, ะปะตะฟะบะฐ, ะปัะฟะปะตะฝะฝั, ัััะฝะพะน ัะฐะฑะพัั, ัััะฝะฐั ัะฐะฑะพัะฐ, ัะบัะฐัะตะฝะธะต ัะพััะพะฒ, ัะบัะฐัะตะฝะธะต ัะพััะฐ, ัะพะฑะฐะบะฐ, ัะฐะฑะฐะบะฐ, ัะฐั
ะฐัะฝะฐั ะผะฐััะธะบะฐ, ััะพะบะธ ะฟัะธะบัะฐัะฐะฝะฝั, ัััะฟะบะฐ, ัััะฟะบะฐ ะฟะพ ัััะฟะบะฐ ะธะฝััััะบัะธะธ, ัะพัั, ัะพััะฐ, ัะพััั ะดะปั ะดะตัะตะน, ัะฒะฐัะธะฝะธ, ัะตั
ะฝะธะบะธ, ัะตั
ะฝะธะบะฐ, ัะตั
ะฝัะบะฐ, ัััะพัะธะฐะป, ัััะพััะฐะป, ััั
ะฝัะบะฐ, ัะฐะณ ะทะฐ ัะฐะณะพะผ, ััะฐะฝัะบ, ัะตะฝะพะบ, ัะตะฝั, ัะฝััััะบััั, ัะฝััััะบััั  |
| ะะฟัะธะธ ัะตะผั |
ะะพะธัะบ ะฒ ััะพะน ัะตะผะต |
|
|
|
|


