Огромная благодарность Jörg Amsler за Мастер-класс
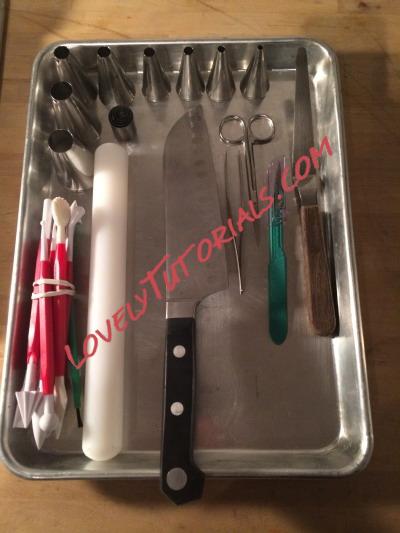
In addition to Sculpey clay, Elastak molding material and chocolate, you will need the following tools to create the flute, saxophone and clarinet chocolate sculptures:
medical scalpel or exacto knife
small scissors
variety of different size round tips
rolling pin
fondant tools
palette knife
tweezers
large knife
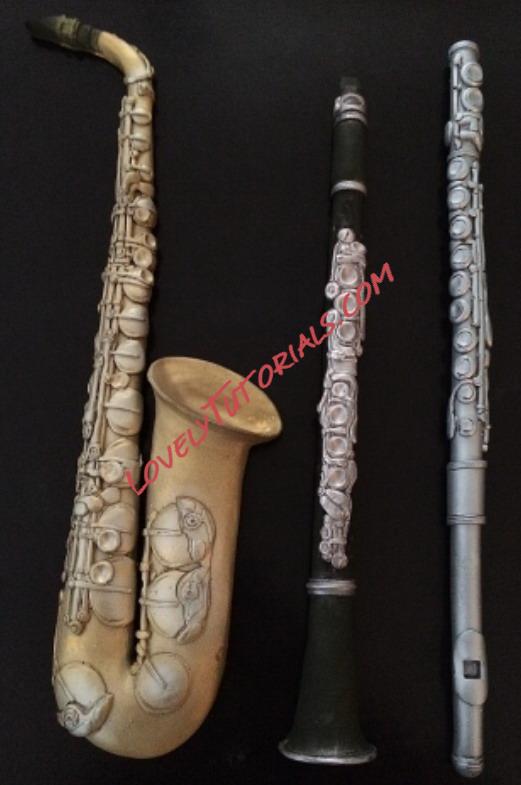
1. I happen to have a flute at home and I used it as a template. I didn't measure anything, I just did it by eye. I used Sculpey clay to form the body of the flute.
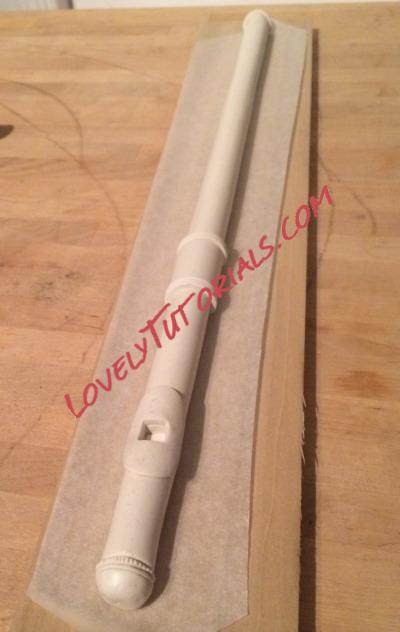
2. I just made a long snake and wrapped a piece around the middle to create the barrel. Two ribbons of clay were attached to the top and bottom of the barrel. The lip plate was made by using an oval cutter. The center of the lip plate was cut out with the scalpel to create the embouchere hole.
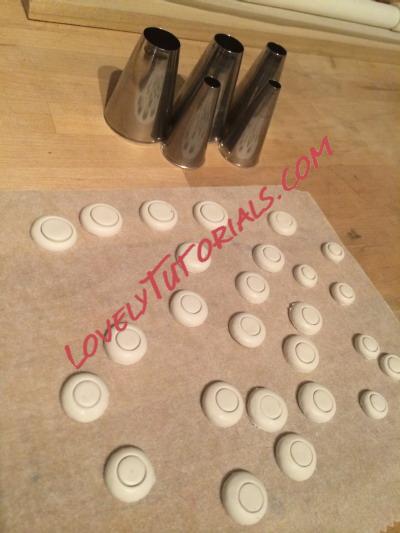
3. I cut the keys for the flute using tips that matched the size. A larger one was used to cut them out and then a smaller one to create the indentations. There are a variety of different sized keys on a flute; you just select the tip that will create a circle closest to its size.
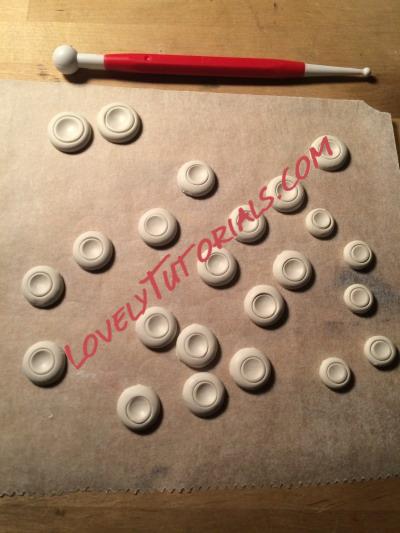
4. Then I used the ball tool to indent the middle of the circles. Then they look like the real keys. You can see I created different sizes to match the sizes on the flute.
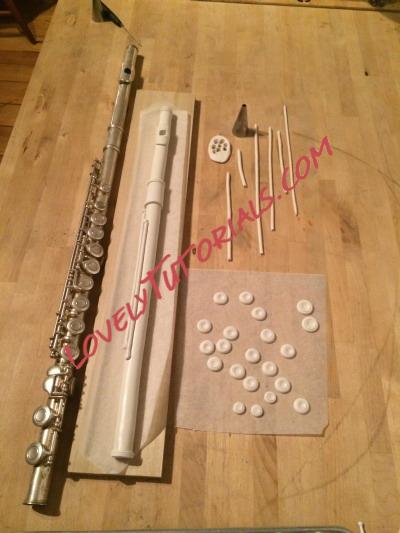
5. Little snakes are created to make the rods of the flute. Here you see one laying on the clay flute. A little tip is used to make cut-outs to create all the little screws that attach the long metal parts to attach to one another. I indented each to make it look like a screw. Just use the flute (or photograph of one) as your guide to add all the little screws to the flute. Next to each key, a small string of clay runs from its side over the rod. These are the details that make your sculpture look realistic.
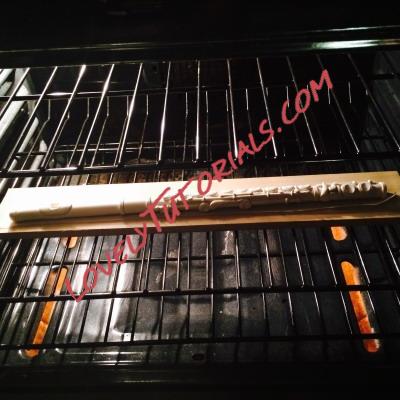
6. You bake the clay at 175 degrees Fahrenheit until hard. The flute took about 1/2 hour to 45 minutes. If you bake it at too high a temperature, it will turn purple. You always want to do this on a flat surface such as wood. You don't want anything bumpy beneath it to warp the shape of the flute otherwise your mold will come out warped and, ultimately, the chocolate pieces will be, too. (You will do this with the clay sculptures of the clarinet and saxophone, too).
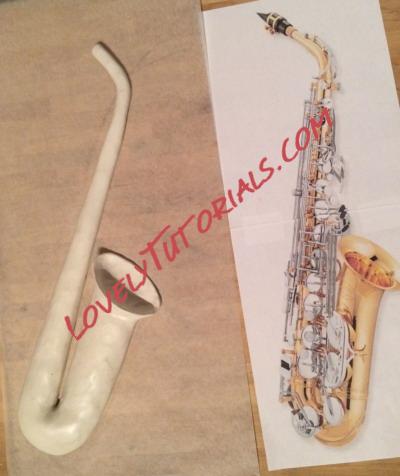
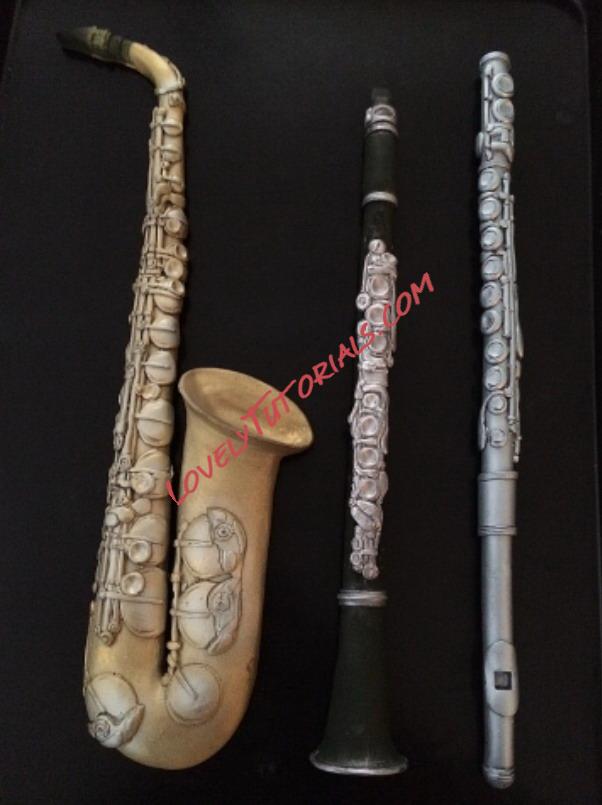
6. The only difference between the construction of the flute and the saxophone is that the saxophone is more like a 2D shape rather then 3D like the flute because the flute was better suited for 3D. You begin just like with the flute by creating a snake of clay. There are so many intricate pieces on the saxophone that I got as close as I could to the photo. The bottom of the saxophone widens and curves upwards.
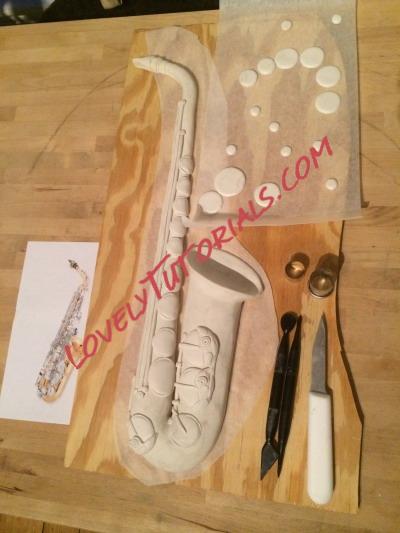
7. I used large round cutters to create the keys. Think strings of clay were used to make the rods. The saxophone has many little screws which were done the same way as on the flute.
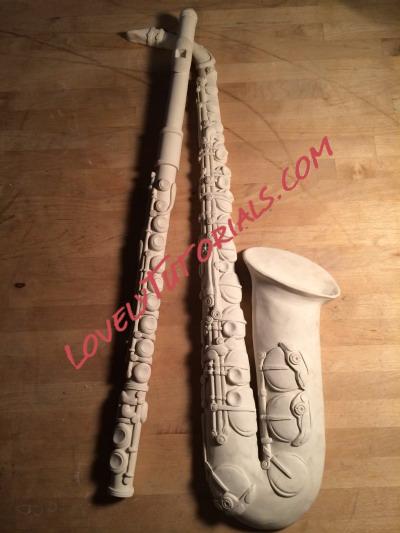
8. Create the long metal parts for the saxophone the same way as you did with the flute. The keys have strings of clay across them to resemble saxophone keys. The largest keys on the saxophone have a little more detail. The saxophone has a lot of screws. The more time you spend making it look realistic with good details, the better your end result will be. Most of the time is spent in preparation. The saxophone is not an exact replica, but you try to get as close as you can to what the instrument looks like.
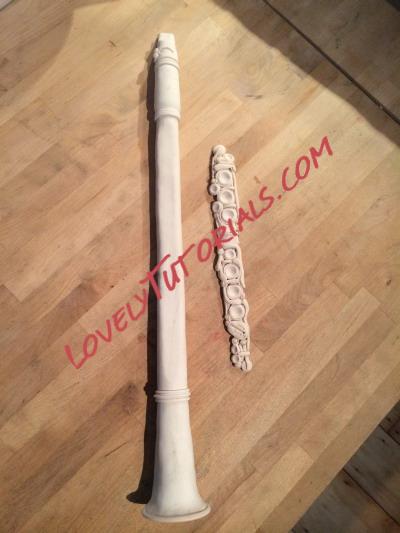
9. The clarinet was done in two parts. I did a cone shape at the bottom to create the horn. The mouthpiece was made by wrapping a few thin bands around the top. When you look closely, you'll see I pressed the middle part down a bit so the middle piece with the keys would lay flat. The reason I did the clarinet in two parts is that the keys are all silver and the clarinet is all black. It would be hard for me to airbrush the keys silver and the clarinet black without having to spend extra time being really, really careful to paint every detail.
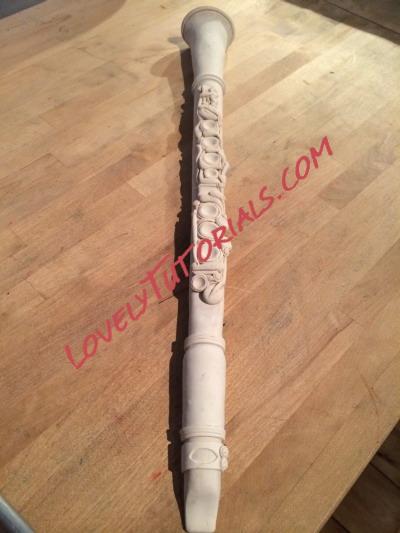
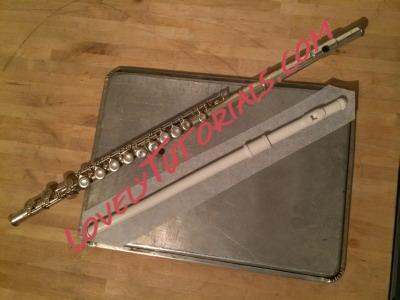
10. Here you see the clarinet keys on top of the clarinet, placed there to make sure they fit the instrument.
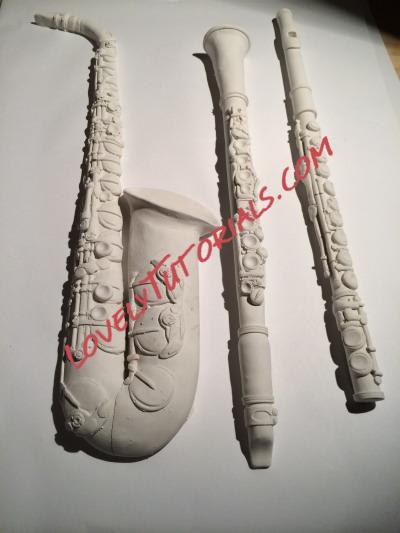
11. Here are the saxophone, flute and clarinet cast in plaster of paris. I did this in order to have an extra mother piece in case I lost the original. I also mounted them on the wall as art.
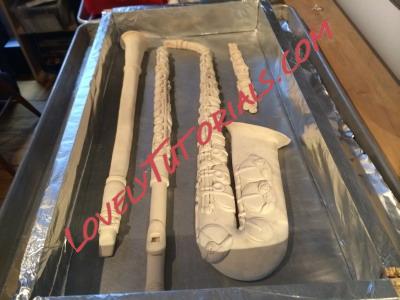
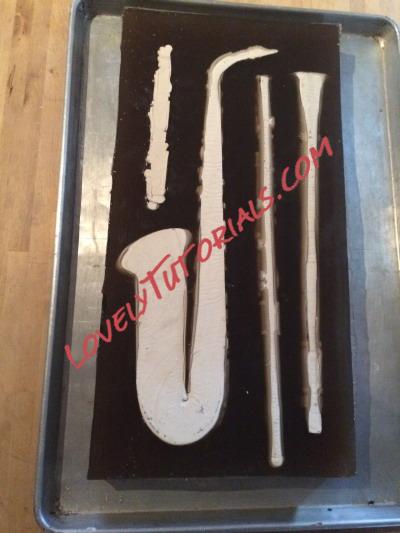
12. Lay all the instruments and the keys of the clarinet in a pan lined with aluminum foil. The foil peels off the mold material really well. When you look at this picture, you'll understand why you really need the clay baked on a flat surface.
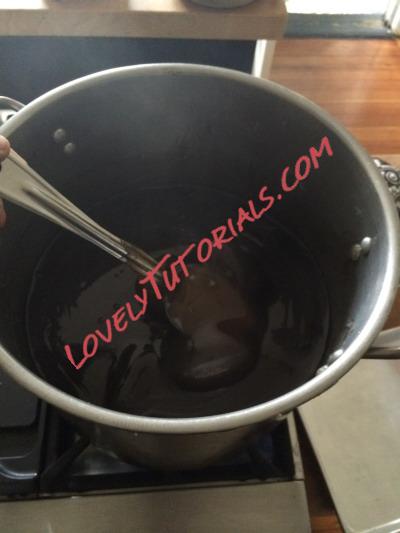
13. Here I'm heating Elastak mold making material. This is made for the food industry. It's not like silicone. Silicone is too hard. This is a re-useable mold making material that you can melt again. This material works great for chocolate; it's only suitable for cold process items. It won't work for isomalt because hot isomalt would melt it. It's cooked on low heat and stirred until melted. The original color is clear - my mold making material has been used over and over again many times and that's why it appears brown.
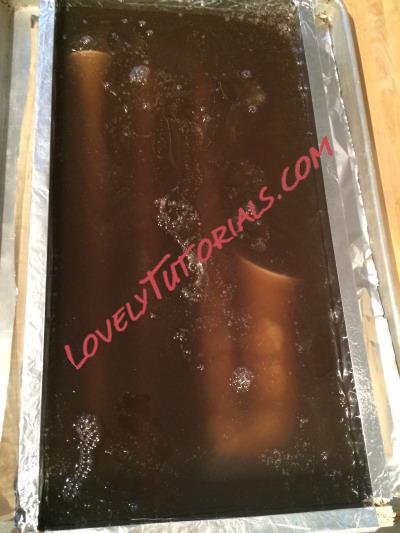
14. Here I've poured the Elastak over the clay instruments. The top of the mold here will actually become the bottom when I remove it and flip it over to take the instruments out.
15. Once the mold making material is cured (about 2 hours) I take the instruments out and take all the pieces out. You slowly pull them out, just letting the molds gently peel away from pressure. It's a very rubbery material.
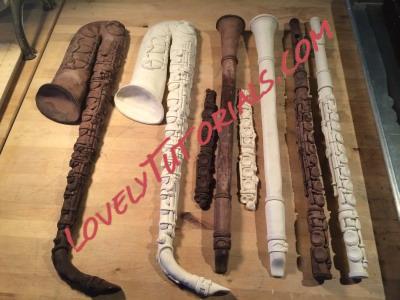
16. Here you see all the original clay instruments next to the casted chocolate instruments.
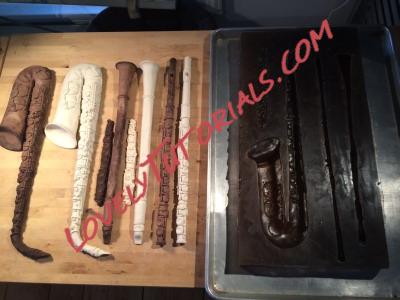
17. Here you see the grouping from above next to the mold.
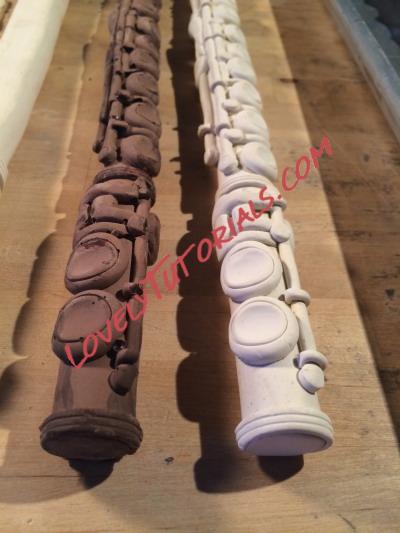
18. Here is a close-up of the flute. You can see how accurate the chocolate piece is to your original mold. The mold making material picks up every detail. The cleaner your work is, the better your results. It will even pick up finger prints.
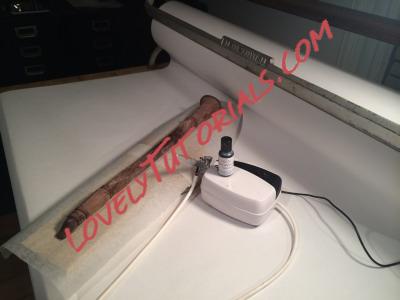
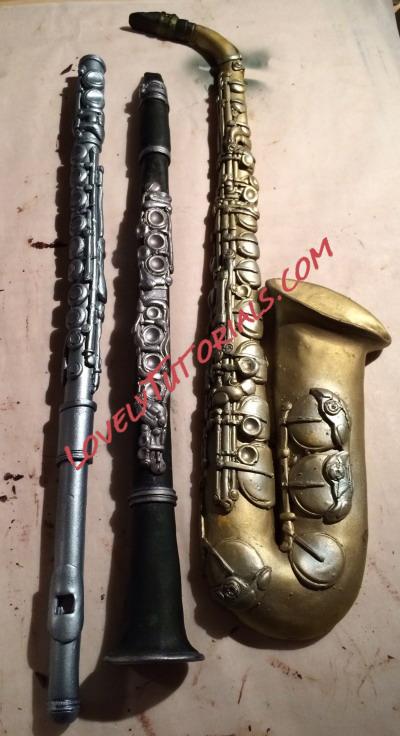
19. Here, I'm airbrushing the clarinet. All the instruments are airbrushed: the clarinet is done in black and the keys in silver, the saxophone in gold and the flute in silver.
20. I airbrushed the clarinet black and separately airbrushed the keys. The band around the mouthpiece was painted with silver and vodka.