Огромная благодарность Автору Tasha за Мастер-класс
Introduction:
This tutorial gives you instructions on how to create the flowers in the centre of my stained glass cake
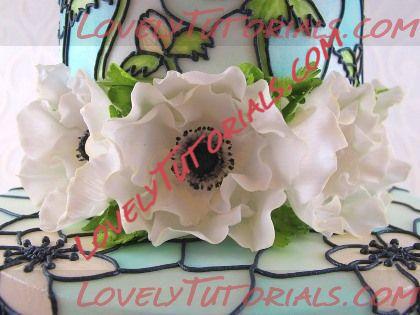
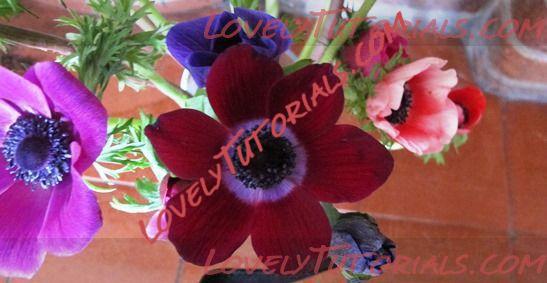
To start with, let’s talk a little bit about this flower. The number of petals ranges from about 5-15, and they are generally an unsymmetrical flower with respect to the petal arrangement. The 6 petal flowers can be symmetrical and the petals are in layers of three, with the layer above over the joins of the layer below. As for the shape of the petals, usually they are rounded with a slight point at the tip, but can be rounded like a rose leaf or a poppy leaf. The petals of the open flower are generally not frilly, but those on the half open or older flower can be. These flowers are often represented as stylised on wedding cakes but here I am going for something a little closer to nature. These flowers come in a multitude of colours both pastel and vibrant, but white is the favourite for a wedding cake. The centre of the flower is black, with the colour underneath being pale green for the pistil/domed centre and the stamens are tipped black with the stem colour being a paler version of the flower colour.
Make the flower centre:
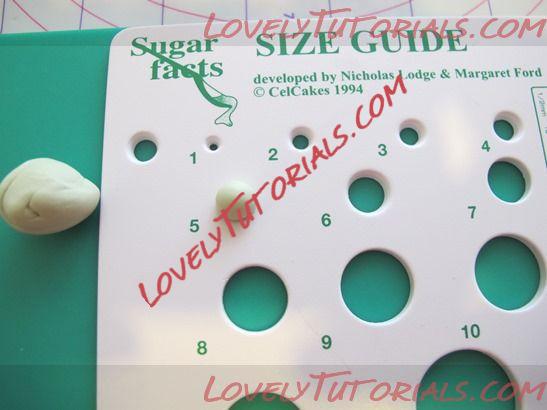
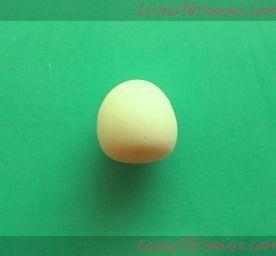
1.Take some pale green flowerpaste/gumpaste and roll it into a pea sized ball, size 5 if you use the �?Size Guide’ (a very useful thing to have for flower making)
2. Next, flatten the ball at the bottom to form a dome or jelly tot shape
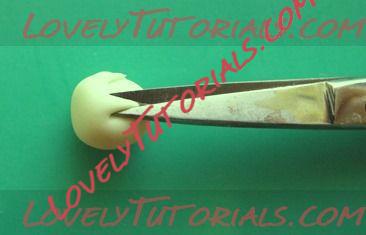
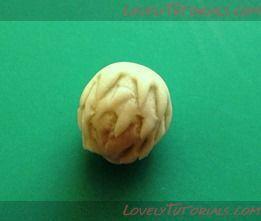
3.To give the pistil/central dome some texture, take a small pair of scissors (nail scissors are ideal, for sugar craft use only) and use the very tip of the scissors to snip out �?v’shapes, start at the bottom and work around, then upwards to the top.
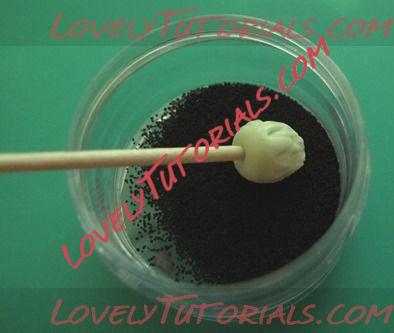
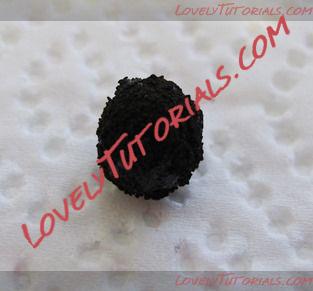
4.To give the pistil the appearance of being covered in pollen, insert a cocktail stick into the base, brush all over with edible glue and dip/roll it into black Sugartex or semolina which has been coloured black using edible food dust. If you have a little plastic pot (I recycle my edible glue pots) you can keep some ready coloured edible pollen ready to go.
5. Gently remove the stick from the base and leave to dry in kitchen towel or alternatively push the other end of the cocktail stick into a foam/polystyrene block and remove the pistil once dry. Don’t worry if there is little bits of green showing, this will just make it look more realistic. To stop the edible pollen from falling off the centre onto your cake you can set it by spraying with a little edible glaze spray.
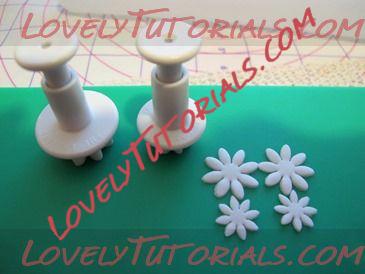
6.To make the stamens, thinly roll out some white flowerpaste/gumpaste. By thin I mean thin enough so you can read text through it (e.g. 0.5mm thick or less). To stop the paste sticking, rub a small amount of white vegetable fat/shortening on the board. You can also use cornflour but it will dry the paste out quicker.
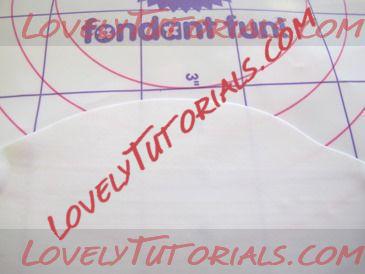
7. Cut out 2 of each of the smallest daisy plunger cutters from PME (or similar, they need to be two sizes that are big enough for the pistil to fit in). Store any cut-outs you are not working on under a stay-fresh mat or equivalent to keep them from drying out fast (steps 8 and 9 do not work well on paste that is to dry).