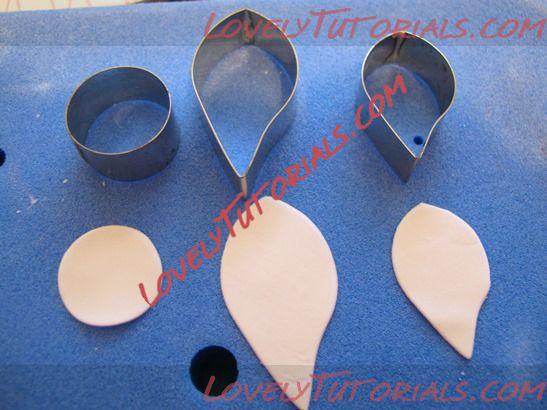
 use cutters
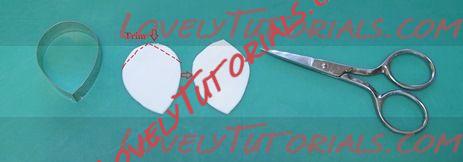 adapt existing cutter
Cutting tips (this what I do, if you do something that works, carry on to the next part)-
adapt existing cutter
Cutting tips (this what I do, if you do something that works, carry on to the next part)-
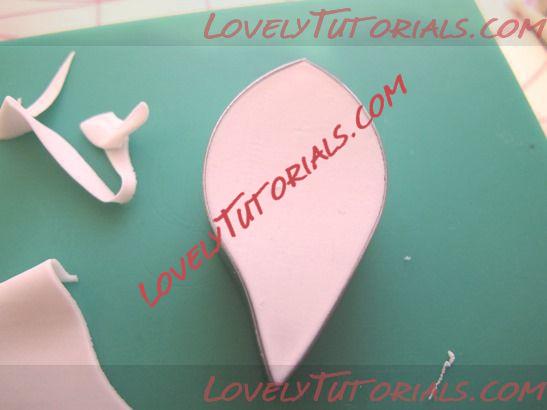
The ideal situation when using a cutter is that when you push down the cut-out gets stuck in the cutter as shown below. In this situation you can rub off the furry edges and push out a cleanly cut shape. If pushing the cutter onto the paste, it is better to pull the flower paste from around the cutter once you have cut through, than to wiggle the cutter about as this can distort the shape and make the cut-out come away from the sides of the cutter. The other thing that helps is to roll the paste out thinly and then turn it over so the slightly dryer side is now on the bottom, this helps get a clean cut. It also helps if the paste is fresh and not old and dried out. You can add a little water to the paste to bring it back to life. The other method which Lindy Smith likes, is to roll out the paste and then place it over the cutter and roll over the top of it, this way you should get a clean cut straight away. If you do get furry edges after cutting, you can rub them off once the petal has dried out or trim them off with a pair of nail scissors which is what I usually do. If you have greased part of your board for rolling, use a different part for cutting. A slight textured surface is also good for cutting as it can help remove the furry edges for you if you like to wiggle the cutter.
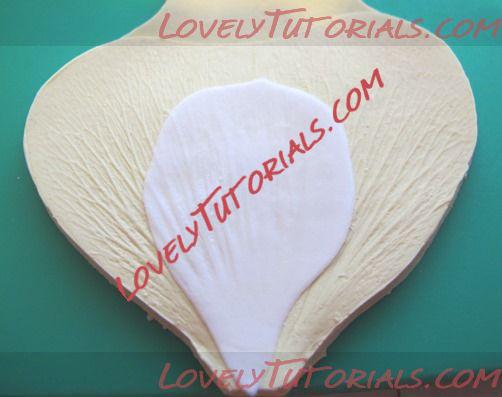
2. Take one of the large petals and vein it using a poppy petal or similar double sided veiner (the one here is made by Sugarcity). With these veiners, there is letters printed in the middle join of the mould indicating what it is e.g. PP=Poppy Petal, if you have this facing towards you then the back of the petal will be veined by the �?back’ part of the mould. Sometimes it is hard to tell which side is which with a heavily veined flower!. Anyway, position the bottom of the cut-out petal as shown , fold the other half of the mould over the top, line up then press down on it firmly all over with your hand or roll over it with a rolling pin
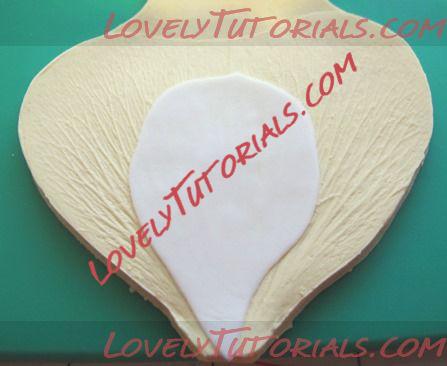
This is what it should look like after. These moulds are non-stick so it should be easy to peel the cut-out petal away. If your paste is very sticky you can apply a little white vegetable fat to the mould or cornflour to the petal (don’t put cornflour directly into moulds, the grains will get trapped in the grooves and you could lose detail on the impression
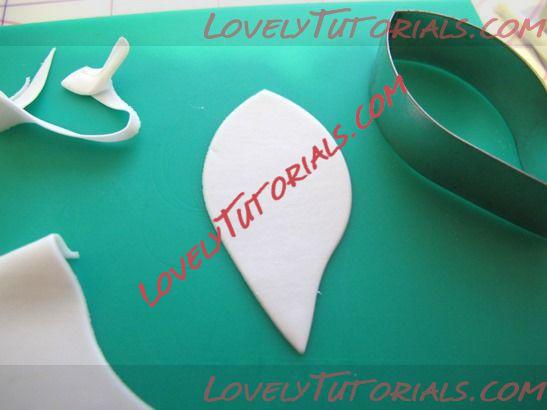
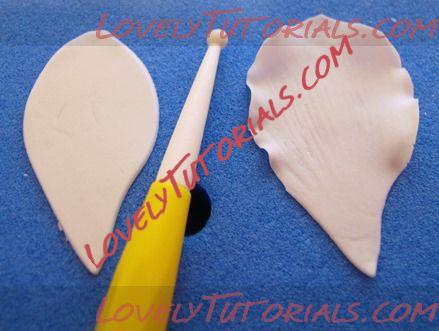
3. Next, put the petal on a foam pad and thin/frill the edges with a small ball tool. To do this run the ball tool around ½ on the petal edge and ½ on the foam pad from side to side on the top 2/3rds of the petal. The harder you press or the longer you go back and forth the thinner and frillier the petal edge will become (don’t press too hard or the paste will tear and the tool may snap!). I also stretch the petal by pulling out the sides and top while holding the other side static, which will thin the whole petal down a bit more and give it a more natural shape. You can see below a petal that had just been cut vs. one that has been veined, thinned and frilled. If the edges of your petals get a cracked appearance when thinning them then usually this means the paste has dried out on the edges and does not want to do what you want it to anymore! If this happens to me I usually trim it off and re-thin the freshly cut bit, petals are not always perfect and most of the time you cannot tell. This is another reason why it is important if you cut out several petals at once that you protect the ones you are not working on from drying out to quickly.
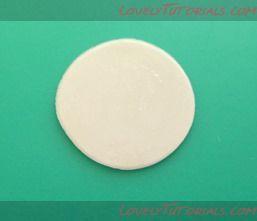
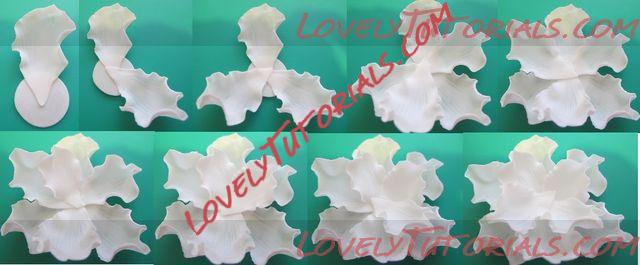
4.Take the circle of flower paste and lightly brush 1/3rd of it with edible glue. Stick the first petal on as shown in the combined picture below. Repeat steps 2 and 3 with the remaining petals (do the larger ones first, then the smaller ones) and stick them onto the circle as they are ready in the sequence below.
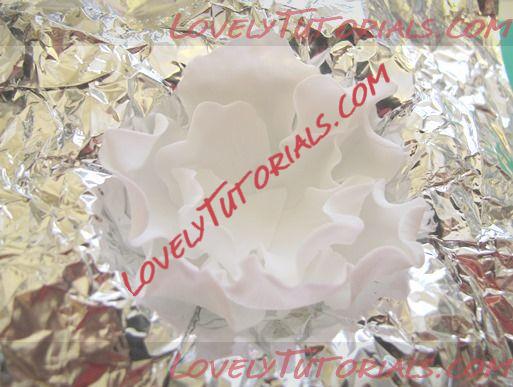
5.Make a curved former (a semi-circle shape, you can use a polystyrene or foam ball to help make the shape neat) out of tin foil for the flower to sit in while it dries (if you poke a few holes in it as well it will help the air get underneath)