
03.04.2012, 11:48
|
|
Администратор
|
|
Регистрация: 07.09.2010
Сообщений: 7,940
|
|

Огромная благодарность Автору- Jeff Arnett за МК

This technique works best with an icing containing at least one-third butter, but can be done with an all shortening icing with slight modifications in the chilling steps.
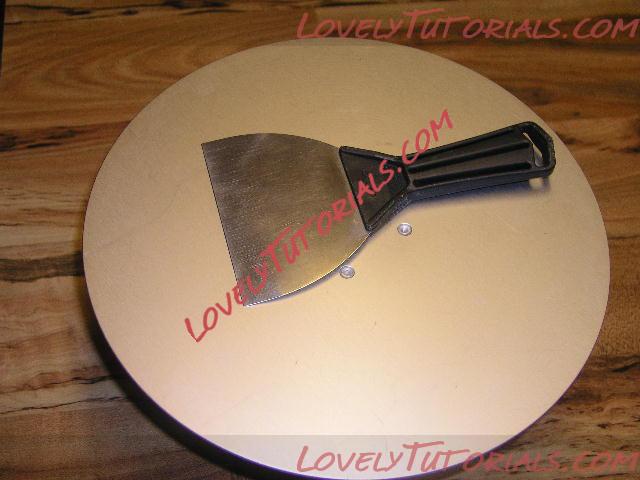 1. To begin with, there are some tools I consider “must have” items:
A Turntable
A Spackling Knife [from a hardware store]
1. To begin with, there are some tools I consider “must have” items:
A Turntable
A Spackling Knife [from a hardware store]
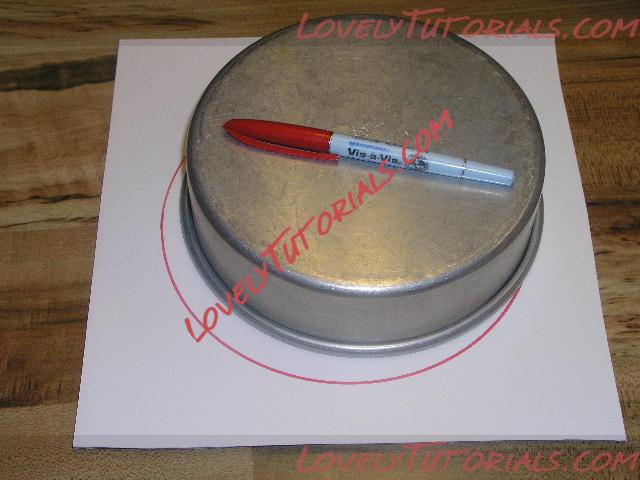 2. Trace the outline of the pan [top side down] onto a sturdy surface, such as a piece of foamcore, cardboard, or for a more permanent use, masonite.
 3. Cover the outline with a piece of parchment paper about 1 to 2 inches larger than the pan’s outline and tape securely so that there are not wrinkles. Some people have had success using acetate instead of parchment.
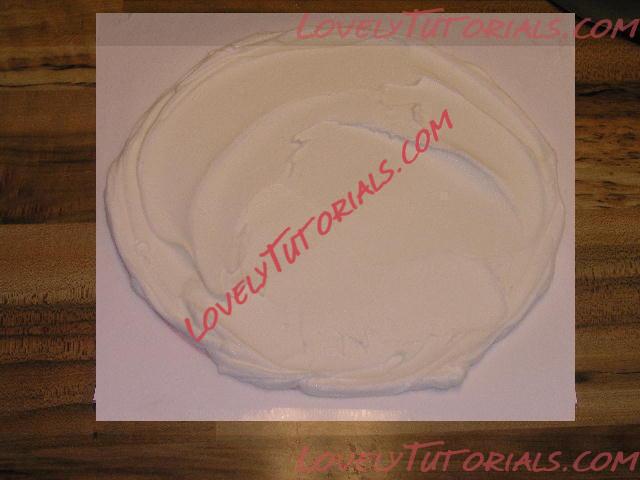 4. Using a very smooth icing, “ice” the area of the circle, extending the icing about 1/4″ past the outline; any extra icing will be removed later. Apply the icing about 1/4″ thick.
Place the “iced” board in the refrigerator and allow to chill until firm, about 10 to 15 minutes. If using an all shortening icing, you may need to place the board in the freezer instead.
4. Using a very smooth icing, “ice” the area of the circle, extending the icing about 1/4″ past the outline; any extra icing will be removed later. Apply the icing about 1/4″ thick.
Place the “iced” board in the refrigerator and allow to chill until firm, about 10 to 15 minutes. If using an all shortening icing, you may need to place the board in the freezer instead.
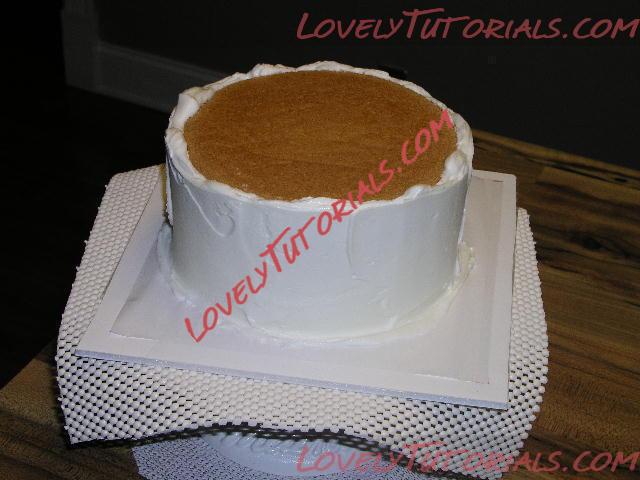
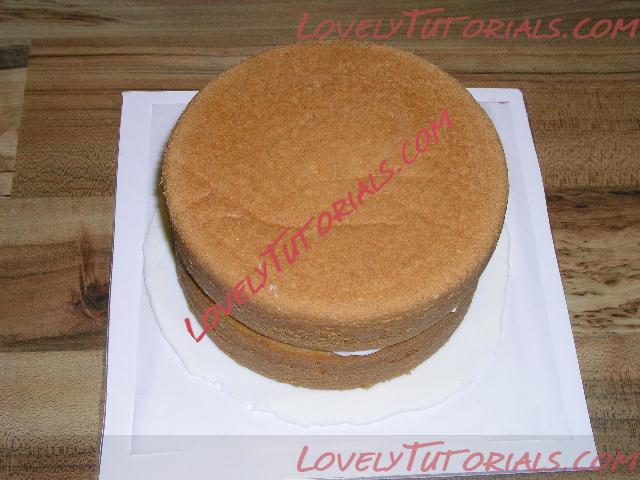 5. Once chilled, remove the board from the refrigerator and place the “top” cake layer top down on the iced circle, centering is in place. Fill and add aditional layers. Here I have used only 2 layers, but normally I would have torted the layers into four.
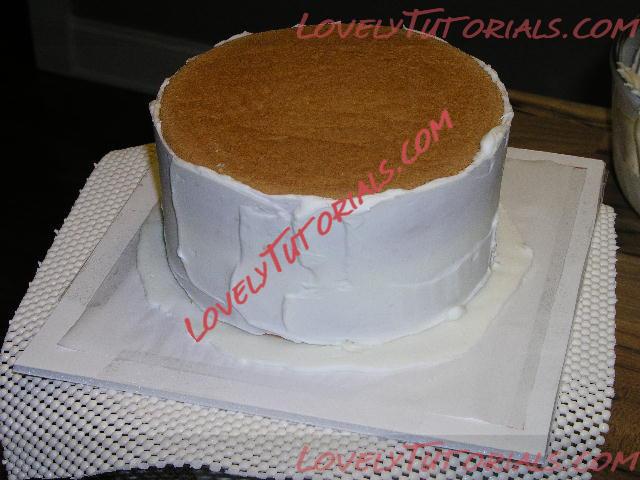 6. Lightly crumb ice the sides of the cake and chill a few minutes if desired before applying the final coat of frosting. Apply the final coat of frosting to the desired thickness using a spatula or large icing tube.
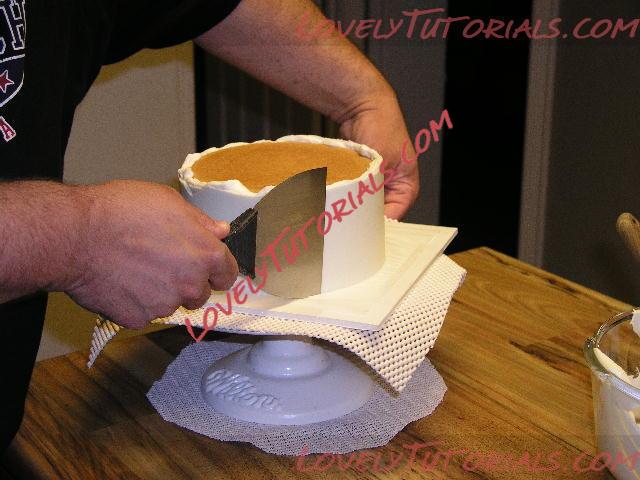
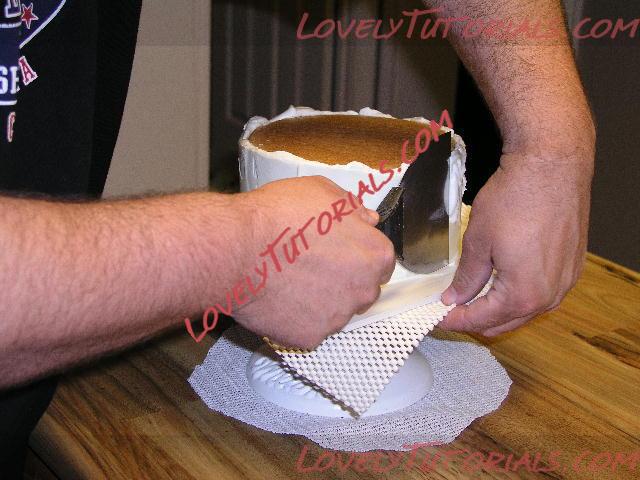 7. Place the cake on the turntable. Dip the spackling knife in hot water and dry with a paper towel. Hold the blade against the side of the cake at about a 45 degree angle and reach the other hand around the back until it is near the hand holding the knife.
BE SURE THE SPAKLING KNIFE IS TOUCHING THE PARCHEMENT or else there will be a line of icing pushed out beneath it.
7. Place the cake on the turntable. Dip the spackling knife in hot water and dry with a paper towel. Hold the blade against the side of the cake at about a 45 degree angle and reach the other hand around the back until it is near the hand holding the knife.
BE SURE THE SPAKLING KNIFE IS TOUCHING THE PARCHEMENT or else there will be a line of icing pushed out beneath it. 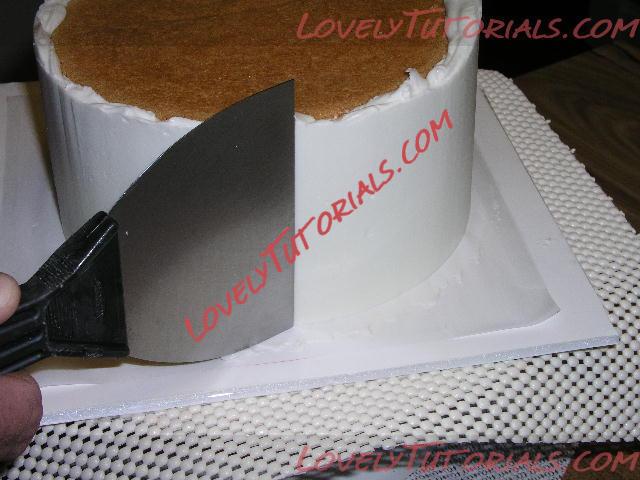 8. SLOWLY turn the turntable one full rotation WITHOUT STOPPING. Inspect the side so the cake. If it is not smooth to your satisfaction, repeat step #7 again. If a small amount of icing has pushed under the blade, simply scrape it away before step #7.
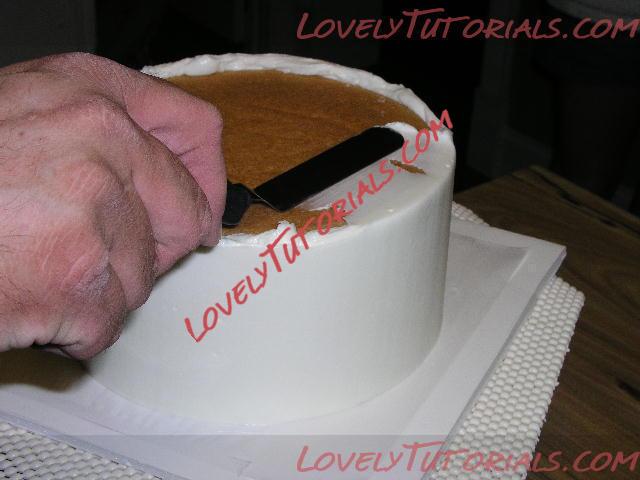 Smooth any icing build up over onto the “bottom” of the cake with a small angled spatula. When the side are smooth to your satisfaction, carefully cut the parchment paper loose from the board ALL THE WAY AROUND THE CAKE using an Exacto Knife. Carefully return the cake to the fridge for about 10 to 15 minutes to firm the icing [all shortening icing may need to be put in the freezer].
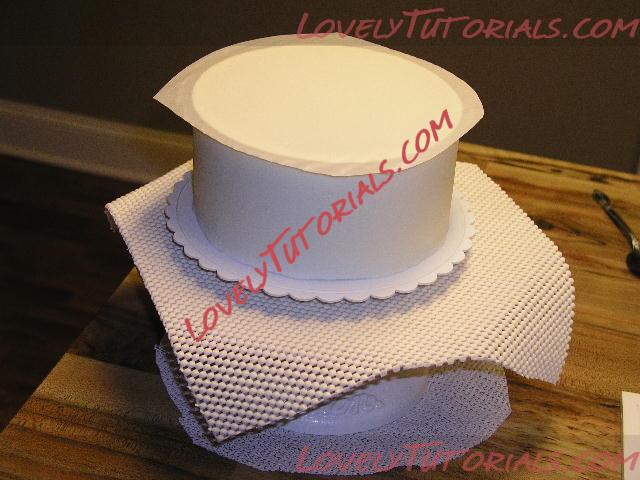
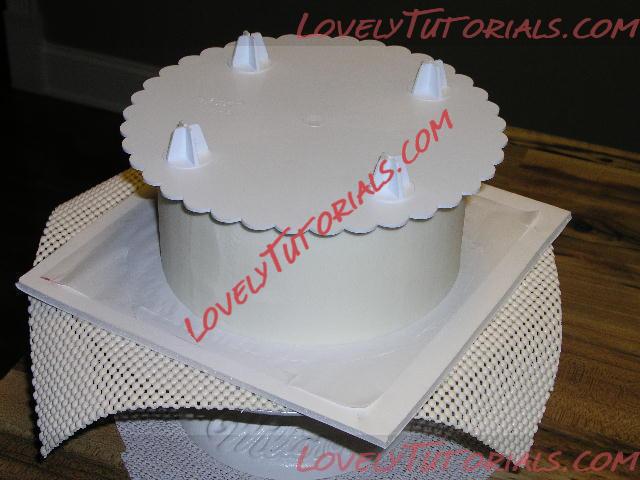 9. Prepare the final cake board by smearing a few strokes of icing on it. Remove the cake from the fridge, center the board and quickly “FLIP” the cake over. REMOVE the cardboard, but leave the parchment in place and return to the fridge for about 10 minutes.
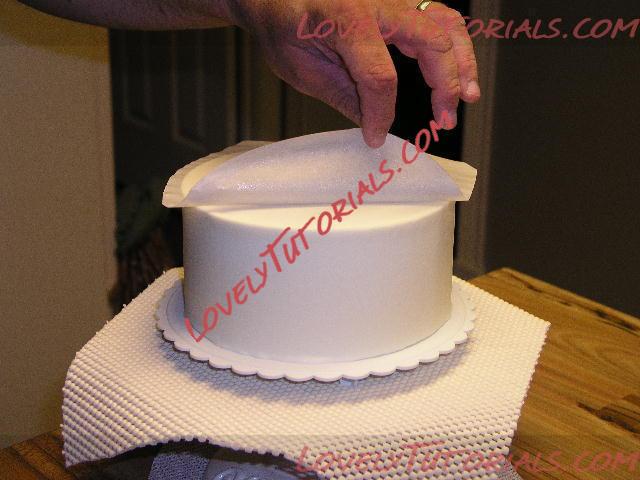
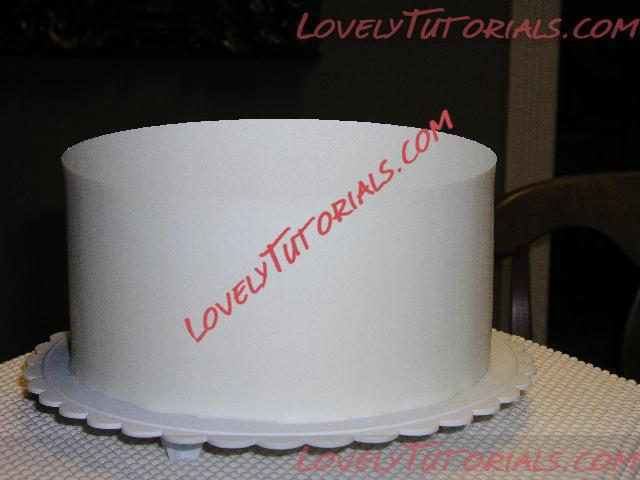
\ 10. Carefully remove the parchment…..you should have a beautifully iced cake with perfect edges and a very level top.

|