МК взят с сайта petalsweet.blogspot.com
Огромная благодарность Автору
Jacqueline Butler за МК
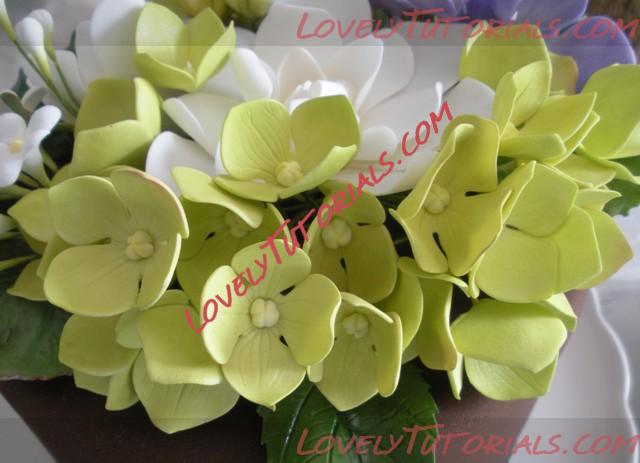
I get a lot of questions about the filler flowers I use in my gumpaste floral bouquets. I frequently use hydrangea and/or small pulled blossoms because they are quick and easy to make, and go well with many of the color schemes for my cake designs. They are also easy to group into any size bouquet to fill spaces between larger flowers, and I think they help to make the final bouquets look full and lush.
I wanted to share my steps for making both of these filler flowers...starting with the hydrangea. I've created this tutorial with a series of photos, but PLEASE let me know if they don't convey the information clearly enough. I know video is the direction to go with future tutorials, but until I have all of the right equipment, I'm sorry the photos will have to do! I have also broken it down into quite a few steps...I don't know who is reading this blog, and I just want to make sure all of the little things are covered. When I started making gumpaste flowers, I know the littlest tips were always so helpful.
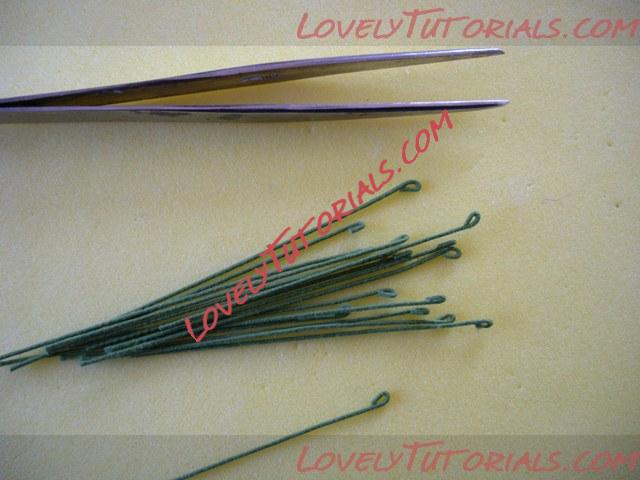
A NOTE ABOUT WIRE: For both the hydrangea and pulled blossoms, I use green cotton-covered wires. They are usually packaged in 12" lengths, and come in many gauges...the higher the gauge number, the finer the wire:
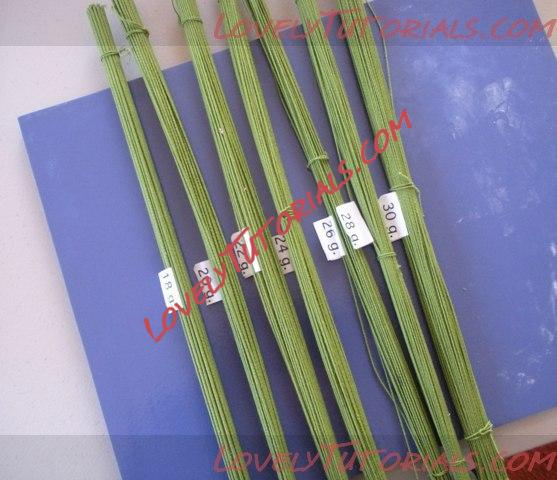
You can also use white cotton-covered wire, but you will eventually need to wrap each wire with green floral tape to make it look like a stem, a timely step I like to skip if possible. I purchase my wire from a local cake decorating store, and online from the talented Scott Clark Woolley, who offers wonderful supplies on his site
Cakes by Design. Of course, you can also make either of these flowers without wire, and attach them directly to your cake. If so, you may want to forgo the gumpaste hydrangea centers and just pipe small centers with royal icing.
HYDRANGEA TUTORIAL PART ONE
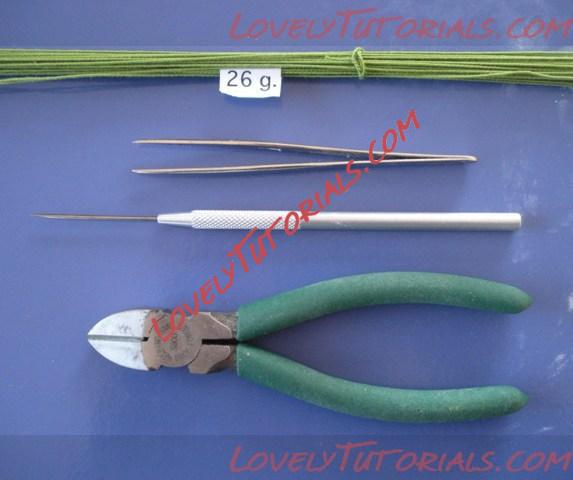
For the hydrangea CENTERS, here are the tools I use:
* 26g wire
* Tweezers
* Needle tool (or you can use a toothpick or pin)
* Wire cutters
* Gumpaste (white)
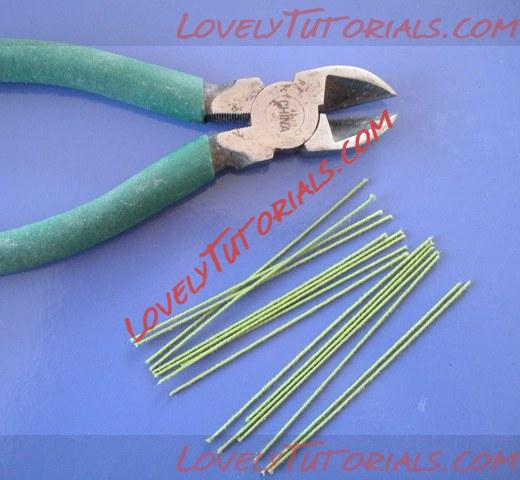
 Step 1:
 Cut your wires into fourths with the wire cutters. Don't worry about making them exact...I like my wire lengths to vary a bit as they help to give the final bouquet a more life-like appearance. Too exact, and you get a stiff and unnatural look:
 Step 2:
 Using your tweezers, bend the very top of your wires, making as small a loop as possible:
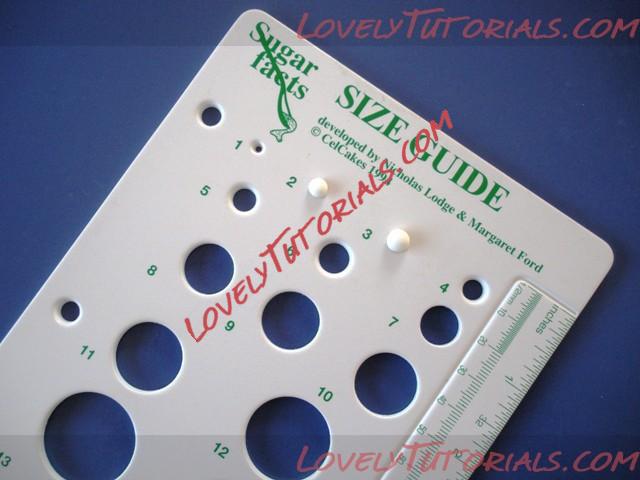
I like to make the centers as small as I can, and having made so many hydrangea, I don't use a size guide. But, I thought I would add some photos with the guide for those of you who do like to use it. Again, try to vary the size of your centers a tiny bit so they do not all look exactly the same. There are two sizes of hydrangea cutters, and I like to have a mix of centers for both. The gumpaste balls I use sit comfortably in #2 and #3 of
Nicholas Lodge's size guide, but keep in mind this amount of gumpaste will be more than the final size of the center. Some of the gumpaste will be pinched off once the center is formed around the wire loop:
 Step 3:
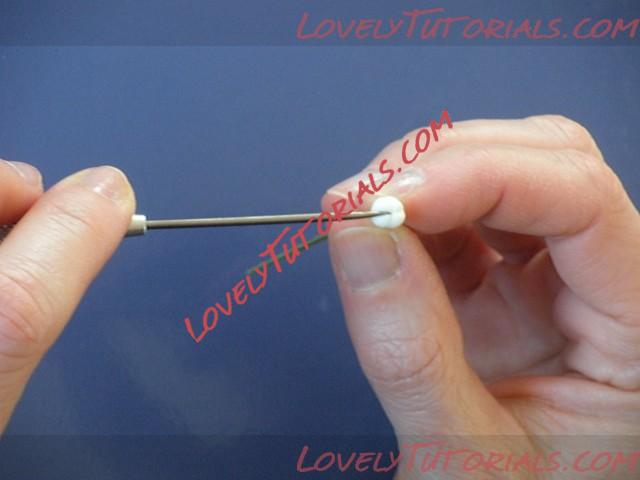
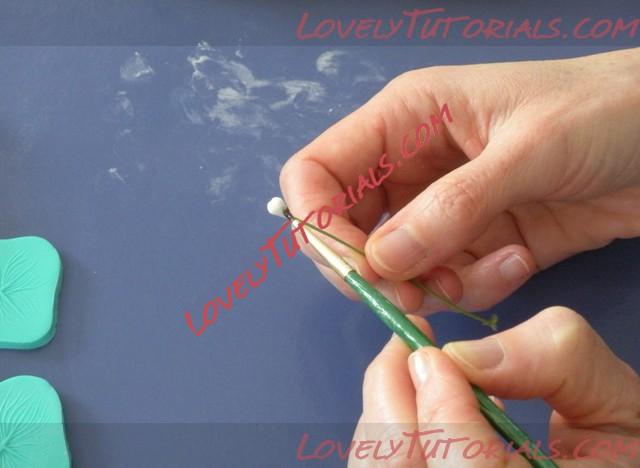
 Working with one ball at a time, insert the wire loop into the center of the ball and gently shape the gumpaste down around it to cover the loop completely. Don't pull the gumpaste tight around the loop, you want to have a bit of padding on top to score with lines. The excess gumpaste will be pulled down below the loop and be pinched off to secure the paste to the wire:
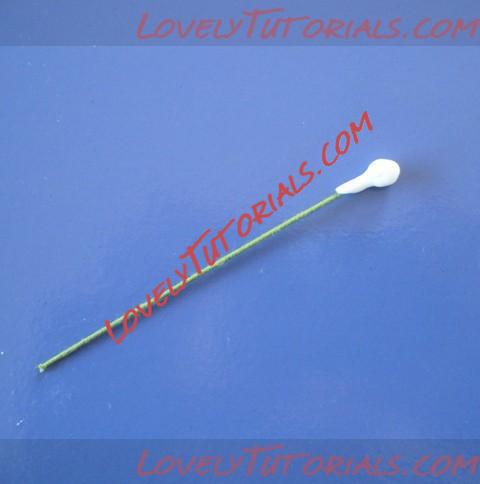
To pinch off the excess paste, twist the wire between your thumb and first finger, right below the base of the loop. Your goal is to end up with a neat and clean little "bud" on the end of your wire:
 Step 4:
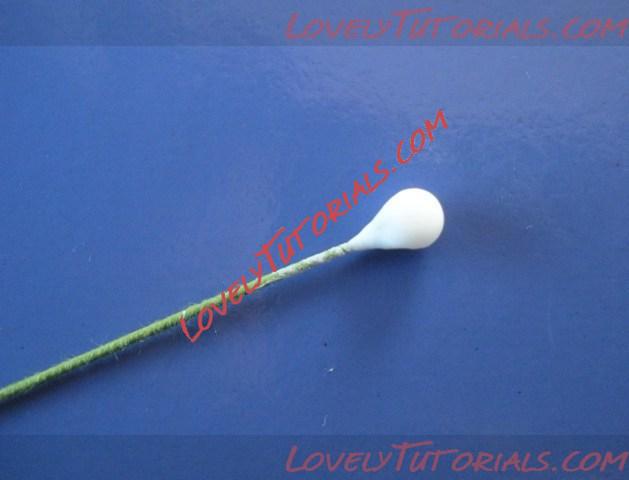
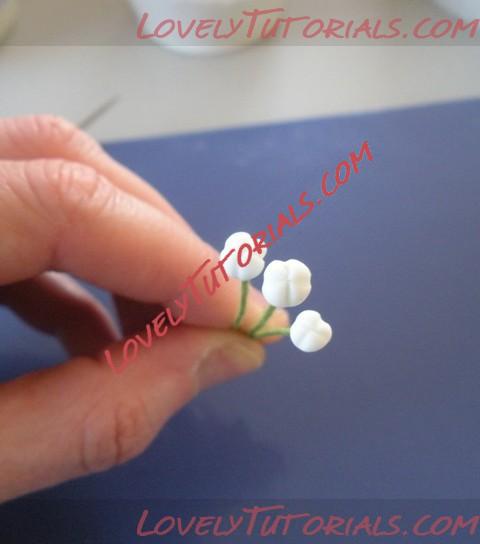
 Using your needle tool (or toothpick or pin), mark four lines starting from the center of the ball, and outwards down the sides. You are now making your bud look like a "hot cross bun"! I prefer to make four lines starting from the center (versus two across the top like an "X") because you end up with a nicely shaped center instead of a flattened ball. Just turn your center a quick quarter turn between each line marking:
The completed center:
And a photo of several centers together with a glass-headed pin for size reference:
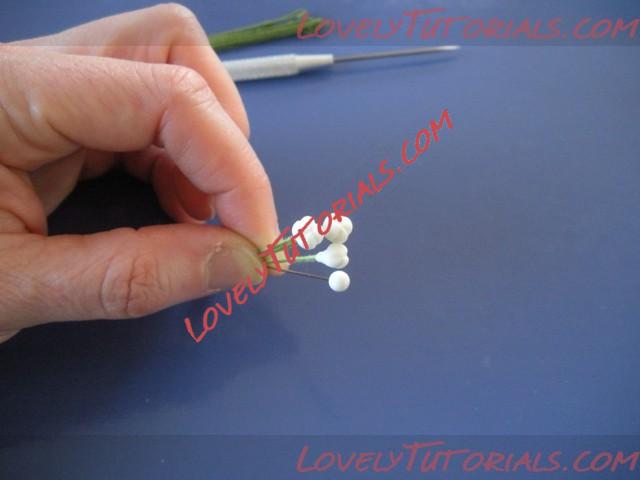
Once you have all of your centers made, let them dry overnight.
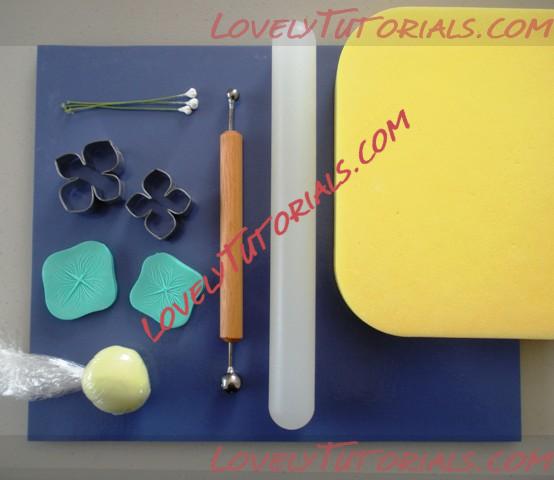
For the hydrangea PETALS, here are the tools I use:
* Rolling/cutting board
* Rolling pin (or pasta machine if making large quantities)
* Foam pad
* Ball tool
* Hydrangea cutters/veiners
* Gumpaste (in color of choice)
* Drying rack (there are a lot of different drying forms you can purchase online, but I also use clothes hangers for drying flowers upside down, and egg cartons to dry them face up)
* Sugar glue and small brush for application
* Dry hydrangea centers
A NOTE ABOUT GUMPASTE COLOR: I use a very pale base color for my hydrangea unless the finished flowers are going to be white. I think it gives the flowers a nice glow of color underneath the final addition of dusting colors. For the green hydrangea in this tutorial, I colored my gumpaste with a mix of AmeriColor gels in Avocado and Lemon Yellow.
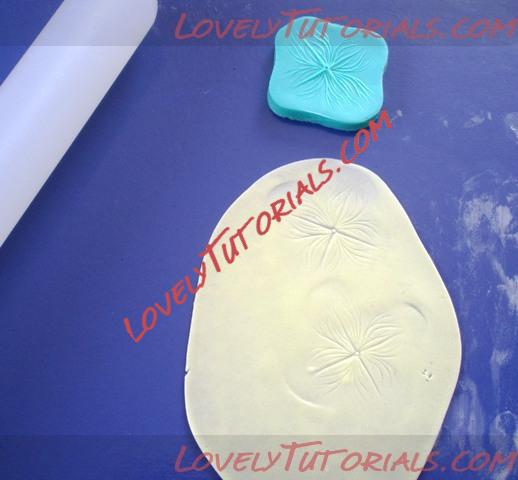
Step 1: Roll out paste thin and press veiner into it, being careful to not press down too hard or veiner may cut through paste:
 Step 2:
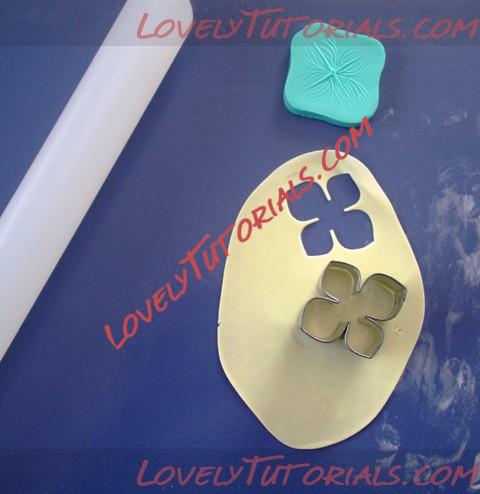
 Cut out flowers using cutters, making sure to align shorter and longer petals on the cutter, with the shorter and longer veins from the veiner:
 Step 3:
 Using your ball tool, thin edges of the cut out flowers, making sure to follow the contours of the petals. With these flowers, I always work from the middle of the flower outward to the tips, along both sides of the individual petals. Additionally, you can "cup" the individual petals by making tiny circles with the ball tool in the middle of each petal. I like to make a mixture of both for my bouquets so the hydrangea look more varied:
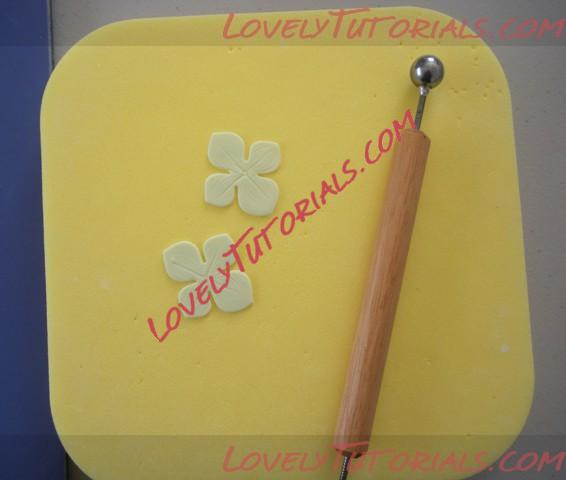
Thin edges with ball tool:

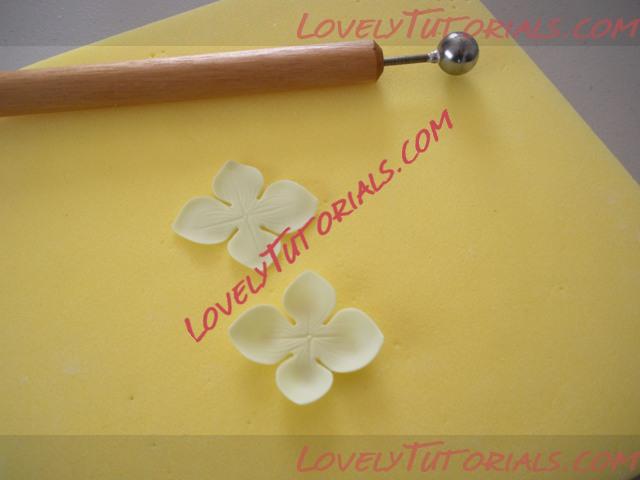
Examples of thinned edges only (in back) versus thinned edges and cupped with ball tool (in front):
 Step 4:
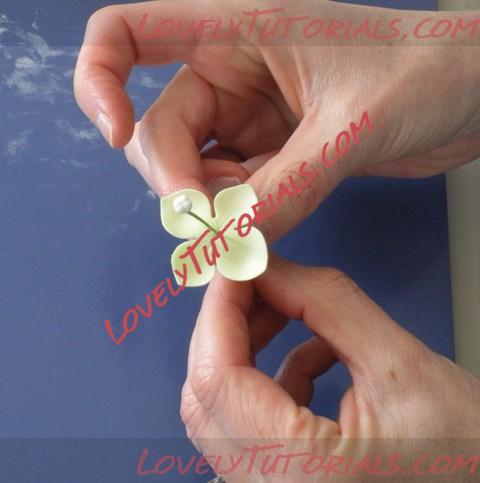
 Lightly dab the back of the center with sugar glue, and thread the wire down through the top of the flower until the center meets the flower. Turn the flower upside down and pinch/press lightly to adhere the flower to the center:


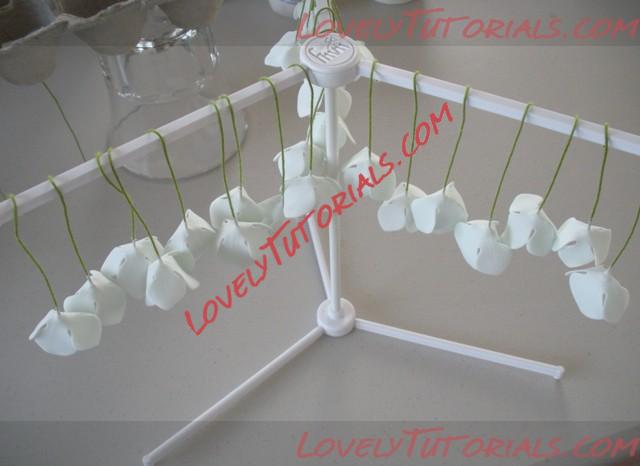
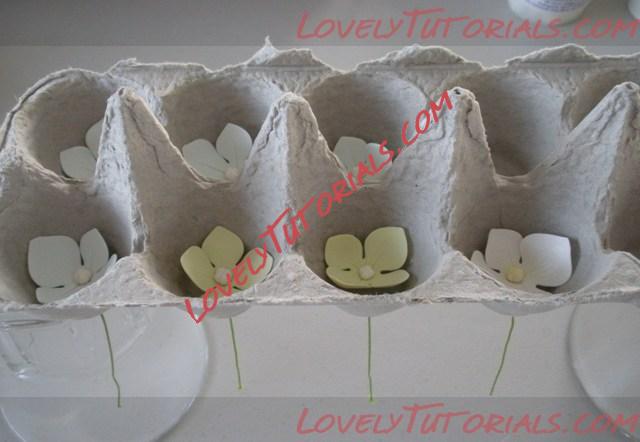
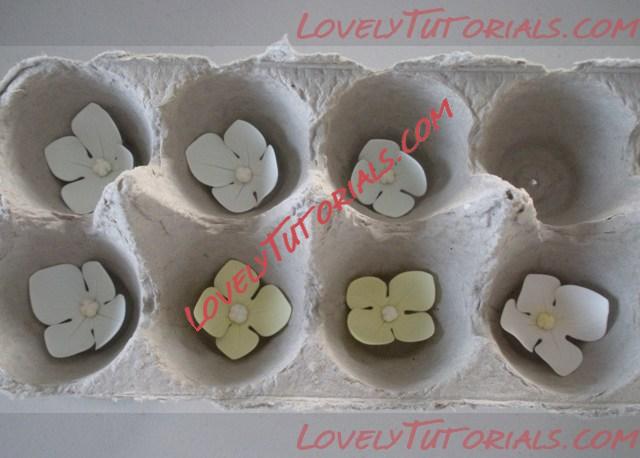
Hang upside down to dry, or poke holes in the bottom of an egg carton and rest the flowers in the egg cups to dry facing up (rest the carton on top of some coffee mugs to allow space below for the wires to hang below). A mix of these drying methods will give you a great blend of open and closed flowers for your final bouquet.
Here are some blue hydrangea hanging to dry:
And a mix of blue, green and white hydrangea drying in an egg carton:
And just a couple of suggestions:
1. When you sit down to make these, make A LOT of them!! I use hydrangeas in many of my flower arrangements...I love the way they look and how easily they compliment other colors. And they are a great way to fill space around large, focal flowers.
2. I make hydrangea in variations of pink, green, white, blue and purple. I recommend making a stash of your flowers in the pale version of the final color, then saving them and coloring them as needed, rather than coloring them all at the same time. I don't always need a deep, dark purple hydrangea...so I adjust my dusting colors accordingly as I am planning the final bouquet of flowers.