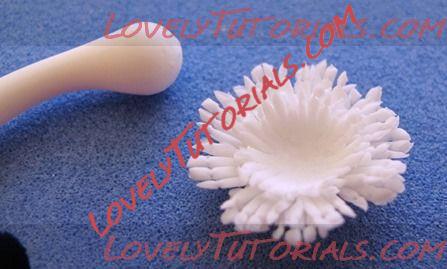
8.Take one of the two larger cut-out daisy’s and using a scalpel/X-Atco knife, cut each petal into 4. I have a small Corian board for cutting so the plastic rolling board doesn’t get ruined.
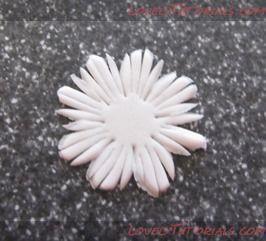
9. Take a small pair of tweezers with a fine pointed end (like the ones you can buy for plucking eyebrow hairs) and pinch in about 1mm down each stem to form a bulbous head
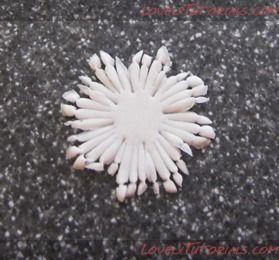
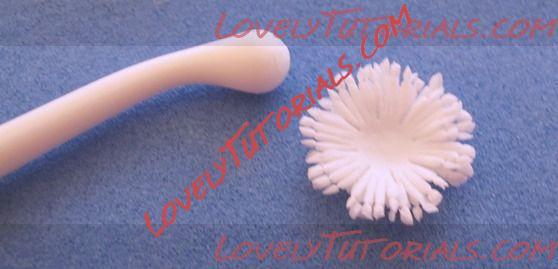
10. Prepare the other of the larger daisy cut-out in the same way and glue it on top of the first (with a small amount of edible glue), ideally so the stalks of the top layer cover the gaps in the bottom layer (interleaved). Place on a firm food grade mat (e.g. PME Mexican Foam Pad or equivalent), and cup/push into the centre using a medium sized bone/ball tool.
11. Repeat steps 8 and 9 with the smaller cut-out daisy’s and stick the two layers together as described in step 10.
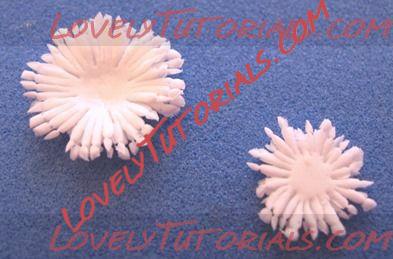
12. Apply a little edible glue to the centre of the larger pair and stick the smaller on top (again, interleaved if possible). Cup the centre again.
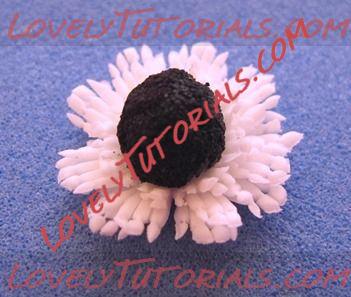
13. Apply a little edible glue to the centre again and stick the flower pistil in. Use the tweezers or scalpel to adjust the stamens and make the shape look more natural
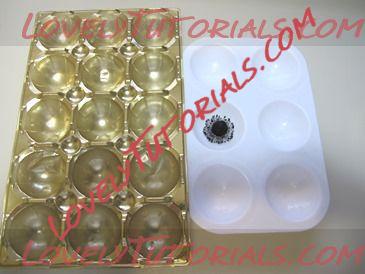
14. Place in a food use only paint palette or empty sanitised toffife candy (or similar) tray to keep the curved shape whilst drying
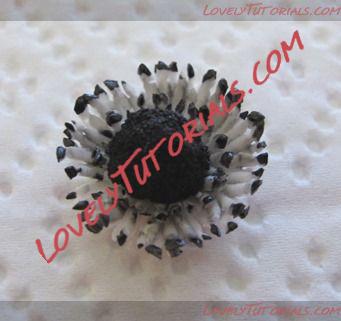
15. once dry, paint the stamen tips black using black food dust or paste dissolved in alcohol, re-juvinator spirit (iso-propyl alcohol food grade) or confectioners glaze (my preferred choice). Colour the stalks a diluted version of the petal colour. As these petals are white, I gave the stalks a grey tint to add depth.
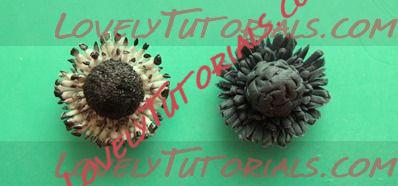
16. To make the centre more quickly, make the whole thing using black flower paste/gumpaste (no painting or spraying required) and do not cover the flower pistil in inedible pollen. The picture below shows what the two look like. Do whatever best suits, they both look effective.
 Make and stick together the petals
1. Roll out some white flowerpaste/gumpaste thinly (as shown earlier) and cut out one small circle, 4 small petals and 6 larger petals. Either use the template shown or the following/equivalent cutters; PME Briar rose cutter (BR 210) 2nd smallest circle, Tinkertech Two leaf 225-228 cutter (TT225-228), two largest cutters. You can also use a rose petal cutter and trim the rounded end of the petal into a point using small nail scissors (for food use). Store the petals you are not working on under a stay fresh mat.
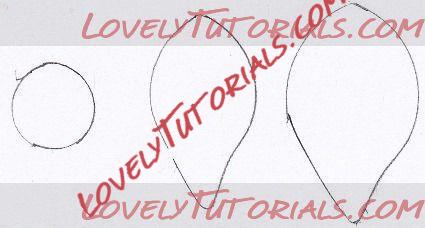 template – actual sizes circle diameter approx.. 2cm, petal lengths approx.. 4.5 and 5cm