
27.07.2011, 19:13
|
|
Администратор
|
|
Регистрация: 07.09.2010
Сообщений: 7,940
|
|
 Клематис, ломонос, Waldreben, Clematis,klematis, clematide, clematite, clemátide
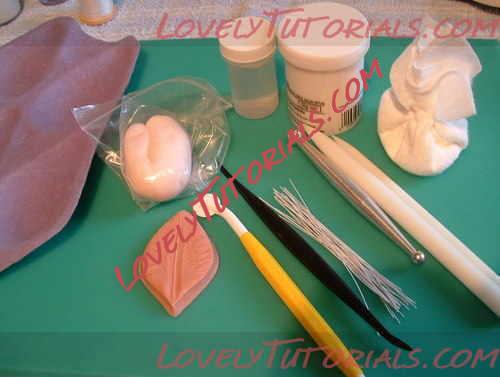
Clematis Flower What you will need:
Rolling board
Shaping tools, ball or bone, dresden tool(if using a cutter)
Slim rolling pins
Cutting wheel
Wires 28g
Orchard pad or similar
White fat(trex) or Petal base
cornflour bag
Petal paste (colour of your choice)
Sugar glue or egg white
Former of choice (in this instance a cardboard pear tray)
Dusky Rose wide Clematis veiner (click here) or suitable cutter if you have one
 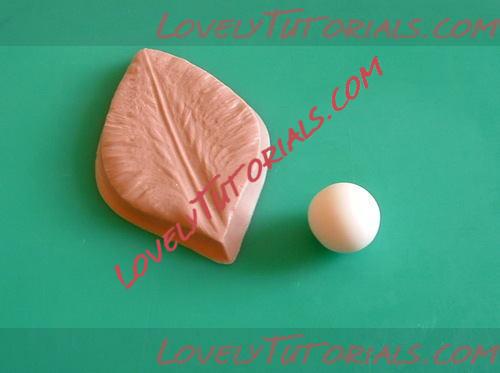  Take a piece of well worked paste and roll into a ball. From the ball roll into a sausage shape.
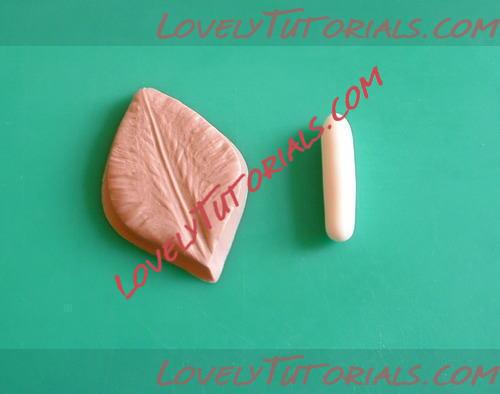
 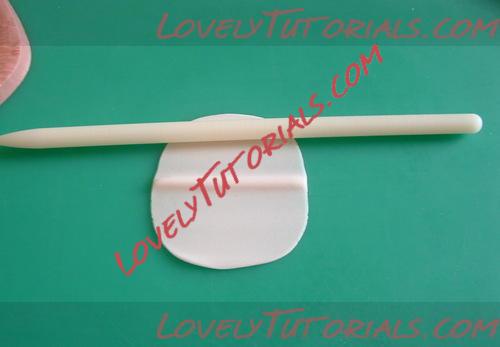  Smear a very little white fat on your rolling board and using a small rolling pin, roll out the paste to a thickness of 2-3mm. From the centre of the paste start rolling away from you, and then from the other side of the paste roll towards you. The idea is to leave a thicker area of paste in the centre in which to insert your wire. Turn the paste around and roll away the top part of the ridge as shown, until you have a uniform thickness all around.
If you are using cutters, you should cut out your petal shape now, and vein the centre and sides of the petal with the dresden tool.
Smear a very little white fat on your rolling board and using a small rolling pin, roll out the paste to a thickness of 2-3mm. From the centre of the paste start rolling away from you, and then from the other side of the paste roll towards you. The idea is to leave a thicker area of paste in the centre in which to insert your wire. Turn the paste around and roll away the top part of the ridge as shown, until you have a uniform thickness all around.
If you are using cutters, you should cut out your petal shape now, and vein the centre and sides of the petal with the dresden tool.
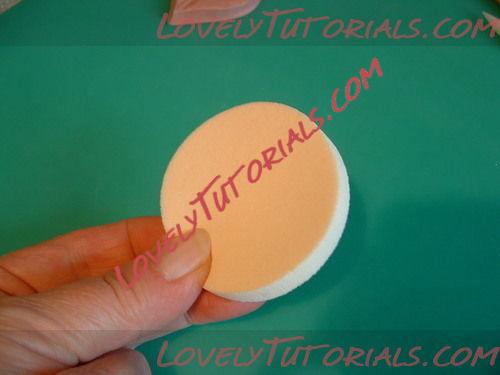
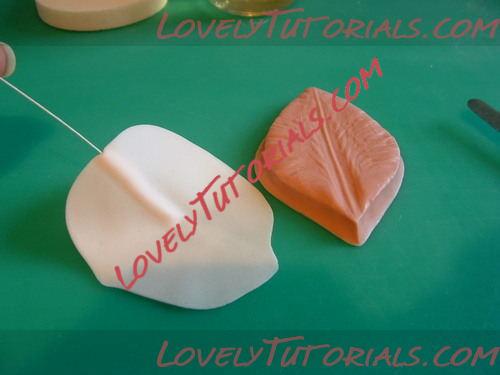
 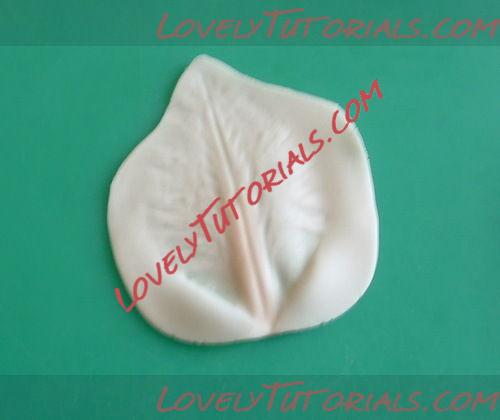  If using the Dusky Rose veiner, lift up the paste and place over the veiner, positioning the centre ridge in the paste in line with the centre of the veiner. Press the paste into the veiner with the flat of your extended fingers. If you have hot hands or the paste is sticky, use a make up sponge like the one shown dusted with a little cornflour to press the paste to the veiner, but make sure you do not lose the centre ridge. Lift the paste off the veiner and turn over.
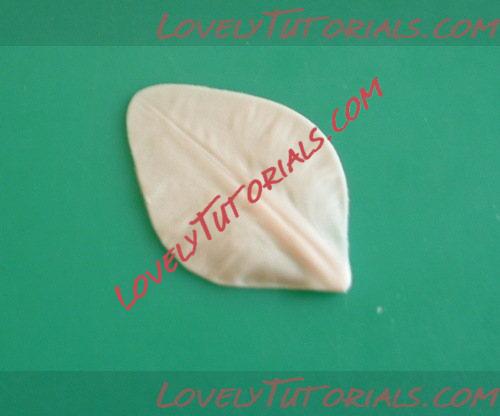  
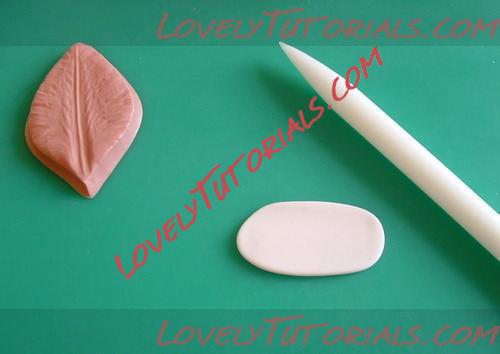
Using your cutting wheel, cut out the impression left in the paste and transfer the cut piece to your softening pad. Take the ball or bone tool and gently frill the very edges of the petal. The tool should be half on and half off the petal.
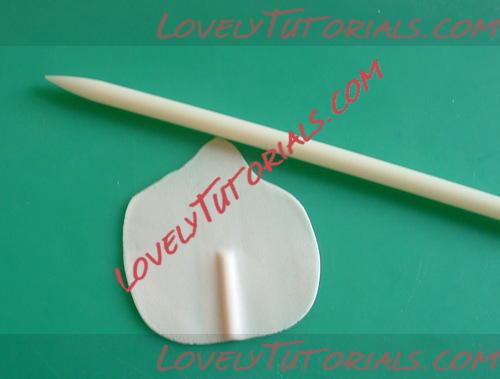
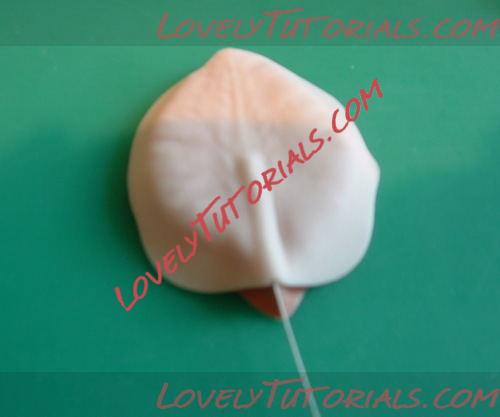
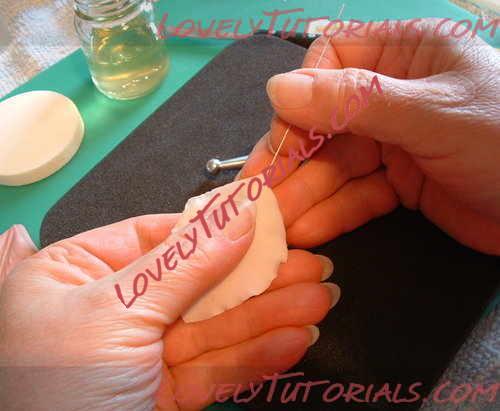 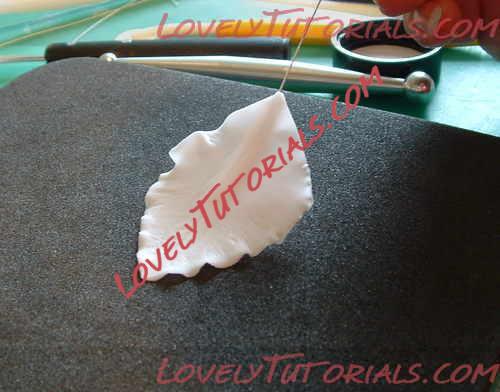  Take a 1/4 length piece of 28g wire and moisten the end of the wire with your chosen glue. Hold the petal very gently between your fingers and thumb and thread the wire into the length of the ridge at the back of the petal. Even if you can't see how far the wire is being inserted, with practice you will be able to "feel" how far the wire is being inserted.
Clematis flowers like these have anything from 5 to 9 petals, so make the required number of petals for your flower in the same way and place into your chosen former to dry. Look at images of real flowers to see how you want the petals to sit with each other. Some clematis have gentle curves , some have very erect petals.
Take a 1/4 length piece of 28g wire and moisten the end of the wire with your chosen glue. Hold the petal very gently between your fingers and thumb and thread the wire into the length of the ridge at the back of the petal. Even if you can't see how far the wire is being inserted, with practice you will be able to "feel" how far the wire is being inserted.
Clematis flowers like these have anything from 5 to 9 petals, so make the required number of petals for your flower in the same way and place into your chosen former to dry. Look at images of real flowers to see how you want the petals to sit with each other. Some clematis have gentle curves , some have very erect petals.
~~~~~~
Alternative wiring
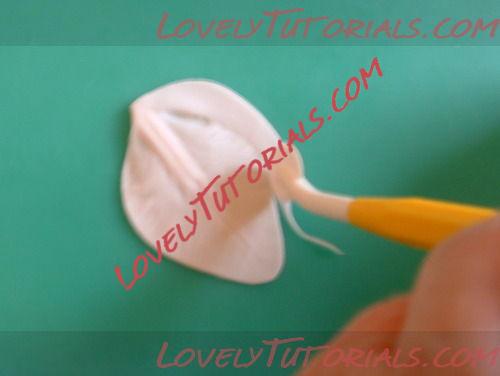
   If you have problems inserting the wires into your finished petals or you are unable to achieve a neat ridge, you can insert your wires into your rolled out paste before being placed on the veiner, as shown.
~~~~~~ Finishing your flower
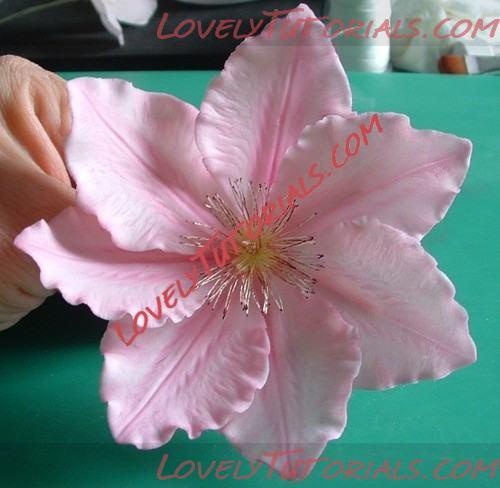
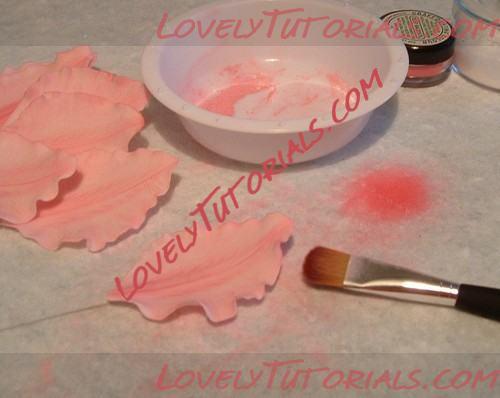   Once all your petals have dried, you can dust them in shades of your choice. I always choose to mix colours in a paint palette or separate pot, finding colours straight out of the pot they come in too concentrated for a delicate effect. Here I have mixed a pink petal dust with cornflour and have just increased the depth of colour in the centre of the petals. Colour can always be added but is difficult to remove once there.
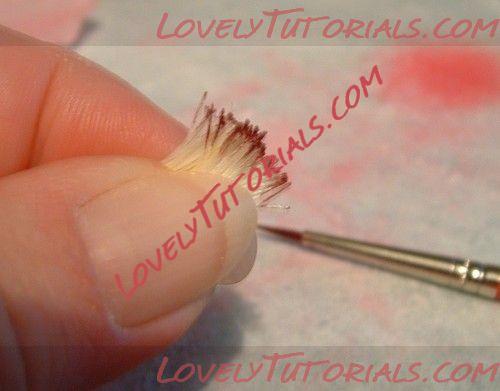
Here I have mixed a little burgundy dusting colour with a little alcohol and painted on the edges of the cottons, and randomly streaked the centre and some of the cottons. Also added a little lemon petal dust to the centre.
Once all your petals have dried, you can dust them in shades of your choice. I always choose to mix colours in a paint palette or separate pot, finding colours straight out of the pot they come in too concentrated for a delicate effect. Here I have mixed a pink petal dust with cornflour and have just increased the depth of colour in the centre of the petals. Colour can always be added but is difficult to remove once there.
Here I have mixed a little burgundy dusting colour with a little alcohol and painted on the edges of the cottons, and randomly streaked the centre and some of the cottons. Also added a little lemon petal dust to the centre.
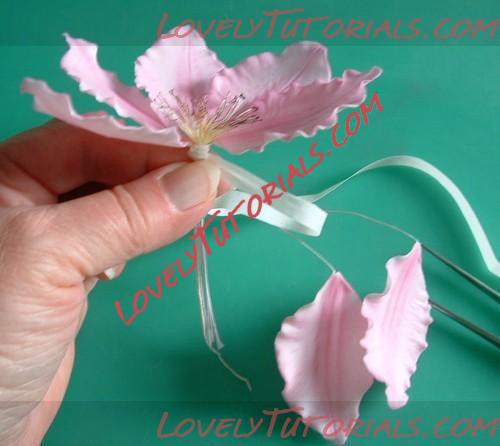 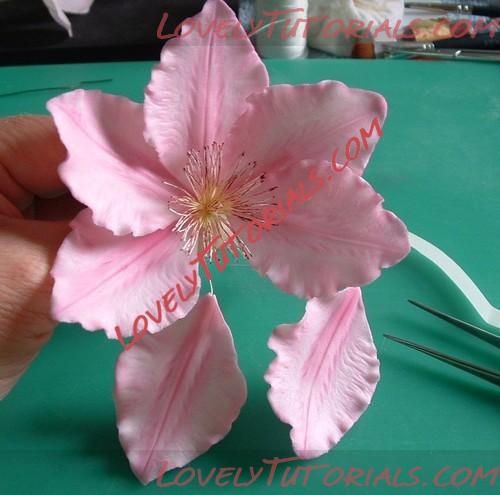  Take a pair of tweezers and bend the wires at right angles on all your petals before you start taping up. Do not be tempted to bend them by hand, as the petals could break. Tape the petals together one by one, overlapping slightly as you go in a uniform pattern around the stamen centre. Try to keep the tape as tight as you can so that the petals are not flapping around. Once all the petals are taped into place you can use an extra length of heavier guage wire taped down the stem to give added strength to the flower. Steam to set the dusting colours.
The finished flower, and also a smaller Clematis Montana flower showing a smaller stamen middle 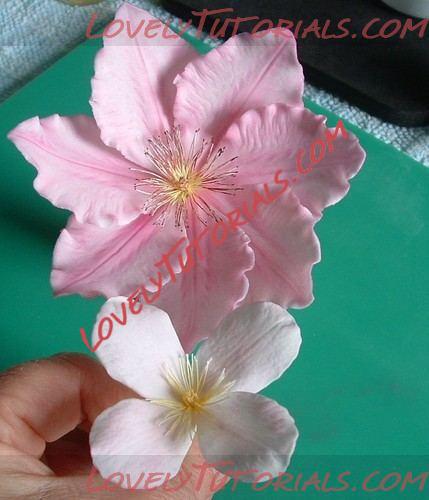

|