DIY by
Erin Gardner
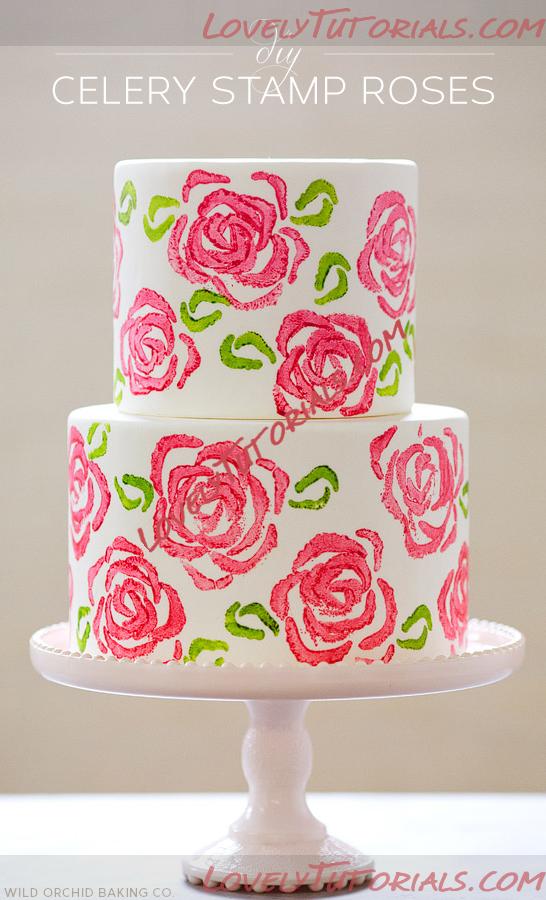
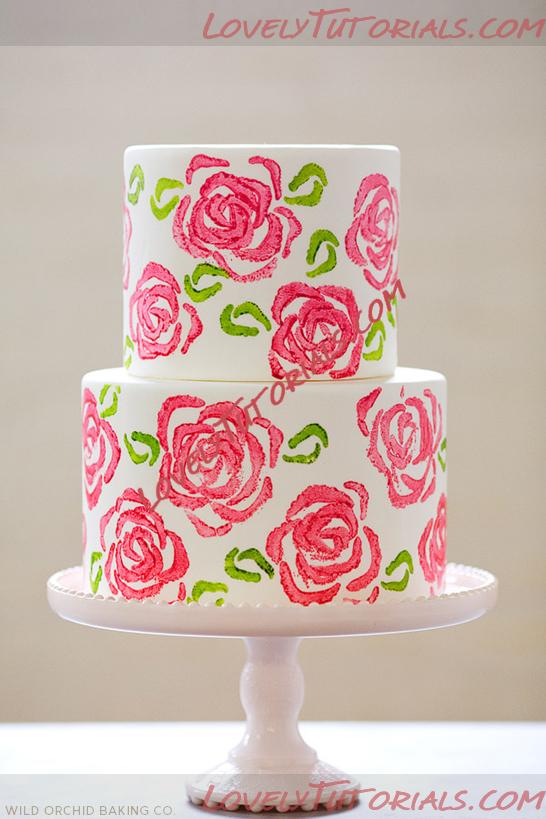
I’ve always believed that great cake decorating doesn’t have to mean using intricate techniques or buying fancy tools (well at least not all the time). Sometimes the best tools can be found right in your own fridge or pantry. This project uses a fridge staple – celery – to create an oh-so-pretty rose pattern with a hand-painted feel. Take a look through your own fridge and see what you can create with what you have on hand. You’ll never look at your veggies the same way again!
 CELERY STAMP ROSE CAKE
a
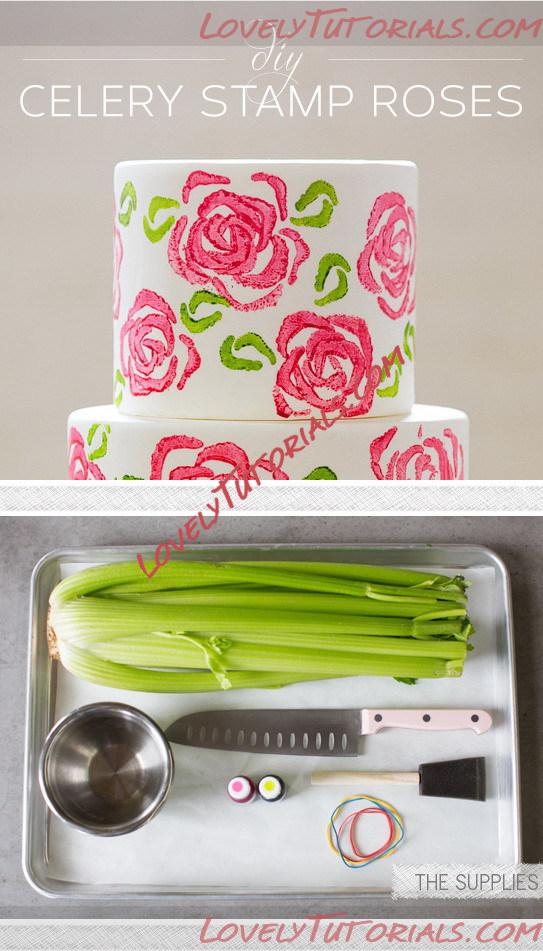
Supplies
- 1 bunch of celery still attached at the base
- Knife
- 2 small bowls
- Foam craft brushes
- Pink gel color
- Green gel color
- Rubber bands
- Fondant covered cake
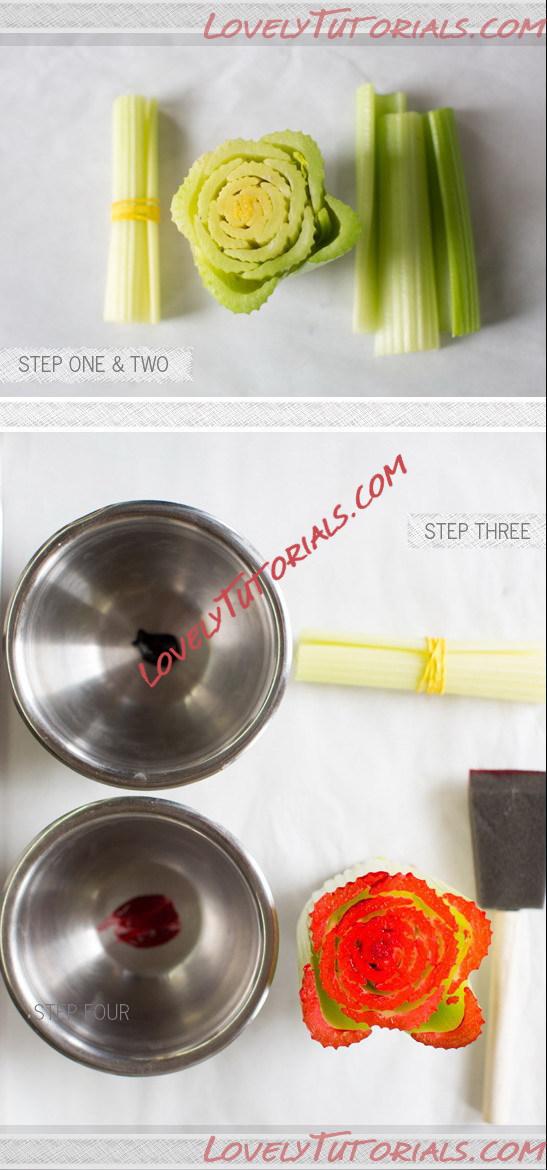
STEP 1 : Make the rose stamp. Cut your celery bunch all the way through about 3 inches up from the base where the stalks are attached. The base of the bunch is now your rose stamp. Set aside the extra celery stalks.
STEP 2 : Make the leaf stamp. Take 2 of the cut pieces of celery and place them together so that the open parts of the celery face each other creating a leaf shape. Use a rubber band to secure the celery stalks together.
STEP 3 : Squirt about a dime sized amount of pink gel color into one of the small bowls, and green gel color into the other bowl. Begin with the rose and apply a thin even coating of pink color to the celery stamp using a foam craft brush.
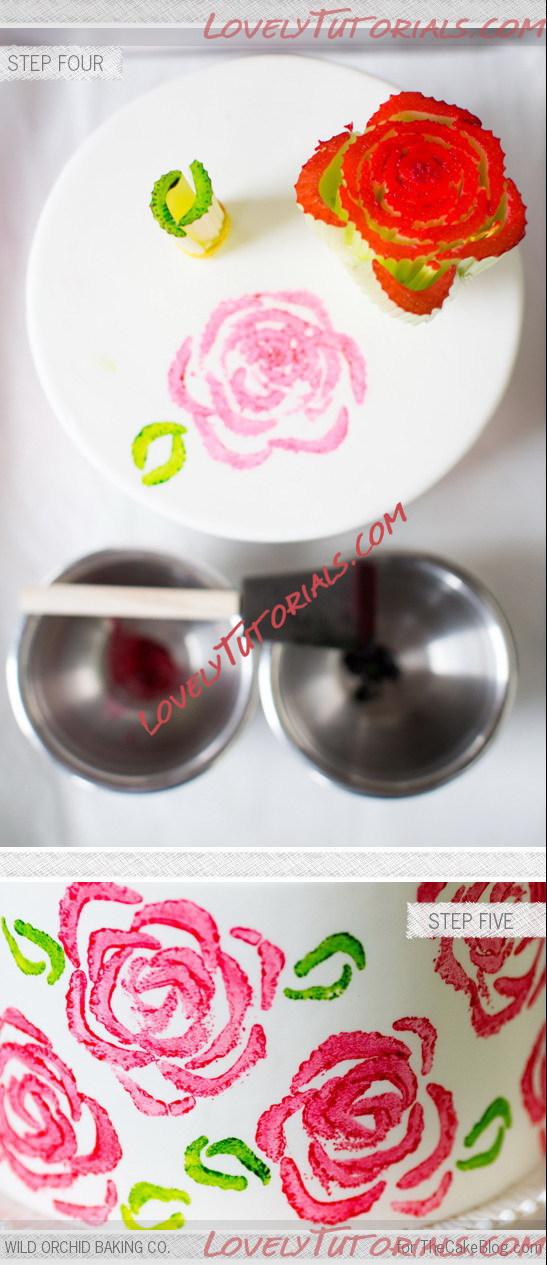
STEP 4 : Press the celery stamp onto the surface of the cake. Roll the stamp back and forth a little bit when stamping on the rounded sides of the cake. Repeat the stamp to create the rose pattern. Wipe down the stamp every so often with a paper towel to remove any excess color.
STEP 5 : If your stamped rose needs a few more “petals” use the extra pieces of celery to add them where needed. Apply the color to the end of a single celery stalk and stamp on extra petals.
STEP 6 : Brush green gel color onto your leaf stamp and add leaves in between your roses where ever you like.
 TIPS :
 If your celery stamp doesn’t quite make the rose pattern that you’re looking for, or if your supermarket only has cut pieces of celery available, don’t sweat it! Cluster up cut pieces of celery so that they form the rose pattern you’re looking for. Secure the bunch with rubber bands just like you did for the leaf stamp.
To use the same stamping technique to create cupcake toppers, start by rolling fondant onto your counter top to about 1/8-inch thick. Stamp the fondant with roses and leaves. Use 2” circle cutters or a drinking glass to cut circles from your rose patterned fondant. Place the circles on a parchment paper lined cookie sheet and let them dry out overnight. Use the circles to top freshly frosted cupcakes.