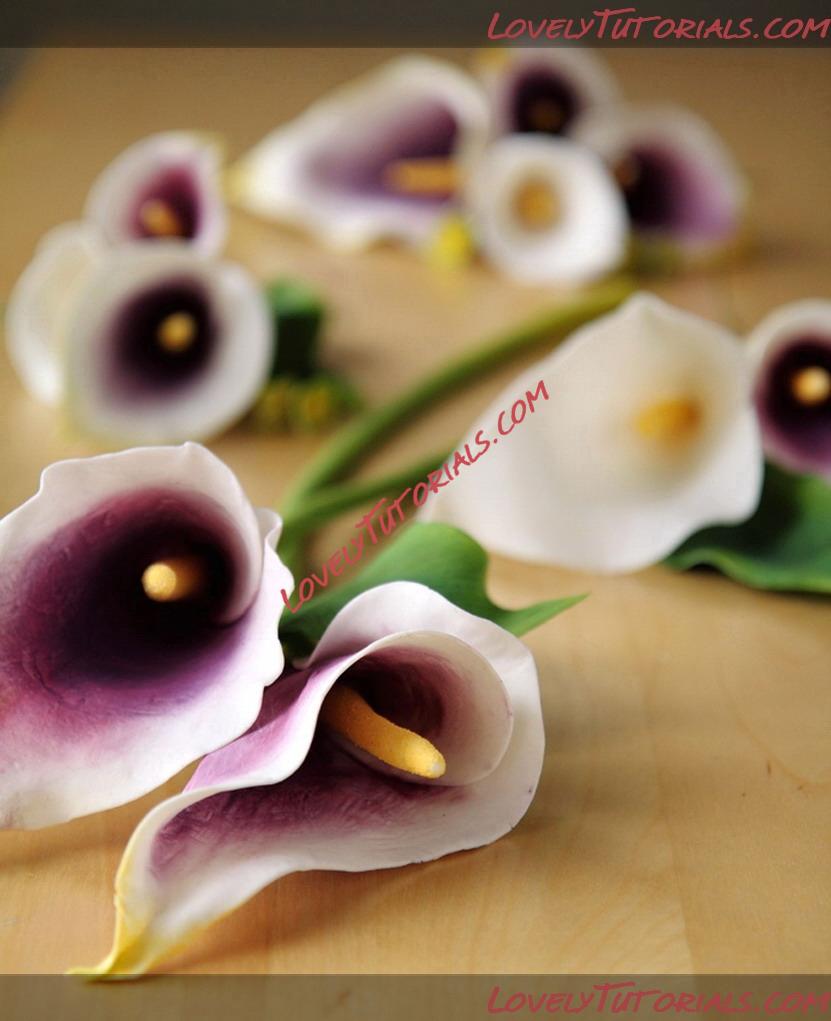
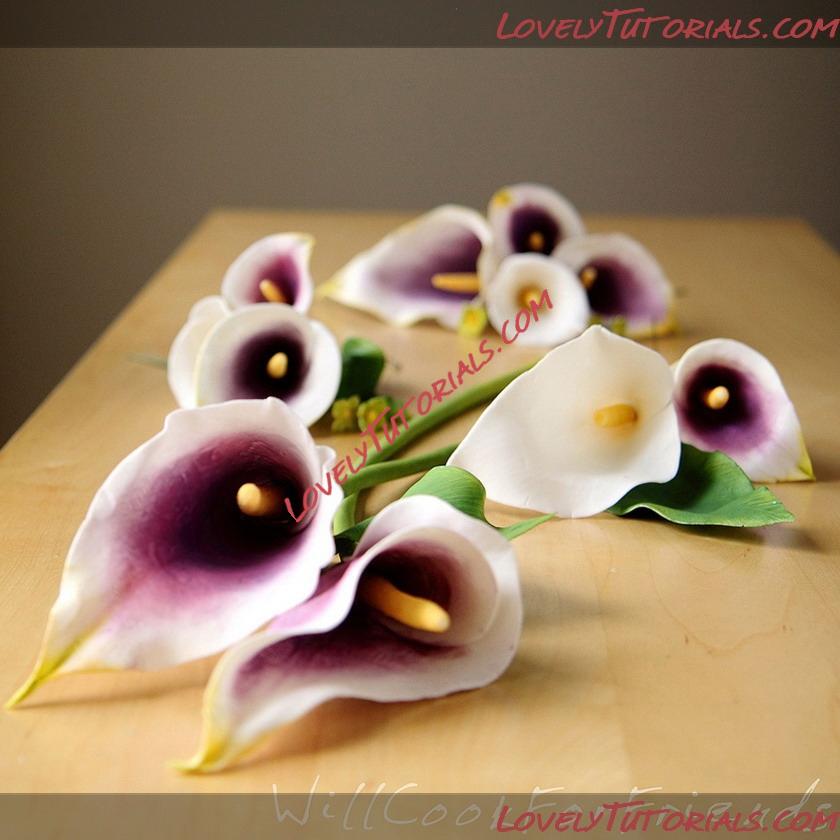
–Ю–≥—А–Њ–Љ–љ–∞—П –±–ї–∞–≥–Њ–і–∞—А–љ–Њ—Б—В—М –Р–≤—В–Њ—А—Г willcookforfriends –Ј–∞ –Ь–∞—Б—В–µ—А-–Ї–ї–∞—Б—Б
 1.) HereвАЩs what youвАЩll need
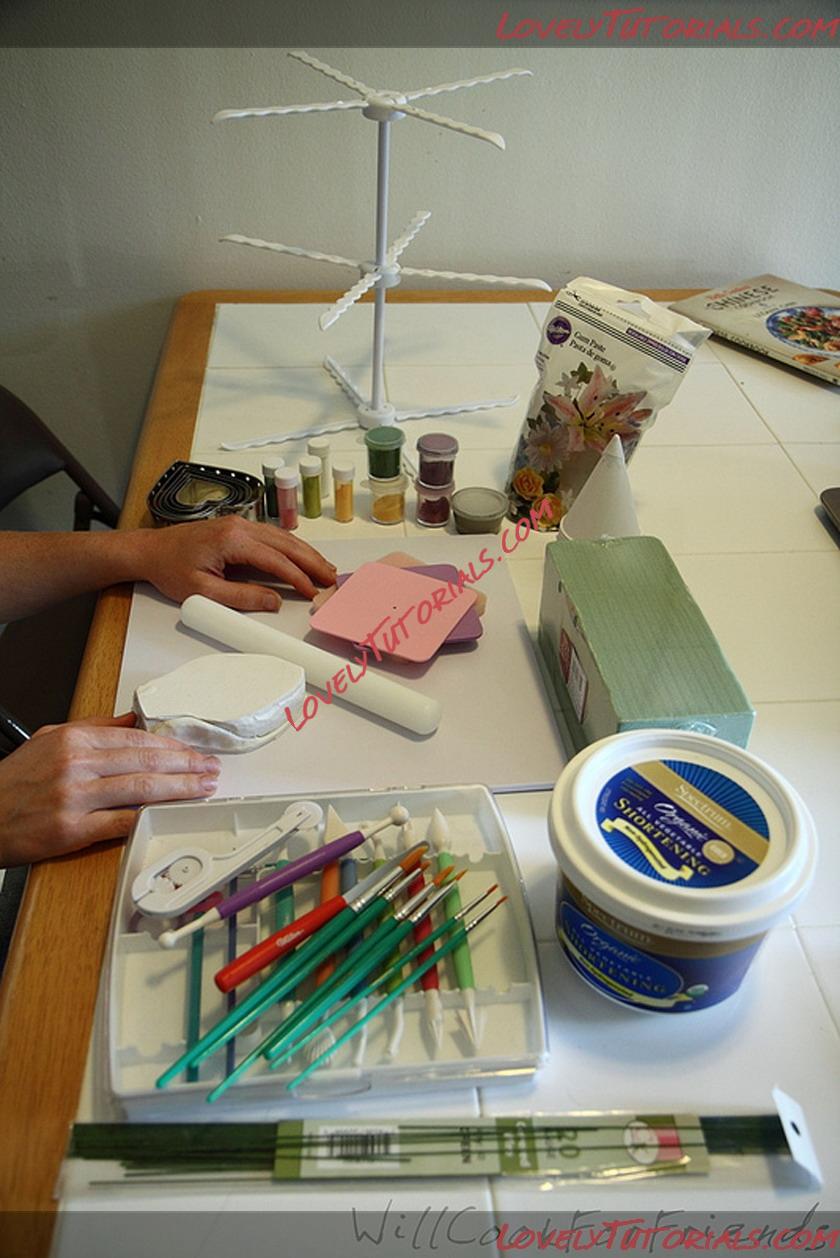
1. Gumpaste
2. A Celboard, matt, or other clean, flat surface to work on
3. Plastic fondant/gumpaste rolling pin
4. Heart-shaped cookie cutters (these are optional, but weвАЩll get to that later)
5. Fondant shaping foam
6. Petal veiner (this is a mold that presses realistic veins into the petals, and isnвАЩt necessary if you donвАЩt want it)
7. Paper cone cups вАУ like the ones dispensed next to a water cooler
8. Gumpaste ball tool, & mini pallet knife (these tools can be bought individually, but are both available in WiltonвАЩs basic gumpaste tools kit вАУ you may find some of the other tools useful as well)
9.Floral wire/tape (I use 20 gauge wire)
10. Green floral wet-foam block
11. Food-safe Color Dust/Petal Dust, in whatever colors you want (note that Pearl dust/Luster dust is sparkly, while color/petal dust is a matt finish вАУ feel free to use what you like)
12. Clean craft brushes, for painting
13. Vegetable shortening
14. вАЬSugar glueвАЭ (approx. 1 part gumpaste dissolved into 1 part hot water вАУ adjust the ratio to create a thick syrup that can be used to вА?glueвАЩ pieces together)
15. Semolina flour or cornmeal (optional вАУ mixed with yellow color dust, this creates the look of pollen along the stamen of the flower)
16. Flower drying rack (or clothes hangers, in a safe and out-of-the-way place)
It sounds like a lot, but donвАЩt be too overwhelmed - the process is really quite simple!
First, we start by making the center stamen (the yellow pollen-holding part of the flower).
2.) How to make the stamen
Throughout this entire tutorial, I will repeat again and again that the most useful thing you can do is to look at real flowers, or photographs of real flowers. This helps to make them realistic in shape, and to know how to paint them when that time comes.
Calla lily stamen are usually quite long and narrow. The size youвАЩll want yours to be depends on the size of the heart-shaped cutter you plan to use. For now, letвАЩs assume youвАЩre using a 3вА≥ heart cutter.
For your first lily, IвАЩd recommend making the stamen approximately half the length of your cutter вАУ so in this case, 1.5вА≥ long, give or take. Once you get more accustomed to making the flowers, you can decide what size ratio you prefer.
Always begin with clean, dry hands, and a prepared work surface (everything you need within reach).
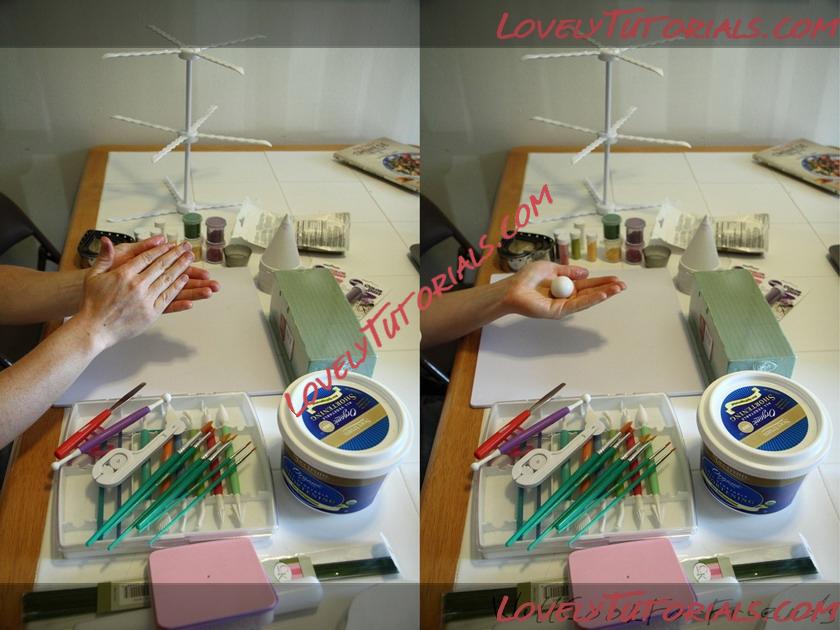
Start by taking a small ball of gumpaste (perhaps a little smaller than a ping-pong ball) in your hand. Rub a small amount of vegetable shortening between your hands, and begin massaging the gumpaste to soften it. Once itвАЩs warmed up and easily pliable, roll it between your palms into a ball.

Lay the ball onto your matt or surface, and begin rolling it out like a snake. Taper one end of the snake, but donвАЩt bring it to a point вАУ just make it narrow. Cut the rope about 1вА≥ вАУ 1.5вА≥ in, and pinch the cut end between your fingers to make another, more abrupt, taper вАУ this end will fit into the bottom of the flower.